Introduction
Hey there! Today, I’d like to show you how to create your own custom maps for Portal Reloaded. This tutorial assumes that you already know your way around the Portal 2 Authoring Tools. This guide is still a work in progress and will be expanded in the future.
Setting Up
Alright, let’s get started with some file management. To use some of the custom assets of Portal Reloaded in Hammer, you’ll have to copy a few files first.
Download Content[drive.google.com]
Download the zip archive, extract the files and copy the folders named ‘portal2’ and ‘sdk content’ into your Portal 2 root directory: ...\steamapps\common\Portal 2
Now we’re ready to launch the Portal 2 Authoring Tools and create a new map inside Hammer. Save it as something like 'pr_my_first_map.vmf'. Okay, let's get going!
You can watch this video alongside for reference: https://youtu.be/5zjZHtfIwIs
Global Entities
Let’s place some basic logic first. Create a func_instance and name it ‘main’. Next, select the ‘main.vmf’ as the filepath. It should be located inside your Portal 2 directory under:
...\sdk_content\maps\instances\portal_reloaded\global
This instance contains all the basic logic used in Portal Reloaded. Place it somewhere in your map. I like to keep it near the map’s origin.
Creating The Present Chamber
Now it’s time to actually design your test chamber. This part is mostly up to you. Keep all the time travel mechanics in mind and get to mapping!
Start with the present version of the chamber. I’d recommend only using developer textures at this stage. We’ll get into proper texturing later. Make sure to leave a 256x192 hole where you want your entry and exit to be.
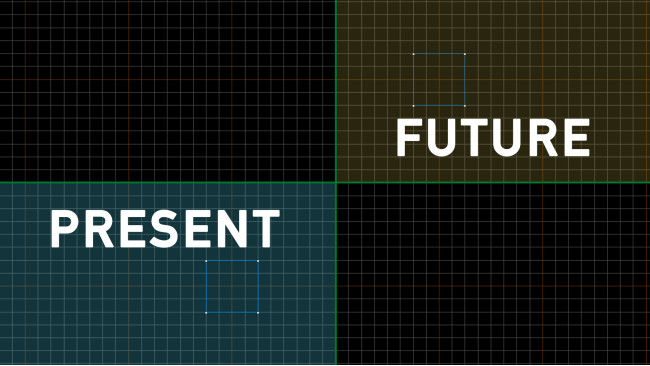
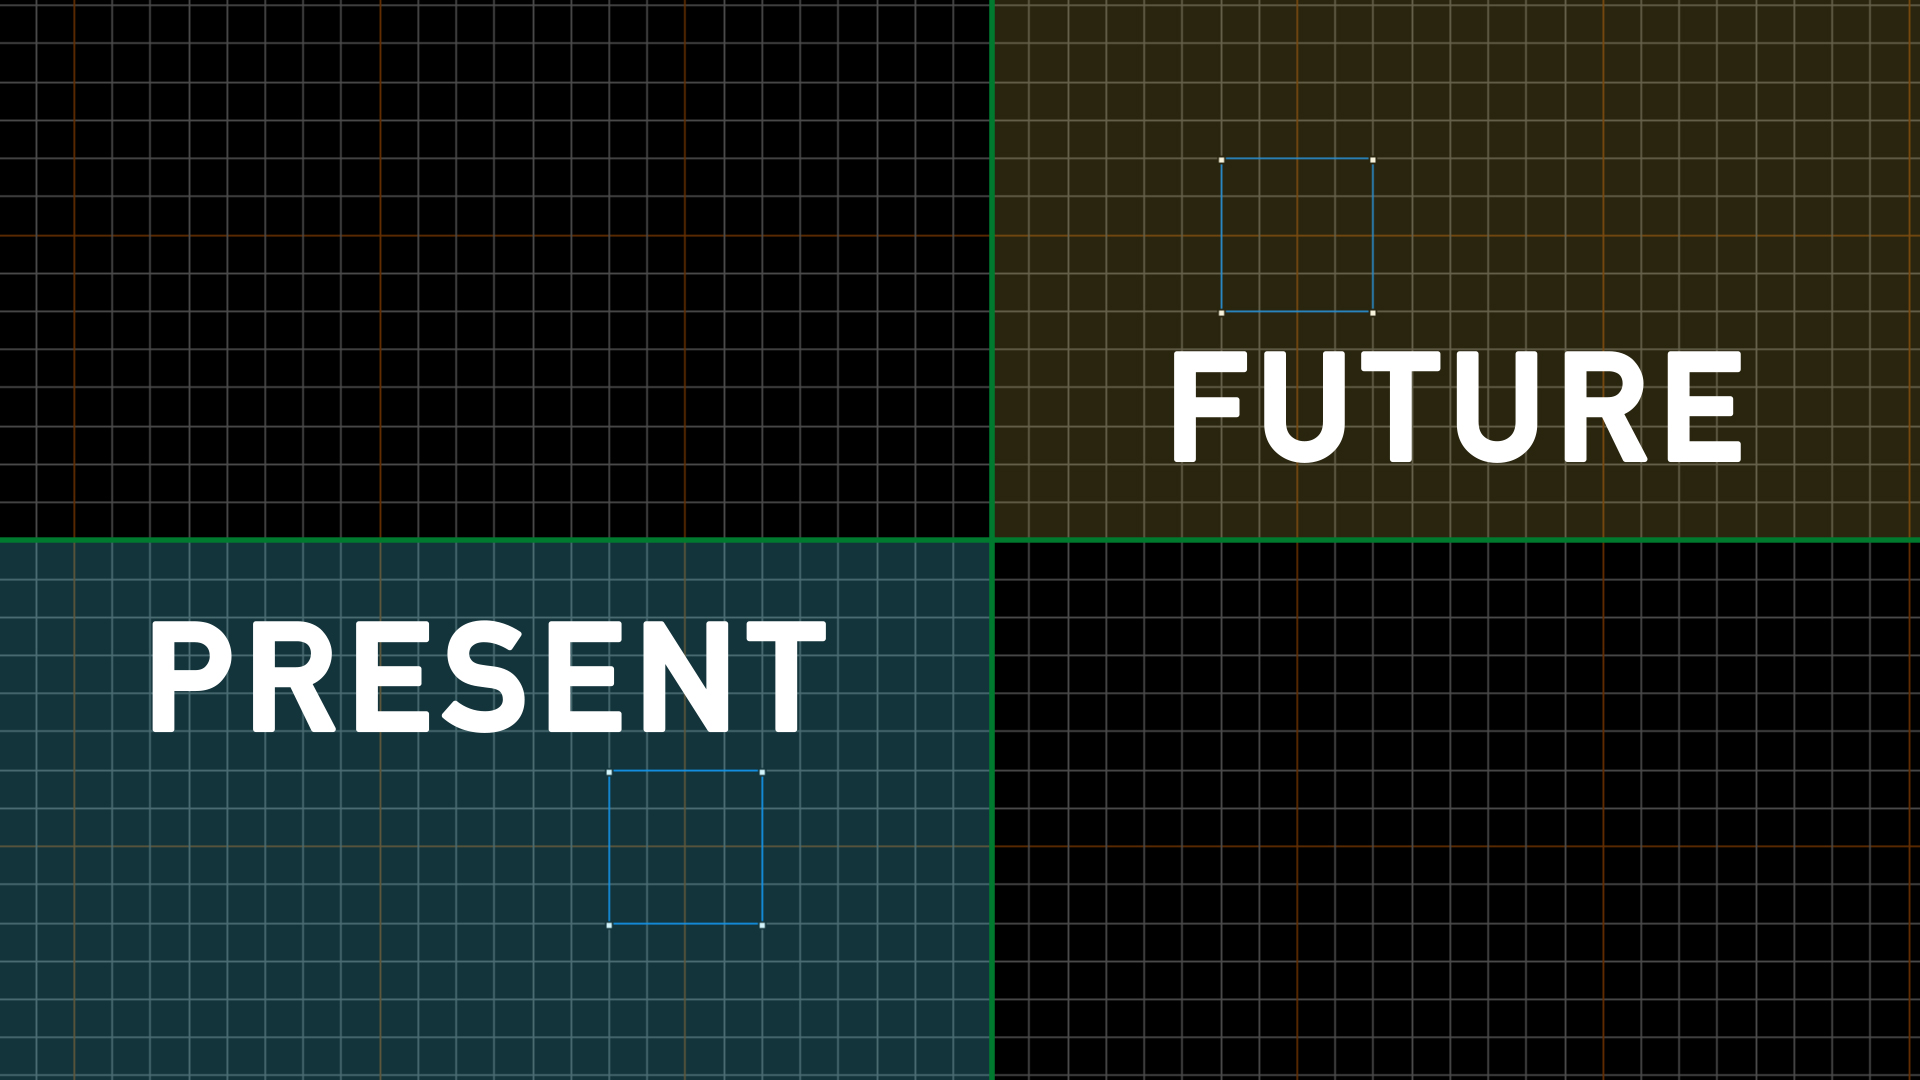
This is where positioning becomes really important. The game places a future cube, portal or time portal by inverting the x- and y-coordinates of the present object. For this to work properly, you have to mentally divide the worldspace into two sections.
The present chamber should occupy the 'negative space' of the coordinate system, while the future version of the chamber should be positioned within the 'positive space'.
Puzzle Elements
This section covers how different puzzle elements like cube dispensers, floor buttons and switches should be used in your map.
Cube DispenserNote, that you can only have one cube dispenser per chamber. Leave a 128x128 hole in your ceiling where you want your dispenser to be. Then, create a new func_instance and name it 'cube1'. Naming conventions are important here, so make sure to follow these instructions carefully. Set the filepath to:
...\instances\portal_reloaded\dropper\cube\pr_cube_dropper_normal_present.vmf
There is also a seperat instance if you want to use a laser redirection cube instead.
The present version of cube dispensers have the following inputs:
Input Function Main Trigger Dispenses a cube Autospawn Enable Enables automatic dispensing of a new cube when the old one is destroyed Trigger Cube Listener Starts checking for cube movement and spawning the future cube Enable Cube Listener Activates checking for cube movement and spawning the future cube Disable Cube Listener Deactivates checking for cube movement and spawning the future cube
IMPORTANT! For the time travel cube logic to work, you first need to call the 'Trigger Cube Listener' input once. You can do that on map spawn or with a trigger_once when the player enters the chamber.
SwitchesCreate a new func_instance and name it 'switch_present_1'. Set the filepath to:
...\instances\portal_reloaded\button\switch\pr_switch_present.vmf
Switches have a 'On Pressed' and 'On Unpressed' output as well as a 'Press In' input. A typical I/O chain would look like this: switch_present_1 --> On Pressed --> cube1 --> Main Trigger
Floor ButtonsCreate a new func_instance and name it 'floor_button_present_1'. Set the filepath to:
...\instances\portal_reloaded\button\floor_button\pr_floor_button_present.vmf
Floor Buttons have a 'On Pressed', 'On Unpressed', 'Box on Button' and 'Box off Button' output.
Creating The Future Chamber
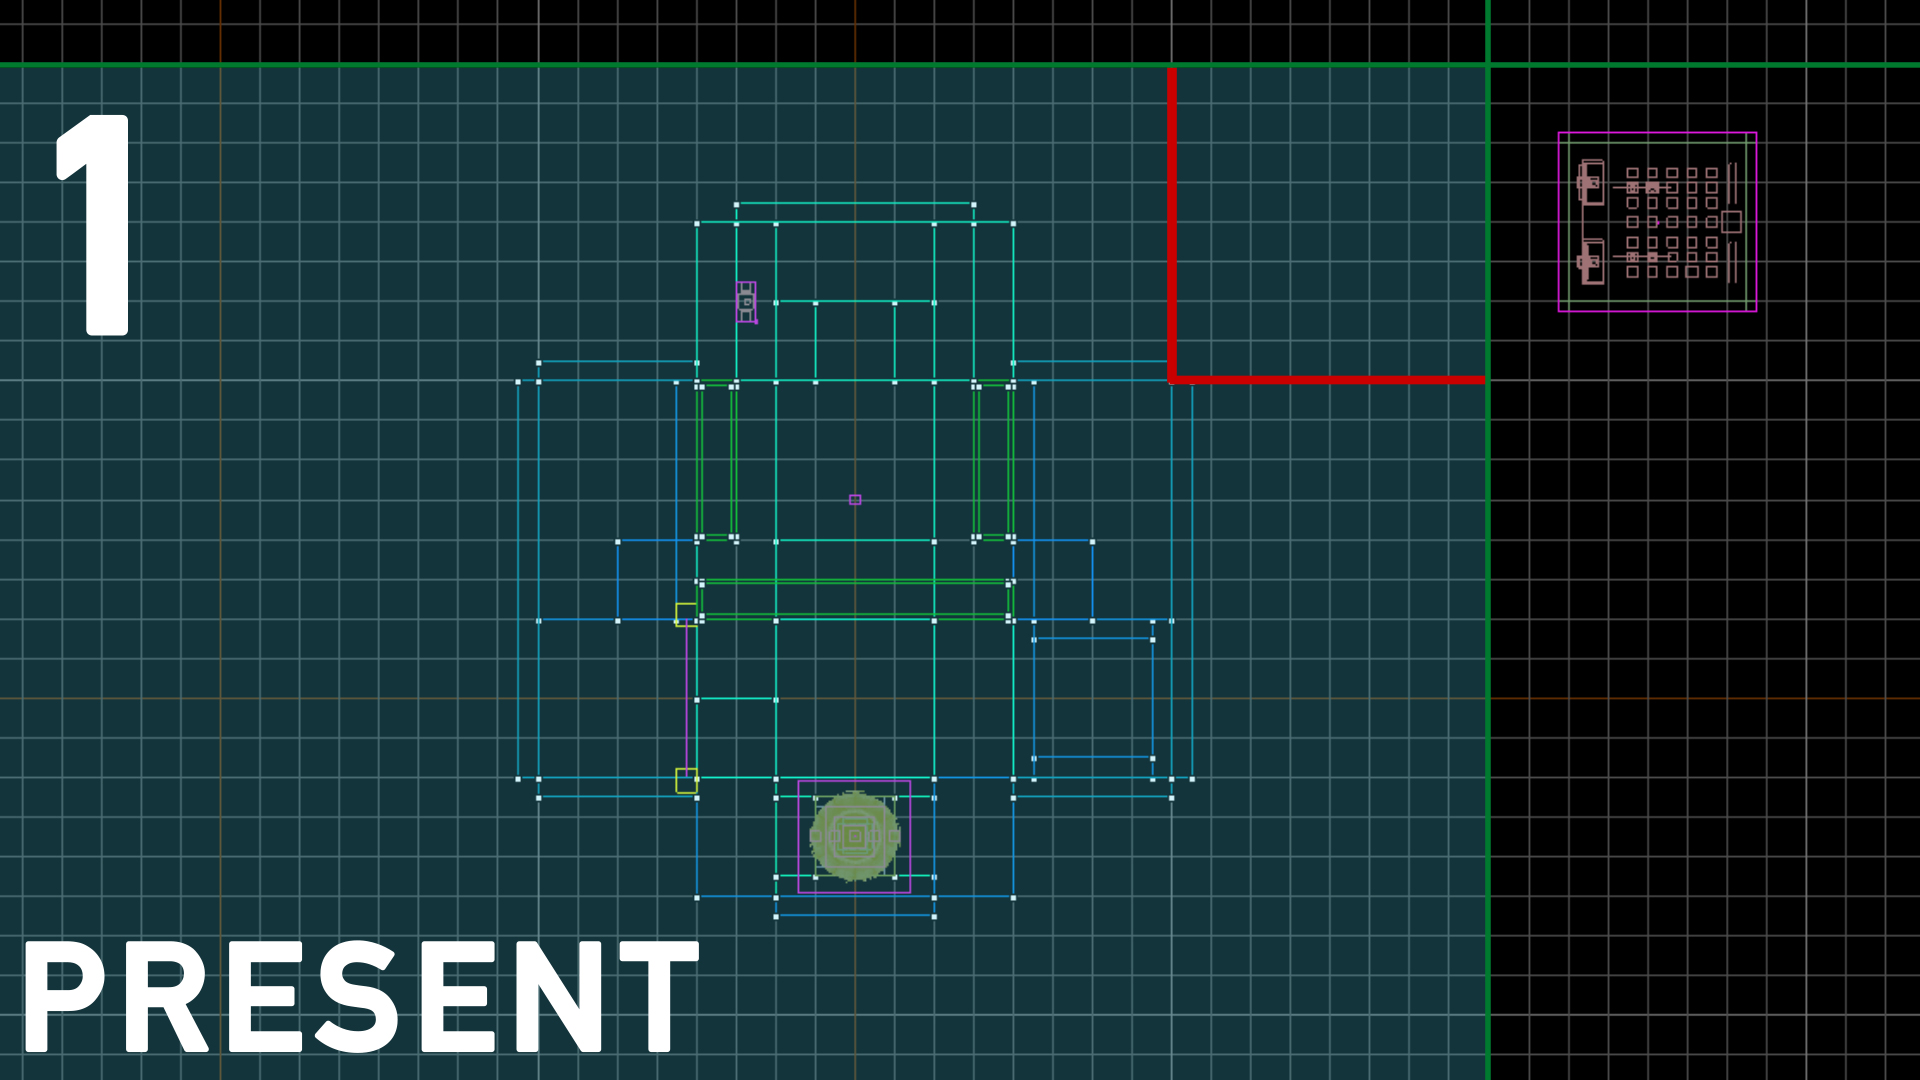
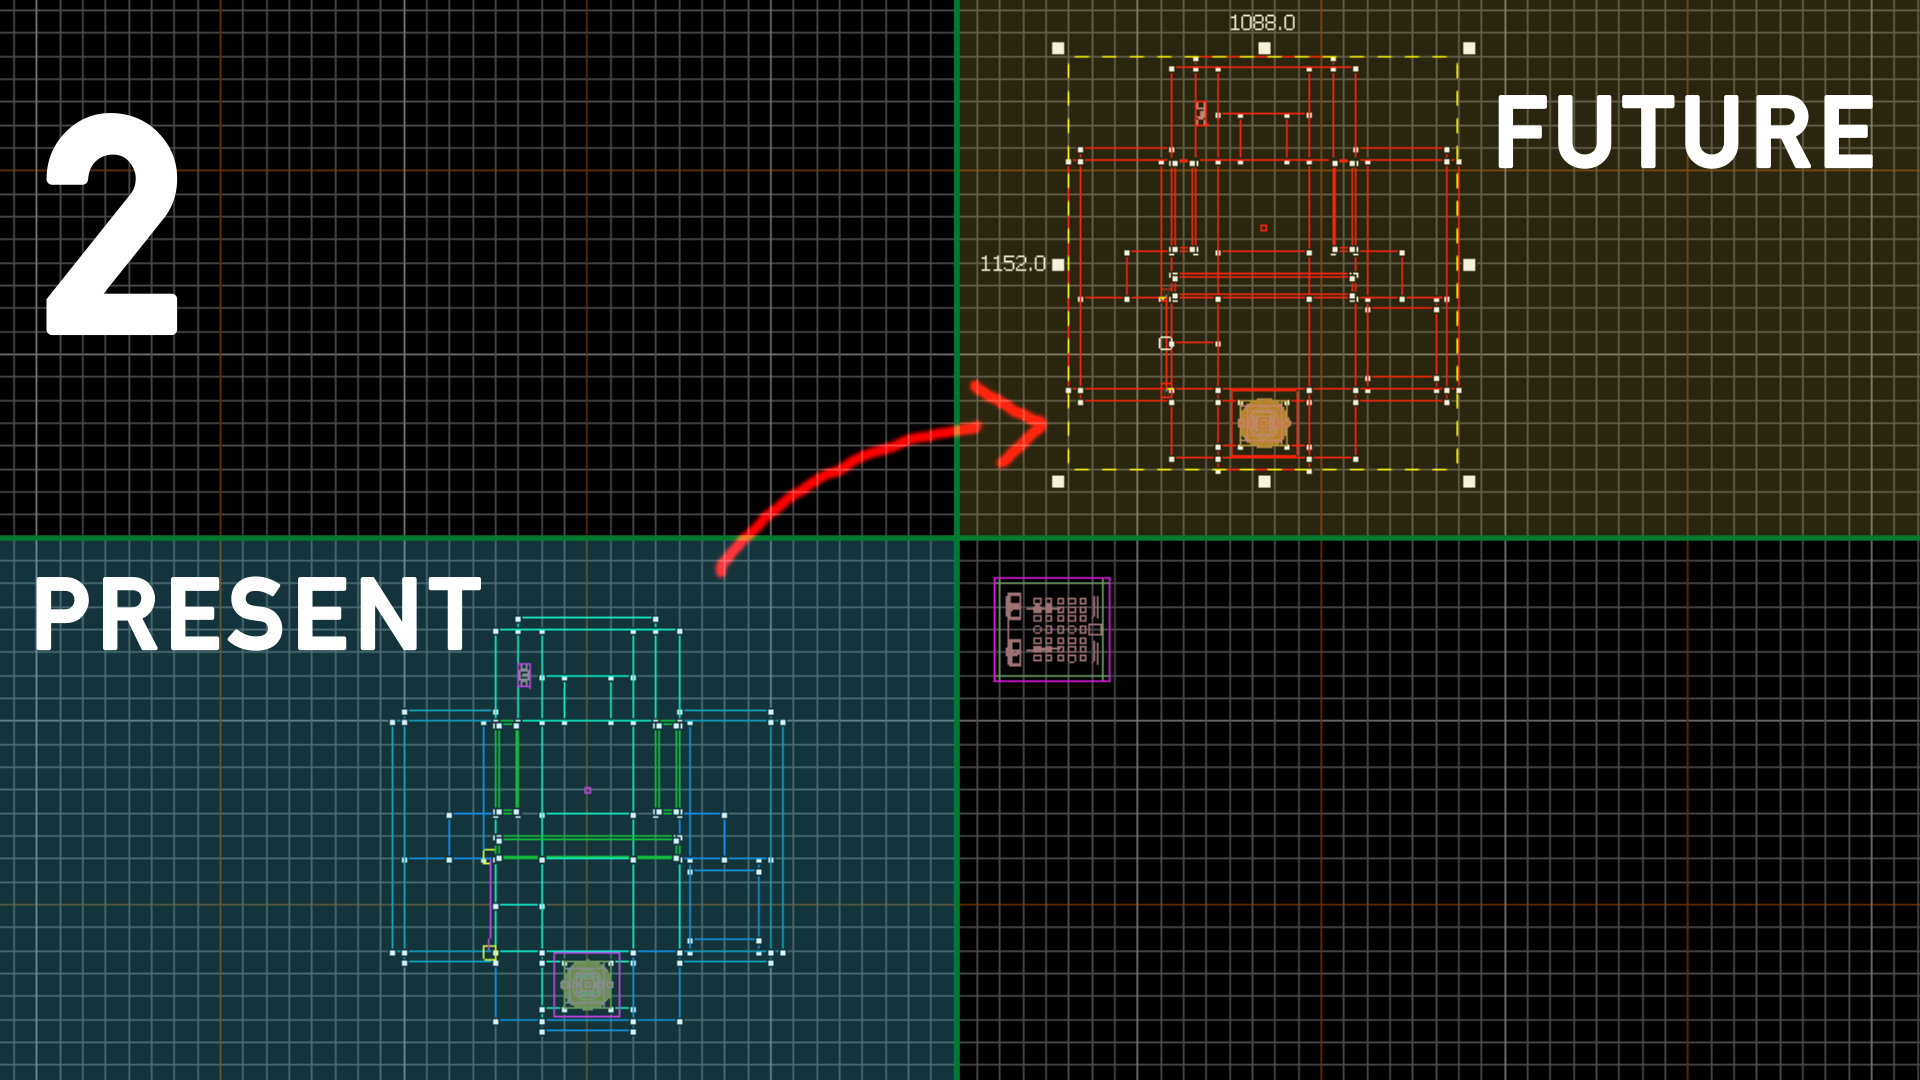


Once you are finished with the basic level geometry and puzzle elements, we can go ahead and create the future version of the test chamber. For that, follow these 4 steps carefully:
These actions should all be beformed in the 2D top viewport.
1. Align the present chamber on your preferred grid size
2. Select your chamber and shift-drag everything into the positive worldspace
3. Rotate the newly created copy of the chamber 180 degrees
4. Align the future chamber on the exact opposite site of the map's origin
Next, replace every cube dispenser, floor button and switch instance with its future variation. Remember to rename them and adjust their outputs accordingly.
IMPORTANT: Name your future cube dispenser 'partner_cube1'.
Great! Assuming you aligned everything correctly and followed the naming convetions, the basic time travel logic should now work as intended. Now you can add some environmental detail like destruction props and foliage.
Arrival & Departure
You can use Portal Reloaded’s arrival and departure logic for your custom map. Decide, whether you want the player to start in the present or the future. Create a new instance and name it ‘arrival’. As the filepath, set either
...\instances\portal_reloaded\transition\arrival\pr_arrival_present.vmf
...\instances\portal_reloaded\transition\arrival\pr_arrival_future.vmf
Since this area does not need to exist in the other timeline, you can use one of these instances for the arrival door in the timeline the player does not start in:
...\instances\portal_reloaded\transition\arrival\pr_arrival_present_fake.vmf
...\instances\portal_reloaded\transition\arrival\pr_arrival_future_fake.vmf
If your test chamber is solvable in either timeline, it's important to use departure logic for both the present and the future. Create two new instances and name them 'departure_present' and 'departure_future'. Set the filepaths to:
...\instances\portal_reloaded\transition\departure\pr_departure_present.vmf
...\instances\portal_reloaded\transition\departure\pr_departure_future.vmf
The departure logic also includes proxy relays for opening and closing the exit doors.
Texturing
The most important thing for making our two chambers look distinct from one another is proper texturing. Thankfully, the Portal 2 base game already provides us with different versions of the same texture. A clean version for the normal test chambers and a destroyed version for the overgrown sections. I would recommend using these pairs of textures:
Floor Textures
Present Future black_floor_metal_001b black_floor_metal_001c white_floor_tile001a white_floor_tile004d
Wall Textures
Present Future black_wall_metal_002a black_wall_metal_005a black_wall_metal_002b black_wall_metal_005b black_wall_metal_002c black_wall_metal_005c white_wall_tile003b white_wall_tile004b white_wall_tile001a white_wall_tile004c white_wall_tile003f white_wall_tile004h
Ceiling Textures
Present Future black_ceiling_metal_001b black_ceiling_metal_001a white_ceiling_tile001a ceiling_tile002b
Lighting
Lighting is a great way to further distinguish the two different timelines from each other. Especially color can have a huge impact on the feel of your level. Personally, i like giving the present chambers a blue tint, while lighting the future chambers in a yellow tone. These are the RGB-values I often use:
Present: 230 230 250
Future: 250 250 220
For the lightcovers, make sure to use skin 2 for the present and skin 1 for the future models.
Soundscapes & Music
Audio design is another great tool to set your timelines apart. Here's a list of soundscapes I like to use in my chambers with clean and overgrown environments:
Soundscape Present Soundscape Future laser_chamber_med_02 TestChamber_Destruction.Laser_Stairs TestChamber.Industrial_clean_01 TestChamber_Vegetation.Standard TestChamber.Industrial_clean_02 TestChamber_Intro_02.BigRoom
If you want to use a track from Portal Reloaded's score in your map, simply create a new func_instance and name it 'music'. Set the filepath to
...\instances\portal_reloaded\global\pr_music_controller.vmf
The instance takes two parameters. One for the present and one for the future track. There are a total of 10 tracks to chose from. They are located in here:
...\steamapps\common\Portal 2\portal2\sound\music
Most tracks are divided into multiple layers. An additional layer is automatically added to the music, whenever the player enters the future timeline and muted, when the player returns to the present.
If you want to use the first track, for example, set the instance parameters like this:
Parameter Value Present Track #music/pr_track_001_1.wav Future Track #music/pr_track_001_2.wav
Using triggers, you then have to manually enable and disable the music when the player enters and exits the chamber. The music controller instances provides 'Activate' and 'Deactivate' inputs for that.
Compile & Play
Once you are happy with your map, hit compile and copy the resulting .bsp file into
…\steamapps\common\Portal Reloaded\portalreloaded\maps\
To play your custom map, launch Portal Reloaded on Steam, open the developer console and type ‘map ‘ + the name of your map. That’s it!
Send In Your Creations
If you'd like to share your level with me, you can send in your map to this email: [email protected]
I will handpick a few of my favorites and feature them on the official Portal Reloaded website, crediting you of course. Thanks for reading and have fun mapping. I look forward to all your awesome creations!
Source: https://steamcommunity.com/sharedfiles/filedetails/?id=2484067334
More Portal Reloaded guilds
- All Guilds
- P-Body Easter Egg Between Chapters 23 and 24
- Portal Reloaded 100% - Tous les niveaux + les 2 fins
- HOW TO OPEN THE GAME
- Reloaded - "Inter-Voice"
- how to make non portable thing portable
- Portal Reloaded Guide 300
- How to Exit the game
- How to enable console.
- How to run Portal Reloaded on Linux
- HOW TO OPEN THE GAME