
⠀⠀⠀⠀⠀


⠀⠀⠀⠀⠀⠀⠀⠀⠀⠀⠀⠀⠀⠀⠀⠀⠀⠀⠀⠀⠀⠀⠀⠀⠀⠀
⠀⠀⠀⠀⠀⠀⠀⠀⠀⠀⠀⠀⠀⠀⠀⠀⠀⠀⠀⠀⠀⠀⠀⠀⠀⠀
Achievement (1/6)


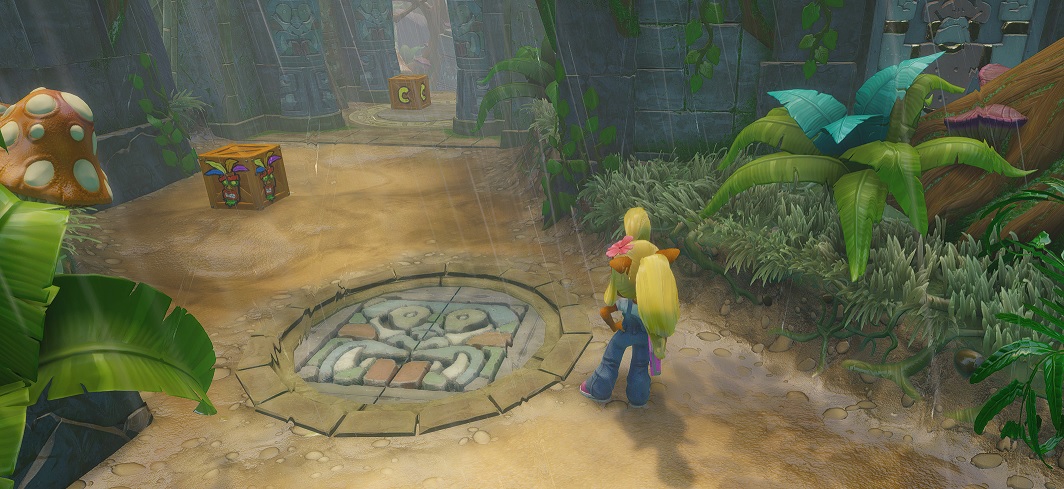
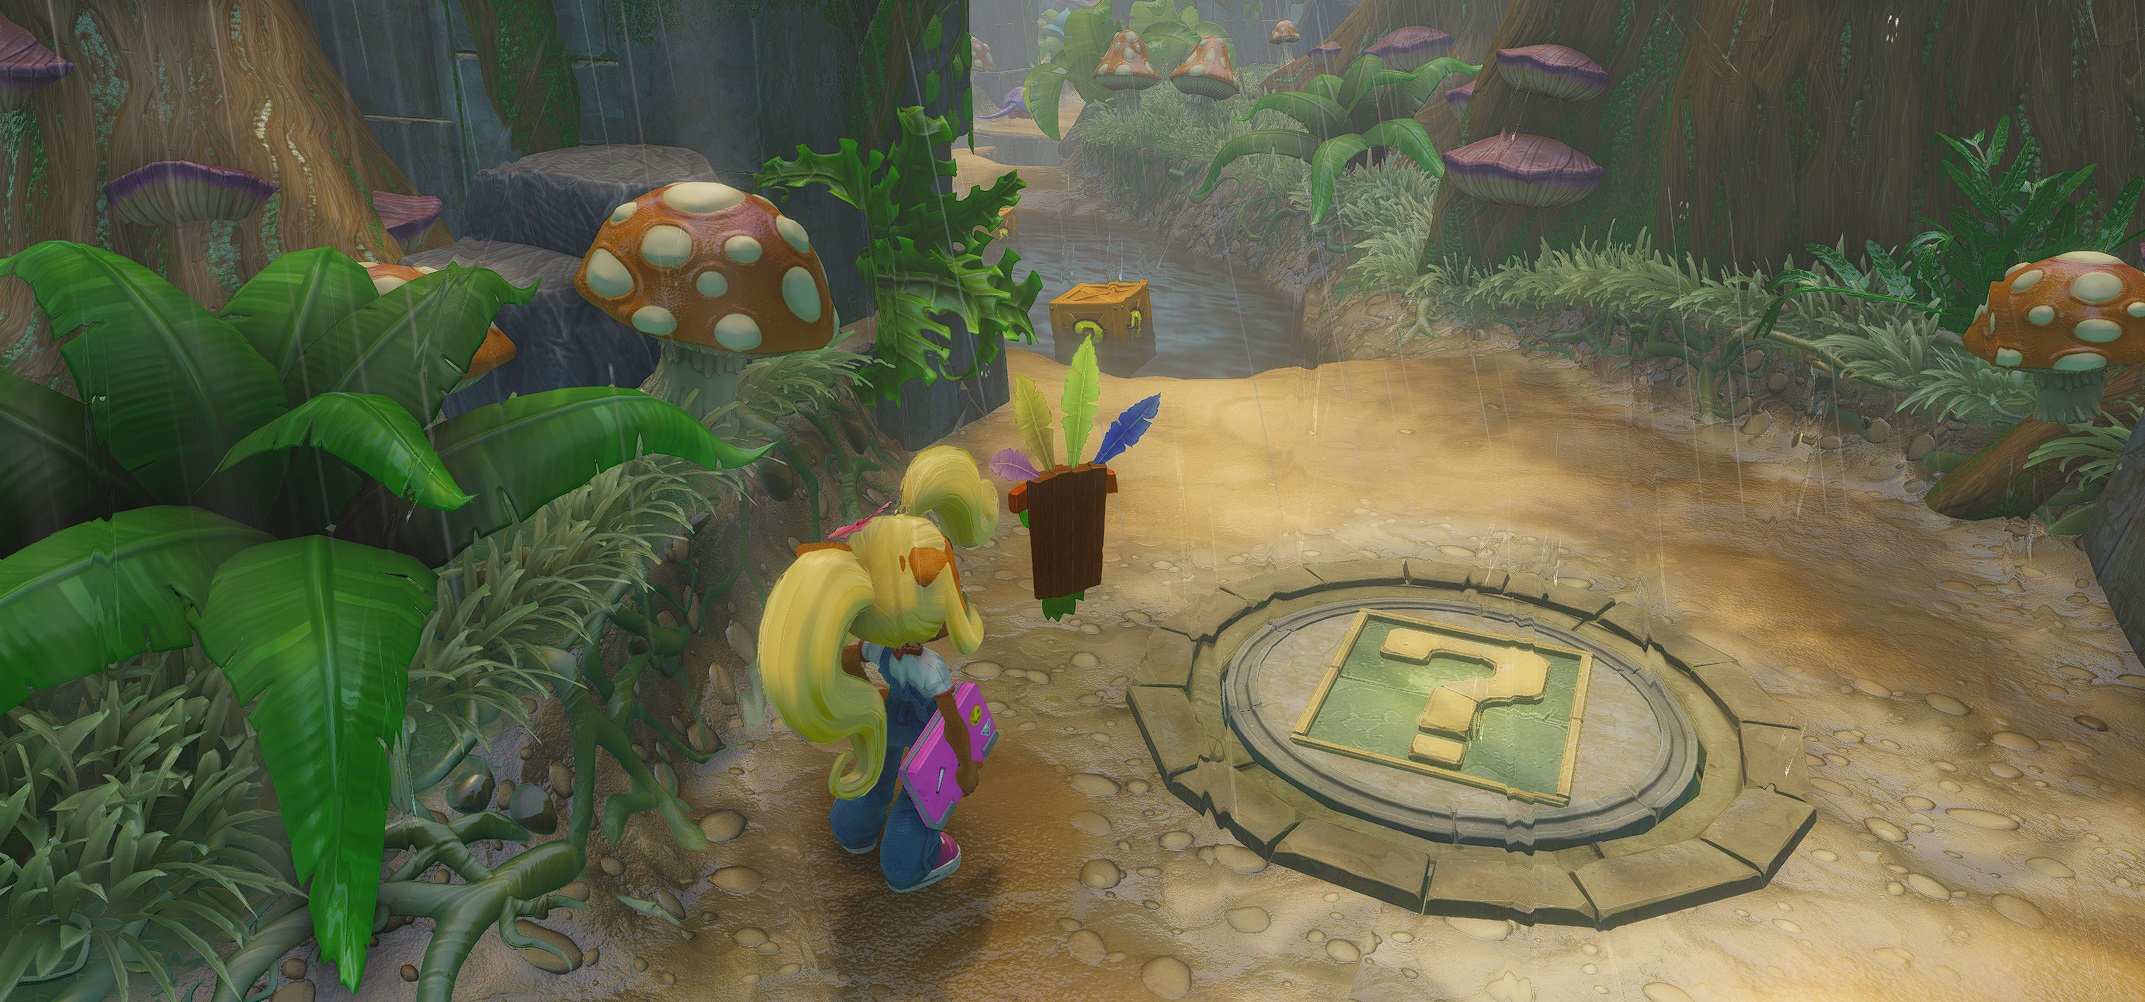
C2 | A Road Less Traveled"Discover a "?" Bonus Path"
You should unlock this one fairly easily.
It can be done in the first level, just stop on the "?" panel to be taken to the bonus path. Simple and quick.
One achievement down already!
C2 | Professor Pulverized"Defeat Ripper Roo"
Story-based achievement. Simply defeat the first world boss to unlock this achievement.
You'll encounter Ripper Roo after completing the first five levels. To defeat him, simply dodge the TNT squares fort each wave. On the wave with the nitro boxes, he'll jump on one and injure himself, giving you a brief moment to do a spin attack to damage him.
C2 | Komodo No Mo"Defeat the Komodo Brothers"
Story-based achievement. Simply defeat the second world boss to unlock this achievement.
You'll encounter the Komodo Bros after completing levels six through ten.
To defeat them, simply spin attack the non-sword throwing brother three times. Each time you attack him, he'll automatically run into his other brother, injuring them both. Do this three times to win.
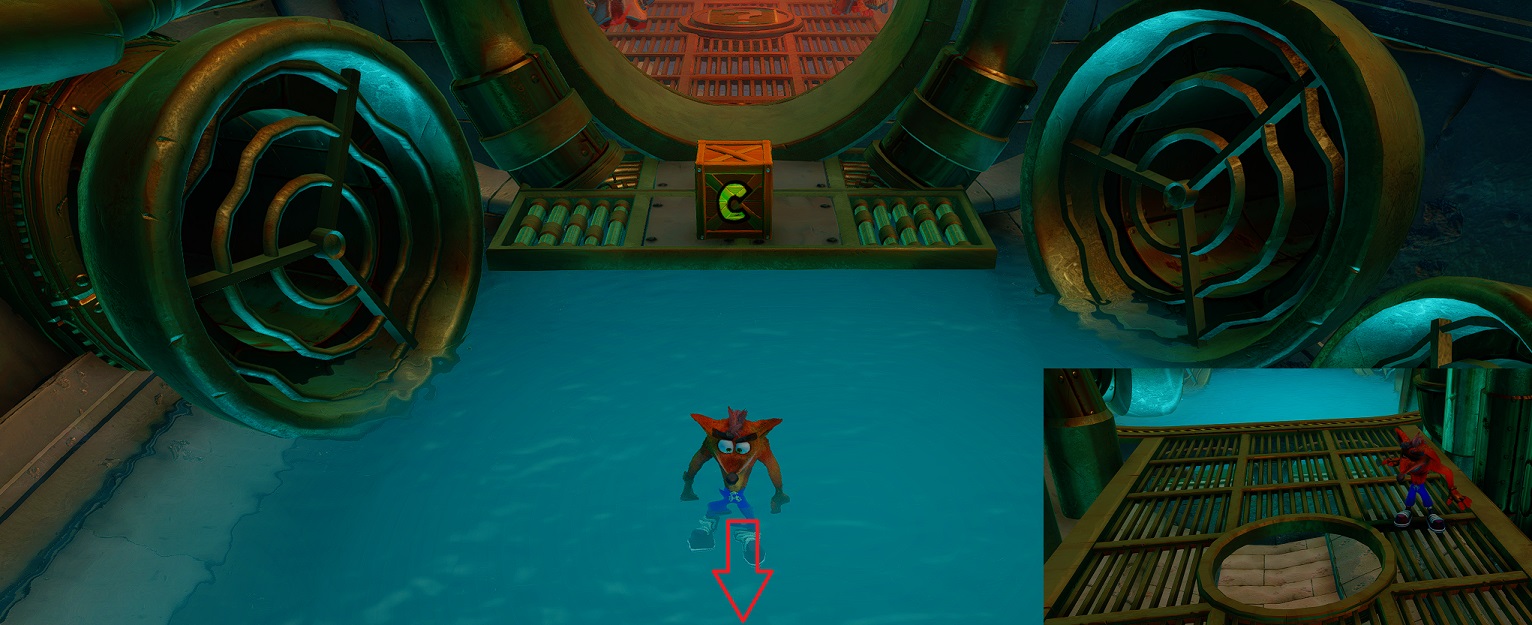
C2 | Jumping the JetboardIn the level "Air Crash", once you get to the first checkpoint, instead of taking the jetboard like normal, you'll want to jump over it.
You'll see a series of boxes floating in the water and a single platform on the right just out of reach.
Use the boxes to make your way to the floating platform and you'll unlock this achievement and enter a secret area where you can branch out to other levels and collect even more treasures, such as the red gem that you probably saw when you went through world one's level "Snow Go". This secret path is exactly how you obtain it.
C2 | A Diamond in the Rough"Discover a Gem Path after earning a Color Gem"
Enter any marked gem path after earning the gem of that respective color. See below for instructions on how to obtain all the necessary colored gems in the game.
An example would be, say, the yellow gem path, which is easily found in the beginning of the level "Sewer or Later" right next to the first checkpoint.
The achievement will unlock the moment you reach the bottom of the gem path.
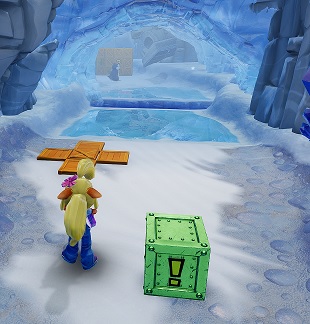
C2 | Island HoppingEnter the level, "Bear Down" and play through the level normally. At the very end, you'll be tossed off the polar bear and thrown to the bottom of a small cliff, next to a "!" crate. Turn around and jump on the floating platforms towards the center one that is covered in snow.
You'll be teleported to the secret entrance hub and earn this achievement in the process.
C2 | Cheated Death (For the Time Being)"Discover a Death Route"
These are scattered around a few levels, such as this one in "Air Crash". To trigger one of them, you must make your way to it without dying once up to that point. Jump on the platform to go to a new area. If you die in that area, you'll be revived at the previous checkpoint, but will still be able to access the death route again.
C2 | Boom Shakalaka!"Defeat 5 enemies with Coco's Double Leg Drop"
Use Coco's "RB or B" (assuming you're using a controller to play) attack on five enemies to unlock this achievement.
It can be any five enemies over the course of your total playthrough.
Simple, no?
C2 | No Bear Left BehindOn the level "Totally Bear", when you reach the end, double back and do a sliding jump over the hole and head back to the bear you just rode in on.
He'll act as a secret teleporter and unlock this achievement.
Defeat Tiny Tiger"Defeat Tiny Tiger"
The third boss you'll face is Tiny Tiger. The platforms you stand on will begin to flash red before dropping off temporarily. Tiny Tiger will follow your every move, so simply jump on a red platform prior to it falling and he'll follow suit, falling to the bottom and taking damage.
Do this three times to win the fight.
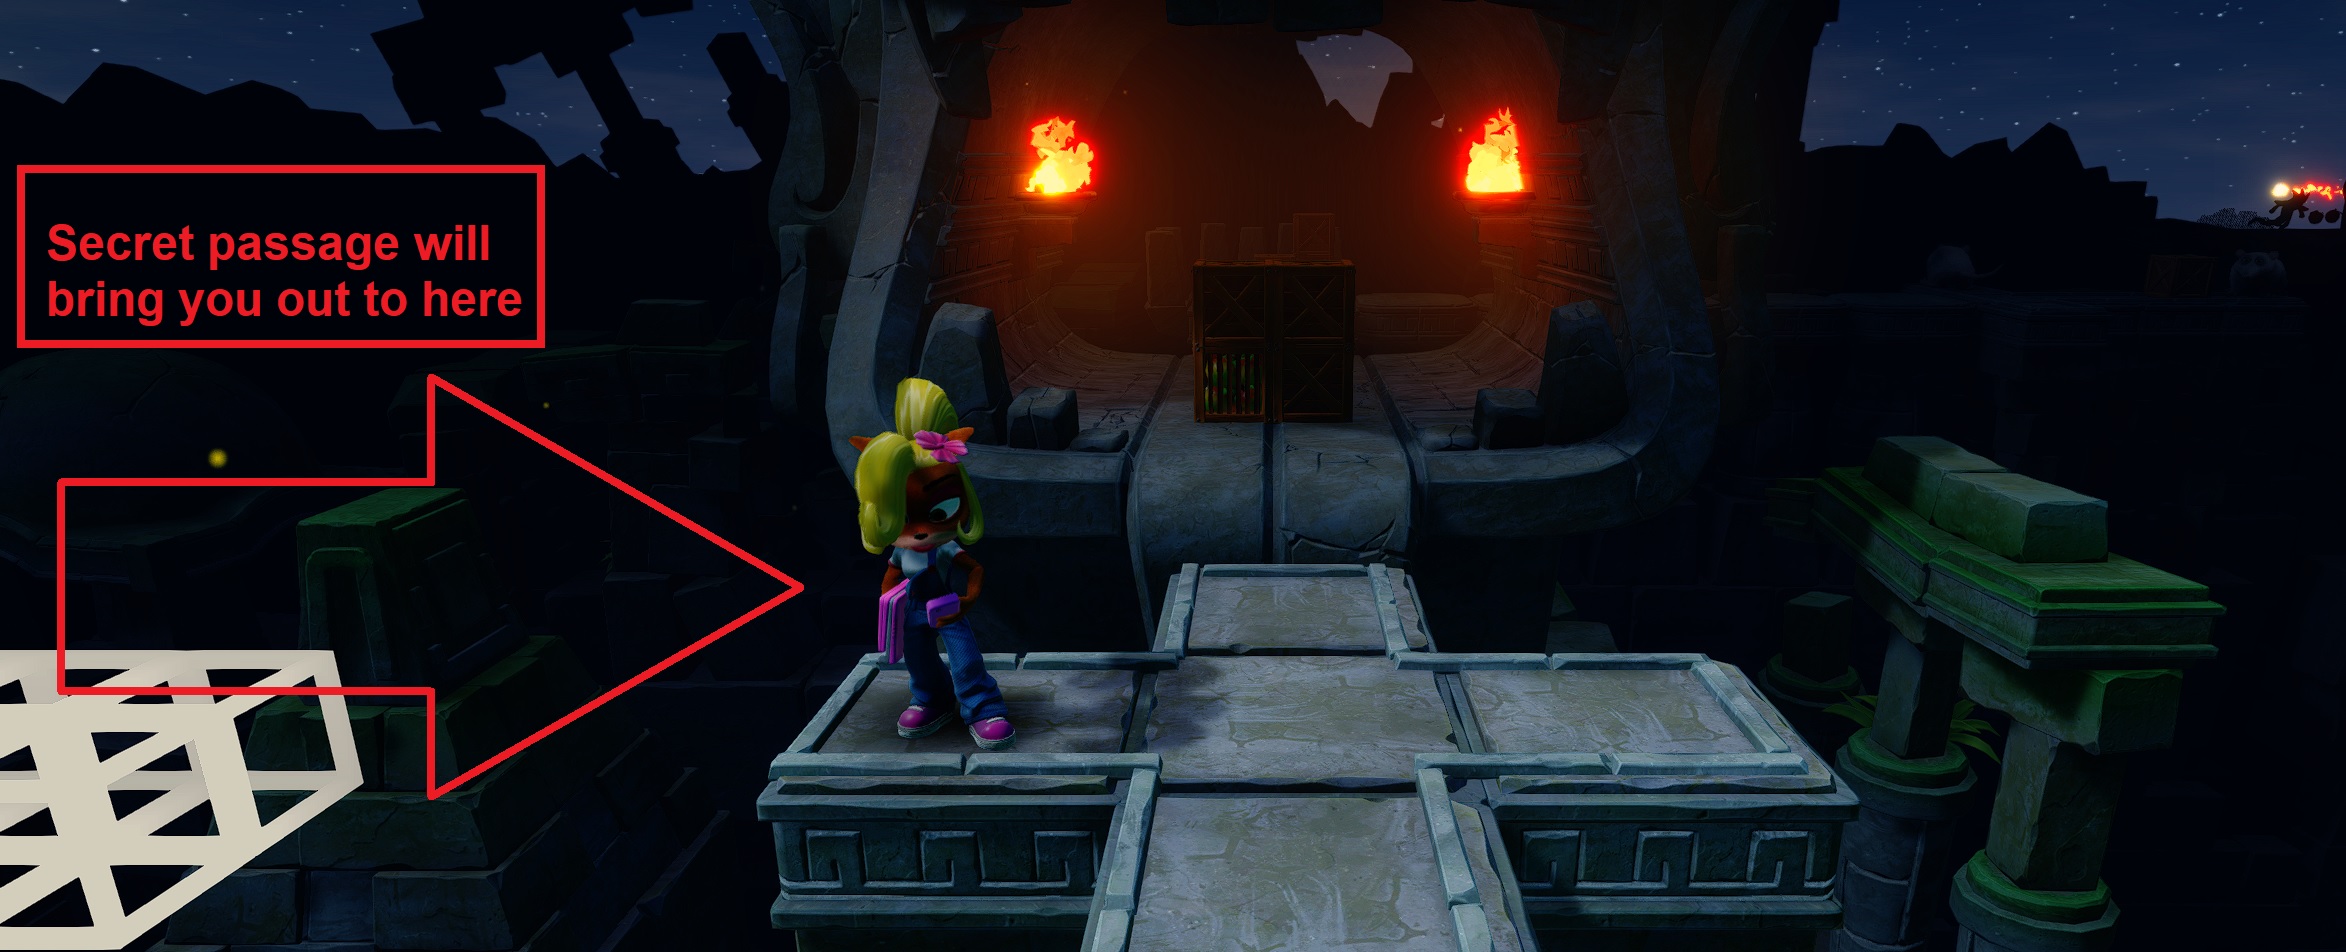
C2 | Hang In There, Maybe!In the level, "Hangin' Out", you'll need to take the alternate secret entrance to unlock this achievement. On the second hole that you go down, you'll land in a pool of water. Instead of heading forward, backtrack and you'll find a secret entrance.
C2 | Buzz Off!Die. In the level, "Bee-Having", all you need to do is get stung by the swarm of bees. Doing so will unlock this achievement and you'll lose a life in the process.
Defeat N. GinDefeat N. Gin
The fourth boss you'll face is N. Gin and his mech robot. This boss battle is broken up into three stages. In the first stage, you need to throw wumpa fruit at his exposed lasers when they open up. Destroy both and he'll switch to his shoulder missiles.
Do the same for these and he'll resort to his center missile launcher. Finally, hit the center portion of his suit when it is exposed to defeat him and earn this achievement.
Defeat N. Cortex"Defeat N. Cortex"
The final boss is once again, N. Cortex. Defeat him to unlock this achievement and beat the game. You'll be awarded the speed shoes, which will enable you to now achieve platinum relic times.
C2 | Crash CubedTo earn this achievement, go to the level, "Bear Down". Continue down the path as usual until you come to the tribesmen that pick up the ice pillar.
On the second set of them, hug the left wall and jump into the ice pillar, launching yourself into the freezing water, dying and unlocking this achievement.
C2 | A Helping PawTime for some misguided animal abuse. Go to the portal room where the polar bear cub is sitting in front of one of the level warp zones. Proceed to jump on his head over, and over, and over, and over, until he spits out some extra lives.
You're a monster.
Achievement (2/6)


Warp Room Level White Gem Requirement Colored Gem Obtained Any Secret(s) Jungle Turtle Woods Destroy all crates Blue Finish level without destroying any crates to obtain the blue gem. Jungle Snow Go Destroy all crates Red From bonus entrance via "Air Crash level". Jungle Hang Eight Destroy all crates (requires blue gem) & beat the time trial. None None Jungle The Pits Destroy all crates None None Jungle Crash Dash Destroy all crates None None Ice Snow Biz Destroy all crates None None Ice Air Crash Clear the Death Path & Destroy all crates (requires access via secret entrance from Bear Down) None Secret Warp to Snow Go - after the first checkpoint crate by arrow crate, hop over the jetski to right-hand platform via the floating crates. Ice Bear It Destroy all crates None None Ice Crash Crush Destroy all crates None None Ice The Eel Deal Destroy all crates Green Go right on the fork (first one) and walk through the false wall at the end of the nitro crates. Follow the path to find the green gem at the end. Sewer Plant Food Destroy all crates Yellow Complete the timed section. Sewer Sewer or Later Destroy all crates & Access platform the gem path (requires yellow Gem) None None Sewer Bear Down Destroy all crates None Secret Warp to Air Crash - at the very end of the level, double back across the floating platforms on foot. Sewer Road to Ruin Clear the Death Path & Destroy all crates (requires access via Diggin' It Secret Warp) None None Sewer Un-Bearable Destroy all crates None Secret Warp to Totally Bear - When you get thrown off the bear at the end, walk back to it by slide-jumping over the chasm and jumping behind the cub. Alpine Hangin' Out Destroy all crates None Secret Warp to Totally Fly - After dropping into the hole that takes you to a checkpoint and the Crystal, walk towards the camera to drop down another hole, and a short secret passage. Alpine Diggin' It Clear the Death Path & 2. Destroy all crates. None Secret Warp to Road to Ruin - Jump on the platform with the bomb-throwing plant near the end of the level and kill it with belly flop. Alpine Cold Hard Crash Clear the Death Path & Destroy all crates. None None Alpine The High Road Destroy all crates & Clear the Green path (requires green Gem). None None Alpine Bee-Having Destroy all crates Purple Jump onto Nitro stairs. High-Tech Lights Out Clear Death Path & Destroy all crates and double back to exit via Death Path. None None High-Tech Rock It Destroy all crates None None High-Tech Night Flight Clear Death Path & Destroy all crates None None High-Tech Pack Attack Destroy all crates None None High-Tech Spaced Out Destroy all crates & Complete level (requires all coloured Gems) None None Secret (via Un-Bearable) The Great Hall Destroy all crates None None Secret (via Hangin' Out) Totally Fly Destroy all crates None None
Blue Gem
To obtain the blue gem, you'll need to complete level one, " Turtle Woods" without destroying any boxes. That includes all types, so no mangos, extra lives or check points.
The only really tricky part is just making sure you jump on the bouncing box at the box wall. You can't simply jump over the other portions without breaking a box.
Finish the stage to unlock the blue gem.
Green Gem
To obtain the green gem, you'll need to complete the level "The Eel Deal". During the level, there are two forks in the road with two different directions you can go. At the first fork, go right and you'll enter a room littered with nitro crates.
The wall at the end of the room is a false wall that you can walk through where you'll find a secret area within the level. Follow the passageway and head to the end of the secret passage to locate the green gem.
Head back and finish the level.
Red Gem
To obtain the red gem, you'll need to enter "Snow Go" from the secret passage in the level "Air Crash". For details on that, see the achievement "C2 | Jumping the Jetboard" for instructions on how to find the passageway.
Once you enter the secret passage, head to the secret entrance via the hub of "Snow Go" and follow the path to its end. The path is filled with icy walkways, enemies, nitro boxes and holes.
If you're able to obtain the Aku Aku masks, by the time you pick up the third one to gain temporary invincibility, you can run through a good portion of it without much trouble.
Drop down at the end of the pathway to obtain the red gem.
Yellow Gem
To obtain the yellow gem, you'll need to complete the timed section "Plant Food". This is different and not related to the relic time trial. Once you get to the section with the first jetboard, you'll notice a timer appear in the lower right-hand corner of the screen. Beat the rest of the level before that timer runs out to earn the yellow gem.
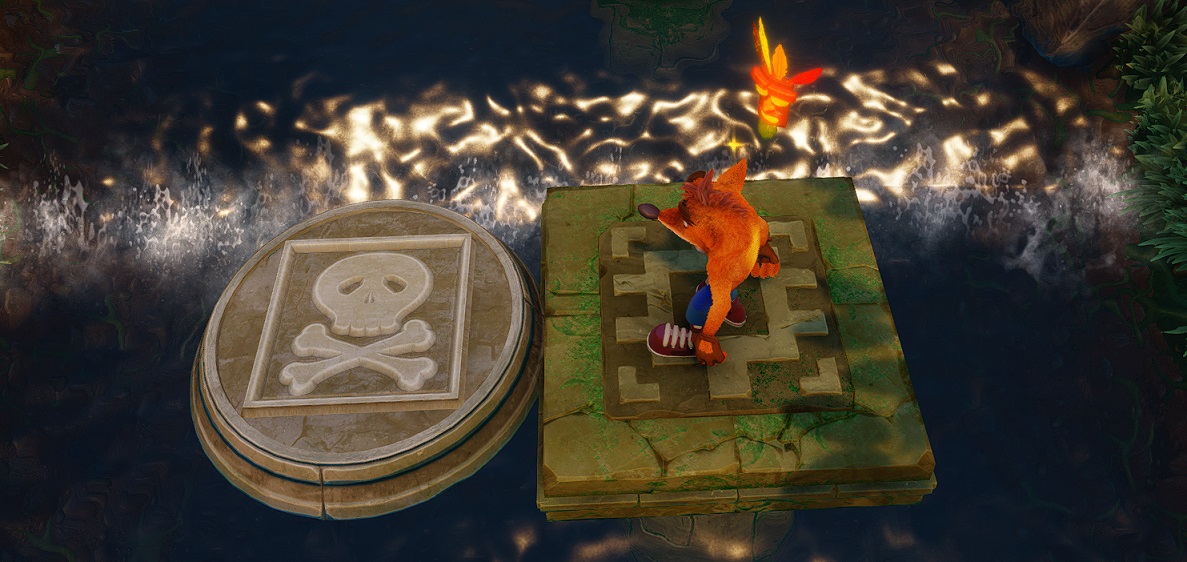
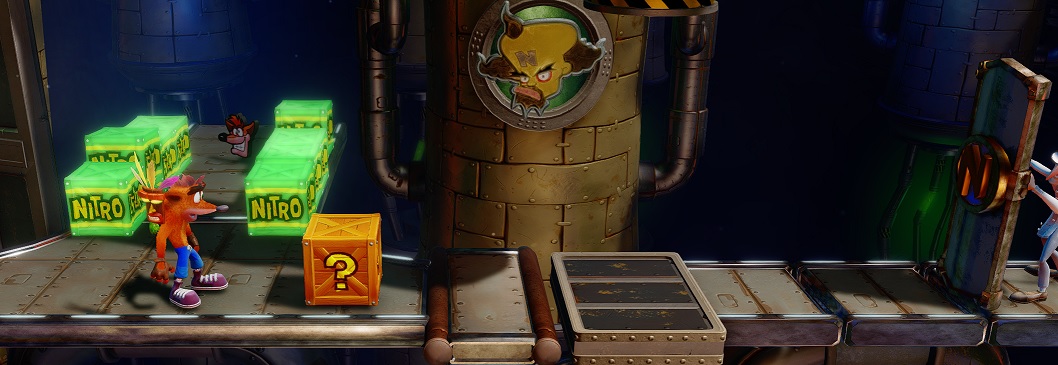
Purple Gem
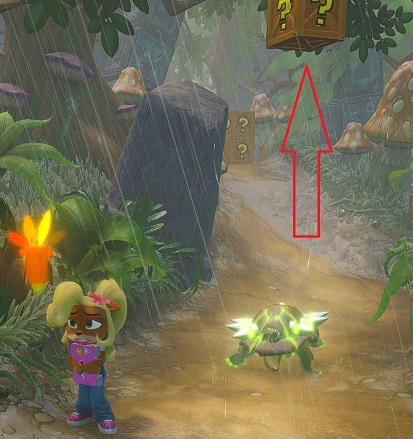
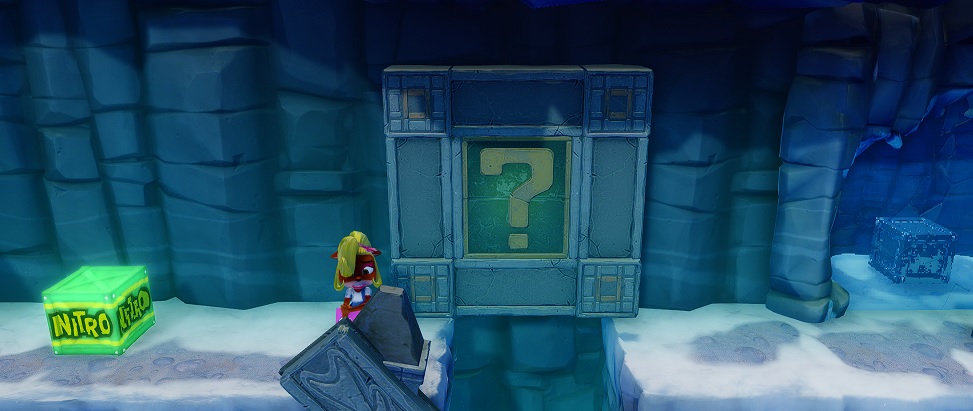
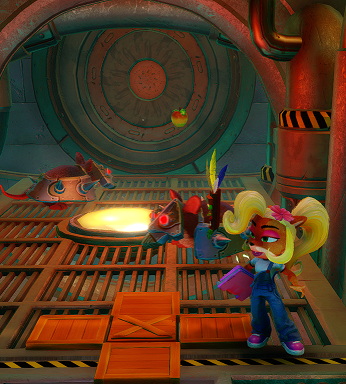
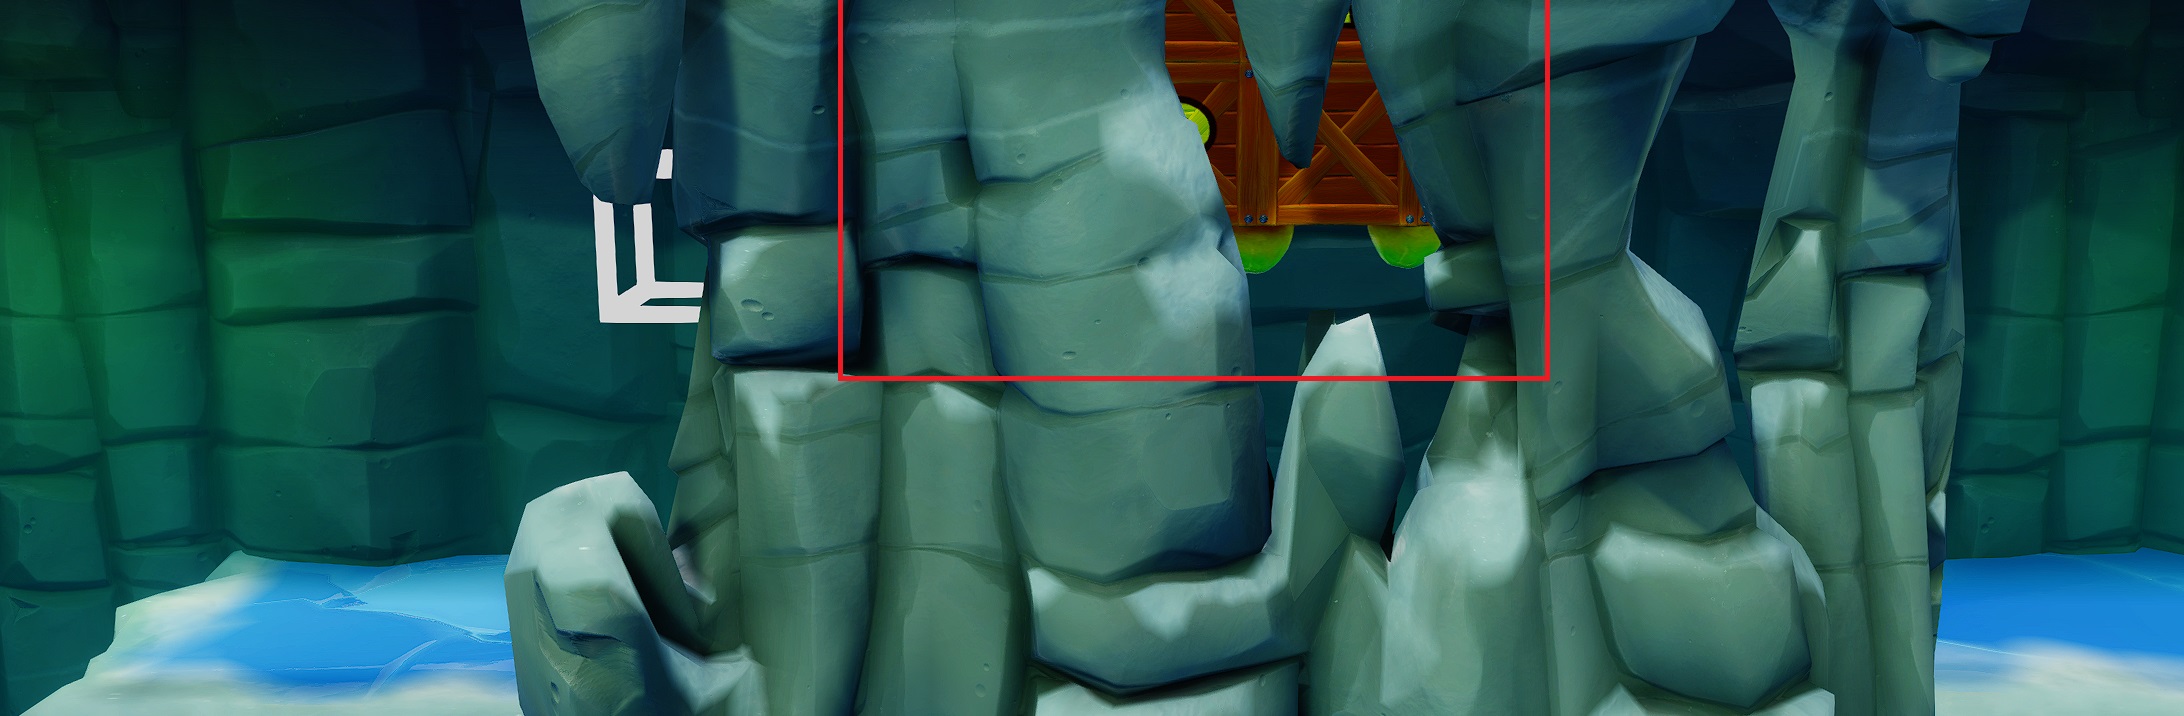
To obtain the purple gem, you'll need to head over to the level, "Bee-Having". Continue all the way until you see a staircase of nitro boxes on the right-hand side of the roadway.
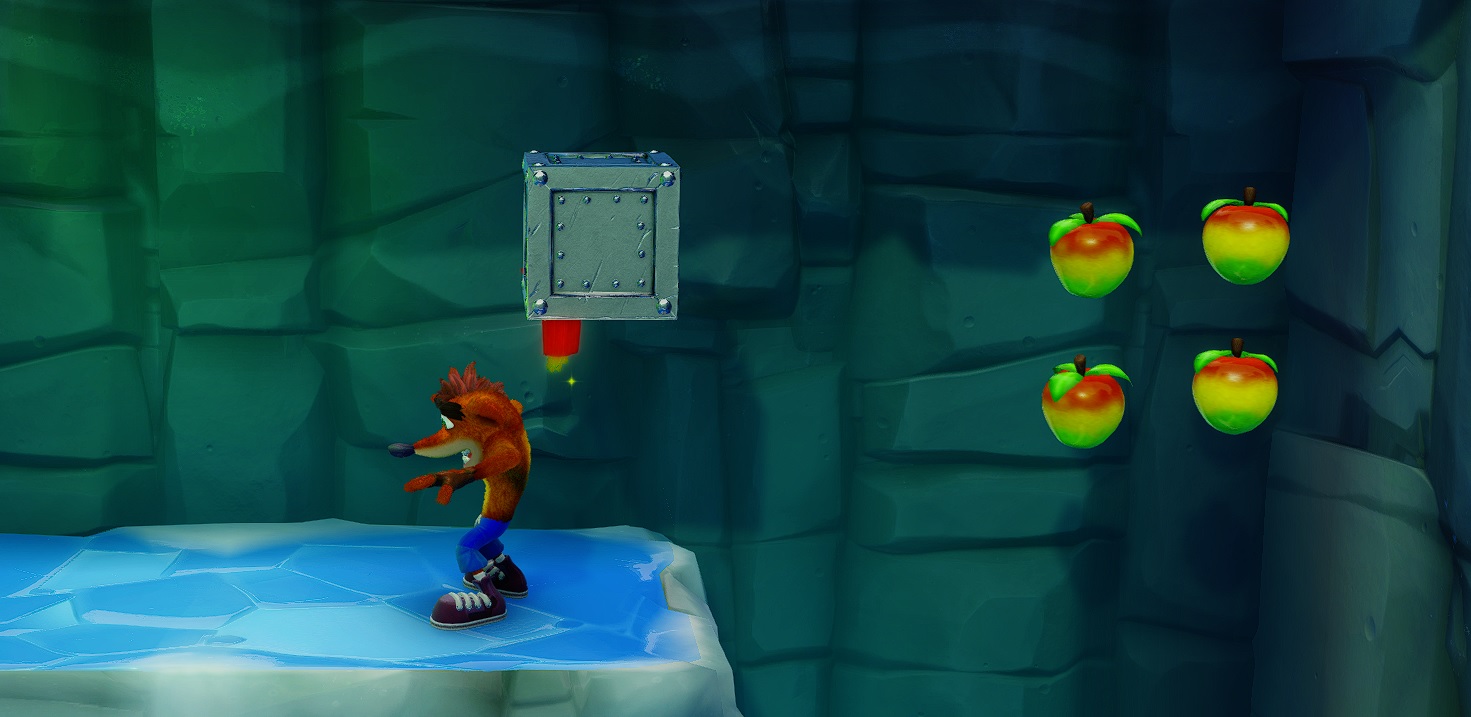
Climb up these boxes (they won't explode) to the top and you'll be teleported to a secret passageway. Towards the middle of it will be the purple gem.
If your character gets stuck in a weird hanging animation as shown in the gif, don't worry; you'll still be teleported over to the gem route.
It'll just hang there for a little bit before transferring you over.
Achievement (3/6)


C2 | The Flora FlopHead over to the level, "Diggin' It". Towards the end of the level you'll encounter a plant on an isolated, circular platform. Go near it so it hides, then jump on it and perform a belly flop to kill it.
You'll be transported to the secret entrance warp room and this achievement will unlock.
C2 | Kick the Tires!Earn 5 Relics
Once you finish the game and unlock the speed shoes, you can unlock this achievement by earning five relics of any color (platinum, gold or sapphire) on any five levels of your choosing.
C2 | Light the Fires!"Earn 10 Relics (gold or better)"
Once you finish the game and unlock the speed shoes, you can unlock this achievement by earning ten relics of any color (platinum, gold or sapphire) on any ten levels of your choosing.
C2 | Wumpa-Burner Engaged!"Earn 27 Relics (gold or better)"
Once you finish the game and unlock the speed shoes, you can unlock this achievement by earning all 27 relics on all 27 levels. This includes all 25 regular levels and the two bonus levels located in the secret warp room (bottom-most room in the main hub). You must earn at least gold time in all 27 levels. Platinum is not required.
C2 | 99 Percent Perspiration"Earn 99 Lives"
Fairly easy to do while you work on the clear gems, time trials and collecting all the colored gems. However, should you need to farm some more to unlock this achievement, head over to "Bee-Having and make your way to the checkpoint just before the first laser barrier.
Once there, position yourself just ahead of the beehive. When the bees start spawning, spin attack intro them to trigger a combo and you'll earn an extra life. Repeat this until you've reached 99 lives and the achievement unlocks.
C2 | One Man's Trash"Earn 21 Gems"
Earn 21 clear gems across any 21 levels of your choosing. This equates to half of the gems possible needing to be earned. For details, tips and tricks on how to do this for each level, see below.
C2 | Laser Powered Vengeance"Earn 42 Gems"
Earn all 42 clear gems across all levels. For details, tips and tricks on how to do this for each level, see below.
"C2 | Cortex N. FuriatedEasiest way to obtain this one enter and exit a level you have not completed three times and you'll earn this achievement. Alternatively, if you have already completed the game, start a new save file and enter and exit three times in a row.
Achievement (4/6)
Earning All 42 GemsBelow is a compilation of all levels and some helpful tips and hints to collecting the clear gems. For colored gems, see the above portion of this guide for information.
First, the break down for how to see what you have or are missing. Note, not every level has two clear gems, or two gems at all. It is recommended that you beat the game and gain the speed shoes prior to unlocking all the gems. It makes things much easier.
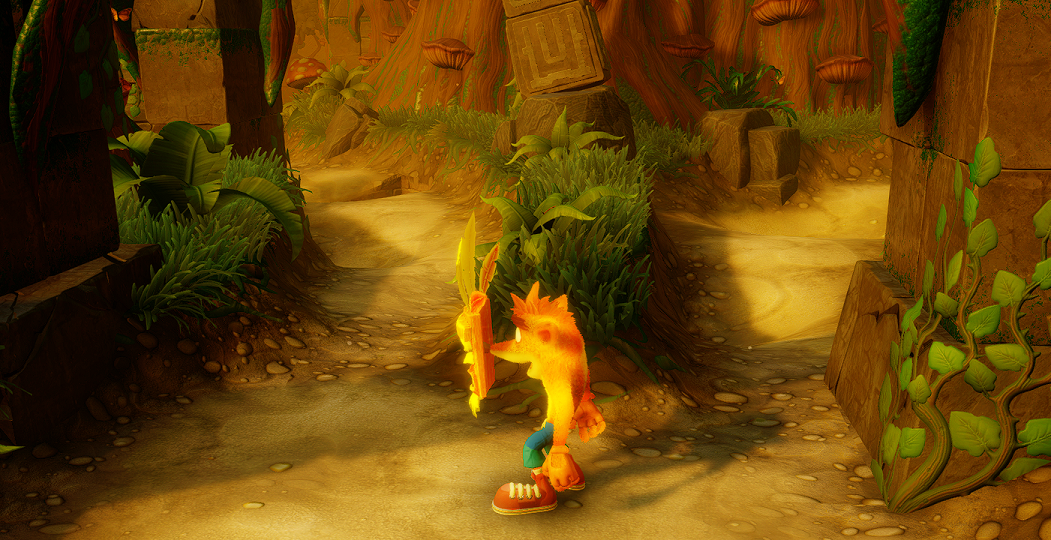
Level 1 - Turtle WoodsFor the first level, there's really only a few things to take note of in this level. Firstly, you'll come to this secret passageway in the very beginning. Do a belly flop or leg drop to enter the area and clear the boxes from within.
After you clear that you'll be teleported back to that area and can continue on. Next you'll come to a green "?" mark platform. Take that to the second secret passage and clear the five boxes inside.
The last portion to pay attention to is at the end just after the first pit.
You'll need to jump on this turtle to reach the box up top just out of view.
Wait for the turtle to go under the box and jump on him.
Use the height gained to spin attack and break the box. Now you can continue to the end of the level and collect the clear gem.
Level 2 - Snow GoThis level is very straight forward. Make sure you take the secret passage in the second portion of the level. Just drop down the hole with the "?" mark symbol on it.
The only other notable secret is once you drop down to the third portion of the level and hit the checkpoint box, double back and hit the trigger box behind it to spawn to more boxes down the road.
If you come to two outlined boxes, you've gone too far. Turn around and run back until you hit a dead end and the trigger box.
You can now progress through the remainder of the level, as there are no more secrets from this point onward.
Level 3 - Hang EightThere's not much in the way of secrets on this level. There is a "?" path you'll need to take, as well as the red gem path to destroy all the boxes, but both are right on the main road and not hidden, so you shouldn't miss them. If you're missing the red gem, see above for instructions on how to get it.
Level 4 - The PitsThe only thing you need to pay attention to in this level is once you get to the fork in the road. I suggest going right first, as there are less holes to dodge on your way back. Head down this route until you come to a pair of boxes that need to be triggered in game (ones that are just outlines). Now head back and take the left fork.
Head down the left fork and clear all the boxes in your path. Once you get to the end of the fork and the two roads meet up, trigger the crate switch and head back down the right fork to get those two crates and the extra lives they contain.
You can now finish the level, making sure to take the "?" path once you reach it.
Level 5 - Crash DashThere are no secrets in this level and only one clear gem for destroying all the boxes. If you find it difficult, come back to it when you finish the game and have the sprint shoes, as it makes outrunning the boulder much easier and mistakes much more forgiving.
Level 6 - Snow BizSnow Biz requires you to take the red gem path to locate all the crates in this level, so make sure you have it prior to trying. For instructions on where the gem is located, see the section on obtaining the colored gems.
Both the red gem path and the secret "?" path are on the main pathway that you have to take as you progress through the level, so there is no need to look for them. You can't miss them.
Level 7 - Air CrashThis level will have two clear gems. One is going to be for the death route, which you will need to get to without dying once. Remember, you can die inside the death route and still try again, but dying outside of it will close it off and you'll have to restart.
The second clear gem is for destroying all the crates, which you will need to access the secret path to Air Crash from Snow Go (see above chart for instructions on how to do that).
Note - you can enter any of the secret passages from the warp room on the bottom floor. You do not need to go back to the level that contains the warp zone to start from the secret entrance. You only need to do that once.
Level 8 - Bear ItThis level is linear and on rails more or less, so there are no secret passages or alternate paths to take. Simply dodge the obstacles and avoid the TNT decoy crates while smashing all the other ones to unlock this clear gem.
Level 9 - Crash CrushAnother boulder level; there are no alternate or secret paths to take, so just destroy all the crates as you run towards the finish to unlock this clear gem.
Level 10 -The Eel DealJust make sure you cover both forks to locate all the crates. When you come to the first fork, hang a right and destroy the one crate in among the nitro boxes.
Don't go down the green gem path unless you need it, as there are no additional crates behind the fake wall that aren't nitro boxes. Now go back down the left fork.
At the second fork, head left to clear out the boxes at the dead end, then go back and continue through the level using the right fork. Make sure to go down the "?" passage when you get to it.
Level 11 -Plant FoodThere are two gems in this level. One is the clear gem for destroying all the crates and the other is the yellow gem. See above for instructions on how to obtain the yellow gem. The clear gem is fairly simple. Head downstream as you would normally do, making sure to do two things:
On the third jetboard, go right down the platforms and destroy the crates on the floating one before jumping on.
Make sure to take the "?" route when you get to it.
Level 12 -Sewer Or LaterYou'll need the yellow gem for this level. Not long after you start the level, you'll locate the yellow gem path. Take it.
Once you finish it, you'll encounter another "?" passageway that you''ll need to clear out as well.
After that, you'll come to the one and only fork in the level. Taking the left fork will lead to crates, while the right fork will lead to the end of the level, so make sure you bank left beforehand, then double back.
Level 13 - Bear DownThis level is another linear level that requires you to ride the polar bear to the end of the level. There are no secret passages to take other than the one at the end for the achievement. However, this does not contain boxes, so don't go that route if you intend on obtaining the clear gem.
Level 14 - Road to RuinThere are two clear gems in this level. One will require you to get to the death route along the main pathway without dying. Complete the death route to earn a clear gem. The second is for all the crates, which will require you to take the secret passage in the bottom-most warp room.
Once you take the secret passage, continue through the level like normal. Do not take the death route this time. Head towards the end of the level and you'll see a "?" path on your right-hand side. If you encountered a monkey, you missed it and need to backtrack.
Achievement (5/6)
Level 15 - Un-BearableYet another linear level, but with a twist. On the second section with the bear, it'll fall down a wooden bridge and leave a giant hole in its wake.
Jump down that hole to reveal a secret area. Clear this area and you'll be teleported back to where you left off.
Finish the level to earn the clear gem.
Level 16 - Hangin' OutThis level is pretty straight forward. The only thing you need not do is go down the secret passage (just don't backtrack). Just keep running forward, make sure you go down the "?" passageway and you should be able to locate all the crates without much trouble.
Level 17 - Diggin' ItThis level can be a little tricky. You have to earn both clear gems at the same time. First off, progress through the level until you get to the fork in the road. On the left is the death route, the right is a regular path.
Take the death route first (assuming you didn't die already. If you did, restart). Complete the death route and pick up the first gem. Once the right path converges onto the left one and the forks meet, backtrack on the other one to collect all the boxes you missed.
It can be a little tricky with the bees, but pay close attention and memorize the "cut off" point when they stop following you to predict where they will be so you can spin attack them. It can be hard going backwards since you have very little time to react, but practice and you should be able to do it.
Once you make your way to where the paths originally forked, turn around and head towards the end of the level using the right path again until the end. Remember to go down the "?" path to collect those crates as well.
Level 18 - Cold Hard CrashThis is probably one of the most difficult levels to beat and there's two clear gems you need to earn. I recommend doing this in two runs.
The first one would be completing the death run first and ignoring the need to break all the boxes. Once you finish the death run gem, the real "fun" begins. First off, you'll want to get to the death run without getting hit once. The reason for it is you need to save up your Aku Aku masks so you can earn invincibility during the death run.
The reason for the invincibility is to destroy the nitro boxes on your first run through the area because as you make your way through it, there will be one box outline that will turn into a crate and the trigger is at the very end of the area, as well as several hidden ones in the foreground. Make sure you don't miss any of them.
So, once you obtain the third mask, make your way to the end of the death route. Once you start hitting all the nitro boxes, slow down and go slowly as to not fall off the edge.
At the very end will be a trigger box.
Hit the trigger box (do not fall down the hole. If you do, restart) and make your way to the beginning of the death route and take the platfrom back up to where it came. Now continue on throughout the the rest of the level to the end and you should have all the crates by the end.
Level 19 - RuinationFar easier than level 18, "Cold Hard Crash", Runation is much more straight forward. The only thing to remember is don't go down the gem path, as there are no boxes there so you are free to ignore it.
Just remember to take the "?" platform and you should have no problems clearing all the crates and earning the clear gem.
Level 20 - Bee-havingAn extremely linear level with only one "?" platform to remember to take. Other than that, you should have no issues completing this level.
Achievement (6/6)
Level 21 - Piston It Away"If you loved Cold Hard Crash, then you're gonna love this!" - No One Ever
This level is a pain to deal with as well and I'd rank it up there with Cold Hard Crash as being one of the most difficult levels to get the clear gems on. Firstly, you're going to want to ignore the death route on your first run. Run past it, but go ahead and take the "?" path.
Remember you have to have a perfect run outside the "?" path, but inside it you can die and it won't wall off access to the death route. Once you clear the "?" path, continue to the end of the level until this point:
Once you destroy that crate, now you need to backtrack to the death route. Remember you CANNOT die, or you have to start the whole thing over again.
Jump on the death route platform take it slow and make sure to hit the checkpoint box. Now, even if you die, you can keep retrying. Make your way to the end to unlock the clear gem. Nice work!
Level 22 - Rock ItThe only thing that makes this level difficult is the weird anti-gravity controls and strange perspective. Other than that, it is a straight shot to the end and with very few crates to get. There are no secrets to pay attention to.
Level 23 - Night FightNight Fight requires you to be pretty quick to avoid losing out on the light from the fireflies, but otherwise it isn't a very tricky level. There are two clear gems in this one and it is near impossible to get them both in one go, so I recommend doing the death route one first.
Once you have that one done, ignore the death route for the second clear gem and take the right path. Once you get to the part where both paths converge, double back down the left path. There are two boxes you need to get that are past the two pits. Once you get the two boxes, turn around and head to the end of the level.
Level 24 - Pack AttackThe only thing that makes this level difficult is the weird anti-gravity controls and strange perspective. Other than that, it is a straight shot to the end and with very few crates to get. There are no secrets to pay attention to.
Level 25 - Spaced OutFor this level, ignore the gem path and keep going forward. Head down the "?" hole and collect all the boxes down there. Once you finish it, head back up and continue the level. It can be fairly challenging with all the precision jumping and sliding that is needed, but there are no death routes, so feel free to die as much as you need to as you practice the level.
The second gem requires ALL the colored gems first. Once you have them all, take the gem path at the beginning of the level. This will be a marathon of obstacles for each gem that you need to do in one go. If you die, you start the whole thing over.
Complete it and you will be awarded the second clear gem!
⠀⠀⠀⠀⠀⠀⠀⠀⠀⠀⠀⠀⠀⠀⠀⠀⠀⠀⠀⠀
https://steamcommunity.com/sharedfiles/filedetails/?id=1304735272
Source: https://steamcommunity.com/sharedfiles/filedetails/?id=2171883824
More Crash Bandicoot N. Sane Trilogy guilds
- All Guilds
- Crash Bandicoot 1 Achievements Guide
- The Miracle
- How To Unlock Framrate
- A Detailed Guide For Crash Bandicoot 1
- Crash Bandicoot N. Sane Trilogy
- Crash Bandicoot N. Sane Trilogy - How to Kill the Papu Papu Easily
- Crash Bandicoot N. Sane Trilogy - Making the Last Jump in Slippery Climb Bonus Stage (Crash Bandicoot 1)
- Crash Bandicoot N. Sane Trilogy - Achievements Guide (Crash Bandicoot 1)
- Crash Bandicoot N. Sane Trilogy - Unlimited Lives Exploit / 99 Lives (Crash Bandicoot 2)