The purpose of this guide is to teach the basics of The Ship to newcomers who don’t know all that much about how The Ship works. If you already understand the basics, this guide is not for you.
The Goal Of The Game

As you may already know, the goal of The Ship is to find and hunt down another player marked as your quarry for money while avoiding the efforts of your hunter. This is how rounds play out.
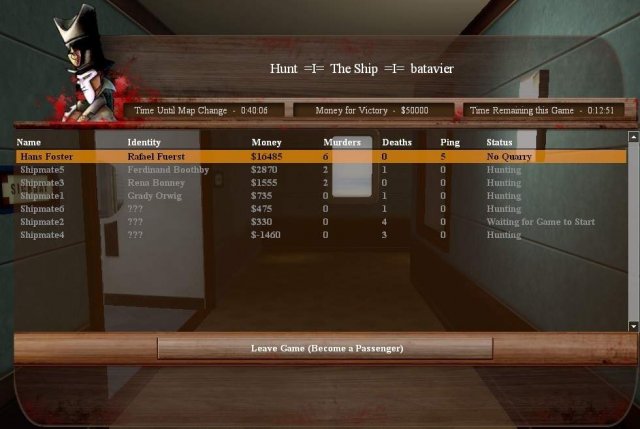
The game itself has a leaderboard recording the amount of money every player on the server has collected, with the winner being either the first to reach the winning total (usually $50,000) or the player with the most money when the map timer runs out.

Be warned, however, that killing anyone who isn’t your quarry or your hunter results in a hefty penalty being inflicted on your money. If your money reaches well into the negative numbers, the server will kick and momentarily ban you. But the value needed to be kicked and banned is very low into the negatives (usually something like -$8000) so you’ll probably only get banned if you’re just killing everyone in sight.

Pursuing Your Quarry
Your current quarry is marked in the bottom right of the screen. Their name, portrait and last known location will be displayed here. Usually the portrait will be a non-descript silhouette. This is because while you know your quarry’s name, you don’t know what they look like. You can find this out by simply talking to other players and asking their names by clicking on them. Once your quarry has been identified, the silhouette will be replaced by a portrait showing what your quarry looked like when you last saw them (keep in mind they could’ve swapped clothes, making this info incorrect).

The last known location is your best tool for tracking down your quarry. It will inform you of your quarry’s location every 30 seconds as well as update your deckplan (accessed by pressing ‘P’ by default).

However, this info isn’t always reliable. The color of your quarry’s location tells you how fresh this info is. Red is pretty much brand new; blue is very outdated and most likely incorrect. Still, it’s better than nothing and you should mainly be using this info the most to chase your quarry.
Choosing The Right Tool

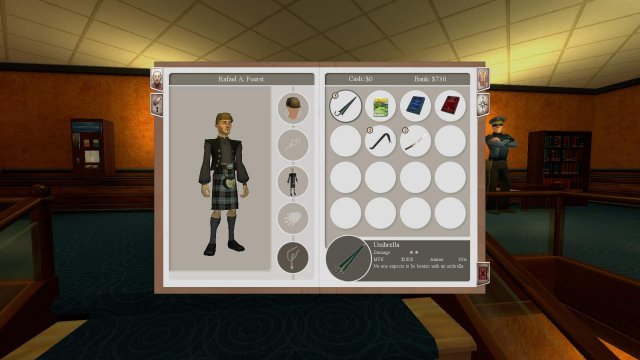
Obviously, successfully tracking down your quarry means little if you don’t have the means to kill them. You’ll want to arm yourself with one of the dozens of weapons found throughout the ship. Weapons are usually stashed in cupboards or dressers in the cabins. Simply click on them to search them. When you pick up a weapon, it is automatically assigned to one of the number buttons on your keyboard (from 1 to 4). You pull out or holster the weapon of your choice by pressing the button it’s assigned to.
While a weapon is out, you can’t interact with any object or person and players tend to panic when they see a weapon drawn, so keep it holstered until your quarry is in sight. You can also throw any weapons you have drawn by right-clicking. This actually does some damage and might even kill someone. However, only a few weapons with actual mass do any real damage when thrown. For example, a Fire Axe is going to do more damage thrown than a Rolling Pin. Consider pegging your weapon at your quarry only if they’re fairly injured already or you have a fairly weighty weapon.

There are two main stats that weapons have that will affect what is a good weapon and what isn’t. The first is Damage, shown by the number of stars in the weapon’s tooltip box. One or two stars means the weapon will require more than a few swings to kill someone and four to five stars means you may only need a single swing to kill someone. So, you’d normally think only the really lethal weapons are worth anything and that you should avoid the less lethal ones. Well, that’s where the second stat, MFK (short for Money For Kills), comes in.

MFK shows you how much money you will be rewarded for killing your quarry with the weapon in question. How MFK works is this: weapons are given random values at the start of the game (usually between $600 to $2600). If a player kills their quarry with a certain weapon, they get paid the value stated on the MFK, but then that weapon’s MFK depreciates down to only $100 at the start of the next round. So, if another player kills their quarry with the same weapon that was used in the previous round, they only get $100. Meanwhile, any weapons that aren’t used as the rounds pass by will increase in MFK. So, it isn’t uncommon to find lesser-used, less lethal weapons going for something like $10,000 for a kill.

So, ideally, you want a weapon that can kill fairly easily for a good sum of cash, or a weapon that offers an absurd amount for a kill.
Money, Money, Money

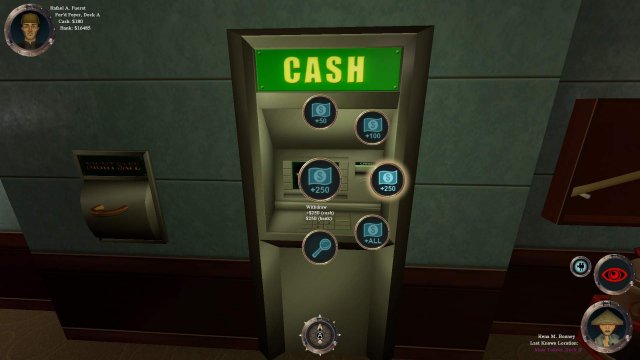
Money is basically the score of the game. However, it’s also a resource you can use to make your job a bit easier. There are several ATMs and deposit boxes scattered around the ship. You can stash money you have on your person (listed next to your portrait as Cash) with the deposit boxes or you can withdraw money from your bank account using the ATMs. Right-click on either of these objects to withdraw/deposit money in $50, $100, or $250 increments.

Money can be used to purchase items from the variety of shops and vending machines aboard the ship or to pay for treatments at the sickbay. It can also be used to bribe guards for information on your quarry’s whereabouts or to look the other way if you try to kill someone. However, having a lot of money on hand is a risky proposition. If you die, you’ll drop a wallet or a purse which contains all the money you had on you when you died. So, if you were carrying $600 or so when your hunter killed you, they’ll not only get money for killing you, but will end up taking your money. To avoid this, you should probably only carry about $250 tops unless you plan to pay for medical care or bribe a guard.

Obstacles To Murder
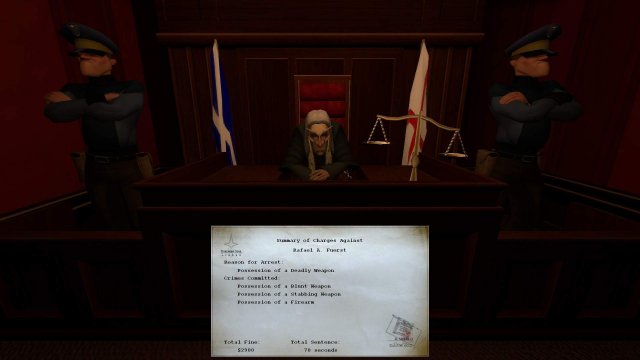
Sadly, killing your quarry isn’t as easy as simply finding them and beating them until they stop moving. There are several dangers you need to be aware of. The main danger being the ship’s Security personnel. There are guards and cameras all over the ship, and if you’re spotted with a weapon drawn or trying to kill someone, you’ll be arrested, fined and sent to jail for a period of time.
You can tell if Security is watching you by checking the eye symbol on the right of your screen. If it’s red, you’re being watched by either a guard or a camera or both. Which of the following is observing you will be shown next to the eye, with a badge icon representing a guard and a camera icon representing a camera. If the eye is green, then no Security is watching, and you can attempt to kill your quarry.
But, as mentioned before, it is possible to bribe guards to not arrest you for trying to kill someone, removing your quarry’s shield if they plan to let the guards and cameras block you. Keep in mind that this is very expensive (the lowest amount of time a guard can be bribed to ignore you for is 30 seconds, which costs $1000).
There is another danger, the presence of witnesses. If another player(s) can see you and they aren’t committing a crime themselves, a small eye icon will appear next to the larger eye. If you’re brandishing a weapon or attacking with one, a bar around the icon will start to fill. When this bar is completely full, the observing player(s) will report you to Security and you’ll be arrested. The more people watching you, the faster the bar will fill. This makes killing your quarry amid a crowd very difficult.
Lastly, your quarry themselves may actually fight back if cornered. They lose no money for killing you and you lose all your weapons and items if you die this way. So, it’s usually a good idea to wait till your quarry isn’t paying attention to you or you’ve just bumped into them and startled them.
I Have The Need(s)
You can’t kill your quarry all the time, nor can you just camp out in a bathroom cubicle with a Tommy Gun until the round ends. This is because of the Needs System. As you move around the ship or performing certain actions, your Needs will start increasing. Your Needs will only show up just underneath your portrait when you press and hold the Display Needs key ("N” by default) unless they’re increasing or decreasing significantly or if they’re above 50%.
As a Need gets higher and higher, it will change color, going from green to yellow to red and then finally purple. If a Need is purple, you need to satiate it as soon as possible, or you will die or suffer some other kind of penalty.
Needs are fairly self-explanatory as to what you need to do to satiate them, just look at the icon of the Need to see what you need to do. You can check for specific places to suit your Needs by clicking on a specific icon in the lower left portion of the deckplan. So, if you aren’t hot on your quarry’s heels or just waiting for the next round, it’s generally a good idea to attend to any outstanding Needs.
One thing that isn’t displayed is your Health. If you’ve been smacked around a bit, there’s no bar or icon telling you how injured you really are. Instead, pay attention to your screen. If your view is bobbing up and down a bit, it means you’re quite hurt and you’ll be easy pickings for your hunter. So, to fix this, visit the sickbay and pay for medical treatment. Be aware that the treatment is rather expensive (light treatments cost $250 and full treatments cost $500) so you might need some money first.
Conclusion
That should cover all the basics of how to play The Ship. If you want more tips and tricks, I have an additional guide for players who already know a fair bit about how to play.
Source: https://gameplay.tips/guides/4304-the-ship.html
