
BASE GAME - Story Related Achievements
You will get an achievement for completing each of the 12 main missions of the base game. There are no prerequisites and no special actions needed in order to complete the main campaign, therefore you can start each mission after completing the previous one.
All story related achievements are unmissable!
What Just Happened

What Just Happened
Complete Arcology Blues
Complete the 1st main quest of the game "Arcology Blues" .
Recommended Level: Level 1
Party Crashed

Party Crashed
Complete Mutual Dependencies
Complete the 2nd main quest of the game "Mutual Dependencies" .
Recommended Level: Level 3
A New Friend

A New Friend
Complete Trading Places
Complete the 3rd main quest of the game "Trading Places" .
Recommended Level: Level 6
Power Hungry

Power Hungry
Complete Empowerment
Complete the 4th main quest of the game "Empowerment" .
Recommended Level: Level 11
Data Digging

Data Digging
Complete Data_Miner
Complete the 5th main quest of the game "Data_Miner" .
Recommended Level: Level 13
Mnemonic Hunt

Mnemonic Hunt
Complete Foreign Code
Complete the 6th main quest of the game "Foreign Code" .
Recommended Level: Level 17
Everyone’s A Smuggler

Everyone’s A Smuggler
Complete Trace Protocol
Complete the 7th main quest of the game "Trace Protocol" .
Recommended Level: Level 17
Magenta Power

Magenta Power
Complete Syntax Error
Complete the 8th main quest of the game "Syntax Error" .
Recommended Level: Level 20
Nothing Personal

Nothing Personal
Complete Recompile
Complete the 9th main quest of the game "Recompile" .
Recommended Level: Level 21
Severed Board

Severed Board
Complete Board Meeting
Complete the 10th main quest of the game "Board Meeting" .
Recommended Level: Level 22
Protocol 61A

Protocol 61A
Complete Project MenShen#1
Complete the 11th main quest of the game "Root Access" .
Recommended Level: Level 23
Something Out There

Something Out There
Complete Project MenShen#2
Complete the 12th main quest of the game "Unhandled Exception" .
Recommended Level: Level 25
Appreciation

Appreciation
Get praise from Kira
This is a story related achievement, therefore it is unmissable. You will receive this secret achievement automatically upon completing the "Foreign Code" main quest, during the cutscene in which Kira praises you for stopping the ship from fleeing and capturing the target .
Next Level AI

Next Level AI
Upgrade your IMP
This is a story related achievement, therefore it is unmissable. The secret achievement will be automatically unlocked during the “Data_Miner” main quest, after recruiting the hacker Noghead and talking to Kira for completing your task. As reward, Kira will upgrade your IMP and the achievement will pop.
Win

Win
Complete all Main Missions
There are 12 main missions in total. After completing the final main mission and after the credits roll, this achievement will unlock. The missions are as it follows:
1. Arcology Blues
2. Mutual Dependencies
3. Trading Places
4. Empowerment
5. Data Miner
6. Foreign Code
7. Trace Protocol
8. Syntax Error
9. Recompile
10. Board Meeting
11. Root Access
12. Unhandled Exception
BASE GAME - Co-Op Related Achievements
As mentioned earlier in the introduction, playing in a co-op session might create some issues regarding the natural unlock of several achievements. By playing in another player’s game (host), you might not receive progression achievements, gameplay achievements or even story related achievements!
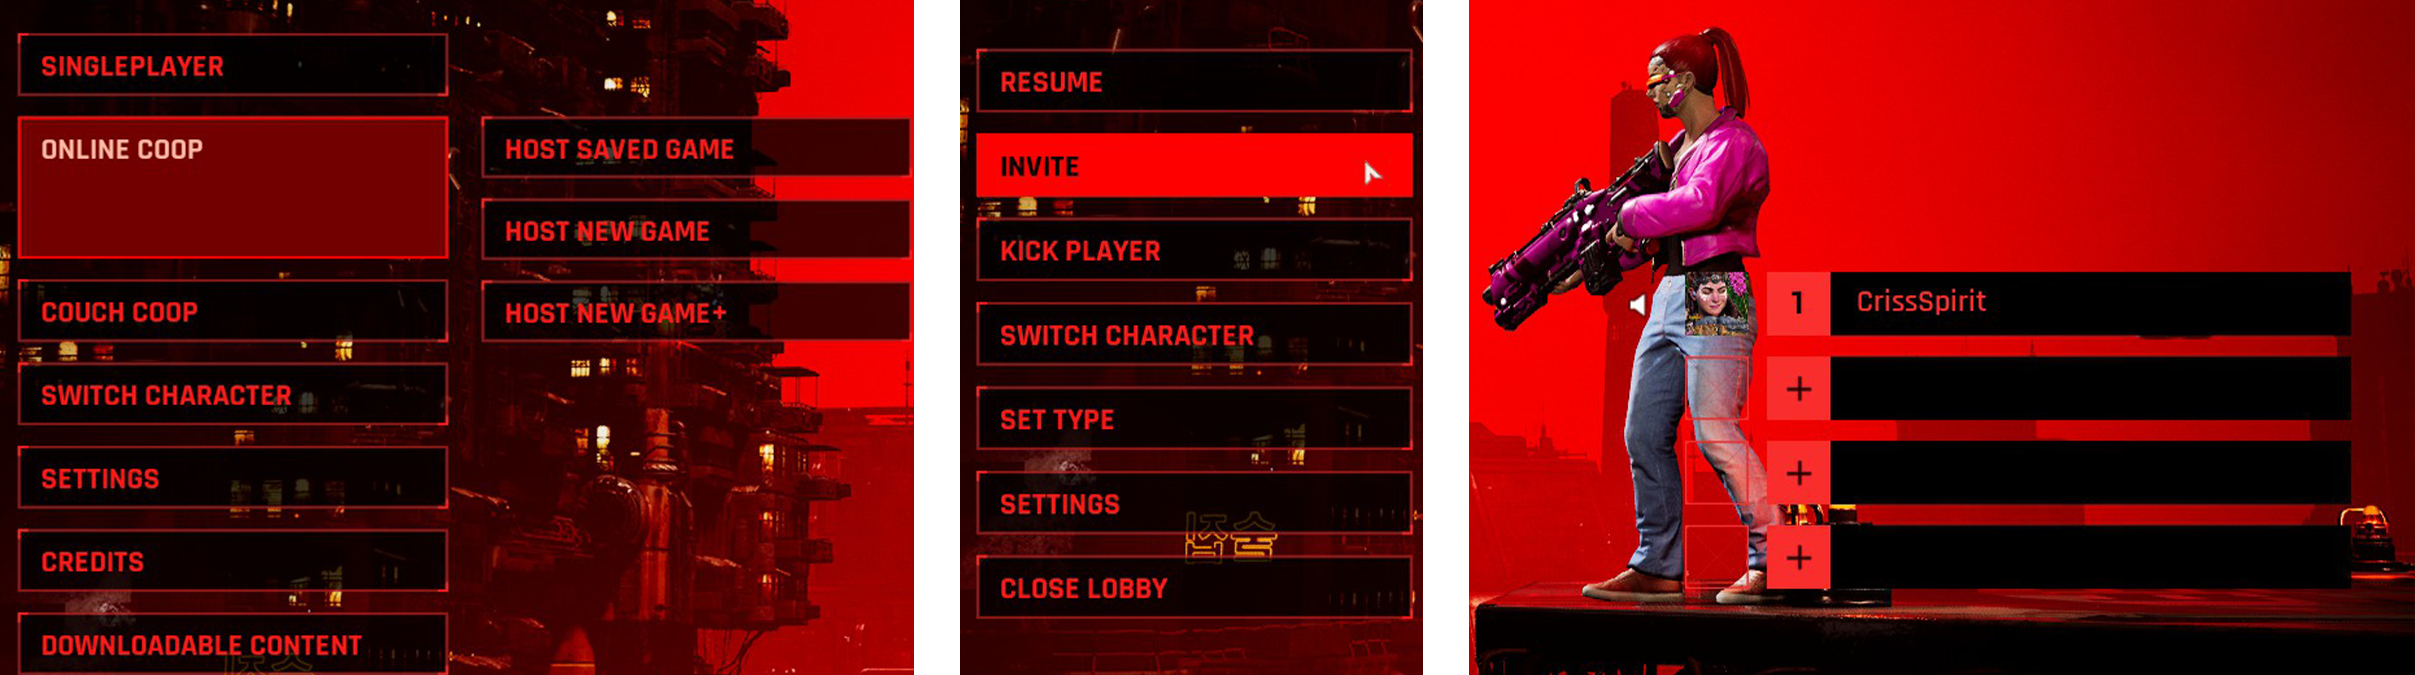
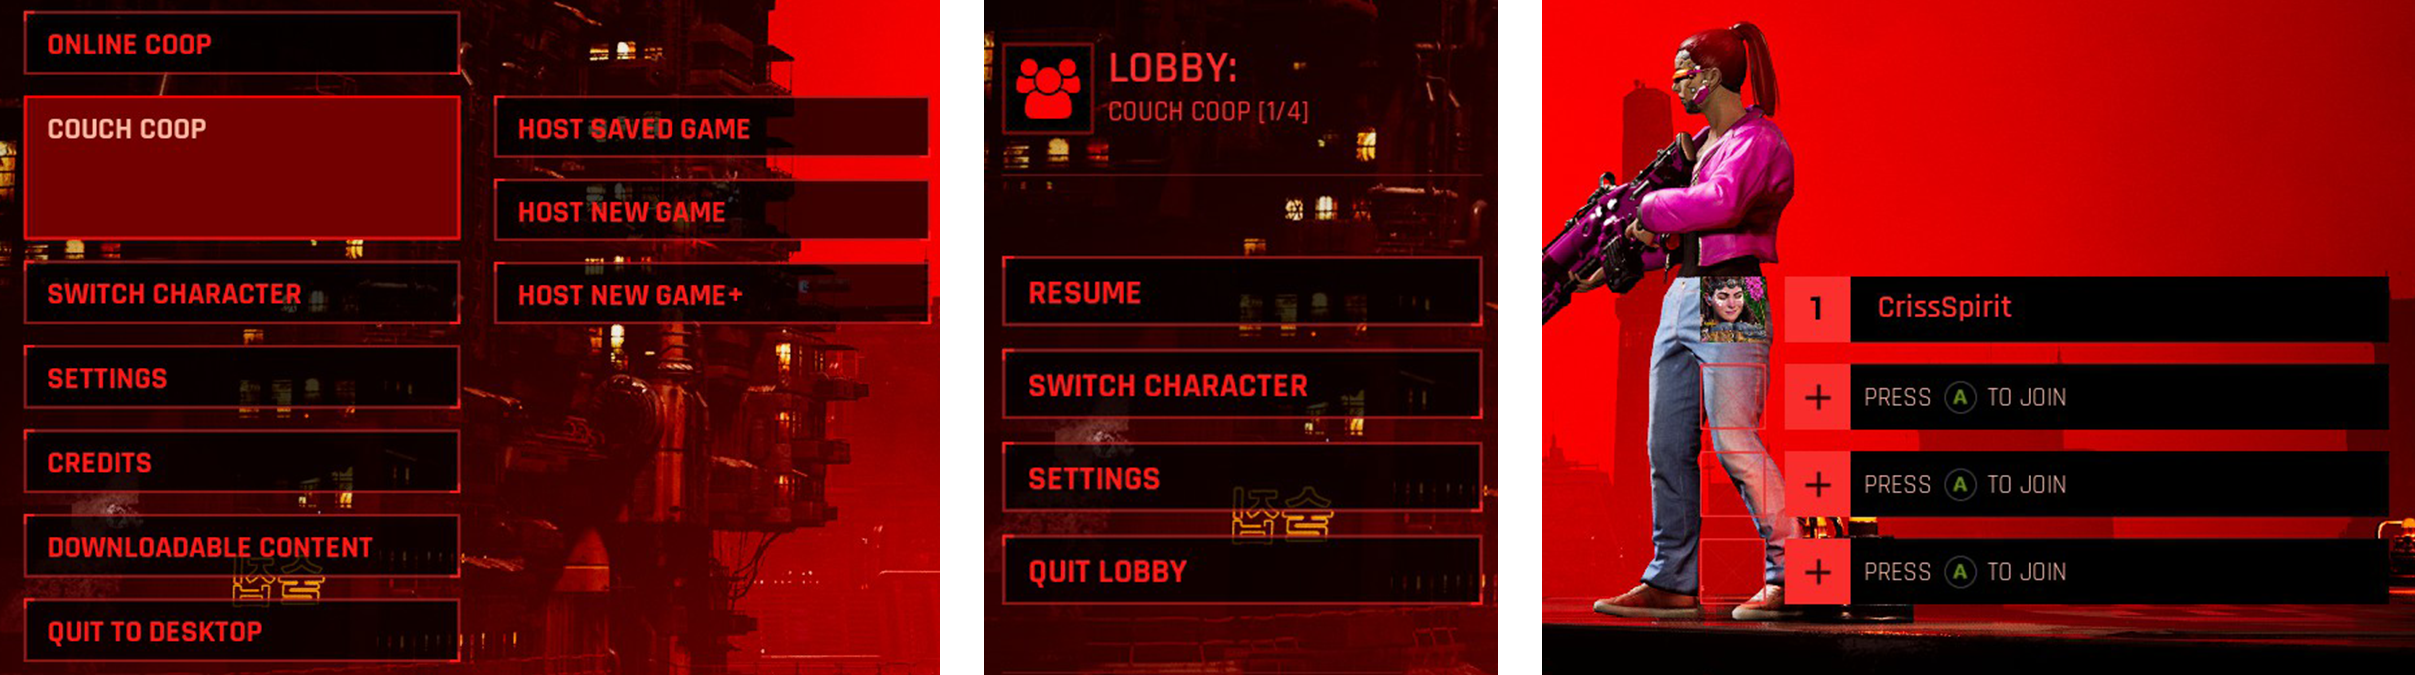
The Ascent has only 2 achievements related to cooperative playing and they don’t even require an online session. There are two ways to create a co-op session:
1. Play online with a friend – As a host, you have to choose the “Online Coop” option, then choose whether you want to continue a saved file (same save that you are playing in single campaign) or begin an entirely new game. Then, you can invite your friend to join your session.
2. Play locally – For this you will need 2 controllers (any controller is fine, for example, you can use a PS4 with a PS5 controller, even an Xbox controller with a PS, but keep in mind that Mouse & Keyboard with a controller will NOT work). Select the Couch co-op and then you will be prompted to choose whether you want to continue a saved file (same save that you are playing in single campaign) or begin an entirely new game. Next, you can begin your local session.
Teamwork

Teamwork
Start your first co-op session
This achievement is unlocked once you start (or join) in a cooperative session. This can be achieved both in the online co-op as well as in the Couch co-op. Simply select one of the two options listed, then start playing.
Helping Hand

Helping Hand[/previewimg]
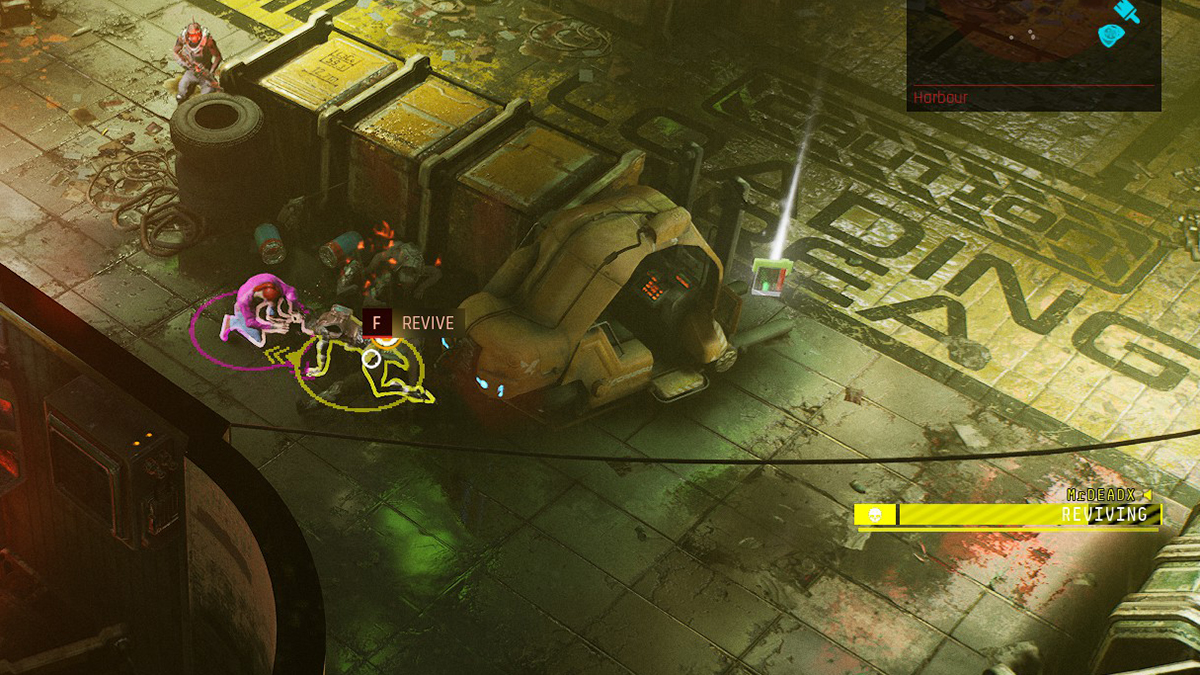
Revive a DBNO friend
While being in any co-op session (local or online), you will need to aid your partner and revive him after he’s been knocked out by enemies, by holding the X / ▢ button on your controller or F on your keyboard.
You can get this achievement at any point in game, but the earliest when you can attempt to unlock it is during the first main mission “Arcology Blues” , when you encounter the first group of Feral enemies.
BASE GAME - Gameplay Achievements
We’re Just Getting Started

We’re Just Getting Started
First enemy kill
You will obtain this achievement automatically during the first main mission "Arcology Blues" , by killing the first enemy that you encounter.
Self Improvement

Self Improvement
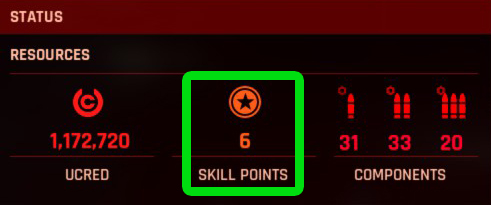
Allocate 3 Skill points
Every time you level up your character, you will receive 3 skill points to assign to the attribute you want. The earliest you can unlock this achievement is once you reach level 2 as you will have your first 3 skill points available to use. Simply allocate them in the attribute you want and your achievement will pop.
Fullchrome


Fullchrome
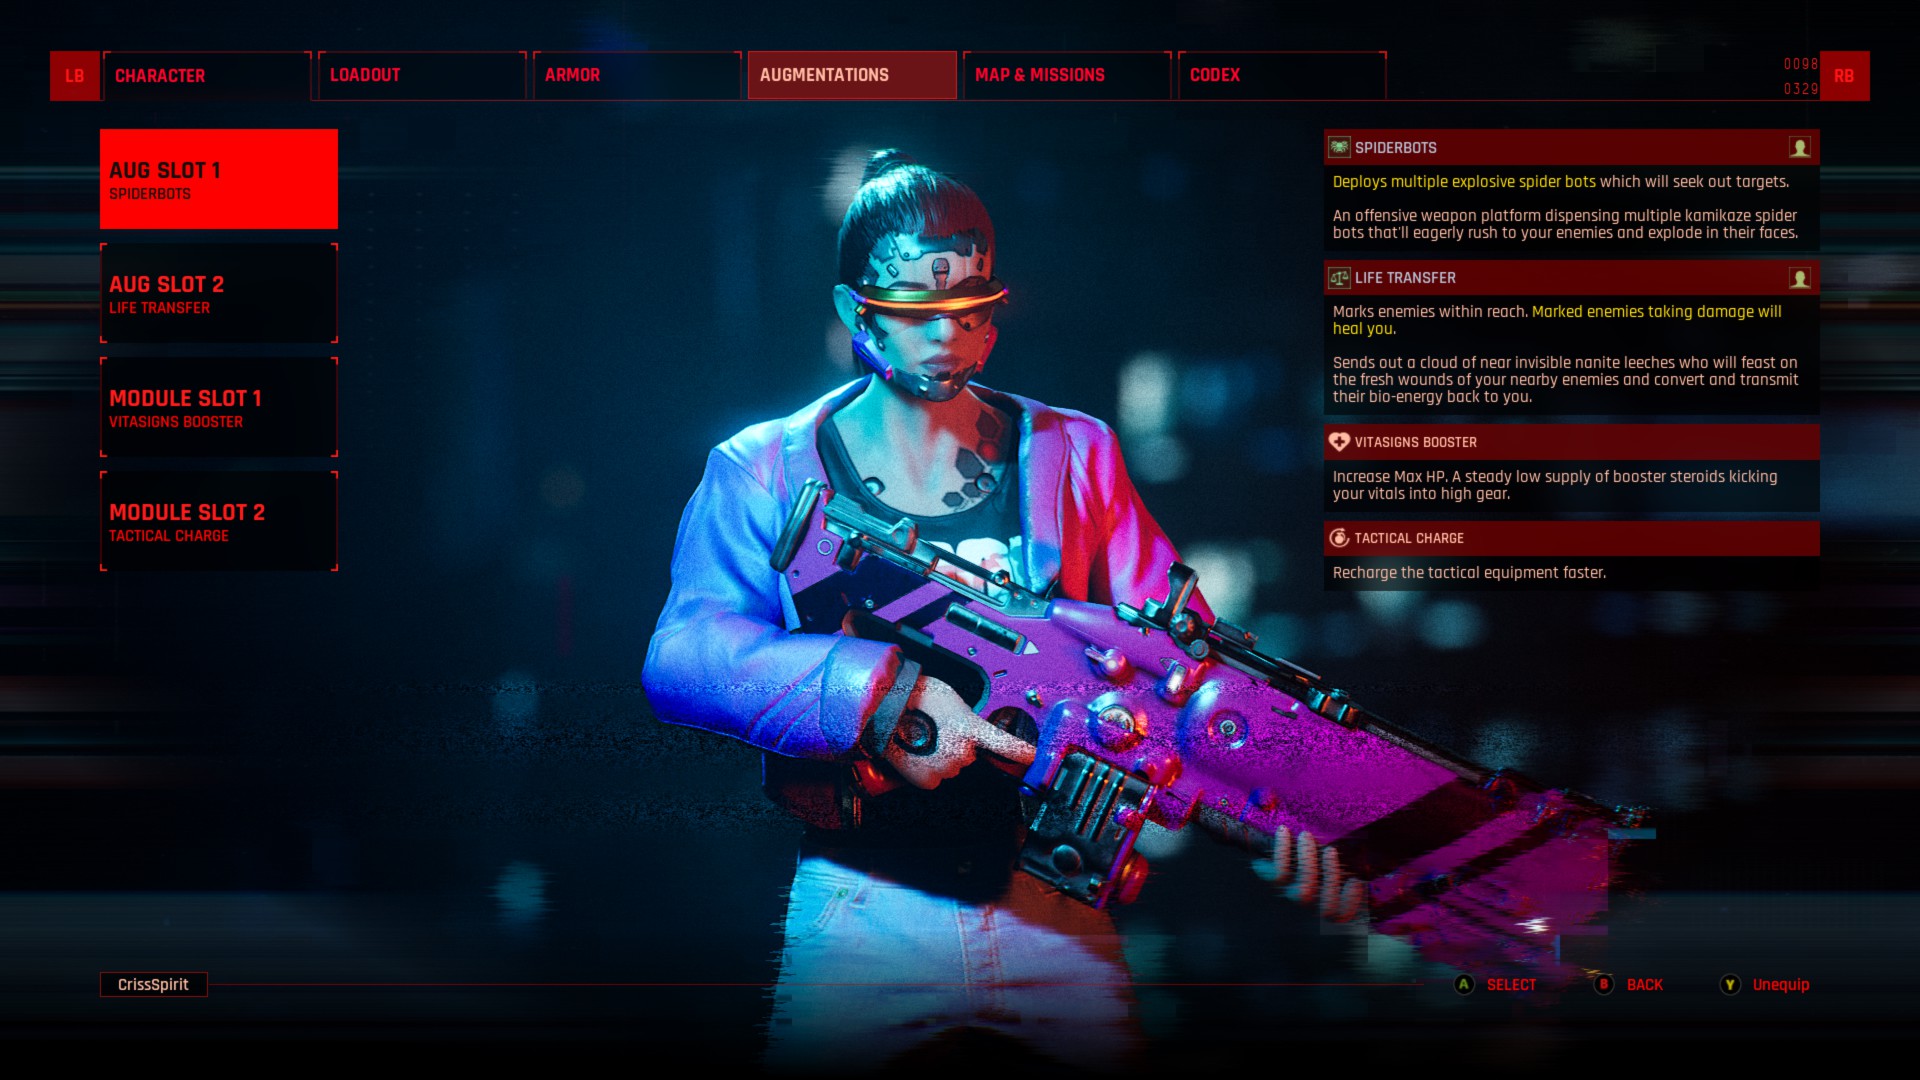
Equip augmentations and upgrade attributes resulting in the fullchrome appearance
The fullchrome appearance is achieved when any of the 4 attributes reaches the maximum level 20. The attributes are:
Cybernetics (head)
Motorics (upper body)
Biometrics (internal)
Frame (lower Body)The main way to increase the level of an attribute is to add skill points up to and including the 20th level. To increase this level, you can also make use of clothing/armor, which can boost your attribute level even beyond 20.
Once you have 20 points (or more) allocated to a single attribute, the achievement will unlock.
NOTE: This achievement can get bugged while playing in co-op and the client might not get this achievement upon meeting the requirements. To fix this issue, go to a grafter and reset all your skill points leave the co-op session, then continue the save in single campaign and re-allocate all of your skill points until reaching the max level in your desired attribute.
Added Extras

Added Extras
Equip two augmentations and a module
You will obtain various augmentations and modules throughout the game as loot, mission rewards or by buying them from Cyber vendors.
Augmentations are abilities that can be activated and used in combat against enemies while modules are passive perks, that can boost/enhance different abilities of your character.
In total there are 2 slots available for augmentations and 2 slots for modules. To get this achievement you only need to occupy 3 slots, 2 for augmentations and 1 for modules.
NOTE: This achievement can get bugged while playing in co-op and the client might not get this achievement upon meeting the requirements. To fix this issue, unequip all augmentations, leave the co-op session, then continue the save in single campaign and re-equip the augmentations.
Do Over

Do Over
Reset your proficiencies once
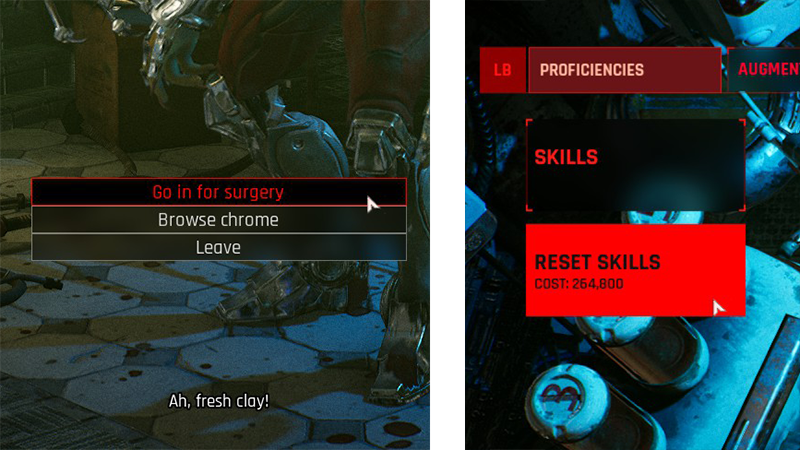
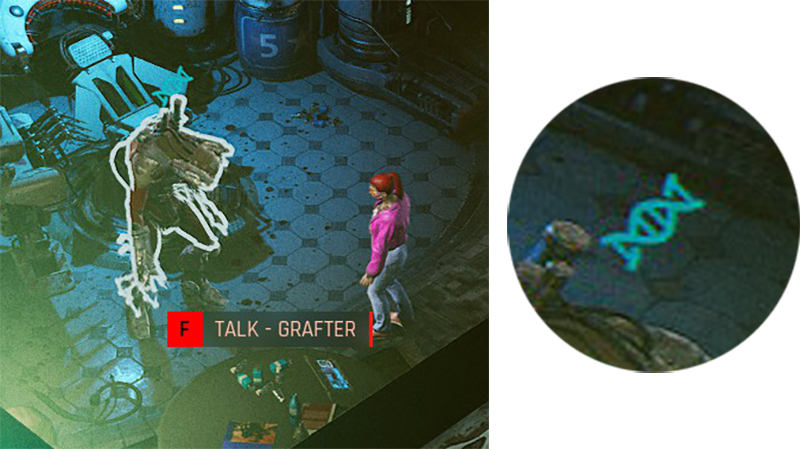
You can obtain this achievement at any point in the game but be warned that the amount of UCREDs needed to reset the skill points will increase progressively as you level up and use the said skill points to upgrade your character. Therefore the best time to reset your skill points is right at the beginning of the game (mainly after finishing the first main mission, as you are given free rein) as it’s fairly cheap. After levelling up for the first times and reaching the Warrens, look for a grafter in Cluster 13 and choose "Go in for surgery". From the "Proficiencies" tab, select the option to Reset Skills and the achievement will be yours.
Grafters have a blue DNA strands icon.
You can find grafters in two areas of the main game: Cluster 13 and The Node.
Fair Trade

Fair Trade
Sell Something
To obtain this achievement, all you have to do is go to a vendor and sell any type of item you have in your inventory. You can sell items at the following merchants: Weapon Vendor, Armor Vendor, Cyber Vendor and Grafter.
Begin the conversation with any of the above mentioned vendors and select the SELL tab. From there, choose a category of items and proceed to sell one item.
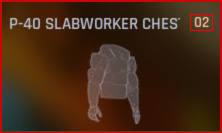
NOTE: If you have more than one type of the same item, you will see this indicated by a small square number in the top-right corner of the item’s slot.
Sashimi


Sashimi
Get killed by a katana
In order to unlock this achievement you must to have your character killed by a Rojin operative wielding a Guillotine (katana melee weapon).
If you are going for this achievement during the main campaign, a spot where you can do this easily is during the “Kill the Onyx Void Operative” objective of the “Trading Places” main mission . You have to be careful, as during this objective there are multiple enemies with different types of weapons and you might get killed by the gunfire instead of the melee weapon. A good suggestion is either trying to kill the gun wielding enemies first so that you increase the chances of being killed slashed by a katana or crouch behind an asset, so that the gunfire will miss you, but the katanas won’t.
If you missed the aforementioned opportunity, you can simply go anywhere in the corpZone as there you can find many melee Rojin operatives, ready to kill you with their katanas.
Drop Your Weapon!

Drop Your Weapon!
Make an enemy drop an exploding grenade
To unlock this achievement, you need to kill/damage an enemy with its own grenade. In order to do so, you need to shoot that enemy when he is about to throw the grenade, so that he will drop the grenade and die (or get damaged) by his it.
Even if it sounds complicated, you might unlock this achievement without even trying hard while just playing and progressing through the game.
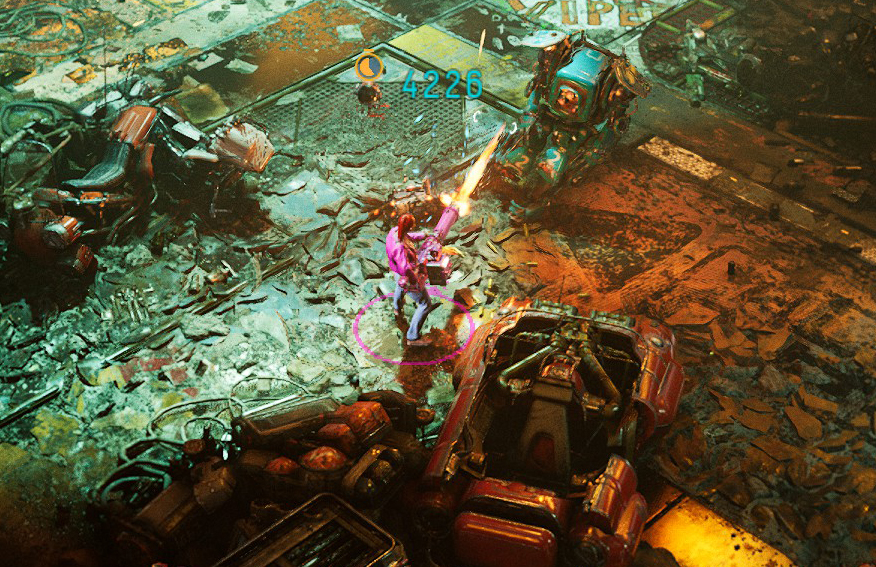
The enemy that will throw a grenade will have bright halo spikes around his head and he will flex his arm behind his back and maintain a throwing position for a couple of seconds before throwing the grenade. Once the grenade is launched, you will see a red AOE on the ground, following the trajectory of the grenade.
You will need to shoot the enemy right when he is about to launch the grenade (while he is in the throwing position, before the red AOE appears). By shooting him before throwing, he will drop the live grenade at his feet and die (or get damaged) by the explosion.
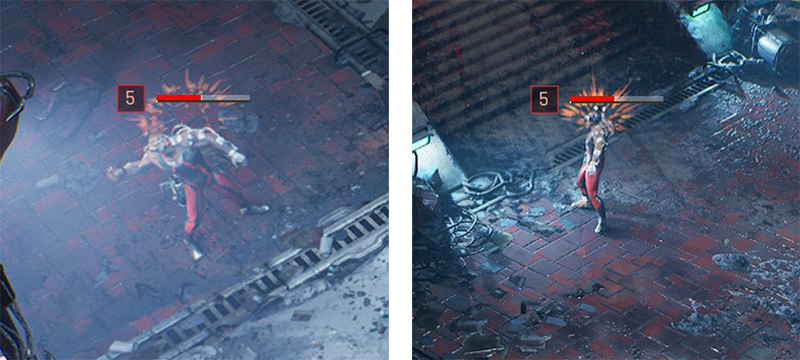
Suicidal

Suicidal
Die more than 100 times
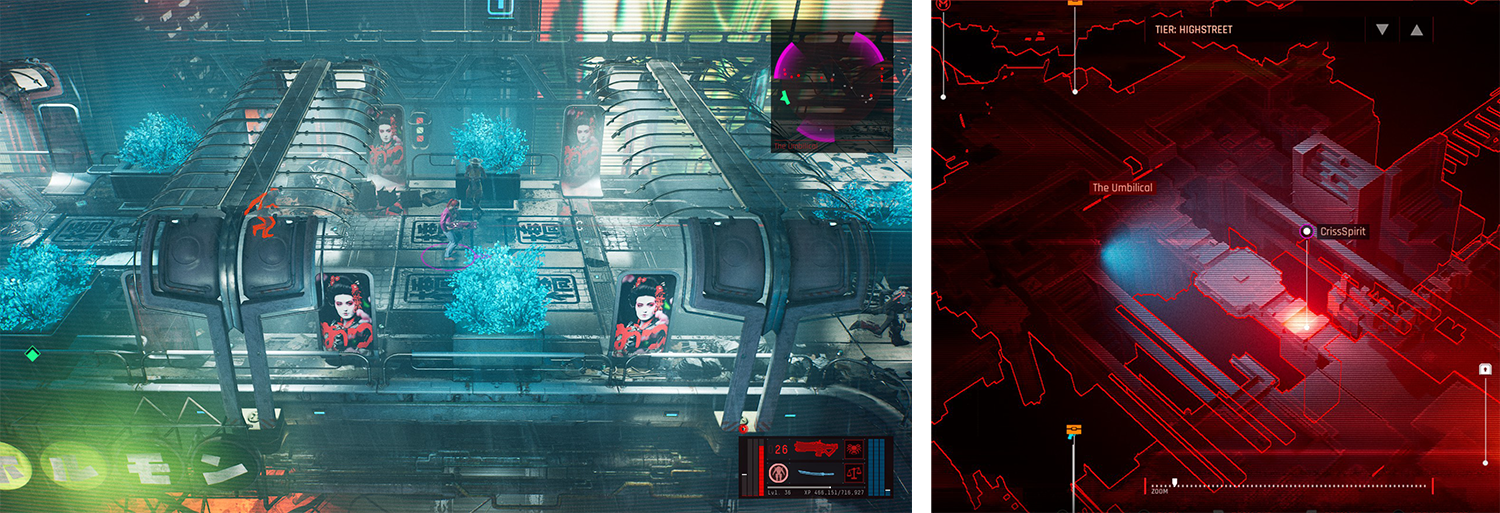
If you are playing through all the campaign missions and side missions as well, chances are that you will come to unlock this achievement effortlessly. But if you finish the game and you still haven’t unlocked this achievement, here are some great spots for you to try to die:
1. The Umbilical (Arcology: Highstreet) - There is a long bridge that connects the Shaft with rezDev and corpZone, where high level enemies will always spawn and kill you on the spot.
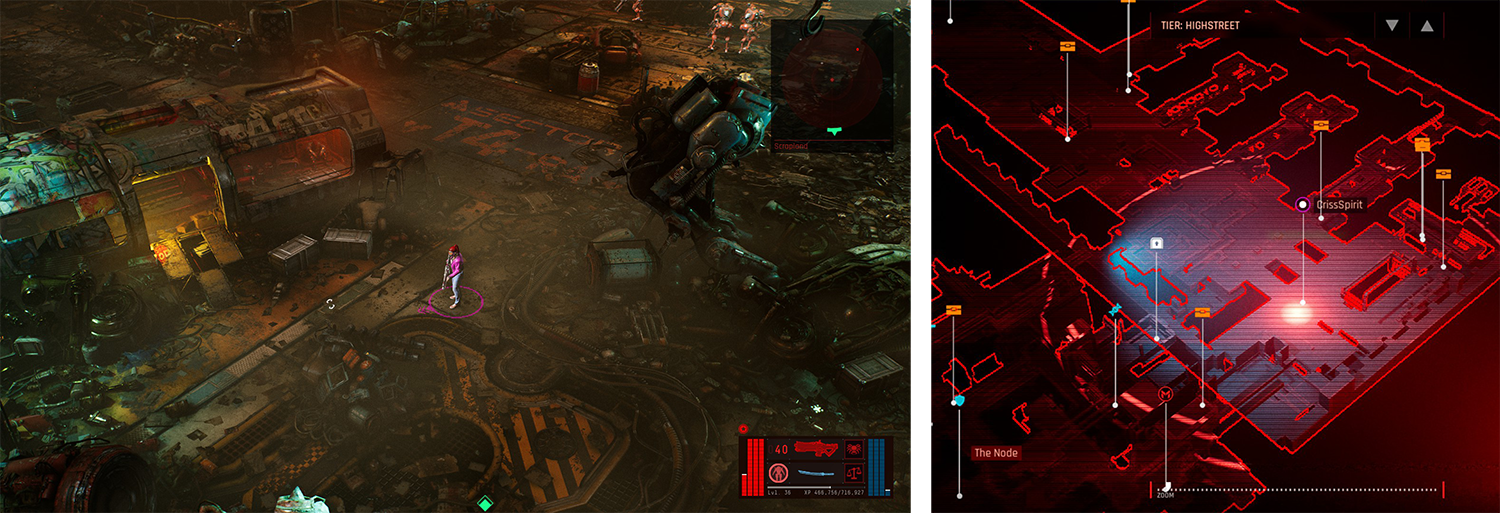
2. Scrapland (Arcology: Highstreet) - You can access this location during two side missions or after the end of the game, whenever you want.
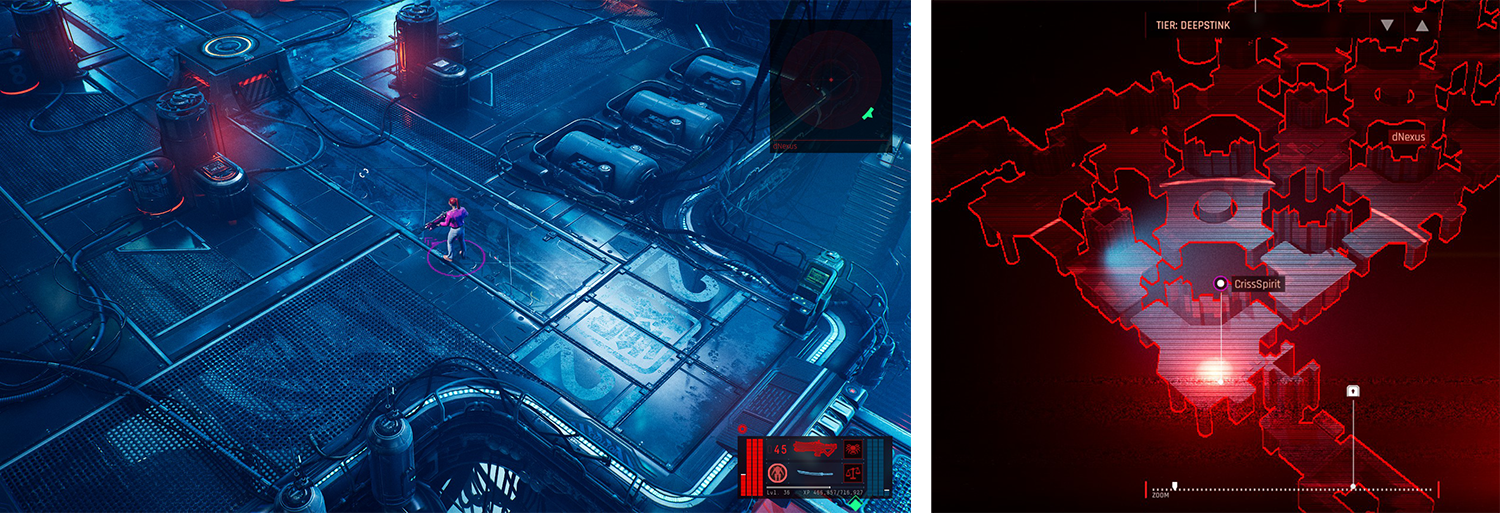
3. dNexus (Arcology: Deepstink) - You can access this location during two main missions or after the end of the game, whenever you want. It is full of robots and turrets and it is a great "farming" place.
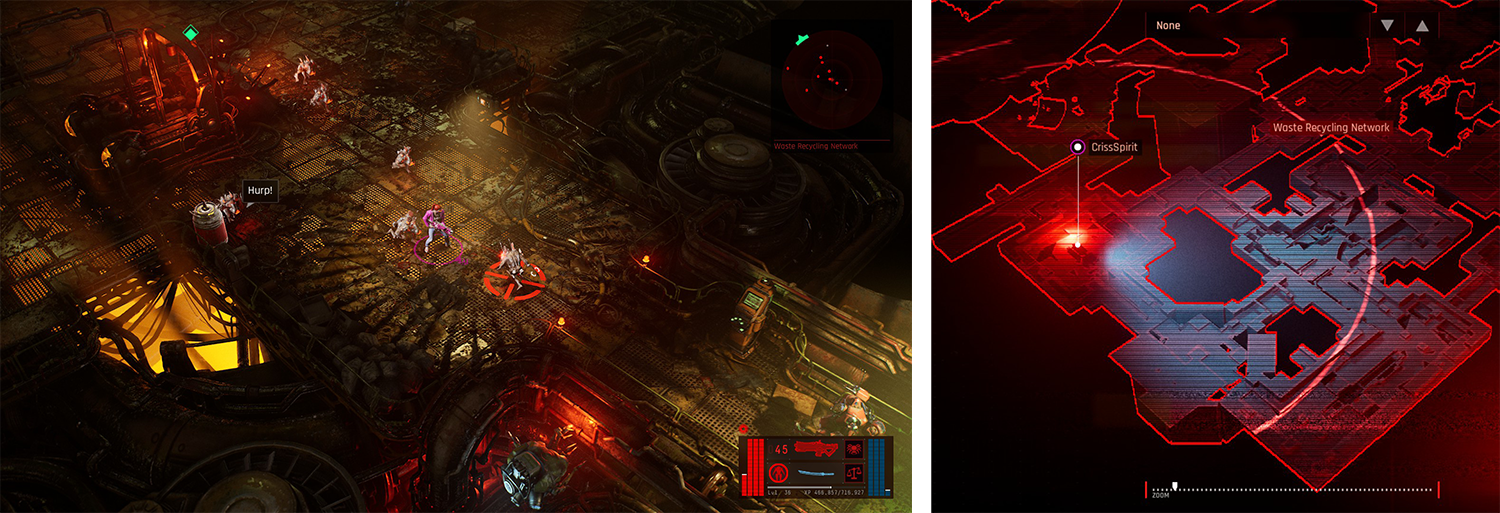
4. Waste Recycling Network and Sub-Sector 41A (Arcology: Deepstink) - You can access this location during the end game. This is a great farming location as here you will be surrounded by waves and waves of Ferals.
5. During any boss battle missions - This is quite simple to "farm": you die in battle, respawn just before the fight, restart the boss fight and die again. There are 6 boss fights in the game, so plenty of chances to try this feat out there.
Please keep in mind that this achievement might reset if you switch between save files and you will have to grind the death counts from 0. Therefore I suggest attempting this achievement on a single save file, without switching to another.
NOTE: If you want this process to be quicker, you can always remove your armor, augmentations and modules so that you will be easier to kill. If you have a couple of UCREDs to spend, then you can also respec your skill points, so that you have lower HP and defence.
Aficionado

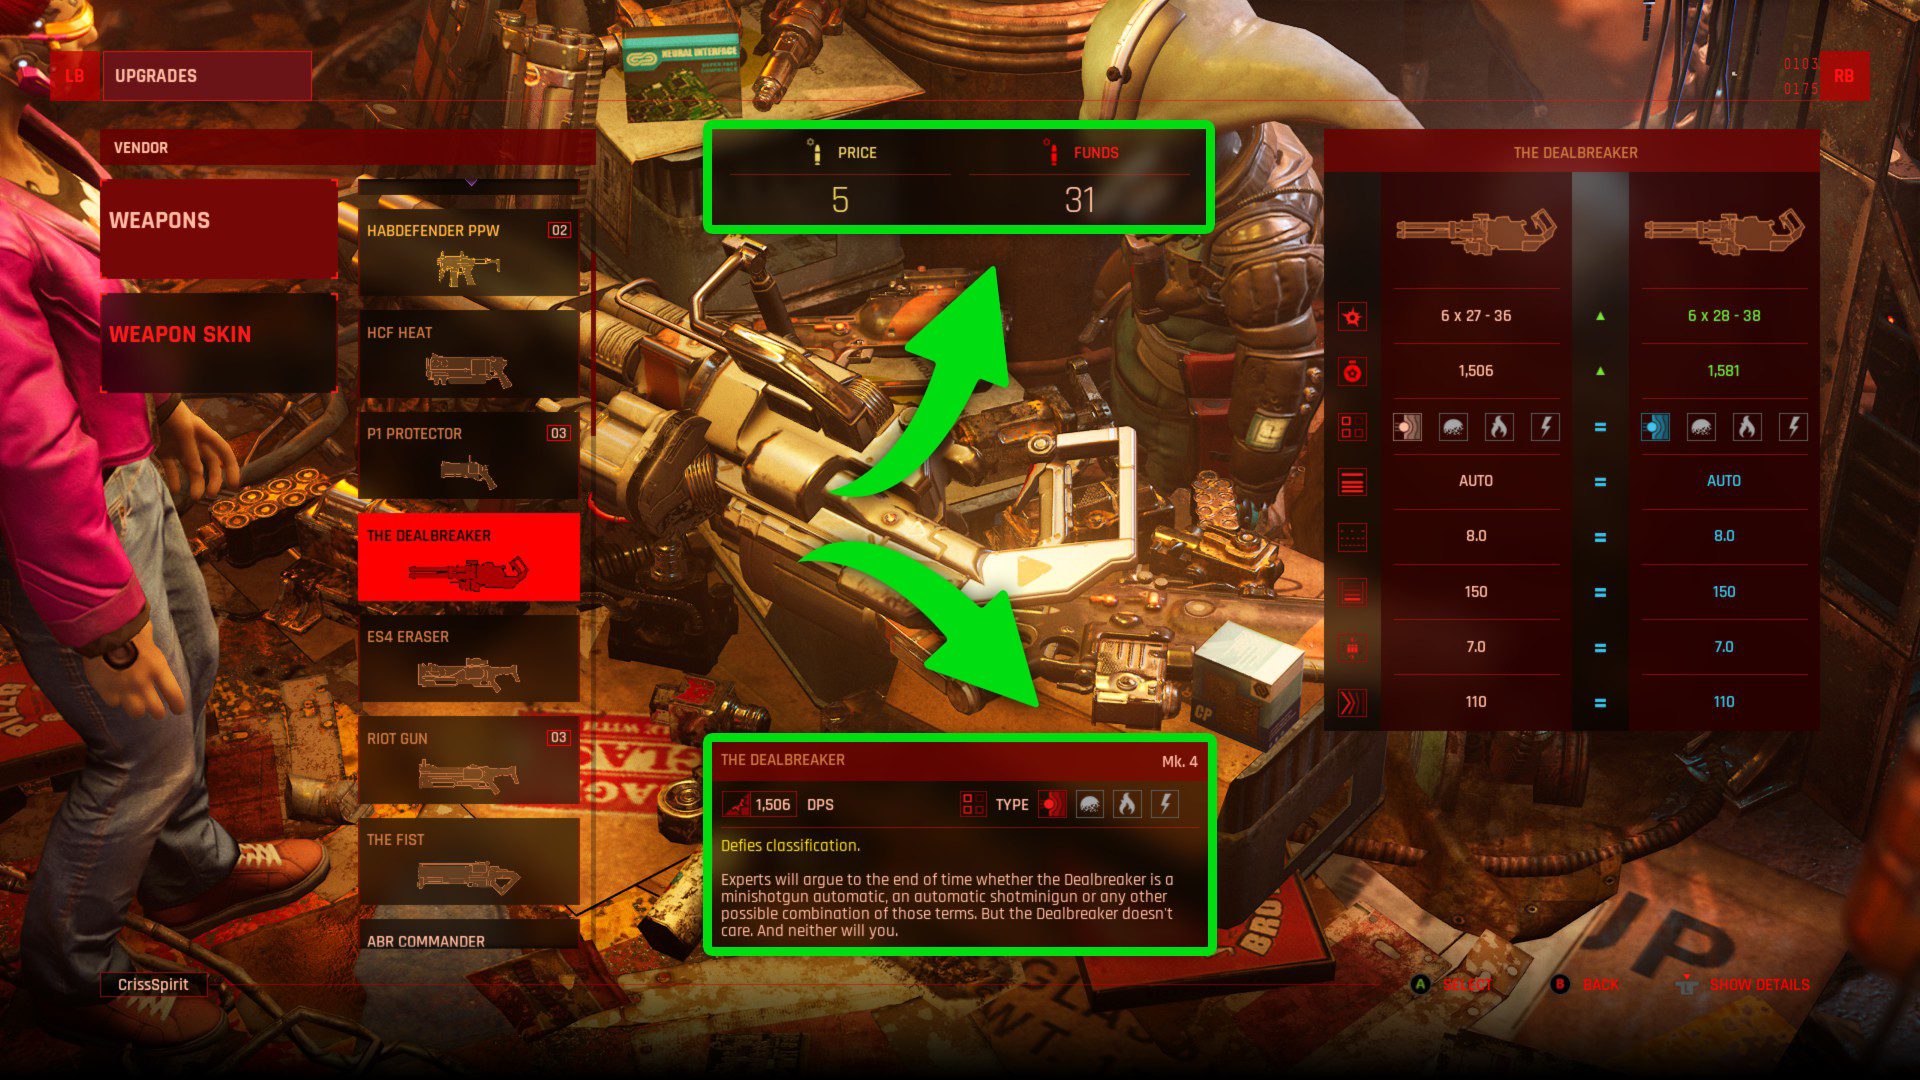
Aficionado
Fully upgrade a weapon
The maximum level of upgrading a weapon is MK10.
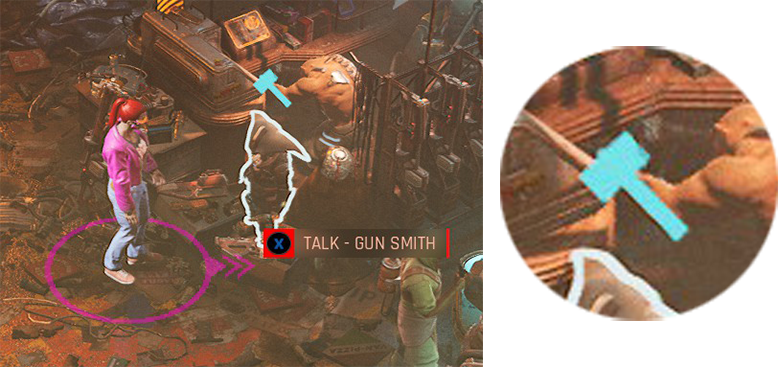
In order to upgrade a weapon you need to visit a Gun Smith vendor. You can find them in two areas of the main game: Cluster 13 and The Node. Gun Smith vendors have a blue hammer icon.
There are 3 tiers of weapon components which you need in order to upgrade any type of weapon. These components can be dropped (rarely) from killed enemies, but mostly they are found in specific places in the world.
Each upgrade level needs a certain amount and type of components, as detailed below:
Level 2 – 1 Basic Component
Level 3 – 2 Basic Components
Level 4 – 3 Basic Components
Level 5 – 5 Basic Components
Level 6 – 1 Advanced Component
Level 7 – 2 Advanced Components
Level 8 – 3 Advanced Components
Level 9 – 1 Superior Component
Level 10 – 2 Superior ComponentsNOTE: This achievement can get bugged while playing in co-op and the client might not get this achievement upon meeting the requirements. To fix this issue, you will need to upgrade a weapon (a different weapon from the one you upgraded in multiplayer) while you are in a single player campaign session.
Getting Out Of The Slums

Getting Out of the Slums
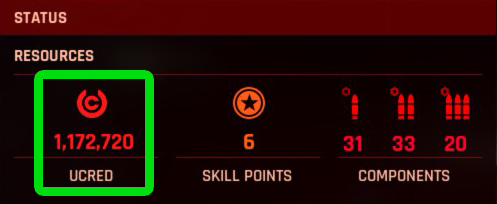
Collected 200’000 uCreds
Currency will be a little difficult to collect at first, but as you progress through the story, you will see that collecting money will no longer be an issue.
For this achievement, you must have 200,000 UCREDs at a time in your inventory. The game will not take into account how much money you have had the entire game so the achievement will not unlock if you never reach the total amount of 200,000.
I suggest you refrain from spending money until you exceed the amount required for achievement, then you can spend away on weapons, armor and augmentations.
Omnihacker

Omnihacker
Hack at least one of each hackable category
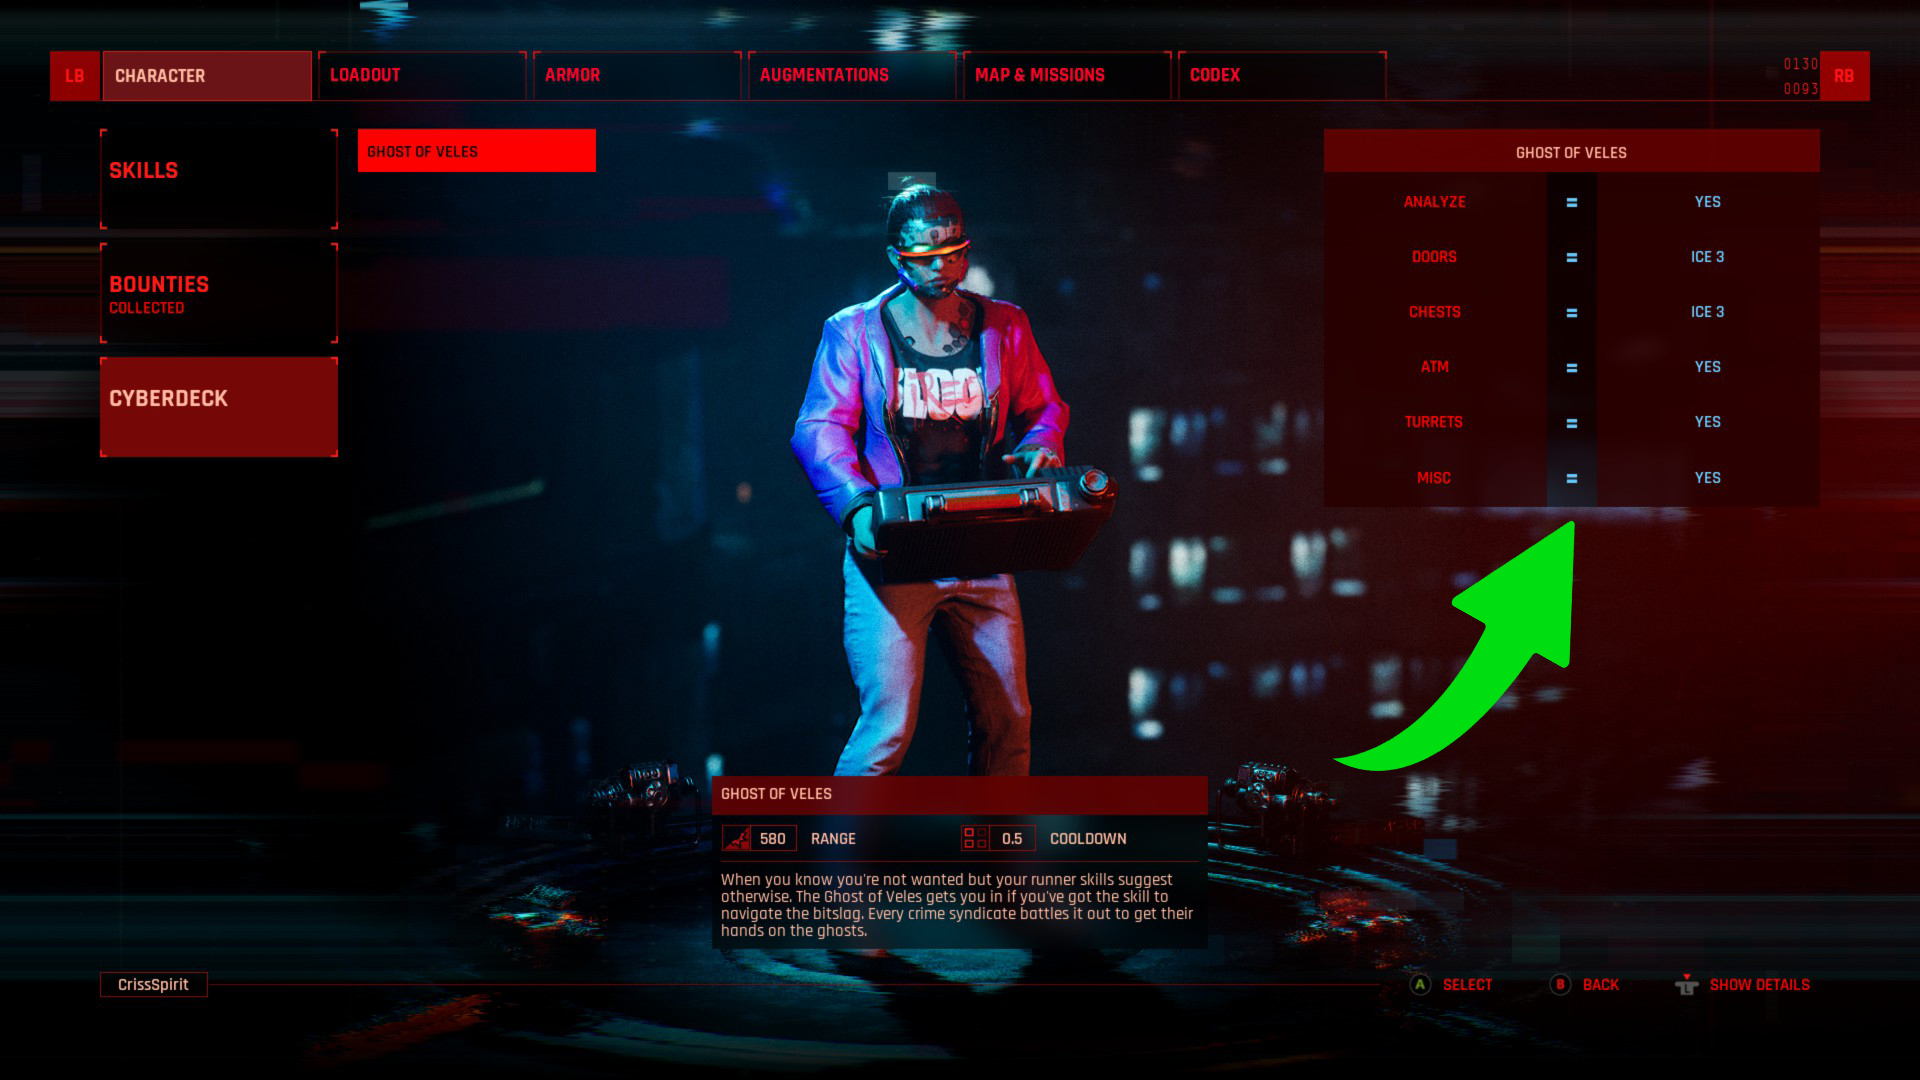
To be able to hack all the interactable objects in the game you must upgrade your Cyberdeck and reach its maximum level: 10. Levelling up your Cyberdeck consists of finding the required upgrade in the world (some of them can be found near NPCs or important places from main missions).
The 10 levels of the Cyberdeck are as it follows:
1. TA Lifestyle (Analyze)
2. City Kicker (ICE 1 Doors upgrade)
3. Peacemaker CD (Turrets upgrade)
4. Icepick (ICE 1 Chests upgrade)
5. Plug (Misc upgrade)
6. Visitor (ICE 2 Doors upgrade)
7. Manta D (ICE 2 Chests upgrade)
8. Diva (ICE 3 Chests upgrade)
9. The Arcade (ATM upgrade)
10. Ghost of Veles (ICE 3 Doors upgrade)
Throughout the world you will be able to find 11 upgrades, but you only need to gather 9 to max out the Cyberdeck (as the Cyberdeck is already at level 1 at the beginning of the game). Here are the locations where you can find the 11 Cyberdeck upgrades, explained briefly:
Cluster 13, immediately after finishing the first main mission, near the Stylist, on a edge of a balcony
No Man’s Land, on the balcony of a building, inside a red chest
Black Lake Towers, during the main mission ”Trading Places”, in the living room next to Nohgead, in the Coder’s Cove hideout
The Glut, near the Transit Station, on a desk next to some hackable turrets
AG Data Vault, accessed from dNexus, during the main mission “Data_Miner” , right on the main path, in a locked ICE-2 chest
Cosmodrome during the main mission Foreign Code , in the eastern warehouse, behind a locked ICE-1 door in a red chest
Nitroad, near the Transit Station, in a small building locked with two ICE-2 doors, in a red chest
south part of the corpZone, in a locked ICE-1 chest next to a vehicle
Blossom Hill, during the main mission “Trace Protocol”, in building block where Lanier’s apartment is , next to the surveillance system's console at the end of the main hall
RezDev within the ExMat facility, towards the end of the main mission “Trace Protocol” in the most north part of the building
after gaining access to The Pinnacle, after completing the main mission “Syntax Error” , on the bench in the balcony where there is an overlooking area
You can see all the hackable categories right in the Cyberdeck’s menu, listed as below:
Doors
Chests
ATM
Turrets
MISC (Vending Machines)It doesn't matter the level of ICE of the hacked item, once you have hacked every type of object by holding the Y/△ button on the controller of C on the keyboard, the achievement will unlock.
NOTE: This achievement can get bugged while playing in co-op and the client might not get this achievement upon meeting the requirements. To fix this issue,leave the co-op session, then continue the save in single campaign and hack all types of items again, in order to trigger the achievement.
Anonymous Withdrawal

Anonymous Withdrawal
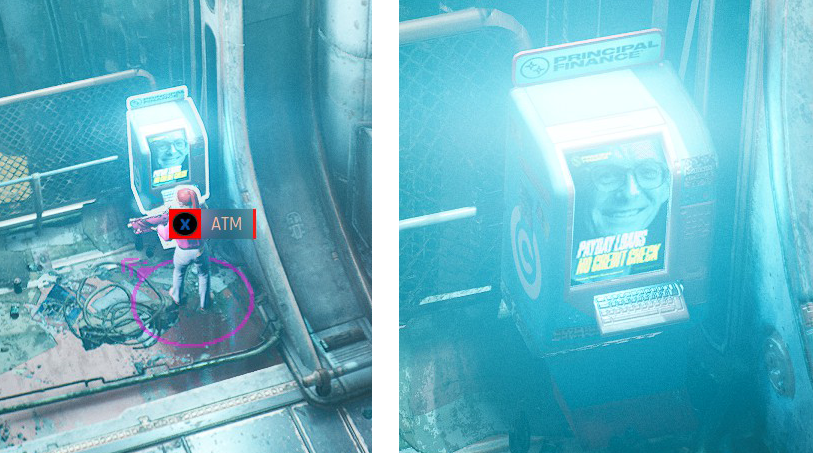
Hack an ATM
Hacking ATMs require having the Cyberdeck upgraded to level 9 - “The Arcade”. Leveling up your Cyberdeck consists of finding the required upgrade in the world (mainly near NPCs or important places from main missions) - SEE THE OMNIHACKER ACHIEVEMENT FOR CYBERDECK LOCATIONS.
You can find ATM almost anywhere in the world; they are little objects, shaped like a box with an image of a man with glasses on the screen.
When you are near an ATM, hold the Y/△ button on the controller of C on the keyboard to hack it. As soon as the hack is complete, the achievement will pop.
Free Candy

Free Candy
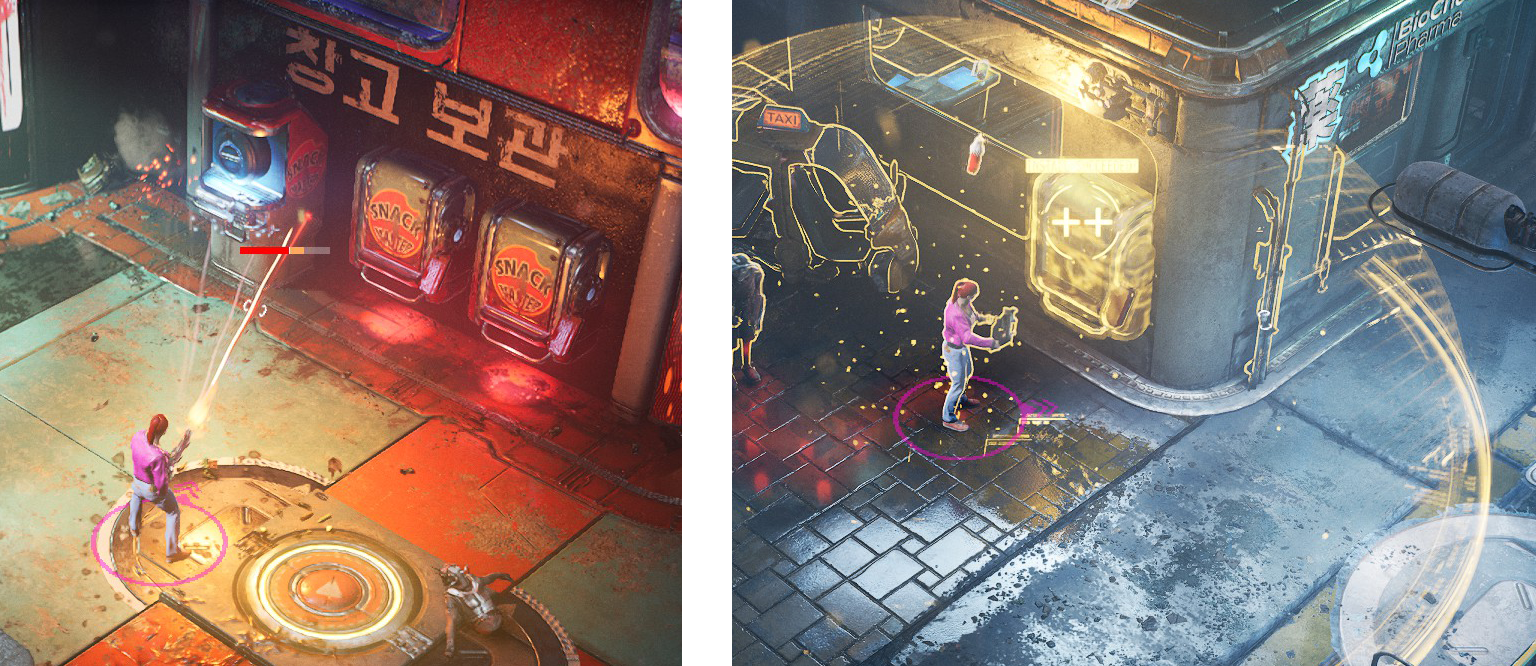
Get the goods by both hacking and destroying vending machines
Like the ATM, you can find vending machines pretty much everywhere. You need to perform two actions in order to unlock this achievement:
destroy the Vending Machine until it healthbar depletes and it explodes
hack the Vending Machine by holding the Y/△ button on the controller of C on the keyboard until the hack is completeTo be able to hack a Vending Machine you must have your Cyberdeck upgraded to level 5 - “Plug” - SEE THE OMNIHACKER ACHIEVEMENT FOR CYBERDECK LOCATIONS.
Black ICE

Black ICE
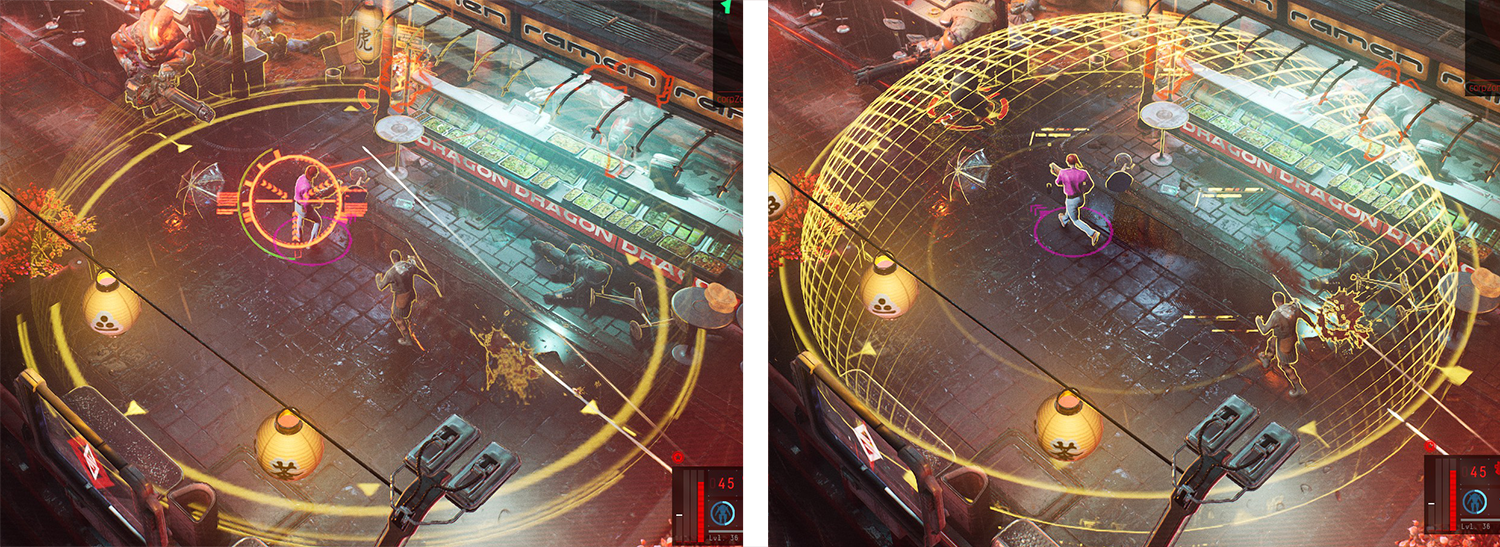
Deploy black ICE against hacker enemy
The first hacker enemies that you will encounter are at the corpZone location. When an enemy is hacking you, you will see a yellow dome (similar to your dome when you hack/analyze something) surrounding you.
Deploying black ICE is counterattacking an enemy's hack. As soon as you see a yellow dome around your character, hold the Y/△ button on the controller of C on the keyboard to counter-hack the enemy and the achievement will unlock.
Bounty Hunter

Bounty Hunter
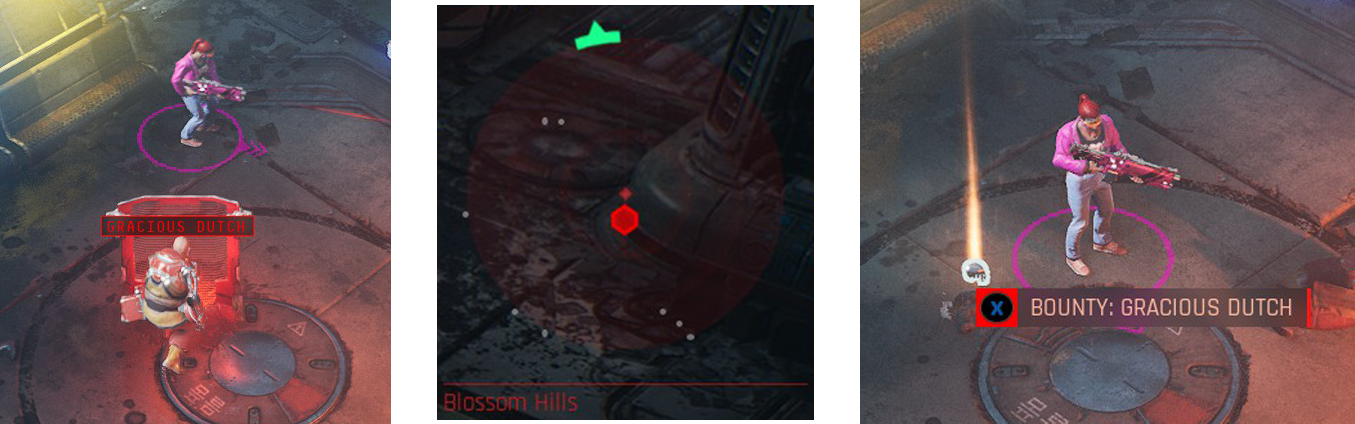
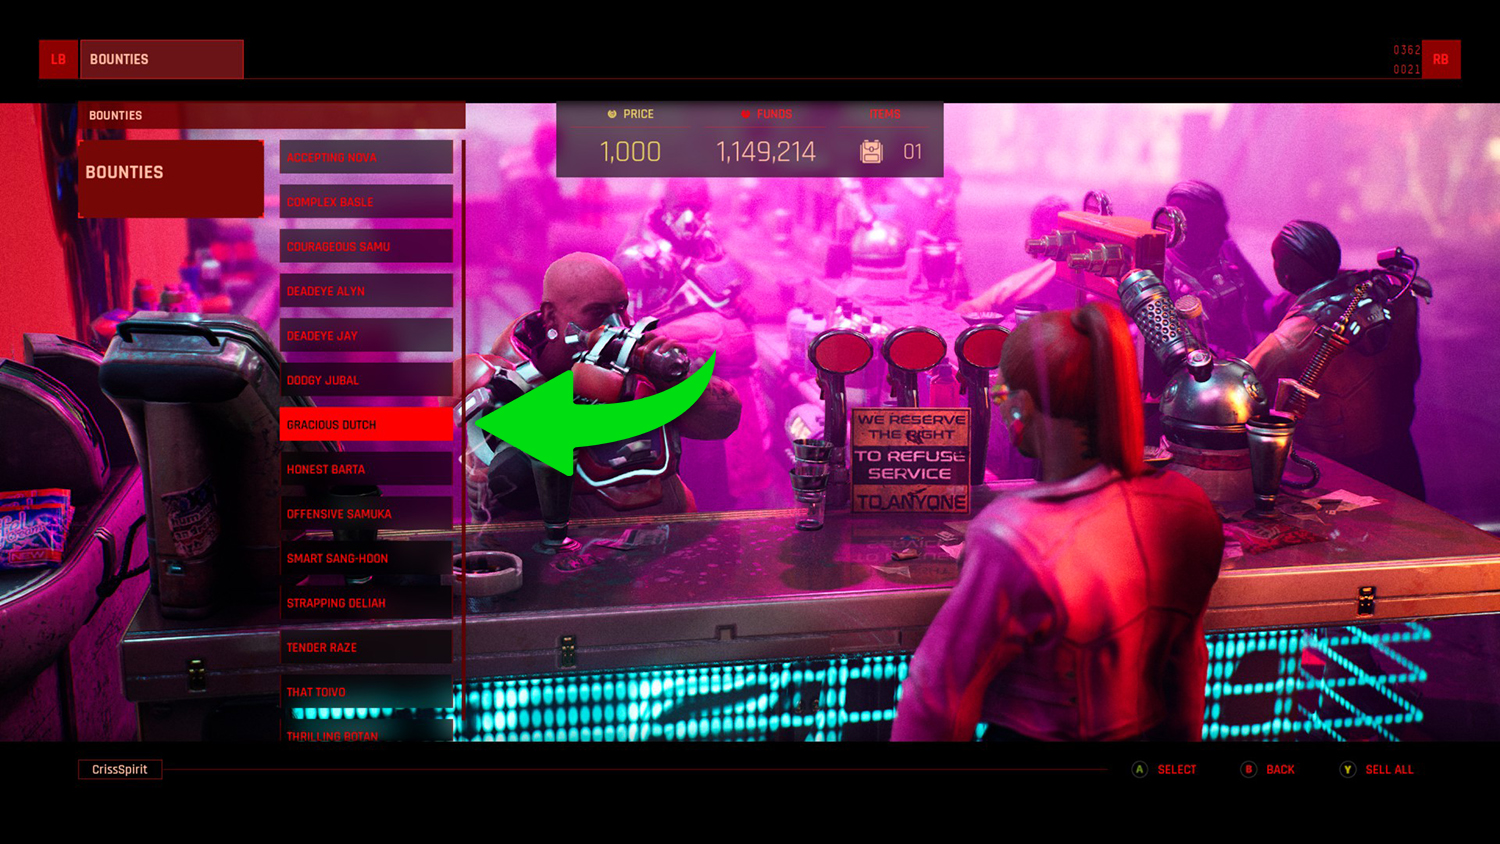
Claim a bounty
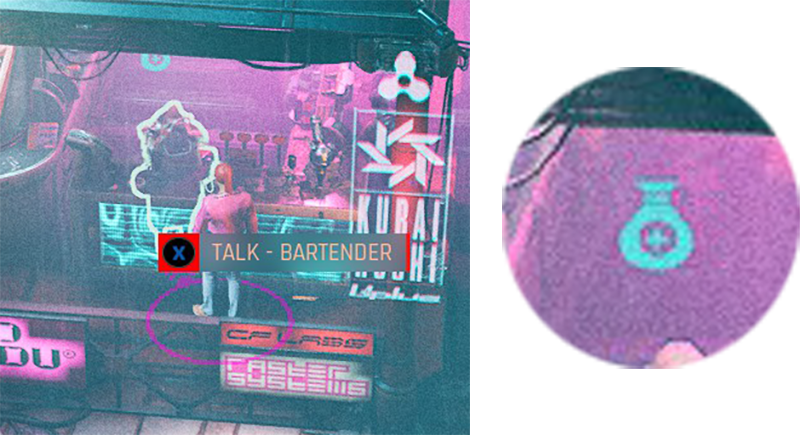
Anywhere in the world (sometimes even in missions), you will come across named enemies, with their names displayed in a red text box. They will also be marked on the minimap as a red hexagon. Once killed, they will drop a bounty item with their name on it.
You have to bring this item to any Bartender in the world and turn it in for a sum by selecting the "Sell collected bounties". Bartenders have a blue pouch icon.
As soon as you turn in your first bounty, the achievement will unlock.
Snooze Or Lose

Snooze or Lose
Try Snooze
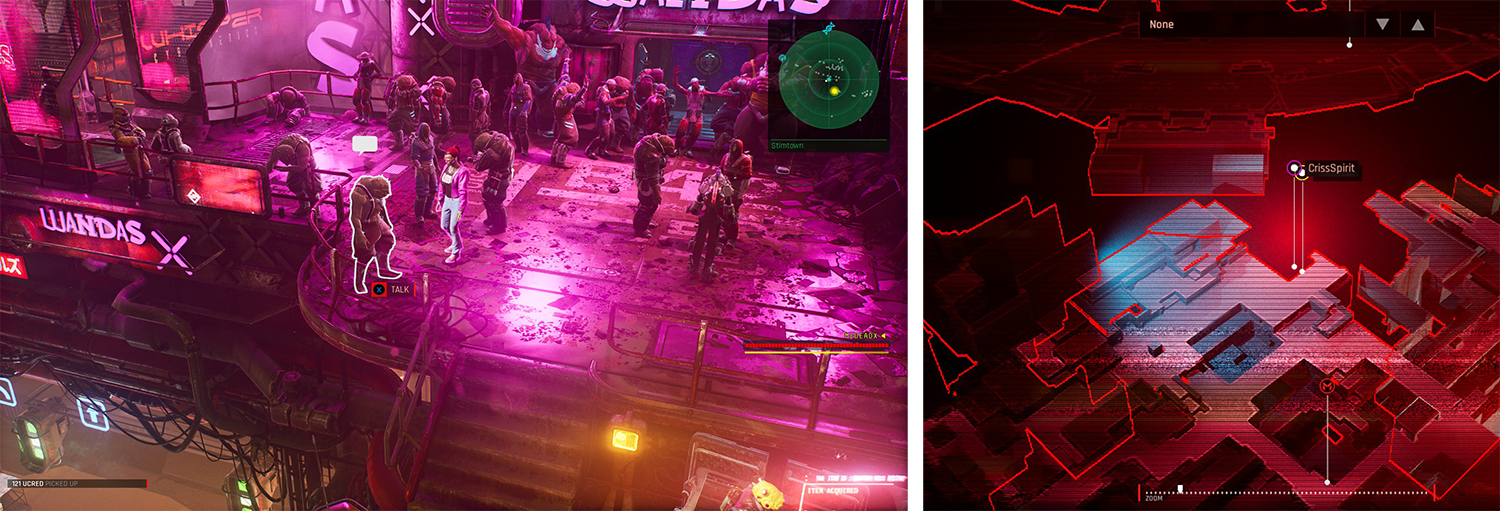
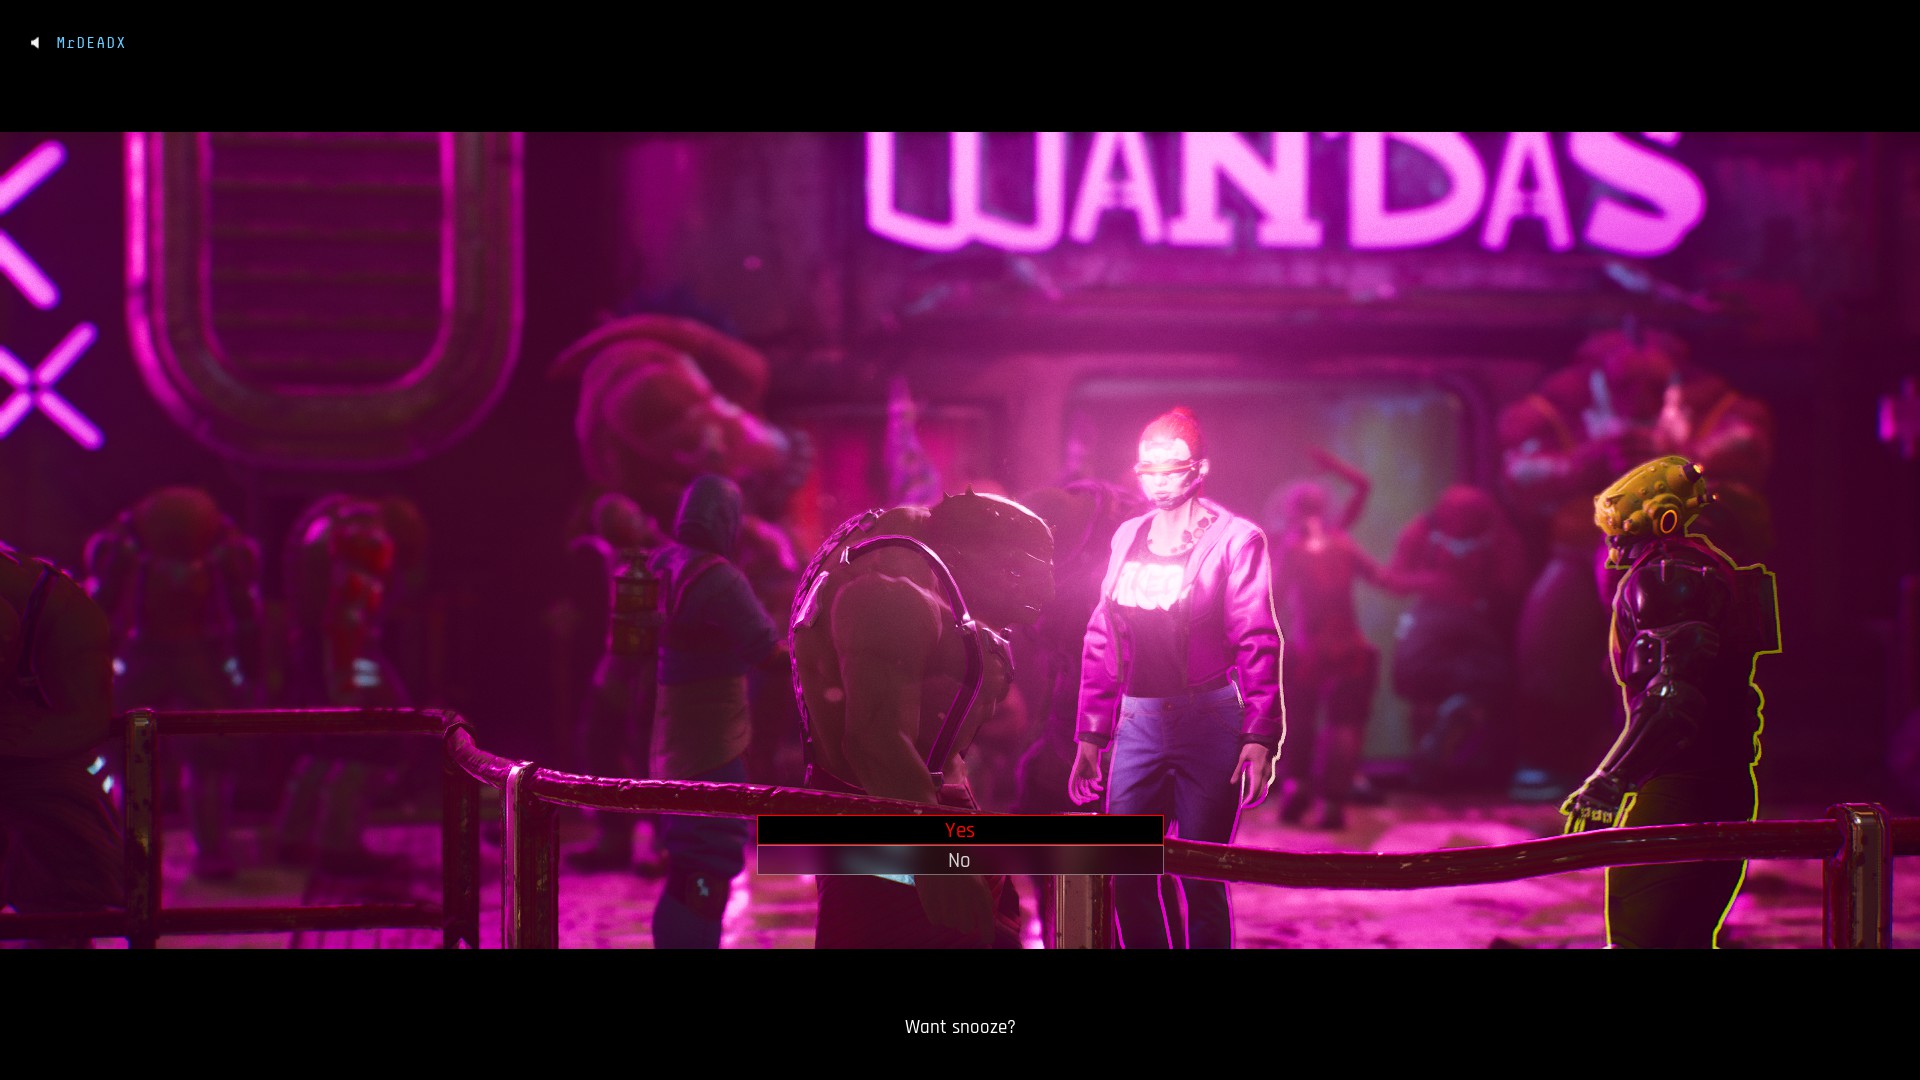
You will be able to get this achievement once you progress enough with the main story in order to have the Stimtown location available.
Then, go to the bottom level of Stimtown, to a pink bar across a bridge called Wandas and find across from it a NPC who has a speech bubble over his head. Talk to him and agree to his proposal to try the “medicine” called Snooze.
Once you accept, the achievement will unlock and your screen will flourish with neon colors for a few seconds, due to the effect of Snooze.
Fight Smart


Fight Smart
Kill a robot with energy damage type
You must kill enemy robots and not regular robots, that are NPCs or worker bots. You can do this in two ways:
use a weapon that deals energy damage, such as: BC7 Disintegrator, E77 Superior, EBR Enforcer, EP4 Pacifier, ER Chrome Puncher, ES4 Eraser, HCE9 Flatliner or Strobos
use the Mono Ranger augmentation - it is a robot that shoots with a weapon that deals energy damage; have the Mono Ranger kill a robot for you
To find out what kind of weapon you have, look for the lightning bolt icon to be highlighted in the loadout menu.
The weapons and the augmentation can either be bought from vendors or they can be looted from killed enemies.
A good place to attempt this achievement is during the 4th main mission “Empowerment” , as you will have to fight multiple enemy robots in the deepStink. They also drop their weapon, which is an energy weapon and can be used to kill them and unlock the achievement.
Overkill

Overkill
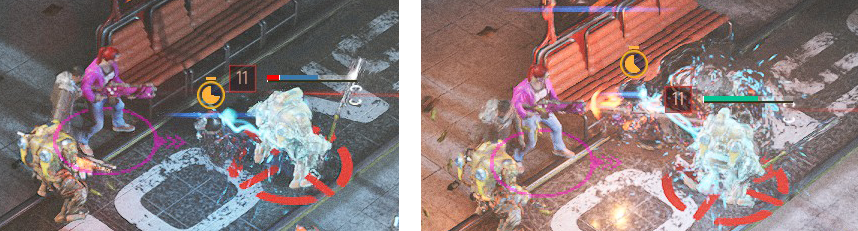
Kill another enemy by overcharging an enemy while it's in stasis
You must have the Stasis Drone equipped under “Tactical” in your loadout (it is an item that can be bought from Cyber vendors or looted from killed enemies). When used, the drone traps an enemy with an energy shield. Shooting at the trapped enemy depletes the healthbar and a blue bar starts charging instead of it. When this bar is filled, the enemy will explode, killing (almost) everything that’s near it.
In order to get this achievement, go to a place where you can get 2-3 enemies together (it works most effectively on Ferals) and use the Stasis Drone on them. Once an enemy is trapped, shoot at him until he explodes, killing the others and unlocking the achievement.
Extreme Overcharge

Extreme Overcharge
Delivered 4000 amount of stasis damage to one target
Similar to “Overkill”, you must have the Stasis Drone equipped “Tactical” in your loadout.
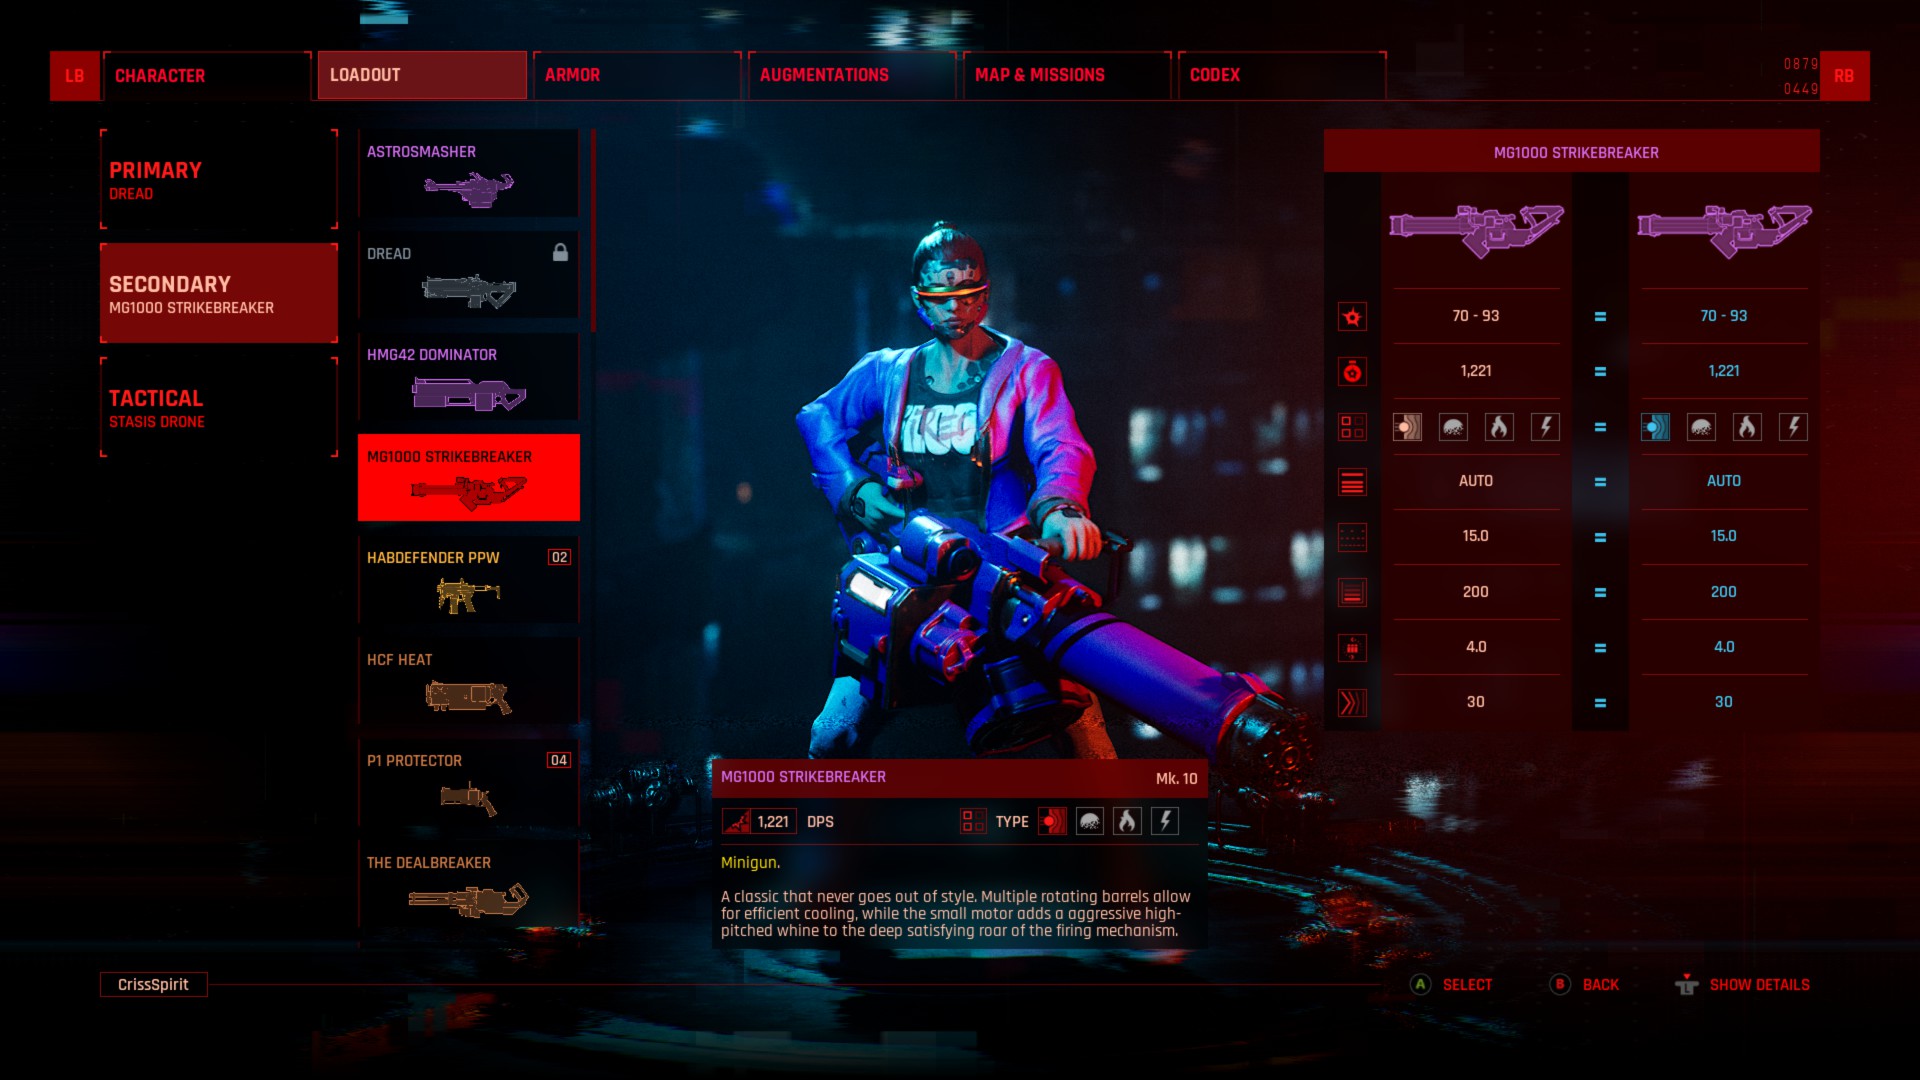
To reach or surpass 4000 damage points, you will need to use the Drone against bigger enemies (such as Hammerhands, large mech, Heavy Monobot etc.), as they have a much bigger life than other small enemies. Make sure to have your weapon upgraded as much as possible (MK 10 is preferable) and shoot at the trapped enemy before the stasis effect wears off in order to make it explode. After the explosion, the damage numbers come up and you can now see how much damage you dealt to the enemy.
If you cannot reach or surpass 4000 damage, you either need a better weapon or a different enemy type (e.g. the enemy had a smaller life and it exploded before you can shoot at it too much).
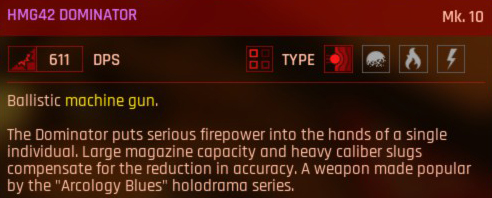
A good example of a weapon that can deal a great amount of damage is the MG1000 Stikebreaker. At MK10 level it has 1221 DPS and a magazine of 200 bullets.
Hygiene

Hygiene
Use the sink after flushing a toilet
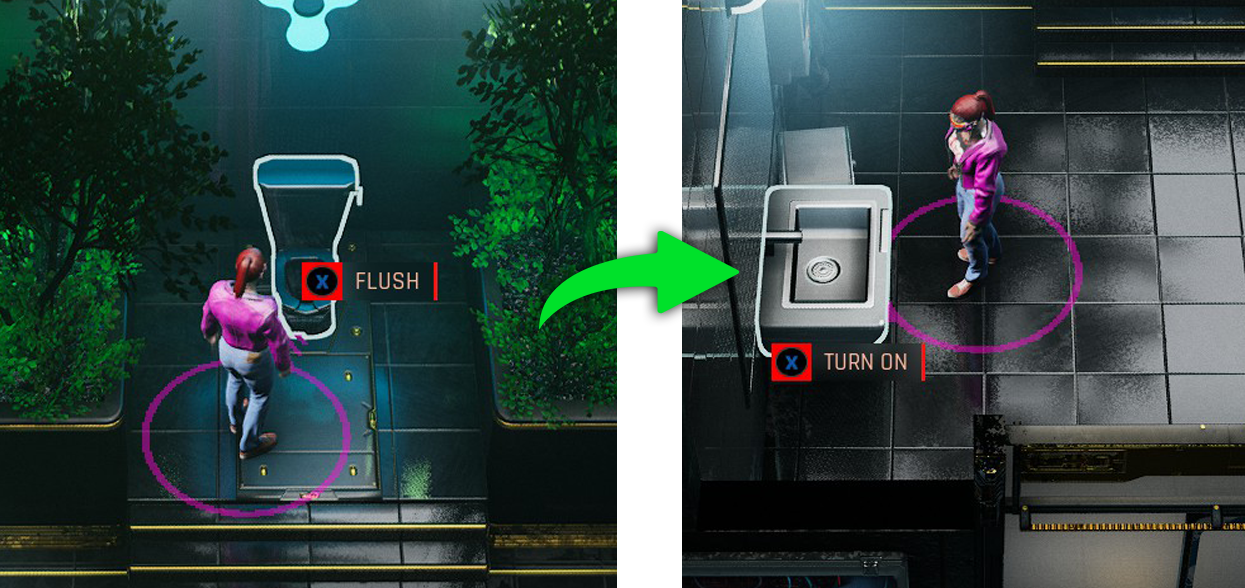
As stated in the description, you must use a toilet, then a sink. In this exact sequence.
For this, you need to find any bathroom in the world and interact with the toilet to "FLUSH" and the sink to "TURN ON", by pressing the X / ▢ button on your controller or F on your keyboard once. If you do this in the proper order, the achievement should unlock.
The first time you can attempt to get this achievement is during the 7th main mission “Trace Protocol”, when you reach Lanier’s apartment . Once inside the apartment, go upstairs and in the bathroom, interact with the toilet and afterwards with the sink.
You will have plenty of occasions to unlock this achievement, as there are many bathrooms throughout the world and you will find many of them while playing main and side missions.
Opportunist

Opportunist
Kill 10 enemies using exploding barrels
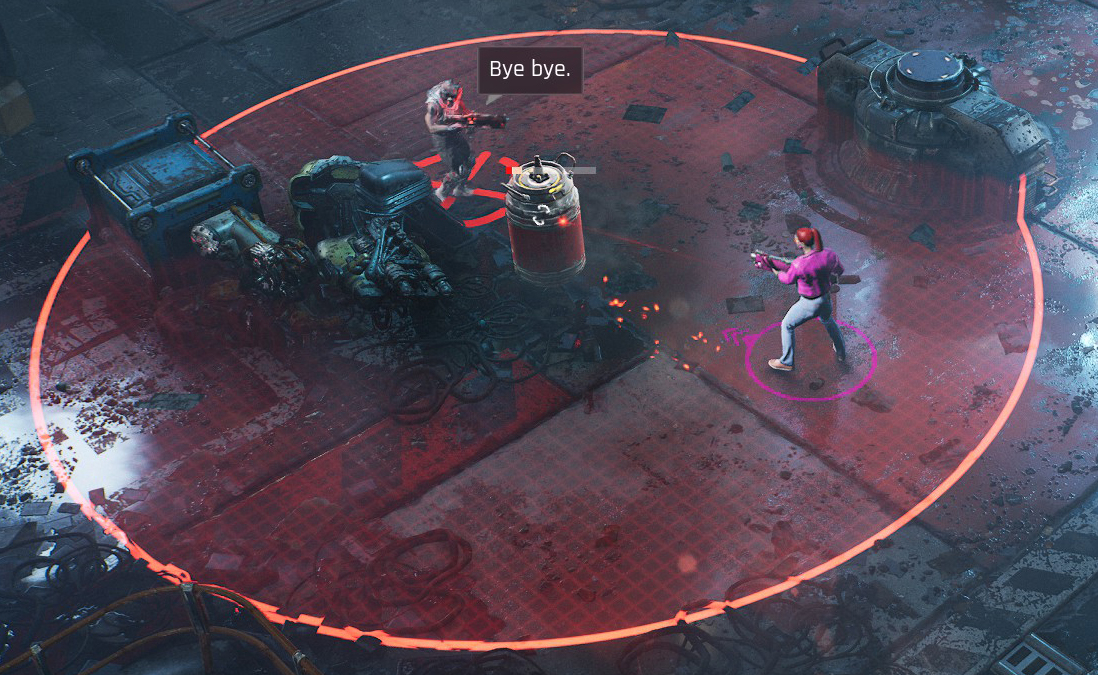
As in many other games, the red barrels scattered all over the world are explosive and perfect for use against enemies. You can shoot them or even can hack them to explode by holding the Y/△ button on the controller of C on the keyboard when near them. As long as the enemies are in the blast radius, they will count towards the achievement.
You do not have to kill 10 enemies at the same time, but in total, as this achievement is accumulative.
Tourist

Tourist
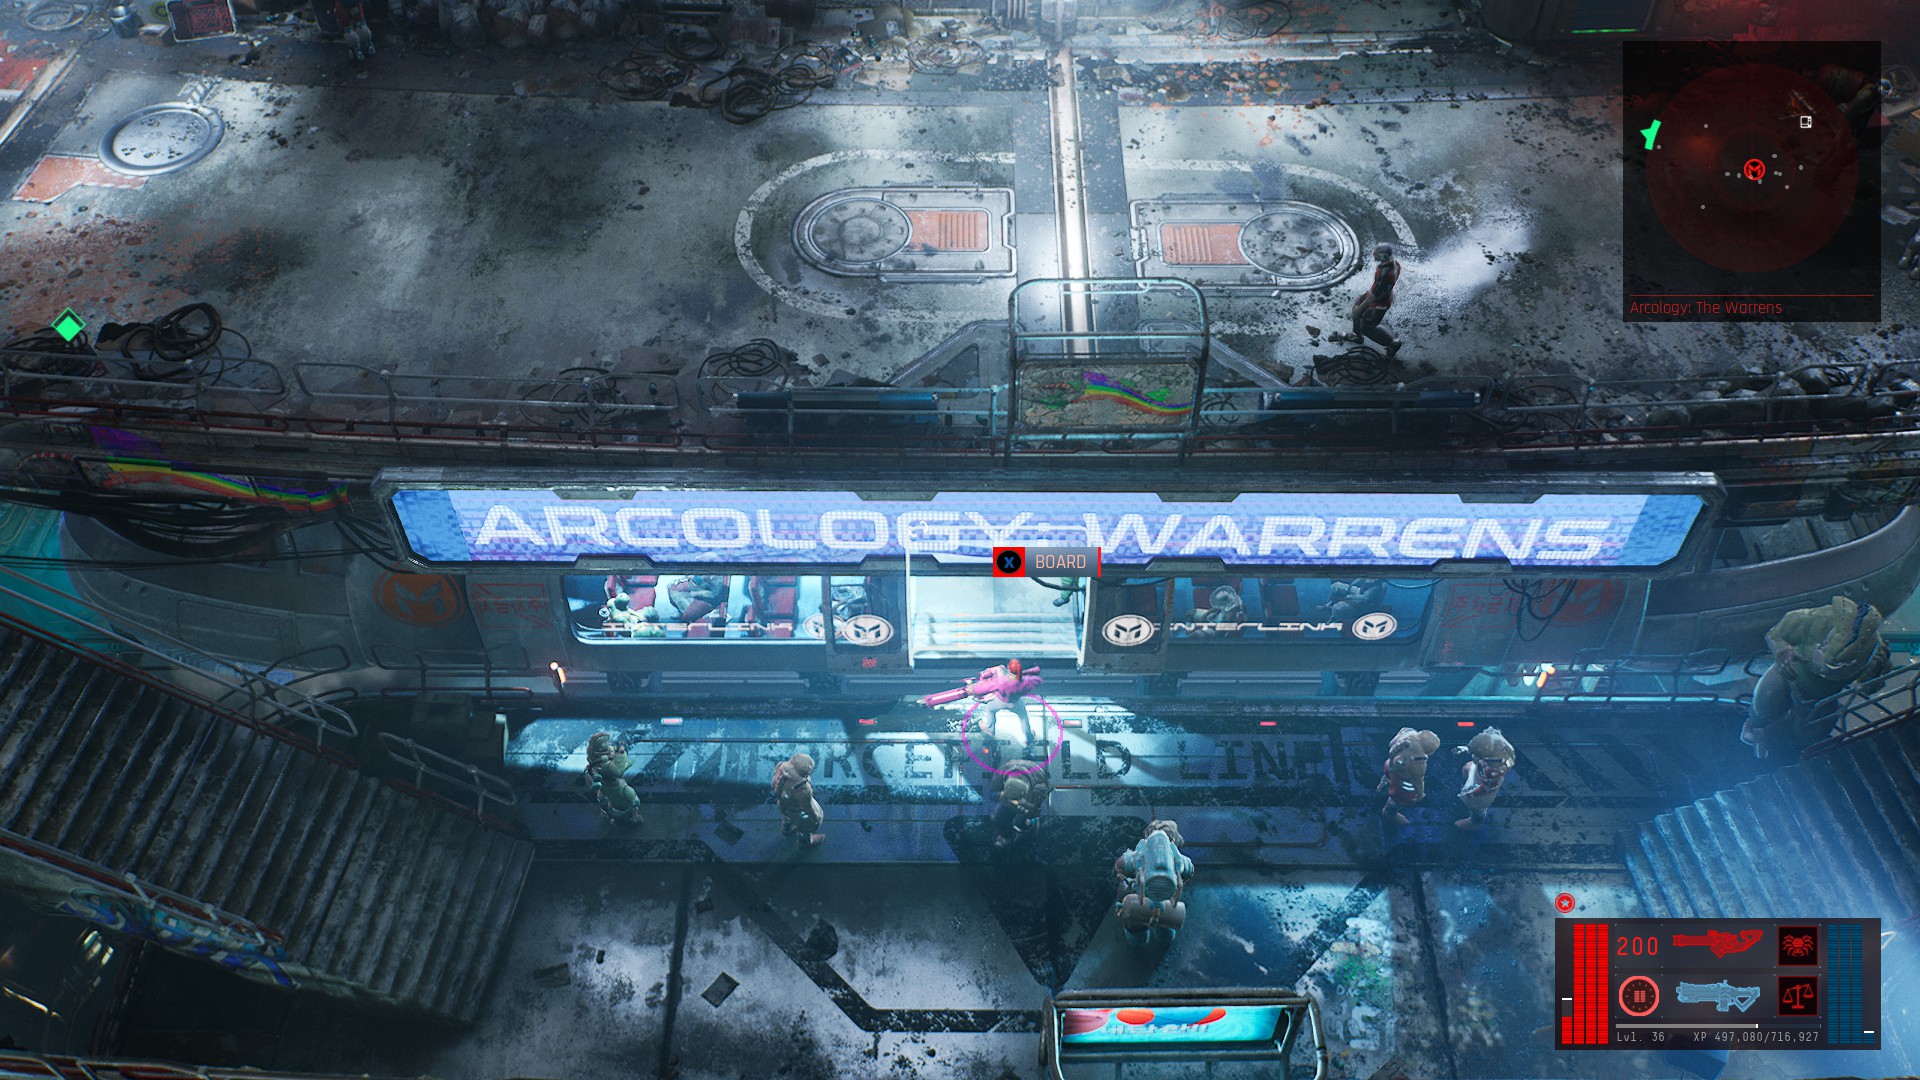
Ride the Interlink Express
One of the many ways to change locations quickly is the Interlink Express, a metro that can be found in almost all districts. You can find this train by looking for the “M” logo on the map and minimap.
To unlock this achievement, simply reach a train and fast travel to any location available.
Curious Consumer

Curious Consumer
Read 10 datapads
All you need to do in order to get this achievement is to read 10 different datapad by pressing the X / ▢ button on your controller or F on your keyboard. You might unlock this achievement without effort by progressing through the main story, as some mission objectives require you to interact with datapads and there are also many datapads scattered in the world.
Explorer

Explorer
Discover all locations
In total, there are 39 locations to be discovered. By completing all main and side missions, you will discover all possible locations in the game, with the exception of the Outskirts. This particular place will not be present in any mission, but it should be discovered as well, as it is necessary for the unlocking of this and the "Comprehensive" achievements.
Here is the full list of all in-game locations:
1. Ascent Group HQ
2. Black Lake
3. Blossom Hills
4. Cluster 13
5. Coder's Cove
6. corpZone
7. deepStink
8. dNexus
9. Gemini Stacks
10. Gratitude
11. Grinder
12. highStreet
13. MenShen
14. Nitroad
15. No Man's Land
16. Onyx Void HQ
17. Outskirts
18. Pod Lot
19. RBM-5
20. RezDev
21. Rooftops
22. Scrapland
23. Serenity Plus
24. Stimtown
25. Sub-Sector 41A
26. Tham's Gate
27. The Common
28. The Cosmodrome
29. The Dusk
30. The Edge
31. The Glut
32. The Golden Satori
33. The Node
34. The Pinnacle
35. The Shaft
36. The Umbilical
37. The Warrens
38. Veles
39. Waste Recycling Network
NOTE: This achievement can get bugged while playing in co-op and the client might not get this achievement upon meeting the requirements. To fix this issue, leave the co-op session, then continue the save in single campaign. Alternatively, re-join the same session you left earlier as the client and the achievement should unlock on the loading screen, before spawning.
Flatliner

Flatliner
Unlock all enemy Codex entries
In total, there are 32 enemies to be discovered by killing each type of them. By completing all main and side missions, you will encounter and kill all possible types of enemies in the game. This section of the Codex is also needed for the "Comprehensive" achievement.
Here is the full list of all enemies:
1. 438 Hung - story related
2. Ascender Combatants - found in Silo 86
3. Automated Defences - found in dNexus, Silo 86
4. Barrager - found on the bridge between corpZone and the Umbilical
5. Black Hacker - found in Silo 86
6. Celine- story related
7. Combat Hacker - found in corpZone, RezDev, the Umbilical
8. Corporate Grab Teams - found in the Edge
9. Dozer - found in corpZone, RezDev, the Umbilical
10. Ferals - found in Black Lake Towers
11. Fullchrome - found on the bridge between corpZone and the Umbilical
12. Hammerhand - found in Warrens and highStreet
13. Havoc - found in Scrapland
14. Heavy Monobot - found in dNexus, Silo 86
15. Interdimensional Calamity - story related
16. Jogger - found in Warrens
17. Light Monobot - found in dNexus, Silo 86
18. Logbot - found in dNexus, Silo 86
19. Megarachnoid - found in dNexus, Silo 86
20. MG Operative - found in the Edge
21. Nug Engineers - found in highStreet
22. Nug Gadgeteer - found in Warrens
23. Onyx Void Operative - story related
24. Papa Feral - found in Black Lake Towers
25. Rojins - found in highStreet
26. Scatters - found in corpZone, RezDev, the Umbilical
27. Scientists - found in BioChoice Pharma facility in Nitroad
28. Siege Mech - found in The Edge, corpZone, RezDev, prison in the Glut, Silo 86
29. Turbo Keesh - found in highStreet
30. Turbo Thugs - found in Warrens
31. Ungrateful Merc - found in corpZone, RezDev, the Umbilical
32. Ungratefuls - found in corpZone, RezDev, the Umbilical
NOTE: This achievement can get bugged while playing in co-op and the client might not get this achievement upon meeting the requirements. To fix this issue, leave the co-op session, then continue the save in single campaign. Alternatively, re-join the same session you left earlier as the client and the achievement should unlock on the loading screen, before spawning.
Comprehensive

Comprehensive
Fill the Codex
The Codex has 8 different categories, which need to be all fully completed in order for the achievement to unlock. By completing all main and side missions, you will be able to complete each section of the Codex.
The Codex consists of the following:
1. Tutorials - fully completed upon starting a new game
2. Factions - fully completed upon starting a new game
3. Species - fully completed upon starting a new game
4. Locations - SEE EXPLORER ACHIEVEMENT
5. Lore
6. Bios
7. Enemies - SEE FLATLINER ACHIEVEMENT
8. Manufacturers
Lore entries are discovered by completing all main and side missions. There are currently 20 lore entries.Here is the full list of all lore:
1. AGI
2. AI & SI
3. Arcology
4. Augmentations
5. Habber
6. Habstack
7. ICE
8. IMP
9. Imprinting
10 .InCon
11. Indent
12. LoHab
13. NetSage
14. Project MenShen
15. stackBoss
16. Stasis Tech
17. The dataNet
18. The Interlink
19. The RBM-5 Tokamak
20. uCred
Bio entries are discovered by completing all main and side missions. There are currently 50 bio entries.Here is the full list of all bios:
1. 438 Hung
2. Aleks
3. Anteen
4. Ariel
5. Atticus
6. Beezelchek
7. Boseman
8. CEO Tahm
9. Chef Wegner R.
10. Clobber
11. CTO Dakyne
12. Dr. Humidore
13. Flabby Ricone
14. Flamingo
15. Flavvus
16. Fouch
17. Francone
18. Grateful Abbott
19. Grigori
20. Hans
21. Harlan
22. Humble Ivan
23. Imp
24. Influencer Celine
25. Iris
26. Kaiser First
27. Kira
28. Krog
29. Kudo
30. Lockesley
31. M-G Rep
32. Merle
33. nogHead
34. Palu
35. Polter Dee
36. Raphel
37. Sal Mon
38. Salucious D
39. Sanguine Humbert
40. Spice
41. Stackboss Poone
42. Taoka
43. The Shipping Master
44. Trenning
45. Trummer
46. Twisty
47. Ubi Gadeeter
48. Voit
49. Warton
50. Won Harting
Manufacturers are discovered by looting or by purchasing each type of available weapons. There are currently 7 types of manufacturers.Here is the full list of all manufacturers:
1. Black Market
2. Canary
3. Cybersec Mega
4. EightCo
5. Habnet Technology
6. uPlus
7. Whisper Cybernetics
NOTE: This achievement can get bugged while playing in co-op and the client might not get this achievement upon meeting the requirements. To fix this issue, leave the co-op session, then continue the save in single campaign. Alternatively, re-join the same session you left earlier as the client and the achievement should unlock on the loading screen, before spawning.
Getting Things Done

Getting Things Done
Finish a side mission
This achievement will unlock automatically when you finish your first side mission. For further details, please refer to “For Both Our Benefits” achievement to see the full list of all side missions below.
For Both Our Benefits

For Both Our Benefits
Complete all side missions
The Ascent has a total of 28 side missions. They will be marked on both the map and minimap by an icon of a yellow outline of a diamond. Note that some of them will not be marked at all and you will have to discover their starting point; it will appear only when you are in the immediate proximity of the NPC/datapad
Some of them will be available from the start, but some of them require certain main missions to be completed beforehand and some will be located in places you have not yet discovered.
You can complete the side missions at any point during the game (given that they are not blocked by other main missions) and they can definitely be completed after the last main mission of the game, as none of them are missable.
Here is a list of all missions and their starting point:
1. Anabolic Express - recommended level: 2; can be started in Cluster 13
2. Balls Deep - recommended level: 7; can be started in Cluster 13
3. Bubble Trouble - recommended level: 10; can be started in Serenity Plus (Cluster 13)
4. Casino Courier - recommended level: 7; can be started at The Golden Satori (Arcology: highStreet)
5. Casino Courier II - recommended level: 18; can be started at The Golden Satori (Arcology: highStreet) [THIS MISSION DOES NOT APPEAR ON THE MAP]
6. Casino Courier III - recommended level: 18; can be started at The Golden Satori (Arcology: highStreet) [THIS MISSION DOES NOT APPEAR ON THE MAP]
7. Casino Courier IV - recommended level: 22; can be started at The Golden Satori (Arcology: highStreet) [THIS MISSION DOES NOT APPEAR ON THE MAP]
8. Casino Courier V - recommended level: 22; can be started at The Golden Satori (Arcology: highStreet) [THIS MISSION DOES NOT APPEAR ON THE MAP]
9. Double Charge - recommended level: lvl 7; can be started in Cluster 13
10. Dreadful Situation - recommended level: 24; can be started in Blossom Hills
11. Dreaming High - recommended level: 20; can be started in Blossom Hills
12. Exotic Dinner - recommended level: 23; can be started in The Node
13. Gear up! - recommended level: 1; can be started in Serenity Plus (Cluster 13)
14. Gen 9 H20 - recommended level: 17; can be started in Arcology: highStreet
15. Humidity Doctor - recommended level: 13; can be started in Cluster 13
16. Liberation Operation - recommended level: 25; can be started in Nitroad
17. Lost and Found - recommended level: 14; can be started in The Node
18. One More Rep - recommended level: 5; can be started in Cluster 13
19. Plug & Play - recommended level: 25; can be started in Stimtown
20. Prison Break - recommended level: 15; can be started in The Glut
21. That Guy - recommended level: 28; can be started in Dirty Dive (Stimtown) [THIS MISSION DOES NOT APPEAR ON THE MAP]
22. The Champ - recommended level: 18; can be started in Dirty Dive (Stimtown) [THIS MISSION DOES NOT APPEAR ON THE MAP]
23. The Dark Horse - recommended level: 17; can be started in The Node
24. The Recipe - recommended level: 20; can be started in Stimtown
25. The Stash - recommended level: 5; can be started inThe Grinder (datapad near body) [THIS MISSION DOES NOT APPEAR ON THE MAP]
26. Silicon Optics - recommended level: 22; can be started in Cluster 13
27. Wash-n'-Go - recommended level: 21; can be started in Dream World (corpZone)
28. You Snooze You Lose - recommended level: 25; can be started in Scrapland
NOTE: This achievement can get bugged while playing in co-op and the client might not get this achievement upon meeting the requirements. Unfortunately, the client won’t have any progress saved on his profile so the only solution is to re-do all the side missions.
DLC: CYBER HEIST - Story Related Achievements
The DLC’s story takes place after the events of the main campaign and it can be accessed only after completing the main story.
The DLC can also be played in co-op and it only requires the host to own the DLC and finish the main campaign (the client can join at any point during the host’s story).
The DLC has 2 main missions and 3 side missions.
You will get an achievement for completing each of the 2 main missions of the DLC. The only prerequisite is to finish the main campaign of the base base. The first DLC mission will begin automatically after purchasing the DLC and can be started right away.
All story related achievements are unmissable!
Brave New World

Brave New World
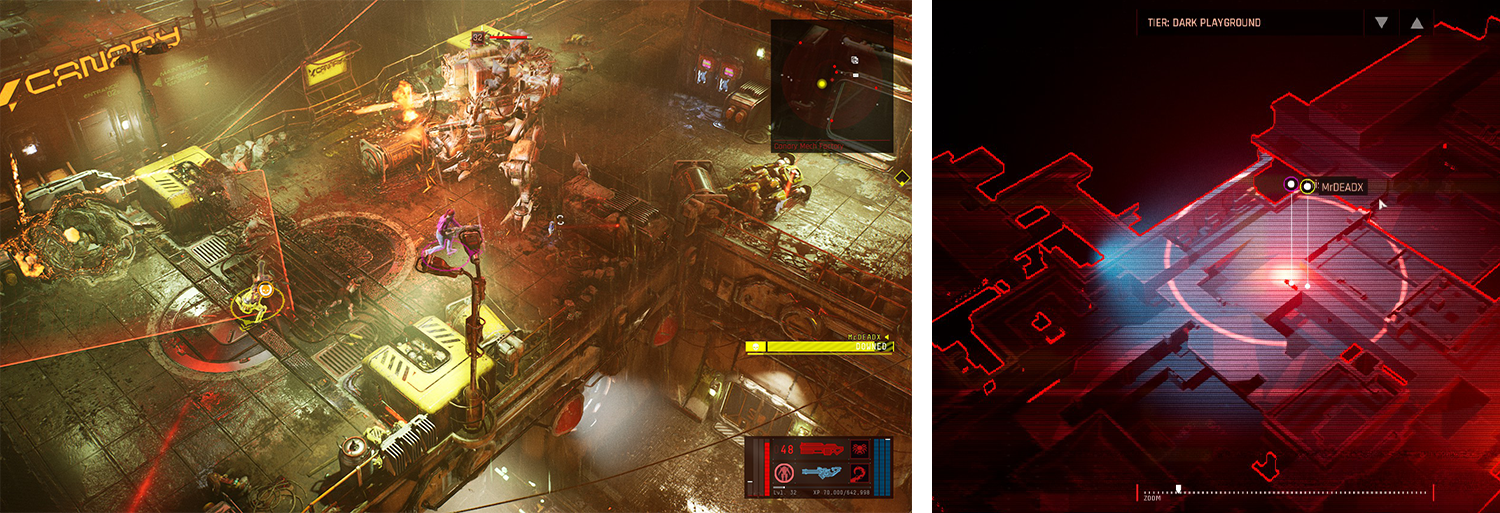
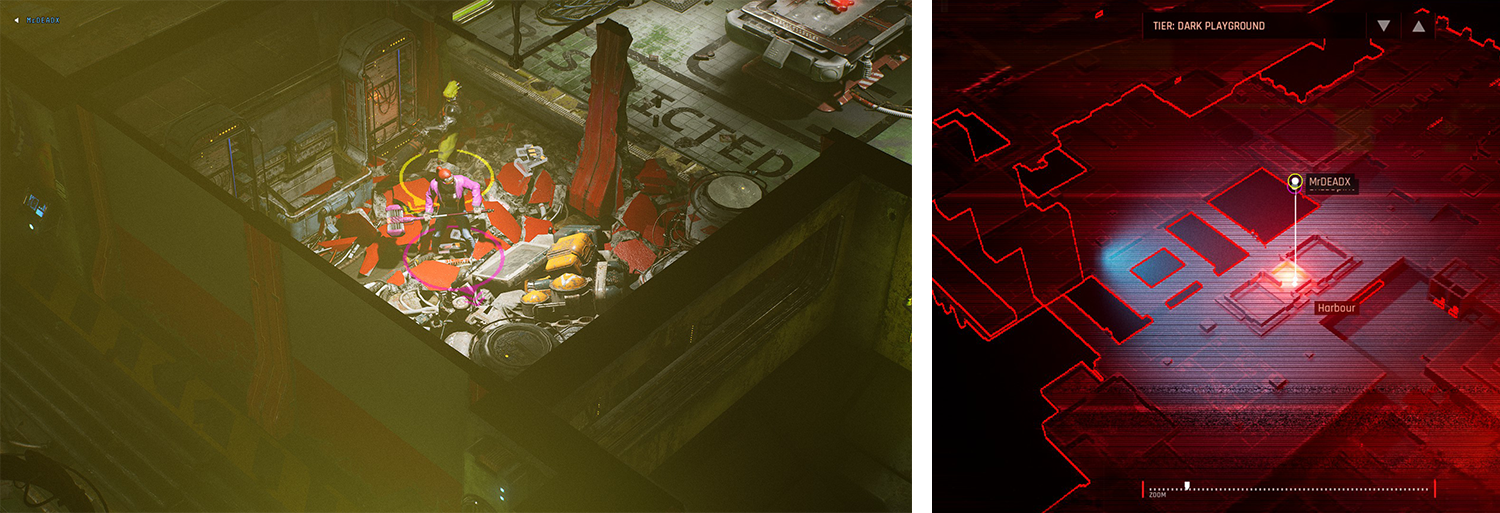
Discover the Dark Playground
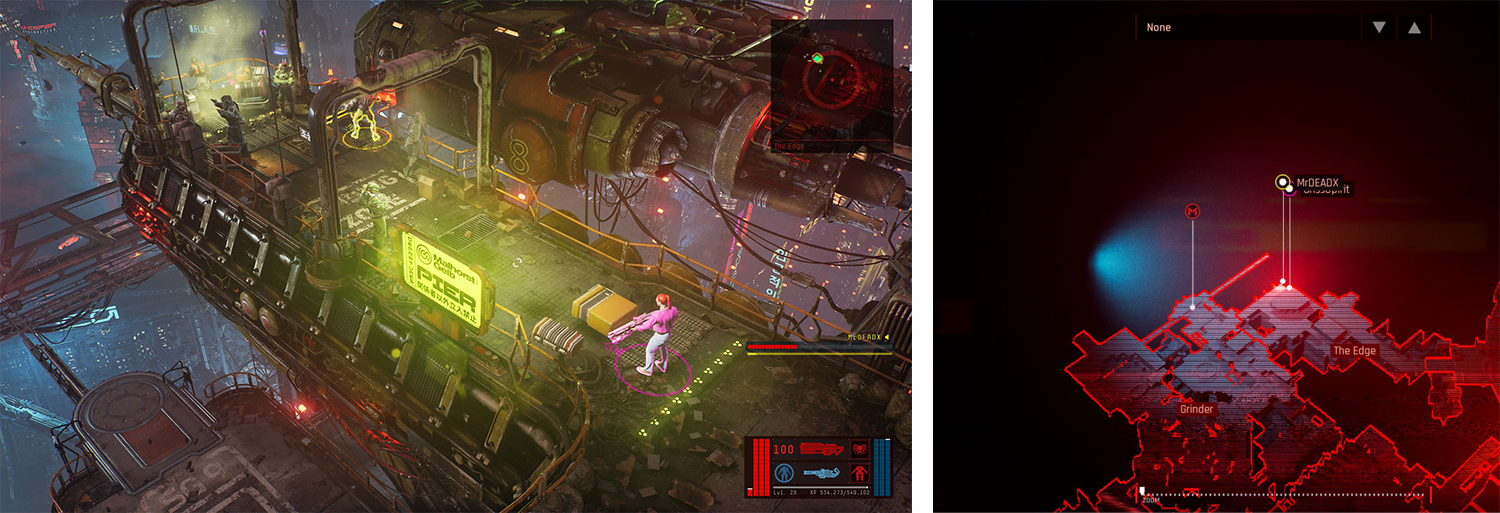
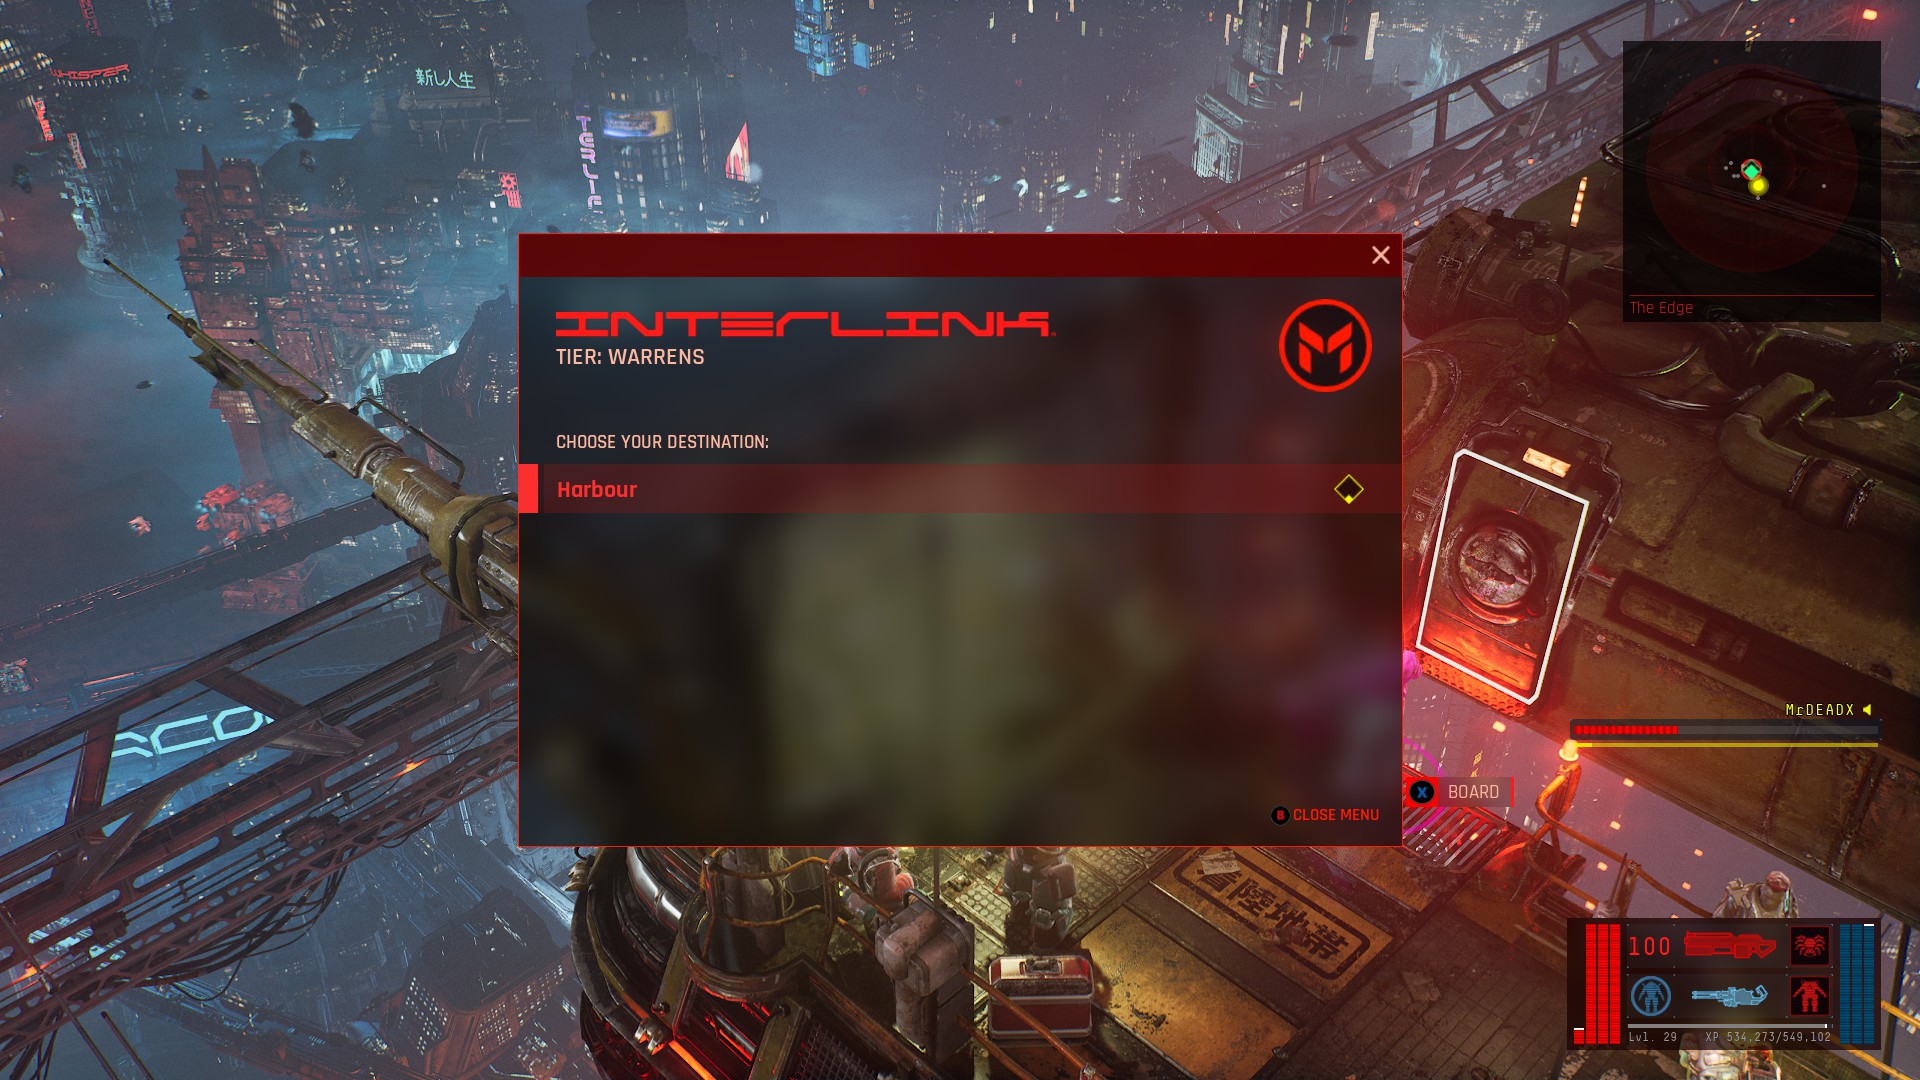
This achievement will be automatically received when you reach the new location of the game, named “The Dark Playground”.
In order to get this, complete the initial dialogue with Kira and then take the shuttle from The Edge to reach the new zone, named Harbour.
The achievement will unlock once you arrive at the new location.
One Step Forward

One step forward
Complete Find & Replace
Complete the 1st main quest of the DLC "Find & Replace" .
Recommended Level: Level 28
All The Way

All the way
Complete Critical Resource
Complete the 2nd main quest of the DLC "Critical Resource" .
Recommended Level: Level 31
Tenuous Grasp

Tenuous Grasp
Find and then lose something valuable
This is a story related achievement, therefore it is unmissable. You will receive this secret achievement automatically during the "Critical Resource" main quest, during the cutscene in which Zell steals the “Ruby” artifact from you .
Zell Is Dead

Zell is dead
Take down Zell
This is a story related achievement, therefore it is unmissable. You will receive this secret achievement automatically during the "Critical Resource" main quest after you defeat Zell, before the cutscene in which you take back the “Ruby” artifact .
NOTE: If you are playing in co-op, this achievement will unlock ONLY for the person who fires the last bullet that kills Zell . Therefore, after killing Zell and receiving the achievement, DO NOT FINISH THE BOSS BATTLE. Instead, have the whole party wiped by the remaining soldiers and restart the boss battle. Have the other person kill Zell so that they can get the achievement too.
Vice Express

Vice Express
Take the train
This is a story related achievement, therefore it is unmissable. You will receive this secret achievement automatically during the "Critical Resource" main quest, when you stow away on the train to the MG Military Base .
Completed Main Mission

Completed Main Mission
Complete all Cyber Heist Main Missions
This is a story related achievement, therefore it is unmissable. You will receive this secret achievement automatically after completing the 2 main missions of the DLC.
The 2 main missions are the following:
1. Find & Replace - recommended level: 28; starting point in Cluster 13 (base game location)
2. Critical Resource - recommended level: 31; starting point in the Harbour (the mission starts automatically after the previous missions is completed)
DLC: CYBER HEIST - Gameplay Achievements
Karlan Engineering

Karlan Engineering
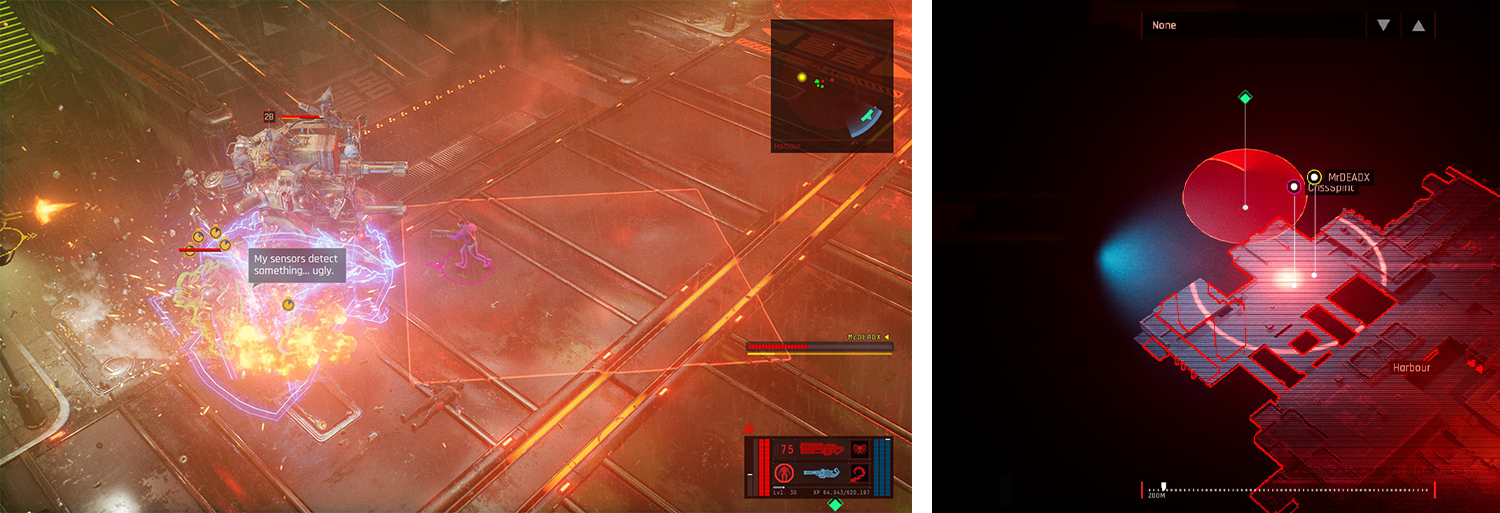
Destroy a Karlan controlled Siege Mech
The Siege Mech is a very large robot that fires missiles and other heavy artillery. It can be found in two places within the Harbour, in front of the entrance to the Canary Robot Factory and inside the factory.
The achievement will unlock once you have killed one Siege Mech.
NOTE: If you are playing in co-op, this achievement will unlock ONLY for the person who fires the last bullet that destroys the Mech. Therefore, after destroying it, leave the zone, travel to another part of the game, leave the session and start another one, or simply have the party wiped by other NPCs. Then, have the other person destroy the Mech so that they can get the achievement too.
Open Sesame

Open Sesame
Find a secret route
In order to get this achievement you need to find and enter a hidden room that contains a chest.
The easiest way to find this room is from where you get off the shuttle to the Harbour.
From this starting point, make your way forward and take the first set of stairs to the left. Go into the building and proceed towards the exit.
Keep to your left and continue forward until you reach a small bridge. Cross the bridge and now you'll find yourself in a shipping yard filled with containers. Keep sticking to the left until you reach a doorway in the corner.
Enter through this door and pass through the next one where you will end up in a room with an elevator. Take this elevator to the ground floor and walk into the room (there is a chest in this room).
As you get into this room, the achievement should pop.
Bring A Knife To A Gunfight

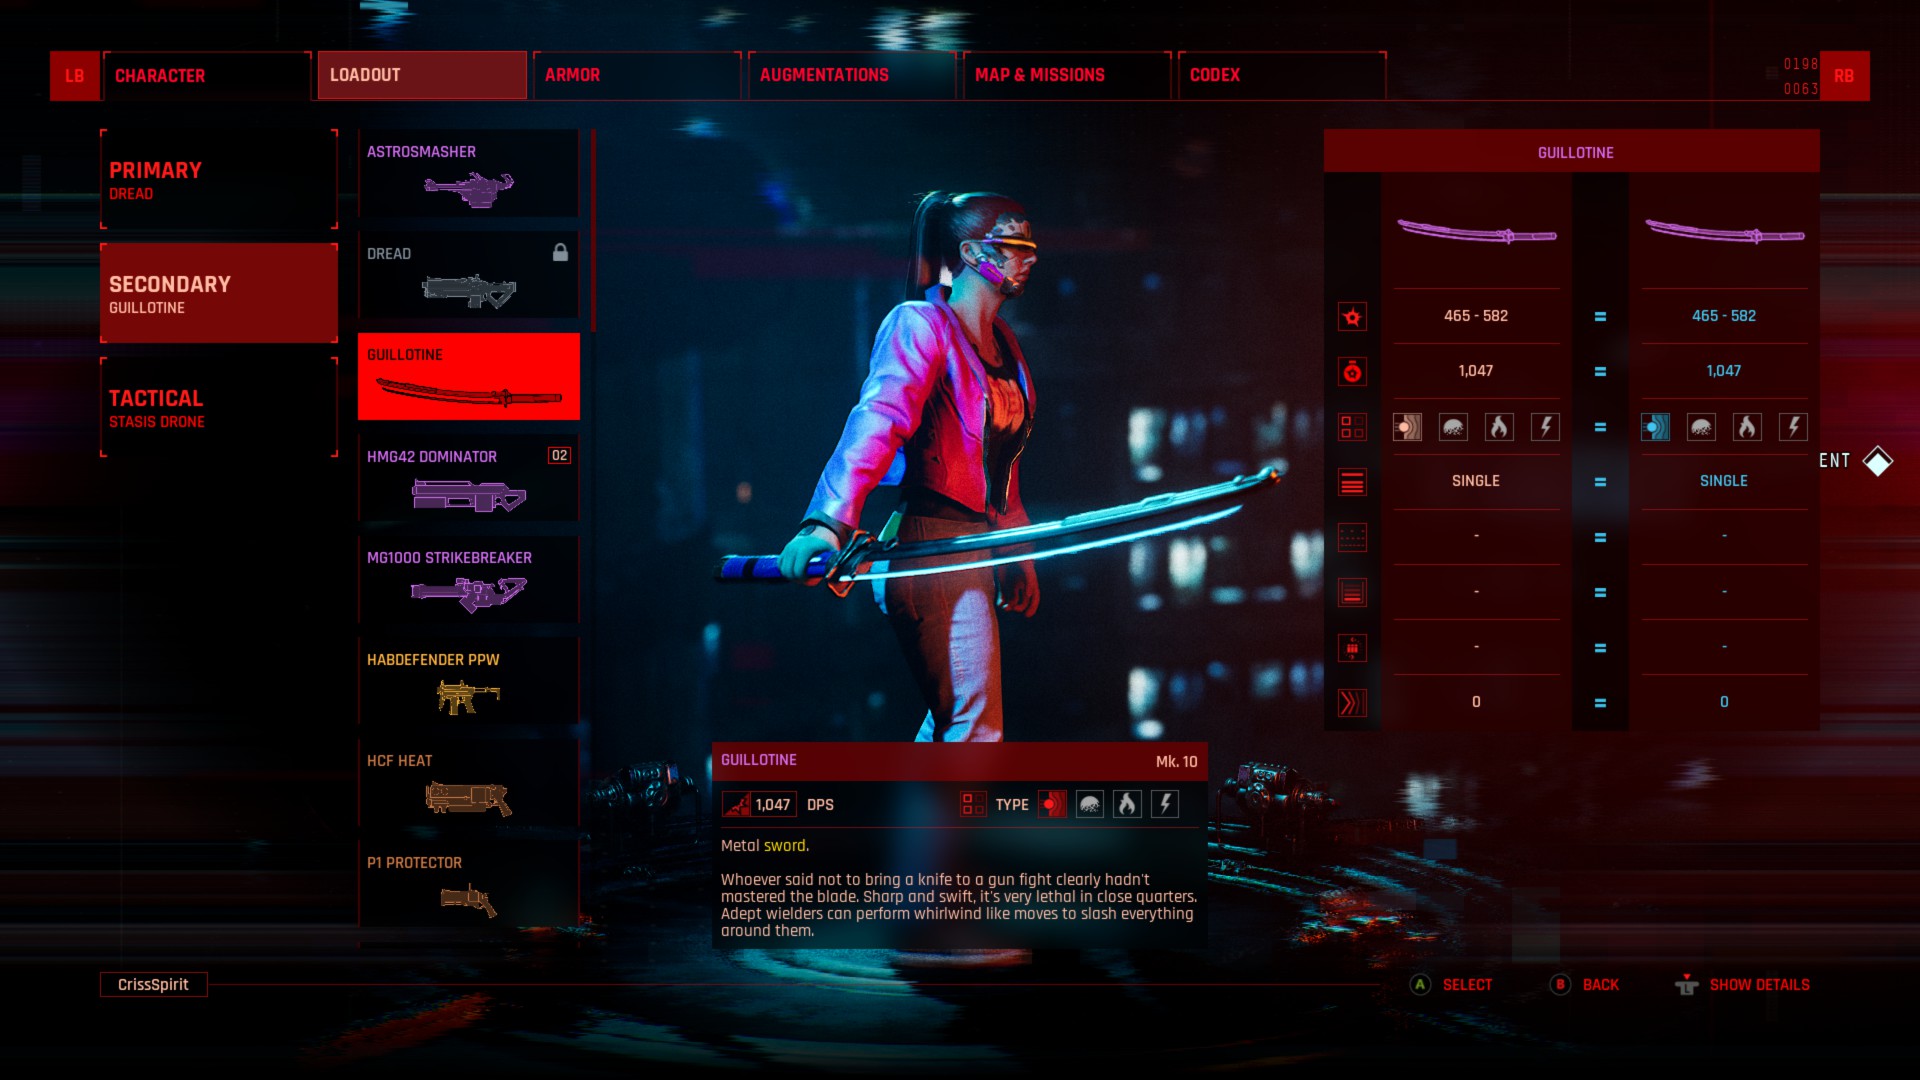
Bring a knife to a gunfight
Obtain your first melee weapon
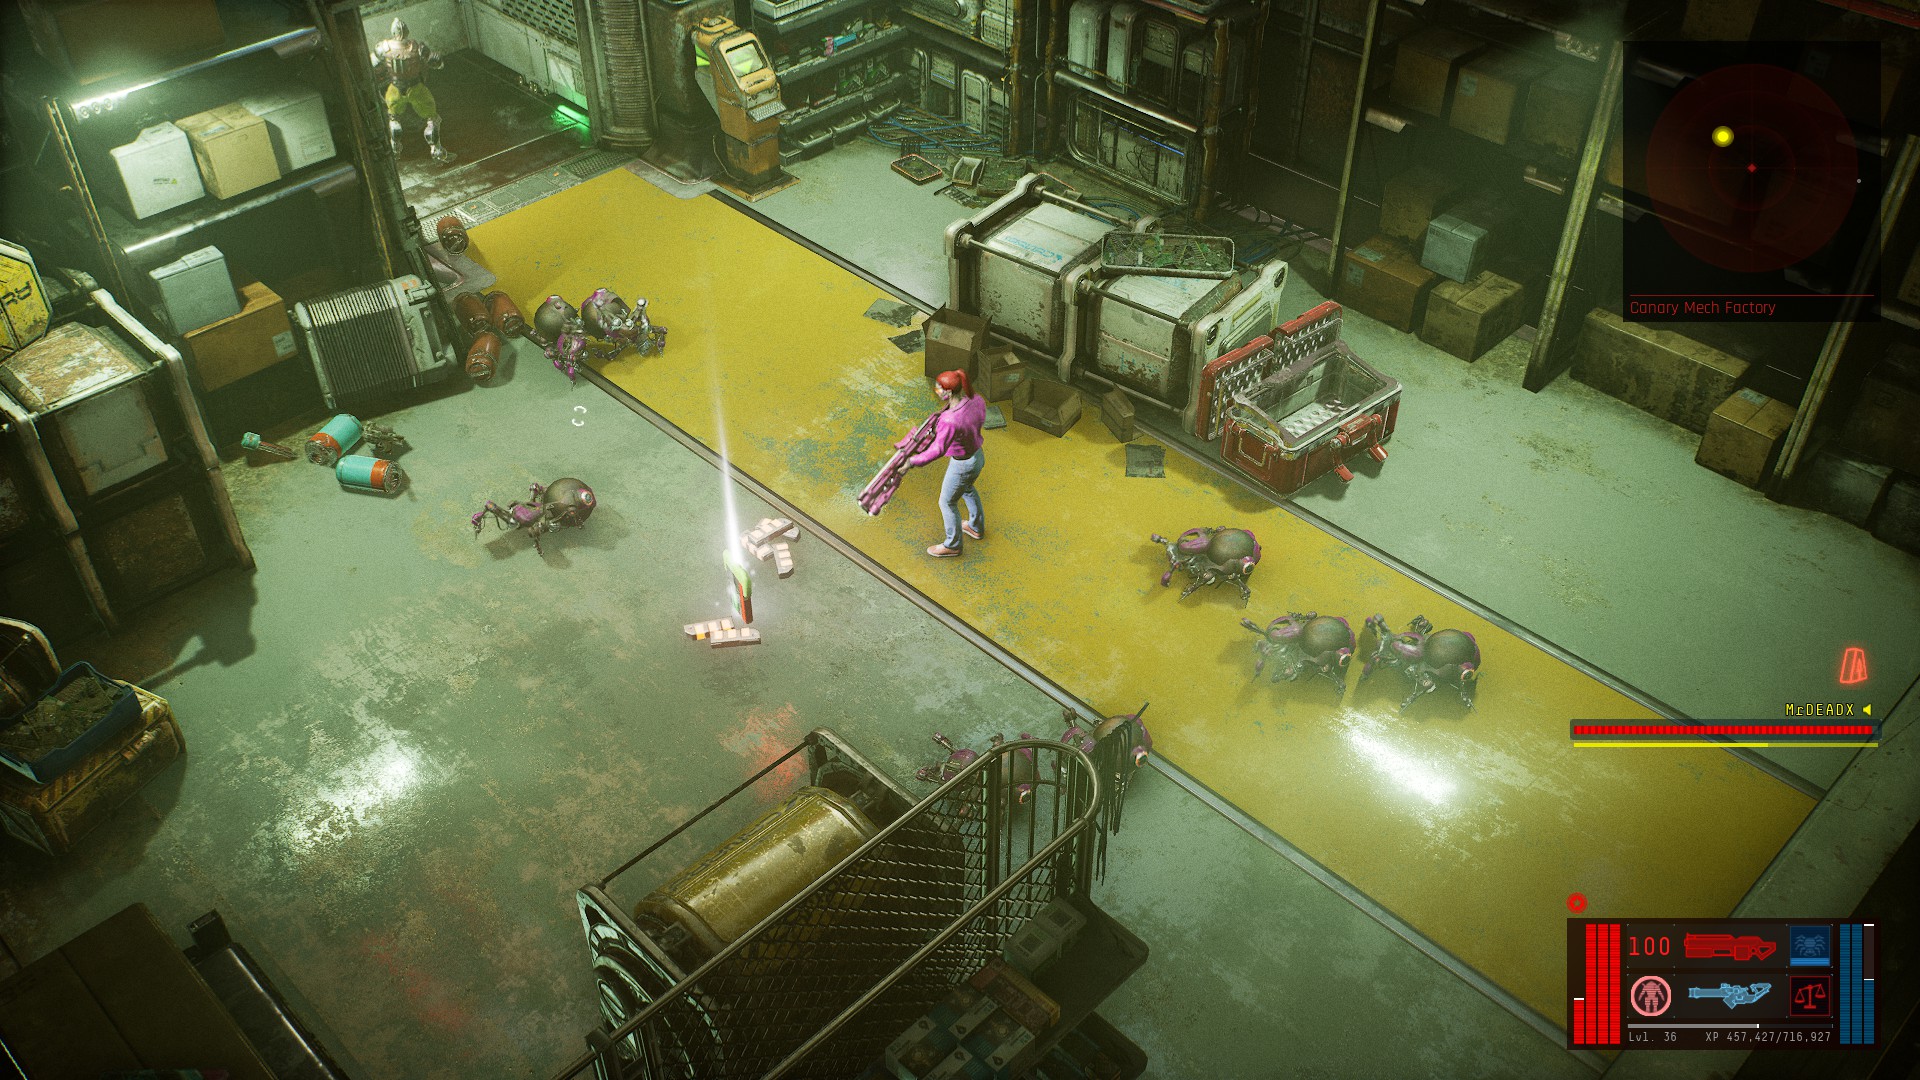
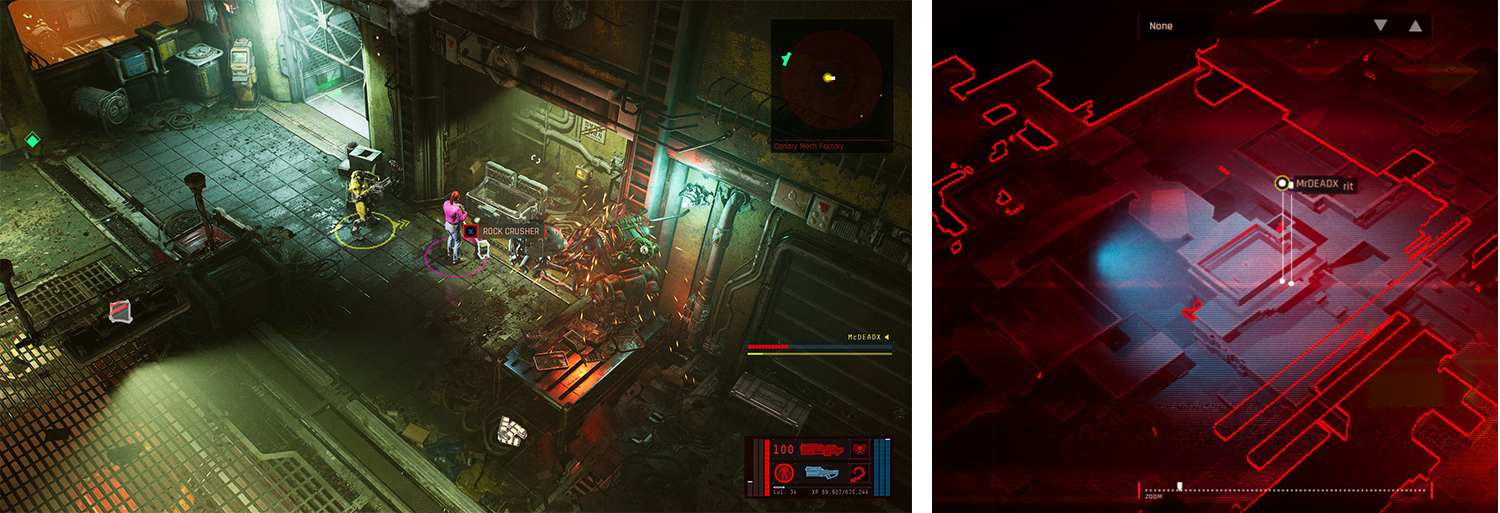
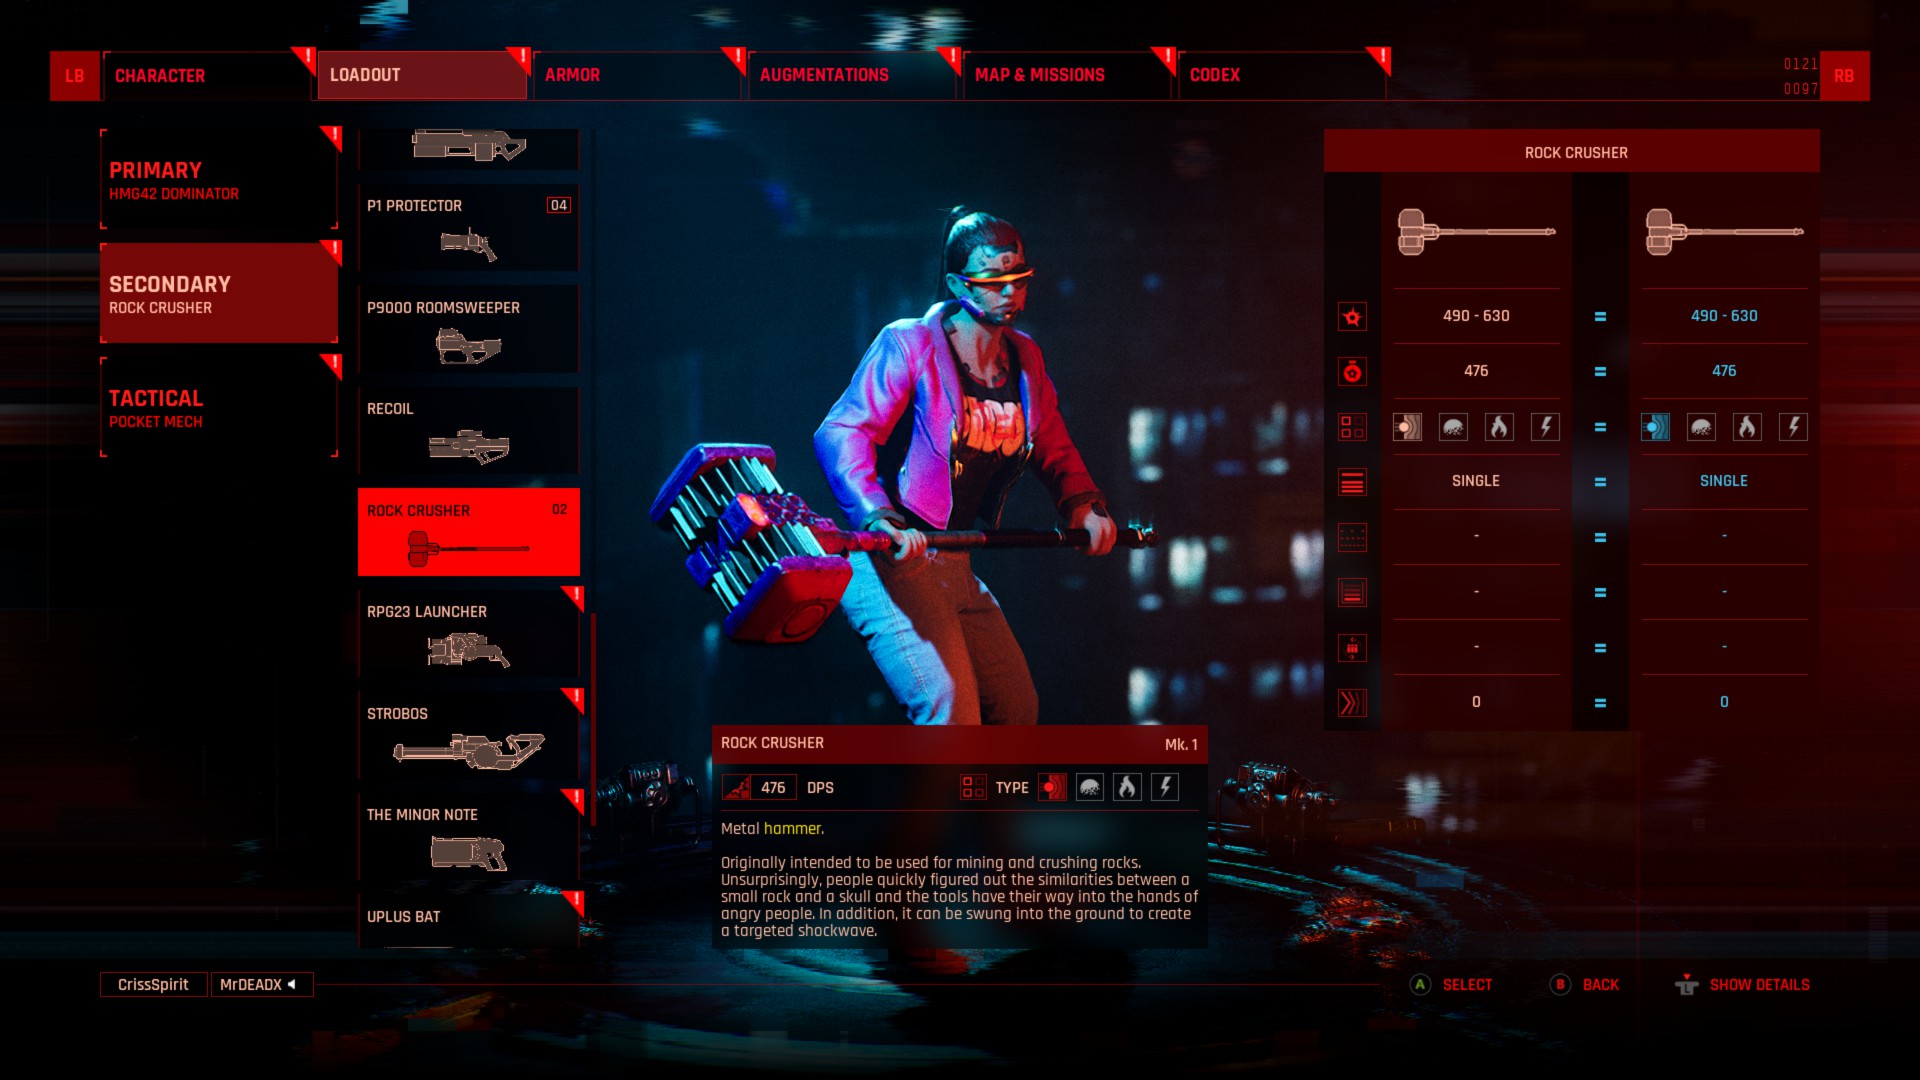
The Cyber Heist DLC has introduced 2 melee weapons: Guillotine and Rock Crusher.
The achievement should unlock as soon as you loot the first melee weapon within the Dark Playground.
The Rock Crusher can be found in 1 location, in Canary Mech Factory. Here is the location:
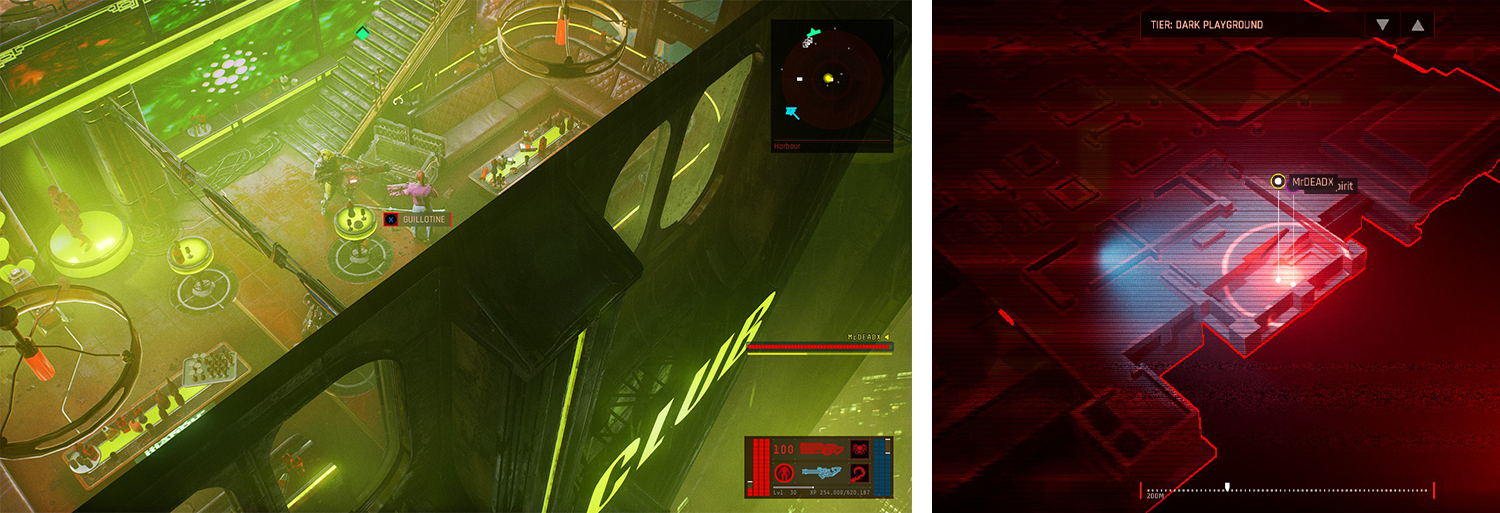
The Guillotine can be found in 2 locations, one in a club in Harbour and the other in a hidden room, where you will have to shoot down the walls in order to get there. Here are the locations:
- Hidden Room
- Club
NOTE: This achievement can get bugged while playing in co-op and the client might not get this achievement upon looting the first melee weapon. One solution is for the client to loot the weapon in a single player campaign, otherwise this achievement will not unlock.
Hammering

Hammering
Perform your first Hammer kill
After getting the Rock Crusher hammer, all you have to do is successfully kill an enemy with the hammer equipped, by pressing the RT/R2 triggers on your controller or LMB on your mouse in order to attack.
SEE "BRING A KNIFE TO A GUNFIGHT" ACHIEVEMENT FOR THE WEAPON’S LOCATION.
First Melee Special Move Kill

First Melee Special Move Kill
Kill an enemy using melee's special move
Each new melee weapon has a special move that can be activated by holding down the LT/L2 triggers on your controller or RMB on your mouse.
To get this achievement you have to successfully kill an enemy while performing the special move.
Keep in mind that the special move is dependent on your level of energy. As long as you have energy available, you will be able to use the special move.
NOTE: Please note that I personally unlocked this achievement using the Rock Crusher’s special move. It should be possible to unlock this achievement using the Guillotine’s special move too, but I have not confirmed this yet.
SEE "BRING A KNIFE TO A GUNFIGHT" ACHIEVEMENT FOR THE WEAPONS' LOCATION.
Not So Special

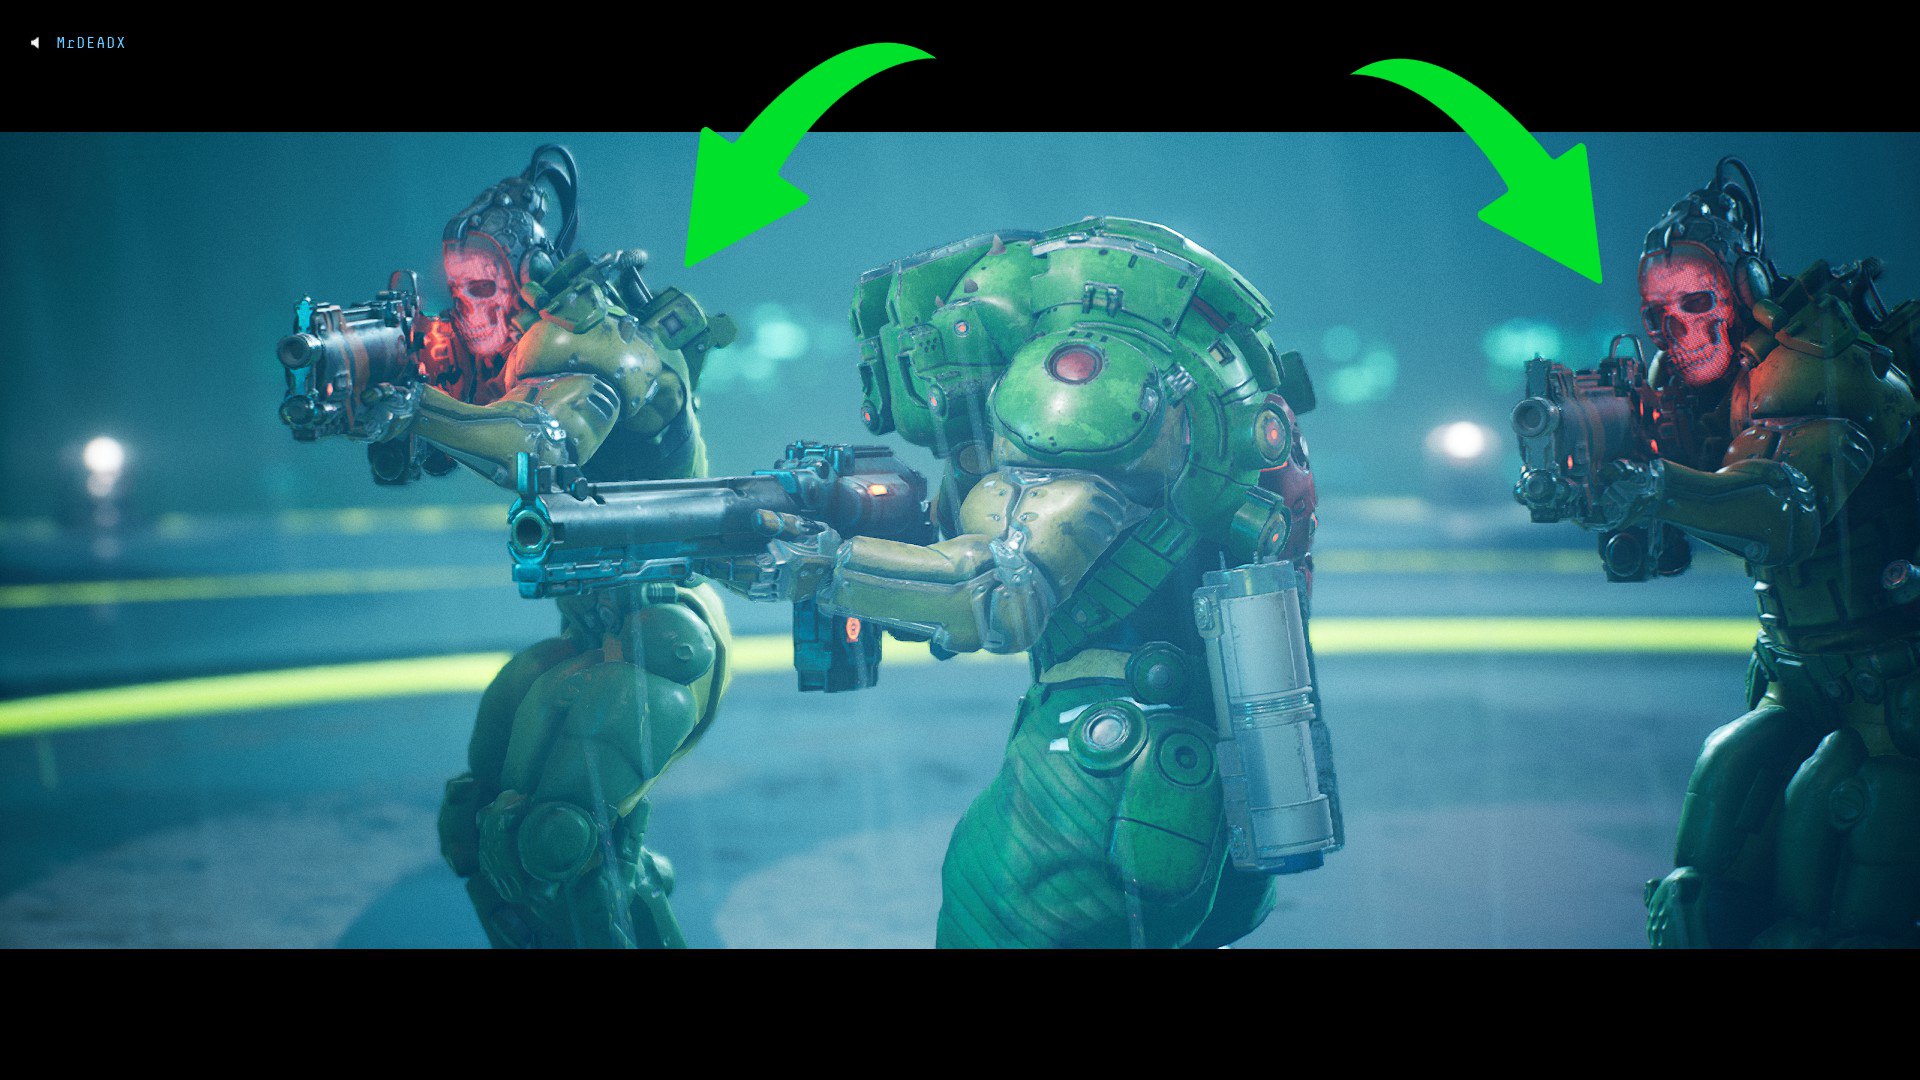
Not so special
Take down a member of Zells' guard
This achievement is somewhat related to the main quest, as you will find Zell’s soldiers only in the MG Military Base.
Zells' guards will have a helmet with a red skull hologram on it, so they are easy to spot. There will be 2 of them, guarding Zell in the final battle . You will automatically kill them both, as you will have to fight them when the boss battle begins.
NOTE: If you are playing in co-op, this achievement will unlock ONLY for the person who fires the last bullet that kills one of the guards. Therefore each one of the party members has to kill one guard in order to get this achievement.
Big Leagues

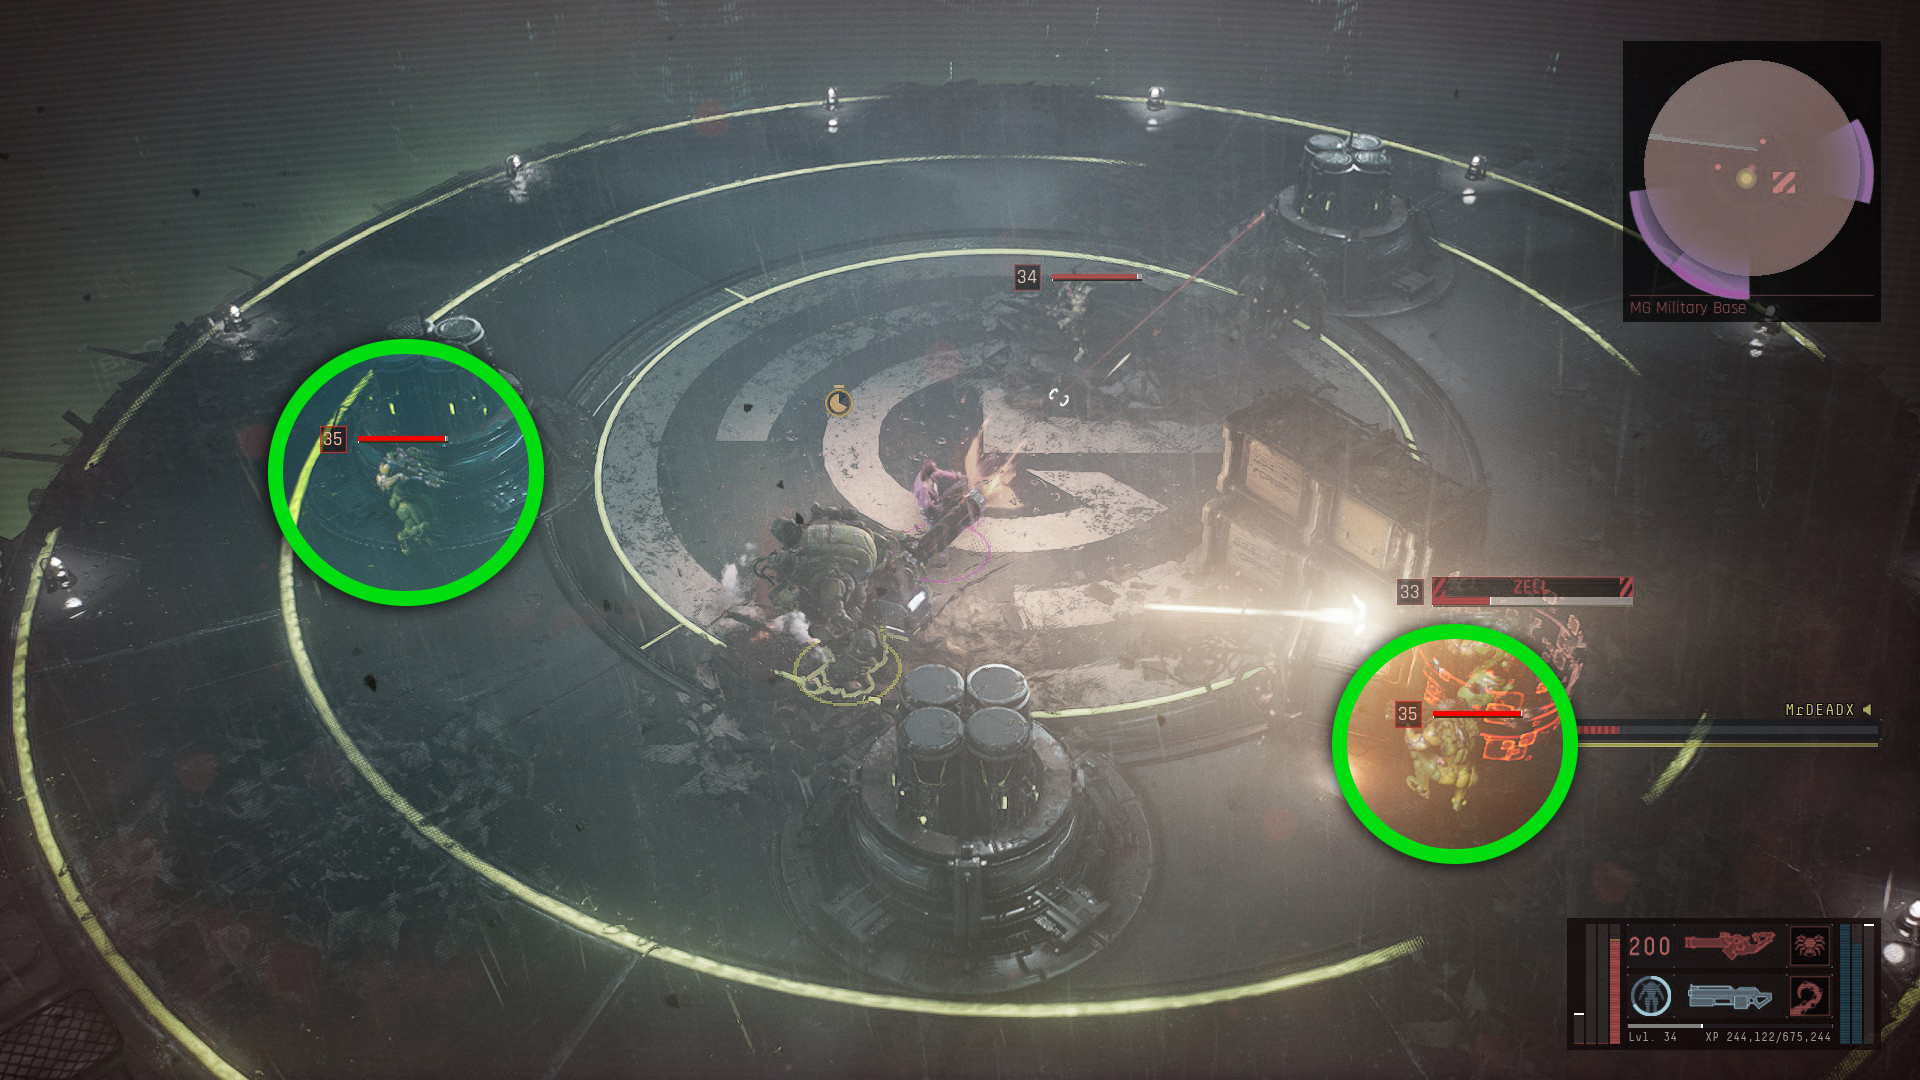
Big leagues
Kill 50 level 35 or higher enemies
As mentioned in the description, you need to kill 50 enemies of a level equal to or greater than 35. It can be quite tedious, because such enemies spawn in the world only if the level of your character is greater than 35.
A good way to farm this achievement easily is during the final boss fight, when you are fighting Zell and his men. Over the course of the boss battle, Zell will continue to spawn soldiers who are close to his level and some of them will be level 35. All you have to do is survive and only kill the soldiers that Zell spawns until you die. You will respawn right before the boss battle and you can repeat this process until you get all 50 kills.
The method mentioned above is really good, as you will not always find enemies at level 35 spawned in the open world and farming for them might take longer than expected.
VIP No More


VIP no more
Kill a level 35 bounty
Bounties spawn all over the world. They are enemies with their names displayed in a red text box. They will also be marked on the minimap as a red hexagon. Their level is dependent on the level of the area, but also the level of your character. In the Dark Playground you will be able to get bounties over level 35 only if the level of your character is greater than 35.
A good way to farm this achievement easily is during the final boss fight, when you are fighting Zell and his men. Over the course of the boss battle, Zell will continue to spawn soldiers and sometimes he will even spawn bounties. Once you kill the bounty, the achievement will pop (you don’t need to turn this bounty in at a Bartender).
All you have to do is survive and kill the soldiers that Zell spawns until a level 35 bounty is spawned. If you die, you will respawn right before the boss battle and you can repeat this process until you kill the bounty.
The method mentioned above is really good, as you will not always find a bounty of level 35 spawned in the open world and farming for one might take longer than expected.
Making Concessions

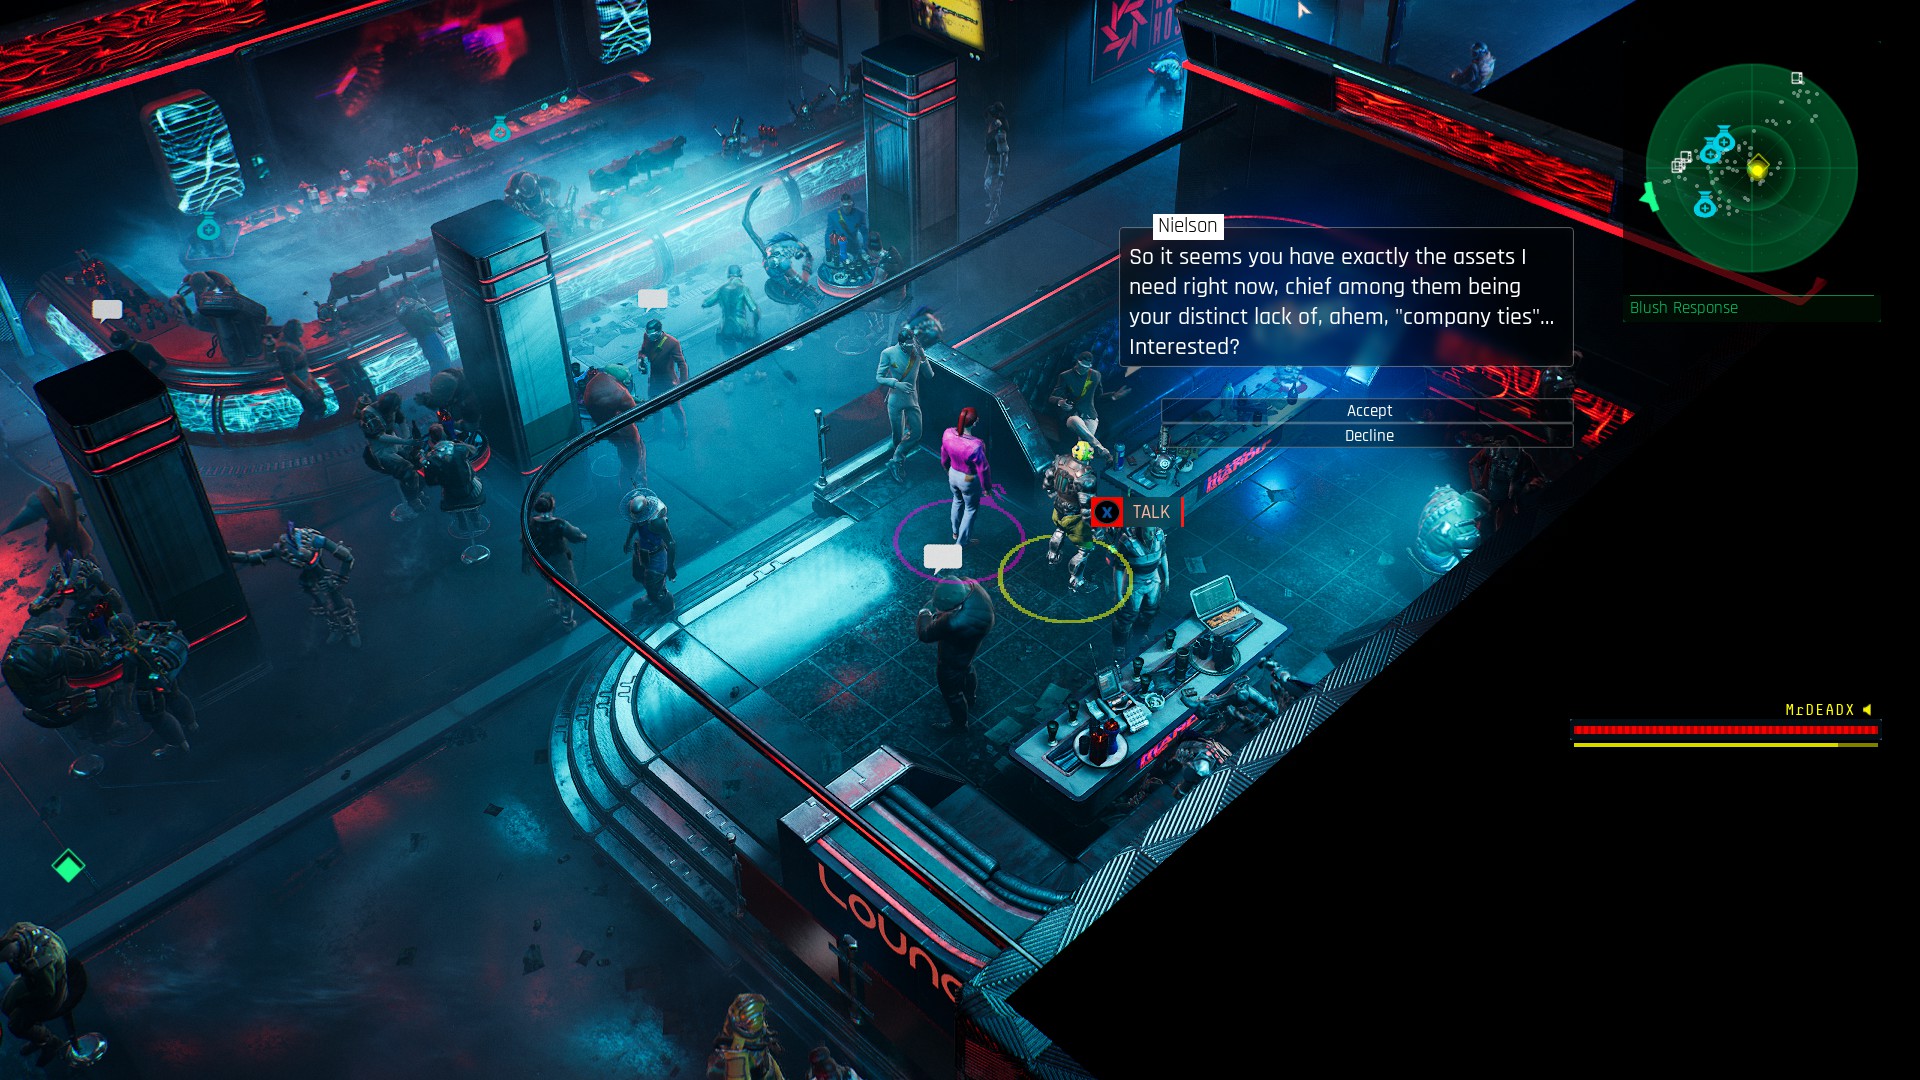
Making Concessions
Completed Making Concessions
“Making Concessions” is one of the 3 side missions of the DLC. The recommended level to start this side mission is level 32 and it can be started within the Blush Response Bar located in the adminZone, by talking with an NPC named Nielson.
The mission consists in sabotaging the robots production at the Canary Mech Factory. After acquiring the data needed from a datapad in Apex Residential Complex, override and install the virus in the control room of the Canary Mech Factory and then head back to Nielson to receive your reward .
Upon completing the mission you will unlock the achievement.
Love Kills

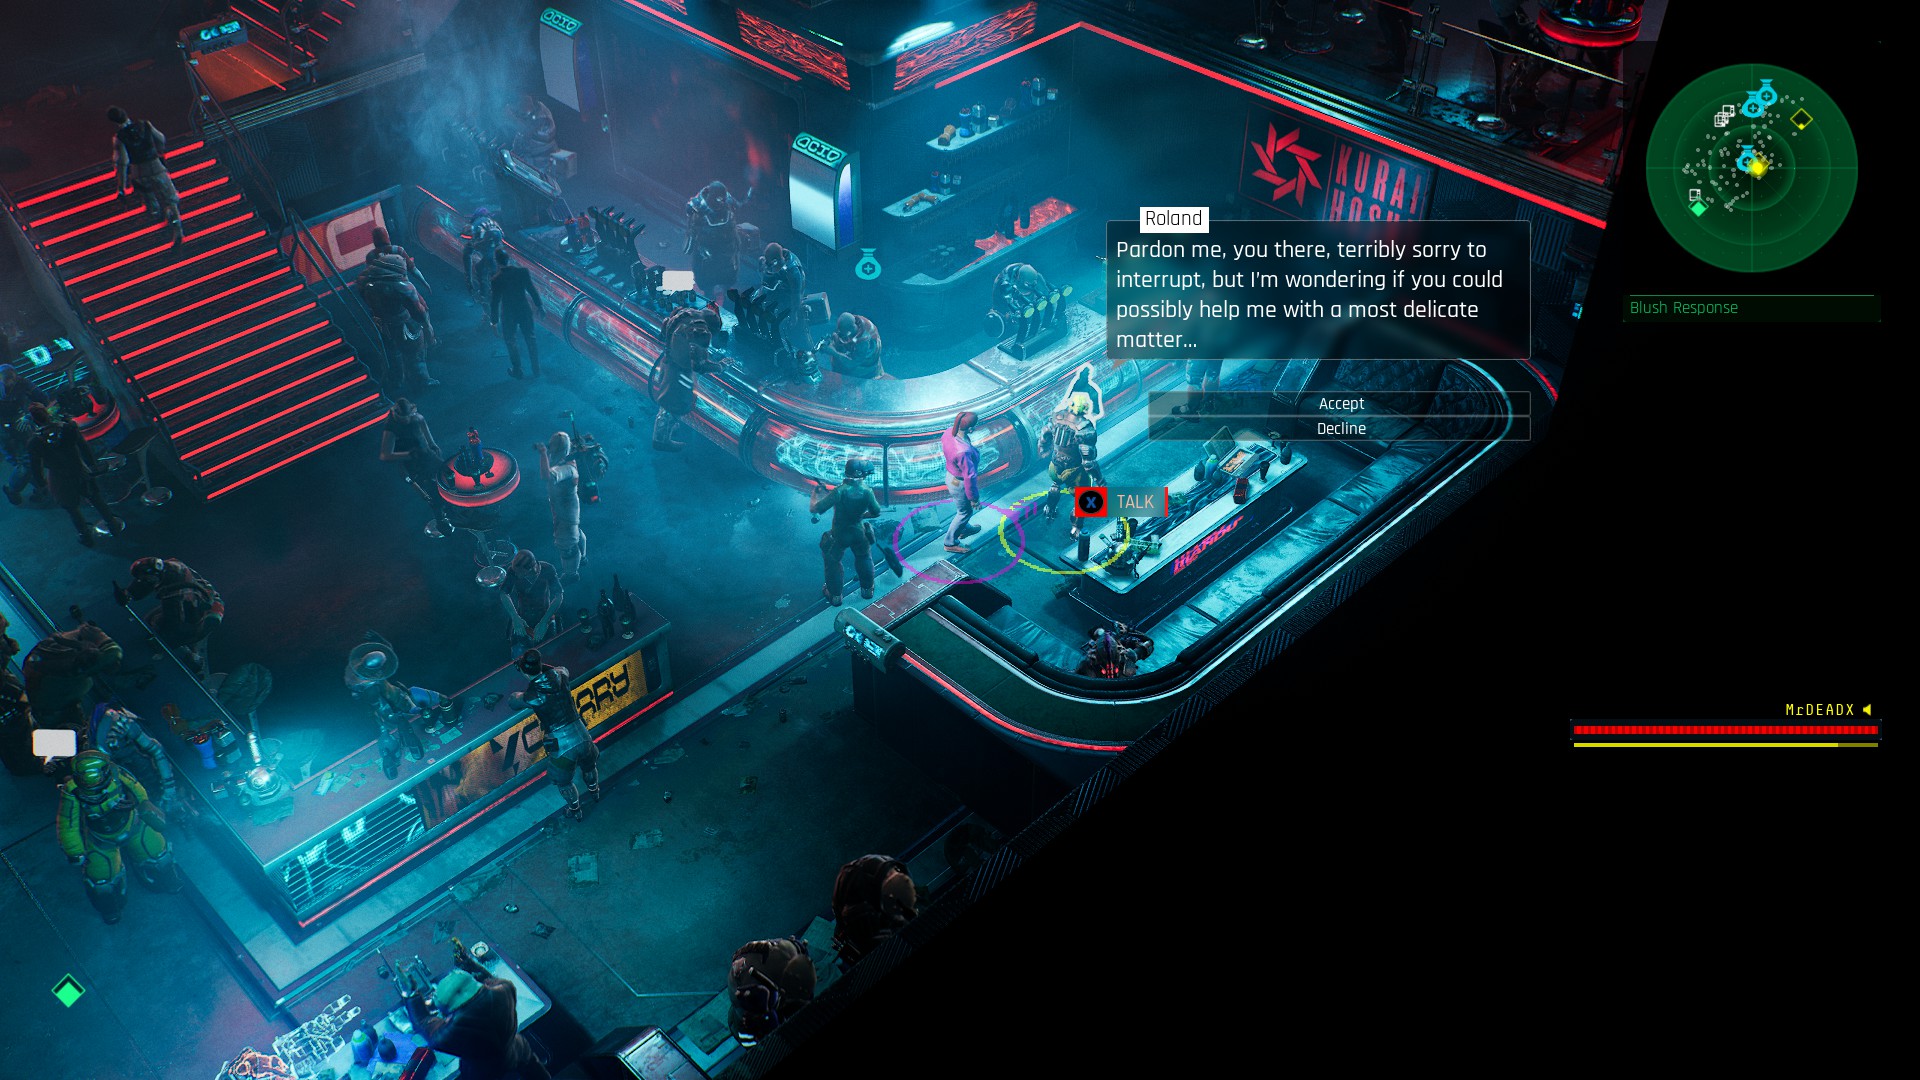
Love Kills
Completed Love Kills
“Love Kills” is one of the 3 side missions of the DLC. The recommended level to start this side mission is level 32 and it can be started within the Blush Response Bar located in the adminZone, by talking with an NPC named Roland.
The mission consists of getting Roland together with the woman he loves, Dulcinea. You will have to talk to Dulcinea and then find and bring her a Moon Blossom flower that is a reminder of the couple’s first meeting. Next, you will have to get rid of a kill squad sent to neutralize Roland (which later you’ll find out that the squad was meant to protect him) and meet up with the happy couple at a hotel .
Upon completing the mission you will unlock the achievement.
Unshackled

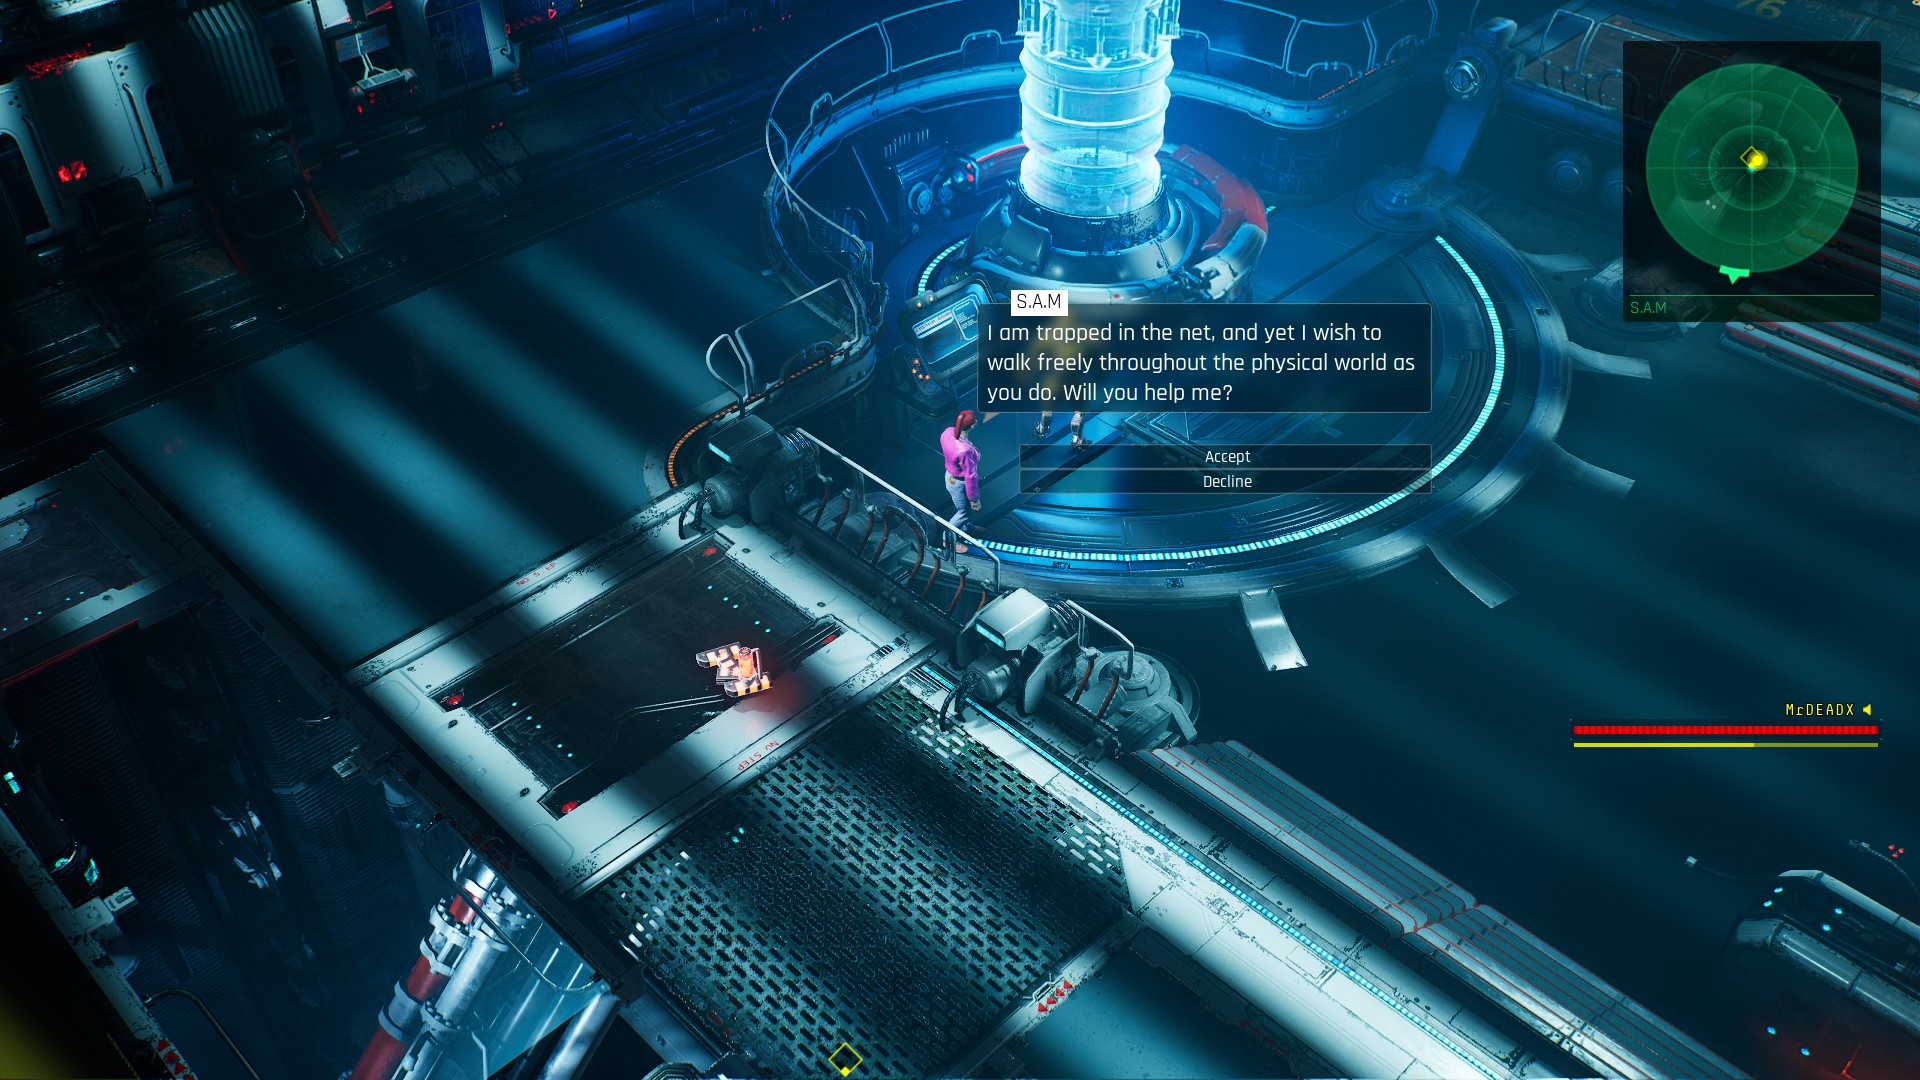
Unshackled
Complete Unshackled
“Unshackled” is one of the 3 side missions of the DLC. The recommended level to start this side mission is level 32 and it can be started at the Canary Mech Factory, by talking with an NPC named Security Automation Mastercomputer AI (S.A.M).
The mission consists of fulfilling the wishes of a sentient A.I. that wants to experiment human emotions. It will firstly task you to find a suitable Mech body for him. When the transfer goes wrong, the A.I. decides that it wishes to experiment death, therefore tasks you with creating a virus that would completely kill him. With the help of Phil (a NPC that can be found back in the base game, in the Outskirts location), you will get a virus that you will now have to deliver to S.A.M. and use it in order to kill him .
Upon completing the mission you will unlock the achievement.
Complete All Side Missions

Complete all Side Missions
Completed all Cyber Heist Side Missions
The Cyber Heist DLC has 3 side missions that will each reward you with an achievement upon completing them. After completing all 3 of them, you will get a 4th achievement for completing them all.
The 3 side missions are the following:
1. Making Concessions - recommended level: 32; starting point at the Club Blush Response
2. Love Kills - recommended level: 32; starting point at the Club Blush Response
3. Unshackled - recommended level: 32; starting point at the Canary Mech Factory
Completed All Missions

Completed All Missions
Complete all Cyber Heist Missions
This achievement will be unlocked upon completing all 2 main missions and all 3 side missions of the Cyber Heist DLC.
The 2 main missions are the following:
1. Find & Replace - recommended level: 28; starting point in Cluster 13 (base game location)
2. Critical Resource - recommended level: 31; starting point in the Harbour (the mission starts automatically after the previous missions is completed)
The 3 side missions are the following:
1. Making Concessions - recommended level: 32; starting point at the Club Blush Response
2. Love Kills - recommended level: 32; starting point at the Club Blush Response
3. Unshackled - recommended level: 32; starting point at the Canary Mech Factory
Conclusion
If you've found this guide helpful, please rate us and add the guide to favorites.
And if you really like our guide you can leave us an award, it would be much appreciated!
If you have further questions regarding an achievement, please leave us a comment!
Source: https://steamcommunity.com/sharedfiles/filedetails/?id=2859602664
More The Ascent guilds
- All Guilds
- Ascent
- "" / Fix for "Aficionado" achievement
- How To: Obtain Forbidden Weapons(Bitsplit, RPEG-33, Persuader)
- Maps for The Ascent
- Setting up PlayStation Input Icons
- THE ASCENT NOT RESPONDING/ THE ASCENT
- The Ascent Guide 208
- Game save file 30lvl (DLC not started)
- (Japanese strategy site)
- VIP no more | Achievement Guide