Intro
This guide attemps to instruct you on how to design your own race ships, and replace your characters current ship.
First things first, you will need a good .txt editor. I use Notepdd++. It has been recommended by some Chuckfish devs too.
You will also need a decent image editor, that can handle transparency and can export the images into .png format. I use GIMP, it's free, powerful and did I mention free?
You may want to start off by simple editing an already exsisting ship, as it has the general dimensions and works as a decent base for starting your first ship design/redesign.
All the ship files are found here:
C:\Program Files (x86)\Steam\steamapps\common\Starbound\assets\ships
(The location may vary, based on your Steam installed location)
This is where all the different race's ships are located. Go ahead and pick your race and you should find the shipship.png
We will start with the human ship for ease.
Editing The Background.
The shipship.png file is the background of your ship. It doesn't have any physical manifestation beyound being the ship's background in-game.
This can be designed any which way you desire with no real dire conquences. You could even just do a paint job on your ship and change it's colour. Or even add decals.
All colour values in shipship.png are in RGBA values (0,0,0,255) The "A" is alpha or transparancy. 255 means no alpha (fully visible) where as 0 would be completely invisable.
Transparancy is carried over ingame, so where it exists in this .png it will be in-game, even half transparancy. Which should be good for things like glass.
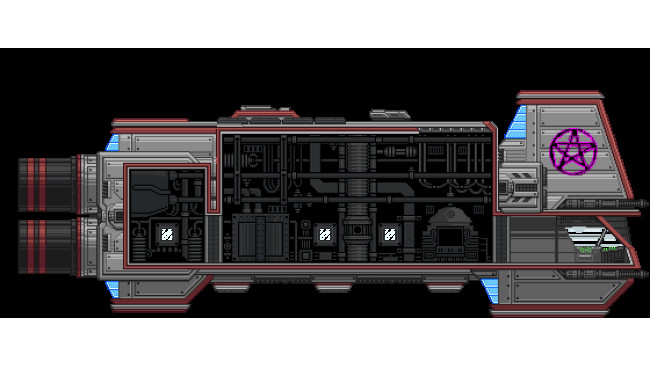
The background of my modded ship.
Physical Dimensions
 Invisible Control Colours:
The next file you need to edit is: dropshipblocks.png
(This is the image that tells the game what blocks to place and where.)
The last file is: dropship.structure
(This file defines what the blocks are and what their corresponding colour is, for use in the dropshipblocks.png image.)
Editing the dropship.structure will allow you with further effort to place different types of blocks or even objects on your ship outside of the default ones.
All colour values in dropshipblocks.png are in RGBA values (0,0,0,255) The "A" is alpha or transparancy. This value would normal permit transparancy but has no effect other than providing more values for colour deffinitions in dropship.structure. No need to change it's value beyond 255.
The dropshipblocks.png
This file is at a 1:8 ratio to shipship.png
Meaning 1 pixel in dropshipblocks.png = 8 pixels in shipship.png.
(Thanks to various sources for that, you know who you are.)
This is the lines that define what image file the ship uses.
"backgroundOverlays" : [] } ],
"Image" : "SHIP.png", - The image file that is the background of your ship in-game
"position" : [X,Y] - The starting position of the SHIP.png. Can be used to ship your ship's background about if it's not quite exact.
There should be a few more of these lines, each one defines the colour in RGBA value and it's function. The first three are invisible blocks, which can allow you to control the physical confines of your ship.
White (Free-for-all):
"blockKey" : [], "foregroundBlock" : false, "backgroundBlock" : false },]
(Please not the ending bracket "]" This isn't in the dropship.structure code, it's to prevent messing up the formating of this guide.)
This pure white colour is empty space in-game wise, that doesn't have objects or any blocks, foreground or background. But still allows you to place objects and allows movement.
Blue (No objects):
{ "value" : [0, 0, 255, 255], "foregroundBlock" : false, "backgroundBlock" : true },
This pure blue colour only allows background, and will not allow you to place objects within it's area.
Red (Absolutly nothing):
{ "value" : [255, 0, 0, 255], "foregroundBlock" : true, "backgroundBlock" : true }, This pure red colour is what prevents everything, even the player from moving. And will take up the most of the image. Essentially it is used to create the boundaries of your ship.
Placing objects:
Yellow (Let there be light(s)):
{ "value" : [255, 255, 0, 255], "foregroundBlock" : false, "backgroundBlock" : true, "backgroundMat" : "apexshipdetails", "object" : "apexshiplight" },
As you can see, this yellow colour defines where the ship's lights go.
"Object" : "OBJECTNAME" - Controls if there's an object at the placed pixel, remember that it's the bottom right of the object in-game.
Adding Your Custom Pixel Colour.
If you want to add both a foreground and a background block and don't want to have to place them manually add the following:
{ "value" : [xxx, xxx, xxx, 255], "foregroundBlock" : true, "backgroundBlock" : true, "foregroundMat" : "MATERIAL", "backgroundMat" : "MATERIAL", },
Value - Want ever value you want as long as it's not already being used.
Foregroundblock - Set this true.
Backgroundblock - Set this true.
ForegroundMat - the name of the material (Has to be a .material file, but don't include the file extension.
BackgroundMat - same as foreground, but will be in the background.
Adding an object like the 3d printed uses the following.
{ "value" : [xxx, xxx, xxx, 255], "foregroundBlock" : false, "backgroundBlock" : true, "object" : "OBJECT" },
To make the blocks or objects un-removable from in-game with either of the tools add the following.
"objectParameters" : { "unbreakable" : true }
Use the dropship.structure file to guide you to the already used colours in dropshipblocks.png. You should note the each object block is only 1 pixel, and is the bottom right placement for objects.
Make sure at the end of the colour definitions you end the coding with " ], " (without quotation marks)
This is the file that correspond to all the colour deffinitions.
"blockImage" : "dropshipblocks.png"
Make sure the whole file is wrapped with both { } Or bad things may happen.
Adding And Installing.
Adding Files To The Game:First things first, make sure that you make back ups of any and all files your change or alter. I won't be held responcible for damages to your game or computer. I have successfully altered my human ship to increase in size.
Make sure the game is not running or this will not work!
!Make sure to make back ups of all your files you intend to change. I won't be held responcible for any damages to the game or your computer!
!!! These steps will change the contents of your ship, any and all items you have stored as both furniture, blocks and items in stored containers with all be lost. But this step is required. Simply take every thing out prior to changing your ship and store it planetside. !!!
**************************************************************************************************************************
Installing:
Steam Install:
Replacing ship files:
1) Goto C:\Program Files (x86)\Steam\steamapps\common\Starbound\assets\ships\RACE (location may vary)
2) Make backups or move into a seperate folder the following files: dropshipblocks.png and shipship.png
3) Alter the files to your liking.
(Check the file dropship.structure for each colour and it's function. Use an image of the ship and correlate them according to the colours found in the file dropshipblocks.png)
4) Save the files.
The following step is for already created characters!
!!! The next step will change the contents of your ship, any and all items you have stored as both furniture, blocks and items in stored containers with all be lost. Simply take every thing out prior to changing your ship and store it planetside. !!!
It is not required for new characters!
Replacing the block data:
After editing the files: dropshipblocks.png and shipship.png follow these steps:
1) Goto C:\Program Files (x86)\Steam\steamapps\common\Starbound\player (location may vary)
2)Take note of your main character's ID. This will be the file xxxxxxxxxxxxxxxxxxxxxxxxxxxxxxxx.player (The "x" will be random numbers and letters)
3) Load the game and create a new character. Based on the race of the ship you edited.
4) Exit the game.
5) Goto back to C:\Program Files (x86)\Steam\steamapps\common\Starbound\player
6) Change the new character's yyyyyyyyyyyyyyyyyyyyyyyyyyyyyyyy.ship with your characters ID.
eg. yyyyyyyyyyyyyyyyyyyyyyyyyyyyyyyy.ship change to xxxxxxxxxxxxxxxxxxxxxxxxxxxxxxxx.ship.
7) Start the game and you should have you new ship.
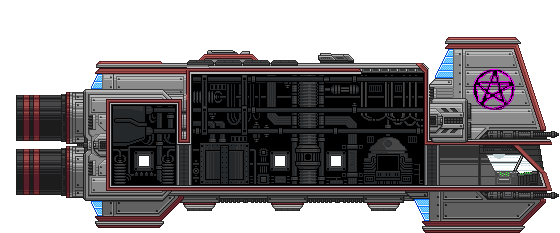
My ship as it currently stands in game. So it does work :P
Uninstalling & Legal.
Un-installing:
Replace the files you had changed with the ones you SHOULD have back upped. Assuming you followed instructions correctly.
I'm prediciting it won't be as simple as that, so use a new character instead. Or repeat the installation with the original files.
Legal.
Any and all images and files used are property of Chucklefish, and are modded for non-commercial useage.
Source: https://steamcommunity.com/sharedfiles/filedetails/?id=201033665
More Starbound guilds
- All Guilds
- Frackin Universe
- How to blow out your eardrums
- Starbound Baarmlar in Trke Rehber
- 100% Collection / Achievement Guide with Console Commands
- Starbound - The Ancient Tablet Guide
- Starbound - How to Defeat the Erchius Horror
- Starbound - Easily Beat The Dantalion
- Starbound - Server Connection Issues Guide
- Starbound - How to Expand Your Crew