
Prelude
Due to GSC Game World charity sale, a lot of new players joined the Stalkers’ community. But due to the war many experienced players went away, as they were mostly Russians. I support Ukraine and wish only victory for them. I feel shame and sorry of being citizen of aggressive country
This guide is for those, who started to play Stalker Shadow of Chernobyl, and loved the atmosphere, but failed to play story, because of different reasons – like unusual interface, bad weapons, lack of money, rounds, weapons, or because of mutants, radiation and anomalies.
I hope, that you’ve already read the manual. And that you know, who is Sidorovitch (he is local trader and task-giver). And that he told you, how to manage with PDA. I must only emphasize the “Dairy” tabs – especially the “message history”, where you can read all dialogs, you did not listen and messages you didn’t read.
START And The First Tutorial Task
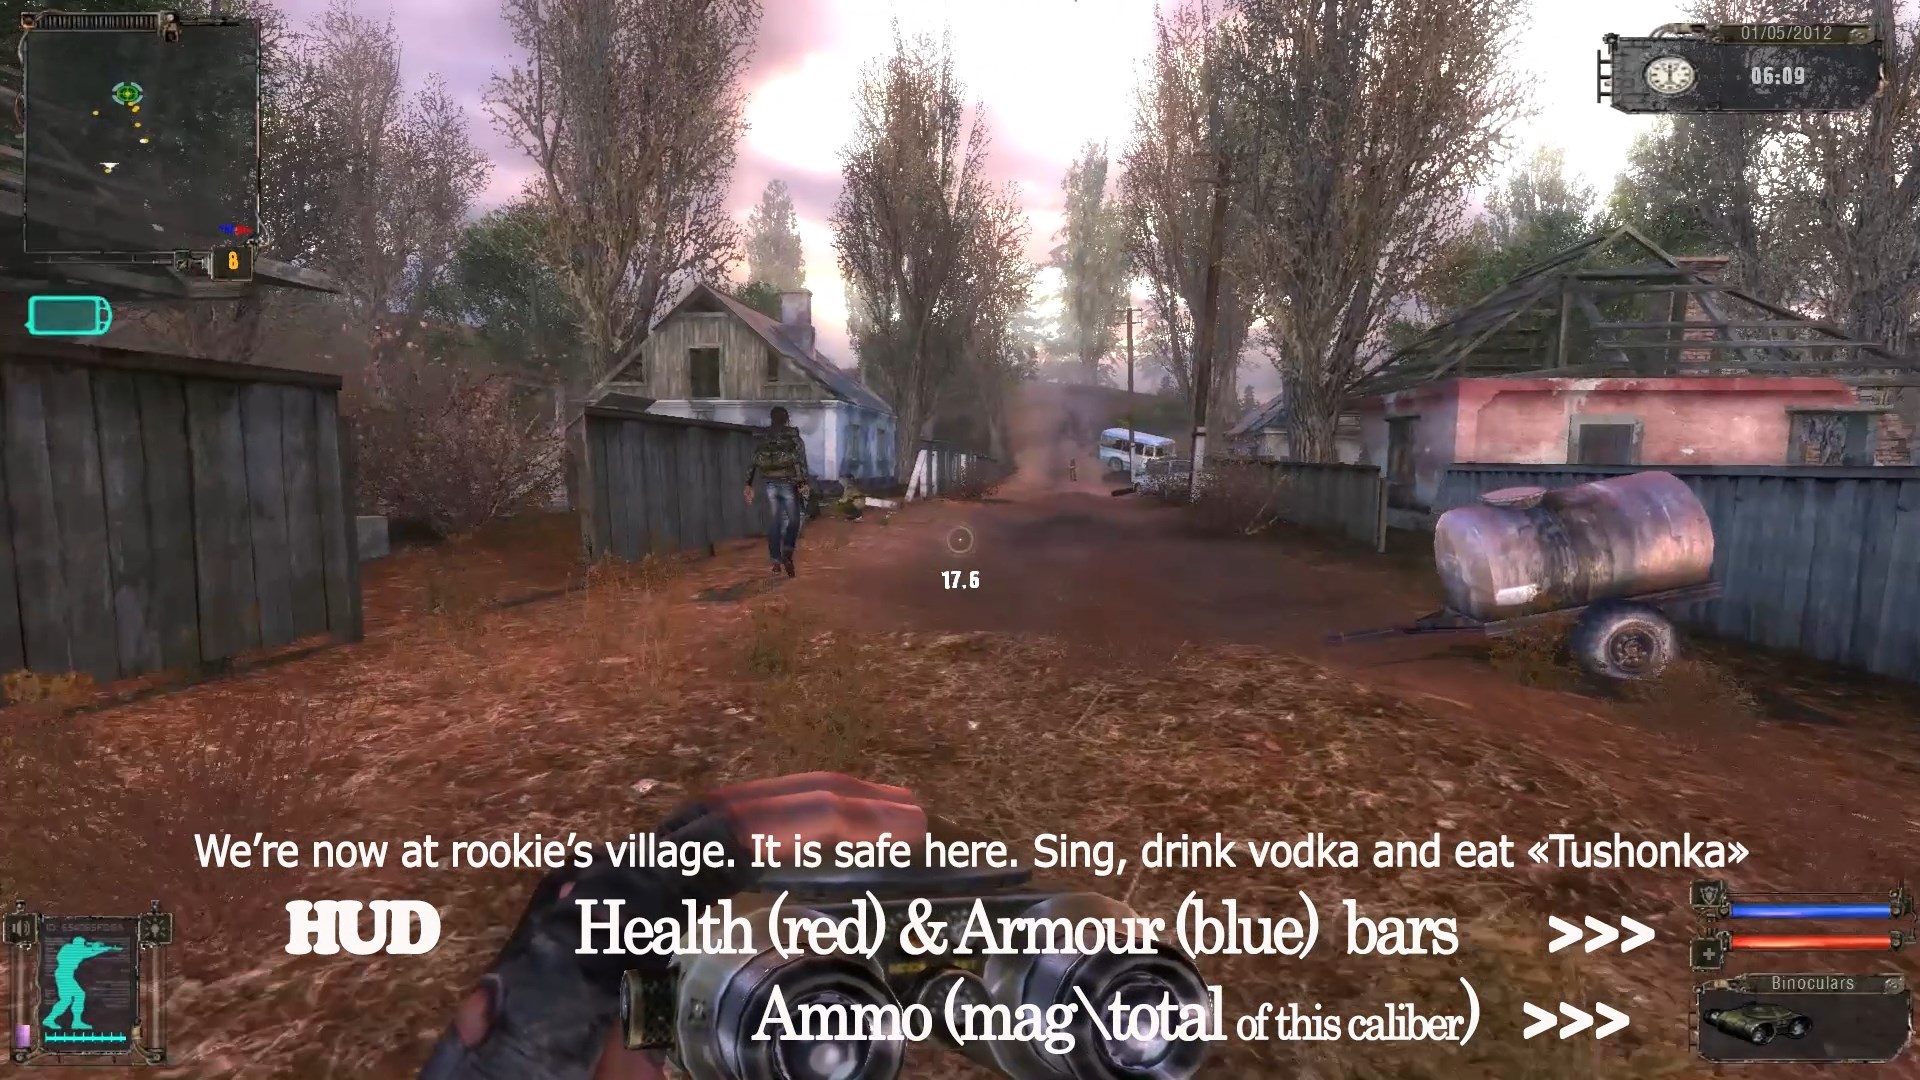
So, we start with getting out from Sidorovitch’s bunker and visiting the Rookie’s village. It is safe here – enjoy guitar and camp-fire jokes. But, first of all, I must admit, that in spite of this game pretend to be open-world – it is not. Every location has a main road and some sites aside it. You can do any stupid things in this game, but it would be wise to follow the storyline for your first playthrough. That mean, that you have to listen and read attentively everything that NPCs tell you and follow their instructions.
The first task is to speak to Wolf (if you forget your main task – press TAB button) – so, do that. It is essential to speak to him and to agree to save Nimble. After that, you will be gifted with some weapons, including knife, that could not be obtained by any other way.
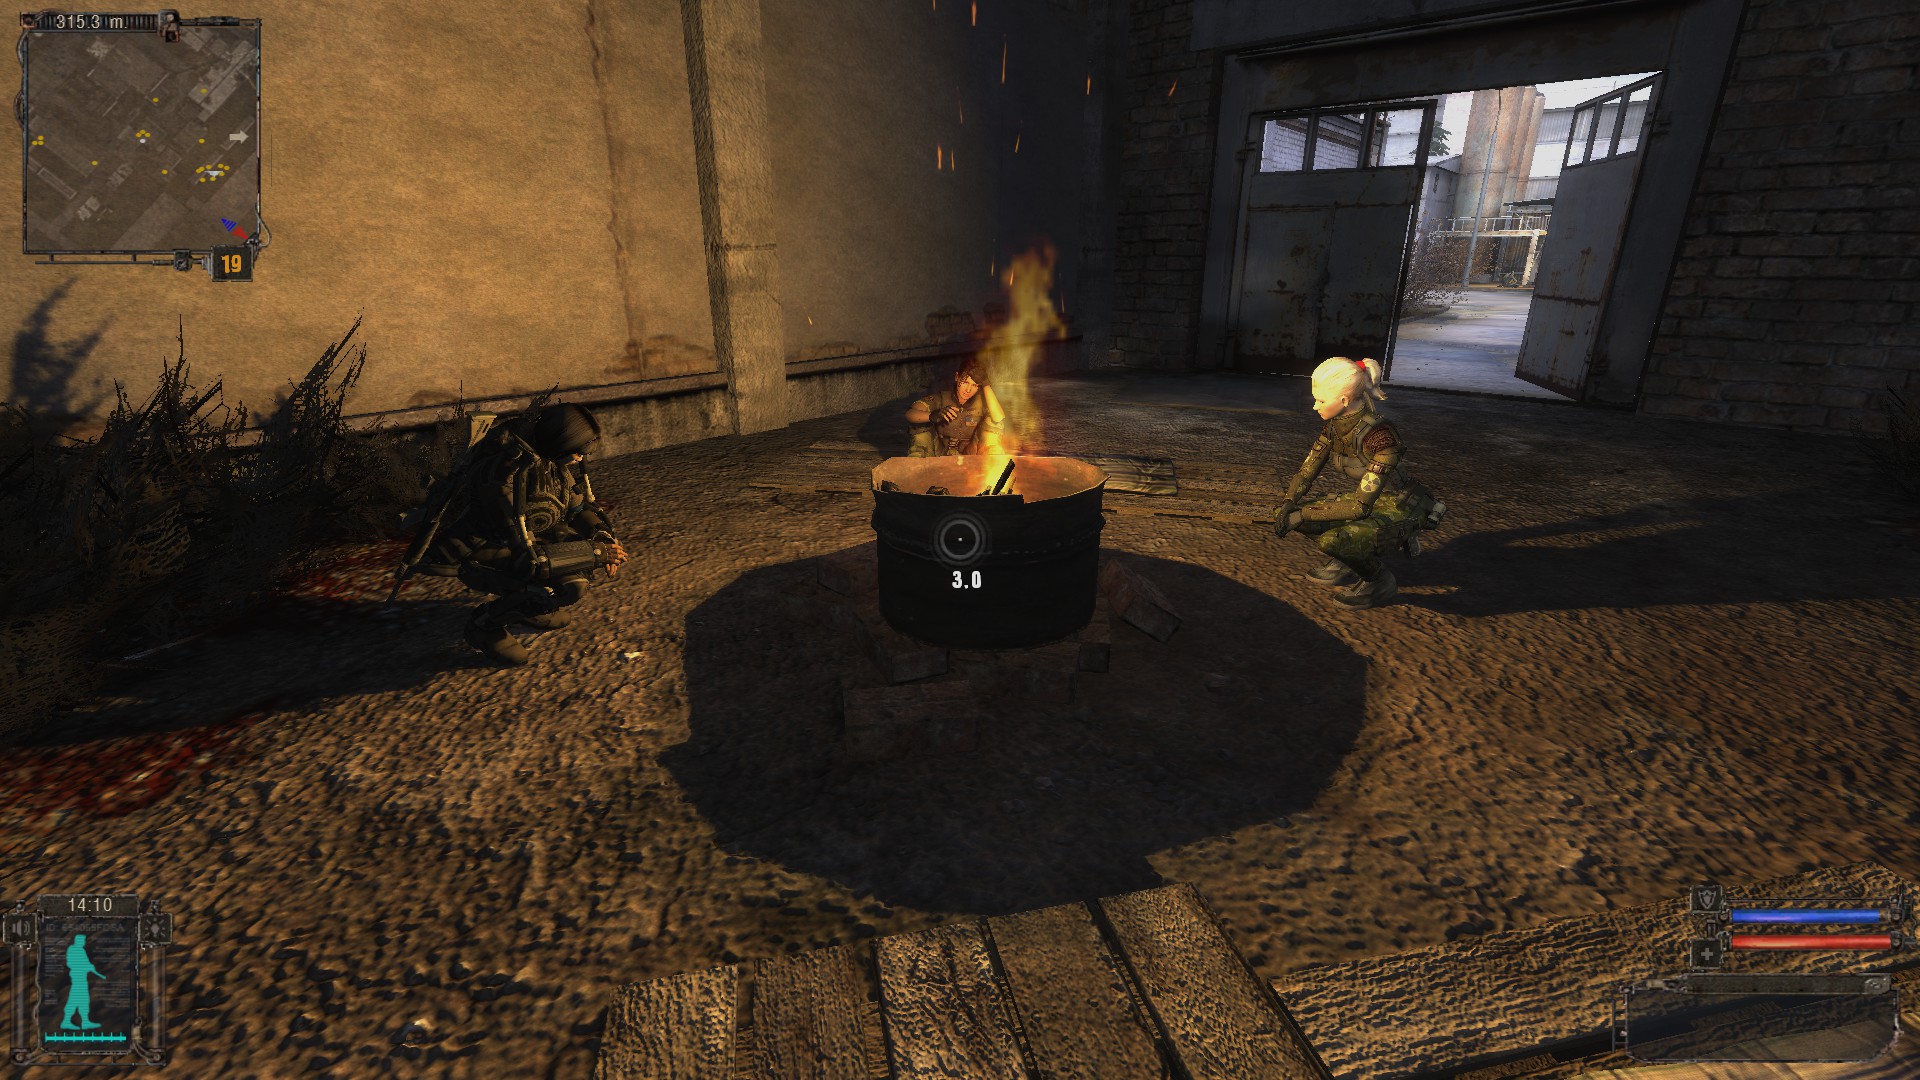
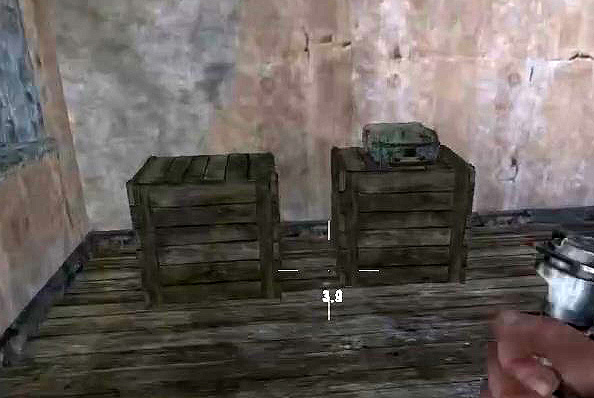
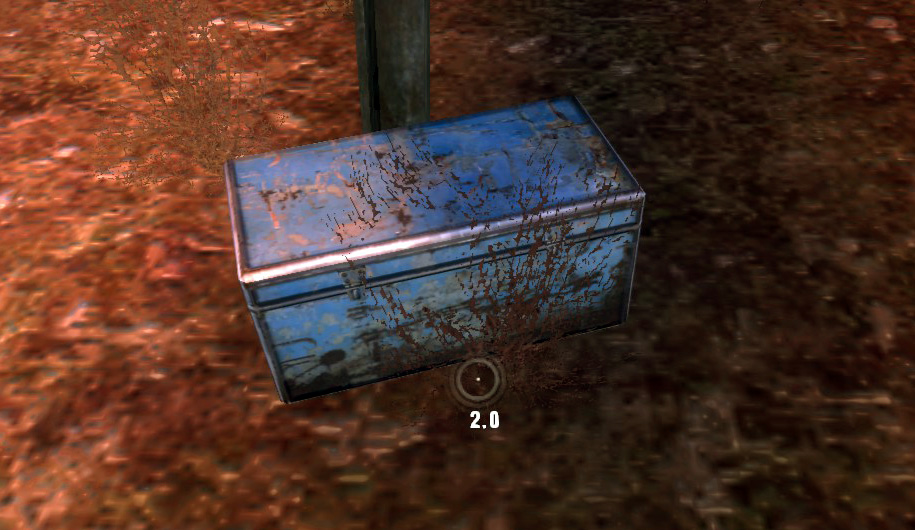
KNIFEBesides the surprisingly high damage during close combat, the knife is the best tool for crashing big wooden crates and small tin blue boxes – that may contain some useful goods. There are standard (fire button) and alternative (zoom button) knife strikes, and the latter is the best for treasure hunting.You can surely run to fight as you are - equipped with thin windbreaker and Makarov pistol (the worst gun in the game), without any meal and medicine. But it is possible to find some goods in the village, If you explore thoroughly all houses, including basements and attics (they are all accessable) and crash all above mentioned containers.
You may find many guides like “How to obtain at the start … merc suit/400 makarov cartridges/ 4 canned meat/ bandages/medkit” – read or watch them to have a good start and enjoy the game. Besides, it could be a good moving/jumping/crouch training.
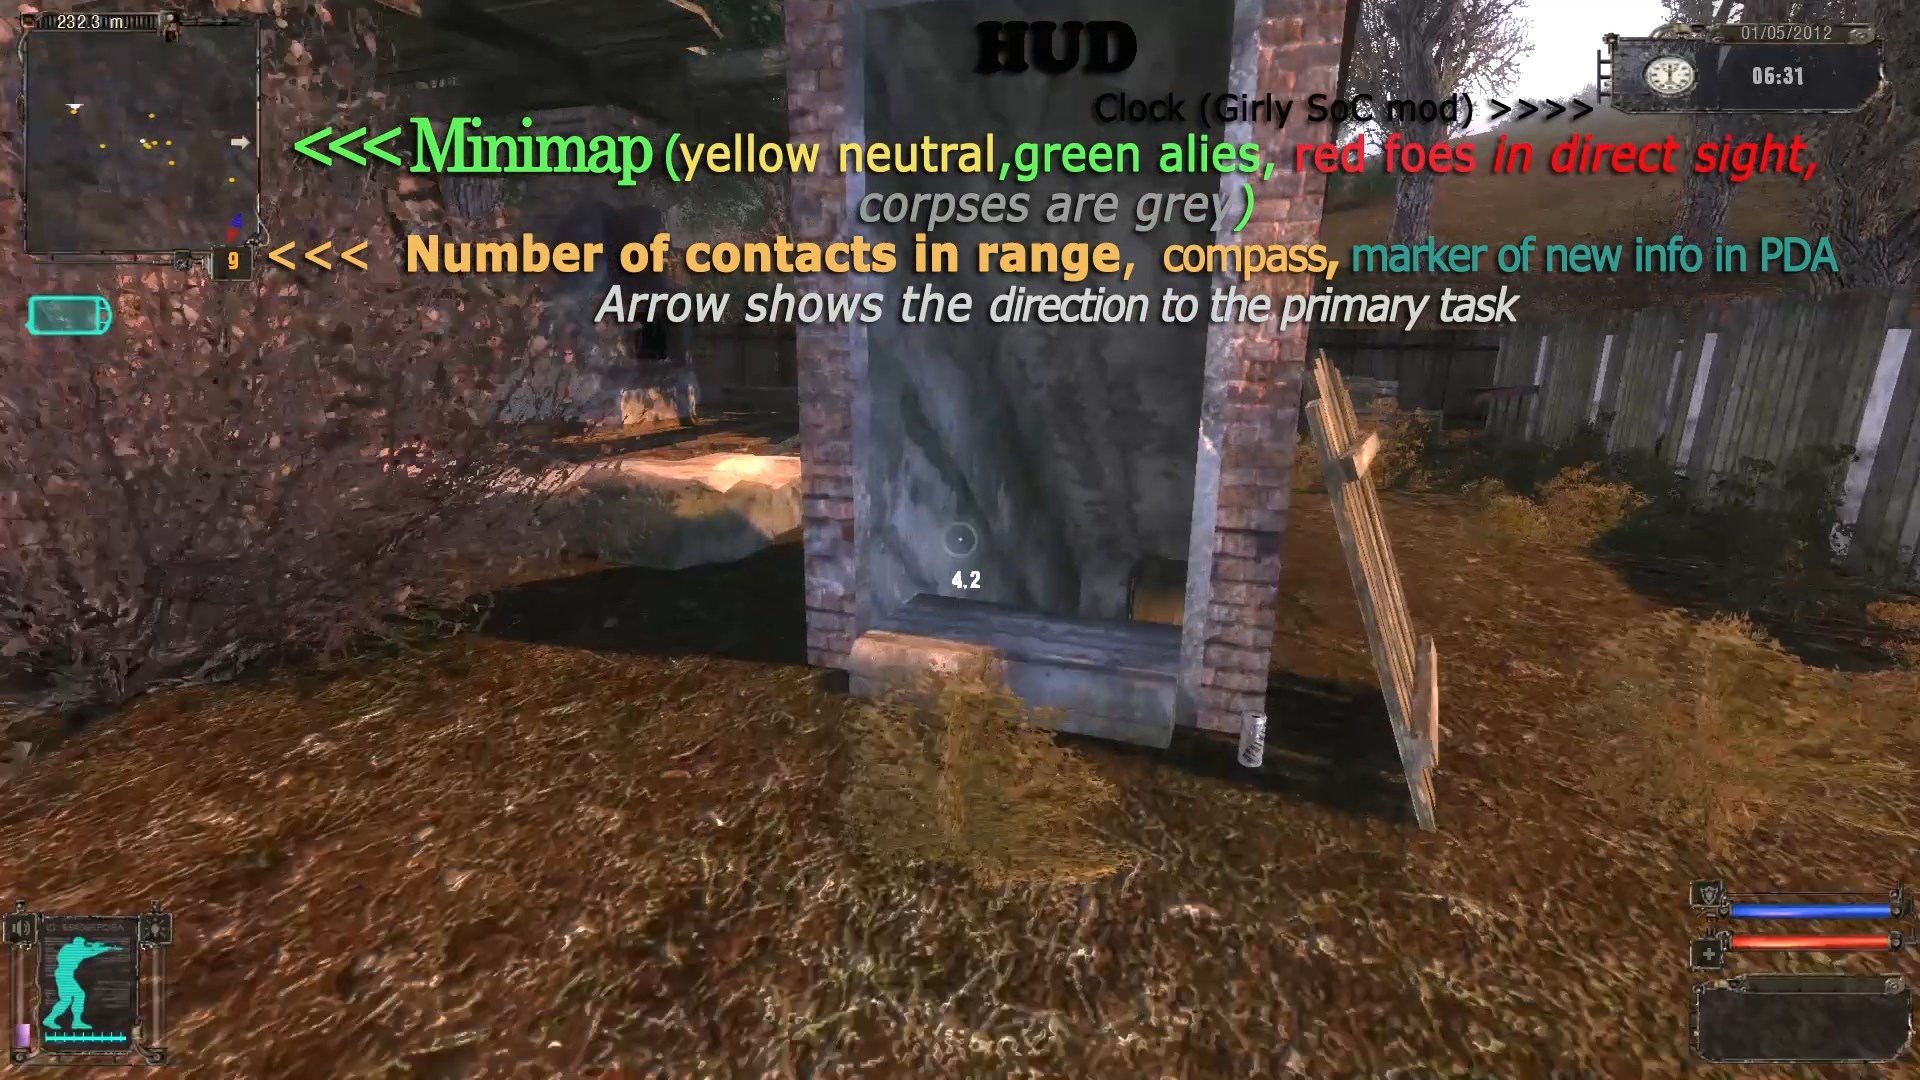
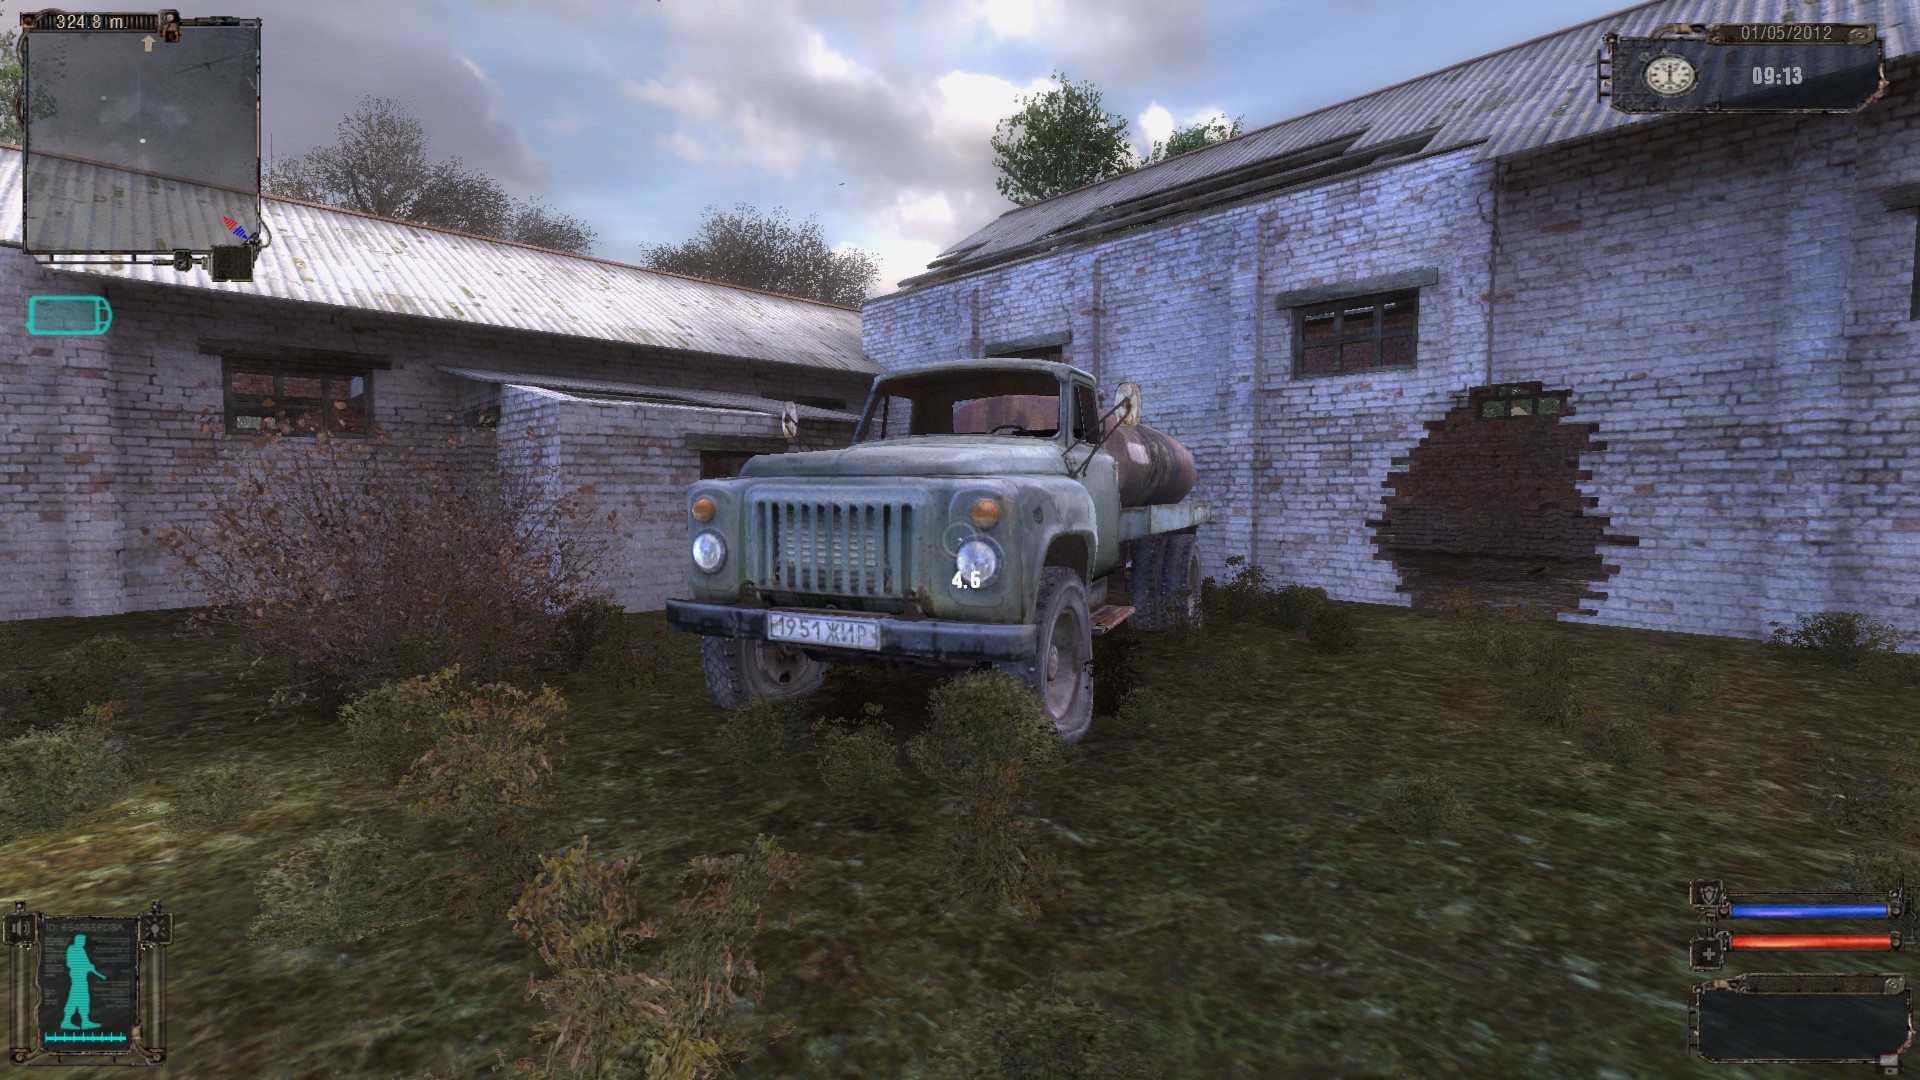
HUDConsidering, that you’ve read the manual, just look at pictures to refresh.
The only important information is that the number of ammo displayed – is the quantity of all the ammo OF THIS CALIBER you have (like FMJ and AP types)
There are some icons on the right edge of HUD, indicating some damages (bleeding, radiation, psi-strike) and critical conditions (weapons and armor) colorized from green to red - invisible now.
Back to game. If you heard, how Wolf instructed his rangers by walky-talky, than you passed the first Cordon Tutorial stage “FOLLOW THE INSTRUCTIONS”
MAKE SAVE
Next task is VERY important: “MAKE SAVE”. Make your first full save on this location or quicksave if you hurry or ignore this task if you are sure, that Universe loves you (Zone is not of this universe, however).
Get out from the village and hit the road . Head north, and that will be your main direction ever (with some exclusions).
MEDKITS AND FOOD
Medkits restore health immediately in vanilla:
(all figures below mean quantity, equal to the part of full bar, which is “1”)
• Regular medkit (orange) gives +2/3 health, reduces 1/3 bleeding and removes 1/10 radiation
• Army medkit (blue) restores full health, full bleeding and -1/10 radiation
• Scientific medkit (yellow) restores full health, removes all radiation and -1/3 full bleeding
• Bandage stops bleeding and adds 1/10 health
• Antirad removes all radiation (+1)
Food restores health, too: Bread +5%, Kolbasa (sausage) +10%, Canned meat (Tourist’s delight) +15%. Satiety has a very weak influence on anything indeed
Energetic drink restores full stamina immediately
HELP WOUNDED
Next tutorial task is “HELP WOUNDED”. Easy - help wounded guy and talk to him. The soldiers in helicopter will discuss to kill you or not. They will not, just to save the ammo.
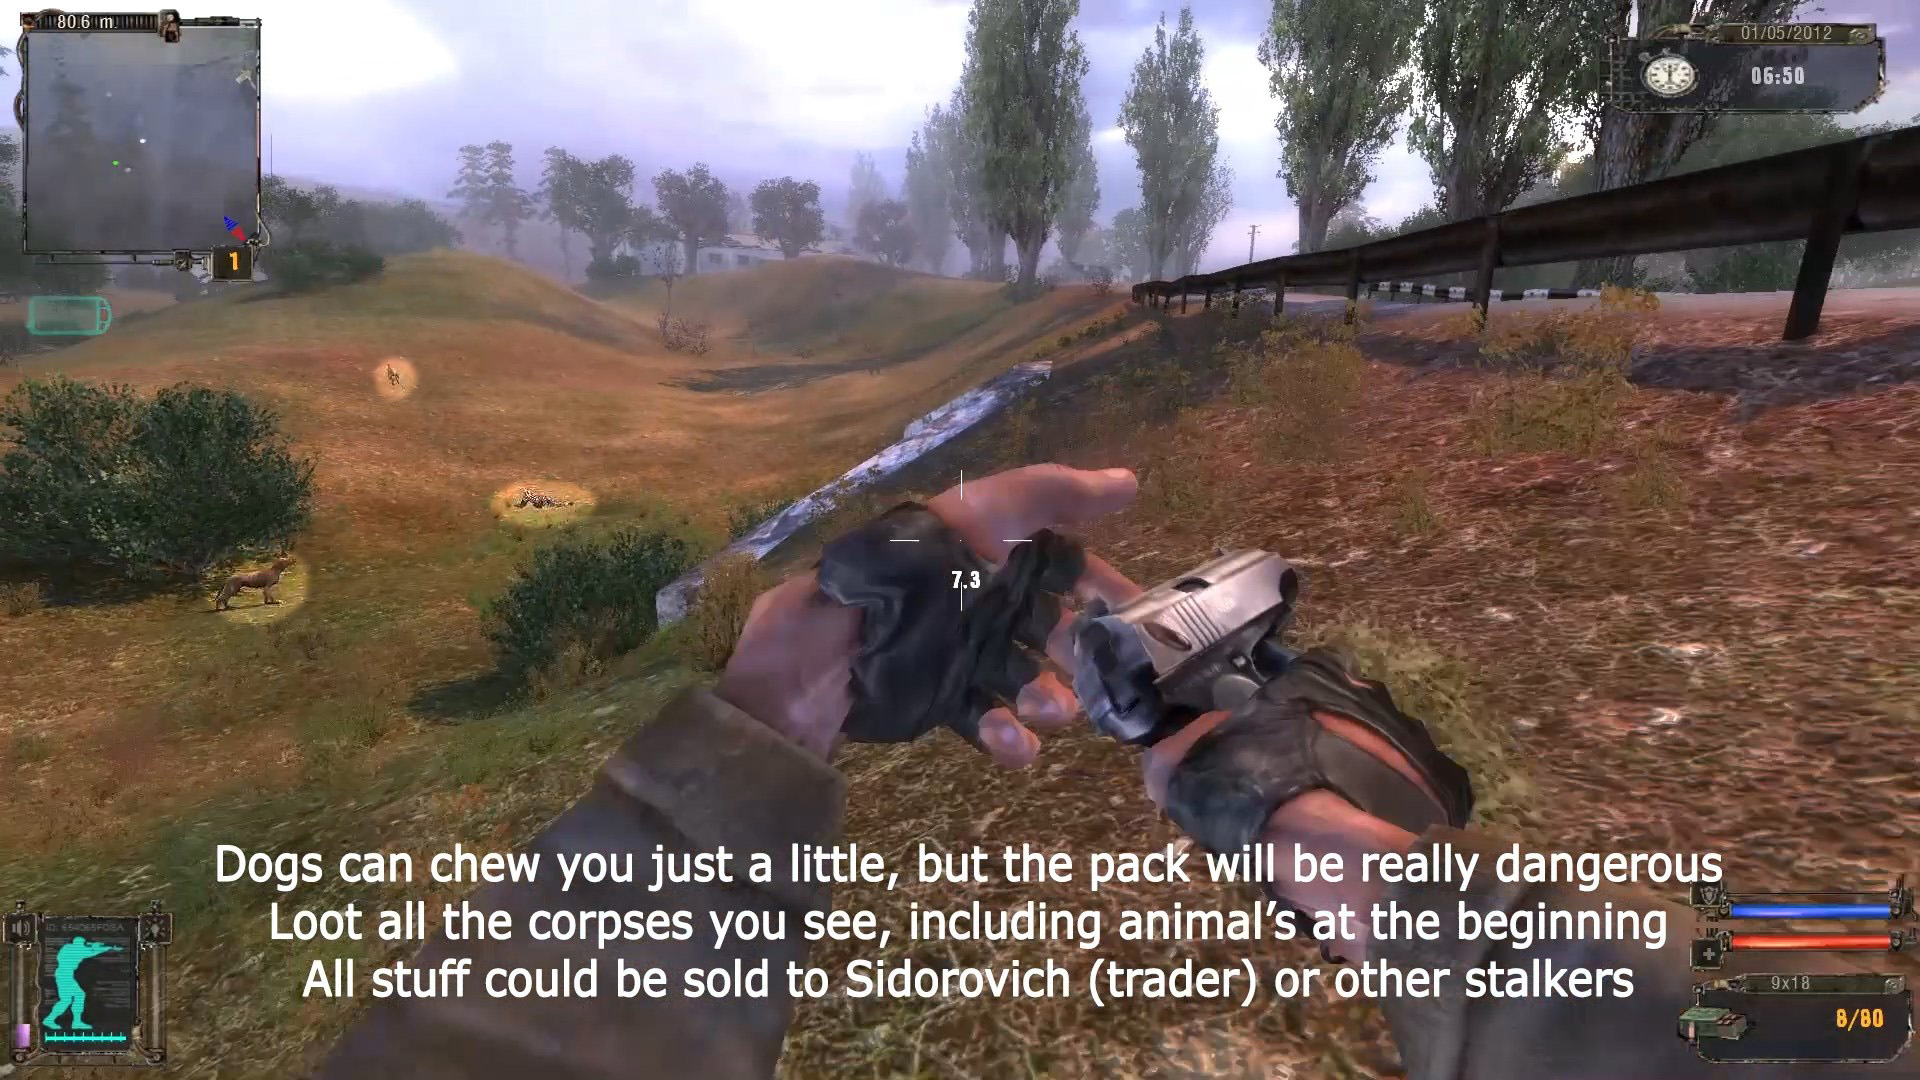
Explore the van-like house and find some goods. Next tutorial task: “kill the dogs and loot the corpse”. That will make you acquainted with Makarov pistol. And blind dogs. Both-three are bad, but not deadly.
INVENTORY And Scout Petrukha

Enter the tunnel and find some more goods.
INVENTORY
You can compare your new pistol with PM and find that it is a little more accurate.
Pay attention for the condition bars of the weapons and suits!
Beware! The blue bar is stamina (nor armor) and the red bar is mental health in inventory.
Back to game. Scout Petrukha is marked on your minimap – speak to him and assault ATP (Car Park) with rangers’ help or without it.
FIGHTING
This is fighting and tactics tutorial. You can train your skills and find your own tactic many times, if you made save before it. I am not a good fighter - so, I use tactic tricks, like climbing the roof, flanking, sneak distant attacks. The only advices:
aim to head,
use lower position (crouch+walk) for better accuracy,
aim and wait 1 second before the first shot (if possible),
loot corpses for ammo and medicine.
When obtain sawed-off, use it for short distances only.Use bandages when "blood drop" is yellow or red
After your glorious victory, speak to Nimble and loot all deads
Quick STALKER SoC Guide For Readers #1
This very unprofessional clip sums up the above contents
LOOTING & TRADE
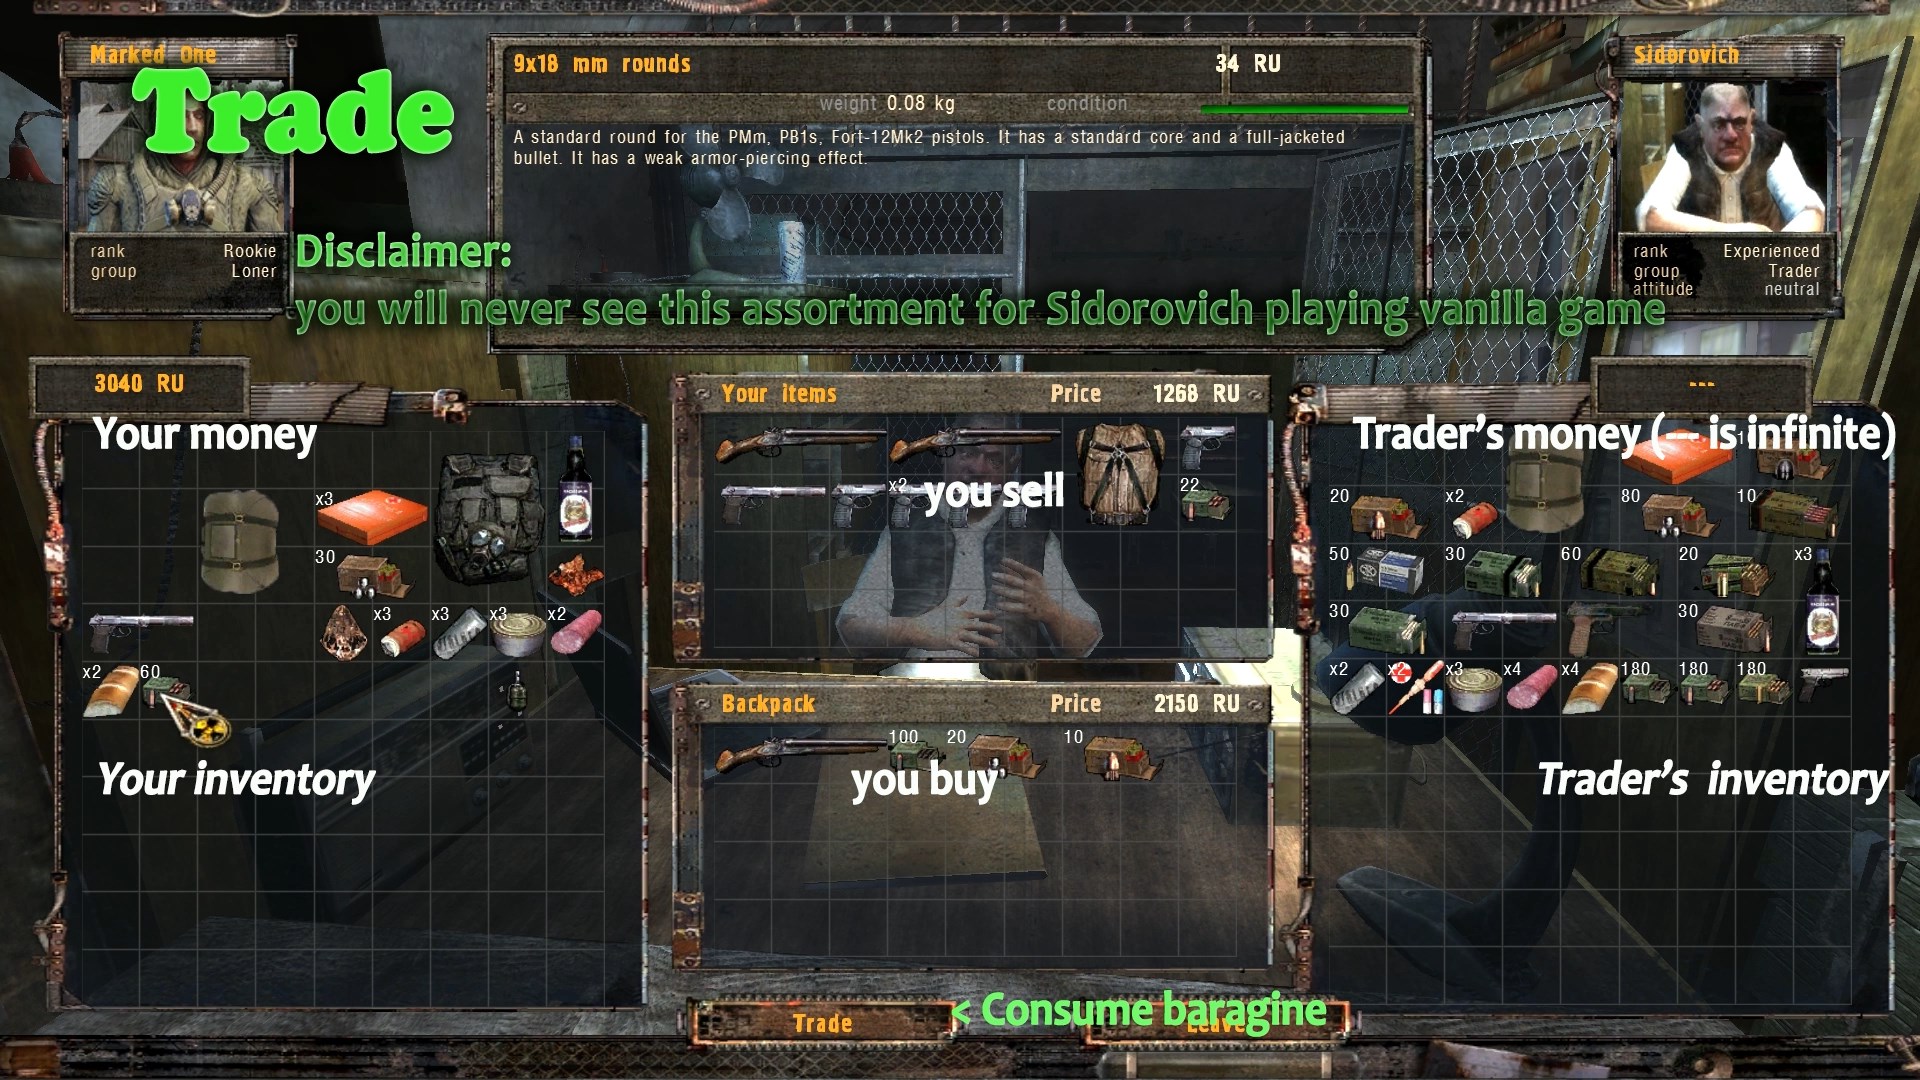
LOOTINGThat is an essential part of your life in the Zone. At first you’ll have to take everything from corpses (mutants including) and sell it to Sidorovich in order to have your starting capital. Further you should take only the items you really need, due to weight limits. The only valuable things to collect for selling are artifacts and suits, but the only traders at the start are Sidorovitch and Barmen. You may receive the info about hidden stashes while looting.
TRADENow return to the trader and sell all the loot. Don’t forget to speak to Wolf before that, get some reward, and take the task for boar lair. It may be useful to unload all weapons before that, using RMB menu in inventory.
Pay attention for the condition bar of these weapons and leave the best one for yourself.
Trade button is at the bottom of regular dialog. Drag or double click to sell and buy. Consume baragin pressing Trade button
Don’t sell artifacts, there may be a special task to deliver it!
TASKS
Most of tasks have 3 days to complete
You’ve already have the task from Wolf (purge boar lair), and there are several tasks from Sidor available now:
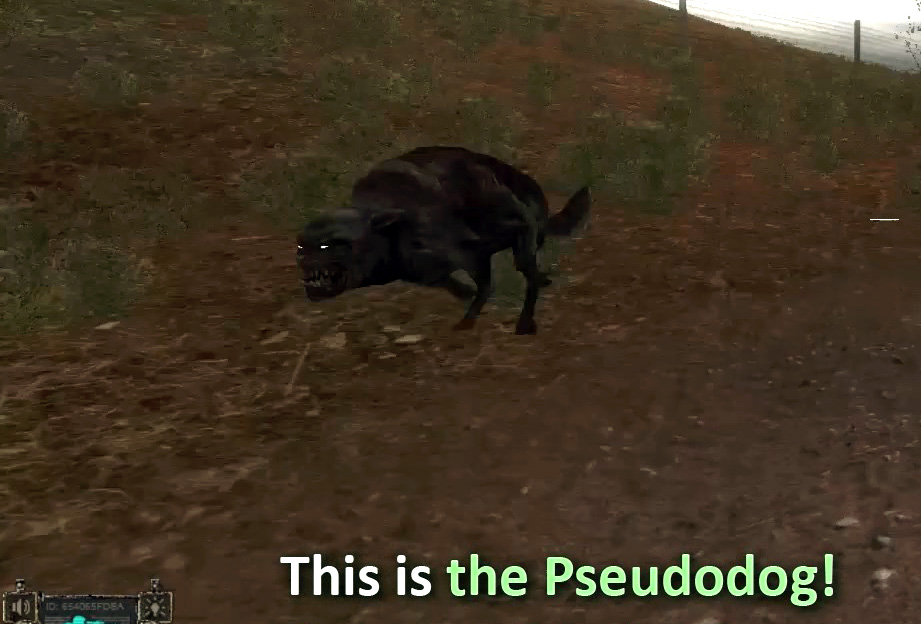
1. Tail of pseudodog (It is not the blind dog tail! Generally – just keep such a tasks in your mind and take it only after you obtain the required item)
2. Kill someone (killing tasks may involve you into unwanted fight with neutral NPCs and make many of them hostile, so don’t hurry to take them)
3. Purge the area (lair, pack, camp etc. – go to the “camp” marker and kill them all, but be ready to seek for some pack (gang) members, who ran away or hide)
4. Find artifact (As it was said for all find-and-bring tasks – better to take the task only after you obtain the required item)
Besides the missions from NPCs, you will be oftenly assigned to automated tasks, that will be seen on your screen and usually easy to complete, but you should understand, who was the task-giver to get your reward.
You may ignore all the side tasks, if you’re sure, that you can get enough money and equipment by yourself. I mean the tasks, that you see in “I need a job…” dialog branch
Take “The special mission” from Sidorovitch, as it is an essential part of storyline
Quick STALKER SoC Guide For Readers #2
Another unprofessional clip summing up the above contents
HIDDEN STASHES
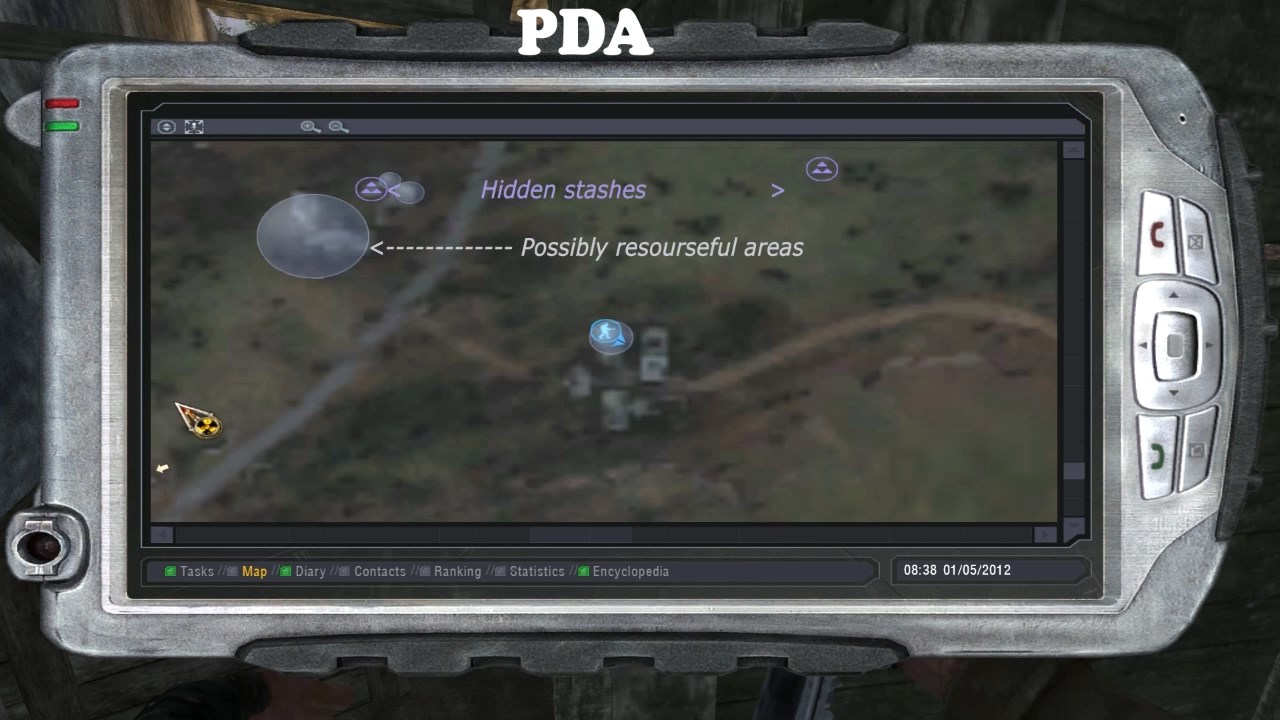


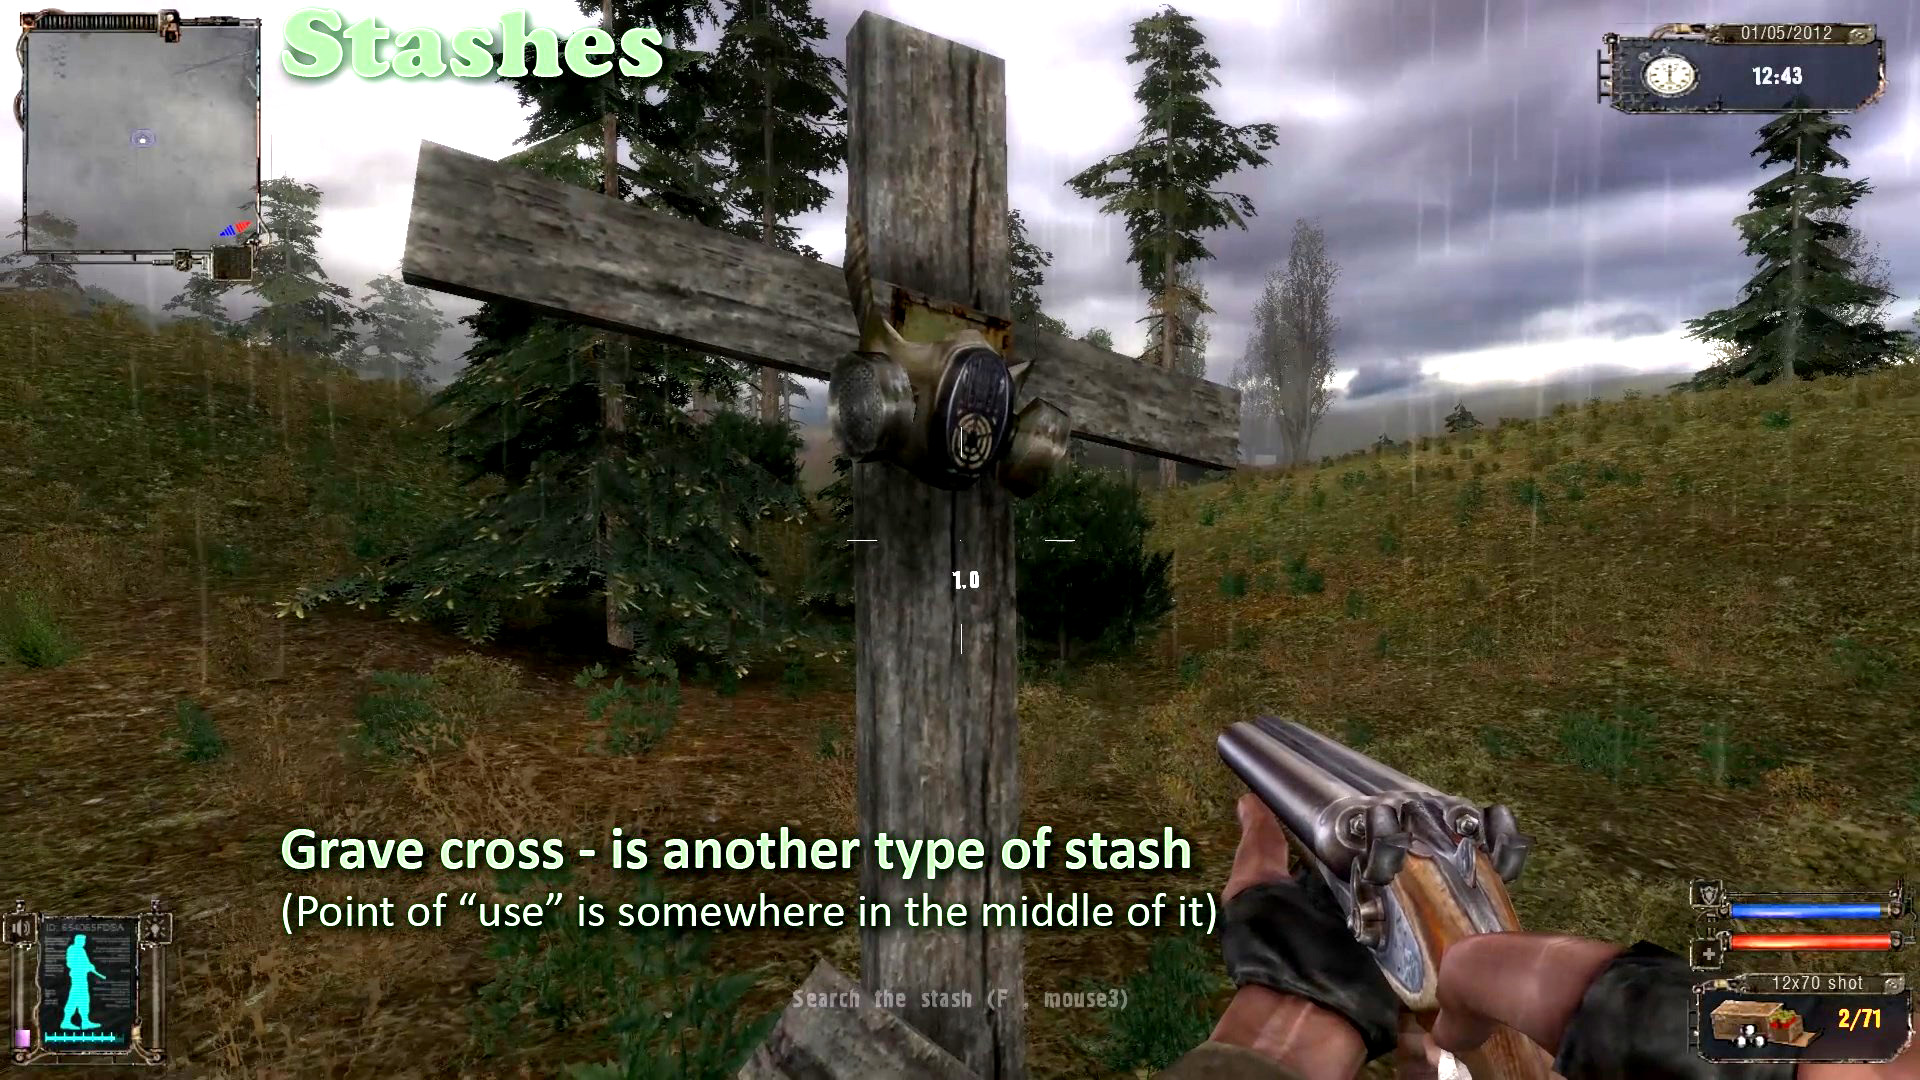
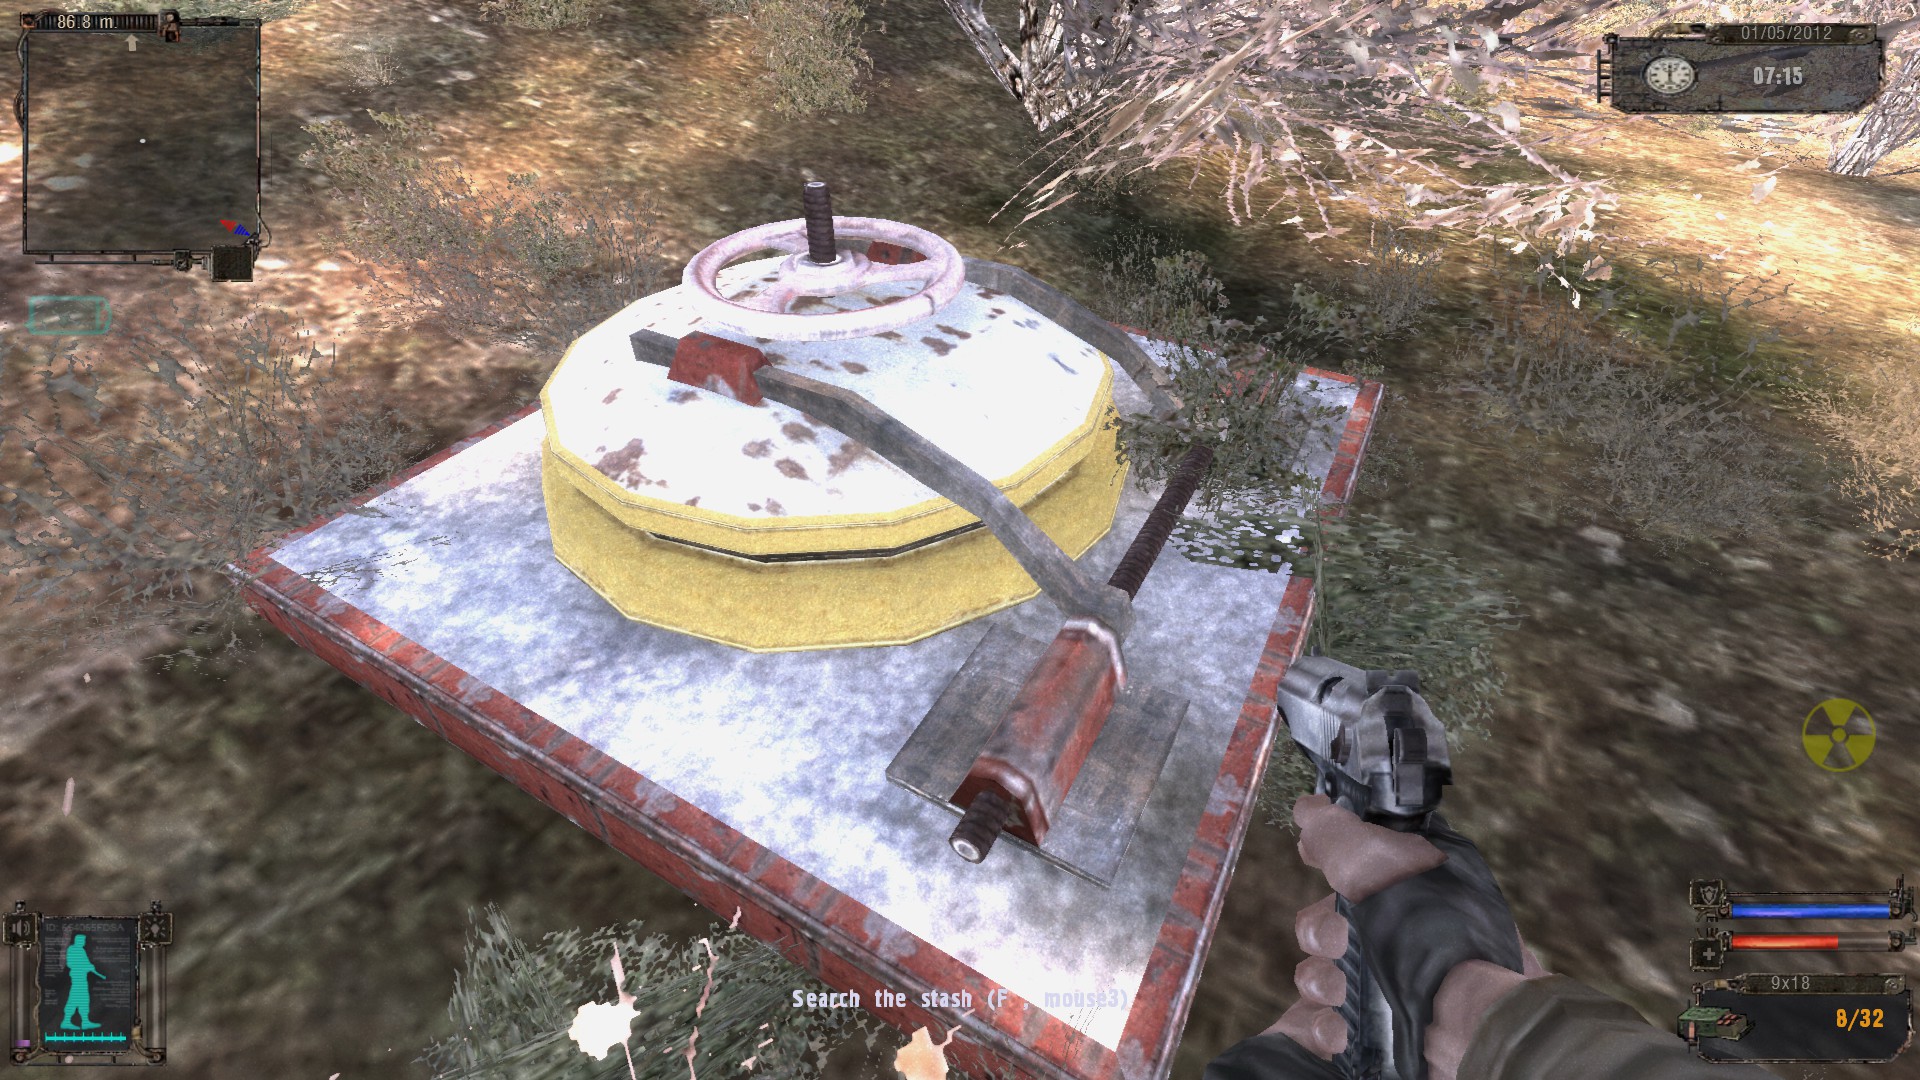
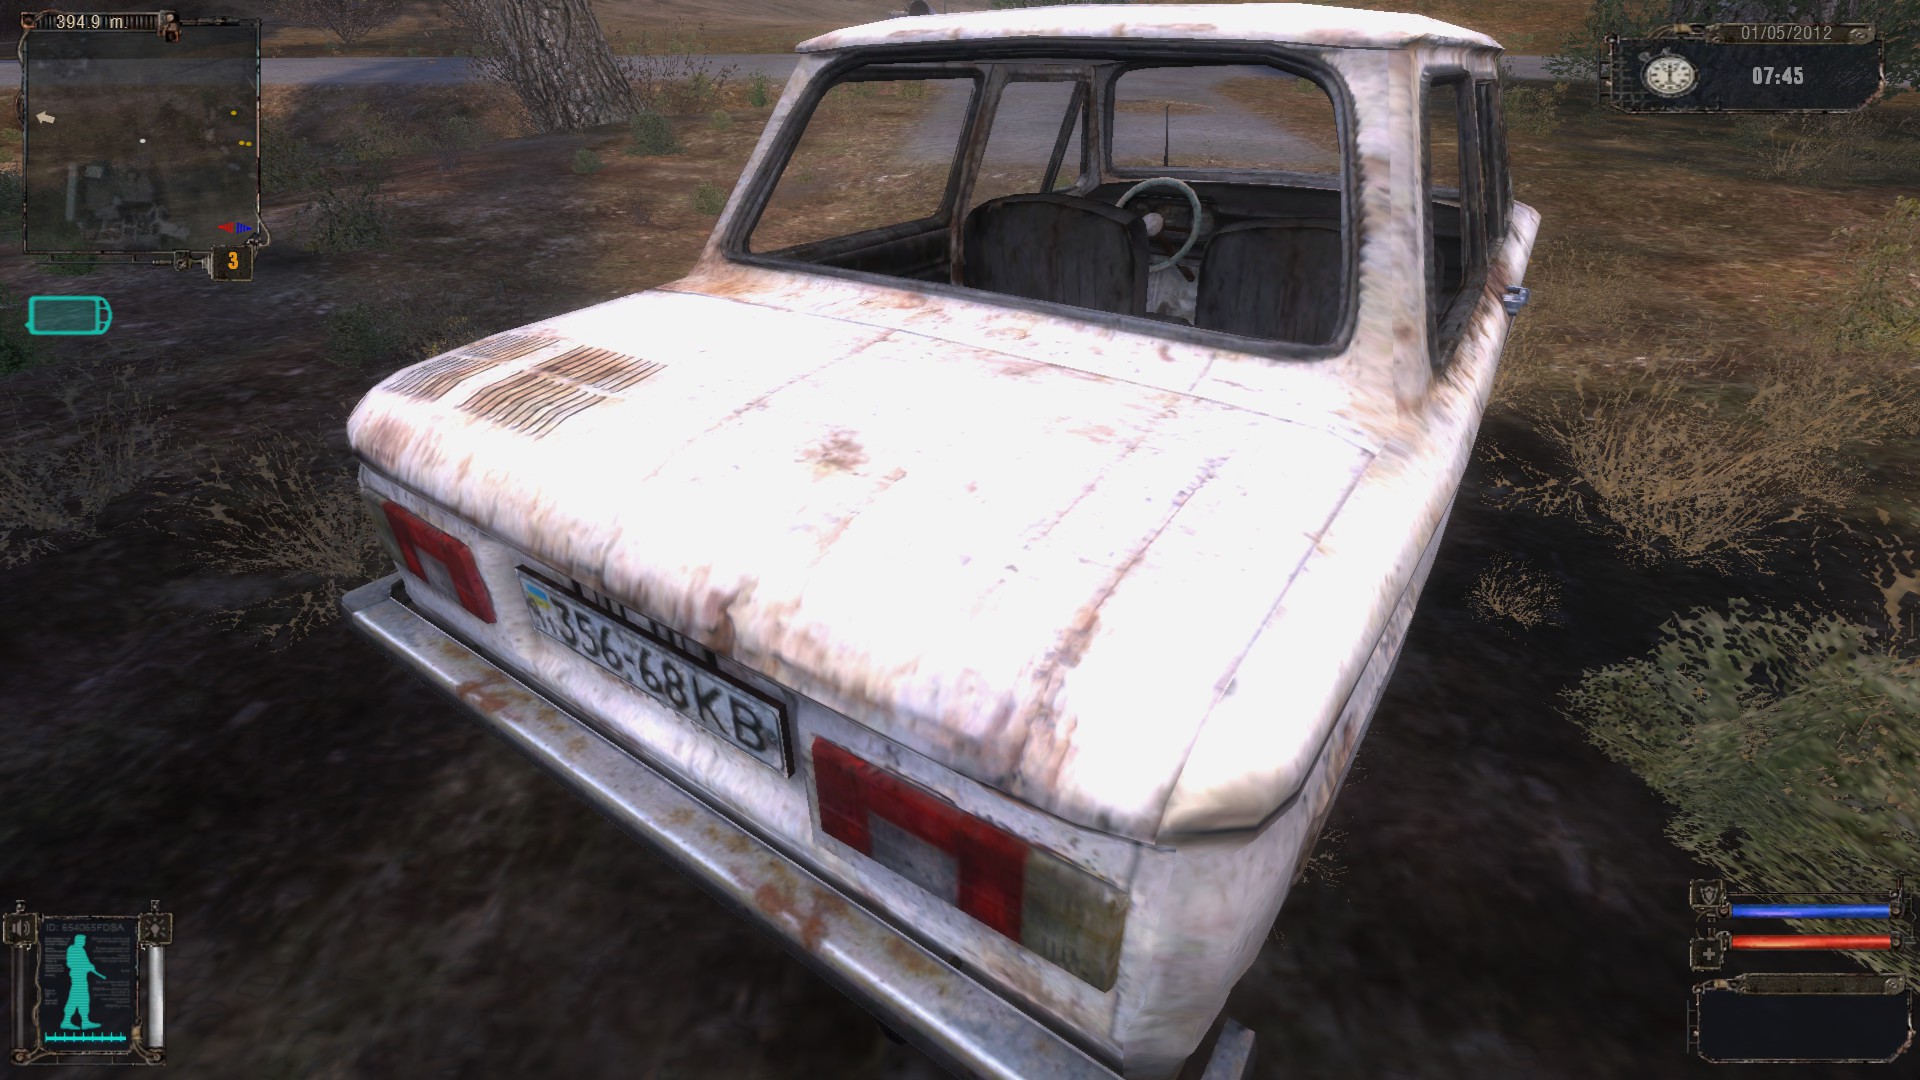
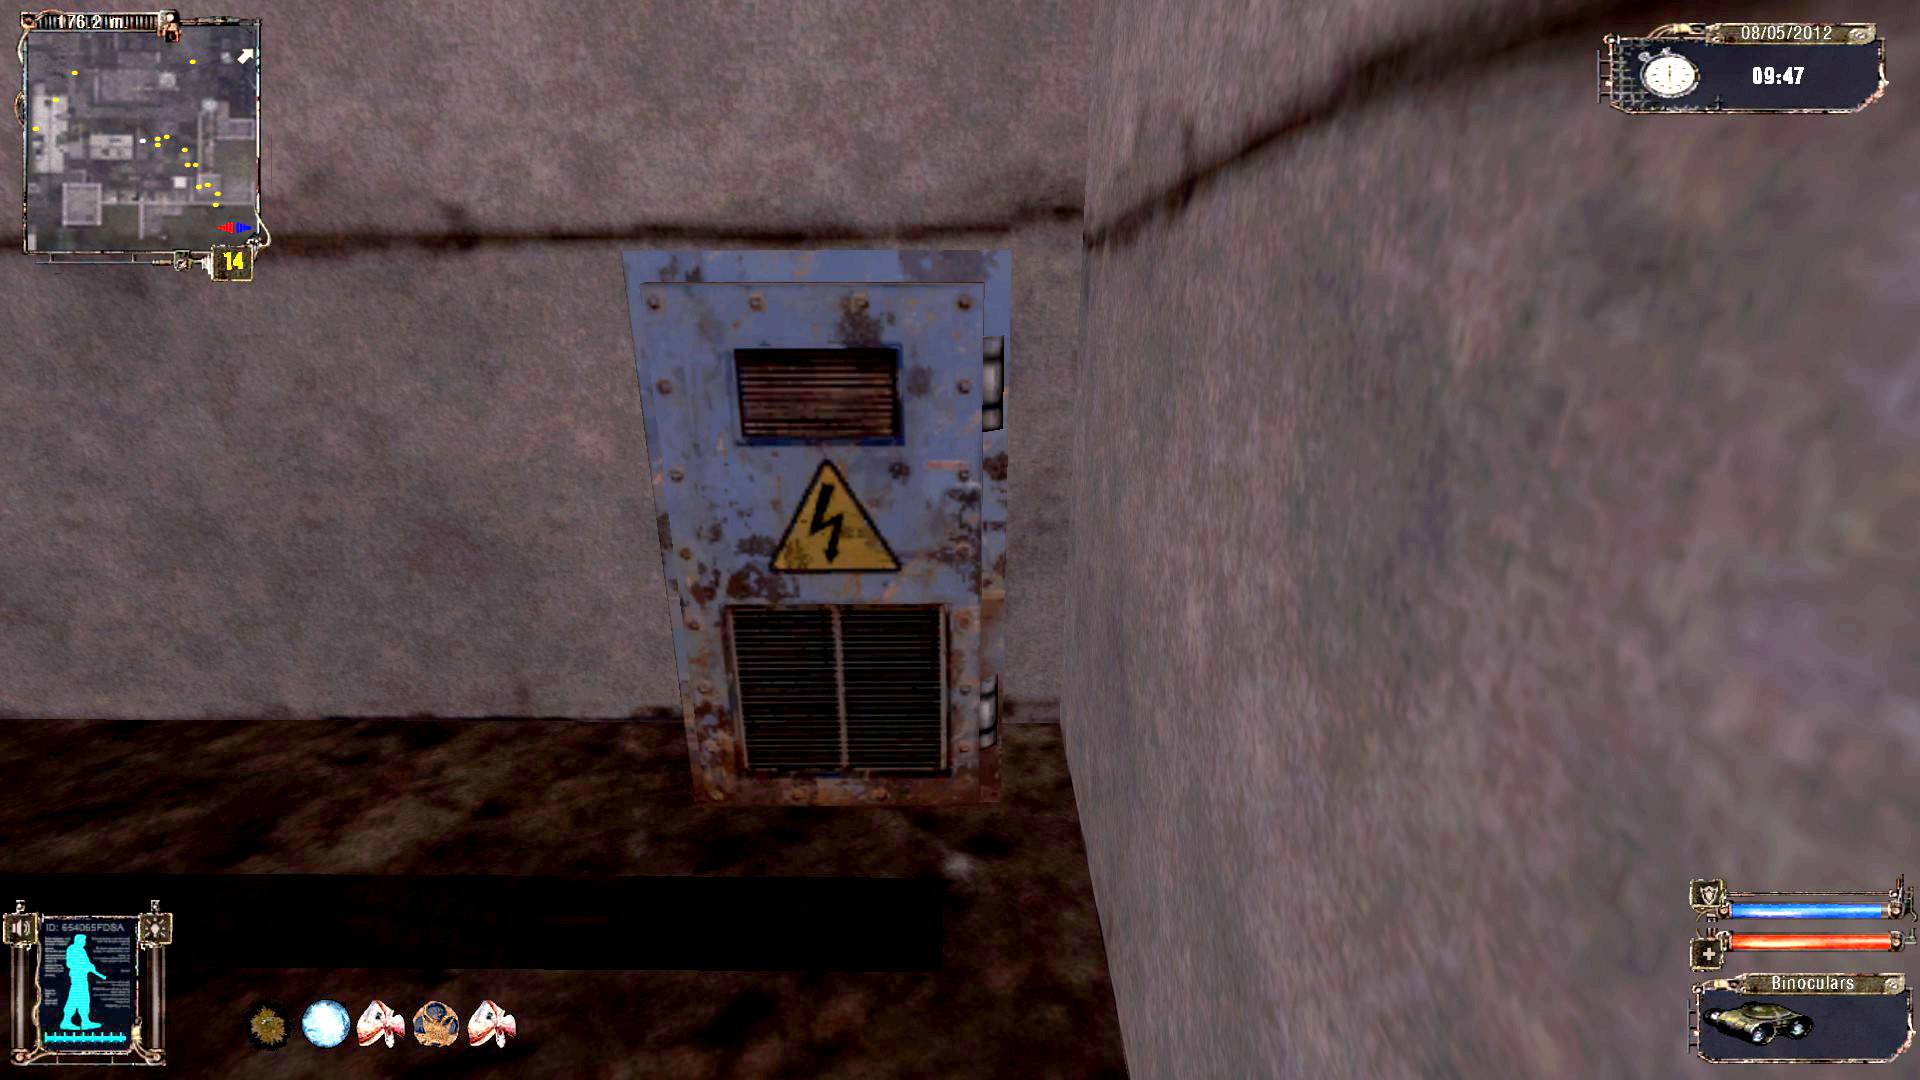
Mostly the content of these stashes is useless, but sometimes you can find that very item you need.
They have a specific mark on map and minimap, but it may be still tricky to find them.
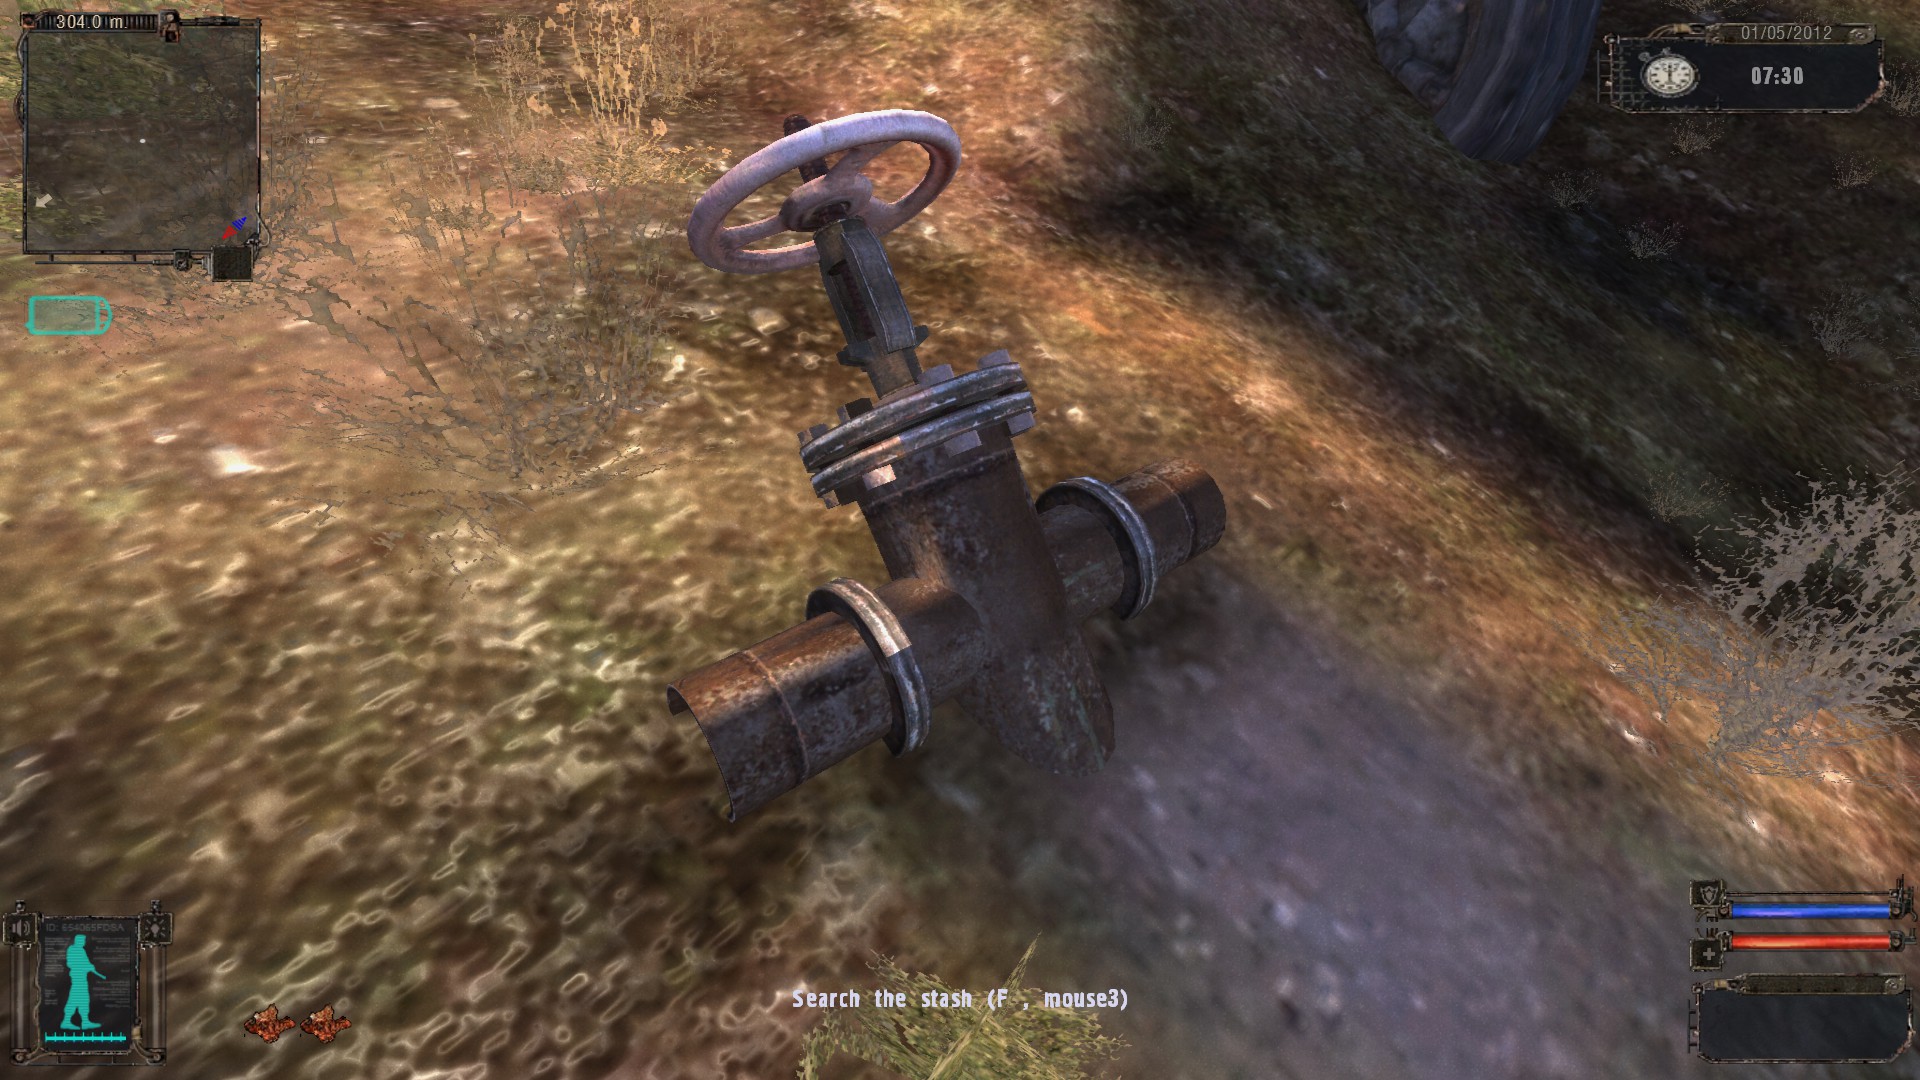
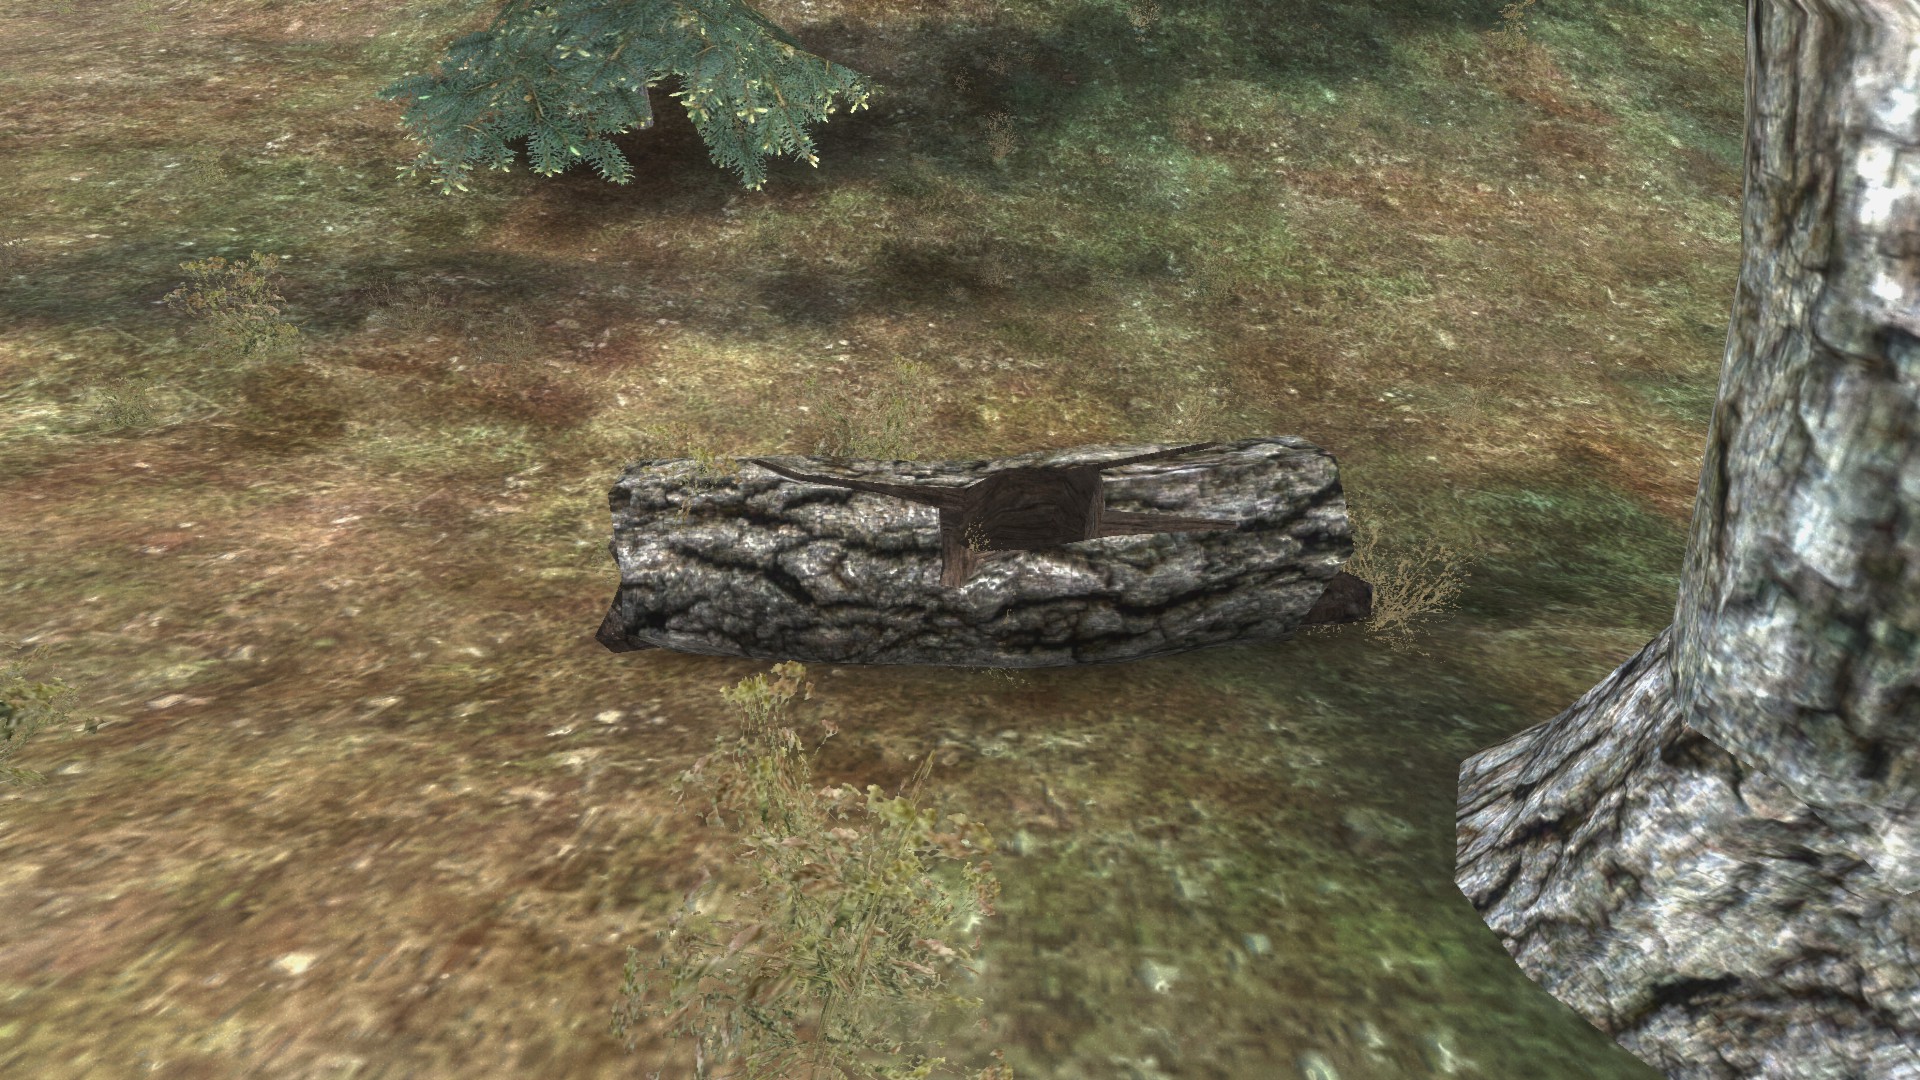
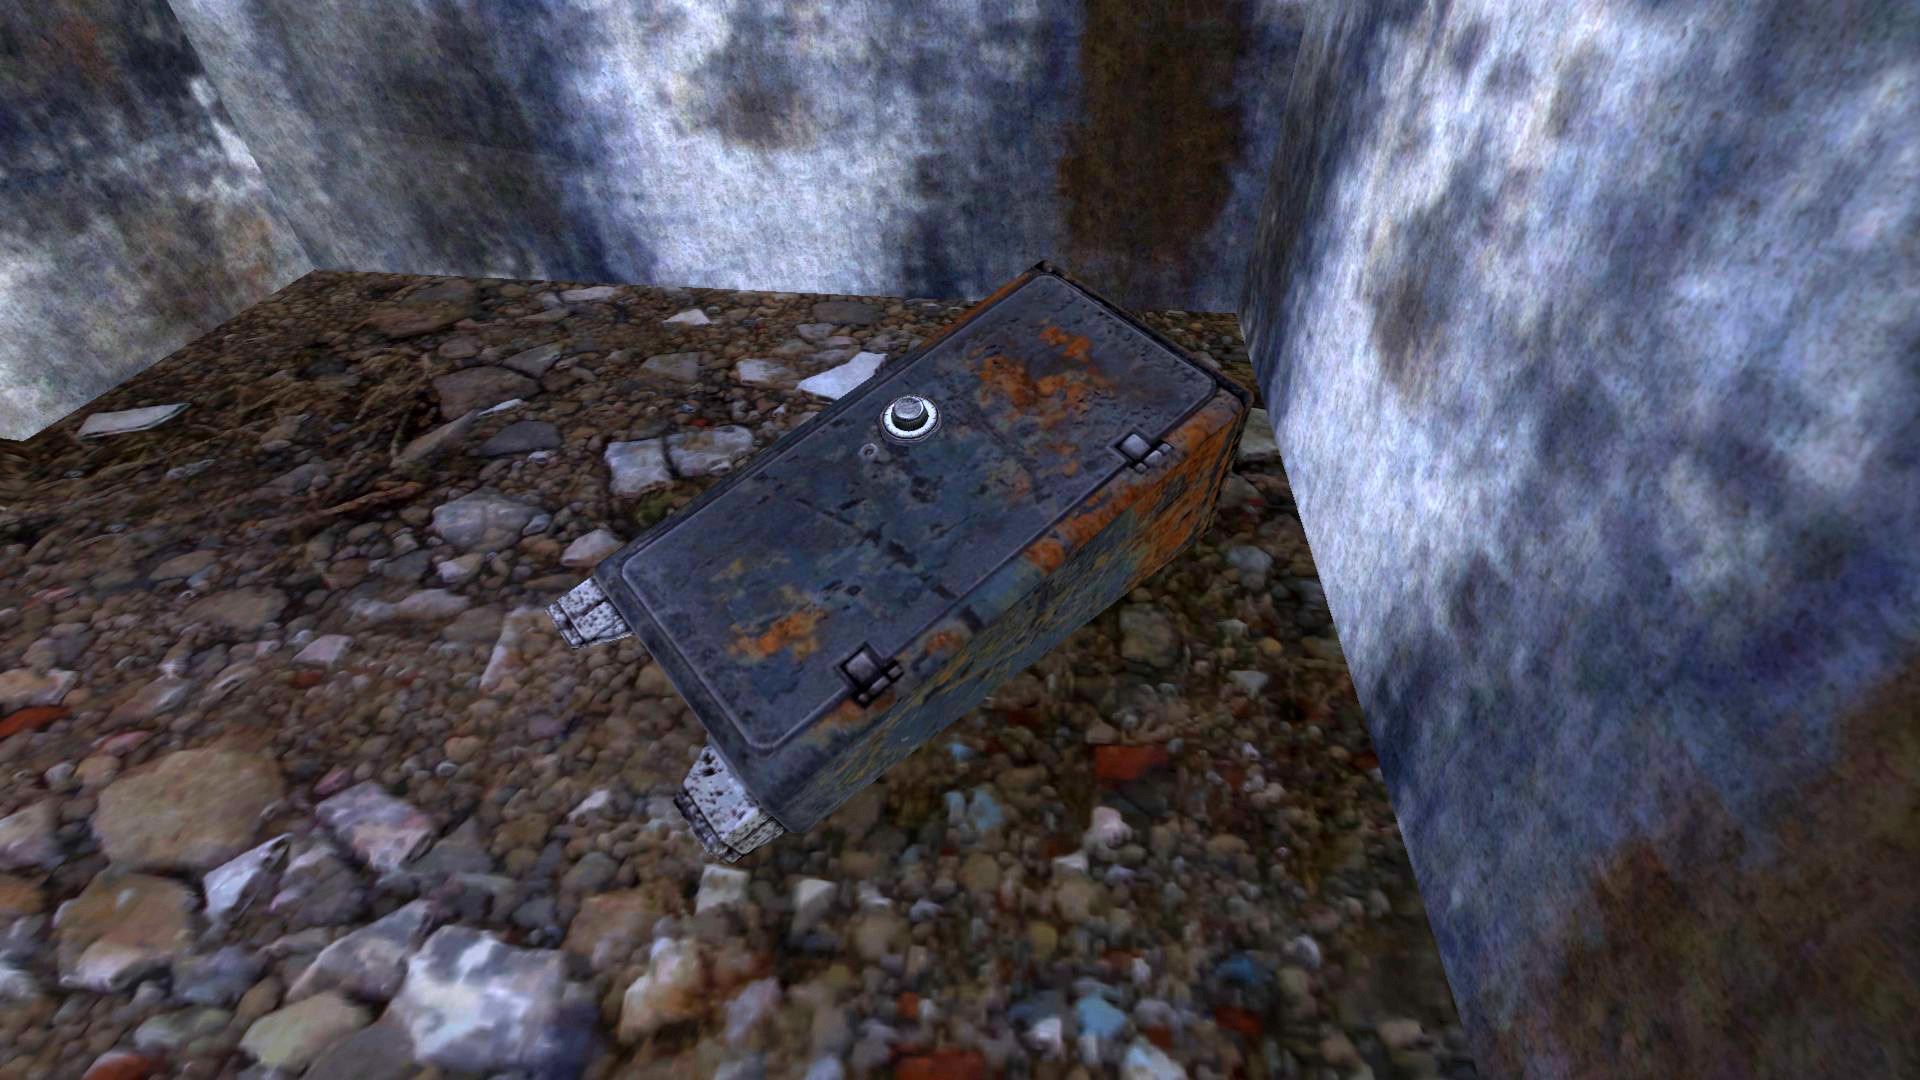
The hidden stash containers types:
The small brown box
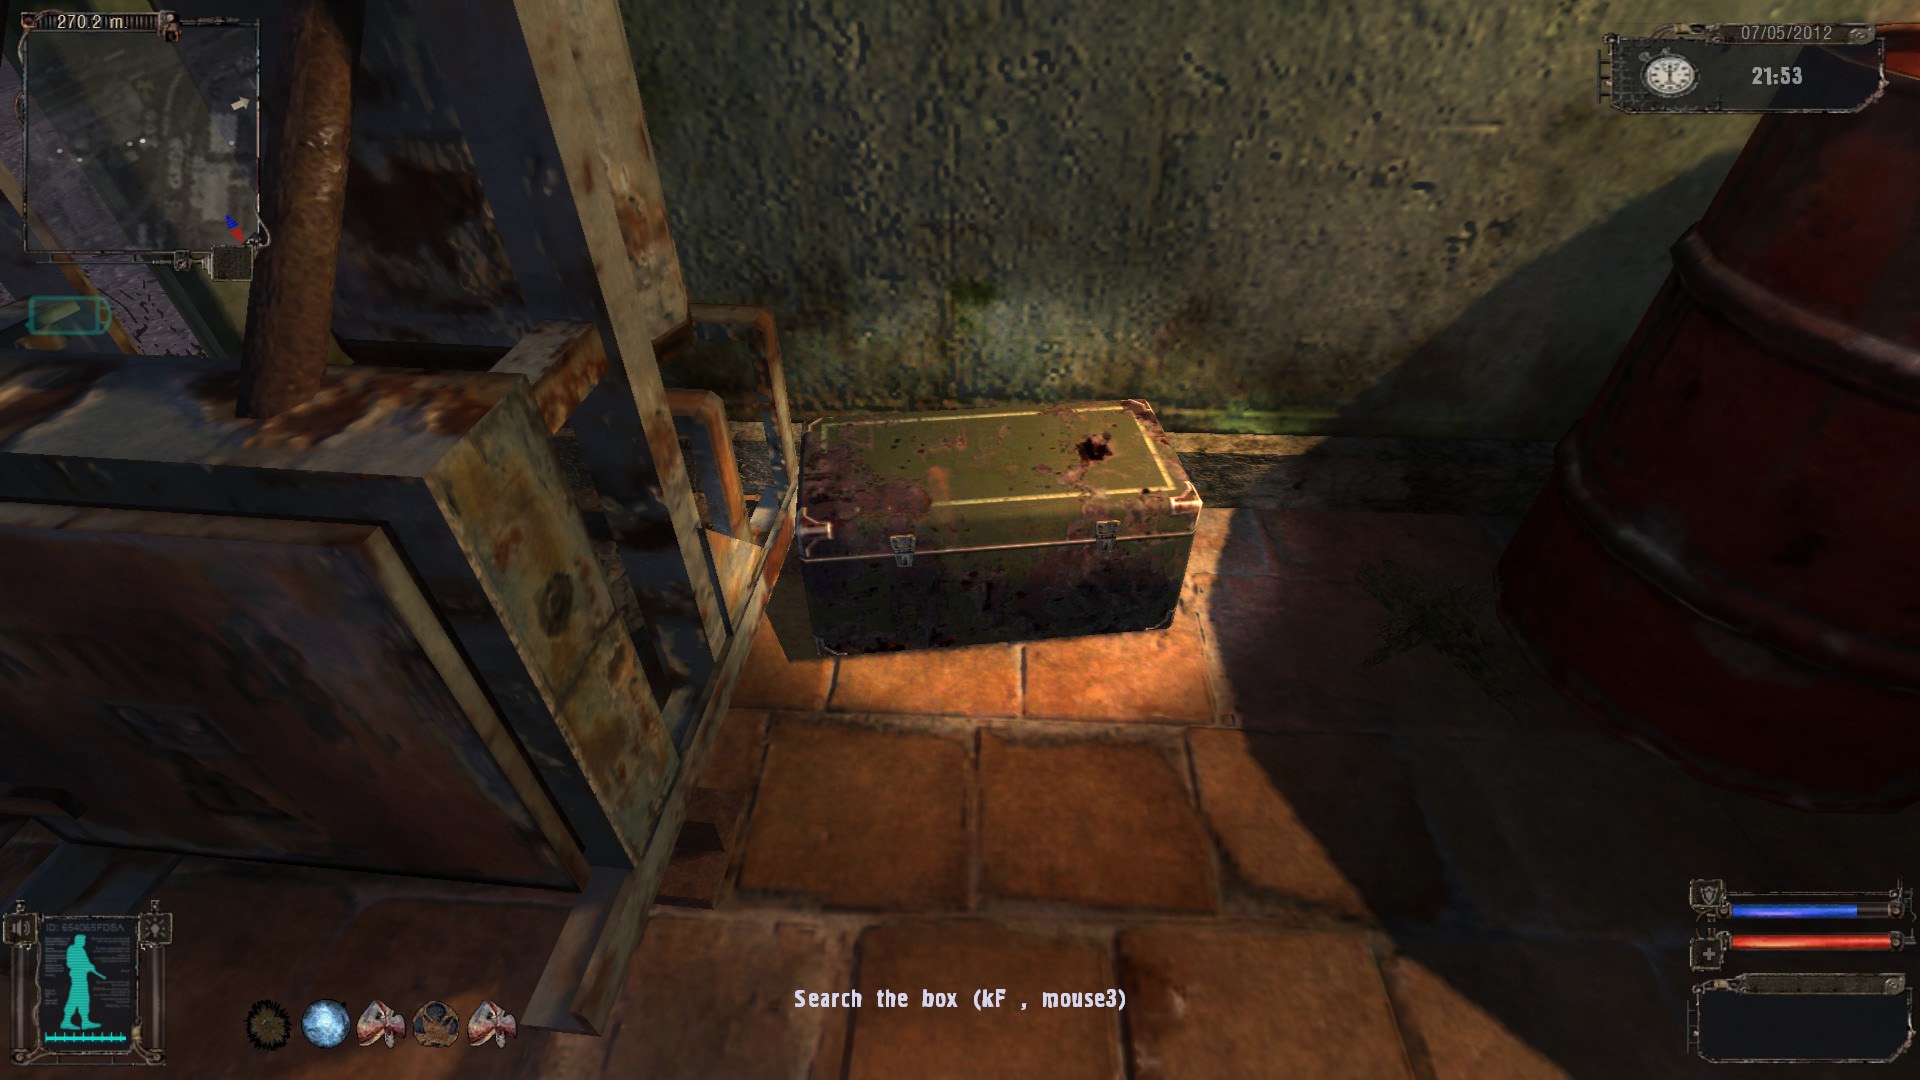
The big green chest
The Grey-green pouch (sack), hardly seen on the ground
The Rusty metal tubes junctions
[list[*] The crack in the log or stump[/list]
The safe cabinet The grave cross
The hatches Zaporozhets car trunk(I wonder, are devs are not aware, that the trunk of this car is in front of it?!)
The electric panel (box)The stash is empty until you discover it while looting. If you put your items in it, they may be replaced with hidden stash contents after you discover it. Besides, you may find the dicovered stash empty - by many reasons, reloading the game included. That is bug or Zone rule - just empty it as sooner as possible after you've seen it on minimap. Stash will be marked on the map until you empty it (put smt to an empty stash and "Take all" to remove the map marker).
Big Blue Chest
Such a chest could turn out to be a hidden stash as well.
But.
It could contain random stuff or be empty for ever. This type of big blue chest is situated usually near campfire (or at bar) and could be used to save your loot. Vanilla NPCs never thieve luckily.
MUTANTS
Back to game.
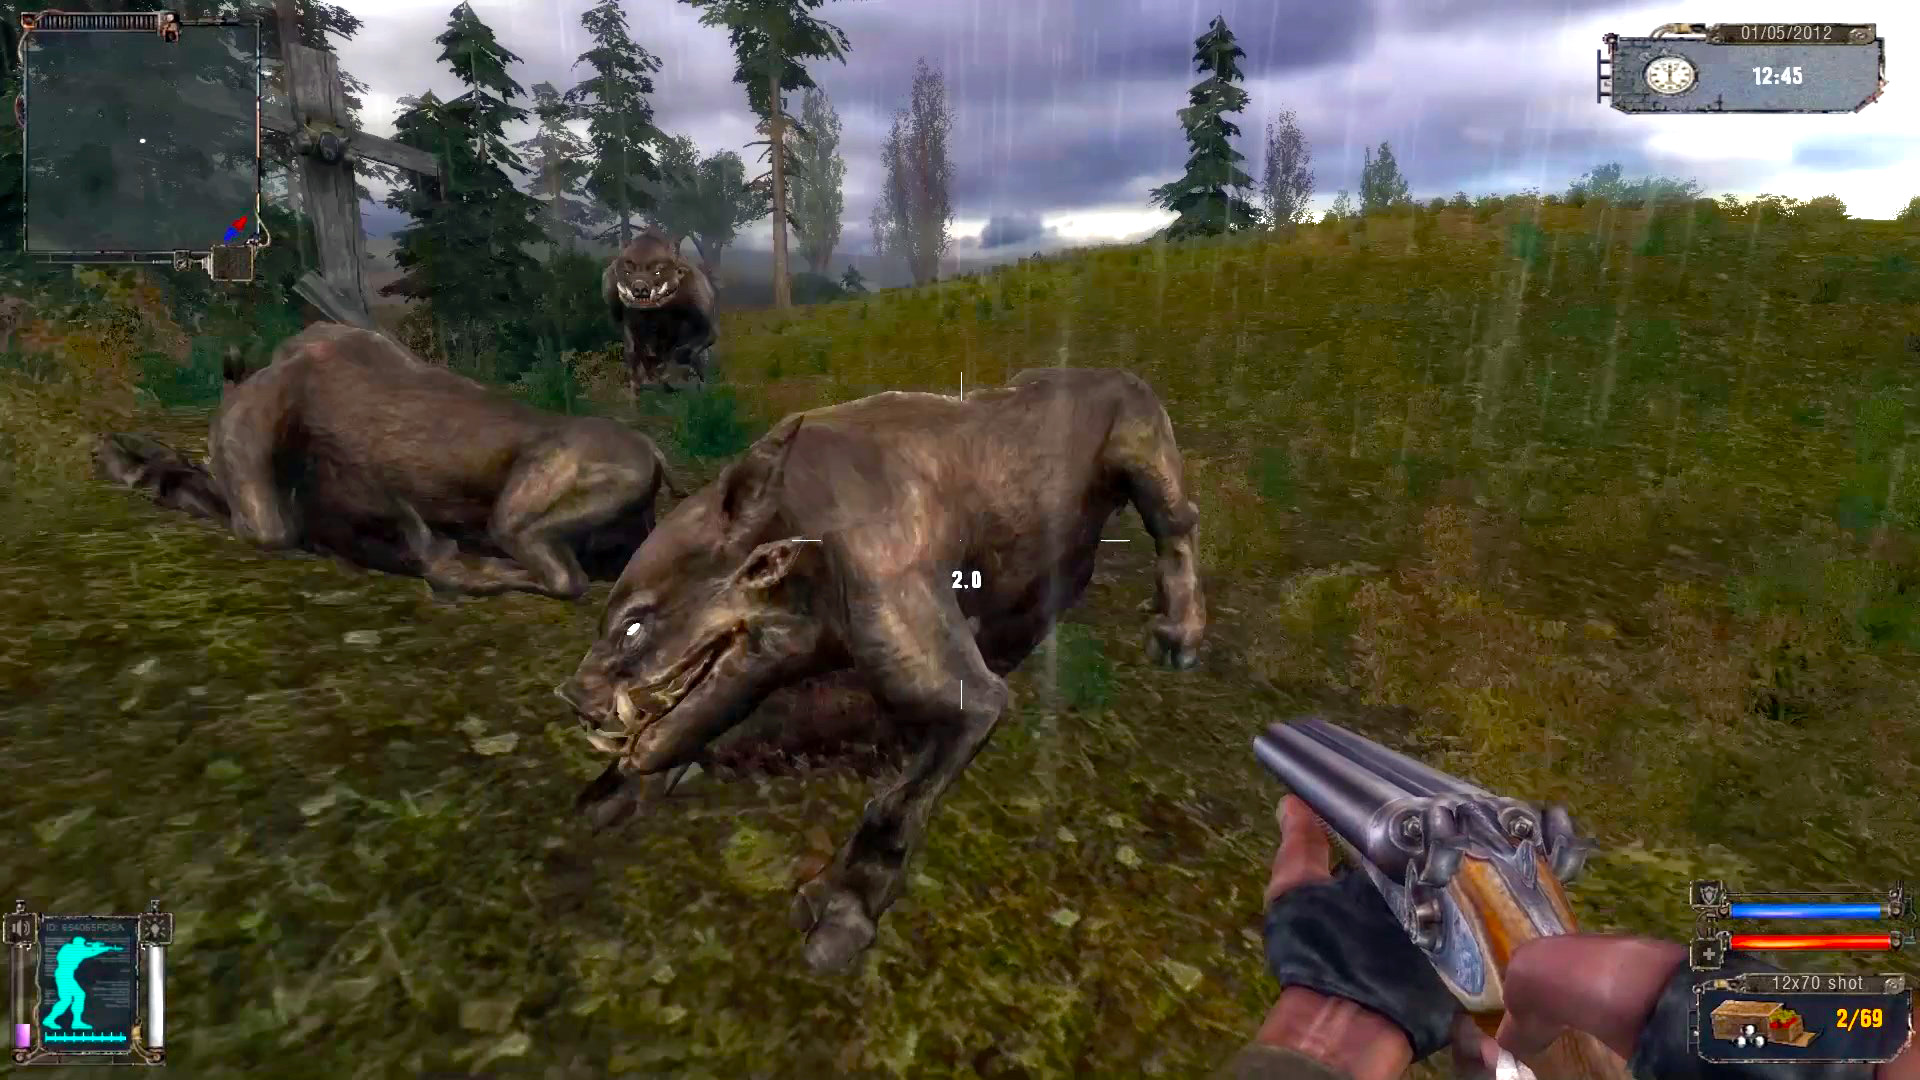
We have a task to kill two boars near the village. These mutants are weak, but the further you go, the stronger they are. Survival rules:
1. Shoot’m from distance or ‘Dodge-n-shoot” (works for a limited number of hogs and dogs, not for a pack). Melee mutant attacks are most deadliest
2. Don’t let them surround you (for pack) – run and/or find something to jump on
3. Pseudodogs and snorks can jump, so climbing isn’t so safe
4. Best weapon is shotgun, but any automatic gun with high RPM works good, too (can lose up to 30 cartriges for each mutant, as they move fast)
5. Rodents are surprisingly dangerous, shoot at sight
6. Pseudogiant (big chicken): jump up, when it rises its paw high - to avoid distant gravitation strike
7. Controller has no melee attack, but it’s not so easy to come close. Grenades work better.
8. Psi-dog produces phantoms, that bite you hard. They will not stop until you kill the “motherdog” (meet them at the Red Forest)
9. Bloodsuckers are invisible when attacking ;-)
Find all general information about mutants in the your PDA encyclopedia, or at Stalker Wiki[stalker.fandom.com]
Soldiers
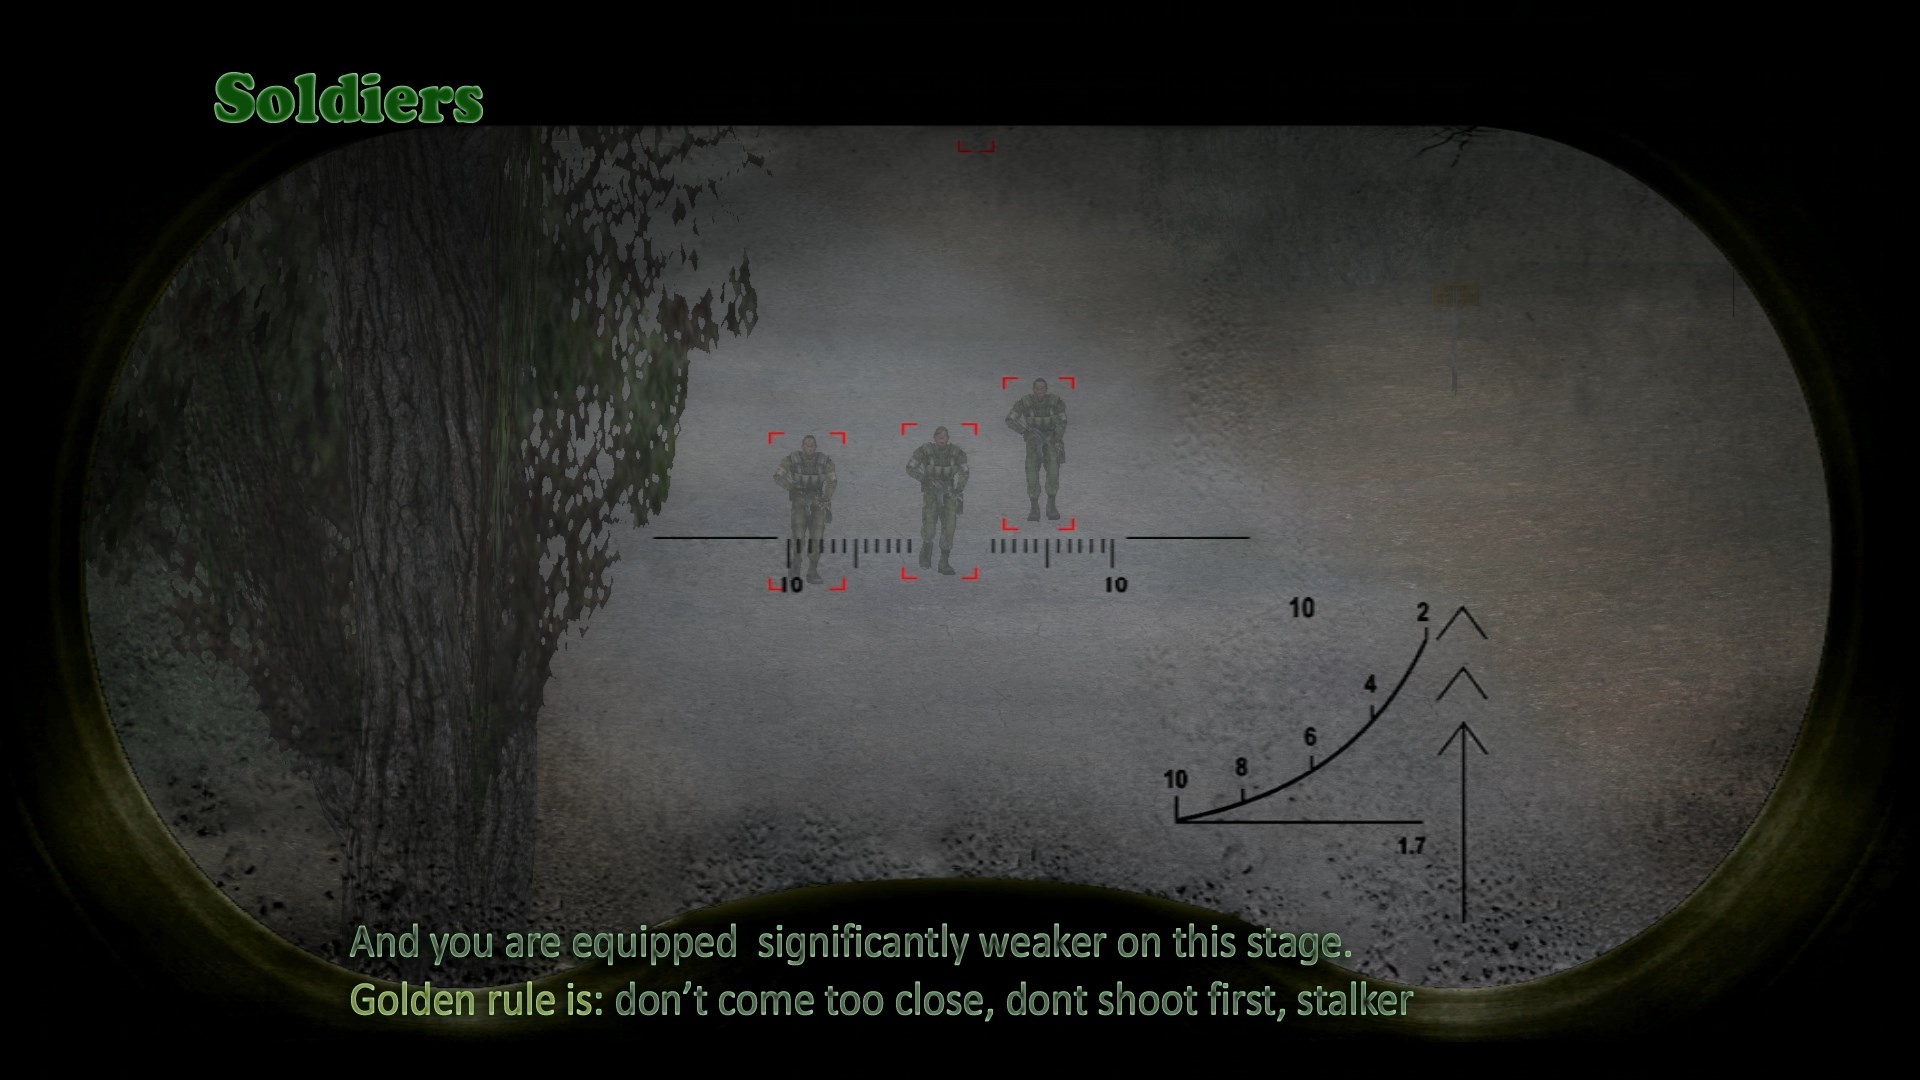
No need to kill Ukrainian soldiers without nessesity!
Yes, you may be able to do that - but all rookies will be killed at village.
As for guards near railway bridge, they could be bribed with reasonable fee - untill you see them red on minimap. Just speak to the nearest guy. If they become hostile (there are many possible reasons for that), they will shoot first.
Quick STALKER SoC Guide For Readers #3
ARTIFACTS
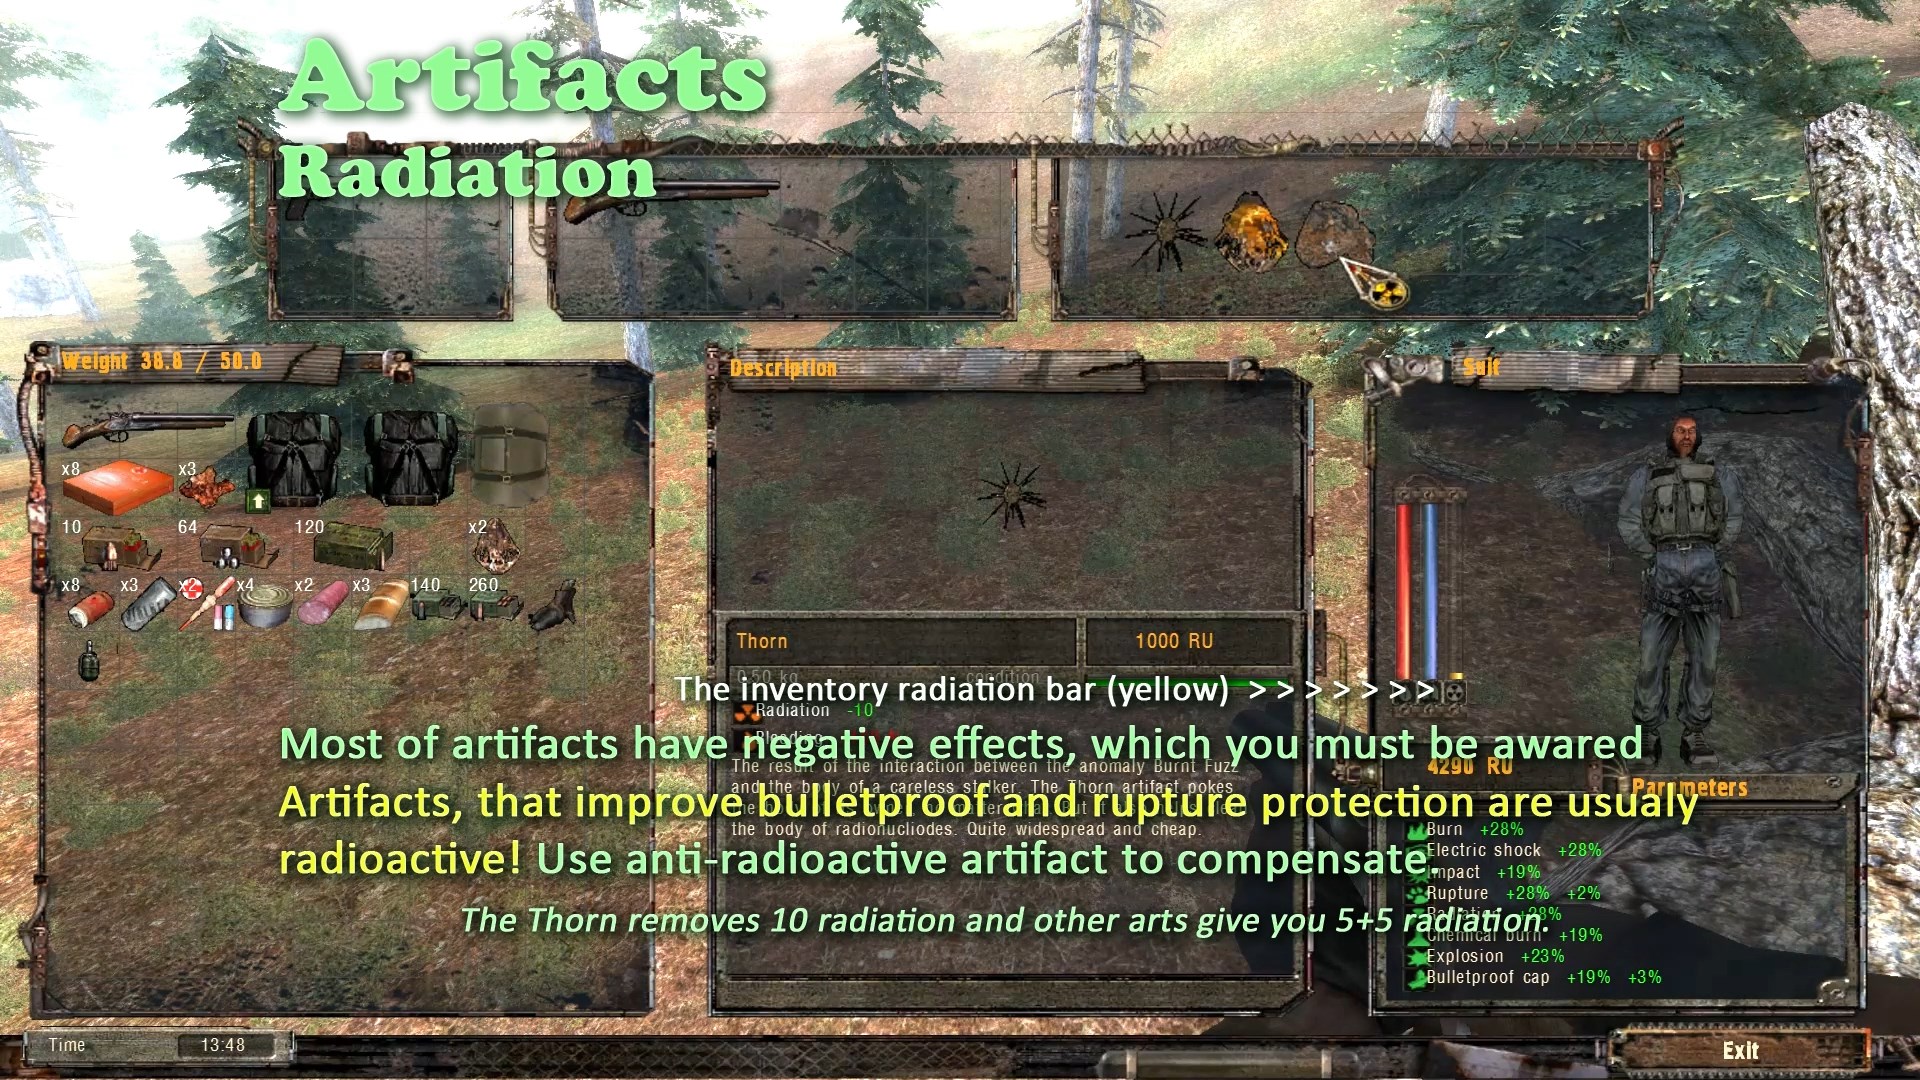
Place artifact to the belt slot to activate its abilities.
Artifacts have positive and negative effects and you will easily learn, how to combine them to compensate drawbacks they give. Good news: the arts of higher tiers have the negative effects equal to that of lower tiers.
The only lethal effect of artifacts is radiation. If you ignore it, you will be dead in several minutes All artifacts, that improve your bulletproof and rupture immunity have this effect! So, dont use them untill you find one of anti-radioactive artifacts. They do not prevent irradiation, but improve radiation removal. Having "Thorn" on your belt with -10 radiation, you can use two artifacts like "Jellyfish" with +5 radiation.
Other negative effects are just uncomfortable (like some immunities reductions), but should be taken into consideration. For example, all health-restoring artifacts decrease bulletproof and rupture immunity - just don't use them in battle isolately.
Cross The Railways
There are at least 4 places where barbed wire fence could be crossed.
But it will be good to visit local sites first.
There is a "guide" you have to meet - this will reveal the most dangerous way to the other side (both meet and use this way are not obligatory).
There is a complex of two building nearby that place:
Some tips:
- if you jump the truck and then reach the roof, you may find the blue box, that seems to be empty - but it is not - all items fall through the textures to the floor inside
- if you've discovered the hidden stash, dont look for it inside other building - it's on the roof again - and you will have to jump again and be attentive to find it
- the artifact could be picked up from inside (NB atrifacts could be moved by shots to avoid anomalies) or use you courage and agility, and spend some medkits
There are two more gaps in barbed wire fence to the right of soldiers. One is at its very beinning and another is at its very end. As for the first one - try not to be seen, as for latter- try not to die from radiation.
Jump up to the locomotive roof diagonally from railway and dead tunnel at that place to get some goods on the roof of it - beware anomalies. Usually I cross embankment here
If you understand the main rule "Follow instructions, rookie!" - you need no further advices.
Parting Instructions
Quicksave! Quicksave before the battle, Quicksave after you won it, Quicksave after any progress you get. Once you will forget this rule and you will have to replay all the level from beginning (you have autosave at location start always)
Have at least one full save on every location
Sell artifacts and monster parts to NPCs, they will pay the same price as traders (except scientist), but remember that some of it may be task targets
Play with crosshear to distinguish neutrals and enemies
NPC may give you important information
Don't be burdened with useless loot - there are no traders between Cordon and Bar. Save artifacts and suites in blue chests and move further
Don't be bothered with start weapons and enemy "spongiousness". The first appropriate gun you gain is Viper SMG (MP5). You can get lot of good cartriges for it, just if you rize your eyes to heavens at the place, where your first battle with bandits at Garbage happens. Pray and destroy two crates.If you want to have more training or/and have more money and stuff- take all tasks at Cordon, visit all strange places there (but remember what I wrote above.
Head bobbing: change cam_inert parameter to lower (even to zero) in _appdata_\user.ltx MODs: There're hundreds of mods for this game. Better to have the first playthrough using vanilla only. After that you will find the mod with parameters you like
BUGs: The current Steam version is rather stable. Grafics is very good for 15 year old game. Use beta (1.00007) if you encount problems from the very start.
Maybe I forgot to write something - but you have your own head, I suppose
GOOD HUNTING, STALKER!
Quick STALKER SoC Guide For Readers #4
Source: https://steamcommunity.com/sharedfiles/filedetails/?id=2798586622
More S.T.A.L.K.E.R.: Shadow of Chernobyl guilds
- All Guilds
- S.T.A.L.K.E.R.: Shadow of Chernobyl Guide 1414
- S.T.A.L.K.E.R.: Shadow of Chernobyl
- ": "
- , S.T.A.L.K.E.R Shadow of Chernobyl
- S.T.A.L.K.E.R.: -
- S.T.A.L.K.E.R.: Shadow of Chernobyl Guide 1387
- S.T.A.L.K.E.R.: Shadow of Chernobyl .
- S.T.A.L.K.E.R.: Shadow of Chernobyl.
- GSC Game World . S.T.A.L.K.E.R., 2002
- GSC Game World in Chernobyl. S.T.A.L.K.E.R. devs notes, 2002