Installing Riva Tuner Software
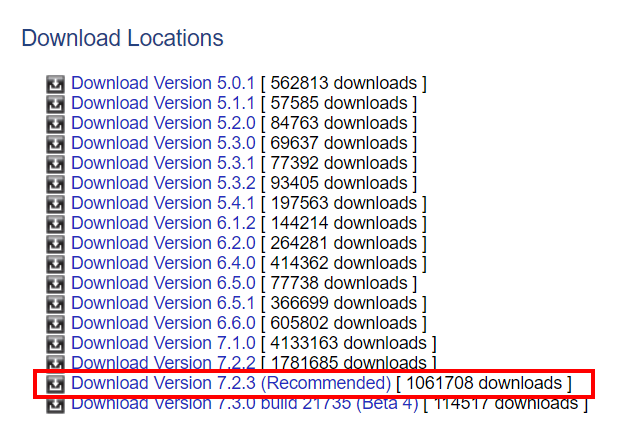
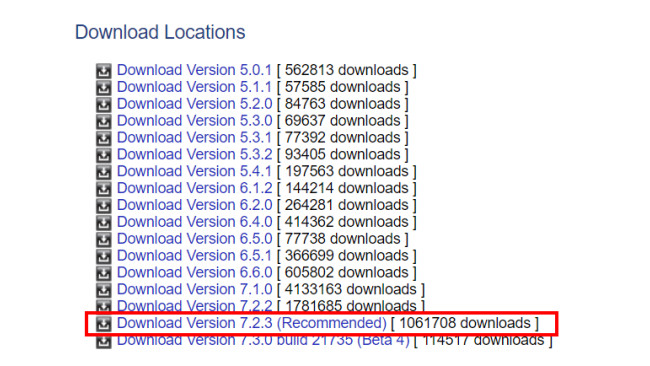
After installing STALKER: SoC, first get the Rive Tuner software from their Official Website[www.guru3d.com] . Get the latest version, and it's recommended that you avoid the latest beta, instead go for the one with the "(Recommended)" written beside it's link.
After downloading it, uncompress the archive with an unzipping tool like 7Zip or WinRAR. You'll find an Executable file inside, run it and follow the installation wizard to install Riva Tuner on your PC.
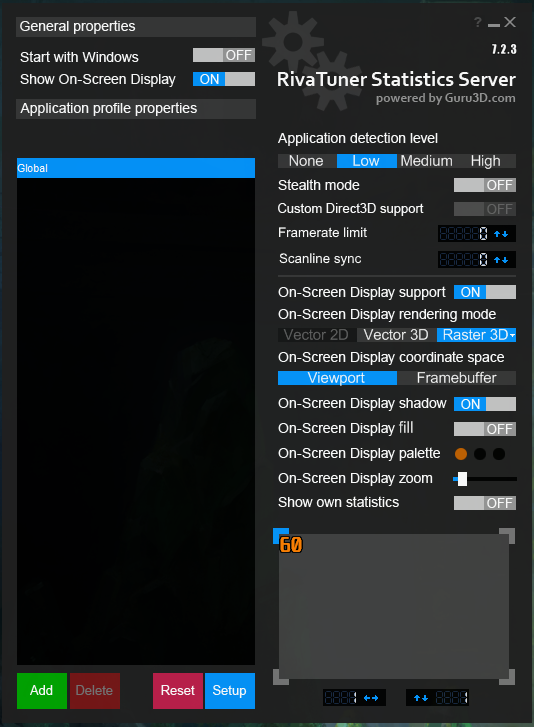
Afterwards, run the Riva Tuner program. It should look like this:
Adding Frame Cap And/or Scanline Sync
Now,
I) To just add a Frame Cap:
Click on the green "Add" button on the bottom left of the program screen, it will open up a File Selection menu of File Explorer. from there navigate to "<Steam-folder> \steamapps \common \STALKER Shadow of Chernobyl \bin" and select "XR_3DA.exe" which is the executable file for the game. Then on Riva Tuner just click on the "Framerate Limit" field and put a number upto which you want to limit your FPS to and therefore run the game. Bear in mind that the Riva Tuner Server Status program needs to run in the background, you may minimize it, but DO NOT kill the program by pressing the "x" icon at the top right.
While the frame capping itself is fine and works well, it may cause screen tearing on some low-end PCs or laptops with lower screen frequency. Hence the "Scanline Sync" becomes necessary.
II) To enable Scanline Sync:
First thing what is "Scanline Sync"?
It's an alternative to V-Sync functionality that tries to reduce the abrupt input lag that is often experience in many games when V-Sync is turned on, while providing the same frame-to-frame syncing for an experience free of screen tearing.
Note that, for Scanline Sync to work properly, your machine must be able to achieve a frame that is consistently higher than your monitor's frequency. That is, if your monitor's frequency is 60Hz, the uncapped frames per second in the games must never fall below 60 fps for Scanline Sync to work reliably.
With that being said, there is one caveat to this process which needs to be corrected manually. There will be at least one visible tear line that needs to be synced in such a way so that it appears outside the bound your monitor screen or at worst at the very edge of the height. To do that, the process is as followed:
1. Make sure you have messed with the "global" setting a little bit in Riva Tuner software to generate a "global" profile file. To do that, in Riva Tuner software, just click the "Global" profile inside the profile selection box. Just add a frame cap and then remove it. It'll make sure that a global profile is generated. Exit the Riva Tuner software by clicking the "x" icon on top right.
2. Open up File explorer and navigate to <RivaTuner Statistics Server-folder>\Profiles and open the "Global" file with a text editor like Notepad. Note that the "Global" file should not have any extension to it, just double click on it and open it up with Notepad or similar application. Under [Framerate] section in the Global file, add the line "SyncHotkeys=1". Make sure the [Framerate] section looks similar to this:
[Framerate] Limit=0 LimitDenominator=1 SyncHotkeys=1 LimitTime=0 SyncScanline0=0 SyncScanline1=0 SyncPeriods=0
Save the file and close it.
3. Inside the Profiles folder open up "XR_3DA.exe.cfg" file with Notepad or similar application.
Under the [Framerate] section add the line "SyncFlush=1". Make sure your [Framerate] section looks similar to:
[Framerate] Limit=0 LimitDenominator=1 LimitTime=0 SyncFlush=1 SyncScanline0=-600 SyncScanline1=0 SyncPeriods=0
Also, you have to include "SyncInfo=1" to the "[OSD]" section. Does not matter which line you add it to, but for simplicity's sake add it the bottom of the [OSD] section.
Save the file and close it.
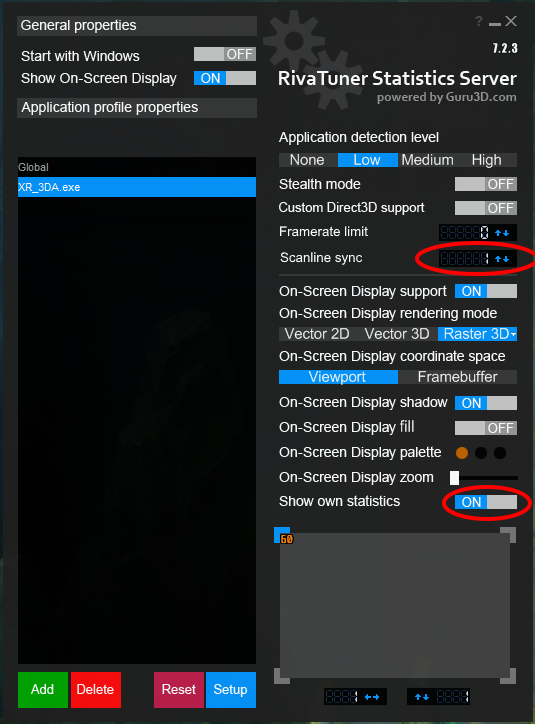
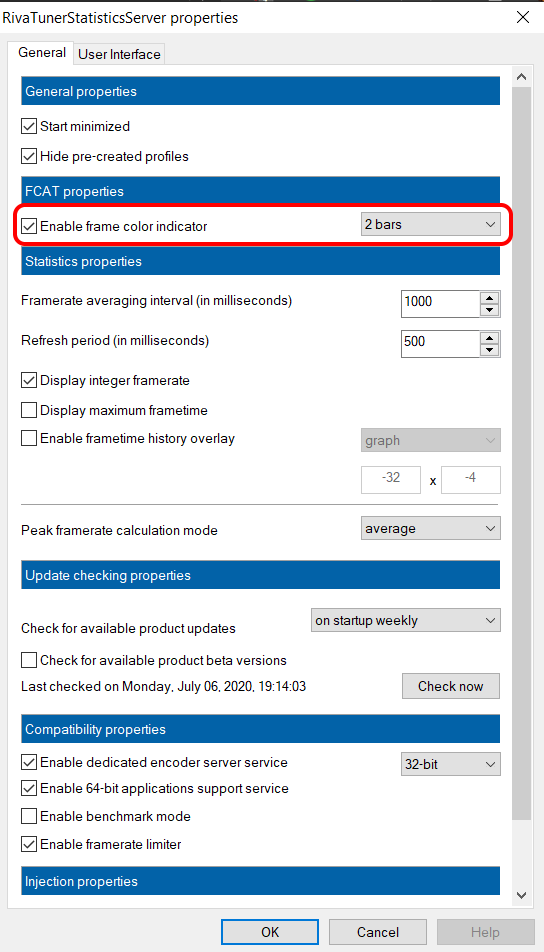
4. Now open up Riva Tuner software and select the XR_3DA.exe profile in the selection box. In the Scanline Sync section input "1". Turn on the "Show own statistics" option. Additionally, you may click on the blue "Setup" button at the bottom of the profile selection box. It will open up a menu, in which you can check the box beside "Enable frame color indicator" and choose any of the options from the list beside. It'll help you detecting the screen tear line.
DO NOT close Riva Tuner software, you may minimize it. Now Start STALKER: Soc from Steam.
5. After starting the game, you will see the "OSD" or On-Screen Display of your FPS, some other statistics and some columns on the right side of your screen depending upon what you chose at the "Enable frame color indicator" menu.
Load up a save and move around the camera to see where the Tear Line is. Now hold "Shift+Control"(Both Left and Right works) and press the up-arrow or down-arrow keys to move the tear-line vertically. Continue it for a while and check if the tear line is moved to such a space that it's no more visible on the screen.
6. When you have come to a conclusion that the tear line is outside the bound of or at the absolute edge of the height of your screen, look at the OSD and note down the numbers beside "Sync line 0" and "Sync total". Exit STALKER: SoC.
7. Subtract the noted down “Sync line 0” number from the “Sync total” number, and then subtract "1" from it.
The formula for the required number is = [Sync total] - [Sync line 0] - 1
8. In Riva Tuner software, inside the "Scanline Sync" field input "-"(minus or negative) followed by the obtained number.
Say the obtained number was "700", inside the Scanline Sync field you input
-700
And uncheck the "Enable frame color indicator" and turn off "Show own statistics".
That's it, the Scanline Sync should now be working. Just make sure Riva Tuner software is running in the background while you're playing STALKER: SoC every time.
I hope you find this little guide helpful. Happy hunting STALKER!
Source: https://steamcommunity.com/sharedfiles/filedetails/?id=2157224737
More S.T.A.L.K.E.R.: Shadow of Chernobyl guilds
- All Guilds
- S.T.A.L.K.E.R.: Shadow of Chernobyl Guide 1387
- S.T.A.L.K.E.R.: Shadow of Chernobyl .
- S.T.A.L.K.E.R.: Shadow of Chernobyl.
- GSC Game World . S.T.A.L.K.E.R., 2002
- GSC Game World in Chernobyl. S.T.A.L.K.E.R. devs notes, 2002
- GSC Game World . S.T.A.L.K.E.R., 2002
- S.T.A.L.K.E.R.: Shadow of Chernobyl Steam
- S.T.A.L.K.E.R. Shadow of Chernobyl
- ,, S.T.A.L.K.E.R Shadow Of Shernobyl
- ( Xbox Series PlayStation 4/5)