Introduction
This guide was primarily inspired by the outdated 'PAYDAY 2: The Numbers' by Big F and Faildozer and 'The Long Guide' by Frankelstner, which is readable here:
http://steamcommunity.com/sharedfiles/filedetails/?id=267214370
The information presented here was obtained from the decompiled PAYDAY The Heist lua made available by gir489.
The pictures were extracted from the game using the wonderful bundle extractor available here:
https://bitbucket.org/zabb65/payday-2-modding-information/downloads
Additional thanks to Paragon for checking if my stats weren't butchered.
Player Stats
Your default health is 300*. With Thick Skin fully upgraded, it becomes 400*.
Your base armor value however does not stay consistent, as it varies between difficulties as shown in the table below.
The number in parenthesis is the amount of armor you have if your body armor is fully upgraded.
Difficulty Armor Easy 60 (110)* Normal 40 (90)* Hard 20 (70)* Overkill/Overkill 145+ 10 (60)*
By default, you cannot take damage again for 0.3 seconds after being shot as long as the damage does not exceed what you previously took. For example, if an enemy deals 50* damage to you, you cannot take 50* damage or less again for 0.3 seconds.
Assuming similar mechanics to Payday 2, the game only takes into account the amount of damage you took before your armor broke. If you had 10* armor and an enemy dealt 50* damage to you, you've essentially only taken 10* damage. The subsequent shot from that enemy would still hit you during the cooldown, because it exceeds 10* damage.
On Easy this cooldown is 0.6 seconds, but on Overkill 145+ it is reduced to 0.15 seconds.
Weapons - Notes
The statistics here are presented as follows:
Damage and health values are multiplied by 10, since it's consistent with the way PAYDAY 2 does it. Numbers multiplied by 10 are marked with an asterisk.
Reload values are displayed as Fast/Slow.
Reload times for shotguns are a bit different, and are noted as such. Reload speed bonuses for shotguns are only applied when you start loading shells, not when you enter or exit the reload.
Accuracy is displayed as the maximum spread for Standing While Moving/Crouching While Moving/Standing/Crouching/Steelsight.
Numbers in parenthesis represent the fully upgraded value.
The Alert Size determines the range at which cops can hear your shots. This is 50 meters for many weapons, but there are exceptions. Assuming that it works similar to Payday 2, cops will generally prioritize targets that make alerts.
Recoil is not included at the moment.
Your weapon butt deals 15* damage.
Weapons - Pistols


B9-S
Ammo Pickup: 6 to 8 bullets
Capacity: 14 (20) / 56
Damage: 10*
Rate of Fire: 750
Reload: 1.8/2.6 seconds
Equip/Unequip: 0.5 seconds
Max Spread: 3.5/3.5/3.5/3.5/1.4 (spread*0.8 (1.12)) degrees
Alert Size: 3 meters
Bronco .44
Ammo Pickup: 1 to 2 bullets
Capacity: 6 / 36
Damage: 45 (63)*
Reload: 4.6 (3.833?) seconds
Rate of Fire: 273
Equip/Unequip: 0.5 seconds
Max Spread: 2.5/2.5/2.5/2.5/1.8 (spread*0.6 (1.08)) degrees
Alert Size: 50 meters
Crosskill .45
Ammo Pickup: 4 to 6 bullets
Capacity: 10 (14) / 50
Damage: 15 (21)*
Reload: 1.9/2.6 seconds
Rate of Fire: 500
Equip/Unequip: 0.5 seconds
Max Spread: 4.5/4.5/4.5/4.5/1.7 degrees
Alert Size: 25 meters
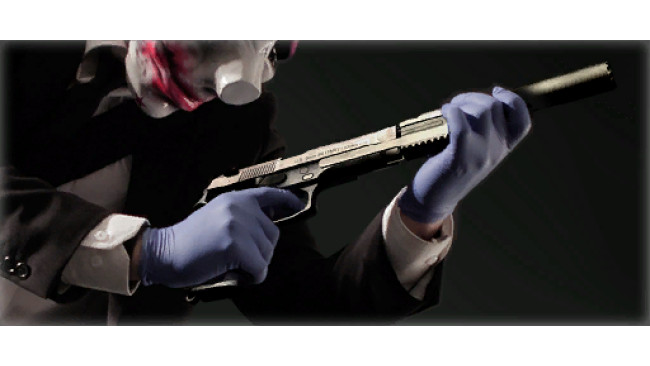
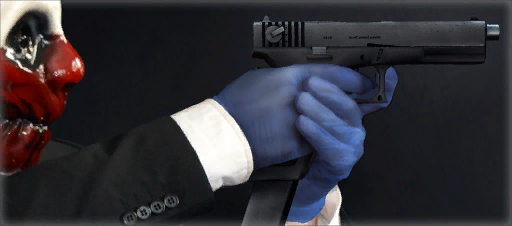
STRYK
Ammo Pickup: 5 to 7 bullets
Capacity: 20 (40) / 56
Damage: 10 (12)*
Reload: 2.5/2.7 (2.0833/2.25?) seconds
Rate of Fire: 909
Equip/Unequip: 0.5 seconds
Max Spread: 4/4/4/4/1.6 degrees
Alert Size: 50 meters
Weapons - Primaries


AK
Ammo Pickup: 2 to 8 bullets
Capacity 25 (35) / 125
Damage: 27 (35.1)*
Reload: 2.3/3.9 seconds
Rate of Fire: 857
Equip/Unequip: 0.5/0.7 seconds
Max Spread: 6/5.5/5/4/1.5 (spread*0.8 (1.2)) degrees
Alert Size: 50 meters
AMCAR-4
Ammo Pickup: 2 to 10 bullets
Capacity 20 (30) / 120
Damage: 20 (24)*
Reload: 1.4/1.9 seconds
Rate of Fire: 600
Equip/Unequip: 0.5/0.7 seconds
Max Spread: 6/5/4/3/1 (spread*0.6 (0.6)) degrees
Alert Size: 50 meters
Brenner 21
Ammo Pickup: 2 to 10 bullets
Capacity 80 (120) / 240
Damage: 25 (35)*
Reload: 4.25/5.4 seconds
Rate of Fire: 450
Equip/Unequip: 0.5/1 seconds
Max Spread: 4/3.5/2.5/2.5/2.5 degrees
Alert Size: 50 meters
M308
Ammo Pickup: 1 to 5 bullets
Capacity 12 (16) / 72
Damage: 40 (48)*
Reload: 1.71/2.61 seconds
Rate of Fire: 600
Equip/Unequip: 0.5/0.7 seconds
Max Spread: 10/8/7/6/0.1 (spread*0.8 (0.08)) degrees
Alert Size: 50 meters
Reinbeck
Ammo Pickup: 1 to 2 shells
Capacity 6 (10) / 30
Damage: 60 (84)*
100% damage up to 5m, 0% at 40m
Reload:
0.4 seconds to start reloading.
0.34 seconds for the first shell.
0.67 seconds for each subsequent shell.
1.3 seconds to exit an empty reload, 1 second for a non-empty reload.
Rate of Fire: 75
Equip/Unequip: 0.5 seconds
Max Spread: 4/4/4/4/3 degrees
Alert Size: 45 meters
Weapons - Secondaries


Compact-5
Ammo Pickup: 2 to 7 bullets
Capacity: 30 / 150
Damage: 11.5*
Reload: 2.2/2.8 (1.57/2?) seconds
Rate of Fire: 600
Equip/Unequip: 0.5/0.7 seconds
Max Spread: 4.5/3.8/3.5/2.5/1.7 (spread*0.8 (1.36)) degrees
Alert Size: 25 meters
GL40
Ammo Pickup: -4 (0) to 1 grenades
Capacity: 1 / 4 (7)
Damage: 400 (560)*
The player who fired the grenade only takes up to 90* damage.
Explosion Radius: 5m (6m)
Reload: 4.3 seconds
Rate of Fire: 600
Equip/Unequip: 0.5/0.7 seconds
Max Spread: 10/8/7/6/0.1 degrees
Alert Size: Firing the GL40 does not create an alert.
The subsequent explosion however has an alert size of 100 meters.
Locomotive 12G
Ammo Pickup: 0 to 1 rounds
Capacity: 4 (6) / 24
Damage: 40*
100% damage up to 5m, 0% at 20m
Reload:
0.4 seconds to start reloading.
0.34 (0.28) seconds for the first shell.
0.67 (0.56) seconds for each subsequent shell.
1.3 seconds to exit an empty reload, 1 second for a non-empty reload.
Rate of Fire: 75 (120)
Equip/Unequip: 0.5 seconds
Max Spread: 5/5/5/5/4 degrees
Alert Size: 30 meters
Mark 11
Ammo Pickup: 2 to 7 bullets
Capacity: 30 (54) / 150
Damage: 13*
Reload: 2.15/3.1 seconds
Rate of Fire: 909
Equip/Unequip: 0.5/0.7 seconds
Max Spread: 5/4/4/3/2.2 degrees
Alert Size: 3 meters
Enemies - Notes
Every difficulty features different multipliers for hitpoints and an additional headshot multiplier on top the headshot multiplier defined for the enemies. The list is as follows:
Difficulty Hitpoint Multiplier Additional Headshot Multiplier Easy 0.7 1.5 Normal 0.8 1 Hard 1 1 Overkill 1.5 1.5 Overkill 145+ (PS3 Version) 1.7 1.5 Overkill 145+ 2 1.55
The default headshot multiplier is 2. Special units and a few normal ones have unique headshot multipliers.
To calculate the amount of damage you'll do with a headshot, multiply the headshot multiplier for the enemy by the additional headshot multiplier in the table above. Then multiply the resulting number by the weapon's damage.
Enemies - Normal


Security Guard
Hitpoints: 20*
145+ Hitpoints: 40*
Weapon(s): Crosskill .45, Compact-5 (Diamond Heist)
Cop
Hitpoints: 20*
145+ Hitpoints: 40*
Weapon(s): Crosskill .45, Reinbeck
FBI
Hitpoints: 30*
145+ Hitpoints: 60*
Weapon(s): B9-S, Crosskill .45
SWAT
Hitpoints: 30*
145+ Hitpoints: 60*
Weapon(s): AMCAR-4, Compact-5, Reinbeck
Heavy SWAT
Hitpoints: 70* (Headshot multiplier of 1.5)
145+ Hitpoints: 140*
Weapon(s): AMCAR-4, Reinbeck
Murkywater
Hitpoints: 80* (Headshot multiplier of 5)
145+ Hitpoints: 160*
Weapon(s): AMCAR-4
Sniper
Hitpoints: 20*
145+ Hitpoints: 40*
Weapon(s): Sniper Rifle
Gangster
Hitpoints: 20*
145+ Hitpoints: 40*
Weapon(s): Mark 11
Enemies - Specials


Bulldozer
Hitpoints: 1000*
Visor Hitpoints: 200* (vs Bullets), 1000* (vs Explosives)
145+ Hitpoints: 2000*
Weapon(s): Reinbeck
Note: The visor must be broken to inflict headshot damage. The health multiplier does not apply to it.
Cloaker
Hitpoints: 150* (Headshot multiplier of 1.5)
145+ Hitpoints: 300*
Weapon(s): Compact-5
Shield
Hitpoints: 100* (Headshot multiplier of 1.5)
145+ Hitpoints: 200*
Weapon(s): B9-S (shield_pistol)
Taser
Hitpoints: 200* (Headshot multiplier of 1.5)
145+ Hitpoints: 400*
Weapon(s): AMCAR-4
Player Upgrades


Body Armor Increase
Provides an extra 10* armor per upgrade, up to 50* extra armor. Each skill tree contains one of these upgrades, except for Sharpshooter which has two.
Extra Cable Ties
Provides 1/2/3/4 extra cable ties, depending on the upgrade level.
Extra Start-Out Ammo
Provides a 10%/20%/30%/40%/50% higher max ammo threshold, depending on the upgrade level. Stacks with Big Game Hunters, allowing the player to carry up to 172.5% maximum ammo if both are applied.
Thick Skin
Provides 20*/40*/60*/80*/100* extra health (base health is 300*), depending on the upgrade level.
Toolkit
95%/90%/85%/80% interaction time for all interactions, depending on the upgrade level.
Crew Bonuses


Aggressor
Multiplies damage by 1.1 for other crew members.
Does not stack with other instances of this bonus.
Big Game Hunters
Multiplies max ammo threshold by 1.15. Does not stack with other instances of this bonus.
Mr Nice Guy/Noob Lube
Multiplies reputation by 1.2 for other crew members. Noob Lube stacks with Mr Nice Guy, but otherwise does not stack.
Protector
Multiplies armor by 1.1 for other crew members. Does not stack with other instances of this bonus.
Sharpshooter
Multiplies weapon spread by 0.9 for other crew members. Does not stack with other instances of this bonus.
Speed Reloaders
Multiplies reload speed by 1.1 for other crew members. Does not stack with other instances of this bonus.
Equipment


Doctor Bag
Charges: 2 (5)
Ammo Bag
Charge: 400% (1000%)
Sentry Gun
Armor: 50 (100)*
Damage: 5*
Rate of Fire: 1200
Spread: 3
Range: 50m
Ammo: 400 (800)
Alert Size: 25m
Trip Mine
0.3 second delay to detonate.
Capacity: 2 (10)
Damage: 1000 (1600)*
Range: 3m
Towards the player who placed the Trip Mine, it has a range of 5 meters and deals a maximum of 60* damage.
Source: https://steamcommunity.com/sharedfiles/filedetails/?id=349294929
More PAYDAY: The Heist guilds
- All Guilds
- The Grind: a guide to completing weapon challenges with minimal pain
- How to crouch in PAYDAY:The Heist
- Heat Street
- Quick & Clean 1-145+ Guide
- Tips, strategies and other information for PD:TH
- How to jump in PAYDAY: The Heist
- PAYDAY: The Heist Guide 3
- OVERDRILL Guide (Russian)/ OVERDRILL
- OVERDRILL Guide