The Beginning


Formatting done byThe Embraced One. Be sure to thank them in the comments
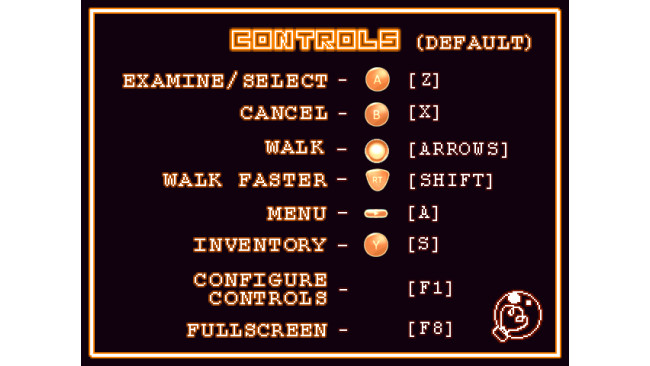
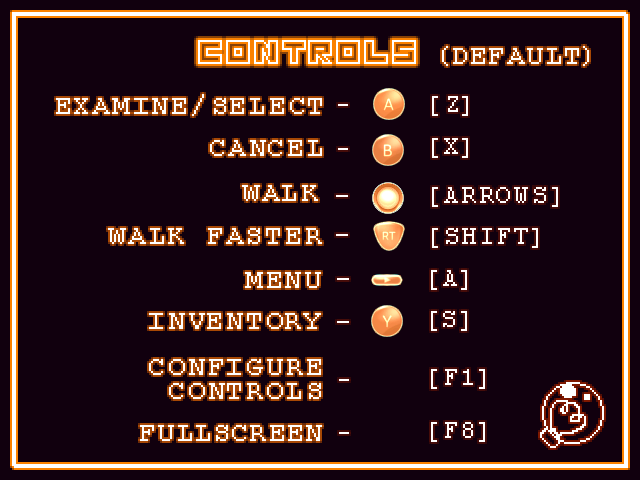
The first thing you're going to want to do is figure out the controls.
If you need to change the controls then you can press F1
Achievement: OneShotNOTE: TO GET THE ONESHOT ACHIEVEMENT, YOU CANNOT EXIT OUT OF THE GAME EXCEPT FOR POINTS WHEN YOU USE THE BEDS OR LATER WHEN NEEDED!
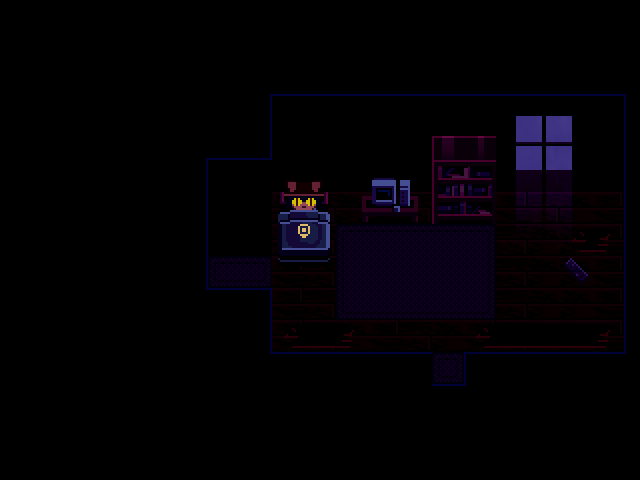
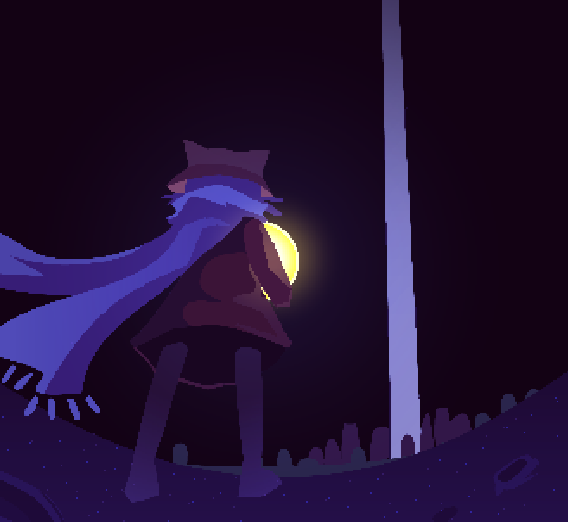
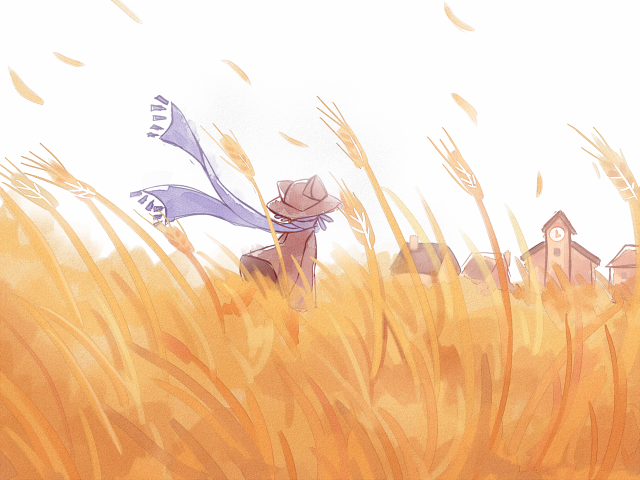
The game starts out with Niko waking up in a dark, creepy room.
Go into the room to your left. Interact with the plant to get a branch.
Go back to the first room and grab the Remote there and equip it, then head over to the window and interact with it. It will tell you four numbers with different colours. This is the code for the computer.
NOTE: The code is randomly generated every time, so make sure you remember it!
After inputting the code, the computer will begin talking to YOU, the player, addressing you by the username of your computer. It will tell you that your actions will affect Niko. The door will then unlock and you can finally go into the next room.
The first thing you want to do here is go over to the fridge and interact with it. It will give you a Bottle of Alcohol.
Combining this with the Branch will make Niko dip the branch in it.
Then go over to the TV and equip the Soaked Branch. Use it on the TV and Niko will light the branch with a spark from it. Use this new Torch on the fireplace.
You'll then see a glint near the fireplace, interact on top of it to grab the Basement key. Equip the key and go to your right and interact with the door.
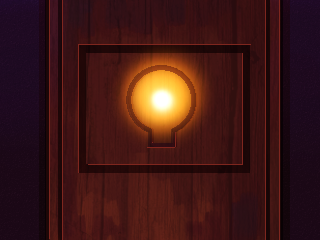
Slowly walk down the steps to reach yet another door to reach the basement. Here you will find what appears to be a giant lightbulb. Interact with it and you will witness a cutscene and receive the Sun.
Go back to the fireplace room and equip the lightbulb and use it on the door to open it. Step out the door to reach the Barrens.
The Barrens


Congratulations, you now know how to fast travel. Go up until you reach a structure similar to the one you came out of.
Walk inside and grab the Metal Bar lying on the ground. Fast travel back to the first house and now you may start walking down/right.
After a little while you'll reach Prophetbot, a robot specifically designed to greet Niko. It'll talk to you for a little while, during that time Niko will ask questions. At this point, if you don't like how the game named you, you can change your name to whatever you want by pressing "That's not my name!".
Once you are finished talking with Prophetbot you can then continue walking around. Walk to the right a little more until you reach the abandoned factory. Go inside and then walk through the next doorway. To your right is a machine that still works, go over to it and equip the metal bar you got from the docks and use it on the machine.
Achievement: Chaotic EvilOnce the crowbar is in your inventory, equip the sun and use it on the machine.
Head back to the building where you met Prophetbot and go inside. To your left will be a glowing box. Use the Crowbar on it to receive the Broken Battery.
Continue past the abandoned factory then up to the cliffs, and use the path that goes to the right and go up and then right again. You should reach a cliff edge with a bunch of black clovers. Once here, go to the house and talk to Silver, a pessimistic robot.
After she stops talking, go over to the shelf on your right and interact with the glint to recieve the Screwdriver.
Go back outside and head to the right. When you get to a cave, interact with the door way and Silver will rush over to open it for you. Once inside, grab the Camera.
Go to the edge of the crevice and Niko will see a faint yellow light. Head back outside and fast travel to the outpost (where Prophetbot is). Use the Screwdriver on the Camera to get the lens.
After that pop the Lens in the Battery.
Use the Sun on the Battery to charge it. Head into the back room and you should see a generator. Put the Battery in it and it will turn on.
Achievement: ShockInteract with the generator to get Niko shocked.
Head back out and you will notice that the computer is on. Interact with it and it will start talking to you, telling you that the code to that safe in the cliffs is not in the game itself. What you want to do now is go into the files on your computer go to documents (usually C:\Users\YourUserName\Documents). There should be a file called DOCUMENT.oneshot.txt. Read it and it will tell you the code
NOTE: the code changes every playthrough!
Head back to the safe and input the code to get the Gas Mask and the Strange Journal.
Once you have that you can go to the gaseous area straight up from the safe. You should enter an area covered in gas. Niko will put the Gas Mask on and now you're good to go!
Keep going up until you reach a factory. Go inside, there should be Gloves lying on the ground, grab them.
Continue through the next door. Here you'll find a Sponge.
Go into the area to the left of the gaseous area you are in now. It is a settlement made for the miners who worked in the Barrens. All you need from here is the Plastic Syringe found in the medical building.
After grabbing the Syringe, go to the left-most area. On the left side of this area there are two peninsulas. One contains a hole with gas coming out of it.
Use the Empty Bottle on the hole to get a Bottle Full of Gas.
On the other peninsula, use the Syringe on the bubble to get Rare Blue Phosphor.
Use the Filled Syringe on the Bottle Full of Gas and Niko will inject the phosphor through the cork and then shake the bottle to get a Bottle Full of Acid.
Now you finally have what you need to fix the rowbot. Fast travel to the docks and interact with it. It will talk for a second and then say it cannot move.
Use the Bottle on the Sponge to get a Wet Sponge. Use it on the rowbot and now it can move.
But alas, its navigator circuits are fried... You will be told to speak with the Head Engineer (Silver).
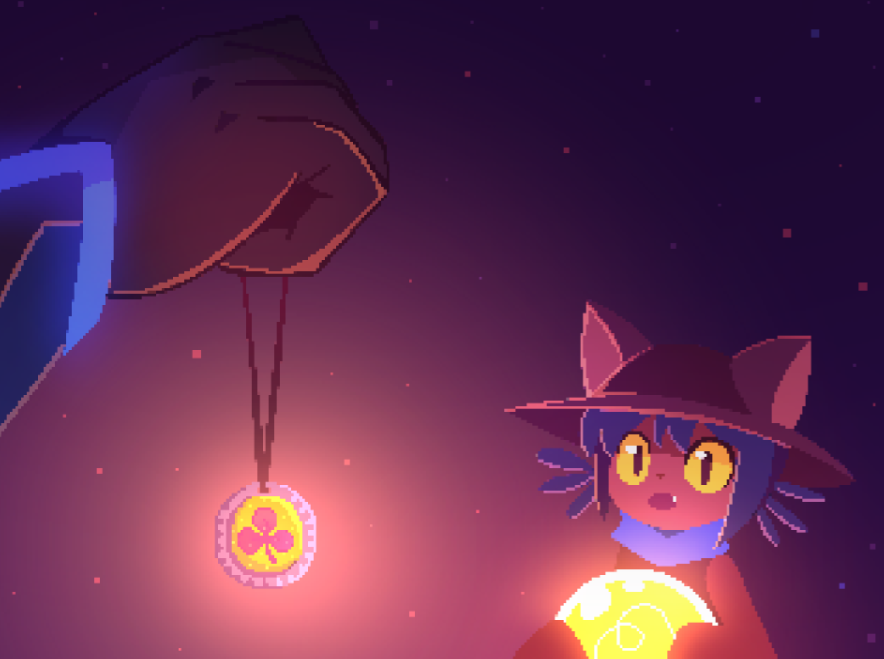
Talk to her and she will give you the Amber Pendant. Talk to her again or try to exit and Niko will ask her if there is anything she wants. She will ask if Niko knows how to play chess.
The Glen


MAKE SURE YOU USE THE BED BEFORE LEAVING! The Steam version of OneShot allows the player to exit whenever they like. But to get the OneShot achievement, you cannot exit unless at beds or the Tower.
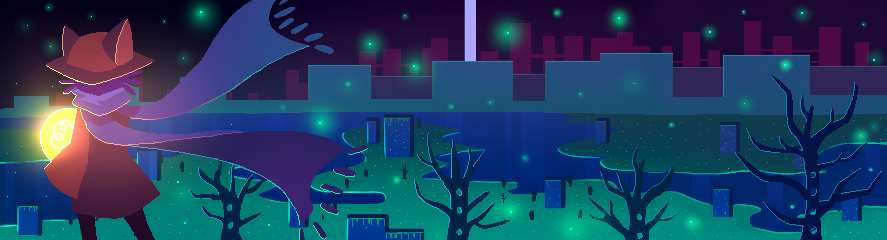
Show the Amber Pendant to the rowbot and it will take you to the Glen, a flooding grassland in which the main population is bird people.
The first place you're going to want to go is down to the forest. This is when you first meet Calamus, a bird person looking for his little sister. Don't worry about him right now. Keep heading south until you reach an area with robots. Pass the first building and continue until you find the next one. Go inside and talk to the robot that isn't walking around. It'll give you a Vial of Water.
Fast travel back to the forest but go back down and to the right-most part of the island and you should see a bridge (if you don't see it you need to explore a bit). Go down that path until you see the big robot standing by the gate to the Refuge. It will ask you to write your name, but neither of you have a pen... So now you have to go out and find a pen!
Go to your right and continue until you see an open doorway. Head inside and go down the stairs to the right. Keep going down until you reach the third level. Now, go to the right and continue until you see another doorway, go inside and you should see a door next to a pond. Go inside and you'll see a computer. It will tell you that the next clue is in the most accessible place on your computer. At this point if you're playing in fullscreen mode, the game will enter windowed mode to reveal your desktop. Your new wallpaper on your desktop is your clue for later.
Go back to the steps and go down to the fourth level, then down and to the right. When you see a path going down, skip it and go to the right. Keep going down that path until you see a block. Niko will tell you that the path is blocked... by blocks!
Now go to the path that went down. When you get into the next room keep going down, then left, then up and now you have met Maize, the plant spirit.
She'll ask to keep the Sun with her for a while. Give it to her. Now the vines to some places have receded. Go back to the gate and to the left of it is a doorway, go inside and use the bed. Niko will have a dream and ask you pointless questions. Go back to the forest and head up into the village.
Now this is where you need to talk to the shepherd about ram herding. Go to the peninsula under him and herd the rams. The point is to get all the rams to stand on a patch of dirt. Don't forget to interact with the spinning demon ram! Upon herding the rams, you'll receive Wool.
Achievement: Ram WhispererHerd the rams on first try without ringing the bell to reset.
Now head right and interact with the magpie trader. To get the Ram Shirt and Dye, Niko needs to refuse the first offer the Magpie makes for the Wool (otherwise you only get Dye).
Achievement: Extreme BarteringAttempt to trade every item in your inventory.
Items needed for this achievement:
Sun
The Journal
Wool
Ram Shirt
Gold Feather
Amber
Dye
Vial of Water
Feather Pen
Seed
Now go back to the ruins and go the second level. There you will see a doorway that leads to a hallway. Go through the hallway until you reach another room. This is where you need the symbol from your desktop wallpaper. Enter the symbol into the floor here and you'll have rescued Alula! Take her back to Calamus (you can fast travel with Alula). They will have a brief reunion and take you to their house where you will receive the Golden Feather.
Head back to Maize now and take the Sun. There is also an orange glint on the ground, interact with it to get the seed.
NOTE: make sure you attempt trading the Dye and Golden Feather before using them!
Head back to the gate where the big robot is. Use the Dye on the Golden Feather to make it a pen.
Use it on the robot to advance through the gate to the Refuge.
The Refuge Part I
 SeedMedicated WaterDirt


Talk to the big red robot near the entrance, and it will tell Niko about the Refuge and the lower part of the city. Show it the and it will tell you about the garden to the left. After visiting the garden and putting the in the pot there, head down from the robot.
Achievement: RebirthPlace the in the garden, then later add the and into the pot.
This is where you'll meet Plight. He needs to get to the surface for his job, but the elevator needs a new button. Head to the bottom left catwalk and take a nap in the bed. Afterwards, go to the bottom right catwalk and keep going until you reach the cafe.
Grab the coffee can lying on the ground and head back to the elevator deck.
Go to the top left catwalk into the apartments. Go through them all if you want, but you only need to go into two of them for achievements. One contains a Roomba vacuum, and the other Mason
Achievement: We Ride at DawnRide the Roomba in the apartments in Refuge.
Talk to Mason in one of the apartments to get some for the seed.
In the last two sections of the apartments, there are two rooms at the bottom of the screen, one is a bathroom and the other is a library/kitchen area. The bathroom contains Scissors, and the kitchen contains Fridge Magnets.
Use the Scissors to cut the Can into a Button.
Then use the Magnets on it.
Head back to the elevator deck and go to the top right catwalk. Keep going straight through this building and use the Tape on the table with the Button.
Head back and go down from the room with the clock person. Keep going right and there will be a computer. It will spit out a weird piece of film.
Go back to the elevator and place the button on it. After the squares infect it, it will ask for a code.
Use the Film (it should cover the game screen) and drag the game window outside the borders of your screen to reveal the code. Input the code and head down the elevator.
The Refuge Part II
 Ram Shirt


 Bookworm
 Medicated WaterDirtSeed
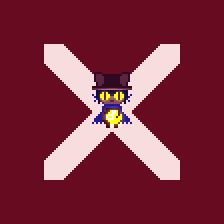
Go all the way to the right from where you are. Go down and head right. Here is the Library the robot was talking about. Head inside and talk to Bookbot.
Niko will ask about books about the Tower and Bookbot will suggest talking to George, but she won't answer the phone, however to visit her, Niko will need a Library Card.
Achievement: Interact with all the glowing books in the library (including the ones at George's place!)
Head back to the elevator and go to the right until you see a sign that tells you to go into the alley.
Achievement: SecretGo in then right, all the way until you see a picture of a ram on the wall. Use your on it to enter the Ram Club. Don't forget to talk to the spinning demon ram!
Now go back to where you could go up and head up and then take a left. There will be a doorway. Head in to get the Lenses. Go back out and to the right. You should see a stairway to a door. Go in the door and you'll meet a talking fox who vanishes after being cryptic.
Go back outside and head back to the point that you can head up again. The next place is the vendor street. Go all the way to the left and go down and go down again. Enter the factory and talk to the robot to start up the puzzle. The puzzle is randomised on each try.
Once you complete the puzzle go all the way up until you see Kip, the head scientist. Talk to her and she'll give you her Library Card.
Interact with the glint on her shelf to get pink Glitter Blue. Go back to the vendor street and enter the photo salon. You can find out the order the lenses need to be put in the camera by talking to the vendors. The order is thick, concave, thin, convex (as per the Tessar lens design by Paul Rudolph).
Step in the light to take photos of Niko (you can redo the picture multiple times!) Grab the Photo use the Glitter Glue on it. Then use the picture on the Library Card and you're good to go.
Head back to the Library and equip the Card. Talk to Bookbot and he'll let you go to the Archive to meet George.
Note: George has a total of 6 personalities you can encounter. Each time the amount of dots on her face change: 1: narcissistic, poetic and speaks in third person 2: stressed and rude 3: tired, worried and hopeless 4: cheerful and encouraging 5: motherly and kind, gentle 6: very casual and friendly
Show her the Journal and she'll decode it for you while you take a nap. After George has decoded the Journal you can finally read it and she gives you a Golden Die.
NOTE: don't forget to interact with the glowing books in George's place for the achievement!
Go back to the vendor street first though and grab the Pill from the pill guy at the far left end and use it on the Vial of Water.
Niko is very hungry, so go back to the upper part of the Refuge to the cafe and ask Ling for pancakes.
Ling will then talk with Niko for a minute as a form of encouragement.
Achievement: PancakesThis achievement is rewarded automatically when Niko eats pancakes at the cafe.
NOTE: Before going back down, don't forget to take the and to the in the garden area!
Head back to the vendor street and go to the place where you went to the factory but head up from that point. This area is the Tower. Head in the tower and exit the game when you see the red X.
The Tower...
RebirthSun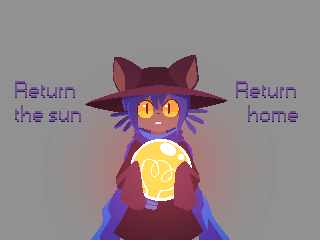
You finally made it in the Tower, Niko stands alone in a dark room and will call out for you but you can't answer. Walk around enough and you'll find a computer. It talks to Niko and then tells you to never come back and then the game quits.
Go to your Documents folder again (typically C:\Users\YourUserName\Documents) and enter the OneShot folder. Look for the black clover symbol and open the .exe program and then open the game again. Interact with the computer and it'll freak out and tell you you weren't supposed to come back. It will summon a door, walk through it.
Now place the black clover application in a way that you see it while playing the game. It will show a note made by the Author to you. It will give you instructions in the next puzzles. Equip the Journal, and line up the symbol of the black glowing clover on the bottom right of the screen to the one on the black clover application. This way, you'll be able to see what way you need to go.
After this, Niko will be transported to the basement of the house we started in. Go to the room with the fireplace. Go through the door that originally opened to the Barrens, then take the elevator. At the top of the Tower, you get to choose between returning the or sending Niko home.
NOTE: To get the achievement, you need to restore the !
Achievement: OneShotIf you only quit the game when entering the Tower and by using beds, you'll now get this achievement!
Once you choose, the credits will roll and you've completed the game. Congratulations, but now you need to open the .exe program once more...
Solstice Ending Part I


To start off, go into your Documents folder again and check for the .exe program with the black clover in front of it. If you haven't already read it then now is the time. The Author tells you that, in the same file (being the folder, not the exe program), is your save data. He tells you how to delete it. This file is the restriction keeping you from going back to the game. Once you delete it, you can enter the game again. Once you start it up, you'll be greeted by the title screen instead of the opening room, so you can start a new game.
This time, Niko will call out your name upon waking up, not knowing who it belongs to. At this point, the game will play generally the same besides the extra dialogue with Prophet Bot.
Play as normal until you reach the abandoned mines. When you first played, you may have walked to the edge of the rails where you sawa faint yellow glow at the end of the tunnel. When the Journal starts to glow, stand on the black clover near the edge and open it.
A minecart will appear and you can enter the depths of the mine with Silver. After reaching the end, Silver will investigate the computers in the room.
Go to the next room to meet Prototype Prophetbot. It prompts you to solve a security puzzle to recover its memories. For hints, travel to the housing buildings in between the gaseous areas and observe the buildings.
Solution: First robot, second empty, third medical cross, fourth robot, fifth empty, sixth electricity.
Upon the attempt to exit the cave, the Entity will begin bringing the cave down. Prototype and Silver will not make it, but you will receive Prototype's recovered memory disk.
You then arrive to the Glenn.
The giant robot at the entrance to the Refuge is infected with squares so you will need to find another way. Head back to the door you passed on your way to the robot and walk inside. Head down to where the path that leads to Maize. Go to the right where Alula and Calamus' house is. Continue down the hallway and talk to Alula and Calamus, then walk outside and head into the building on the right. You'll see another clover. Stand on it and use the Journal, then a boat will appear.
After arriving at the graveyard, head down and to the right where you meet Cedric. You will need to find a Battery and Gears so he can fix the Flying Machine, to take you to the Refuge.
Head back to Maize and ask her to connect the islands, then head to the village and talk to the Magpie trader. He will give you a Music Box for free. Head down to the area of robots where you got the Vial of Water in your first playthrough, but go to the bigger building this time. Talk to the robot to get the Battery.
Go back to Cedric and give him the items so he can fix the flying machine. Now you can fly over to the Refuge!
Solstice Ending Part II

Once you land in the Refuge, the Flying Machine will be engulfed in squares and Cedric will leave via a parachute to fix Prototype Prophetbot.
Head over to the elevator where you'll find Plight kicking at the door. After talking to him, try to repair the elevator and it will immediately burst into squares! Go to the office building, where the clock person is and enter the room with the big vault and number display.
Interact with the big door and enter the password. The hint is documents.
Solution: Solstice
Enter and try to open the elevator on the right. Niko is not tall enough to pull the lever above the door, but Plight can. Once you two take the elevator down, Niko walks out, but Plight gets stuck in squares.
Go to the door on the left side, towards the lab. You'll find Kip trying to stop Cedric from entering the lab as it's about to collapse. She'll fail and then escord Niko to the Library where all the other city folk are. Talk to her and George until they let Niko go.
Go to the alley back to where you met the fox at the tree to meet it again.
Take Rue above the vault elevator to look at the city of the last time where you will be interrupted by squares.
When you go back inside, Cedric and Prototype appear. Interact with the coloured portals and make the three of them stand on them.
Now in your Documents, under "My Games" and "OneShot", there should be four new folders named "Big Portal", "Portal 1", "Portal 2", and "Portal 3". Go into each individual Portal file (not including the Big Portal folder) and take the key file from them and place them in the Big Portal folder.
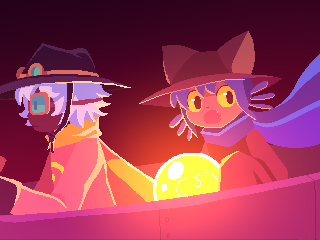
Go back into the game and a door will appear. Walk inside and you will yourself in the room of the Author. Go into the next room after talking to everyone, and enter the Tower.
Exit out of the game and start it up again. You'll now be in the "World Engine" and will have to walk back and forth and ascend the area. Once at the top, a door is present. Walk inside and you'll enter a room with a bridge. Walk across and you'll be face-to-face with the Entity using Niko's image.
It will talk to you for a while, telling you about what it did and why it's unstable. A long dialogue will play out.
The credits will be plastered on the ground this time. You can walk around during this segment and talk to characters that supposedly died. Once finished, you'll get both of the previous endings at once.
You can play through the game again to get any achievements you missed. When you start up the game, you'll need to select "...", a new option in the main menu, but this time, you play as the Entity instead of Niko, because remember, Niko went home!
Achievement List
SeedMedicated WaterDirtRam ShirtAchievement: OneShotTo get this achievement, you need to only quit the game by using the beds and quitting when entering the tower, on the big red X.
Achievement: Chaotic EvilOnce you flatten the metal bar in the factory, equip the sun and use it on the machine.
Achievement: ShockInteract with the generator after activating it to get Niko shocked.
Achievement: Ram WhispererHerd the rams for the Shepherd on first try without ringing the bell to reset. (see video above)
Achievement: Extreme BarteringAttempt to trade the following items with the Magpie trader: Sun, The Journal, Wool, , Gold Feather, Amber, Dye, Vial of Water, Feather Pen, .
Achievement: RebirthPlace Maize's in the garden, then later add the and into the pot.
Achievement: We Ride at DawnRide the Roomba in the apartments in Refuge.
Achievement: BookwormInteract with all the glowing books in the Library (including the ones at George's place!)
Achievement: SecretGo in then right of the alley all the way until you see a picture of a ram on the wall. Use the on it to enter the Ram Club.
Achievement: PancakesThis achievement is rewarded automatically when Niko eats pancakes at the cafe.
Achievement: ReturnDelete the fake save file in Documents/MyGames/OneShot and begin the Solstice Ending.
Resetting The Game
Turn off the Steam Cloud sync for OneShot by right-clicking the game in your library, selecting Properties, going on the Updates tab and unticking "Enable Steam Cloud synchronisation for OneShot".
Then go into offline mode by clicking the Steam menu in the top left corner in Steam and selecting "Go offline".
Next, go to your app data file. Here is the location of it:
C:\Users\*YourUserName*\AppData\Roaming\Oneshot
Make sure you make a backup of this folder (i.e. copying it to your Desktop!), then delete everything in here apart from the following:
settings.conf
save_backups
Instead of deleting the backup saves folder, go into it and delete everything in it.
You can go back online and turn on Steam Cloud if you want.
Now you can play OneShot again!
Source: https://steamcommunity.com/sharedfiles/filedetails/?id=1134657947
More OneShot guilds
- All Guilds
- ? ! !
- Silliness Guide (UPDATED)
- OneShot on Linux: The Definitive Guide
- OneShot Guide 968
- how to be silly
- How To Experience This Masterpiece A Second Time
- How to open the game!
- Who's a good Sun? Niko is a good Sun!(Not a son)
- OneShot Guide 922
- Como no llorar la perdida de NikoDeidad