Side Quests
NieR Replicant has a total of 71 Side Quests, many of which offer fantastic rewards - and many of which don't.
There is no achievement or bonus for 100% completion of the Side Quests. But for those who wish to do so anyway, this guide should come in helpful.
This guide will contain minimal spoilers for both the main plot, and the actual plots for the Side Quests. There's some stuff that I can't avoid saying (especially for Side Quests with branching paths depending on your decisions), but I'll be using as much diplomatic language as I can to try and obfuscate the twists along the way.
Also, lastly, I just want to say that none of the Side Quests in NieR Replicant are that difficult. There are some tedious ones, sure, but they mostly boil down to Fetch Quests, Kill Shades, and/or Talk to People. Following the in-game tips should usually be enough to get you what you need - but once or twice you might have trouble finding a particular NPC, which is where you might find this guide useful. Or maybe you just want to see the list of every quest so you know which ones you're missing. Whatever works for you bro
also god apparently this guide is 10000 words long what am I doing with my life
Starting Side Quests
To start a Side Quest, you need to go and talk to the person who gives the Quest - revolutionary, I know.
One nice thing that NieR Replicant does is give you a starting hub for all the quests, however. Pop down to your Village Inn from time to time to check on Devola - if there's any people handing out quests who you haven't talked to yet, she'll tell you where they are. You don't need to talk to Devola before starting any quests, but she'll point out where the quest-givers are on the map, which can be a big help if you're getting lost trying to find them.
People with quest related dialogue have different dialogue bubbles over their head when you approach them - it's the same type that you see used for the main quest. Additionally, their icon on your minimap will be white with a black dot rather than pure grey. Keep an eye out for both of these when starting or doing quests, since they'll save you running around in circles.
Disclaimer On Uncompletable Quests
So, chances are you looked at the Quests section of Weiss, saw "Uncompletable", and proceeded to brick yourself over the thought that you might miss content.
Don't worry too much about this. This isn't JRPG territory, where you can walk two steps too far and unknowingly lock yourself out of half the game. So, without spoiling too much, the game is split into two halves - a Part 1 and a Part 2.
Part 1 has 36 Side Quests, and if you don't finish them all before you reach Part 2, you can't go back and finish them. If you missed one, you're gonna have to make a new save file. Yikes.
To avoid this, your "point of no return" is when you're asked to investigate the Manor in the Southern Plains. Go finish up any remaining Side Quests before going any further - these are 50% of the quests in total, so that's what you want your completion percentage to read. You can't miss any of the Part 1 Side Quests while still in Part 1; all of them are available to go and start and complete at this exact moment in the plot, so you can chip away at them at your leisure.
Part 2 also has one "Uncompletable" Quest, but that's a weird case, and we'll talk more about that when we get to it. This one is way more lenient, however, since you can go back and finish it right after you get Ending A. Definitely don't stress over that.
And again, there's no bonus for 100% quest completion - the only penalty you have for missing a quest is your OCD whenever looking at the quest menu.
Part 1 Quests
There are a total of 36 Side Quests available in Part 1.
In total, for all of the Part 1 Fetch Quests, you will need to gather:
15 Medicinal Herbs
15 Mutton
3 Tulip Bulbs
3 Berries
3 Royal Ferns
3 Bounty Fertilizers
1 Venison
11 Wheat
1 Eagle Egg
5 Lizard Tails
5 Mouse Tails
10 Wool
5 Natural Rubber
10 Goat Hides
1 Melon
11 Watermelons
1 Pumpkin
10 Sardines
5 Sharks
5 Rice
5 Mushrooms
3 Goat Meat
10 Wolf HidesPlan accordingly for these items - specifically, consider planting some Wheat and Watermelons. You can harvest 10 Wheat from one seed, but only one Watermelon from one seed. Planning ahead for crops will save you a significant amount of gold.
You can technically add "1 Fluorite" to this list, but that quest walks you through the process of getting one, so YMMV on that.
You will also need to fish:
10 Sardines
10 Blowfish
7 Rainbow Trout
5 Bream
5 Black BassYou will need 20 Sardines in total, as you lose the 10 you fished for the Fisherman.
1-6
#1: Herbal RemediesOh boy, the first quest in the game is a fetch quest? That's how you know we're in for a good time.
Talk to Popola in the library. She'll want two Medicinal Herbs.
These are cheap to buy from the herb shop (potion shop? whatever). Or you'll have already got a few from killing shades. Or found them by breaking boxes. Honestly, Medicinal Herbs are really common, so this shouldn't be an issue. You might even have them already.
Hand them over to Popola for a cheeky 500 gold. Done.
#2: The Gatekeeper's ErrandTalk to the eastern guard by the northern gate in your village. He'll send you to go talk to the Blacksmith's wife, who is in the south of the village shopping district. That's it. That's the quest. Get your 500 gold. Done.
#3: The Lost EggsAt the north end of the shopping district in your village, talk to the item shopkeeper. He'll want a chicken egg.
You can talk to some fellows to pin it down, but it's behind one of the pillars by the fountain in the middle of the village. There isn't a shining item spot for this, but you'll get a short cutscene as soon as you're close to it. Run back to the shopkeeper and give him his prize. You'll get a Health Salve. Done.
#4: Old-Fashioned Home CookingIn the north of the village shopping district, there's a woman on a bench complaining about her kids. She wants 10 mutton to feed them. Lucky for you, there are a lot of sheep in the Northern Plains, and Mutton is their most common drop. Keep in mind that you have to actually interact with the body to get the drop - and the bodies will despawn if you don't do this shortly after the kill, so be mindful of that. Either way, you can just run in and out of the village to respawn them, so this shouldn't be an issue. Go slaughter them, return with the goods, and enjoy your hard earned 1500 Gold. Done.
Except not done, because you can actually repeat this quest for all of Part 1. Don't worry, it's marked as complete in your quest list, but you can infinitely give the woman 10 mutton for 1500 gold. This isn't a terrible way to make money in the early game, but you'll get a lot of it later, so don't go grinding this unless you really need to. Anyway. Done.
#5: Shopping ListSpeak to the florist in the north of the village shopping district. She wants three tulip bulbs - you can buy these from the Grocers in Seafront, to the south. Grab them, give them to her, enjoy your 500 gold. Done.
But wait! There's more! This quest unlocks farming. You'll get access to 2 plots by your house where you can plant seeds, and wait real time hours or days to see them turn into produce. What a fun and exciting mechanic that I'm sure won't be a bottleneck for a later side quest! But yeah. Done.
#6: Book SmartsIn the village library, talk to the lady on the far side of the top floor who wants you to return some books. She tells you where to go, but don't sweat it too much, since you can only interact with the correct shelf anyway - so it should be easy to pin them down. Return the red and blue books to get your quick and easy 500 gold. Done.
6 down, 65 to go.
7-12
#7: The Tavern Keeper's GrandmotherGo to the Tavern in the village shopping district. The Tavern Keeper wants 3 Medicinal Herbs, 3 Berries, and 3 Royals Ferns.
You should know where to find Medicinal Herbs by now. Berries are randomly found in both the village and northern plains via item spots - but if you hate randomness, you can buy these for 200 gold each from the Material Shopkeeper in the village.
Royal Ferns are the doozy items here - they're rare spawns in the Northern Plains, so you'll be looking for a while to get them all. Or, y'know, you can just buy them for 150 gold each in Seafront. Whatever works for you.
Return with the goods, and then you're given one last item to hand over to the old woman by the village fountain. Make the daunting 10 second trek to get your 2000 gold reward. Done.
#8: A Return to ShoppingThis is a sequel to Quest #5: Shopping List.
The Florist in the village shopping district wants three bounty fertilizers. You buy these, once more, in Seafront. You'll get a Tulip Bulb, a Bounty Fertilizer, and 2000 Gold for this quick fetch quest. Done.
Oh, yeah, and you get one more row for your field. That's 15 potential spaces now, up from 10. Cool, huh? Done.
#9: Boar Hunt!YEEHAW
In the north end of the village shopping district, you'll find an old man asking you to hunt a wild boar. Easy enough, right?
So, the boar is on the far side of the Northern Plains - near the Aerie - and it'll be one of the harder early game fights.
Okay, that's half true, and half a lie. The boar hits hard if you let it, and it can take a pounding - so it's difficult in that sense. At the same time, it has a very obvious attack pattern, and can't really do anything if you just keep dodging behind it. Either way, your best bet is to just charge up some magic, fire, dodge as needed, and rinse and repeat for a couple minutes. Once you kill it, you get the tusk, and return to the old man. Easy 1000 gold. Done.
Ah, but you get to keep the tusk - which is important, as everyone knows that Boars will defect to those bearing a token of dominance over their kind. In other words, you can now ride them. Which is good, because they're FAST. Go zoom across the North and South plains to your heart's content. And hey, if you ride it for 5 minutes straight, you get an achievement. Now that's what I call a deal! Done.
#10: Yonah's CookingAfter you've pleased Yonah with the power of fishing, she'll give you a fetch quest. One vension, one wheat, simple enough.
Venison is harvested from the deer in the Southern Plains, Wheat can be bought in the village for 500 gold - or, if you'd prefer, harvested from your allotment after you plant a 50 gold wheat seed. This gives you about 10 or so (which you may want to do, as you'll need a lot more wheat for an upcoming quest). Once she has the goods, cutscenes ensue, and you receive your... "reward". Lovely. Done.
#11: On the Wings of EaglesThis is a sequel to Quest #7: The Tavern Keeper's Grandmother.
Tavernkeep has another job for you. Talk to her in the village tavern, and she'll want an eagle egg from the Aerie. This spawns by the house underneath the Chief's one - you know, all the way through the place, in the most inconvenient spot. Grab it, give it to the tavernkeep, and then give the resulting concoction to the old woman at the fountain. You get 2000 Gold for your time. Done.
#12: Fragile Delivery:^)
Honestly, this one isn't that bad. A little off-putting at first, sure, but really not that bad.
Talk to the west guard on the Northern Gate of your village. He'll give you a package to deliver - but here's the catch, it's fragile, so you can't do anything that will break it. That is, you can't roll, and you can't take damage.
On the other hand, you're free to jump, attack, and use magic. Go hog wild on those.
Anyway, you just need to take the package from the Northern Gate to the Aerie - across the Northern Plains. Honestly, just book it - if you're running straight, most enemies don't really know how to catch you (and there aren't any ranged attacking enemies in the early game), so you can basically go straight to the Aerie without too much hassle. Hand over the package, return back to the guard, and get your 1450 gold reward. Done.
But wait... What if I failed? What if I did break the package? Do I get the bad ending?
Nope, the guard has infinitely many replacements to give you. You can finish this quest first try, or on your millionth try. Doesn't affect a thing.
Also... You may or may not want to wait a little while before doing this quest, since there may or may not be shades in very awkward places on your next trip to the Aerie. If there are, just progress the plot a bit until there aren't. Then the trip should be smooth sailing. Not that hard, right? Done.
12 down, 59 to go.
13-18 (The Fisherman Saga)
#13: Fragile Delivery 2Now, this might be hard to believe, but this is a sequel to Quest #12: Fragile Delivery.
This time, you're looking for an old guy in the north end of the village shopping district. This time, you're going to Seafront, and visiting the tavern there.
There's not much to say here. Same principles as before - if anything, this one is easier, since there's less nonsense in the Southern Plains, and Seafront is perfectly safe. Drop off the package, dash back to the guy, and claim your 1500 gold. Done.
The Fisherman SagaSo over 10% of NieR's side quests are about fishing, so I'm going to put up the preliminary information here.
To fish, you want to pull the line towards you, while holding the direction opposite of where the fish is. If it's on the right, pull towards you and left. If it's on the left, towards you and right. Dead centre, just towards you. That's it, you've mastered fishing.
There's a bait shop in Seafront that will sell you what you need. To start with, you'll only have Earthworms, Lugworms, and Lures available. The first two are dirt cheap, the lure costs 100 gold. This is because the first two are consumable bait, while the lure is reusable. As time goes on, you'll unlock new fish to use as bait, but you can mostly ignore this for Part 1.
Now, some fish might seem impossible to catch. The health bar decreases way too slowly. Well, my good fellow, that's where the Fisherman Quests come in. Each time you finish one of these quests, you get better at fishing - that is, fish become easier to pull in, you don't need to spend as long in the minigame, and overall it becomes more bearable.
You can space these out however you want, but since each of these quests become available immediately after you finish the previous one, I'd advise just bum-rushing them in one fell swoop. You'll have the fastest fishing skill available in Part 1, and can forget about it until the quests get even more entries in Part 2.
So. The Fisherman's Gambit.
#14: The Fisherman's GambitThe bloke who gave you the fishing rod wants you to get good with it, and demands 10 sardines. Easy enough.
Sardines can be caught right next to the guy who gives you the quest. You'll want to use lugworms as bait, which can be bought for 10 gold each just up the road. You'll probably miss a few, and end up catching occasional pieces of trash, but there's not much that can surprise you here. Catch the sardines, hand them over, and unlock faster fishing. Easy. Done.
#15: The Fisherman's Gambit, Part 2you'll never guess what quest this is a sequel to
Fishbloke now wants 10 Blowfish. Annoyingly, these are caught in the exact same place as sardines, with the exact same bait - lugworms. Expect to catch a few sardines as a result. Anyway, get your 10 blowfish, hand them over, and get better at fishing. Done.
#16: The Fisherman's Gambit, Part 3you'll never guess what quest THIS is a sequel to
Fishbloke gives you a fish outside of Seafront, this time! You need to go catch 7 Rainbow Trout. You can find these in the Northern Plains, near the base of the bridge leading to the Junk Heap. Use a lure. Catch 7, bring them back to fishbloke, get better at fishing. Done.
#17: The Fisherman's Gambit, Part 4YOU'LL NEVER GUESS WHAT QUEST THIS IS A SEQUEL TO
Fishbloke worried for your safety while you were in the Northern Plains, so he wants you back in Seafront. 5 Bream, caught in the same spot as Sardines and Blowfish. Riveting, I know.
You can use lugworms here, but since the water is full of Sardines and Blowfish, consider using a Lure instead. Less hassle. Fish your 5, hand them over, and get another fishing upgrade. Amazing. Done.
#18: The Fisherman's Gambit, Part 5This quest is only available after completing every other side quest in the game.
No, of course not, it's a direct sequel to Quest #17: The Fisherman's Gambit, Part 4. Yeah, I didn't see that one coming either.
Fishbloke wants 5 Black Bass.
Your best bet for these is to go to your village and use a lure. Either go down by the water wheel, or the body of water across from it (where you wash up if you fall in). Catch 5, go back, get another fishing upgrade. And that's your lot for fishing upgrades in Part 1! Done, done, done.
18 down, 53 to go.
19-24
#19: The Ballad of the TwinsIn the village tavern, one of the regulars asks about getting Devola and Popola to sing together. Go talk to them both. Devola's down with it, but Popola needs a drink to get over her stage fright. A drink made by the Seafront Tavern Keeper. Who sends you on a fetch quest for five mouse tails and five lizard tails.
These are easy enough to grab - while you can't buy them, there are two lizard spawns in the Eastern Plains, and two mice spawns in the Junk Heap (near the store, not in the dungeon). Mice and Lizards are small and run around, but you pick them up as if they were an item spawn. Leave and re-enter each area a few times to grab 5 tails from both of them. Shouldn't take long.
Drop by the Seafront tavern, get the drink, give it to Popola, and then enjoy listening to the Song of the Ancients duet in the tavern. There's no material reward for this quest, but hey, it's a good song brent. Done.
#20: A Dog Astrayhuh we have to go find a dog in a yoko taro game, I'm sure this will be a happy upbeat quest
In the southern end of the village shopping district, there's a man near the Blacksmith who wants you to go find his dog in the Northern Plains. You'll find the good boy on the north end, past the base of the bridge to the Junk Heap. You'll need to fight off a couple of shades, and then grab a bag of herbs. Run back to the man for your 1000 gold. Done.
#21: The New Merchant in TownGo to the fellow on the ship in the most southeastern part of Seafront. He sends you on an exciting adventure to find 10 Wool, 5 Natural Rubber, and 10 Goat Hides.
Wool and Goat Hides are rare drops from Sheep and Goats respectively - they're not too painful to gather. Just farm the sheep in Northern Plains and the goats in the Eastern Plains until you've got both resources.
Natural Rubber is a rare spawn from item spots in the Northern Plains. Or, if you value your time, you can buy them for 700 gold each in Seafront. Yikes, spending 3500 gold on one quest? That doesn't seem worth it.
Just kidding. Hand over all the items and you'll be given 10000 gold for your time. Yeah, I'd say buying the rubber is the right call. Done.
#22: The Postman's RequestQuick and easy job. Talk to the Seafront Postman (you might need Devola's guidance to trigger this) and he'll give you a letter to take to the lady in the lighthouse. Climb the lighthouse, give her the letter, receive 1000 gold. Done.
#23: The Lighthouse Lady's WrathThis is a sequel to Quest #22: The Postman's Request.
Go to the post office (again, via Devola if need be). Talk to Postlad. Then over to the Lighthouse Lady. Then back to the Post Office. Leave, go back in, and run into the back. There's a short moving box puzzle that you can figure out on your own - you're a big girl, I believe in you, it's not that hard. There's a letter in the back room (and a black pearl, score). You then get hit with a moral quandary which changes the end of the quest. Go back to the Lighthouse Lady.
If you give her the letter, you make her happy, but don't receive any rewards. Done.
Or, if you tell her the truth, you'll get 1000 gold for your time. You monster. Done.
#24: ClosureThis is the sequel to Quest #23: The Lighthouse Lady's Wrath.
You know the drill - visit the Postman, use Devola if you need her, and get the quest.
There's actually not much of a quest here. You literally just tell him how the last quest ended, or you can lie to him about it. No rewards either way. But hey, another quest for the completion log. Done.
24 down, 47 to go.
25-30
#25: Yonah's GiftThis is a sequel to Quest #10: Yonah's Cooking.
Yonah wants more food. In order, she wants a Melon, a Watermelon, and a Pumpkin.
You can either grow these in your field, or buy the former in Seafront for 1200 gold, and the latter two in Facade for 800 and 500 gold respectively.
Hand over the three goodies one by one, and watch as your little sister "rewards" you once again. Done.
#26: Letter to a LoverThere's a fella wandering near the Seafront fountain on the east side of town. Turns out he loves someone who lives in the Aerie, and wants you to deliver a letter... and some precious cargo.
Nah, don't worry, this one isn't fragile. Dash and die to your heart's content.
Go to the Aerie, make it to the end, and go to the left side of the row of houses by the chief's place. Find out that this was a huge waste of time, and start making your way back out.
On the conveniently boss-sized platform, you'll encounter a giant shade. Whoop it's ass, grab the plant that it drops, and go back to Seafront. You get 3000 gold for your time. Done.
#27: A Signature DishHead to the Seafront Tavern, and speak to your pal the Tavern Keeper. He wants 10 Medicinal Herbs, 10 Wheat, and 10 Sardines. Standard stuff - you should be drowning in Medicinal Herbs (even though 10 is the max you can hold), you either took the advice to plant wheat earlier or will now go and buy it for 500 gold each, and if you maxed your fishing skills then sardines are trivial to catch (or you can buy them for 250 gold each). Be mindful not to buy too many of these resources, however, since you only get 5000 gold for your time - a great profit if you grew the wheat yourself, or the cost of the 10 wheat if you bought it. But that's your problem, not mine. Done.
#28: Bon Appetit!This is a sequel to Quest #27: A Signature Dish.
Head to the Seafront Tavern, and speak to the Tavernkeep. He asks for 5 Sharks, 5 Rice, and 5 Mushrooms.
You'll want to do Fisherman's Gambit Part 5 before this, because Sharks are hell to catch otherwise. Whether you take that advice or not, you can catch Sharks by using Sardines as bait at the Seafront Pier.
You can grow rice in your field, and find mushrooms in various item spots around the world, or buy them in Seafront for 600 and 800 gold respectively. This is a riskier investment than the Natural Rubber, because you only get 5000 gold for delivering all this to the Tavernkeep - so you'll be at a 2000 gold loss if you bought all of them. Although, Sharks sell for 1250 Gold, so you could always catch some spares to make up for it. Anyway. Done.
#29: Fragile Delivery 3Uh oh.
So, the Eastern Gate wants in on the fragile action now. The western guard wants you to deliver a package to Facade - and this one is going to suck, since the desert is full of very aggressive Wolves.
So, as said previously, enemies don't really know what to do if you just book it. While it'll be pretty scary, you can actually just run straight for Facade, and the Wolves shouldn't actually land any attacks on you unless you get boxed in or something. Additionally, at this point, you should have Dark Wall in your arsenal - fully charging that covers you in an impenetrable shield for a short while. That might make the trip less spooky.
Either way, make it to the Facade Weapon Shop, hand over the goods, return to the guard. Collect your 2900 gold. Even if it took you 20 attempts. Done.
#30: The Tangled MessageIn Facade, jump into the river of sand to respawn in the middle (or painstakingly make your way over to the platform). The fellow there wants you to send messages to people, who will then do the same, over and over. You have to be careful not to forget the message, which requires a little bit of thinking on your part, unless you're a filthy cheater using a guide to tell you the answers.
First, head to the town gate, and tell the western guard "The Masked People Respect Their Rules."
Secondly, go to the palace entrance, and tell the western guard "The Men of the Mask work for the king."
Thirdly, go to the childminder in the north of town, and tell them "Childcare can be difficult."
Fourthly, go to the southeast treasury garden (bottom floor, on the side by the grocery store), and say "Only nobility may enter the treasury."
Finally, go to the person slightly north of the strange things shop, and say "Quicksand."
Apparently that sequence of events is worth 10000 Gold. Hey, I'm not complaining. Done.
30 down, 41 to go.
31-36
#31: Item UnknownIn Facade, a lady near the palace entrance asks for 10 "round, striped food objects". If you don't want to think for more than 5 seconds (there's only a few types of food in the game, process of elimination y'all), she's talking about Watermelons. You'll want to grow these if you want to profit, but if you don't, you can actually buy them from the shop 5 steps away from her for 800 gold each. You get 3000 gold for your time. A 5000 gold loss if you chose to buy them! What a steal! Done.
#32: The Runaway SonI hope you like travelling.
Talk to a man in the south end of the village shopping district. Then go to the east side of Seafront, south of the fountain, and find the lad. He gives you a fetch quest - 5 mutton and 3 goat meat. You should know where to get those by now. Then swing by the Seafront Tavern, get directed back to the man in your village, then get sent back to Seafront. Talk to the guard just by the entrance/exit to the town - he'll point you to Facade. So, go to Facade, head to the southwest part of town, and (after being directed by some villagers), talk to the son in a nearby house. Then leave town, and "chase" the lad across the desert. It's kind of implied that you have to stop him, but you move faster than he does, and the quest doesn't progress until you get to the other side anyway - where you fight some wolves, head back to the quest giver, and get... nothing. There's no reward here, only a host of annoyed NPCs. Alas. Done.
#33: Apology from a FoolTurns out the Strange-thing shopkeeper got that name because he cheated on his wife. This is a fetch quest for 10 Wolf Hides. Now, you can buy these... for 5000 gold each, on the other side of Facade. Yeah, no thanks. Run out, fight a ton of Wolves (hides are their rare drop, unfortunately) - they spawn frequently in the Sandstorm, if you have the Royal Compass - and then go back to the Shopkeep. Then go a few floors up to hand off the cloak, and bip bap boom, enjoy your 20000 Gold. Done.
#34: The Pride of a LoverThis quest starts a little oddly.
So, there's a guy near the base of the lighthouse in Seafront, looking over the town. He has a quest bubble, but the first 2 times you talk to him (leave and re-enter the town to progress this), you don't actually get a quest. The third time, however, you get your quest - a fetch quest for some Fluorite. Head to the Facade Strange-Thing Store, and you'll get pointed to the Barren Temple. Go in the Barren Temple, explore a little, and pick it up - it's an item spot, and there's a few different ones throughout the temple, so just check all the funny glowy lights you find. Once you've got your "rare" metal, head back to Seafront, and cash it in for 30000 gold. Yeah, the economy has started to fall apart around this point. Told you not to get too invested in those 1500 gold Mutton runs. Done.
#35: The Littlest HeroQuick heads up - if you haven't already, go grab the Royal Compass. A guard outside the palace is handing it out. This lets you traverse the Sandstorm; while it's a useful tool for Apology from a Fool, it's necessary for this quest.
Talk to the Facade Blacksmith, then leave town. You should see his son wandering around in the desert - talk to him, then chase after him into the sandstorm (don't worry if you lose sight of him, it doesn't matter). He's headed for the wolf den on the left side of the sandstorm (check the map, there's a set of stairs leading to it). Run in, kill the Wolves, then warp back to Facade for your 10000 Gold reward. Done.
#36: The Missing GirlIn the northwest corner of Facade, someone wants you to look for their missing daughter. Ask the nearby folks until you learn that she was last seen on the lowest level of the city, and with her boyfriend. Go down to the bottom level and find a bloodstain near the treasury. Talk to the nearby guard, then talk to the guard by the entrance of the town. You'll be directed to the Sandspout Well just outside of town. Go investigate it, then go back to the quest giver for your happy ending, alongside 10000 gold for your time. Bam. Done.
36 down, 35 to go. Hey, that's halfway! You've done all of the Part 1 Side Quests now, so feel free to storm straight into Part 2!
Part 1 Overview
Okay, so which quests are actually worth doing?
Well, the easy answer is all of them - given you can't go back and do any you missed later, it's better to have them all ticked off in case you decide you wanted that 100% completion somewhere down the line. But, if you're definitely not interested in doing all of them, or just want to know which ones might be worth doing during the speedrun achievement...
UnlocksThe most important quest in Part 1 is #9: Boar Hunt!. Apart from being an early 1000 gold, this unlocks the boar for transport, which will save you HUGE amounts of time when going through the Northern and Southern Plains.
Additionally, Quests #5: Shopping List and #8: A Return to Shopping will unlock your field for farming purposes, which may be nice to have access to.
If you miss the field unlock in Part 1, you can buy it any time in Part 2 for 5000 gold. I imagine you can also acquire the Boar Tusk somewhere, but I'm not 100% on that.
SequelitisQuests #21: The New Merchant in Town, #26: Letter to a Lover, #28: Bon Appetit! and #36: The Missing Girl all have follow-up quests in Part 2, so you may want to consider knocking them out so you don't lock yourself out of any Part 2 Quest Content. Additionally, both Quests 21 and 36 reward 10000 Gold each, which are mighty fine rewards for your time. Speaking of which...
High GoldMost of the Facade Quests, near the end of Part 1, offer 5 digit Gold Rewards. #30: The Tangled Message, #35: The Littlest Hero, and #36: The Missing Girl offers 10000 Gold, #33: Apology from a Fool offers 20000 Gold, and #34: The Pride of a Lover offers a whopping 30000 Gold. Most of these are fairly short Quests, too (give or take on some of the item farming required for the Fetch Quests), so they're high return on your time investment.
Mid Gold#27: A Signature Dish gives you 5000 Gold, although you might need to buy some items for it, which reduces the total profit.
#29: Fragile Delivery 3 gives you 2900 Gold, but might prove to be difficult depending on how you handle running from the Wolves in the desert.
#7: The Tavern Keeper's Grandmother and #11: On the Wings of Eagles both give you 2000 Gold for a little fetchery.
#4: Old-Fashioned Home Cooking offers 1500 Gold for killing around 10 sheep (more if you get the uncommon drop instead of their common), and is repeatable as many times as you want.
#12: Fragile Delivery offers 1450 Gold and #13: Fragile Delivery 2 offers 1500 Gold for your time, although these quests can be a little spicy due to the gimmick of "don't dodge and don't take damage".
Low Gold#20: A Dog Astray, #22: The Postman's Request, and #23: The Lighthouse Lady's Wrath all offer you 1000 Gold for your time - and none of them ask for much of it. Do note that you have to be truthful in the last decision of #23: The Lighthouse Lady's Wrath to get the 1000 gold, otherwise the quest has no reward, and you can slap it into the category below.
#1: Herbal Remedies, #2: The Gatekeeper's Errand, and #6: Book Smarts all offer a cheeky 500 gold as your reward. #3: The Lost Eggs offers a Health Salve for your time. These are all small rewards, but the quests are also exceptionally short (and they're all available right out the gate, when you have no money), so it's up to you if you think they're worth your time.
Also, #1: Herbal Remedies is on the Critical Path, so you can't miss that one even if you wanted to. Sorry for anyone who wanted to do a no-side-quest% run.
No RewardIf you're purely reward-motivated, then there are 5 quests in Part 1 that give you nothing.
#10: Yonah's Cooking and #25: Yonah's Gift only give you some cutscenes with your beloved sister, while #19: The Ballad of the Twins allows you to watch Devola and Popola sing Song of the Ancients as a duet. None of these are materialistic rewards.
#24: Closure is extremely quick, as you only need to talk to a single NPC, but offers nothing for your time. It's predecessor, #23: The Lighthouse Lady's Wrath, also offers no rewards if you decide not to be truthful in the last decision.
#32: The Runaway Son is the clear winner for worst quest in Part 1. It's long, has you traverse the entire world several times, and gives you NO reward. Not even a cute cutscene or some sense of closure - all you do is make several NPCs annoyed in the process.
Also, special shout out to #31: Item Unknown; you think this would be mid-gold tier, as it gives you 3000 Gold. But you have to grow the Watermelons to make a profit here. You have to spend 800 Gold on Watermelon Seeds, so that's a 2200 Gold reward. And if you buy them outright, you're 5000 Gold down for handing over 8000 Gold worth of Watermelons. But here's the kicker - if you grow 10 Watermelons yourself, and then sell them at a shop, you'd get 4000 Gold, as they sell for 400 each. You basically lose money for this quest, no matter which way you do it. This lady is ripping you off.
Fisherman's SagaI'm just going to lob Quests 14-18 here, since "increased fishing level" is all part of the same package. This is a great reward, don't get me wrong, but you don't lose access to the Fisherman Quests in Part 2 - so there's no need to rush them here unless you specifically need a certain fish (or want to go farm some rusted clumps).
So what's the plan?If you're trying to min-max your experience (especially if you're going for speed), here's what I'd personally recommend.
#9: Boar Hunt! is a must, prioritise that and knock it out as you visit the Aerie for the first time on the Critical Path. If you're planning on using your field at any point on this save, also knock out #5: Shopping List and #8: A Return to Shopping, as you can just buy the items needed while you're in Seafront for story purposes, and this saves you 5000 Gold in Part 2. Lastly, knock out as many of the High Gold quests as you need. You'll want 32400 Gold at the start of Part 2 so you can immediately buy the Phoenix Spear from Facade, as it's arguably the best weapon in the game before the first Ending - especially if you're lucky enough to get some Gold Ore and Giant/Eagle Eggs to upgrade it. You should be fine to just do #34: The Pride of a Lover and then sell any excess supplies to get this, but feel free to take on #30: The Tangled Message, #35: The Littlest Hero, and #36: The Missing Girl for their respective 10000 Golds, as they're all quite quick quests. Farming the Wolf Hides for #33: Apology from a Fool can take some time, so only pick that one up if you're desperate for cash. After that, decide if you want to do any of the 4 quests that offer sequels in Part 2, and ignore the rest. Bang. Done.
Part 2 Quests
There are a total of 35 Side Quests in Part 2.
In total, for all of the Part 2 Fetch Quests, you will need to gather:
10 Broken Lenses
15 Broken Batteries
10 Mysterious Switches
35 Logs
20 Dented Metal Boards
10 Stripped Bolts
1 Memory Alloy
21 Titanium Alloys
25 Broken Motors
30 Iron Ore
10 Severed Cables
10 Giant Catfish
10 Rice
10 Pink Moonflower Seeds
1 Crystal
3 Machine Oil
3 Eggplants
3 Goat Hides
20 ClayYou will also need to fish:
3 Sandfish
3 Royal Fish
2 Blue Marlins
1 Hyneria
37-42

#37: The Masterless LighthousePart 2 starts off strong with one hell of a fetch quest.
A guy at the base of the Seafront Lighthouse wants 10 Broken Lenses, 10 Broken Batteries, and 10 Mysterious Switches. You can grind all of these at the Junk Heap Dungeon, but Broken Lenses are also sold at the Two Brothers Weaponry Store, so you can top up any missing numbers by putting down some cash. Hand over all of these to the guy for a cheeky 30000 Gold reward. Done.
#38: The Scattered CargoSpeak to the old lady under one of the trees by the Seafront Fountain. She wants you to grab 3 crates of cargo that's washed up around the world, and tells you not to look in them. Easy enough.
One of them is in your village, near where you wash up if you fall in the water.
One of them is in the far end of the beach in Seafront (the one through the cave, on the way to the lighthouse).
One of them is in the northern plains, near the base of the bridge to the Junk Heap.
Grab all three, return to the lady, and enjoy a quick 20000 gold reward - and 20% off all purchases in the Seafront Medicine Store, alongside them stocking some better items. Pretty good, eh? Done.
But wait. What if you looked in the crates? Well, you'll find out what they really contain, and can then instead give them to the authorities in Seafront. You won't get the better medicine store from this route, but you get 50000 gold as a reward, alongside a sense of justice. Pick whichever ending you prefer. Done.
#39: The Strange Fate of the JewelSo this quest is narratively a sequel to Quest #24: Closure and the Lighthouse Lady Saga, but you can still do it even if you didn't finish the Quests in Part 1.
There's a woman near the port in southeast Seafront who wants a Mermaid Tear. Ask around town, and you'll be pointed to the Lighthouse. Investigate the pile of letters there to be pointed to the Post Office. You'll need to run to the back room again - the box puzzle is exactly the same as in Part 1, so just move them around like last time. Grab the letter and jewel, go back to the quest giver, and get 10000 gold for your time. Done.
Alternatively, you can just bury the jewel in the ground for narrative purposes. There's no material reward for this, though. Either way. Done.
#40: Thieves in TrainingTalk to the Item Shopkeeper in your village to hear about some thieves. Ask around town until you learn they're children who work in a pair. Go talk to them - they're near the ferry man, by the waterwheel. Then go talk to a man in the village tavern. And then go back to the Item Shopkeeper for 3000 Gold. Easy. Done.
#41: Learning a TradeThis quest is a sequel to Quest #21: The New Merchant in Town. Sorry, if you missed that one, this one's kaput too.
Talk to the man on the ship in Seafront Port - he's in the same place as last time. He wants you to grab something from the strange-thing store in Facade. Grab it, return to him, and then get asked to grab something from the Two Brothers Weaponry. Grab it, return to him, and get 20000 Gold for your time. Done.
#42: A Bridge in PerilTalk to the guard wandering near the Northern Gate in your village. You'll be told to go fight a big shade that sometimes appears in the Northern Plains.
So this can be a bit of a funky one, since it's sort of RNG based. You're told the Shade usually only shows up when it's cloudy, so you'll want to go hunting for it when it's fully overcast - if it's only slightly cloudy, and you can still see some blue in the sky, you might be able to find it, but it spawns much less frequently. Just keep trying until it's fully grey, run to the wooden bridge (the one you cross to get to the other side of the plains with the Aerie and Forest of Myth), and see if it spawns. If it does, great, kill it. If it doesn't, try again. This shouldn't take too long - it doesn't spawn that infrequently.
Once you're done, return to the guard, collect 30000 Gold. You'll also get the weapon "Labyrinth's Whisper" as a drop from the Shade. Not a bad haul! Done.
42 down, 29 to go.
43-48 (Fisherman Saga 2 Electric Boogaloo)
#43: Master of the Southern PlainsSpeak to the Postman in the Seafront Post Office. You'll be told to go kill a big shade in the Southern Plains.
The spawn mechanics for this shade are just like the one in the quest right above this one: it only really shows up when it's cloudy, so wait until it's fully grey, then run through the Southern Plains to see if it spawns. It'll appear in the small passage between the big open field area and the intersection which leads to the Manor (so you can't miss it if you try and run straight from Seafront to your village).
Kill the shade, return to the Postman, collect 30000 Gold. Done.
#44: The Fisherman's Gambit, Part 6HERE WE GO AGAIN LADS
So, after The Fisherman's Gambit, Part 5 - wait, what's that? You didn't do all the Fisherman Quests in Part 1? Well, you're out of luck then, aren't you?
Actually, the Fisherman's Gambit series are the only Part 1 quests that are still available in Part 2. You're not going to get locked out of fishing, so if you still haven't done them, go do them now. It's fish time.
So, after The Fisherman's Gambit, Part 5, it's time to go back to Fishbloke for a new assignment. This time we're hunting Sandfish.
Sandfish can be caught in the desert sands using the lure. Just catch them by the ferry - it's the quickest and easiest place to get to. Catch 3 Sandfish, return to Fishbloke, and get another Fishing Upgrade. Bet you've missed those, huh? Well it's only up from here. Done.
#45: The Fisherman's Gambit, Part 7go do part 6 first
Fishbloke wants 3 Royal Fish. You catch these in the Eastern Plains using Earthworms. Fish them up, return to Seafront, get your Fishing Upgrade. Done.
#46: The Fisherman's Gambit, Part 8it's called part 8 because it comes after part 7
Fishbloke now wants 2 Blue Marlin. You can catch these with Sardines at the Seafront Pier - but expect to catch a few Sharks along the way. Same spot, same bait, got to love it. Once you've caught the two Marlin, Fishbloke teaches you the last of his knowledge. That's it. There's nothing more he can do for you. We're finished. Done.
#47: The Fisherman's Final Gambitwait didn't you say part 8 was the last one
So, Fishbloke might not be able to teach you anything else, but he does want you to go and catch a legendary fish - the Hyneria.
This can be caught by using Sardines in the Desert. Now, here's the funny thing - there's another legendary fish that you catch with Sardines in the Desert, called the Rhizodont. This is the hardest fish to catch in the game, and there's an achievement for doing so. As a result, there's a slight chance you might catch this while looking for the Hyneria - the Hyneria still puts up a fight, but if you're making so little of a dent that you think the catch will take 5 minutes, chances are you're pulling up a Rhizodont. If you do happen to do that, it's up to you if you want to go through the hassle of catching it, or leaving it until after the quest.
Once you have your Hyneria, return to Fishbloke... and reflect on the experience to gain one last fishing upgrade. NOW you're in a good spot to go catch those super hard fish. Or just abandon fishing forever, and rejoice the fact that you're finished. Yep, no more fishing quests. Done.
#48: Staying AfloatSpeak to the guy with the red sash in Seafront's port. He wants 5 Logs, 20 Dented Metal Boards, and 10 Stripped Bolts.
Logs can be found from item spots in the Plains, or bought from the material shopkeeper in your village for 500 gold each. Dented Metal Boards and Stripped Bolts are common drops from the Junk Heap Dungeon, so just go and do a run of that to grab what you need.
Once you have the goods, go back to red sash dude, and claim 20000 gold. Done.
48 down, 23 to go.
49-54
#49: Contract for a ContractorSpeak to the guy near the pigs in your village. He wants 1 Memory Alloy, 10 Titanium Alloys, and 10 Broken Motors.
You'll want to go do runs of the Junk Heap Dungeon for these - run to the first elevator and go down to B2. You'll want to bomb the breakable wall to get to the north part of the dungeon, run dead north (and then through the funny room with all the holes in the floor), and do the big fight in the end room there. Then go through the dungeon to the next area, run to the south (to the breakable wall), clear the side passage next to it to get a bomb, bomb the wall, then go through and clear the big encounter there, as well. This is the route that takes you tall the P-33 robots, which will always drop either Memory Alloy or Titanium Alloy. Then just run through the rest of the dungeon to get to the end, take the elevator back up, and do another run if you need to.
You can sometimes get Titanium Alloys from the yellow robots, but it's a rare drop, and you kill a ton on the way to the P-33's anyway. Make sure to use item drop rate boosting words on all your loadout for maximum odds.
You get the broken motors from the flying robots - it's not a rare drop, so you should easily get them all while farming the Titanium Alloys.
If you're lucky, you can get 10 Titanium Alloys from just 2 runs of the dungeon. You're more likely to need 3 or 4, though.
Once you have all the goods, return to your guy, and get 30000 gold. Well earned. Done.
#50: The Creaky WaterwheelSpeak to the woman next to the item shopkeeper in the village. She'll want some parts from the Strange-Thing Store in Facade. Go there, and he'll ask for 10 Iron Ore and 10 Logs. Both of these are available from item spots in the world, or if you hate RNG, you can buy logs in the village for 500 gold each, and Iron Ore from the Junk Heap for 1000 gold each. Bear in mind that outright buying these resources is a net loss for the quest. Once you've delivered the goods, return to the girl in your village, and get 10000 gold for your time. That's a 5000 gold loss for those who bought everything. Alas. Done.
#51: The Faded FountainThis quest is a sequel to Quest #50: The Creaky Waterwheel.
The guard next to the fountain in the village shopping district saw you do that fetch quest and wants in. Now he wants you to go to the Facade Strange-Thing Store. Run over, and this time, you're asked for 10 Broken Motors and 10 Severed Cables. These are relatively easy drops from enemies in the Junk Heap Dungeon, so just do a quick run of it to grab them all (if you don't have them already). Give them to the Strange-Thing Shopkeep, go back to the quest giver, and get 20000 gold for your time. Done.
#52: Bon Appetit! 2This quest is a sequel to, shock and horror, Quest #28: Bon Appetit!
Talk to the Tavernkeep in Seafront. He wants 10 Giant Catfish and 10 rice. You can catch Catfish using Carp in the Eastern Plains - they're slightly difficult to catch, so you may want to go and finish up the Fisherman's Gambit saga first, for maximum fishing power. As before, you can buy rice in the Seafront Grocery store for 600 gold each, or grow them yourself for much less. Once you have the goods, return back, and get 20000 gold. Done.
#53: Life in the Sandsnervous laughter
Welcome to the de facto worst quest in the game!
Okay, that's an exaggeration... right? All you do is go to Facade, talk to the lady by the Mailbox, and deliver her 10 Pink Moonflower Seeds. Just a fetch quest, right?
Yeah, except you can't buy Pink Moonflower Seeds.
See, there's a crossbreeding mechanic for Moonflowers. Depending on how you arrange them in your field, there's a small chance of a mutation, which will give you a new colour.
To get Pink, you first need Indigo. To get Indigo, arrange it so a Blue Moonflower is planted with 2 Gold Moonflowers either side of it. For max success, plant Gold - Blue - Gold - Blue - Gold in a row, all three rows.
There's a 10% chance of a mutation, so with 6 chances per full field, that's roughly a 47% chance per attempt.
Great! Basically fifty fifty. So, how long does this process take?
2 Real Time Days. 48 Hours.
You need the seeds, not the flowers. And it takes 2 days for you to be able to harvest seeds from a plant.
And that's only for Indigo Moonflowers. You then need to repeat the process with Indigo - Red - Indigo to try and get Pink. At least when you do get pink, you can just plant those and wait 2 days to turn it into seeds without having to worry about RNG. But yeah, have fun doing that.
Alternatively, you can be a filthy cheater and keep moving your system clock forward 2 days to speedrun this quest in like... half an hour. This doesn't take away from the fact that fertilizing + planting all the seeds takes forever and is a miserable process, so you'll have to bite the bullet on that one.
Anyway, regardless of how you get those 10 seeds - bring them back to the lady in Facade, and cash them in for an unceremonious 10000 Gold. Absolutely not worth the hassle, honestly. But hey, at least it's over. Done.
Although, if you've gone that far down the crossbreeding rabbit hole, you might want to consider going all the way - you can combine pink seeds with peach seeds (gained from red and gold crossbreeding) to potentially get a Lunar Tear, which does give you an achievement. If you want to read more about the mechanics of crossbreeding, and how to go all the way to white, check out the Gardening Guide which covers all of that in detail.
https://steamcommunity.com/sharedfiles/filedetails/?id=2467457412
Oh, and if you didn't unlock the field in Part 1 - you can't do those quests now, but you can buy a "Cultivator's Handbook" from the Florist in your village for 5000 gold to get access to it. No softlocking yourself out of this quest, I'm afraid.
Now let's never think about our field ever again. Done.
#54: The King's MaskQuick and easy one. The eastern guard for Facade Palace wants 1 Titanium Alloy and 1 Crystal. Titanium Alloys are rare drops from robots in the Junk Heap Dungeon, and Crystals can rarely be found as item spots in the Barren Temple. Alternatively, you can buy Crystals for 2400 gold each at the Facade Material Store - which isn't the worst choice for this quest, as once you give the goods to the guy, you get 10000 gold. Told you it was quick and easy. Done.
54 down, 17 to go.
55-60
#55: A Child's Final ChanceVisit the Grocer in your village. You'll then need to talk to a few children at town, until you're directed towards the Forest of Myth. Head there, walk over to the divine tree in the back (depending where you're at with the plot, there might be an item spot there - you actually just need to approach it and get a cutscene for the side quest, no item required). Head out of town, then head back to the Grocer for 10000 gold, and a 20% discount at her shop from now on. Cool. Done.
#56: A Shade EntombedTalk to a guard at Facade's main gate. You'll then have to go beat a giant shade in the Barren Temple - you're looking for the long, dead end corridor room near the back. Be aware that shades have taken over the temple after Part 1, so you'll have to clear some trials to freely progress. Once you've killed the big shade, head back to the guard, and get 30000 gold. Done.
#57: The Damaged MapTalk to the blacksmith in your village. You'll then want to go collect a map from one of the shelves in the library. Once you've got it, head to the Facade Strange-Things Store - you'll be asked for 3 Machine Oil, 3 Eggplants, and 3 Goat Hides to repair the map.
Machine Oil is a rare drop from floating robots in the Junk Heap Dungeon, Eggplants can be grown in your field or bought from the village grocer for 400 gold each, and Goat Hides are the rare drop from Goats.
Once you've given the goods to the Strange-Thing Shopkeep, head back to the Blacksmith, and then over to Popola. You'll then need to go to the Lost Shrine - once inside, head up the spiral stairs to the next floor, and then go through the right door at the two sets of doors (the left door takes you deeper into the temple, the right door brings you to a dead end with your goal). Once you've grabbed this, head back to the Blacksmith once more.
You then have the choice of giving him some junk, or selling his wife's hair ornament and giving him the gold. Either way, he'll give you another treasure map. Take this to Popola, and you'll be directed to the bottom of the steel bridge in the Northern Plains (the one on the far side of the plains, near the Forest of Myth). Pick up the item to add "Labyrinth's Shout" to your weapon list. Done.
#58: Research ProjectSo this quest is a sequel to #59: A Tale of the Study, but listed immediately before that one chronologically. Kinda weird.
Visit Sebastian at the Manor, who wants you to grab something from down below. You'll want to head to B2 in the underground facility, and then the second to last room. The stuff you're looking for is in the southern middle room. Once you've got it, you'll need to go to a house in Seafront - it's the one on top of the entrance/exit, which is a place you never need to go to at any other point in the game. After entering Seaforth, head down the first alley on your left, and then just climb the stairs until you get to it (you'll see an interaction symbol). After talking to the resident, return to Sebastian at the Manor to finish the quest. There's no material reward here, only lore. Done.
#59: A Tale of the StudyVisit Sebastian at the Manor. He'll tell you to go deal with a shade in the Manor's study. The shade doesn't fight back, but can take a lot of damage - expect to go up to a 500 hit combo or so, depending on your level and weapon. Once it's dead, go back to Sebastian, and collect 15000 gold for your work. Done.
#60: The Great TreeA man next to the item shop in Seafront wants a root from the tree in the Lost Shrine. Go and grab it (you'll need to fight off some shades before you can collect it from the item spot). Then deliver it to the guy, and get 20000 gold for the trip. Done.
60 down, 11 to go.
61-66
#61: The Despicable ManA woman in the south part of the shopping district in your village wants you to find someone. Ask some nearby villagers to be directed to the Forest of Myth. Ask around there to be directed to Seafront. Ask around there to be directed to the Junk Heap. After asking in Two Brothers Weaponry, return to the quest giver for your 15000 gold reward. Done.
#62: A Memorable KnifeTalk to the Tavern Keeper in Seafront. He wants a knife from Two Brothers Weaponry. Head over there - you'll need 10 Titanium Alloy for it. Do a few Junk Heap Dungeon runs if you need any. Once you've got enough, get the knife, then give it to the Tavern Keeper in Seafront for 20000 gold. Done.
#63: The Shade ArmyTalk to Gideon at Two Brothers Weaponry. He'll want 5 Broken Batteries and 5 Broken Motors - these are both common drops from flying robots in the Junk Heap Dungeon. Once you've got them, talk to him, and then head to the back elevator in the Junk Heap (the one that takes you to 2F, not B1/B2). Clear out all the shades on this floor - you'll be informed when you're done. Head back to Gideon and receive 30000 gold for your time. Done.
#64: A City RebornThe western guard at the Facade Palace wants 20 Iron Ore, 20 Clay, and 20 Logs. These are all random rewards from item spots around the world, but if you want to go shopping, Iron Ore can be bought from Two Brothers Weaponry for 1000 gold each, Clay can be bought from Facade for 800 gold each, and Logs can be bought from the village for 500 gold each. That's 46000 gold to outright buy all the resources for this quest - but hey, you'll still profit, as you get 50000 gold for it all. Mad profit if you didn't buy any of these, though. Either way. Done.
#65: Nightmares and DustTalk to the eastern gate guard by Facade's entrance. You'll be sent to explore the sandstorm. Head towards the middle of it - you should find a big shade along the way. Kill it and report back for 20000 gold.
#66: Disturbing the Sleep of KingsThis quest is a sequel to Quest #56: A Shade Entombed.
Talk to the King of Facade on the top of the palace. You'll be sent to clear out all the shades from Barren Temple. Head over there and clear all the rooms - you'll find some tougher big shades at the back, especially in the old boss room for the area. Once you're done, report back to the King, and receive the weapon "Labyrinth's Song" for your time. Done.
66 down, 5 to go. Almost there!
67-71 (And The "Missable" One)
#67: Shadows of the DesertThis quest is a sequel to Quest #36: The Missing Girl.
So this quest is a weird one - Devola won't tell you about it, and it won't even register as a quest until you complete it. On the far side of the desert, near the stairs to a ferry, you'll see a masked woman with a quest bubble. Talk to her, then leave the area (going to Facade is the most convenient choice). Go back to the desert, and talk to her again - she'll be close to Facade now, under the rocky arch before the entrance. Leave and re-enter the area once more. She'll be very close to Facade's entrance now. You then need to fight off some shades. Once you're done, you'll be given 30000 gold for your help. Done.
#68: Search for the ShadeTalk to the guard at the southern side of the village shopping district. You'll then be told by a small girl to go look near the river - head straight north out of the shopping district, then go straight north while hugging the river to your left. You'll get a cutscene. Go back to the guard, and you'll then be told to go to the front of the library. Do so, get a cutscene, then go and ask some villagers in the shopping district for more clues. Go talk to the little girl once more, and you'll be indirectly directed to the hill to the west. Go up the stairs by the shopping district's north gate (as if you were going to the ferry), and then follow the western path to a tree that overlooks the town. You'll find a shade. Kill it. Go back to the guard for your 5000 gold reward.
#69: FreesiaThis quest is a sequel to Quest #26: Letter to a Lover.
Talk to the man above the Weapons Shop in Seafront. You'll be asked to deliver a flower to the Material Shop in Facade. Make the delivery and report back for 10000 gold. Super easy. Done.
#70: The Magical StoneSpeak to the Fortune-teller in the Forest of Myth. You'll be asked to grab an item from the Lost Shrine.
Funnily enough, you can't actually start this quest until you're on track to face the final boss - so the Lost Shrine will be crawling with difficult shades.
Head to the roof (the outdoors section) of the Lost Shrine. You'll need to parkour up the side. Remember at the start of the game, where you had to move a box to where the broken ladder was? Well, just before that area, there's another box.
Note the dirty marks on the floor - this is where you need to drag the box.
Hop up behind a broken wall, move another box, hop up again, and then jump across some broken rooftops until you reach an area with a big shade. Kill it, and you should find the item you're looking for. You'll then need to fight your way back to the entrance of the Lost Shrine (sorry, no free warp here) and return to the Forest of Myth.
You'll then be asked if you want to receive your fortune or not. This is a repeatable action (you can have your fortune read at any point after the quest, as many times as you want) which puts you into a familiar looking combat gauntlet. Great for experience and grinding item drops from shades, especially if you need a quick boost before facing the final boss. Regardless of whether you have your fortune read now or not, you're also given 10000 gold for the trip. Boom. Done.
#71: The Promised GiftSo remember how there was one Quest in Part 2 which could be "Incompletable"?
It's this one.
Again, minimal spoilers, but you can start this quest as soon as you unlock the canal ferry - but lose the chance to finish it after the plot progresses past a certain point. Part 2 is nonlinear, so this can happen at different points for different people - but basically, once you choose to "go and see if Popola has anything new" after finishing a plot beat, this quest is canned. Again, this one's not a big deal, because you can immediately do it after you get an ending - but it's worth keeping in mind if you wanted to do a 100% run on Ending A.
Anyway, talk to your favourite Red Bag Ferryman (at any ferry point - village is probably the most convenient). He wants advice for his wife's anniversary. Run through the dialogue options, and he'll ask you to go grab a Red Gem. You can grab this from the Facade Strange Things Store (it's a freebie). Once grabbed, head over to Seafront, and meet his wife outside of his house. Conversation ensues, "good" times are had, and you get 3000 gold for your time. Done.
If you're wondering why this quest is the last on the list (especially since #70 seems to fit nicely as a "final" side quest), it's because this was added specifically for the v1.22 remaster. New content, yay!
And... That's Done. 71 down, 0 to go. 100% Quest Completion. Pat yourself on the back. Okay, that's enough, don't overdo it.
Bonus Quest (Sheep Slayer)
So, uh, there's actually one last "quest". Kinda.
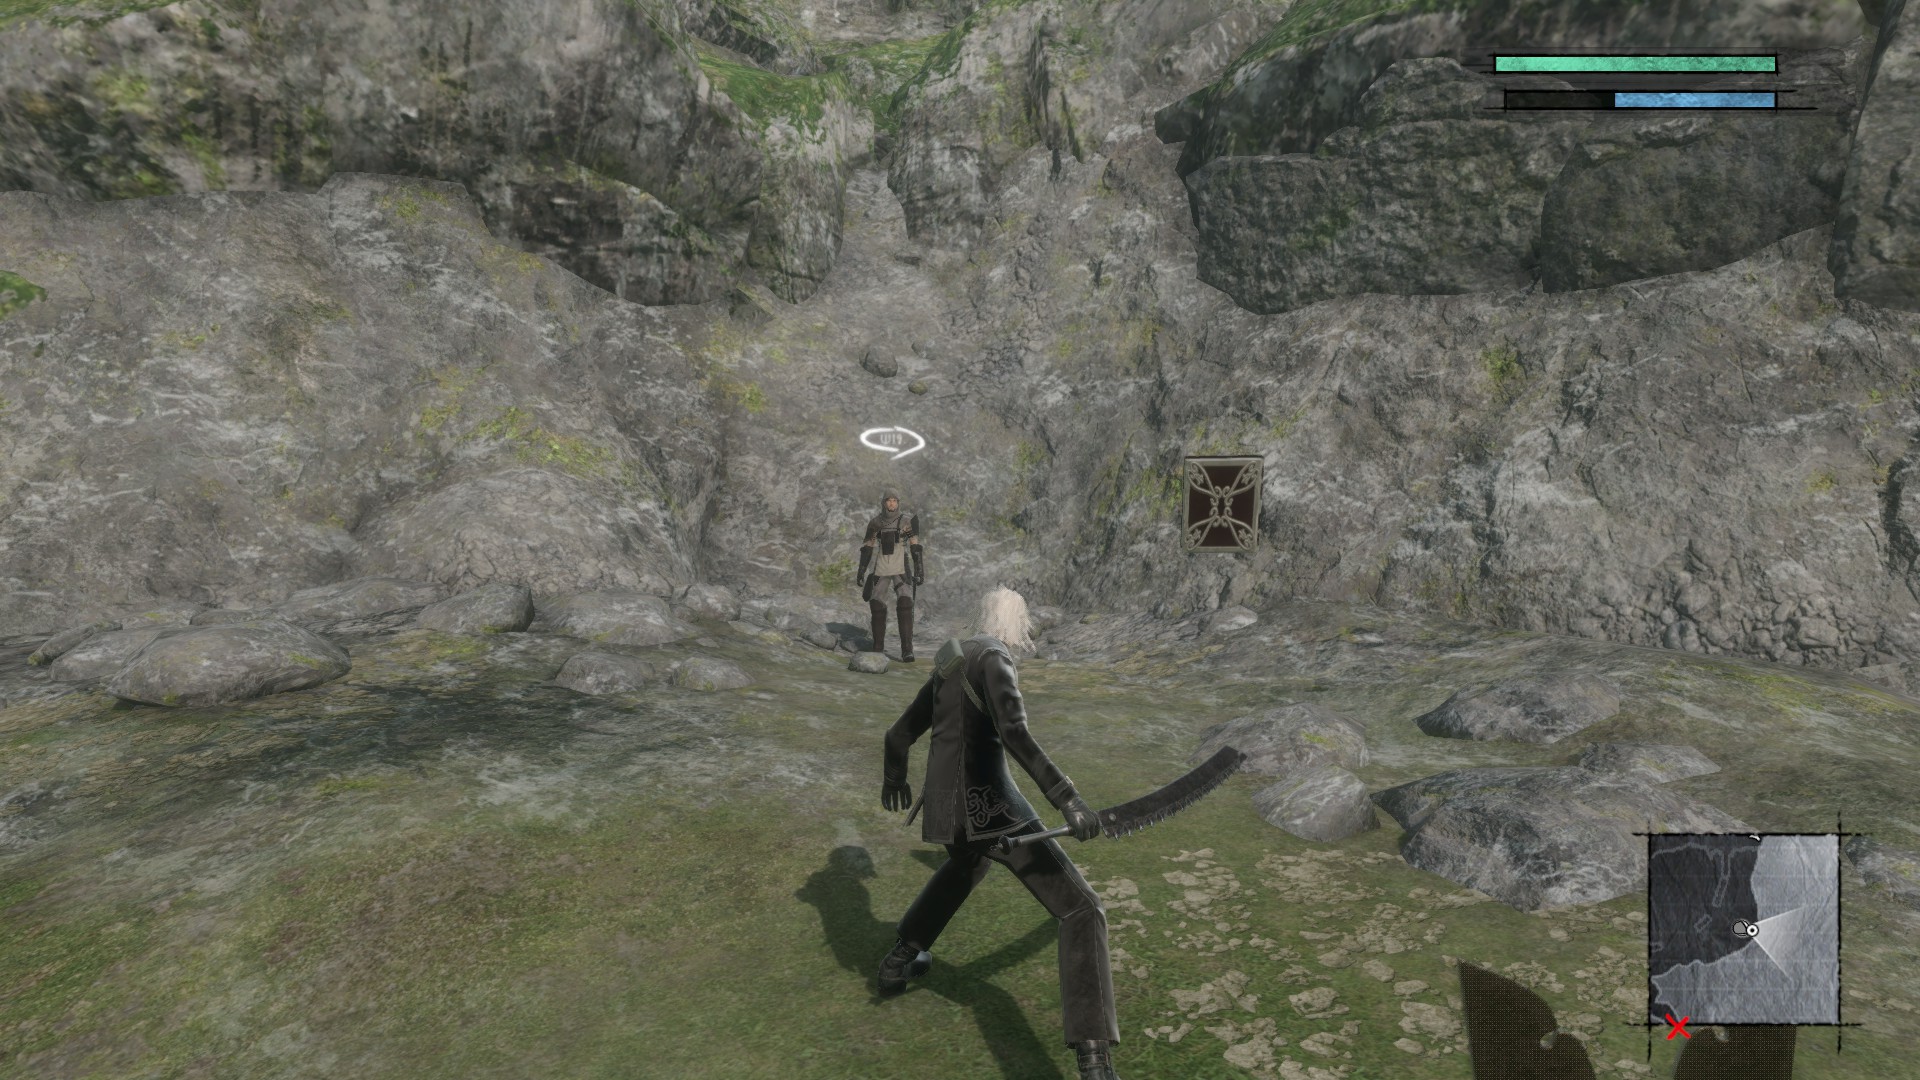
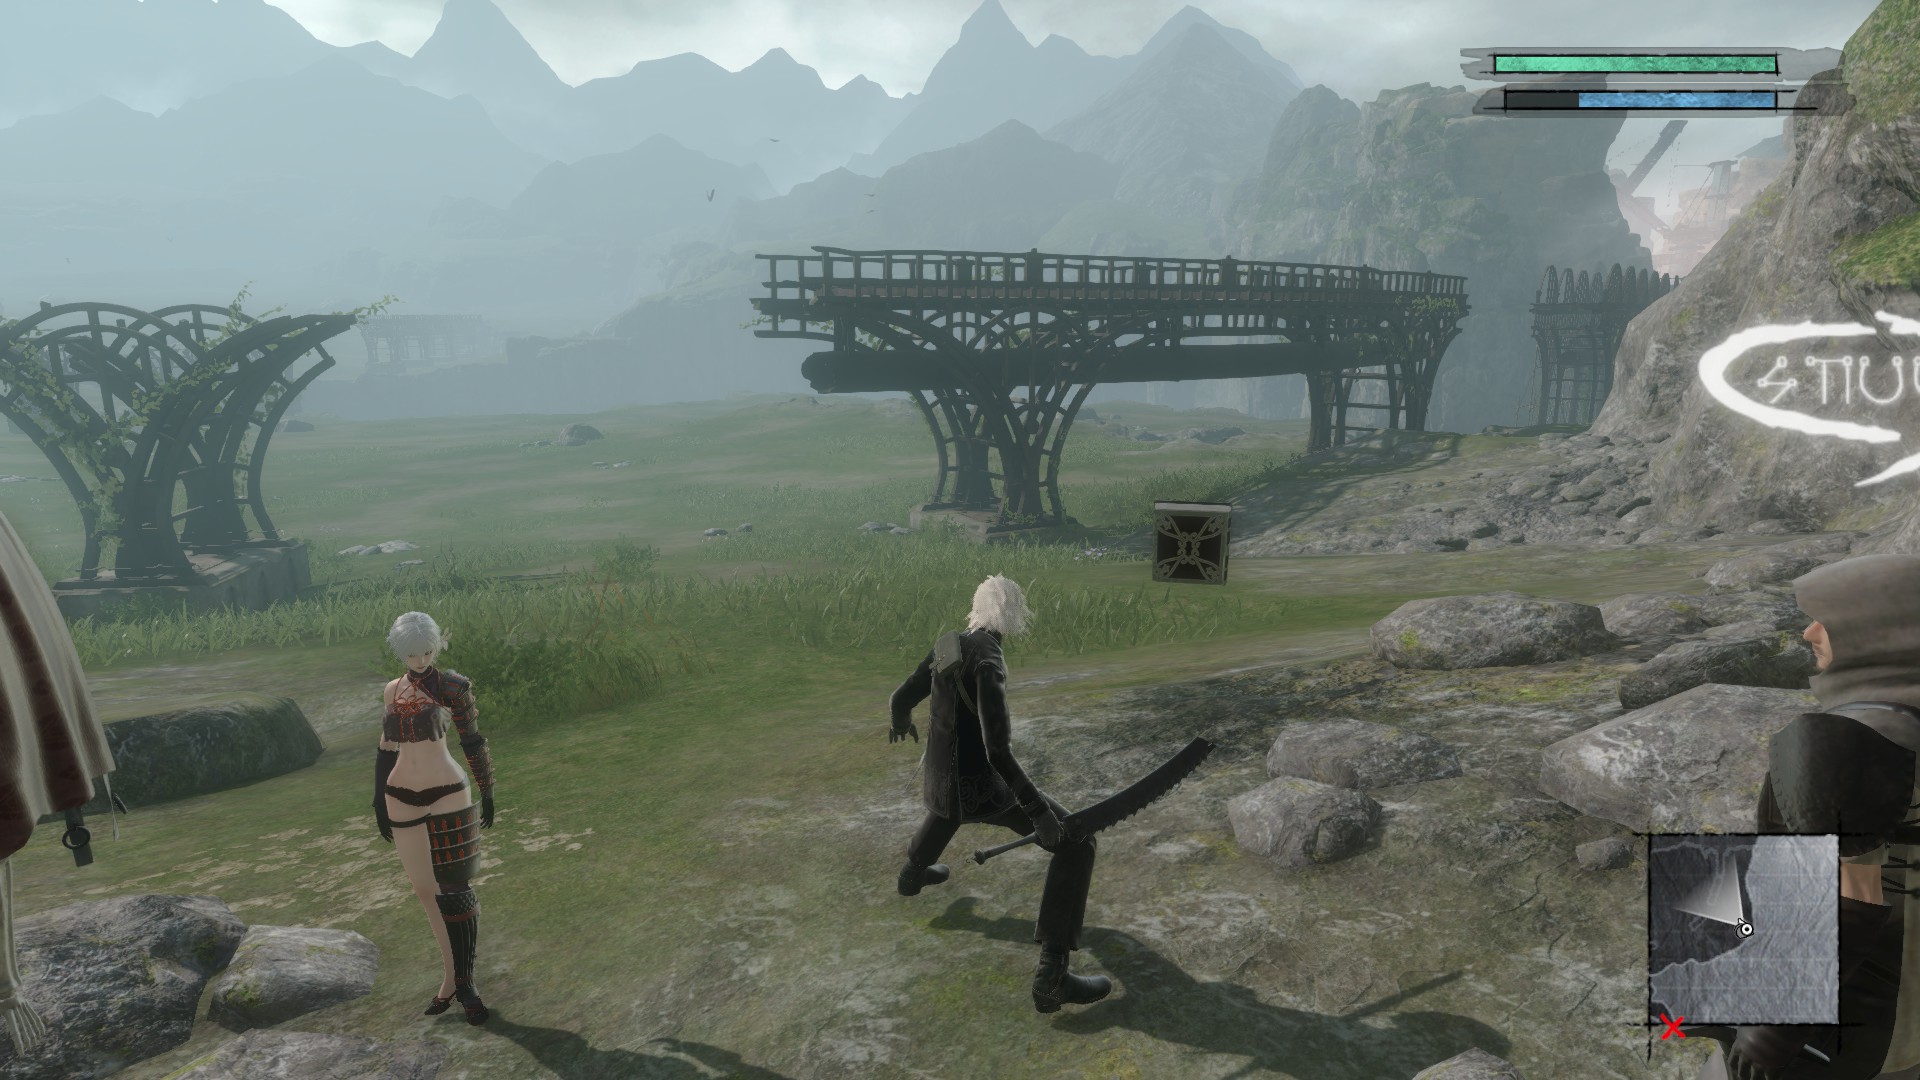
During Part 2, a random guard shows up on the far right side of the plains.
Here.
And with the bridge as a reference.
He has a quest bubble, and you're asked if you want to accept the quest... but this isn't a quest. It's a repeatable minigame where you ride a boar and try to charge through as many sheep as possible.
It ends if you crash into something, or if enough time passes, so there's probably no "completion" bonus or anything of the sort (given the plains are way too big, and the sheep are all over it). Just 100 gold for each sheep you ram into.
I've also heard that the sheep killed in this minigame don't count towards the Sheep Whisperer achievement (Kill 100 Sheep), so do that in Part 1, or make a new save/find time for it in your <15 hour speedrun. I might be wrong on that, though. Haven't tested it myself.
So yeah, this isn't really a quest, but it has a marker for one, so in the guide it goes.
Closing
you're done why are you still reading
FAQs
Why can't I start [this quest]?
Some side quests are only available after the plot has progressed past a certain point. You're not gonna get Facade Quests before you've been to Facade, for example. Just keep moving forward and you'll be able to do them eventually. Don't ask me exactly when they all trigger I'm not your dad
I should be able to do [this quest] but it's not appearing!
Try leaving and re-entering the area - that sometimes fixes the issue. Alternatively, go and grab the quest hint from Devola - if she assigns you a quest-starter, that flag takes priority, so you should definitely be able to accept it now. I think a few of the Postman quests have trouble starting without Devola's aid.
I have to talk to someone for [this quest] but they're talking about another one?
Yeah there's a few parts of the game where the quest flags aren't ordered great. I know the Two Brothers Weaponry suffers from this in Part 2, since you can't finish one of the quests involving them until you've got them to shut up about another one. Just do the quests blocking your dialogue first and you should be good to continue.
I'm at a point in Part 2 which says it's a point of no return?
Congrats on making it to the final area. You regain access to Part 2 the moment you finish it, so don't worry about cleaning up any unfinished Side Quests, your progress is saved and you can go finish those up once you're done. You never regain access to Part 1, though, which is why you kinda need to rush those if you don't want to be locked out of 100% questage
Who is the best boy?
Emil
Will you be my friend?
get out of my steam guide
Source: https://steamcommunity.com/sharedfiles/filedetails/?id=2469041194
More NieR Replicant ver.1.22474487139... guilds
- All Guilds
- NieR Replicant ver.1.22474487139... Guide 532
- NieR ReplicantRussifier for NieR Replicant
- NieR Replicant
- Achievement Checklist: Nier - Replicant
- 100% Achievement Guide: Nier - Replicant
- [ ver.1.22474487139...]
- 100% Achievement Guide [NieR Replicant]
- 100% Checklist [NieR Replicant]
- NieR Replicant ver.1.22474487139... Guide 472
- NieR Replicant ver.1.22474487139...