Overview
Point defense (pd) is very important to keeping your ship not dead so this guide will cover various tactics to dealing with the missile menace that are effective and most importantly point efficient.
Its A Losing Game
Currently, the Point Defense Controller (PDC) can take up to 2 seconds switch targets which means on average it takes pd turrets 1 second to start firing on a target. This is one of the reasons spam is so effective, they aren't trying to defeat your pd setup they are just waiting for that target-switching delay to break through your defenses. This delay can be even more deadly for S3h in which on average they can gain 800+ meters or 1600+ meters if you hit the 2-second delay which can be up to 2/3 the firing zone of an aurora. Luckily this will be fixed in the OSP update but until then AMMs are really the only method to trying to reduce the impact of this issue.
Point Defense Options

Lets look at some of the options we have to build are pd net.
DefenderBuffed By: mounted gyros
Range: 1,750 meters
Damage Per Hit: 15
Due to their high DPS, they are a great option in defending against S3 torpedoes though due to them targeting where the missile is and not where the missile is going, they will miss a lot on things that aren't heading straight for them. They can have some success against S2s but anything that is going semi-fast, 250+, and not straight for them they will miss every shot on. Missiles that it can't really handel are S2h, S3h, and some faster S2s.
ReboundBuffed By: mounted gyros, ammo elevators
Range: 2,002 meters
Max Damage Per Hit: 15
The rebound is an okay pd option that can deal with some S2, not really most S2h spam, and doesn't stop any S3h's and struggles with S3 torpedoes. Most of its AOE fire is wasted due to the unoptimal placement of flak rounds for a missile volley. If you want to read more about this, check out the flak damage chart section.
StonewallBuffed By: mounted gyros, ammo elevators(pretty small buff)
Range: 2,002 meters
Max Damage Per Hit: 15
The stonewall works worse than a rebound due to the additional flak rounds being fired per second spreading diagonally from the targeted missile meaning that most of the AOE is just hitting near the side of or behind the targeted missile and also has an even more un-optimal placement of flak rounds compared to a rebound for a missile volley. If you want to read more about this, check out the flak damage chart section.
AuroraBuffed By: mounted gyros
Range: 3,000 meters
Damage Per Hit: 8
The aurora is one of the best turret options for pd due to its ability to synergize with all of the other pd options. In addition its ability to battle-short enables it to take down a lot of missiles in a short amount of time but can ware down, when battle-shorted, fast. It is effective at hitting all of the missile types but struggles with higher HP missiles like reinforced S3h's and S3 torpedoes.
SarissaBuffed By: energy regulators, mounted gyros, gun plotting centers
Range: 6,250 meters
Damage Per Hit: 65
The sarissa sounds good on paper but due to its slow fire rate and its chance to miss shots it really struggles with any missile type and with most S3h's being reinforced it needs two shots to take 1 S3h missile down. Adding on to the fact that if a missile changes directions or has a wiggle to it it will miss 100% of the time. I have also found that jamming it will significantly reduce its effectiveness due to removing a lot of the range advantage it has. However, if you buff them to have a cycle rate of 2 secs, have some gun plotting centers, and aren't jammed they make a pretty good pd system.
mk61/62 cannonBuffed By: ammo elevators, gun plotting centers, mounted gyros
Range: 7,200 meters
Max Damage Per Hit: 6
In my opinion, they are basically the better sarissa due to it being cheaper, having the same range, and it being a flak round which can account for some wiggle of a missile. It takes quite a few turrets shooting to make it a good pd option but can hard-wall a lot of spam when you get enough of them. Due to their ability to auto-target missiles if you don't want to micro an mk64 cannon, they make for a good pd net in addition to being able to shoot small ships. However, they are affected by jamming similar to the sarissa so it is best to pair them with some floodlights and some gun plotting centers to be able to hit missiles at their max range.
h1mk64 cannonBuffed By: ammo elevators, gun plotting centers, mounted gyros
Range: 8,000 meters
Max Damage Per Hit: 16
If you bring 5+ with some ammo elevators they can be one of the best pd options in the game due to the fact that you can one-shot any volley of missiles. They operate similarly to the mk61/62 cannons but they need the additional micro to lock and then fire at the back missile of a volley and are also affected by jamming due to it reducing the time you have to respond to incoming missile volleys. It also helps to add some gun plotting centers and ammo elevators to make sure your flak rounds get close.
Anti-Missile Missile (AMM)
One of the best pd options to bring into the game due to their scalability to incoming volleys and ability to significantly reduce the size of incoming volleys. They are best paired with no-flak pd options, mainly auroras and defenders that will clean up any missiles they do not kill. Currently, I use two different types of missiles specialized in killing S2 spam and S3/S3h missiles volleys.
Softkill
I would recommend planning to hard-kill every missile but soft-killing a missile with chaff/active decoy can be a great option for reducing the number of missiles heading for your ship. Currently, any missile that is soft killed by a flare/chaff/active decoy will not get targeted (don't get an active decoy stuck in your ship, bad times will happen) so it is a great way to reduce the load on you pd net. In my experience flares have caused wake missiles to hit my ship rather than avoid it so make sure you place them appropriately so that flares don't deploy in between you and the wake missiles. Also for larger ships (Axford/Solomn), I recommend using active decoys due to them matching your radar signature with just one decoy while chaff needs multiple to match.
Flak Round Damage Chart
Looking at the charts and image you can see why flak starts to struggle with faster, higher number missile volleys. Due to it targeting the closest missile the flak rounds will be centered around where that missile is. Sometimes it will be placed optimally just in the front or placed behind the missile where it takes around 50% less damage. What this means is that the targeted missile will live longer than the missiles around it reducing the effectiveness of a flak turret through it hitting more empty space which is very bad given that flak only has a range of around 2k. This effect can be somewhat limited by using auroras to kill that low health but not dead front missile but more micro is needed to flick battle-short on and off due to auroras having a 3k range as to flaks 2k.
Thank you to PuppyFromHell for the flak damage chart info, a link to his google spreadsheet is provided at the bottom of this guide if you are interested in looking at some more game mechanics.
AMM Blast Frag Damage Chart
Looking at the charts below it is clear that frag EL is much better than regular frag at higher speeds this means that for your S3 hybrid missiles, it is best to use EL on them while for S2/S2h (if intercepted before staging) spam it is better to use regular frag to save some points. Another factor to consider is the AMMs' ability to kill other AMMs heading to intercept other missiles which means it is best to limit the explosion size of the AMM and the amount of AMMs being deployed. I have found using a 3/3 EL frag for S3s and 4/2 frag for S2s has worked well(more on this AMM design in Building a PD Net). This explosion size also means that larger s2/3 AMMs will suffer greatly because they will just blow up in a chain with only one missile actually detonating on target.
Thank you to PuppyFromHell for the AMM blast chart info, a link to his google spreadsheet is provided at the bottom of this guide if you are interested in looking at some more game mechanics.
E-War And Soft-Killing Missiles
E-War is a very important part of the game and can be even more important in soft-killing some types of missiles. Another aspect is the counter E-War which in the case of missile defense would be floodlights. 1 floodlight stops just about 2 jammers so you only ever need 2 to stop a lot of the E-War you will encounter but I would recommend bringing 3 just to have a backup plus you will be able to push through any jamming in the game due to the diminishing returns of jamming v.s fully stackable floodlights. As for soft-killing missiles with E-War or chaff/active decoy, the list below will detail what stops what seeker type.
Active/Passive Radar - ACT(RADAR)/PSV(RADAR)
Jamming is an effective way to soft-kill these missiles and you can also use an active decoy or chaff. For passive radar, you will need more jamming then what the spotlight they are using produces which in most cases since the launching ship just uses 1 spotlight you will need two jammers. You can also early stage hybrids but most of the time people will use a validation/second seeker to stop it from staging early or target the missile to activate its seeker to where that doesn't matter. Even if they have a secondary validation seeker you can reduce the detection range of the radar by jamming them.
Command - CMD
Comm Jamming is the way these seekers are supposed to be jammed but due to how comms work it is hard to make it work at soft-killing missiles, especially for hybrids.
Anti-Radiation - ARAD(RADAR)
Active decoy and not having jamming on is an effective way to soft-kill these missiles
EO - PSV(EO)
You can't soft-kill this missile seeker (yet), but you can use a sacrificial ship if they didn't get the ship type before launch to minimize its impact.
Wake - PSV(WAKE)
This one usually misses by itself but due to its wide FOV, you will see it pair with radar to bring it back around for another attempt/to distract your pd system. If you want you can use flares but this can also cause them to hit your ship if the flare is deployed between your ship and the missile.
Reading The Missile Type
*any missile with the seeker type in brackets means that it is a validator. I.E. [cmd]
The first position in the seeker tag will be the slot 1 seeker with the following one being the backup seeker so a missile with the tag of ACT(RADAR)/CMD will have active radar as its first seeker then command as a backup. To deal with this missile all you would need to do is jam the missile due to the active radar taking control of the missile when it detects something. Now if the missile reads ACT(RADAR)/[CMD] it would be an active radar command validation which means you would need to try to comm jam it if the active radar is set to reject invalid. Though if you see this combo it will most likely be an S3h with an extended radar seeker set to reject invalid made to stage a 5k.
Building A PD Net


My current pd net that I use for my Solomn(BB) and Keystone(DD) has 2 jammers (2 DD), 3 floodlights (2 BB, 1 DD), 2 auroras (2 BB), and 3 defenders (1 BB, 2 DD) with about 80 s2 counter AMMs and 20 s3 counter EL AMMs on the BB. If you want to increase the effectiveness of your pd system just bring more auroras/AMMs because 3 defenders are more than enough to take down any S3 spam. The AMMs are set up as follows.
This AMM is designed to counter a lot of the S2/S2h spam that you will encounter. Each of these can one-shot a non-reinforced S2, and the AMM is set to cold launch because in my testing hot launch could make the missile not reach its target or hit a rock while also not aiding in how fast it turns. It is set to free approach so that when it is targeting the lead missile of a volley it will fall a little behind the target, hopefully hitting some other missiles in the process. This also helps the AMMs not kill each other because they will come in from their own approach vector from the other AMMs. One downside to free approach though is these missiles struggle to intercept missiles not heading for the launching ship.
The same design ideas apply to this AMM but it is switched to EL so that it can intercept staged S3hs but has the range to intercept almost any seeker type before they can stage at around 4k. This AMM is set to minimum angle due to the AMM needing to be in the way of the missile to be able to intercept it if it stages before it reaches the missile. Having a size 3 EL frag warhead means that, even though the damage doesn't show it, it can one-shot reinforced S3hs.
How To Use The AMMs
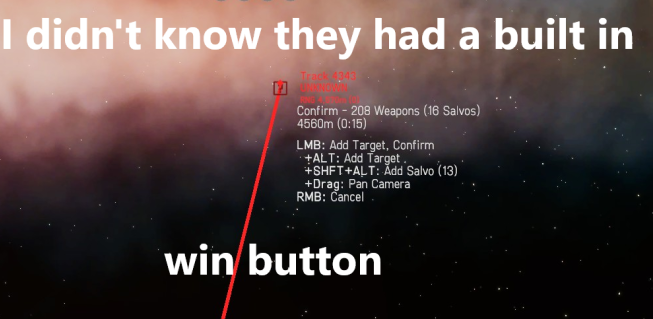
You can change out the seeker type to be active radar if you don't want to micro your pd but you get an AMM that costs more (double the price for an S2 intercepter) and is less resistant to jamming. So with that in mind the best setup for using passive radar AMMs is for one ship to have 2 floodlights that are covering both sides of the ship for a 360-degree view. You will then want to group them together and now regardless of orientation, you don't have to think to get the correct floodlight to fire. This means you can't have both of them firing at different things but it is a good trade-off. Then whenever your pd system fires AMMs you will have a couple of seconds to fire your floodlight if it is not already firing, which in most cases when you are being jammed it will be up and firing in the correct direction. The floodlight and AMMs don't have to be on the same ship and if you want to have multiple ships with AMMs just make sure to have AMM firing enabled on only one ship because each ship will individually fire an AMM at one missile which increases the cost of interception and causes more AMMs to just kill other AMMs. The amount of AMMs to bring is up to you just keep in mind that 1 player can bring around 208+ S2 to spam or 60+ S3hs to spam so ideally you want to bring around half in each amount in AMMs at the minimum.
Grouping Up (death Balling)
Grouping up with 2 or more of your teammates is one of the best ways to deal with any missile spam due to having more pd protecting your ship. Though any pd turret works this is best done with auroras due to their range and effectiveness. One downside to this is that if you are all grouped up in one spot then you will lose to cap (if that is the game mode you are playing) though the most effective option is teams of 2 so that you can hold/push cap while getting the overlapping pd.
What Does The Future Of PD Look Like
In the future, the OSP update will fix the PDC target delay issue which will improve, across the board, all pd against missile spam. The update will also bring new targeting equations which will vastly improve the performance of defenders with smaller improvements to the other turrets. Another factor this update will bring is the need to incorporate defenders into your pd net so that you can deal with newly pd-able rail gun rounds. One thing that I don't think will change with this update is the best composite pd net system which has AMMs, auroras, and defenders which will be able to deal with any missile or rail threat presented to them.
Spreadsheet Data Link
Thank you again to PuppyFromHell for compiling a bunch of info on how the game mechanics work.
https://docs.google.com/spreadsheets/d/1pB_kOSDFyLfL-RyihnDmyeRAJUCtBsbBT_H8eefH8u4/edit#gid=1199279253
Source: https://steamcommunity.com/sharedfiles/filedetails/?id=2928510633
More NEBULOUS: Fleet Command guilds
- All Guilds
- Better Battle Report (BBR) User Guide
- How to use ELINT and cosmo MiG-31
- Silent Thunder Gamemode Guide and Rulebook
- Missile Defence A.k.a: how not to die
- Hardly's Helpful Guide to: 450mm Revolver Bulkers
- Hafen's Guide to Custom Jammers
- Armchair Admiral's Acronym Almanac.
- Short Guide to Creating Voice Packs
- Automatically Adjusting Anti-Air Armaments; A Guide to Missile-Based Hardkill Systems
- Matters on Messing with Modern Missiles; a Guide about Sofktill in NEBULOUS: Fleet Command