Introduction
Movement in Nebulous may seem straightforward, but mastering the ability to maneuver efficiently can make the difference between winning and losing in many engagements. Nebulous gives you a lot of control over the movement of your ships. This guide will teach you how to use those controls to win engagements by getting to shoot faster and dodging your opponent’s shots. If you have any questions you can get in touch with me on Discord at PuppyFromHell#8516.
The Basics
I’ll cover the basics first. This will cover what the various movement options are, how to engage them in game, and what the various movement indicators are. Feel free to skip this section if you know all of that stuff. If you went through the tutorials they’ll have covered most of this.
Movement Commands POS (Move to Position): You designate a location and your ship moves to that location in the shortest path possible. You can set waypoints by holding Shift to have your ship change direction and navigate around obstacles.
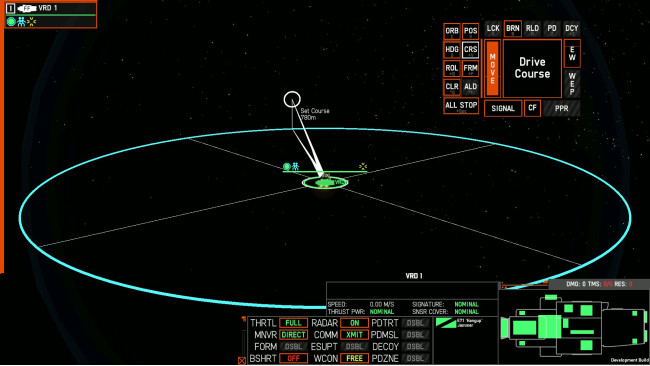
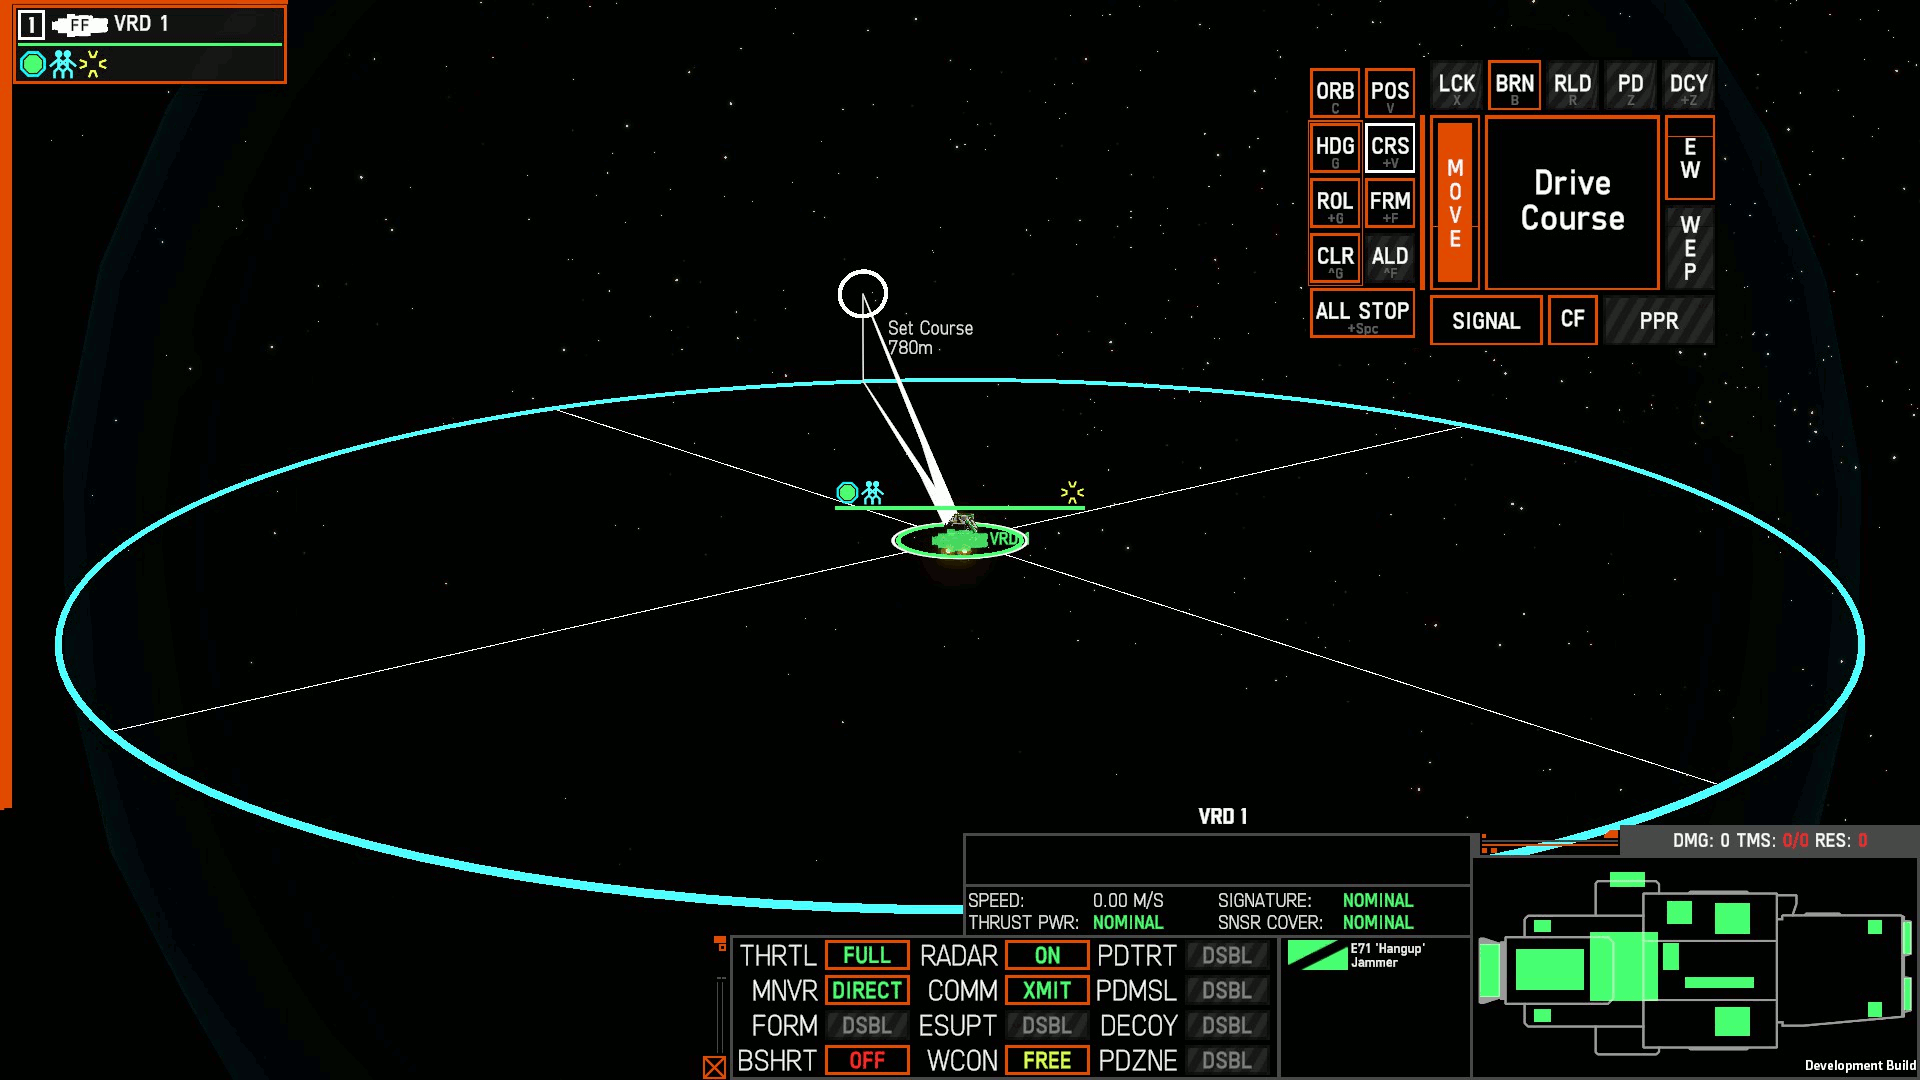
CRS (Drive Course): Order your ship to continue moving in a direction without stopping.
ORB (Orbit Position): Order your ship to orbit at a fixed distance around a designated point. You can also orbit around a target track such as a ship. Orbiting requires selecting first the orbit point and second the orbit distance and angle.
HDG (Hold Heading): Order your ship to point its front in a specific direction and hold it there. It will continue to point in that direction throughout all movement commands until you issue another HDG command or you tell it to stop.
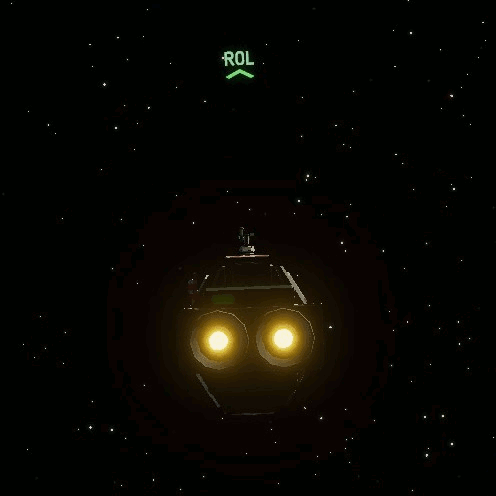
ROL (Roll Ship): Order your ship to roll so its top points in the direction you specify and hold it there. Like the HDG command it will hold that position until told otherwise.
CLR (Clear Heading/Roll): Tell your ship to stop following any HDG or ROL command you have previously issued. There’s no way to cancel either HDG or ROL without canceling the other, CLR will always cancel both.
ALL STOP: Order your ship to immediately stop moving. It will apply reverse thrust in order to bring its velocity to zero.For movement commands that specify a point in space, you can press the Control key and move the mouse to change the elevation of the point. Here's a visual illustrating what these look like in game.
Waypoints are set by using the Shift key while selecting a position. They’re visible in the tactical view as blue lines showing the path the ship will take.
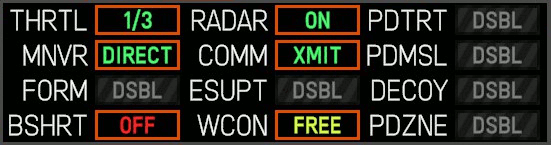
Throttle SettingsThere are four throttle settings, selectable under the THRTL option. Throttle settings only affect the linear top speed and acceleration of your ship. They do not affect your turn or roll rate. The settings start at one third speed, then proceed to two thirds speed, full speed, and flank speed. Flank speed increases your top speed and acceleration by 50%.
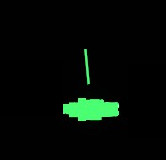
IndicatorsThere are several indicators when looking at your ships and sensor tracks that indicate various movement aspects. You can always see your held heading and roll in normal view, seen here.
In the tactical view, you can see a heading indicator on your own ship visualized as a solid line extending from the ship icon. This is also visible on sensor tracks once they are identified as a ship.
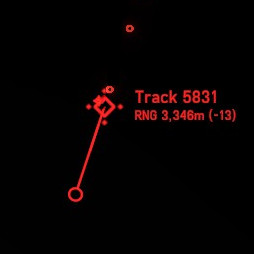
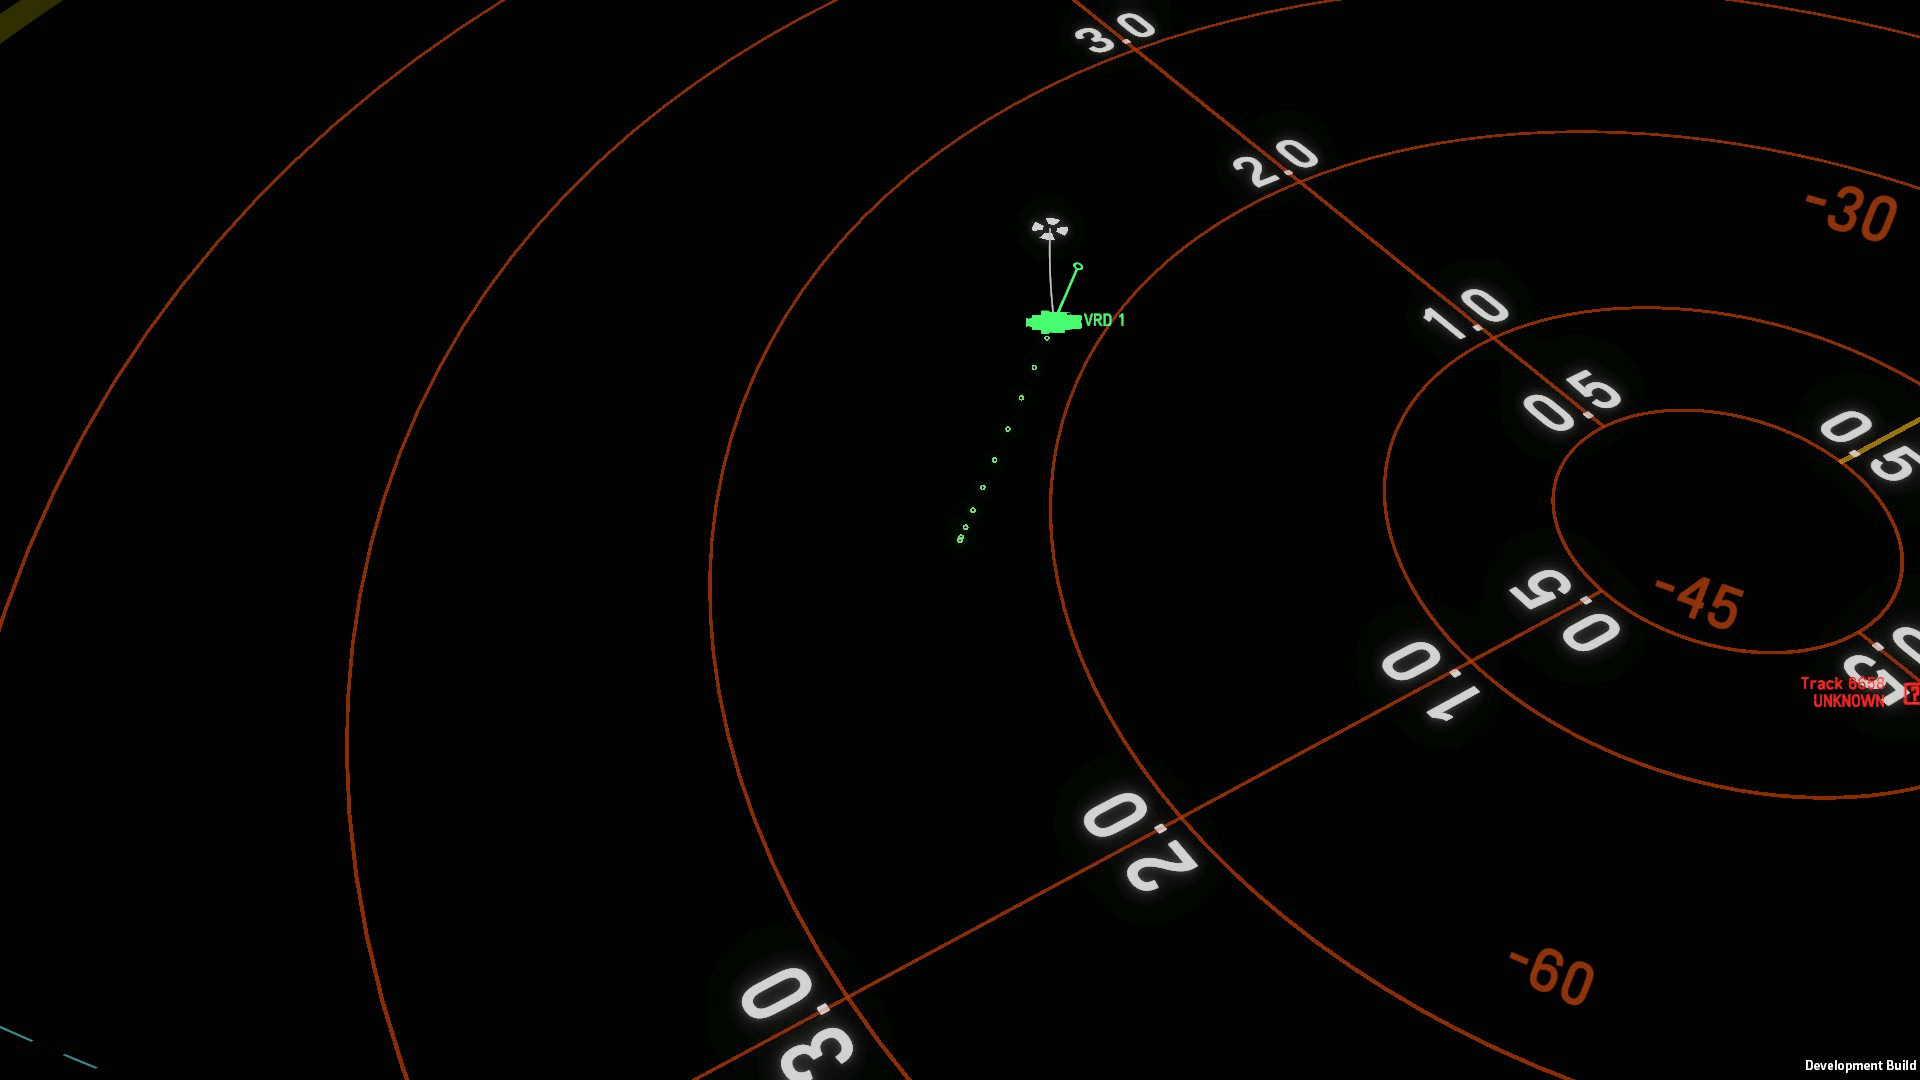
Velocity indicators are shown as solid lines with a circle on the end. A ship or track that isn’t moving has no velocity indicator. The track’s range is shown as a number next to the letters RNG. A track’s speed relative to your own is also visible as a number in parentheses next to the range.
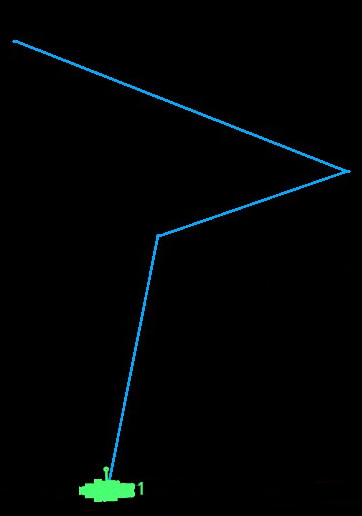
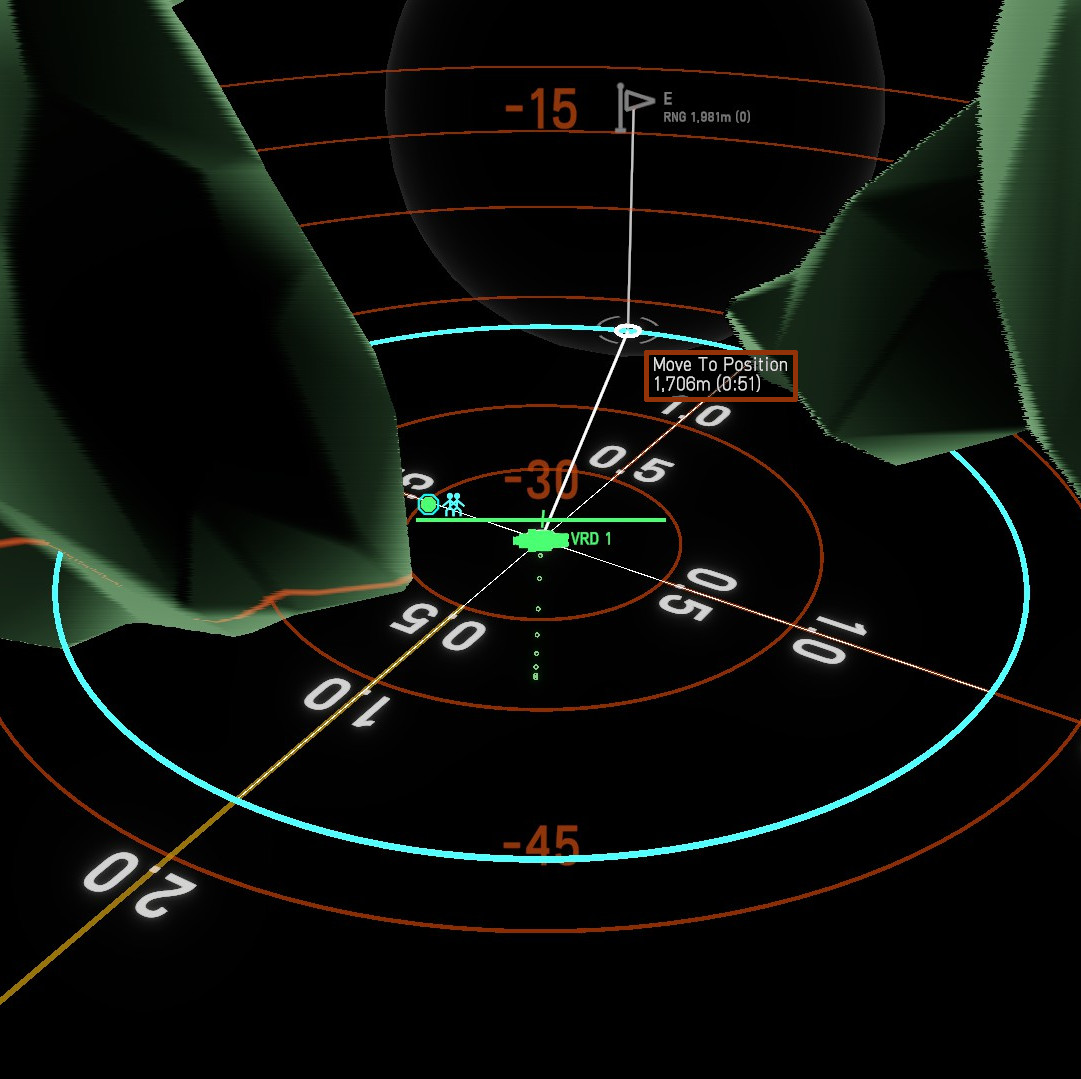
Sensor tracks will also leave dots indicating the path that the track has taken while you have had it on sensors. This can be useful to tell if a ship is evading or not. Under the MNVR option there are selections for DIRECT or EVADE. DIRECT will tell your ship to take the most direct path to its destination. EVADE will have the ship perform random course changes while it moves towards its destination. You can see the difference in movement between these options below. The first image is using DIRECT, while the second uses EVADE.
CorrectionThis section previously stated that throttle settings only affected top speed and did not affect acceleration. This was incorrect and has been corrected. Thank you Paimon and NotSoLoneWolf on the Discord for correcting me on this.
Automatic Movement
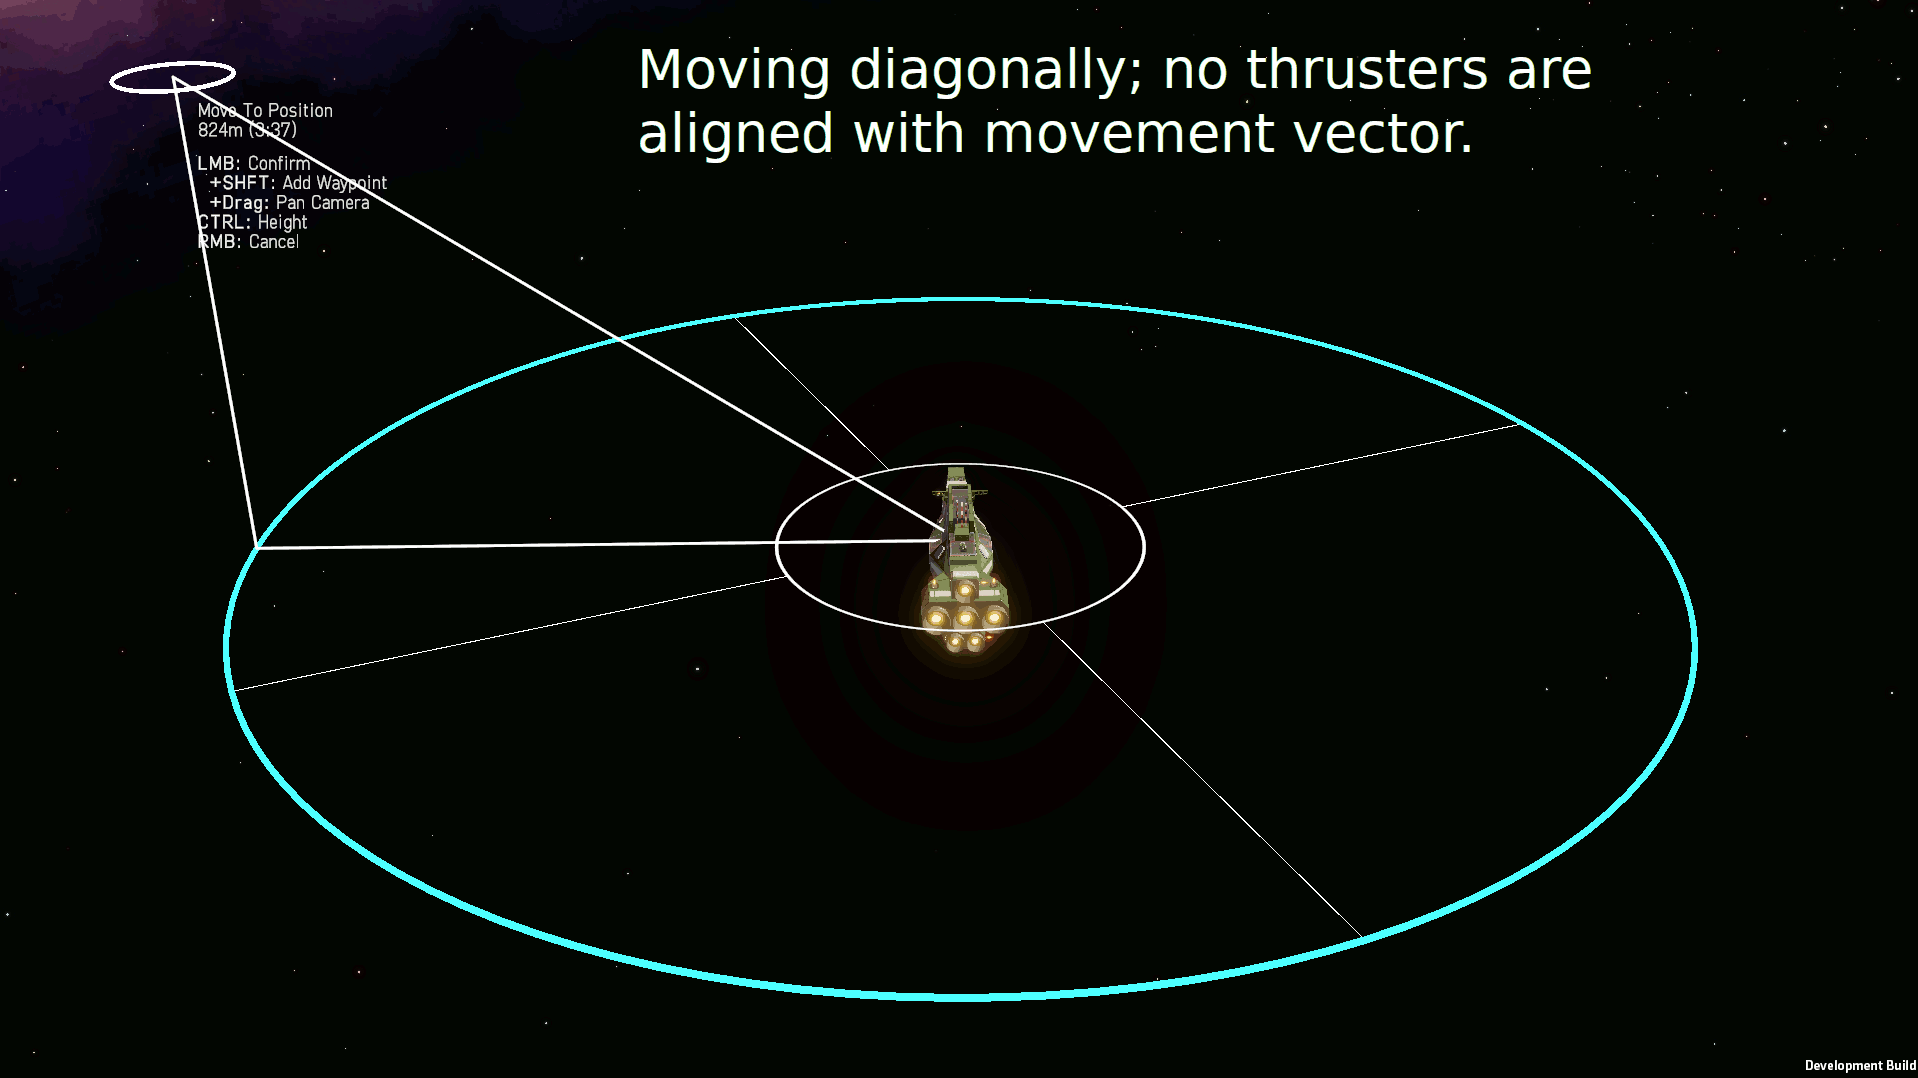
There are times when your ship will change its heading or roll automatically without you issuing a HDG or ROL command. When you issue a fire order, the ship will automatically roll so it can bring as many guns to bear as possible, however it will not change its heading. When you issue a movement order (and you are not holding a heading) your ship will turn to point its nose along the direction of travel. Furthermore, if that movement order is in a direction such that none of the ship’s thrusters are aligned with that direction then the ship will rotate to align its thrusters with that direction. This will occur regardless of any ROL commands or any fire orders you have issued. See the below images for an example of this in practice.
Moving In Space
Moving efficiently in Nebulous requires several changes in thinking from movement in more traditional video games. Ships in Nebulous have inertia and require time to both accelerate to top speed and change directions. Thrusters on different sides of the ship are not equivalent in power either. The main thruster will accelerate fastest, while the other thrusters will all produce a smaller amount of thrust. Thruster damage also affects the thrust produced, and damaged thrusters will struggle to move your ship at all. All of this combines to create situations in game where knowing which thrusters are firing to move your ship, and controlling those thrusters, can be the difference between winning or losing.
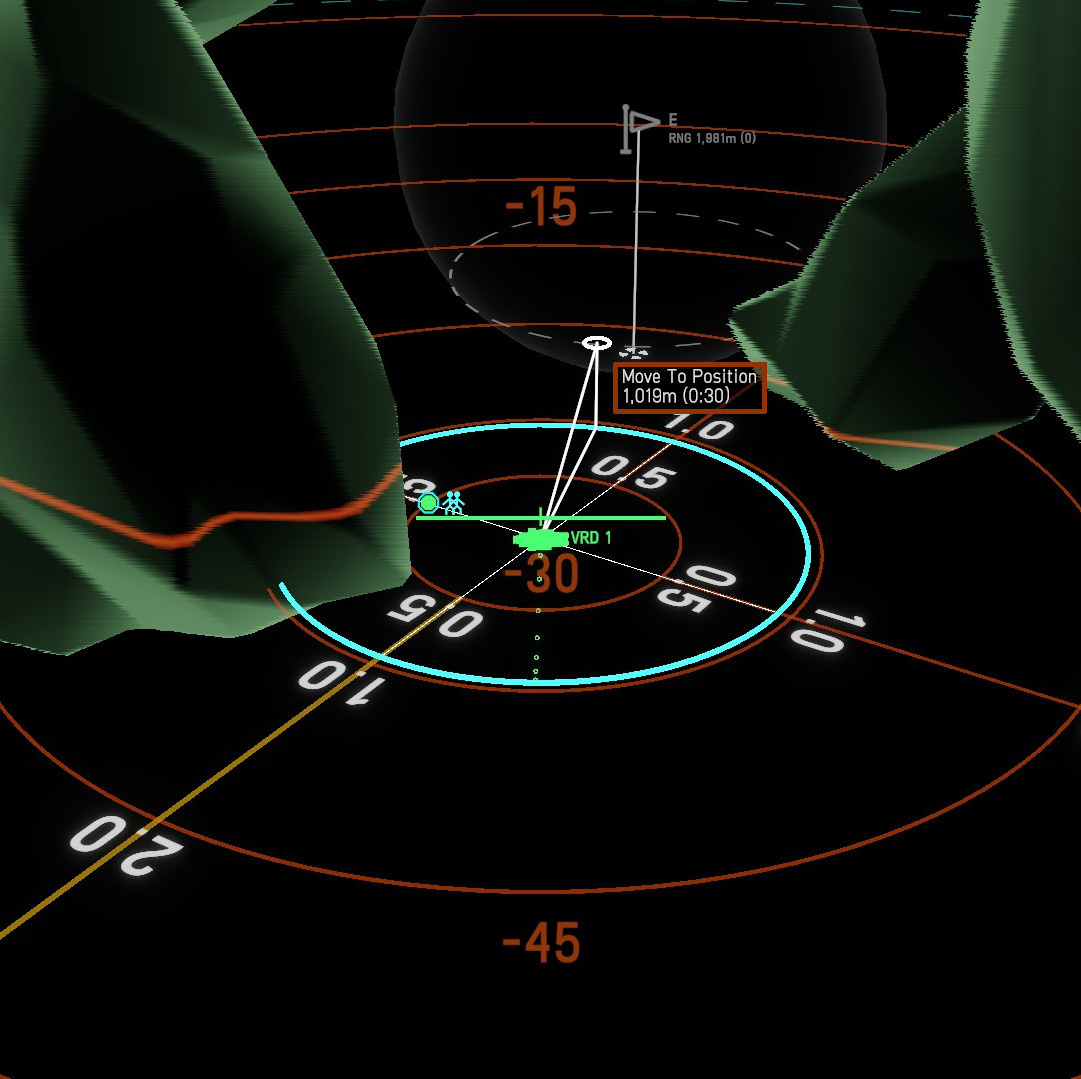
In addition to thruster performance movement in Nebulous is also complicated by a third dimension. You need to think about moving in three dimensions simultaneously to maximize your efficiency. For example, sometimes the quickest route to a capture point requires ascending or descending, as illustrated in the following diagrams.
Here I’m navigating to a point so I can capture it. The game helpfully points out that it’ll take me 51 seconds to get there. However, if I elevate a little bit, as shown below, I can get there in 30 seconds. That’s a 21 second difference which is a third of the time it takes to capture the point in the first place.
Moving And Shooting
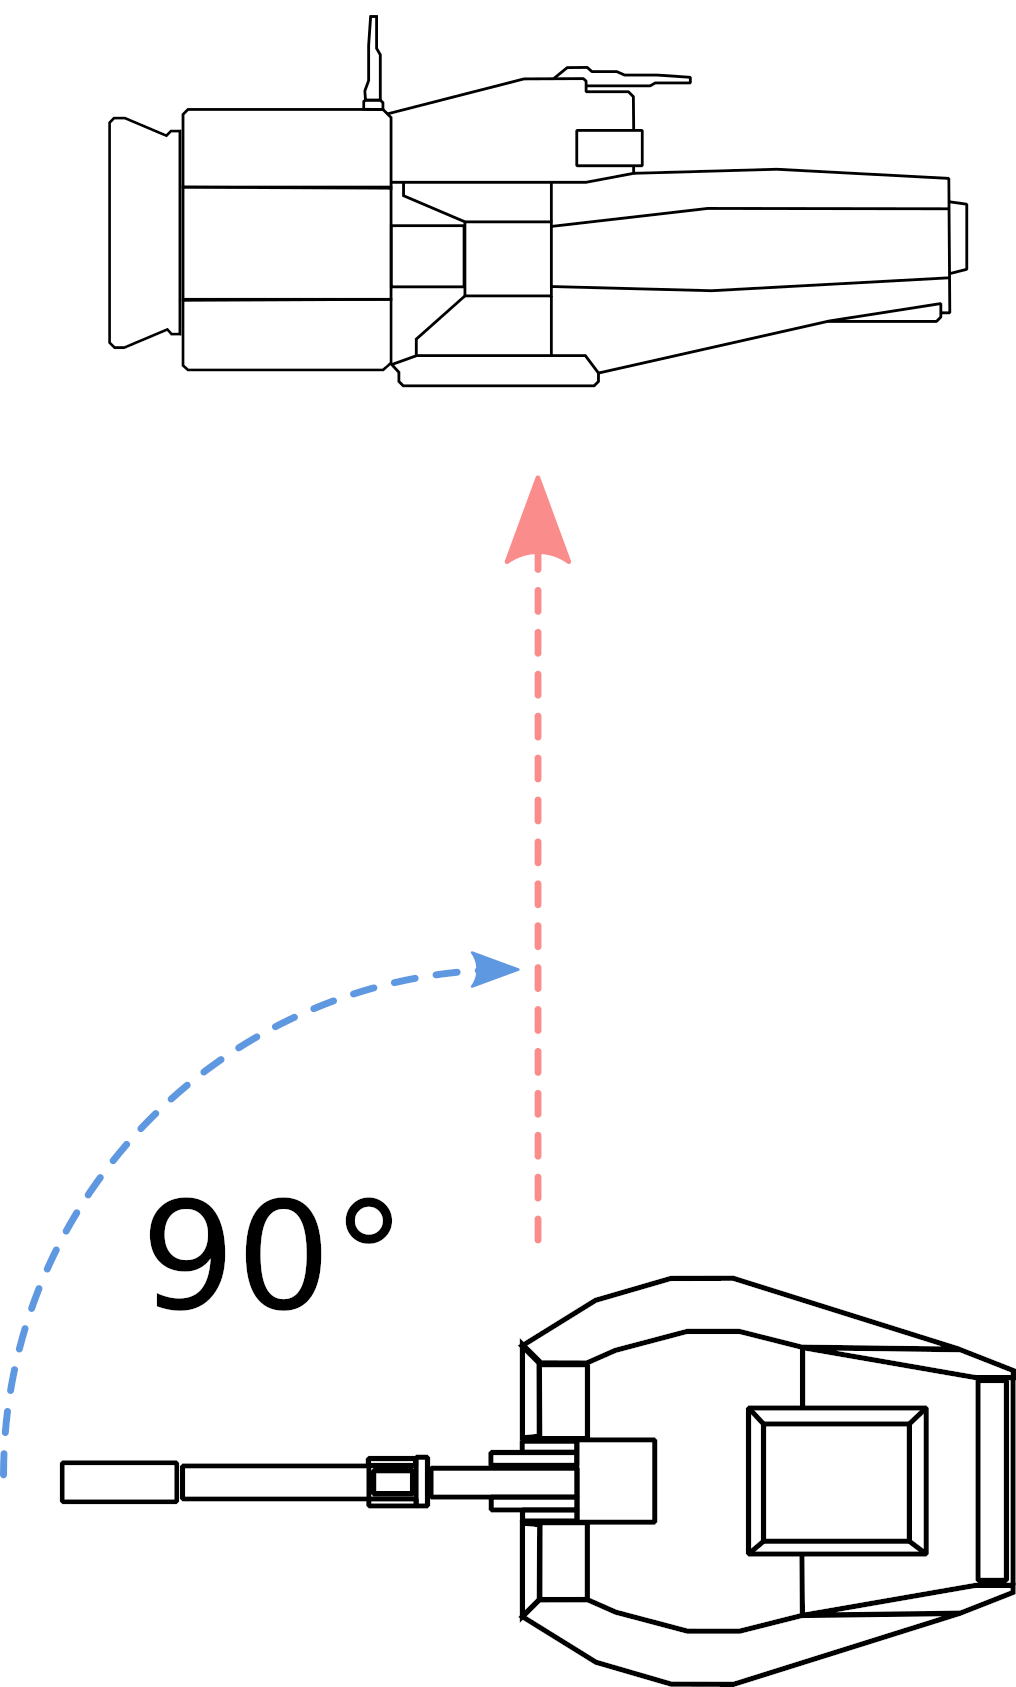
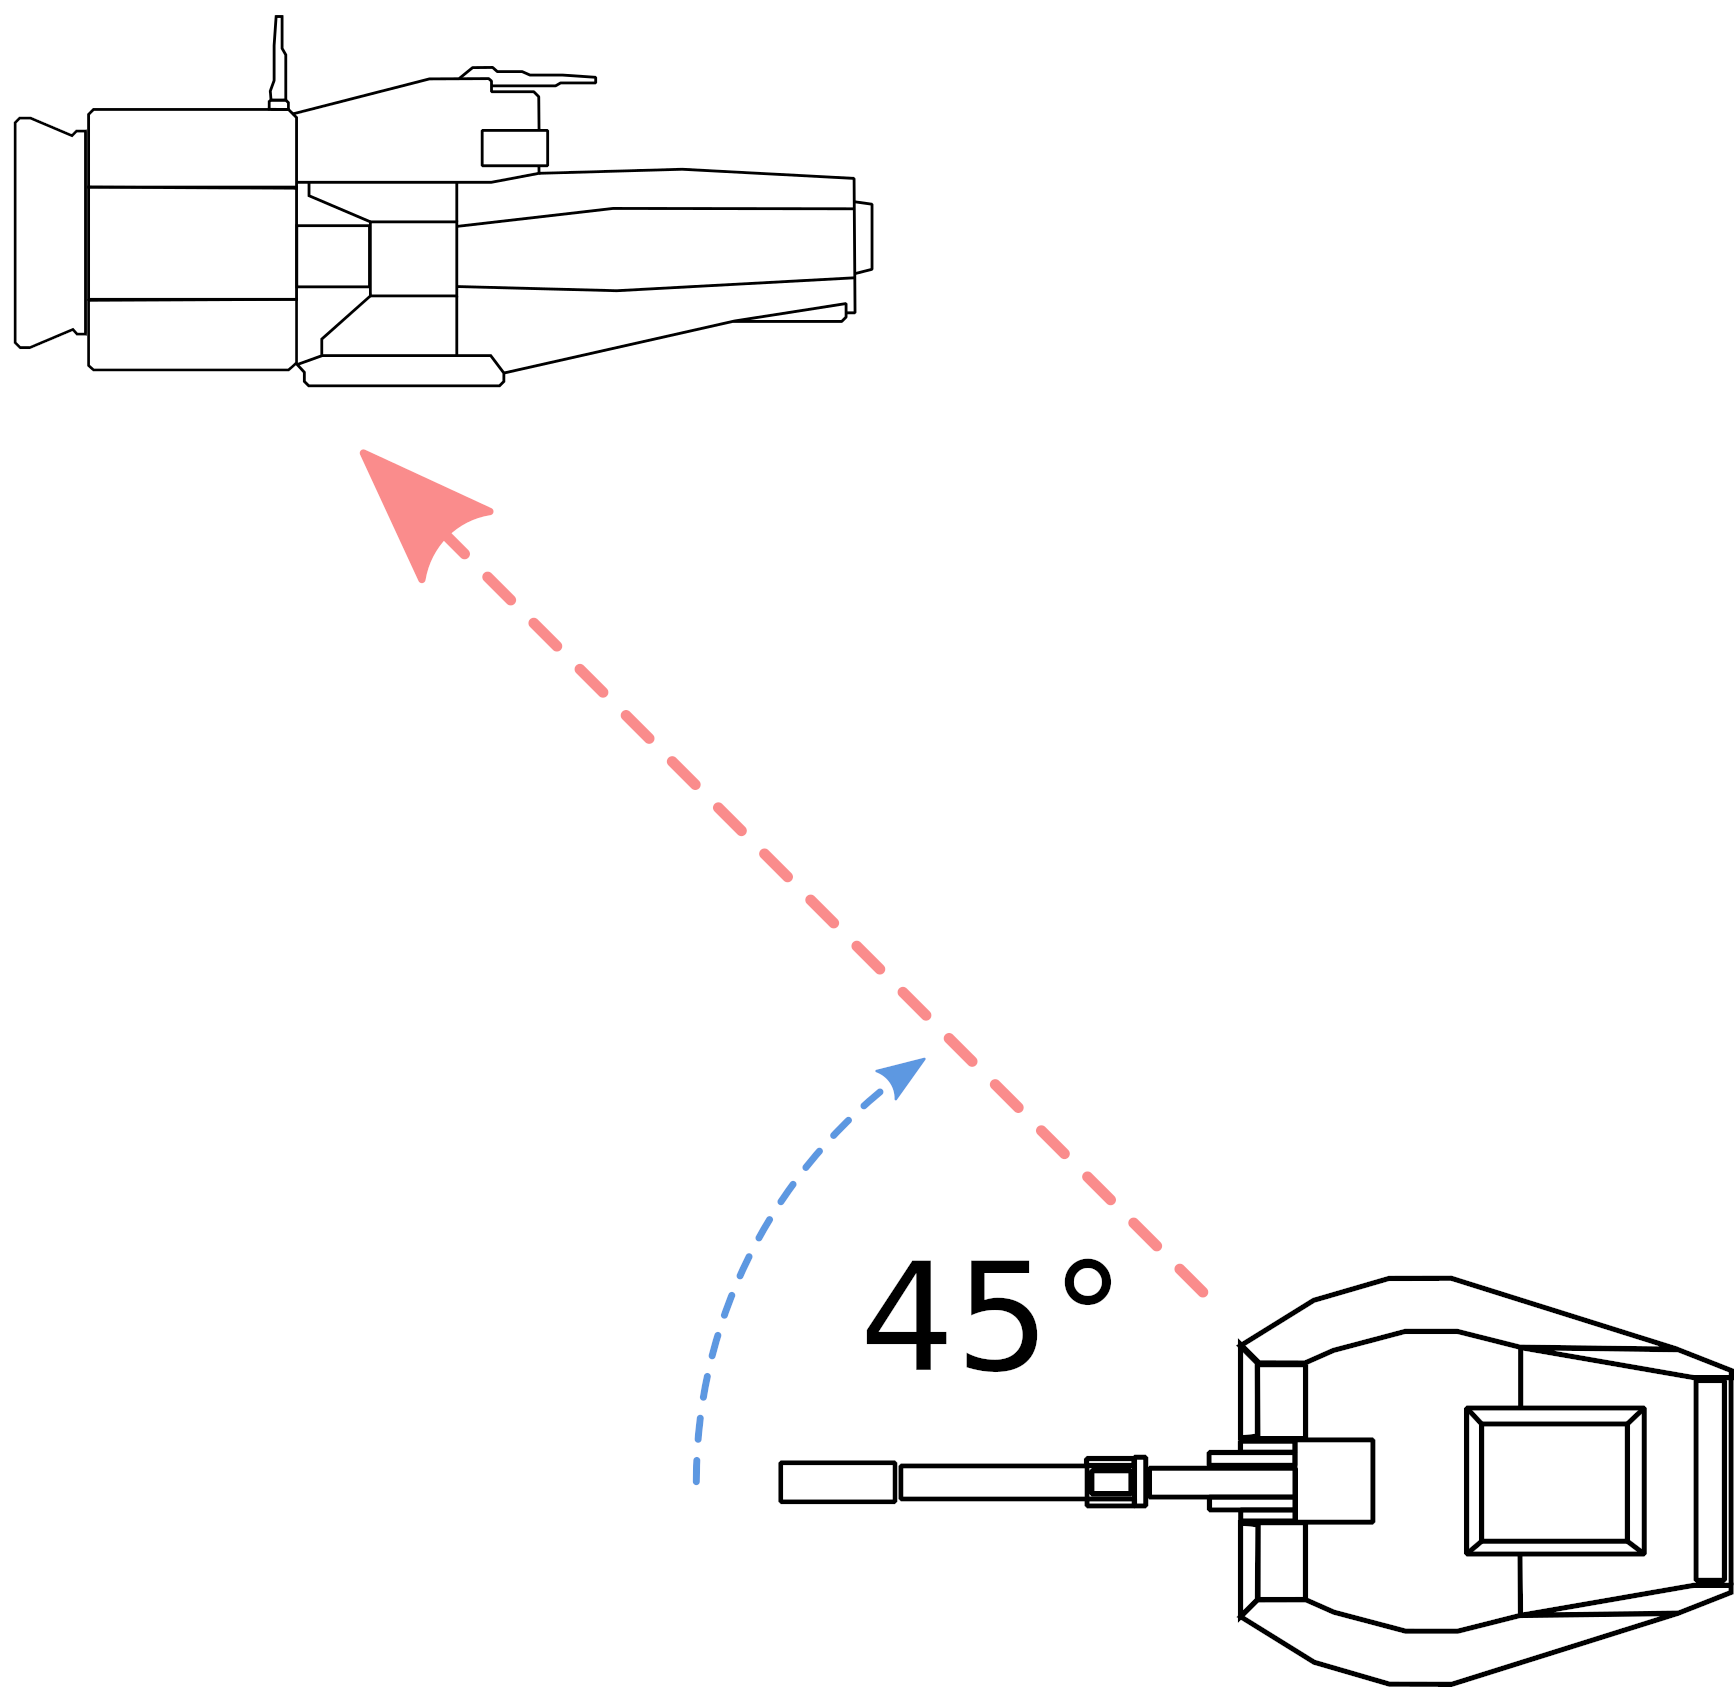
In Nebulous your guns need to be pointing at the target before they can fire. This is most apparent with spinal weapons, which need to turn the whole ship instead of a turret. But turrets also benefit from smart maneuvering. Suppose you are trying to shoot a Sprinter with a Mk64 turret. Your turret may have to traverse 90° to get on target, as shown in the below diagram.
However, if the turret was moved to the right in the diagram, it may only need to traverse 45° to get on target.
The takeaway is to always be maneuvering your ship such that you are reducing as fast as possible the angle your weapons need to traverse to get on target. This applies to turrets, spinal weapons, and any heading or roll changes required to unmask your weapons on the target. The reverse also applies here. If you are being shot at then maneuvering so you are growing the angle their weapons need to traverse will lengthen the time you can’t be shot. Finally, remember that the effectiveness of this strategy is also dependent on your distance from the target. Farther targets require less traversal in order to remain on target, and closer targets require more. Mastering these micro maneuvers will see you win more engagements because you will get your guns on target faster than your opponent.
Moving And Dodging
Aside from beams, weapons in Nebulous all have a flight time before they hit their target. Avoiding the firing arcs of your opponent is the best option, but with clever maneuvering you can increase your odds of avoiding a successful hit dramatically.
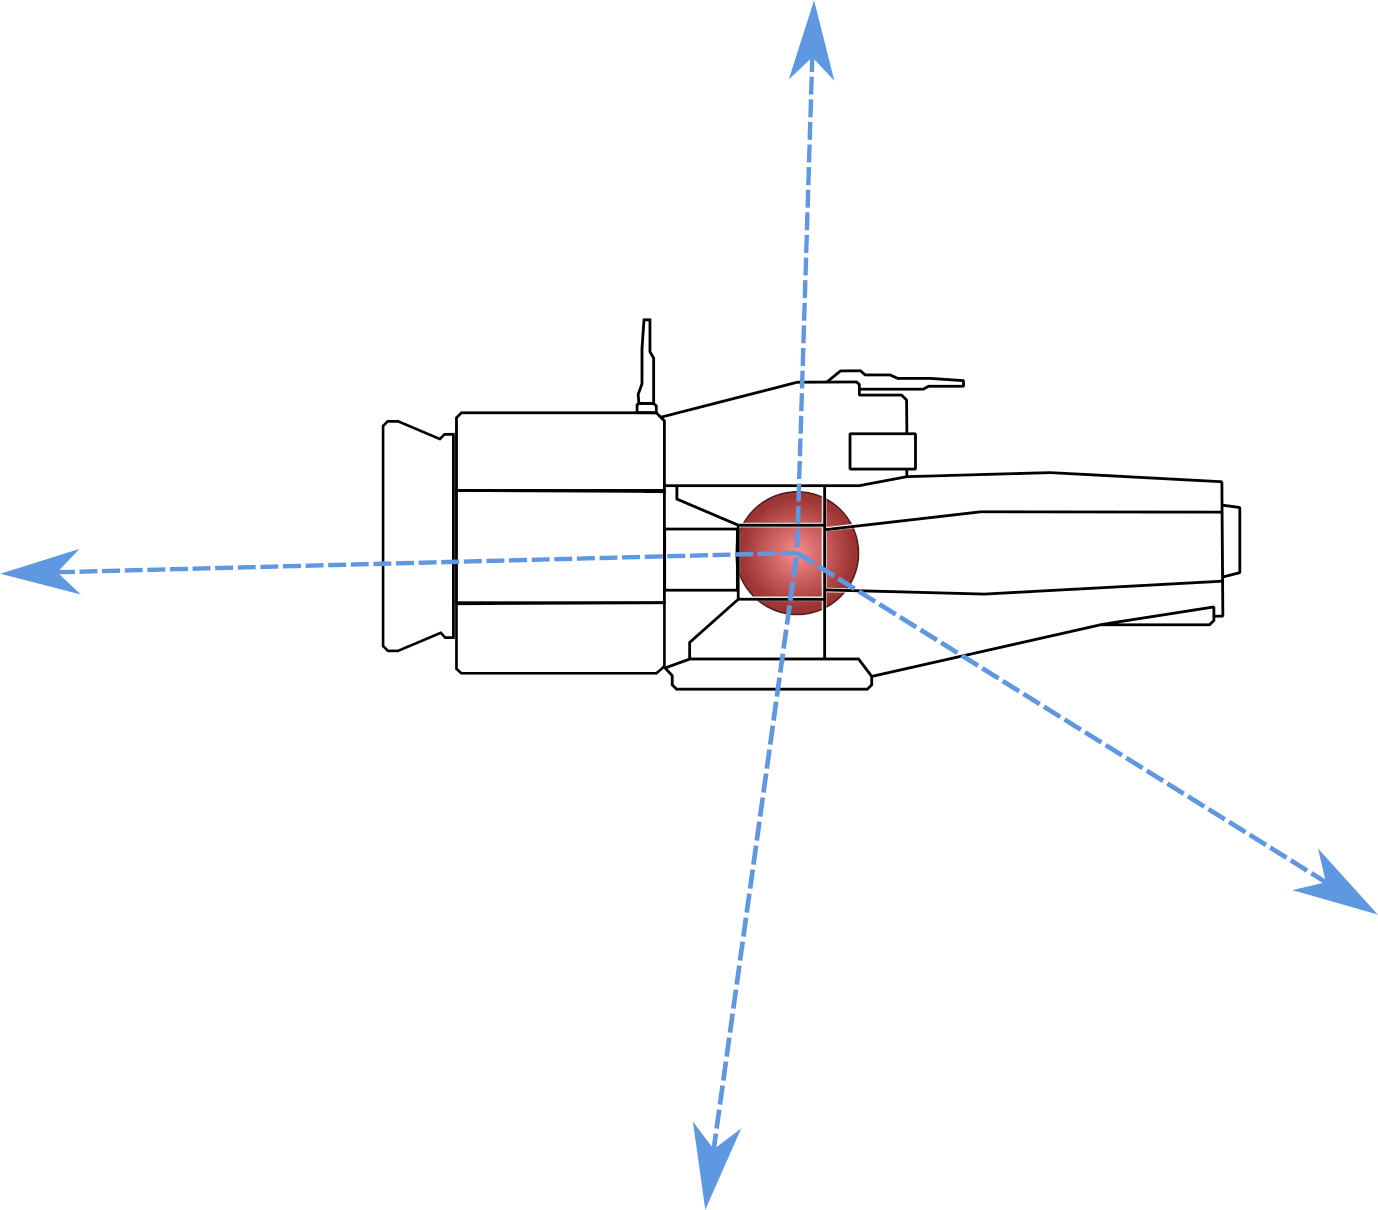
Cannon shells have the distinct disadvantage that they cannot change their trajectory. They are also slow enough that at most engagement ranges they have flight times measured in seconds. Both 120mm and 250mm shells travel at 800m/s, while 450mm shells travel at 750m/s. The first step to dodging cannon shells is minimizing your cross section. For most ships this means pointing your nose at the shooter but in an emergency just being on the longitudinal axis is good enough. This of course gets trickier with shooters spread across multiple angles. To dodge the incoming shells, you need to issue a move order such that your ship moves perpendicular to the incoming shells. For example, imagine in the following diagram the bullets are being fired through your screen at the sprinter (visualized by the reddish circle). There are four example vectors the sprinter can move in to dodge the incoming shells, but really there are an infinite number of vectors that are perpendicular to the incoming shells. While acceleration is the most important factor that contributes to a successful dodge (and why a Raider drive is good in this situation), there are many contributing factors. Each ship will be slightly different. Play around in-game until you get a feel for it. You can use this calculator[rocketpuppy.github.io] to calculate theoretical minimum dodge ranges for specific ship parameters.
Missiles can be dodged in a similar fashion. However because they can change their trajectory the timing required to successfully execute a dodge is much tighter. Practically only Sprinters can dodge missiles with any reliability. The goal when dodging is to force the missile to make an extremely tight turn in order to hit your ship. With a little luck the missile won’t be able to make that turn and will sail off into the void. The final consideration when dodging is your ship geometry. You want the missile to pass the shortest amount of ship geometry to maximize your chances of success. For a sprinter, orienting such that the missile will pass from top to bottom is the best choice.
Conclusion
Moving efficiently is very important in Nebulous when it comes to winning individual engagements. To leave with an anecdote, I personally have used the techniques in this guide with an Axford to maintain a distance of 8 kilometers from a ship that was engaging me with heavy 450mm cannon fire while on my way to capture a point. By maneuvering quickly and efficiently I was able to dodge almost all of their fire and only took superficial amounts of damage. With the information in this guide and a bit of practice you will start to see more successful engagements and ultimately you will win more games.
Thank you to HopefulMonster, Weeble, and everyone else who read and helped me refine the first drafts of this guide.
Source: https://steamcommunity.com/sharedfiles/filedetails/?id=2892430677
More NEBULOUS: Fleet Command guilds
- All Guilds
- Better Battle Report (BBR) User Guide
- How to use ELINT and cosmo MiG-31
- Silent Thunder Gamemode Guide and Rulebook
- Missile Defence A.k.a: how not to die
- Hardly's Helpful Guide to: 450mm Revolver Bulkers
- Hafen's Guide to Custom Jammers
- Armchair Admiral's Acronym Almanac.
- Short Guide to Creating Voice Packs
- Automatically Adjusting Anti-Air Armaments; A Guide to Missile-Based Hardkill Systems
- Matters on Messing with Modern Missiles; a Guide about Sofktill in NEBULOUS: Fleet Command