General Training Tips
Where do I start?First of all, Money. Second of all, Money. Wait, did I say Money already? Good, because you'll need plenty of that. The first couple of monsters will be your money-makers, and as such there's little value to spend your hard earned cash on them. It would be counterproductive. Also, if your monster discovers any items that you don’t need - guess what - sell them immediately for quick cash! Just make sure to not sell something you might regret later (Apple Cakes, Mint, Taffy, etc.). Now let's cover the actual grind, what will make your earn this shiny ambrosia: battles. Subscribe your monsters to tournaments, always, but be cautious to not raise the ranks too much or else you'll just lose and stress out your monster. They're money-makers, but they still have souls.
In essence, you'll have a few "Working" monsters who will focus on gaining wealth and a few "Fighting" monsters who will focus on spending said wealth. The latter will also take part in the most difficult tournaments, errantries and expeditions. The workers will fight too, but again, just the bare minimum in order to amass a chunk of the fortune.
What stats should I raise?It all depends on your play-style and experimentation is advised. To be fair however, you really don't want to be a jack-of-all-trades in this game. Focus on three stats (for example Intelligence, Skill, Speed / Power, Skill, Defense / etc.), then, when you've maxxed out all these, go to the next preferred one. This way you'll have four good stats which will carry you throughout the game. You can also go to the next ones if you wish to do so, but it will be time-consuming and you'll most likely need to "abuse" the Freeze and Fuse system (meaning freezing a monster before he dies and fusing it with a good match); at the end of the day, you really want to take everything one step at a time. Trying to raise your monster to be balanced across the board will probably just result in a monster who doesn't excel in anything at all and will not be great for battle. Take this into consideration when you do the special training for them to learn new moves, and how you choose to fight overall... All in all it's better to choose to raise a high Intelligence monster or a high Power monster from the get go and base your strategy around that.
What's the best schedule for Drills?The most efficent training method for the Fighters' basic training is the no-rest method:
Week 1: Tablets, Nuts Oil, Hard Drill
Week 2: Mint Leaf, Light Drill
Week 3: Nuts Oil, Hard Drill
Week 4: Mint Leaf, Light Drill
If your monster Dislikes Tablets then you can either reload the game before he was created or, if you don't want to cheese it, have a switch in Week 3 to a Light Drill every other month. The only downside is that this approach takes a lot of time and you need 1300G per month (unless you take advantage of sales of course).
Should I Praise or Scold my monster?That's up to you of course, but keep in mind that if you always scold them you're much more prone to stressing out your monster, which in return can make him leave the Ranch and leave you dangling around the place and losing precious time - among other things. On the other hand, praising them too much might cause them to cheat more often in Drills, which still upgrades their skills albeit less so. I'm not entirely sure, but that might also make them more lazy in fights, like getting confused, but don't quote me on that. Overall, you need to strike a fine equilibrium.
What's the point of Nature in a monster?To expand on the previous question, Nature is rated on a scale of -100 (worst) to +100 (best), 0 being neutral. Monsters start out somewhere on the scale, depending on their breed. Your monster's Nature can be affected by certain items (like the Hero Badge), but is mostly affected by direct response from you. So again, this goes down to the praise/scold thing. By praising your monster for doing well during Training, you can shift its Nature toward good, but if you allow it to cheat without scolding it, it will start to shift toward bad. Some monsters require a good or bad Nature in order to learn specific techniques.
This is how a healthy monster looks like
How Do I Upgrade The Ranch?

WARNING!!! SPOILERS AHEAD!!!
Some unlocks revolve around your ranch upgrades. You must be on the ranch one Week 4 of May to trigger the events (Be on ranch week 3 and rest/drill into week 4 etc.). Have at least 5k Gold + the upgrade cost or the event won't trigger.
Stable Price Breeder Rank 1st 15,000 4th 2nd 30,000 7th
House Price Breeder Rank 1st 5,000 3rd 2nd 8,000 5th 3rd 12,000 6th 4th 20,000 8th
Altar Price Breeder Rank 1st 5,000 Not relevant 2nd 8,000 Not relevant
Sorry pal, but I can't. Next week is renovation day!
How Do I Unlock Every Breed? Any More Info You Can Give Me About Related Topics? (Part 1/2)
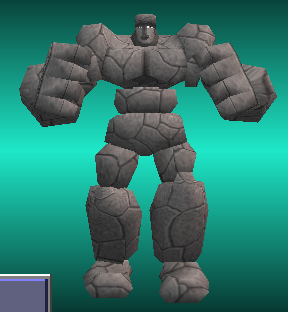

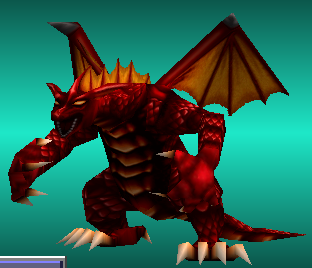
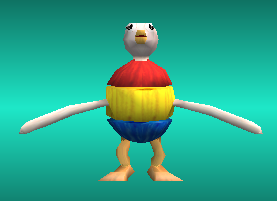
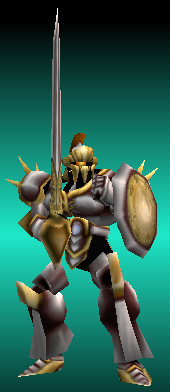
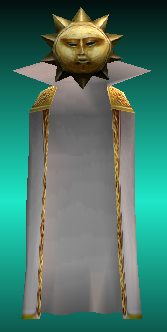




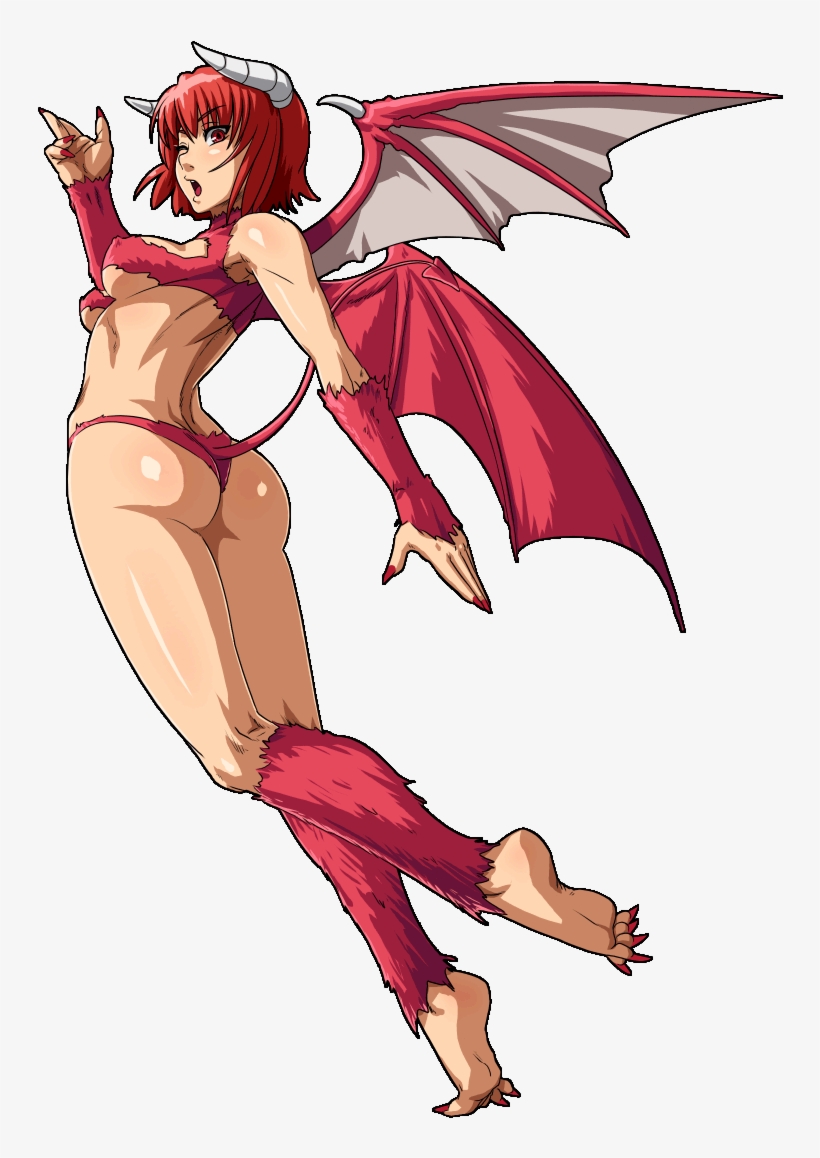
Despite being initially locked, the following monsters as sub-breeds are available right away:
Baku, Dragon, Henger, Gali, Golem, Worm. The following monster Main breeds do not have to be unlocked:
Ape, Arrowhead, Colorpandora, Gaboo, Jell, Hare, Hopper, Kato, Mocchi, Monol, Naga, Pixie, Plant, Suezo, Tiger, and Zuum.
Baku and Golem: Achieve Breeder Rank of 4 (Beat B Rank), and have already purchased the first House upgrade from Binto. If you have 17,000 G or more on May 4th, Binto will arrive again and upgrade your stable for 15,000 G. After this is done, Baku and Golem are unlocked.
Bajarl: Achieve Breeder Rank of 8 (Beat two of the Major 4), and have already purchased all three house upgrades and two stable upgrades from Binto. If you have 22,000 G on May 4th, Binto will arrive again and upgrade the house for the last time. After this is done, you will be given the Bajarl Pot, which is used during combining to unlock the Bajarl.
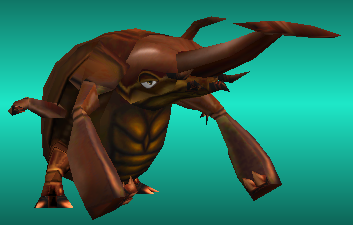
Beaclon: Unlock the Worm, and then raise it while satisfying the following conditions:
The Worm’s rank is C, or lower.
The Worm is at least 4 years old, and less than 5.
The Worm’s loyalty is 80 or more.
The Worm must have been fed 30 or more “Cup Jelly.”
The Worm has 0 fatigue and 7 or less stress on June 4th (Resting on the 3rd required)
If all conditions are satisfied, the Worm will cocoon into a Beaclon with a 100% chance. If the Worm cocoons into a different monster, not enough “Cup Jelly” were fed to it. If the conditions are satisfied it will cocoon/unlock the Beaclon. It will live out the rest of the Worm’s lifespan.
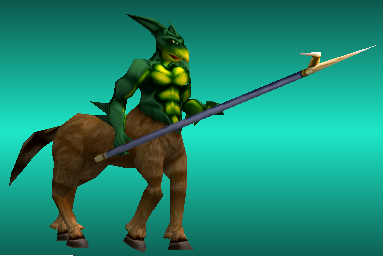
Centaur: Achieve Breeder Rank of 4, and finish the first expedition at Kawrea. Having done this, send a monster that is at least B Rank to the Heavy Errantry (Mandy Desert) between the months of March and August. If the monster is uninjured, it will return with a Spear. Your monster and the Centaur will fight (this will take an entire week so you will lose additional lifespan), and afterwards you may use the Spear in combining to unlock the Centaur. There is no particular penalty for losing this fight - but it is not difficult.
Dragon: Achieve Breeder Rank of 6 (Beat S Rank) or higher, monster must be exactly B rank. Have Binto renovate your stable at least once, and participate in at least one IMa vs. FIMBA meet. Having done these, if you have a B rank monster (exactly B rank, not higher or lower) on the ranch on July 1st, you will be invited to the Dragon Invitational. Attend it on August 2nd and defeat Lagirus to receive the Dragon’s Tusk. Use this Tusk in combining to unlock the Dragon (You may attend this match multiple times to receive more tusks).
Ducken: Feed your monster enough “Cup Jelly” to receive 5 “Diamond Marks”, and receive the Quack Doll that comes as a reward (You can either sell this doll or give it to your monster). Afterwards, attend the Torles expedition with Rovest [Requires a monster with 210+ LIF, 50+ Fame, having finished the first Kawrea expedition, and C Rank or higher]. Retrieve the Strong Glue from the tree near the beginning of the expedition. If your monster has less than 350 INT, the Glue will NOT appear. Gather another Quack Doll via Cup Jellies, and it will become a Ducken Doll which you can use during combining to unlock the Ducken. You cannot get rid of the Strong Glue without cheating/using a cheat device such as a Gameshark to remove the item from inventory.
Durahan: Achieve Breeder Rank of 4. Attend the Parepare expedition with Kavaro [Requires a monster with 140+ LIF, 40+ Fame, C Rank or higher, 1st Kawrea Expedition Finished]. Visit the Decaying Palace behind the huge pumpkin, and search for the Old Sheath. If your monster has less than 300 INT, the Sheath will NOT appear. Afterwards, go to the Shop to hear Verde’s rumor. From then on your monster must be A rank, and it will be invited to the Double-Edged Invitational on February 1st, which then takes place on the 4th. Win the invitational to receive the “Double-Edged” which can be used in combining to unlock the Durahan.
Gali, Henger, Mew, Worm: Achieve Breeder Rank of 1 (Beat E Rank). If your D or higher rank monster is on the ranch on July 1st, you’ll be invited to the IMa vs. FIMBA qualifying match at the end of the month. Win this tournament, and you can attend the meet on August 4th. Attend, and whether your team wins or loses the meet, you will unlock all four breeds afterwards. The meet is then held every 4 years after the first one- though you will not receive any special notification.
Ghost: Allow a monster to die. Hold a funeral and build a shrine for it. 140 weeks later, if you have at least 8,000 G on March 3rd, you will be prompted to upgrade the shrine- Do so. Another 140 weeks later, a similar event will occur on March 3rd if you have at least 13,000 G. Do so again. The following year on March 3rd, you will have a brief cutscene and then receive the Stick which can be used during combining to unlock the Ghost.
Jill: Achieve Breeder Rank 6 (Beat S Rank). Attend the Torles expedition with Rovest [Requires a monster with 210+ LIF, 50+ Fame, having finished the first Kawrea expedition, and C Rank or higher], and acquire the Big Footstep from the Large Snowman at the top right of the map. If your monster has less than 500 INT, the Footstep will NOT appear. Afterwards, send a B or higher rank monster to the Sharp Errantry (Papas Mountains). You will be warned about “Bighand.” Defeat Bighand during the errantry to receive the Big Boots which can be used in combining to unlock the Jill. ` (Getting the Big Footstep has no Breeder Rank requirement, but the rest does)
Joker: Attend the 2nd Kawrea errantry [Requires a monster with 280+ LIF, 50+ Fame, B Rank or higher, 1st Kawrea Expedition Finished]. Visit the Burnt Altar on the upper right side of the map and find the “Joker Mask”. If your monster has less than 300 SKI, the Mask will NOT appear. Head back to the ranch- sit through Pab’s idiocy, and then receive the Mask which can be used during combining to unlock the Joker.
Metalner: Achieve Breeder Rank 8 (Beat two of the Major 4), have the year be at least 1010, and have a B or higher rank monster on the ranch. With these conditions satisfied, on September 1st (it is not guaranteed to occur the first time, as it is weather dependent- which is random), you’ll be visited by “Aliens.” This can continue to happen through November 4th or until the event is finished. Once concluded, you will receive a crystal and be trash talked. Take this crystal to the Shrine in town to unlock the Metalner (no combination item).
( ͡° ͜ʖ ͡°)
How Do I Unlock Every Breed? Any More Info You Can Give Me About Related Topics? (Part 2/2)
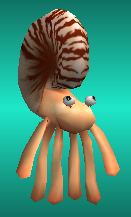

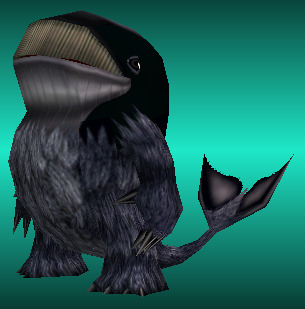

Niton and Undine: Achieve Breeder Rank 4. Raise a Hopper to at least B Rank, and have it on the ranch during the Winter months (December to February). Ensure that the Hopper has 0 fatigue and less than 30 stress at the start of a week (resting is mandatory). It will dig up Hot Springs and give you an unpleasant bit with Pabs. Afterwards you will receive the Undine Slate which can be used during combining to unlock the Undine. When the Hot Springs cutscene is over, the Niton is quietly unlocked (no combination item).
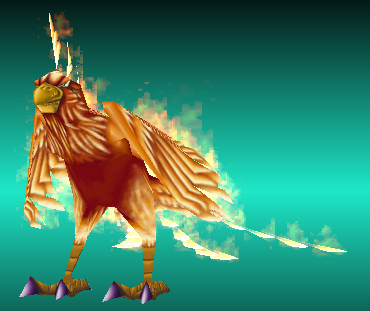
Phoenix: Attend the 1st Kawrea expedition [Requires a monster with 140+ LIF, 40+ Fame, and having beaten E Rank]. Acquire the Phoenix Feather from the only searchable location (If you do not get it here, the Feather can also be obtained during the later Kawrea expedition). Use the Feather during combining to unlock the Phoenix.
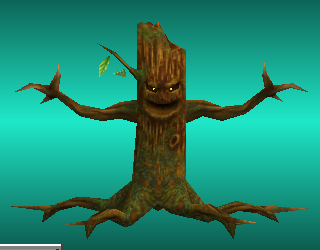
Mock: Achieve Breeder Rank 4. Afterwards, visit the Shop on occasion until you receive the “Seeds” (This event is tied to the “new item” trigger. If you do not achieve Rank 4 until after “Manseitan” is unlocked, the Mock is locked forever- though this takes almost 30 game years). Approximately 10 years later, and after ten brief events, the planted tree from the seeds will die (These events generally seem to occur in April). Allow a monster to die (funeral not required). Afterwards, you will receive a free Mock, and Mock will be unlocked.
Wracky: Achieve Breeder Rank 7 (Beat one of the Major 4), and ensure the year is 1005 or higher. When you have a monster with 90+ Fame on the ranch, you will receive the Doll. Regardless of your options, you will always receive the doll. Colt will ask to throw it away the next week; it doesn’t matter what choice you pick. Allow a monster to die, and afterwards you will receive a free Wracky, and Wracky will be unlocked.
Zilla: Achieve Breeder Rank 6, upgrade the stable once, and complete the requirements to unlock the Niton and Undine. Then, when sending a B or higher rank monster to the Hit Errantry (Torble Coast), you will be warned about a big water creature. Attend the errantry and defeat the “Zilla King.” Like with Bighand, whether or not Zilla King will appear or not at the end of the errantry is random. You will receive a “Zilla Beard”, which can be used during combining to unlock the Zilla.
To be Added: Potential new monsters added in the DX edition(?) Stay tuned.
Useful Links related to Breeds and Training:
1. Purebred stats and growth rate explanation[docs.google.com]
2. Alternative Raising Methods [legendcup.com]
3. Stress and Fatigue counter[drive.google.com]
4. Preferred Foods by Species and their Effects[drive.google.com]
5. Strategy guide for every monster breed[gamefaqs.gamespot.com]
He's coming for you.
What Effects Can Be Expected From Items?
Shop Items
Your inventory increases in size with every House upgrade, up to 20 slots
The following items will be unlocked in the shop as the game progresses. The counter which determines this only starts when you first visit the shop, so the year may vary if the initial visit is delayed. Releases are distanced by approximately 200 weeks, but this may vary slightly.
1004~: Magic Banana (King Ape can only appear while this is the newest available item)
1008~: Nageel
1012~: Troron
1016~: Kasseitan
1020~: Larox
1025~: Manseitan* The following cannot be purchased:
Paradoxine (acquired on errantry in Torles Mountains location 4) and Teromeann.
-----------------------
Monthly Food items
Potato:
Liked: +1 Spoil, -1 Form
Neutral: +4 Stress, +3 Fear, -4 Spoil, -1 Form
Disliked: +16 Stress, +4 Fear, -10 Spoil, -1 Form
Milk:
Liked: -3 Stress, +3 Spoil, +1 Form
Neutral: -2 Stress, +1 Spoil, +1 Form
Disliked: +4 Stress, -4 Spoil, +1 Form
Fish:
Liked: -6 Stress, +3 Spoil, +2 Form
Neutral: -3 Stress, +2 Spoil, +2 Form
Disliked: +2 Stress, +1 Fear, -2 Spoil, +2 Form
Cup Jelly:
Liked: -7 Stress, +1 Fear, +2 Spoil, -3 Form
Neutral: -5 Stress, +1 Fear, +1 Spoil, -3 Form
Disliked: +1 Stress, +1 Fear, -1 Spoil, -3 Form
Meat:
Liked: -8 Stress, +6 Spoil, +6 Form
Neutral: -6 Stress, +4 Spoil, +6 Form
Disliked: +1 Fear, +1 Spoil, +6 Form
Tablets:
Liked: -15 Stress, +2 Fear, +3 Spoil, +3 Form
Neutral: -13 Stress, +2 Fear, +1 Spoil, +3 Form
Disliked: -10 Stress, +2 Fear, -1 Spoil, +3 Form
Tablets are the only worthwhile food, or Cup Jelly on a budget.
Colt’s Cake: +15 Form.
-----------------------
Active Items
Mango: -10 Fatigue, +1 Fear, +1 Spoil, +1 Form
Candy: -2 Stress, +1 Spoil, +10 Form
Smoked Snake: +40% Fear, -20% Spoil, -10 Form
Apple Cake: -10% Fear, +10 Spoil, +10 Form
Mint Leaf: -50% Stress, -2 Spoil, -5 Form
Powder: +5 Fatigue, -24 Form
Sweet Jelly: +5 Form, -5 Nature Shift
Sour Jelly: +5 Form, +5 Nature Shift
Nuts Oil: -28 Fatigue, (-20% Stress*), +1 Fear, +1 Spoil (*Stress reduction only for Arrowhead, Henger, and Durahan Main or Sub Breeds)
Nageel: +50% SKI and DEF at tournament this week, -20 Lifespan
Kasseitan: +50% POW and SPD at tournament this week, -20 Lifespan
Larox: +10 POW and DEF, -10 LIF, -4 Lifespan
Manseitan: +10 LIF and SKI, -10 SPD, -5 Lifespan
Troron: +10 POW and +5 SKI on successful drills for a month, -6 Lifespan
Paradoxine: +30 POW & SKI; -10% SPD & DEF on successful drills for a month. -18 Lifespan
Teromeann: +100% SPD, +20% POW, and +20% SKI at tournament this week. -20 Lifespan
Golden Peach: +50 Lifespan
Silver Peach: +25 Lifespan
Half Eaten: +1 Form
Rock Candy: +1 Form
Irritator: +10 Fatigue, +15 Stress, -1 Form
Griever: +10 Fatigue, -40% Stress, -1 Form
Ducken Doll: +50% Fatigue, -50% Stress (Applies automatically if you give it to monster)
Star Prunes: +5 Spoil, +1 Form, +20 Fame
Magic Banana: Can have one of the following effects
(Fear) |+10| |-10| |-10|
(Spoil) |+10| |+10| |-10|
(Form) |-1| |0| |+1|
(Fatigue) |0| |-15| |-30|
(Stress) |-10| |-5| |0|
Note: if MB is decreasing your monster's loyalty, then it's increasing his lifespan, or viceversa.
-----------------------
Passive Items
Artemis Statue: At the beginning of each month, reduce your monster’s fatigue by 3% (floored), and increase their Spoil by 1. Artemis statues are not very useful due to rounding down and being judged separately (one at a time), but have minor use after Errantries.
Gemini Pot: At the beginning of each month, reduce your monster’s stress by 3% (floored), and increase their Fear by 1. Similarly bad at reducing Stress, but the extra fear is useful for raising loyalty as it is normally harder to come by. Hang onto a few for easy 100 loyalty.
Lump of Ice: At the beginning of each month during June to August, reduce your monster’s fatigue by 3%, and their stress by 2% (floored). Does not enhance rest. Mostly useless.
Fire Stone: Identical to Artemis Statue from December to February, but without the +Spoil effect. Sell it for a decent profit.
Hero and Heel Badges: Increase or decrease your monster’s nature shift by 1 (respectively) at the beginning of each month. Quite useful.
Dino Tail: Artemis Statue, but by 1% (floored), and without the Spoil effect. Entirely useless.
Pure Gold: At the beginning of each month, if your monster is a Gold Suezo, reduce its stress and fatigue by 1% (floored). Yes, really. It’s pointless, just sell it.
Flower: At the beginning of each month, reduce your monster’s stress by 2% (floored). As this requires 50 stress to do anything, this will never have any use.-----------------------
Combination Items
All disc chips also give additional moderate % weighting to their respective type of monster.
Ape Chips: (+1) on Parepare Jungle Errantry, (sells for 1000 G)
Arrowhead Chips: Guard Battle Special, (sells for 500 G)
Bajarl Chips: Vigor Battle Special, (sells for 1000 G)
Baku Chips: +50 Form, (sells for 500 G)
Beaclon Chips: (+1) on Pull, (sells for 500 G)
Big Boots: Generate Jill
Big Footstep: +10 LIF, +10 DEF
Centaur Chips: (+1) on Mandy Desert Errantry, (sells for 2000 G)
Colorpandora Chips: +50 Spoil, (sells for 500 G)
Crab Claw: +50 SKI, +50 DEF
Double Edged: Generate Durahan
Dragon Chips: Fury Battle Special, (sells for 2000 G)
Dragon Tusk: Generate Dragon
Ducken Chips: +50 SPD, (sells for 1000 G)
Ducken Doll: Generate Ducken
Durahan Chips: (+1) on Domino
Feather: Generate Phoenix
Gaboo Chips: Fight Battle Special, (sells for 500 G)
Gali Chips: +50 Base Nature, (sells for 1000 G)
Ghost Chips: (+1) on Dodge, (sells for 1000 G)
Golem Chips: +50 POW, (sells for 500 G)
Hare Chips: Grit Battle Special, (sells for 500 G)
Henger Chips: (+1) on Shoot, (sells for 1000 G)
Hopper Chips: -50 Form, (sells for 500 G)
Jell Chips: (+1) on Endure, (sells for 500 G)
Jill Chips: (+1) on Papas Mountain Errantry, (sells for 1500 G)
Joker Chips: -50 Base Nature, (sells for 1500 G)
Kato Chips: (+1) on Meditate, (sells for 500 G)
Mask: Generate Joker
Metalner Chips: +50 Fear, (sells for 1500 G)
Mew Chips: Hurry Battle Special, (sells for 1000 G)
Mocchi Chips: +50 Fame, (sells for 500 G)
Mock Chips: +10 Lifespan, (sells for 2000 G)
Monol Chips: +50 DEF, (sells for 500 G)
Naga Chips: +50 SKI, (sells for 500 G)
Niton Chips: (+1) on Swim, (sells for 500 G)
Old Sheath: -10 DEF
Phoenix Chips: (+1) on Kawrea Volcano Errantry, (sells for 2000 G)
Pixie Chips: +50 INT, (sells for 1000 G)
Plant Chips: +10 Lifespan, (sells for 1500 G)
Pot: Generate Bajarl
Spear: Generate Centaur
Stick: Generate Ghost
Suezo Chips: Ease Battle Special, (sells for 500 G)
Taurus Horn: Give Centaur heavy combination weight, +25 Nature (if "positive")
Tiger Chips: Will Battle Special, (sells for 500 G)
Undine Chips: (+1) on Study, (sells for 1000 G)
Undine Slate: Generate Undine
Worm Chips: +50 LIF, (sells for 500 G)
Wracky Chips: (+1) on Leap, (sells for 1500 G)
Zilla Beard: Generate Zilla
Zilla Chips: (+1) on Torble Coast Errantry, (sells for 1500 G)
Zuum Chips: (+1) on Run, (sells for 500 G)
The items your monster will request for a drill have very minor effects like +1 Form, -2 Form, or -1 Stress. For the most part they do the same thing but cost different amounts. None of them are important - they’re there to cause your monster stress if you say “No”
These are your gods now!
How Do I Git Gud With Combinations?
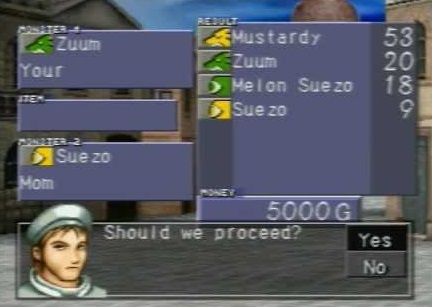
The first chosen monster in combining is the "seed", the most important one of the two. Technique inheritance and % generation chance are reliant on the first chosen monster.
Things that can be inherited/altered by combining:
- Techniques are inherited at a 2/3 truncated rate from the first parent if the main-breed doesn't change (10 non-basic/special techs
will become 6 non-basic/special techs on the resulting monster). If the main breed changes, the result will instead inherit up to 4
techs, if the first chosen has one of each type (Heavy, Hit, Withering, Sharp).
- Number of technique uses are inherited from the first parent for the purpose of tech chains (Special Technique uses are not
inherited).
- Base Nature of the monster is affected by the parents, with two best monsters raising the base nature, and vice-versa for Worst.
- Battle Specials can be inherited at 45-50~% rate for each particular special (Real and Unity cannot be inherited).
- Initial form will tend up or down if the parents are Plump or Skinny, respectively.
Things that don't change:
- Stat gains of the offspring
- Guts rate
- Lifespan of the offspring (without combining item)
Compatibility is determined by how many stats align on the two combined monsters, but this doesn't necessarily mean their "listed" stats. This is what Dadge says about compatibility levels:
No stats match/monsters are identical breed: "This one's all up to you."
One stat matches: "The prospect is unsure."
Two stats match: "This combination doesn't look so good, I can't recommend it."
Three stats match: "The prospect is fine... It will probably work out."
Four stats match: "The prospect of this combination is good. You can look forward to it."
All six stats match: "The prospect of this combination is great. It can't go wrong [...]"
If you combine two of the same monster (Zuum/Zuum with Zuum/Zuum), the compatibility will always be the worst possible. Differing in Main or Sub-breed will avoid this. Compatibility relies on the stat ordering of both parents. Dadge's compatibility is determined this way:
Growth Level 0 (E) = Stat * 0
Growth Level 1 (D) = Stat * 0.5
Growth Level 2 (C) = Stat * 1
Growth Level 3 (B) = Stat * 1.5
Growth Level 4 (A) = Stat * 2
You can ignore the usual 999 stat limit when getting correction values. This will then order the stats based on their after-correction values to give them an order, and then compares them. However, this is "Dadge's Compatibility", and not necessarily the true compatibility. It's a great pointer and if you've done everything right, he will say it's a great combo, but it's not entirely the extent of things.
For an in-depth guide about combining, check out this link[drive.google.com] .
Also, if you need a Combine Calculator to make things easier on you, check this[jack-cooper.gitlab.io] .
Ah yes, this combo will give me the best Metalner there is... Right?
How Do I Git Gud In Expeditions?
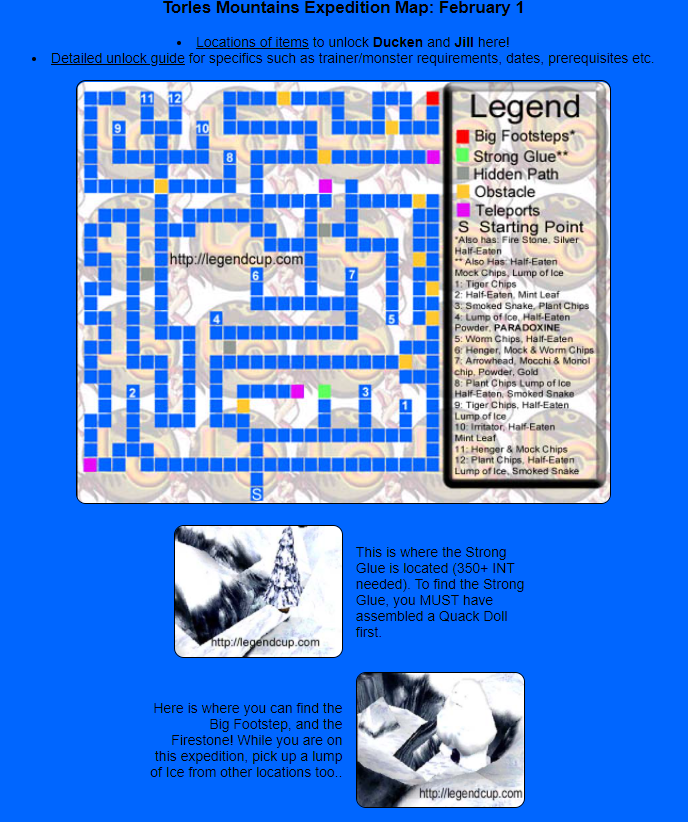
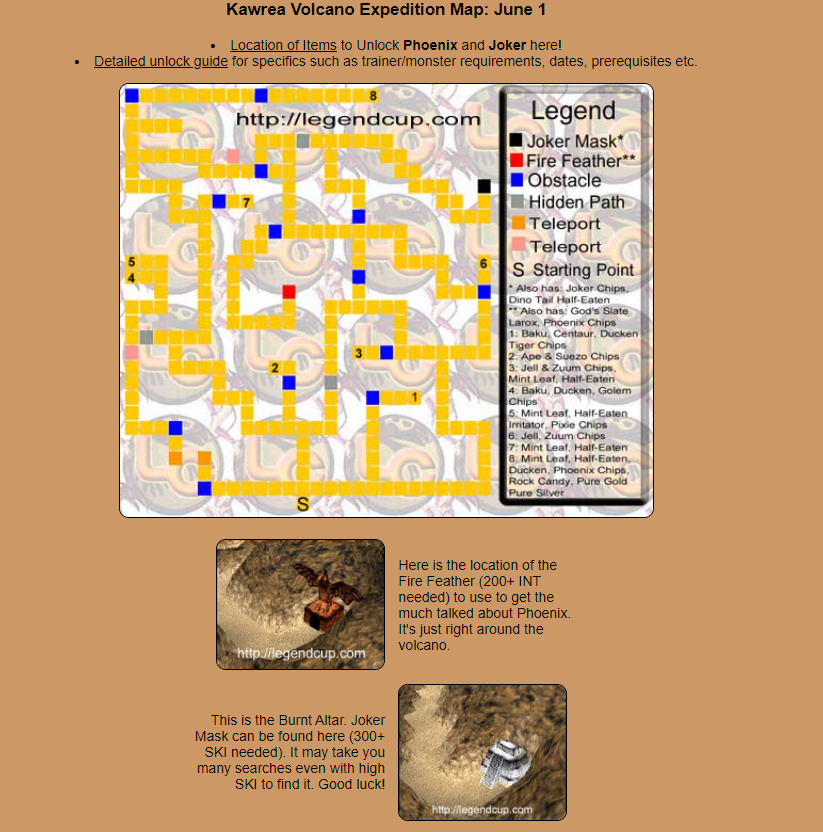
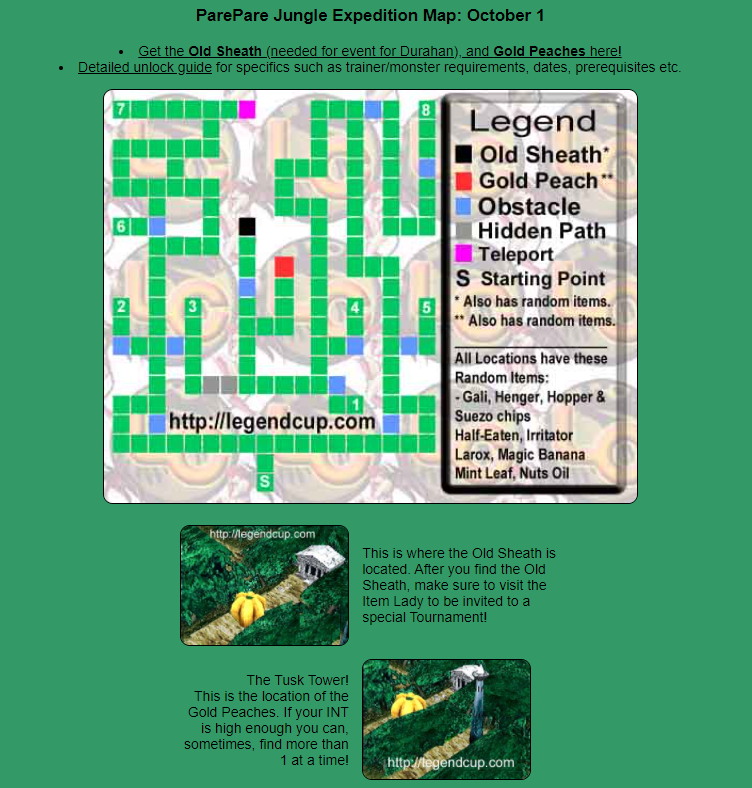
First of all, you may find this set of maps a valuable aid:
Secondly, you may want to check out this link for an in-depth walkthrough.[docs.google.com]
Sitography And Credits

Of course there's waaaay more stuff to cover; after all this is a big, big game. But if you feel the need of something specific, I would encourage you to check out this link repository[legendcup.com] .
Last but not least, I'd like to thank the authors who made all of this possible, because without their hard work I couldn't compile everything in a single page. These are Fenrick, Alchius, SmilingFace96, Tsmuji, me and a few anonymous users. If you have questions, please redirect them on the Monster Rancher discord[discord.com] . There are tons of experts in there.
This guide's version is 1.0 ; more stuff might be added in the future. Did I miss an author? Is there some incorrect information? Please tell me in the comments and I'll add your name among the helpers! Also, if you found this guide helpful, remember to rate it so more people can discover it.
You may also like my Monster Rancher 1 & 2 DX Steam review, or my Steam Curator Page.
Source: https://steamcommunity.com/sharedfiles/filedetails/?id=2677436703
