Preamble
Hello and welcome to my Main Quest guide for Siralim Ultimate.
This guide sets out to assist the reader in getting through the game's main quest or storyline by providing information on what you will encounter in each realm and how to overcome it. It also includes information on each boss fight that must be overcome during the story. While this guide is primarily intended for newer players, I hope will be of assistance to anyone who may need it.
This guide deliberately avoids discussing the game's actual story itself, ensuring that spoilers are kept to a minimum for those who wish to discover things for themselves.
Last updated on the 3rd of March 2021, current as of game version 0.8.10.
Beginning The Game
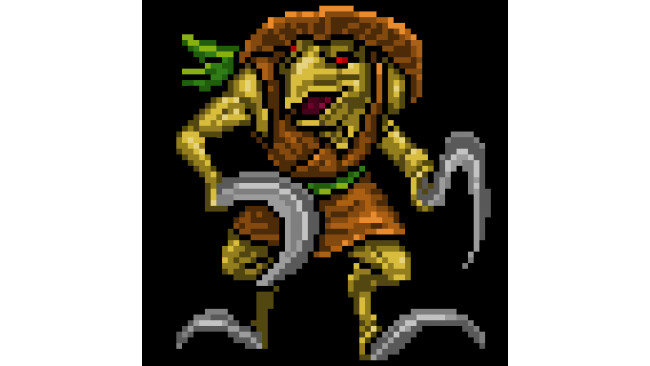
SpecializationClassPlay StyleEstimated DifficultyCharacter GenerationUpon starting a new game and selecting a save file slot to put your new game in, you will be greeted by Caliban, the fellow you see in this guide's icon. At this point you'll be prompted to enter your name, and what specialization of mage you want to play as.
Name should of course be selected in accordance with your own preference, but the choice of is a little more complicated - this determines the mage abilities you will have access to, as well as what two creatures you'll receive to get you started. I have written another steam guide that covers the nuances of this choice in depth, but in case that's a bit too much detail or you simply don't want to read it (which is fine - no judgments here!), here's a very quick rundown of what each choice represents and how it functions:
Animator Death Strategies revolve around a single powerful creature Advanced Cabalist Sorcery Highly adaptable spellcaster Advanced Cleric Life Powerful defenses and healing Intermediate Defiler Death Weakens and shuts down enemies Intermediate Druid Nature Grows stronger from having smaller teams Advanced Evoker Sorcery Powerful spellcaster Beginner Hell Knight Chaos Powerful physical attacks Beginner Inquisitor Life Reacts to and punishes particular enemy strategies Advanced Monk Nature Strong evasion-based defenses Intermediate Necromancer Death Uses minion buffs to enhance team Beginner Paladin Life Strong defenses and counterattacks Intermediate Reaver Chaos Grows stronger as battles go on Intermediate Sorcerer Sorcery Shuts down enemies ability to act Intermediate Tribalist Nature Grows stronger from using teams of similar creatures Advanced Trickster Chaos Uses luck manipulation to tip the odds Advanced
If you're still not sure, it's not something to worry too much about - your specialization can be changed later in the game, and due to the game's balance it's actually very difficult to mess up in any kind of permanent capacity.
Once you have made your choice, the game's Tutorial will begin.
Which should I pick?
If you're a complete beginner to RPGs/the series and have no idea what you're doing, go with Hell Knight as it is simple and easy to use.
If you're looking for a simple, strong offensive specialization, go with Hell Knight for physical attacks, or Evoker for casting spells.
If you want a specialization with strong defenses, go with Cleric for tanking hits, or Monk for evading hits.
If you like to shut down enemies to stop them from acting, Defiler is the most straightforward, whereas Sorcerer has a more complex and conditional take on the concept.
The rest of the specializations have various unique strategies, so read their descriptions and consider carefully if you're looking for something different.
The Tutorial
Before we begin, it's worth pointing out that you can't miss anything during the tutorial other than flavor dialogue from the many characters present, so don't worry about the characters and objects present. You can also take as much time as you like.
After some dialogue, speak with Everett (the red-haired man in green next to you) to initiate a simple tutorial battle. Simply attack his creature repeatedly until you win; don't worry about the other options in battle for now.
After this, head right until you see a large glowing brazier. Interact with it and summon the Unicorn Vivifier, then return to Everett and speak to him again. He will then direct you to speak to Nortah (man in a straw hat and overalls) at the Menagerie, which is the large wooden fenced pen you can likely see to the left. Do so and then return to Everett again.
You will now be directed to head upwards - turn left at the branching path and speak to Sabon the Blacksmith. After the dialogue, use the Forge option to craft a sword, then the Upgrade option to upgrade it to tier 3, then the Socket option to put the ambers you were just given into the sword. After this, go into your menu, select Creatures, and use Equip Artifact on either creature to complete this section of the tutorial.
After this, head right into the other room and speak to Rhea the Enchantress. After the dialogue, select Craft, choose one of the gems, and then go into your Creature menu again and equip it to the first creature you had (unless you're playing one of the Life classes, in which case equip it on either creature). After this, return and speak to Everett.
The tutorial is complete, and after some more dialogue you will be ready to venture into the Realms for the first time. Go all the way north until you see a pyramid-like structure glowing purple. Select the options available to you and you will be teleported to your first realm, the Blood Grove.
Siralim Basics - A Quick Primer
This section of the guide is intended for total newcomers to the Siralim series or even RPG games in general - if you're already familiar with how the game works or are confident you can figure it out yourself, you can safely skip this section and move on to the next.
CreaturesYou may be wondering how the game works on a mechanical level by this point, and also what all the various terms you've been seeing are all about. Each creature you obtain has five stats, and they are as follows:
HealthThe creature dies if this is reduced to zero in battle.AttackHow hard your creature hits when using the Attack command.IntelligenceHow powerful spells cast by this creature will be.DefenseWhen your creature takes damage, this stat reduces the amount taken.SpeedHow soon your creature can take its first action in battle, as well as how likely it is to dodge attacks or land critical hits.
Each creature also has a Class and a Trait. The creature's Class is what type it belongs to - Chaos, Death, Life, Nature or Sorcery. Each Class is strong when fighting against one class, and weak against another. If you need help remembering which is which, try using these phrases:
Life endures beyond Death
Death puts an end to Chaos
Chaos ruins the plans of Sorcery
Sorcery twists Nature
Nature feasts on Life
A creature's Trait is its unique ability which can be all sorts of things - getting extra attack power in certain situations, getting free spells, reacting to enemy actions, and much more. Traits are a core part of Siralim's gameplay, and figuring out which combinations of traits are powerful or useful is a huge part of the fun. Don't worry too much about the complexity for now - just read what each trait does as you discover it and think where it could be useful.
BattlingIn battles, the winner is determined when one side has no more creatures left standing - the side that survived wins the battle. Creatures take turns performing actions of their choice until this condition has been met - whichever creature has the highest Speed stat gets to go first, then the second highest, the third highest, and so on. The order that creatures will take their turns in can be seen on the right side of the screen in battle - this is referred to as the Action Queue.
When it is one of your creatures turns, they will wait for you to give a command. The following options are available:
AttackPhysically attack a creature.DefendReduce damage taken for one turn.ProvokeAttempt to redirect enemy physical attacks away from other creatures to itself for one turn. Increases the amount of damage taken.CastCast a magic spell.MacroHave your creatures follow a prepared battle plan. This is an advanced option, so don't worry about it for now.Skip TurnTake no action during this turn.InspectLook at a creature to see detailed info about it. This option does not use up your turn.HistorySee a record of everything that has happened in the current battle. This option does not use up your turn.ForfeitGive up and retreat to the castle, forfeiting your Fortune bonus.
Once the creature has taken an action, its turn ends, and the next creature in the queue does the same until the battle ends. Different things can happen during the creature's action depending on what kind of creature traits are active in battle, so if something unexpected happens, it might be a good time to slow down and use the Inspect command.
There are other factors to be aware of in battle too - a creature's stats can be reduced or increased, and status effects (known as buffs when good, or debuffs when bad) can be applied to creatures which will help or hurt them in various ways. Since this is a very basic primer these will not be covered, but are available for viewing in the game's codex command.
EquipmentEach creature you have can equip one artifact, and a minimum of three spell gems. These are very helpful items, and going without them will make the game drastically more difficult.
Artifacts are pieces of equipment such as Swords, Shields, and so forth - the tutorial will teach you how to craft and equip artifacts and spell gems. While the main thing artifacts do is provide large stat boosts to the creature holding them, they can also have other beneficial properties such as granting buffs, inflicting debuffs, and even granting the creature holding it an extra trait. Never go into battle without an artifact equipped on each of your creatures.
Spell Gems allow a creature to cast the spell the gem contains, which can do a huge variety of things. Gems have classes, and in most circumstances can only be equipped to a creature of the same class - Chaos gems for Chaos creatures, and so forth. Keep in mind that spells have a limited number of charges - this indicates how many times a spell can be cast per realm before it is used up. Charges are replenished at the start of each new realm, however. Also remember that the power of a spell is dependent on the creature's Intelligence stat, so spells that do damage, healing or increase/decrease stats should be given to creatures with high Intelligence so that they will be more powerful.
PerksIt's not all about your creatures - your actual player character is also quite important due to access to Perks. These are powerful skills that will be applied to all of your creatures in battle, which can be unlocked and leveled up by earning perk points by completing realm quests at the highest realm depth you've been to.
If you feel you've made a mistake, you can reset your perks at any time using the magic wardrobe in the castle, as well as eventually change the specialization you chose once you unlock the ability to do so.
Obtaining New CreaturesObtaining most creatures is simple - defeat the creature in combat in a realm, and you will be able to summon it for your own use at the castle. You will need to pay a fee of Essence per summon, so be careful - this is more of an issue early on than any other time, but Essence is not hard to come by so it's not too much of a problem.
Certain creatures however can only be obtained from the gods. You will need to increase your favor with that god by interacting with objects in their realm; this will give you the right to purchase them at their altar using Emblems as currency. You always get at least one emblem per realm, and it costs 10 emblems to purchase one from a god. Each god has a different creature race available, so increase your favor with each to see what they have.
There are certain other creatures that can only be obtained via other methods too, but that is an advanced matter beyond the scope of this guide. You'll get there eventually!
Traversing Realms
Each realm follows a predictable pattern - the first stage requires to to interact with the altar belonging to the god of the realm - this always looks like a tall glowing statue that depicts that particular god, and you will almost always start near it. Bear in mind that you cannot interact with some of the other objects in the realm until you do this, so make interacting with the altar a priority.
Once you're done, you can go to the next realm depth by finding the Teleportation Shrine (it looks the same as the one in your castle) and selecting the next realm. It will always default to the highest realm depth available to you on the selection screen, but you can backtrack if you want to. You do not have to do this immediately - if you explore the realm you will find lots of objects to interact with that do various things, usually beneficial, as well as more monsters for you to fight so you can level up and gain more resources. Once you've cleaned a realm out, there's nothing to do but move on.
This guide will cover the various objects that can be found in each realm.
In the second stage, you will be presented with a regular, randomly assigned Realm Quest - this is a task you have to complete before you are allowed to move on to the next realm depth. This can be anything from gathering objects to defeating enemies, but they shouldn't generally give you too much trouble. Note that if you complete the task but are defeated and ejected from the realm before you can reach the teleport shrine, it still counts as increasing the realm depth because you finished your quest, so you'll be able to go to the next realm from the castle.
In the third stage, you will fight a boss creature. These are stronger than regular monsters and have unique and powerful abilities that you need to strategize around, so before doing anything else in battle, make sure to use the Inspect command to see what the boss does, so you can plan accordingly. This guide will, of course, cover what each boss does and how to fight them.
It should be noted also that each realm has different monsters within, so when you go to a new realm you can expect to see new creatures you haven't seen before. Remember to use Inspect if you see something new, though this guide will cover the new monsters you'll see in each realm too.
Blood Grove (Realm Depth 1-3)


CreaturesPilwiz Peasant (Nature)
Hits VERY hard and inflicts Bleed on hit, which causes you to lose a portion of your current health every turn. Bleed can't kill you in and of itself, but it can certainly weaken you to the point the Pilwiz can finish you off. Definitely a priority target.
Amorphous Shambler (Death)
Pretty much a non-threat at this point of the game. Its stats are a bit lackluster and its trait won't do much unless you picked Cleric or Paladin, but you should be able to take it out before it causes trouble either way.
Brownie Mauler (Nature)
Hits fairly hard, and deals damage to whichever creatures were adjacent to the one it hit. Take Bats, Pilwiz and Hounds out first, but don't ignore these guys.
Terror Hound (Death)
Fast, hard-hitting, and as if that wasn't bad enough, they give Dire Wolf minions to their whole team so they will all hit harder. Fortunately they can't take a hit, but keep in mind that getting rid of the Hound doesn't make the Dire Wolves go away immediately.
Koloss Firebrand (Sorcery)
Very tanky, it will generally take a few hits before going down. It gets bonus damage based on the difference between its health and its target's health, so keep that in mind.
Ebony Ent (Nature)
Provides its allies with a healing status effect just for showing up in battle, which you can't stop. Other than this it's very much not threatening, and killing it doesn't get rid of the healing status, so you can safely leave it for last.
Bard Balladeer (Sorcery)
They can hit somewhat hard, but not as hard as the big hitters in this realm. Be careful if you're using Nature creatures. Their trait isn't anything to worry about at this point of the game.
Manticore Conqueror (Chaos)
It gets extra free hits in every time it attacks. It has the potential to be a jerk, but it doesn't hit significantly hard unless you've got Sorcery creatures.
Crypt Bat (Chaos)
Bats are fast and hit fairly hard. This particular Bat also likes to add more damage every time one of its allies attacks. Fortunately they're a bit fragile, so focus on taking it out first.
Exiled Satyr (Nature)
Exiled Satyrs prevent you from attacking more than once per turn. Unless you're working with the Hell Knight's starter creature, this isn't going to be relevant at this point of the game. They're not all that much of a problem, generally.
Realm ObjectsGourds/Squashes will provide you with a little bit of resources once you've eaten three.
Bear Traps grant you favor with Apocranox.
Chopped Wood can be taken to Tents for a reward.
Pan Pipes will start a fight with a group consisting entirely of Satyrs.
Caves take you to a miniboss room. This starts a fight with a tougher than normal group of monsters, but winning will reward you with two treasure chests and some favor with Apocranox.
Boss: Kiichi
Each of your creatures will be inflicted with Bleeding. This can't be avoided, so you'll be taking a portion of your remaining health in damage each turn - keep an eye on your health levels so your crucial creatures don't get picked off. Expect this fight to be a bit tougher than anything else you've faced so far.
General TipsIf you haven't already, summon more monsters - you're not going to get through the game with just two creatures, after all.
Make sure to equip them all with artifacts as well. You'll want to be gradually upgrading the artifacts as you go to help your creatures reach their full potential, as well as kitting them out with spell gems. Brimstone costs do scale up as the artifacts get more powerful though, so choose carefully and be efficient.
Check through your craftable spells from time to time - you've likely been picking up Inscriptions in loot, giving you new spells to craft. Some spells are very, very useful - bear in mind that the Intelligence stat only dictates how powerful damage, healing, and stat-changing effects will be. If you have a monster with a low intelligence stat, they can still use most buff/debuff/utility spells just fine.
Each time you finish a realm quest at your highest realm Depth or defeat the boss of a realm, you'll be awarded Perk Points. Your character's perks can be accessed under Character from the main menu, and the specialization you picked at the start determined which ones you get. Make sure to level these up as you go along according to your preference - they make up a considerable amount of your power in battles.
Frostbite Caverns (Realm Depth 4-6)


CreaturesSand Giant (Nature)
It will regenerate from any damage rather quickly, and is fairly tanky and hard-hitting. Its main weakness is that it is slow, so it will likely act last in the timeline. If you can reduce its defense, this will help you overcome its regeneration.
Terror Wight (Death)
Take these out first in almost all circumstances unless you want to get hacked to pieces. They power up every time one of their allies dies, so if it ends up as the last enemy standing it will become very, very strong.
Stag Celestial (Life)
These aren't much of a threat at all, and their trait is extremely unlikely to come into play.
Mud Golem (Sorcery)
Golems can hit respectably hard, but mostly have very hefty defenses more than anything else. In addition, striking the Mud Golem will blind all of your creatures, so try to take it out with spells or leave it for last.
Terra Vulpes (Life)
A fast caster. Its trait gives it a chance to cast damaging spells at the start of battle. This would potentially be annoying if enemy creatures could even use magic yet, but they can't until the next realm.
Brim Smith (Sorcery)
Smiths like to enhance artifacts with their traits - this one allows it to share its artifact attack bonus with its friends. Since enemy artifacts aren't very powerful right now, this doesn't do much for it.
Ancient Spirit (Life)
Another caster. Its trait gives its friends who get healed a random buff - this is only really going to come into play with Sand Giants in this realm; if both show up in one battle, take out the Spirit before the Giant since it's easier to do.
Dusk Ossein (Death)
Osseis traits usually revolve around resurrection/revival and the Rebirth buff, which aren't going to come into play at this point in the game. They are somewhat fast, so be careful.
Monstrous Gargantuan (Nature)
Powerful to begin with, but especially beware their ability - they hit harder the more damage they've taken since the last time they attacked. Either grind them down gradually and carefully, or wait for them to take their turn then pile everything you've got on them and hope it's enough.
Realm ObjectsPiles of Firewood can be taken to Igloos for a small reward.
Cross Graves give you a little bit of loot
Ice Diamonds grant you some favor with Azural.
Campfires grant your creatures a buff for the rest of the realm.
Stone Graves summon a group of Mummies to fight. Mummies can inflict the Curse debuff, which causes you to take damage whenever you inflict damage, so be careful.
Frozen Yetis summon a group of Yetis to fight. Be careful if you're using nature creatures, as Yetis are Sorcery-type and hit hard.
Boss: Myrtle
Myrtle can potentially be dangerous - if one of your creatures dies, it powers up - sort of the inverse of the Terror Wights you've been fighting. Too many deaths and Myrtle will rapidly become far too much to handle - this can especially be an issue if you are using the unicorn to revive your creatures.
Ideally, knock out Myrtle first - it takes priority even over Terror Wights as a target since it gains more stats and is more powerful. Also if you have stat-reducing spells, you can cast these on Myrtle to bring it back down to more manageable levels if it has been powering up.
General TipsWhen you return to the castle after defeating Myrtle, Projects will be unlocked. These are essentially quests that run in the background during realms by adding things to collect in various manners, and will reward you in various ways once completed. They can be started with Everett in the castle, and cost a fee in Granite every time you start a new one.
Specifically, the projects to upgrade the Blacksmith, upgrade the Enchantress, and unlock the Jester are what you begin with - I recommend upgrading the Blacksmith first, since it allows you to upgrade your artifacts to even stronger tiers. You can upgrade the Blacksmith four times and the Enchantress twice, and the stronger tiers will cost more granite and take longer to complete.
The Jester unlocks cosmetic options for your character, so he is not particularly important for storyline progress.
In the next realm, enemy creatures will gain the ability to cast spells, so plan accordingly!
Caustic Reactor (Realm Depth 7-9)


CreaturesAaxer Apocalypse (Chaos)
Apocalypses make their team grow stronger the longer the battle goes on. This one in particular gives itself and its allies more stat power for every turn they've taken, so take them out early.
Cave Cockatrice (Chaos)
Its trait is capable of more, but at this point in the game it essentially just copies the ability of the first (that is, center creature on the bottom row) creature in its party. Treat it like a copy of whatever it's copying.
Plague Alchemist (Sorcery)
Plague Doctors are casters, but they're lacking in defense, so a solid hit will take them out. This particular Plague Doctor makes your creatures take damage if they get their stats dropped. This can be nasty if paired with Automatons, so be cautious if they show up together.
Arcane Automaton (Sorcery)
Every time it gets a turn, your whole team's attack stat gets lowered. This can add up and will hit physical-oriented teams like Hell Knights pretty hard, so make sure to bring some casters along so you have a backup plan.
Blobbarian (Chaos)
Attacking this will get the attacker inflicted with Disarmed, which essentially switches off all bonuses from your artifact. Since artifacts are a large amount of your power, this is pretty bad - take them out with spells if you can.
Wicked Carver (Chaos)
Deals inconsistent damage, which can range from feeble to pretty nasty. They're not the biggest threat here, but definitely keep an eye on them.
Maniac Mutant (Chaos)
The presence of Maniac Mutants allows creatures on their team to sacrifice themselves by Provoking, which will power up all of their allies. The AI doesn't usually take advantage of this, but keep it in mind. The Maniac itself can also hit respectably hard, so be careful.
Noxious Smog (Chaos)
Hits very hard, has a lot of defense, and inflicts Poison, which will cause gradual damage. They're quite threatening, so deal with them early, especially if you're using Sorcery creatures.
Crazed Leper (Death)
If one of your creatures dies with debuffs on it, this creature will cast Corpse Explosion, which is a fairly nasty spell that hits all your creatures. It's best to take these out first due to them being potentially very dangerous, and also they have glass cannon stats so they can't take a hit.
Creatures you've seen before:
Brim Smith (Frostbite Caverns)
Realm ObjectsValves can be switched off to gain favor with Venedon.
Potions will inflict a debuff on all enemy creatures for the rest of the realm.
Crates contain a small amount of treasure.
Papers can sometimes give you inscriptions.
Oozes will start a fight with a group of Concoctions.
Boss: Loid
While Loid is still alive, attacking will get you inflicted with Scorn, which prevents further attacks. Casting spells gets you inflicted with Silence, which prevents spellcasting. You can't have both at once, so this essentially forces you to alternate between attacking and casting.
Bear in mind that any time you get either of these debuffs, Loid will grow stronger, so it's best to take him out first if possible. He's not too tough otherwise unless he has been allowed to power up, so this shouldn't be too hard.
General TipsSome of the creatures in this realm should show you that going all-in on one strategy in Siralim can get you countered and shut down pretty hard, so at least in the early game it's best to mix it up and give yourself multiple options so you have an out when a battle goes bad. Bear this in mind when summoning up creatures.
Once you've defeated Loid, you'll unlock both Decoration Mode and the Fusion Lab. Put the Fusion Lab somewhere in your castle using Decoration Mode to be able to use it. (You can also rearrange the rest of your castle, so you can put the things you use closer together for efficiency.)
Fusion allows you, for a fee of Essence, to combine two creatures into one. The resulting fused creature will have stats averaged between the two parents, the appearance of the first monster you selected, and the class and palette of the second monster you selected. It will also have the traits of both parents at once. This is a very powerful feature and allows you a lot more combo potential on your team - for instance, fusing a Pilwiz Peasant and a Noxious Smog will result in a creature that hits extremely hard with attacks due to having two 75% attack bonuses, and will inflict both Poison and Bleed at once.
It's definitely worth having every creature on your team fused since you're leaving a lot of potential on the table for no good reason, but keep the essence costs in mind - again, essence isn't too hard to come by, so if you need some just fight for a while in realms and you'll build your stock back up.
By now you may have also found Trait Materials in treasure - if you've upgraded the Blacksmith at least once, you can upgrade Artifacts to tier 15 to unlock their Trait Slot - for an expensive brimstone fee, the Trait Material can be slotted in, giving your creature another trait in battle - along with fusion, that's three traits at once, besides the other power an artifact grants. It costs a lot at this point of the game, but is very much worth doing if you've found a trait material that you can leverage any use out of.
Titan's Wound (Realm Depth 10-12)


CreaturesGlutinous Slime (Sorcery)
These sticky bois have a fair bit of defense, and any time they gain stats, they share a portion of the gain with the rest of the team, which makes Terror Wights even more of a threat. Beyond this, Slimes aren't too threatening on their own beyond their defensive bulk.
Ritual Abomination (Death)
Abominations are one of the tankiest races in the game, so don't expect to be able to take it down without a bit of elbow grease. In addition, attacking this one physically results in your whole team being hit with the Vulnerable debuff, which increases damage taken. Take them out with spells or leave them for last.
Oculum Leech (Death)
Similar to the Ebony Ent, the Oculum Leech provides the Leeching buff to its whole team by its presence alone, which means they will heal a little whenever they damage your creatures. Killing the Leech won't end the effect either, so be wary. The Leech itself is fortunately not too nasty.
Necrotic Clutcher (Chaos)
Clutchers punish your creatures whenever they dodge attacks - Necrotic Clutchers in particular get two free attacks whenever this happens. Be especially careful if you're playing as a Monk (their perks revolve almost entirely around dodging), or you'll get slapped silly.
Creatures you've seen before:
Koloss Firebrand (Blood Grove, Sorcery)
Sand Giant (Frostbite Caverns, Nature)
Dusk Ossein (Frostbite Caverns, Death)
Terror Wight (Frostbite Caverns, Death)
Monstrous Gargantuan (Frostbite Caverns, Nature)
Realm ObjectsBlood Pools grant you favor with Mortem.
Blood Geysers will lower the stats of enemies in the realm by 5% for each geyser you active.
A Bone Key can be taken to the Big Chest to unlock it for a lot of treasure.
Bone Piles summon a pack of Osseins to fight.
Effigies start a fight with a group of Clutchers. Again, be careful if you're playing as a Monk.
Boss: Giran
Giran is just a wall of strength - it copies 25% of each of its allies stats, so it's essentially a one-man army. This said it doesn't get any extra or special actions, so it will only be able to as much as a regular creature per turn, and can't react to anything your creatures do.
It may be best to take out Giran's allies first so that you outnumber it, and then use stat lowering spells and traits, as well as debuffs, to blunt Giran's advantage. It should be simple to take out from there.
General TipsAfter defeating Giran you'll unlock a new project that, when completed, allows you to take on more projects at once. This is very useful so I recommend starting/completing it as soon as possible.
Also make sure you're keeping up on upgrading your artifacts and perks. Your spell gems can be upgraded too, but materials for enchanting them are a bit on the rarer side, so don't worry too much if you haven't got a lot to work with there.
Path Of The Damned (Realm Depth 13-15)


CreaturesDelirious Ghoul (Death)
Fast, hits respectably hard, and steals half of the target's speed if it hits. If you find your creatures missing a lot of attacks, it's probably this creature's fault, so switch to spells since they can't be dodged.
Forsaken Swampdweller (Death)
Forsaken start strong, but get weaker as the battle continues. This one in particular gets a much larger health pool, but takes damage at the start of every turn it gets. If you're struggling to deal with them, bunkering down for a while can help.
Abyss Banshee (Death)
Banshees tend to get access to advanced versions of spells. The Abyss Banshee can cast Death Siphon without killing its allies, giving itself a big stat boost when it does so. Make sure to kill it before it powers up too much.
Ira Sin (Death)
Its trait gives it the Berserk and Savage debuffs at all times, allowing it to potentially hit very hard. It has a fair bit of defense beyond this, so be careful around them.
Lich Priest (Death)
It's quite strong at casting spells, and grants its whole team access to the Murder of Crows spell, which will hit harder if you have any dead creatures when it's cast. They can't take a hit though, so knocking them down early might be a good idea.
Blood Reaper (Death)
Reapers can instantly kill your creatures with an attack if they're on low health or leaves them on low health after attacking, making them a serious threat. In addition, this particular Reaper heals its whole team if it manages to kill one of your creatures in this manner. Definitely worth taking out first, just in case.
Abyssal Spectre (Death)
This Spectre's attacks cause the target's stats to be averaged. This is only a problem if you've been doing some serious minmaxing - otherwise, neither the Spectre nor its ability are terribly threatening.
Gimp Mummy (Death)
You may have seen these already in the Frostbite Caverns if you interacted with the graves, but they appear in wandering monsters here so this is where their writeup will be. Mummies love to mess with the Curse debuff, and this Mummy in particular hits hard and inflicts it on your creatures. Curses make you take damage whenever you deal damage, so be careful. Mummies are very slow, so you should be able to take it out before it can cause trouble.
Creatures you've seen before:
Ritual Abomination (Titan's Wound, Death)
Terror Wight (Frostbite Caverns, Death)
Realm ObjectsPurple Roses grant you favor with Erebyss when picked.
Grey Boulders give you a little bit of resources.
Graves grant you some treasure.
Mushrooms inflict a debuff on enemies for the rest of the realm.
Skull Piles summon Spectres and Banshees to fight. You'll get favor and treasure for defeating them.
Boss: Vlora
Every time one of your creatures takes a turn, Vlora gets an extra turn. She's not too much of a threat beyond this due to middling stats, but using stat reductions or debuffs on her will make her extra turns amount to very little.
General TipsAlmost all monsters you fight in this realm will be Death class, so be careful if you're using a lot of Chaos creatures. Life creatures, on the other hand, will have an advantage.
Once you progress to Vlora's boss fight, more creatures will unlock in every realm - this happens every 15th realm depth, so the amount of monsters you'll see per race will gradually expand as you progress. Backtracking into previous realms may result in you meeting new creatures - for simplicity's sake however, this guide assumes you're simply moving forward without backtracking, so these creatures won't be covered unless they appear in future realms moving forward. You may also see some creatures not covered here in Vlora's boss fight, so use the Inspect command to see what new creatures are capable of.
Defeating Vlora unlocks the Castle Expansion project, which is cosmetic. It's nice to have if you like to decorate your castle a lot, but not necessary for progression.
The Swamplands (Realm Depth 16-18)


CreaturesSalamanders: Fire & Thunder (Chaos)
Salamanders are casters that usually get to cast spells automatically under certain circumstances, and share their trait with the whole team. Fire Salamanders cause their team to fire a spell off as a parting shot when they die, and Thunder Salamanders occasionally make spells cast twice. Both of these traits are rather threatening, but Fire Salamanders should be taken out first if they show up to blunt their overall effect on the battle.
Waspids: Guardian & Worker (Nature)
Waspids work together with each other - the Guardian allows them to keep their buffs through death, and the Worker can revive dead Waspids when it attacks. Neither of them are too much of a threat due to their fragility, however.
Ents: Hemlock (Nature)
The Hemlock Ent's presence gives their whole team healing at the start of their turns, which is boosted even further if an Ebony Ent is present. Focus down Hemlock Ents early in the fight, especially if bulky tanks such as Imlers are present.
Hunters: Servant & Light (Nature)
Hunters are fast physical attackers that get more attacks when they're around their own kind. They can be taken out rather easily but are highly likely to get at least one attack off before they do. Be cautious if you're using Life creatures.
Mites: Interloper & Gravedigger (Nature)
Mites have varied traits that usually make debuffs worse. Mite Gravediggers should be taken out as a first priority in this realm, as their trait allows them a chance to immediately revive creatures you kill. Interlopers inflict Blight, which blocks healing; they're not as threatening as Gravediggers, but keep an eye on them.
Vulpes: Decaying (Life)
It has a chance to cast healing spells at the beginning of battle. Beyond being fast, it's really not much of a threat.
Imlers: Redstone & Sandstone (Nature)
Imlers are a significant threat to begin with due to their considerable Attack and Defense, but they work together with Imlings usually to protect them or empower them, making them even more dangerous if they're paired together. Sandstone in particular is an issue if Imlings are present, because you cannot damage the Imlings until the Sandstone Imler is dealt with first. I strongly recommend bringing something that can lower or ignore defense to deal with them quickly.
Imlings: Varve & Leda (Nature)
Imlings are fast casters who work together with Imlers - usually, Imlers do the tanking and covering while Imlings blast you with powerful spells. They can be taken out pretty easily if they're not accompanied by Imlers, otherwise you'll usually have to deal with the Imlers first before you can have a safe shot at the Imlings.
Tremors: Ahnok & Quamar (Nature)
Tremors usually have very disruptive traits that will prevent your creatures from acting - Ahnok Tremors inflict Snare at the start of their turns, which knocks your creature to the bottom of the timeline, and Quamar Tremors have a chance to inflict Stone whenever your creatures finish their turns. This can be tremendously annoying, so it's best to deal with them as soon as possible.
Unicorns: Consecrator & Vivifier (Life)
You started with a Vivifier so you most likely know what it does, but just in case you missed it - it can revive an ally when it attacks. This puts it on level with the Mite Gravedigger, so it should be taken out first. Consecrators heal their allies when they attack - not as much of a threat as the Vivifier, but definitely a problem if left alone for too long.
Creatures you've seen before:
Ebony Ent (Blood Grove, Nature)
Terra Vulpes (Frostbite Caverns, Life)
Realm ObjectsObelisks grant favor with Meraxis when destroyed.
Temples take you to a miniboss room, with a reward of treasure and favor for winning.
Spore Flowers inflict a debuff on all enemies for the rest of the realm.
Treasure Piles give you... well... treasure.
Caves summon a group of Imlers and Imlings to fight. This can be very challenging, so be careful.
Lodges start a fight with a group of Hunters. Since Hunters get stronger the more of them there are, be very cautious about interacting with these.
Boss: Aspects of Meraxis
This is a fairly strange boss fight and can be quite challenging. The enemy Aspects won't ever do anything during their turns - they'll just defend. This should give you some breathing room unless you have creatures who take actions automatically.
Whenever your creatures damage any of the Aspects, they take 30% of the damage that was inflicted as recoil. In addition, since they're Aspects, they will dodge physical attacks a LOT, and sometimes counterattack or take particular actions depending on which one you attacked. Unlike all other boss fights, defeating the leader Genggai does not end the effect of his trait either, so you will have to plan this one out carefully and patiently.
Debuffing and reducing stats still works, but note that reducing their defense will cause you to take more recoil damage, since the damage is related to how much you did to them rather than the Aspect's attack power. Casting spells that damage all of them at once is quite likely to get your creatures killed, so be extremely cautious about doing so. Plan your moves out and proceed carefully and you will be most likely to win.
General TipsDefeating the Aspects unlocks projects that, when completed, allow you to change specialization at the wardrobe. These can take quite a while to complete, but they'll give you another option if you don't like the specialization you started with, or want to experiment. You'll also unlock several specializations you can't begin the game with, so you'll have some fresh options as well.
Refuge Of The Magi (Realm Depth 19-21)


CreaturesRavens: Acolyte & Defiler (Sorcery)
Ravens are fast and can cast spells pretty well. The Acolyte enhances the Intelligence stat of its whole team making their spellcasts more potent, so take them out quickly. Defilers cause your team to start with a chunk of health missing, which you can't really do anything to stop.
Djinn: Dreamweaver & Pyromancer (Sorcery)
Djinn are powerful spellcasters - the Dreamweaver gets free extra spell casts any time it casts a spell manually, but the Pyromancer is incredibly dangerous - it damages your entire team, usually by a pretty good chunk, any time any member of its team casts a spell. Take Pyromancers out as fast as possible.
Grimoires: Forbidden & Runic (Sorcery)
Grimoires are very good at casting spells but can't take hits very well, so a good slap or two should put them out of commission. Forbidden Grimoires cast hard, but have a chance to fail when casting, and Runic Grimoires provide their team with Arcane, which isn't too important on enemy creatures.
Shapeshifters: Death & Life (Multi-Class)
Shapeshifters have interesting traits that allow them to use defensive actions offensively and vice versa, but the AI doesn't really take advantage of them at all. Beyond that they're mostly just squishy, so don't worry too much about them.
Rift Dancers: Aerum & Aen (Life)
Rift Dancers are fast and not much else, and their traits are unlikely to come into play for the AI. They're not really a threat at all.
Automatons: Cursed (Sorcery)
Cursed Automatons will sap your team's Intelligence every turn it gets, which will make your spellcasting weaker and weaker. Take them out quickly if you're using a spell-heavy team, otherwise they're not too much of an issue.
Watchers: Glade & Coast (Sorcery)
Watchers are all about conditional bonus damage. Glade Watchers can be dangerous because they get a significant damage boost for their sorcery spell gems, so it's going to hit any non-sorcery creature quite hard. Coast Watchers aren't quite as dangerous, but keep an eye on your intelligence stats because they hit harder if theirs is higher.
Plague Doctors: Herbalist (Sorcery)
When these guys attack, they turn all the buffs on the target into debuffs. They are on the slow side, so take them out before this happens.
Occultists: Spider & Viper (Sorcery)
Dangerously effective casters. Spider Occultists are more dangerous, as they will cast Magic Missile for free any time their allies cast a spell, piling more damage on your team. These should be taken out after Djinn Pyromancers, as a priority.
Slimes: Mercurial (Sorcery)
Mercurial Slime's trait allows it to share minions it gains with its team, which is mostly unlikely to become relevant. Beyond that it's just defensive and not much else, like most slimes.
Creatures you've seen before:
Arcane Automaton (Caustic Reactor, Sorcery)
Glutinous Slime (Titan's Wound, Sorcery)
Plague Alchemist (Caustic Reactor, Sorcery)
Realm ObjectsChemistry Sets offer you three colored reagents out of five, and allows you to mix two to make various things happen. The result of each combination is always consistent, and always beneficial. Experiment and find out what you can do with them!
Telescopes grant you favor with Zonte.
Book Piles can sometimes give you inscriptions.
Potions grant your creatures a buff for the rest of the realm.
Bookshelves can sometimes summon a group of Grimoires to fight.
Portals summon a group of Phase Warriors.
Slimes start a fight with a group of Slime creatures.
Boss: Xyrxzys
When your creatures take their first action in battle, they are no longer able to select their actions on each turn - they must keep taking that same action over and over. This sounds very threatening, but isn't particularly - once you kill Xyrxzys, the effect ends, so just have all your creatures pile on and murder him, and from there it'll pretty much just be a slightly tougher than normal battle with monsters you've already been facing.
General TipsFrom this realm onward, you may come across golden portals in realms - these are Nether Portals, which take you to a bonus room. These can contain treasure, resources, or other beneficial things. If you see one, there's no reason not to go for it.
Great Pandemonium (Realm Depth 22-24)


CreaturesCerberus: Ashmouth & Caustic (Chaos)
Cerberus aren't able to cast spells manually, so they're most likely going to attack physically during their turns. They can often cast under certain conditions, but neither of these ones can do that. Both of these are solid support creatures that grant spells and enhance stats respectively, and taking them out doesn't remove the bonus. Beyond that they're a middling threat, so focus on nastier things first.
Asuras: Gutslasher & Bonebreaker (Chaos)
Asuras do nasty things if their allies score critical hits. The Bonebreaker in particular ties into this by providing its team with Savage, which increases their critical hit rate, and provides its own bonus on top of that, so expect bursts of high damage from the enemy team if the Bonebreaker shows up. Gutslashers have a chance to attack again if they crit, so watch out if they're paired with Bonebreakers.
Bats: Pulse (Chaos)
Pulse Bat's trait increases its speed when its allies attack, which doesn't do too much on its own. It's not as much of a threat as Crypt Bats, but it still has powerful attacking stats and low defense, so take it out quickly.
Doom Guards: Chaos & Death (Chaos)
Doom Guards are extremely tanky, and often have traits that give their allies some form of protection. Chaos reduces all damage taken by their team by 25%, and Death makes it so that your critical strikes don't do extra damage anymore. These aren't overwhelming problems to deal with, and Doomguards don't put out a lot of threat otherwise, meaning they're not a high priority.
Devils: Twisted & Cinder (Chaos)
These guys like to bully particular classes by dealing extra damage to them and taking less damage from them. Twisted goes after Sorcery and Cinder goes after Nature, so check your team's class composition when dealing with them.
Gargoyles: Goretongue & Dusktail (Chaos)
Chaos spell casters, Gargoyles usually get a boost when casting spells of that class. Goretongue can be dangerous in particular due to providing its whole team with Chaos Bolt, which ignores a portion of your defense - be careful if you're using tanky high-defense strategies. Dusktail allows their team to inflict Silence when casting a single target chaos spell, so it can be a nuisance to spellcasters when paired with Goretongue.
Efreet: Volcanic & Wildfire (Sorcery)
Efreets love setting things on fire, synergizing with the Burn status. Wildfire can inflict it with attacks, and Volcanic does huge damage when attacking a Burned creature. Their defenses aren't great, but Volcanic is (if you're burned) the bigger threat of the two.
Phoenix: Volatile & Thunderstruck (Sorcery)
Phoenixes can do some nasty things whenever they or their allies get resurrected. This isn't likely to happen too often in this realm due to there being no creatures with revive traits and no Life class creatures in Great Pandemonium, but be careful all the same - Tremors can rarely pack resurrection spells. Volatile can deal a good chunk of damage to your whole team when resurrections happen, and Thunderstruck will inflict Stone on three of your team members.
Apocalypses: Agor (Chaos)
Enables its team to deal more damage with critical strikes for every turn they've taken in battle. Take it out early, especially if Asura Bonebreaker is present.
Creatures you've seen before:
Crypt Bat (Blood Grove, Chaos)
Aaxer Apocalypse (Caustic Reactor, Chaos)
Ahnok & Quamar Tremors (Swamplands, Nature)
Realm ObjectsSmall Volcanoes cause enemies to lose a portion of their health at the start of each battle for the rest of the realm.
Lava Pools grant you favor with Vulcanar.
Boulders give you a small amount of resources.
Floating Stones teleport you randomly between any other floating stones in the realm.
Egg Nests sometimes give you a small amount of favor with Vulcanar, and sometimes start a fight with Apocalypses and Tremors led by a Devil. Winning grants you more favor, and some treasure.
Boss: Spoonor
Spoonor's fight is essentially a damage race - your whole team has poison which can't be removed, and every time Spoonor takes a turn, the damage from the poison is doubled. This means there are only going to be so many turns you can take before the poison will just outright one-shot your creatures.
It's best to take Spoonor out as fast as possible to stop the poison from intensifying. If you can take him out quickly enough the poison damage shouldn't be too bad for the rest of the fight - otherwise pack some debuff-removing spells such as Mass Dispel, Antidote or Nutrition to stop your creatures from dying horribly.
General TipsOnce Spoonor is defeated, you'll get another project to increase the maximum amount of projects you can run at once. Again, I recommend finishing it as soon as possible so you can have more progress being made at once.
Make sure you're keeping up on those perks, artifacts and gems!
Azure Dream (Realm Depth 25-27)


CreaturesCrusaders: Dawn & Blood (Life)
Crusaders are tanks with solid defenses that are usually able to heal themselves in some capacity. Dawn Crusaders can be particularly rough to take down due to always having Protected (reduces damage taken), Repelling (sometimes blocks spell damage), and always Defends at the end of its turn even if it took a different action. Blood Crusaders heal at the start of their turns and whenever they attack - Blight can turn this strategy against itself, if you have it.
Seraphs: Neralim & Andolin (Life)
Seraphs can hit respectably hard, and usually get some kind of special ability via their trait. Neralim can give itself free spells by Provoking, and Andolin can kick one of your creatures to the bottom of the timeline by Provoking. Neither of these is a major threat, but their attacking stats are still potent; don't underestimate them.
Demigods: Timeless & Ceaseless (Life)
Demigods tend to have a mix of traits that do all kinds of different things. Ceaseless Maker inflicts damage using its Defense stat rather than its Attack or Intelligence, so be careful if it appears alongside Frozen Spirit. Timeless Master can do more damage the more damage it has received, so it's best to take it out in one round if you can.
Priests: Fire & Water (Life)
Priests are the opposite of Automatons - they do something beneficial for their team at the start of their turns. Fire Priests increase their team's Attack, and Water Priests increase their team's Intelligence. These boosts can stack up quickly, so Priests are a high priority.
Valkyries: Knight & Scout (Life)
Valkyries are physical attackers, often with some kind of protective ability built into their traits. Scouts will counterattack if you physically attack any of their allies, and the presence of the Knight means all damage you inflict on their team is split halfway with the Knight, effectively making them a shared health pool for the whole team. Note that attacking the Scout herself does not trigger a counterattack and nor does casting spells, so use this to your advantage.
Stags: Guardian (Life)
Much like the Stag Celestial before it, this creature's trait just isn't going to come into play for the AI in any meaningful capacity, and they don't really have the statline to pose a threat to you.
Sanctuses: Humanitas & Humilitas (Life)
Sanctuses usually have defensive traits or ones that benefit their team. Don't attack Humilitas physically, because it will halve the attacker's attack stat every time you do. Humanitas gives its team a small stat boost. Neither of them are super threatening, but you do have to keep their traits in mind when dealing with them.
Spirits: Frozen (Life)
Frozen Spirit increases the defense of its allies whenever they get healed. Considering you're in a life-heavy realm where healing is going to be plentiful, this can be a huge pain in the rear, so take these out before their boosts stack up and your damage output becomes pitiful.
Creatures you've seen before:
Rift Dancers (Refuge of the Magi, Life)
Unicorns (Swamplands, Life)
Stag Celestial (Frostbite Caverns, Life)
Ancient Spirit (Frostbite Caverns, Life)
Realm ObjectsGolden Apples give you favor with Surathli.
Angel Statues grant your creatures a buff for the rest of the realm.
Obelisks can give you a small amount of favor, or start a fight with a larger favor reward and some treasure.
Mirror Balls start a fight with a copy of your own team. Since they won't have the same artifacts or spells, nor access to perks, they're a lot weaker than your own team.
Wishing Stars allow you to pick between Strength, Wealth, and Glory. Strength grants you a buff for the rest of the realm, Wealth gives you a little bit of resources, and Glory starts a fight with Unicorns, with a reward of favor with Surathli. Sometimes the wish can go unanswered and you get nothing, however.
Boss: Qila
This fight is essentially a check to see if you're able to dish out enough damage. Qila gives all of her creatures strong barriers (essentially extra health over the top of the regular health pool) at the start of battle and at the start of their turns, meaning you're going to have to put out enough damage to overcome their barrier on top of their regular health, because it will fill back up when their turn comes around.
If you're struggling, a chaos spell called Warp Reality is able to destroy barriers and deal damage in the process of doing so - this essentially gives you some powerful cheap shots at the enemy here. Beyond that, the spells Absolute Corruption, Dispel and Mass Dispel can also knock barriers off if you're having a hard time getting through them.
Temple Of Lies (Realm Depth 28-30)


CreaturesSoulflayers: Depriver & Peacemaker (Sorcery)
Soulflayers are decent spellcasters with rather odd traits that allow them to influence the most common race in their team to copy their actions. It doesn't usually come into play very much for the AI, but you can always take advantage of it yourself. Deprivers allow their allies to launch extra attacks alongside them, and Peacemakers allow them to join in on provoking when they provoke.
Bards: Jongleur (Sorcery)
Jongleurs make their team do 50% of their damage with attacks using Defense rather than Attack. This may make tanky, tough creatures hit harder, and weak-defensed creatures hit softer.
Phase Warriors: Spellblade & Knight (Sorcery)
You may have already fought these in the portals in Refuge of the Magi, but this is the first realm they show up in on their own so the writeup is here. Phase Warriors have traits that protect their team, and they're a little bit on the tanky side - Spellblades allow creatures to counter with some damage based on their speed whenever they're attacked, so be careful when hitting fast creatures. Knights block 80% of the damage that you deal via anything other than attacks or spells; that means your perks and creature traits that deal damage. This is a huge damage cut, so you'll likely need to use direct attacks and spells to deal with the enemies until the Knight is dealt with.
Carbuncles: Aquamarine & Emerald (Sorcery)
Carbuncles get stronger the more spells have been cast in battle - this means spells cast by BOTH sides, so be cautious, especially if you're playing as an Evoker or rely on multicasts. Emeralds get an escalating chance to cast a spell whenever damaged, and Aquamarines allow their team to get a free buff when casting spells, again with an escalating chance.
Paragons: Emerald & Diamond (Life)
Paragons have traits that affect every creature in the battle in some way. Emeralds make every creature take 50% more damage, which can be risky if you're using monsters with poor defenses. Diamonds make it so that spell gems can never be sealed, which is very beneficial for caster teams - ironically, it also cancels out the traits of Crunchers should it show up alongside them.
Wolpertingers: Vicious & Vile (Nature)
Wolpertingers synergize with Scourge spells, which are single-target spells designed to do massive amounts of damage to a particular class. Vile Wolpertinger's trait makes Scourge spells free to cast, which doesn't do much for AI teams, but Vicious Wolpertinger throws in an appropriate scourge cast whenever it lands an attack, so be careful when dealing with them as they can do a lot of damage in a single burst.
Crunchers: Elder & Bloodstone (Sorcery)
Crunchers are anti-spell creatures that like to seal spell gems, or get bonuses for sealing gems. Bloodstones will seal one of the target's spell gems any time it attacks, and Elders deal more damage for every sealed spell gem the target of its attacks have.
Keep in mind you can Provoke to redirect attacks, and Crunchers aren't the fastest creatures around - you can use this to keep your important spells from being sealed.
Amaranths: Stardust & Planetary (Life)
Amaranths are very defensive, and get traits that hinge around the Defense stat. Planetary Amaranths give their whole team 40% more Defense, and Stardust Amaranths allow their team to use a portion of their Defense stat as attack power when attacking. They don't do a whole lot beyond that, but they are life class so be wary of them resurrecting and healing their allies.
Creatures you've seen before:
Bard Balladeer (Blood Grove, Sorcery)
Shapeshifters (Refuge of the Magi, Multi-Class)
Grimoires (Refuge of the Magi, Sorcery)
Realm ObjectsA Golden Key can be taken to the Large Chest for a large amount of treasure.
Rainbow Wells grant your creatures a buff for the rest of the realm.
Large Purple Gems give you favor with Aurum.
Gem Piles give you a spell gem enchanting material.
Rainbow Portals take you to a miniboss room, with a reward of favor and treasure.
Horseshoes start a fight with Carbuncles. Try not to let the fight drag on too long or they'll get very strong from all the spells.
Dust Bags start a fight with a group of Crunchers. Be careful if you're using spell-heavy teams.
Boss: Vitja
Vitja is generally a massive pain in the rear to fight. You can't damage Vitja at all until you've dealt with the Gemlings, and taking out one of the Gemlings causes it to spam a bunch of spells all at once. If one of the gems happens to spawn with Requiem or Divinity, you are in for a LONG fight due to the constant resurrecting. In this case it may just be worth forfeiting and trying again if you don't want to be stuck in the fight for a long time.
The best strategy here is to proceed carefully and use single-target attacks and spells to knock out the Gemlings one by one, otherwise you will be faced with a huge blitz of spells you might not be able to recover from. Do bear in mind that debuffs and stat decreases will still work on Vitja even if she's immune to damage, so you can take some of the pressure off yourself this way.
This fight can be something of a struggle especially for newer players, but don't give up - remember you only need to win once to make it through, and you learn a bit more with every fight.
General TipsOnce you reach Vitja's realm, it's Realm Depth 30 - a multiple of 15, which means more creatures are going to unlock going forward. That means three creatures per race rather than two. This, again, means backtracking may net you some new creatures if you're interested in doing so.
Cutthroat Jungle (Realm Depth 31-33)


CreaturesArachnalisks: Canopy, Spitting & Dragonlair (Nature)
Arachnalisks make use of both the Snared and Poisoned debuffs, being big spiders. Hitting the Spitters with a physical attack will cause it to poison your whole team, Dragonlairs have a chance to snare your monsters when they take damage from poison, and Canopies throw in Bleeding whenever your monsters are poisoned. Not the biggest threats here, but keep an eye out for poison and remove it if you can.
Snaptraps: Wizened, Battrap & Cultivar (Nature)
Snaptraps punish certain enemy actions by sending the creature to the bottom of the timeline, though they do so on a fairly low chance so it's mostly only a problem if you're spamming particular actions a lot. Battraps react to healing and Cultivars to buffs, so be especially careful if you're playing as Clerics. Wizeneds have a small chance to make matters worse - they react by any of your creatures being sent to the bottom of the timeline by sending the rest of them there - thankfully on a 10% chance, but keep it in mind.
Imps: Hexer, Sacrificer & Shaman (Nature)
Imps are very fast nature spellcasters - they have good intelligence so expect them to hit fairly hard. Hexers provide their whole team with the Shellbust spell, and killing them doesn't end the effect - Shellbust lowers defense so if you're using a defense-heavy team then finish the fight quickly. Sacrificers allow their team to cast nature spells twice, and Shamans have a chance to make their single target nature spells hit your entire team - overall, Imps are far more of a threat than they look, so get rid of them fast.
Harpies: Pillager, Eyegouger & Screamer (Chaos)
Harpies usually have disruptive traits that impair your team's ability to function. Screamers have a chance to inflict Confusion at the end of your creature's turns - Confusion is a very dangerous effect that can cause your monsters to target their allies when trying to attack or cast. Be very careful about offensive actions if you see it on your creatures. Eyegougers hit hard and Blind your creatures, which makes them unable to select targets deliberately, and Pillagers effectively force your creatures to act like they have Blind even if they don't. Make sure to bring multi-target spells to circumvent their disruptions.
Salamanders: Water (Chaos)
Water Salamanders allow their team to cast spells by defending or provoking. The AI doesn't tend to use it that much, so these aren't too much of an issue.
Maniacs: Huntsman & Warrior (Chaos)
Huntsmen inflict your whole team with Poison and Burn if you take any of their allies out, so take them out first to avoid this effect. This can be particularly dangerous if Arachnalisks are present, so keep that in mind. Warriors have a strange trait where they have a chance to resurrect if they die on an ally's turn - I can't see the AI taking advantage of it all that much, so just beware of their strong attacks and don't worry about them much otherwise.
Leeches: Oozing & Digger (Death)
Oozing Leeches gain a barrier whenever the Leech status heals them, and Diggers deal extra damage and can't be hurt by Blight whenever they have Leech. Neither of these are too much of an issue unless they show up with an Oculum Leech, but even then they shouldn't be too hard to take out and not cause too many problems.
Waspids: Soldier (Nature)
Waspid Soldier hits extremely hard, but dies when it lands a physical attack. It tends to take itself out, but beware the burst of damage.
Pilwiz: Slasher & Guardian (Nature)
When they provoke, Slashers get a free attack against every one of your creatures that has Bleed. Guardians heal their team every time the Bleed status does damage to your team. Since they're synergistic, they can only really do much if they're around things that can apply Bleed to your team, so be very careful if Canopy Arachnalisks are present alongside them.
Brownies: Trickster & Captain (Nature)
Captains reduce defense with their attacks, and Tricksters can inflict confusion. Both of these effects are dangerous in addition to Brownies in general hitting fairly hard to begin with, so getting rid of them fast should be a priority.
Creatures you've seen before:
Fire & Thunder Salamanders (Swamplands, Chaos)
Maniac Mutant (Caustic Reactor, Chaos)
Oculum Leech (Titan's Wound, Death)
Worker & Guardian Waspids (Swamplands, Nature)
Pilwiz Peasant (Blood Grove, Nature)
Brownie Mauler (Blood Grove, Nature)
Realm ObjectsOnce you've eaten three Fruits, various results will happen, almost all beneficial. The combination of different fruits you eat (but not the order) determines which result you get.
Imp Huts demand Mushrooms (which they call Feel Goods) in different colors. Once you've satisfied the demand from every hut, you'll gain a large amount of favor with Torun.
Angry Totems grant you some favor with Torun, or start a fight with either Asuras or Imps that grant a larger amount of favor as a reward.
Boss: Imp Impington
Imp Impington allows his team to take two turns at once. You'll want to focus down monsters to thin their numbers out, reducing the amount of overall actions the enemy team gets. The nature of this battle is only likely to give you too much trouble if you have slow monsters and the enemies get a barrage of turns at the start before you can do anything.
General TipsAfter defeating Imp Impington, you will unlock Instability at the realm selection stream. This can add difficulty to realms in the form of enemies being fused, and realms having properties that benefit enemies and hinder your own creatures - the reward is a significant boost to the amount of items you find in treasure.
In addition, it delimits the types of creatures that can show up in each realm - this guide does not cover extra creatures that may show up if you turn instability on (mostly because it's a nightmare to document!!), so be careful if you choose to do so.
Arachnid Nest (Realm Depth 34-36)


CreaturesMites: Invader (Nature)
Mite Invaders, when attacking, lengthen the duration of debuffs by three turns.
Gorgons: Gazer, Sorceress & Deranged (Sorcery)
Gorgons inflict and enhance the Stone status effect, which prevents creatures that have it from dodging or dealing critical damage. Sorceresses make stone last forever, Gazers make your whole team deal less damage for every teammate that has stone, and Deranged can apply stone with attacks, as well as getting a damage bonus. If you're struggling with these and the Mites, bring debuff-removing spells to make sure debuffs stay off your team.
Imlers: Boulder (Nature)
Be cautious about killing Imlings when one of these is present - it gains a huge attack and speed boost if one dies while it's still alive, and Imlers already hit very hard to begin with.
Imlings: Tainted (Nature)
If this Imling starts next to an Imler, it becomes a fusion of itself and the Imler it's next to. This gives it the Imler's trait and essentially averages its stats out since Imlers and Imlings have inverse stats of each other. How hazardous this makes it depends on what it fused with.
Manticores: Crimson & Flailing (Chaos)
Flailing Manticore can use a portion of its attack as defense, making it fairly tanky. The presence of Crimson Manticores means your attackers will be hitting with 40% less of their attack than usual, so bring them down with spells if you need your attackers at full power.
Bats: Vampire (Chaos)
Besides being a speedy hard-hitter like all bats, Vampire Bats also heal themselves for any attack damage they inflict. This ultimately doesn't mean much for them due to their fragility, however.
Pit Worms: Gladiator, Spitting & Tunneler (Death)
Pit Worms are similar to Automatons and Priests, but they often (but not always) use their trait ability at the start of enemy turns rather than their own turn. Tunnelers inflict damage at the start of your creature's turns, and Spitters will reduce their defense instead. The Gladiator gets an attack boost every time one of its allies takes a turn. You should generally deal with worms quickly, as their abilities will always gradually be tipping the battle in their favor the longer they're allowed to add up.
Dryads: Naturalist, Proliferator & Raincaller (Nature)
Dryads tend to synergize with either having or inflicting buffs on their team. Raincaller allows her team to heal for every buff they have by Defending, Proliferator grants stat bonuses to her team for each buff they have - if the enemies manage to get a lot, they will become very tough. Naturalist can defend to extend how long her team get to keep their buffs. They're good at casting spells but not great at taking hits; judge their threat level by how many buffs the enemy team has.
Creatures you've seen before:
Arachnalisks: Dragon, Canopy & Spitting (Cutthroat Jungle, Nature)
Snaptraps: Cultivar, Battrap & Wizened (Cutthroat Jungle, Nature)
Bats: Pulse & Crypt (Great Pandemonium, Chaos)
Imlers: Redstone & Sandstone (Swamplands, Nature)
Imlings: Varve & Leda (Swamplands, Nature)
Mites: Interloper & Gravedigger (Swamplands, Nature)
Manticore Conqueror (Blood Grove, Chaos)
Realm ObjectsBaby Spiders grant you some favor with Regalis.
Webbed Cocoons can either start a fight with creatures, give you a small reward by freeing a grateful prisoner, or release a Mimic that you can then fight for treasure.
Eggs grant you favor with Regalis, or start a battle with Arachnalisks and Mites that grants more favor.
Boss: Etta
Every time your creatures end their turns, they attack one of your other creatures for twice the usual damage. This isn't much of a problem if you're using a spellcaster team, but can get really nasty if you've got heavy physical hitters. Piling on Etta and getting rid of her first will end the effect, so that is highly recommended either way.
General TipsDefeating Etta unlocks a project that unlocks Gambling Dwarves when defeated. While they're not too useful, you'll want to unlock them for post-story reasons and doing so sooner rather than later is beneficial, so unlock them when you have a free slot and nothing more pressing to do.
Eternity's End (Realm Depth 37-39)


CreaturesInquisitors: Watchful, Carnivorous & Egglayer (Nature)
Inquisitors tend to get traits that either give or enhance minions. Egglayers give out a random minion to their whole team at the start of battle, Carnivores make their team's minions last longer, and Watchful gives its whole team zombie minions. Of these, the Watchful is the most dangerous, as they cause damage at the start of their master's turn. Keep in mind that similar to other status providers however, killing Egglayers and Watchfuls will not end their effect immediately.
Occultists: Raptor (Sorcery)
It grants their teammates a boost in intelligence depending on how many sorcery gems they have equipped - given enemy teams are usually fairly mixed, this isn't too much of an issue, but keep in mind Occultists are fairly strong casters to begin with.
Masochists: Witch, Macabre & Lurid (Sorcery)
Masochists tend to play around with debuffs. Witch gains a buff and inflicts a debuff when it attacks, Macabre makes it so that when you would gain a buff you've got a chance to get a debuff instead, and Lurid gives their team a chance to purge debuffs at the start of their turn. Macabre masochists are especially dangerous to teams that love to buff up, Clerics in particular; fortunately Masochists tend to have paper-thin defense, so take them out before they shut you down.
Carbuncles: Onyx (Sorcery)
It can make its whole team immune to debuffs if 12 or more spells have been cast in the current battle by all creatures. Unless serious spell spam is going on right off the bat, this won't activate for a short while - so Defilers in particular might want to do them in quickly before they shut down your perks.
Crusaders: Dusk (Life)
Dusk Crusader gains a large amount of defense whenever it attacks - it also hits fairly hard. Don't let it get too many attacks off or it will become incredibly hard to take down.
Phase Warriors: Marauder (Sorcery)
Grants its team a 40% chance to dodge physical attacks. This can be pretty annoying, but it can be easily dealt with using spells.
Demigods: Infinite (Life)
Infinite Lords hit harder the more health they're missing, but they're not the best brawlers to begin with so this isn't too much of a concern compared to some of the other creatures here.
Amphisbaenas: Arbitrator, Vaccinator, Chef (Life)
Amphisbaenas cause their teams to double certain actions, but make those actions less powerful - generally the doubling makes up for the power loss, however. Chefs double up spell casts, Vaccinators add an extra debuff whenever you get debuffed, and Arbitrators double on on physical attacks. These can synergize rather nastily with some of the other creatures here, so be careful.
Ophans: Narklin, Burhua, Enim (Life)
Ophans are strong casters whose Life spells get a power boost. Enims allow their team to gain buffs from casting life spells, Burhua makes their team's life spells twice as strong, and Narklin grants the whole team access to Major Healing. These are massive pests due to all the healing power they tend to bring with them, so I advise taking them out sooner rather than later.
Amaranths: Nexus (Life)
Nexus Amaranths cause their team to gain attack whenever they gain defense. This can get incredibly nasty with Dusk Crusaders and certain spells, so it can be risky to leave them around for too long.
Creatures you've seen before:
Occultists: Spider & Viper (Refuge of the Magi, Sorcery)
Carbuncles: Aquamarine & Emerald (Temple of Lies, Sorcery)
Crusaders: Dawn & Blood (Azure Dream, Life)
Phase Warriors: Spellblade & Knight (Temple of Lies, Sorcery)
Demigods: Ceaseless & Timeless (Azure Dream, Life)
Amaranths: Stardust & Planetary (Temple of Lies, Life)2
Realm ObjectsThere are three Spheres that do various things - collecting all three will get you a large favor reward with Vertraag.
The Sun Sphere starts a fight that rewards you with favor.
The Moon Sphere grants your creatures a buff for the rest of the realm,
The Arcane Sphere gives you 250 of every resource.
Teleporters transport you randomly between the location of other teleporters in the realm.
Spires start a battle with a group of Amaranths and Watchers.
Portals take you to a miniboss room, with a reward of favor and treasure.
Boss: Lucian's Godspawn
Godspawn are rare creatures you can only get from the gods - if you've done a LOT of backtracking you may have even gotten one for yourself at this point (in which case you will likely be drastically overlevelled for most of the story). They don't synergize with each other too well, so this is more or less a fight against a general group of powerful monsters.
Try to avoid attacking Ugat, Mumu or Emlai physically - their abilities (stat gain, debuff and buff respectively) trigger whenever they are attacked or land an attack of their own. Yllor and Ottum will use strong physical attacks, and Aja Birku will fire off a barrage of spells whenever its turn comes up. I recommend taking down Aja Birku first, followed by Ottum and Ugat. The battle should proceed smoothly from there.
General TipsOnce you've defeated Lucian, you'll unlock two new projects - the Goblet of Trials, and the Refinery. The Refinery is an extremely useful piece of kit I recommend unlocking as soon as possible; it allows you to break down unwanted items in to resources, as well as convert one resource into another (at a 3:1 ratio) to make up for any shortages you might have.
The Goblet offers you rewards for completing realms as a particular specialization - this will work better once you've unlocked more (ideally, all) specializations, as the reward increases for doing so. It's not as much as a priority as the refinery, but it's better off unlocked than not.
Where The Dead Ships Dwell (Realm Depth 40-42)


CreaturesSea Shamblers: Innocent & Recruiter (Death)
Innocent Shamblers enable their team to heal themselves via causing Blight damage to your team, and Recruiters make it so that you have a chance to take extra damage from Blight. The AI generally doesn't make use of blight damage, so these aren't too relevant.
Sparktails Professor, Courier & Officer (Sorcery)
Sparktail traits usually center around retaliation, either directly or indirectly. Officers return 100% of the damage they take to the inflictor, so be especially cautious when dealing with them. Couriers deal back a portion of damage they take to your entire team, so try to take them out with spell or indirect damage. Professors deal more damage the more damage they've taken over the course of battle, so taking them out in one volley is your best bet.
Forsaken: Rotmongerer, Seacrawler (Death)
Rotmongerers start with strong defense and intelligence, but lose 25% of it every turn they take. Seacrawlers start with five buffs, which turn into debuffs once they wear off.
Reapers: Bone, Soul (Death)
All Reapers have the ability to instantly kill targets on low health, so be very cautious around them. Soul Reapers steal the trait of whoever they kill and grant it to their whole team, and Bone Reapers power up their whole team whenever they kill something.
Pit Wraiths: Liberator, Redeemer, Dominator (Death)
Pit Wraiths have an odd selection of traits and middling statlines; they tend to provide powerful benefits to their team while not being much of a threat themselves. Dominators are an exception, halving the defense of whoever they hit with a physical attack - they can break through your tanks and defenders very quickly with this, so treat them like a serious threat if you're using defensive strategies. Redeemers are tremendously annoying - they make your team start with 2 random debuffs each. You can't do anything to stop this from happening, but at least the Redeemer itself isn't too threatening. Liberators allow their team to deal much more damage to creatures that are defending or provoking, so be careful when using those commands.
Sins: Superbia, Acedia (Death)
Superbia Sin has tough defenses and always has Repelling, which allows it a chance to ignore spell damage. Acedia Sin reduces the attack and intelligence of your team by 40% at the start of battle - this can't be negated by killing it, so you might want to bring some spells to help power you back up, just in case.
Clutchers: Flamegrip, Vital (Chaos)
Flamegrips punish dodging via inflicting Burning (ongoing damage) and Scorn (inability to attack physically). Vitals punish dodging by inflicting Stone, which stuns a creature for several turns. Again, be particularly cautious if you're playing as a Monk.
Wisps: Abyssal, Laughing, Dancing (Life)
Wisps usually have very powerful traits, that come with a drawback of sending them to the bottom of the timeline whenever they take damage - keep an eye on the timeline and give them a slap if they're approaching the top, and they'll never get a turn to actually use that power. Dancing Wisps deal double damage at all times, Laughing Wisps are immune to debuffs and take half damage, and Abyssal Wisps can cast and attack 3 extra times.
Crunchers: Frostbite (Sorcery)
Their physical attacks seal one of your gems and grant it an attack boost. Use provoke to redirect it away from your critical spellcasters, but don't let it get too many attacks off either way.
Creatures you've seen before:
Amorphous Shambler (Blood Grove, Death)
Forsaken Swampdweller (Path of the Damned, Death)
Blood Reaper (Path of the Damned, Death)
Ira Sin (Path of the Damned, Death)
Necrotic Clutcher (Titan's Wound, Chaos)
Amphisbaenas: Vaccinator, Chef, Arbitrator (Eternity's End, Life)
Crunchers: Elder & Bloodstone (Temple of Lies, Sorcery)
Realm ObjectsA Key can be taken to the Big Chest for a large amount of treasure.
Doubloons grant you favor with Friden.
Masks either grant you favor with Friden, or start a battle with Pit Wraiths and Forsaken, rewarding you with a larger amount of favor.
Boss: Tellur
Tellur himself is essentially a massive defensive wall - not just that, but he makes his whole team incredibly tanky by limiting the amount of damage they can take in one hit. 10% of maximum HP for teammates, and 3% for Tellur.
Putting these creatures down is going to be fairly difficult, as softening measures like defense drops,debuffs, and boosting your own attack aren't going to overcome the damage cap.
Multi-hit spells such as Death Blossom, Meteor Shower and Murder of Crows can help in this fight - the trait says they can only lose a certain amount of their HP per HIT, not per turn. Evokers in particular might have an easier time with this fight, especially with these spells, due to their chain-casting abilities. Since it's a long fight Reavers may also have an advantage due to them gaining power each turn.
General TipsYou get another maximum project limit expansion project unlocked after you defeat Tellur, so get it finished as soon as you can.
The Level Up feature at the fusion station will also be unlocked - this allows you to pay Power to raise a creature's levels. This is great for helping freshly summoned creatures catch up to the rest of your party immediately, and is fairly cheap unless you use it a whole bunch at once. This should give you a bit more flexibility in summoning new creatures to add to your team.
Faraway Enclave (Realm Depth 43-45)


CreaturesDragons: Soldier, Guardian & Sentinel (Sorcery)
Dragons punish certain actions taken by the other team. Soliders punish dodging by damaging the whole enemy team, Guardians punish defending and provoking by sapping the whole team's defense, and Sentinels punish dealing critical strikes by sapping the whole team's speed. If you see a dragon, slow down and inspect it so you know what to expect - they are capable of single-handedly ruining strategies under the right conditions.
Wyverns: Windrider, Sonicscreecher & Skystalker (Chaos)
Wyverns like to counter spellcasts, so be careful if you're using magic-heavy teams. Skystalkers have a chance to copy offensive whole-team spells and Windriders have a chance to copy beneficial whole-team spells. Sonicscreechers can retaliate against single-target damage spells by firing them back at your own team - Evokers running Spider Occultist should be extremely wary of this one.
Apis: Charger, Defender & Endurer (Life)
Apis are very tanky and tough to take down, and usually have defensive traits that make them even tougher in some way. The Endurer can't be harmed by attacks if it's below 65% health, the Defender will take all attacks for its allies as if it were provoking (without the defense penalty), and the Charger inflicts Scorn (can't attack) and Disarmed (switches your artifact off). You may want to switch to spells if the Apis are preventing you from taking down a priority target.
Storms: Raving, Thunder & Red (Nature)
Storms are strong when they're at full or near-full health, but lose those benefits when they aren't, so giving them a firm clout will knock the wind out of them and make them much less of a threat. Red Storms get a big stat boost, Thunder Storms prevent their allies from falling below 5% health (essentially making them unkillable by anything short of an outright one-shot until the storm's trait is deactivated), and Raving Storms get immunity to debuffs and spell damage resistance.
Griffons: Dreamfinder, Divebomber & Assault (Life)
Griffons are fast, hit hard, and they get stronger the more Griffons are on the enemy team. Assaults get a chance to take extra turns that increases the more griffons there are, Divebombers will attack any time another griffon attacks (except other divebombers), and Dreamfinders share gained buffs between all griffons on their team. They're already a threat on their own, but can get especially nasty if enough of them are around, so keep an eye on them.
Sanctuses: Caritas (Life)
This Sanctus shares any healing it gets with another creature on its team. Not too much of a threat.
Watchers: Hell (Sorcery)
Hell Watchers get a big damage boost for each dead ally they have, so take them out first.
Paragons: Ruby(Life)
Ruby Paragons make all creatures start with 100% more Maximum Health. This can be synergized but the AI won't really take advantage of it with random teams, so it mostly just drags fights out and makes everyone very disappointed in it.
Creatures you've seen before:
Imps: Hexer, Sacrificer & Shaman (Cutthroat Jungle, Nature)
Sparktails: Courier, Professor & Officer (Where the Dead Ships Dwell, Sorcery)
Watchers: Coast & Glade (Refuge of the Magi, Sorcery)
Paragons: Emerald & Diamond (Temple of Lies, Life)
Gorgons: Gazer, Sorceress & Unhinged (Arachnid Nest, Sorcery)
Sanctus: Humanitas & Humilitas (Azure Dream, Life)
Realm ObjectsShells can be taken to Imp Huts, similar to mushrooms in the jungle. The reward for satisfying every hut is favor with Lister, and treasure.
The Moai Statue asks for 250 of each resource, and gives you favor with Lister in return. 250 can easily be recouped in one or two battles, so this is basically free favor.
Sea Pineapples grant favor with Lister.
Egg Nests start a fight with Wyverns and Dragons, with a reward of favor and treasure.
Boss: Imp Impington Prime
This is just the same boss fight from the jungle, so the same strategies apply.
General TipsDefeating Imp Impington again gives you a project that unlocks the Divination Candle. Using this in realms allows you to summon packs of creatures you have rank C or above knowledge in to fight - this is more useful in the post-story than it is right now, so build it or don't at your leisure.
Once you reach Imp Impington's fight, it's another multiple of 15 so there'll be more creatures in every realm. The usual advice applies.
Make sure you're still upgrading those artifacts and perks - you're getting into the late parts of the story now, so the game isn't going to pull any punches.
The Barrens (Realm Depth 46-48)


CreaturesSeraphs: Undolim & Vanelin (Life)
Vanelins get a huge attack boost after their first attack, and Undolims can revive their allies by defending. These are both significant threats that should be dealt with quickly.
Djinn: Illusionist & Evoker (Sorcery)
Illusionists deal more damage with spells they've already cast a lot, and Evokers can deal lots of damage by provoking if they have a lot of ethereal spell gems.... which they won't. The AI doesn't really synergize well with either of these, so don't worry about them too much.
Pit Worms: Accursed (Death)
Causes damage any time an ally gets a turn, similar to the Tunneler. A nuisance that needs dealing with quickly before the damage stacks up.
Sanctuses: Castitas (Life)
This Sanctus is invisible while it's on high health, so you can't target it manually with anything. Make sure you save multi-target spells or auto-attacks to deal with these, because in certain cases they can force you to forfeit simply because you have nothing that can hit them.
Asuras: Blooddrinker & Heartripper (Chaos)
Blooddrinkers let their team heal any time they deal critical hits. Instead of attacking once, Heartrippers launch four weaker attacks. Again, be particularly careful if these are teamed up with Bonebreakers.
Hunters: Faith & Moon (Nature)
Both of them get extra attacks for every Hunter present, but the Faith Hunter is particularly annoying since its extra attacks can revive fallen teammates. It's worth taking out first if possible.
Phoenixes: Frost & Royal (Sorcery)
Frosts freeze three of your team members when their allies are revived, and Royal Phoenixes have a chance to bump revived allies to the top of the timeline. Both of these are another reason to take Faith Hunters out first if they're present.
Nixes: Guardian, Creeper, Infomer & Impostor (Death)
Nixes usually have traits that disrupt or shut down certain strategies, and they're fast and can hit fairly hard on top of that. Imposters prevent all stat gains for all creatures, Informers silence all of your creatures at the beginning of battle (bring a backup attacker, spellcasters!), Guardians can hit multiple times and hit harder when they do so, and Creeepers fire off three spells when they die, so take them out last.
Apis: Guardian (Life)
At the start of battle this creature sinks its entire attack stat into health and defense. It can't do a whole lot to you, but you can't do much to it either. Bring defense penetrating spells and take this nuisance out last (though before Nix Creepers).
Diabolic Horde: Intruder, Watchman, Henchman & Spectator (Chaos)
Diabolic Horde get stronger the more of them there are on one team, though their traits don't stack so this essentially means the more diverse horde members there are, the stronger they get. Spectators boost defense, Henchmen boost speed, Watchmen boost attack, and Intruders boost intelligence. You cannot stop them from gaining these stats, but you can reduce them in battle if they get a bit too spicy.
Creatures you've seen before:
Seraphs: Neralim & Andolim (Azure Dream, Life)
Djinn: Dreamweaver & Pyromancer (Refuge of the Magi, Sorcery)
Pit Worms: Gladiator, Spitting & Tunneler (Arachnid Nest, Nature)
Sanctuses: Humilitas, Humanitas & Caritas (Azure Dream/Faraway Enclave, Life)
Asuras: Gutslasher & Bonebreaker (Great Pandemonium, Chaos)
Hunters: Servant & Light (Swamplands, Nature)
Phoenixes: Volatile & Thunderstruck (Great Pandemonium, Sorcery)
Apis: Charger, Defender & Endurer (Faraway Enclave, Life)
Realm ObjectsOases either start a fight with Nixes and Efreets, grant favor with Yseros, grant treasure, or do nothing.
Wood can be taken to Tents for a small reward.
Relics grant favor with Yseros.
Sand Pits take you to a miniboss room, rewarding you with favor and treasure.
Boss: Ramses
Ramses places the Cursed status on your creatures, which makes them take recoil damage when they deal out damage. He also forces them to attack it at the start of their turns, and heals himself any time he takes damage.
Slapping blight on him can negate his healing if you're struggling to overcome it, but otherwise be cautious as you can't get rid of the curses until Ramses is gone. Casting spells that damage all enemies or launching multiple actions in one turn could get your creatures killed very quickly, so make sure to have a means of revival available just in case.
General TipsOnce you've defeated Ramses, Creature Masters will start appearing in realms at your highest realm depth. These are challenging fights with a group from a particular creature race. The rewards are significant but they can be particularly dangerous, so use caution when approaching one - they are optional fights, so you can skip them if you're not feeling up to it.
Unsullied Meadows (Realm Depth 49-51)


CreaturesBrownies: Enforcer (Nature)
These can inflict Vulnerable and Stone in addition to just hitting very hard to begin with.
Centaurs: Raider, Warrior, Wrangler & Ranger (Nature)
Centaurs are fast physical attackers that usually get extra attacks in certain scenarios. Rangers get extra attacks when it attacks for every spell your creatures cast, Wranglers automatically attack your creatures when they cast spells, Warriors counterattack if they are attacked, and Raiders get free attacks any time one of your creatures dies. Raiders can be extremely brutal and lead to spirals of losing multiple creatures, so take them out as a priority target.
Storms: Cyclone (Nature)
While they're on high health, your creatures have a 20% chance to lose their turns. This can be incredibly irritating, so smack it to deactivate its ability as soon as you can.
Satyrs: Exiled, Dominator, Rammer & Spry (Nature)
You've seen Satyrs before all the way back in the Blood Grove, but they get their writeup here since they start appearing in the wild now. Their traits prevent your team from doing things more than once per turn, essentially shutting down spam strategies entirely. Exiles allow only one attack, Dominators limit healing, Rammers limit stat gains, and Sprys limit spell casts. The effect ends if you take them out, so if one is blocking your strategy then focus it down first.
Griffons: Screecher (Life)
Screechers make all griffons take less damage for every griffon present in the fight. It doesn't usually add up too much due to the random nature of enemy teams, but keep in mind that griffons are fast and can hit fairly hard.
Harpies: Torturer (Chaos)
Torturers make it so that when your creatures cast single-target spells, they have a 50% chance to target themselves instead. This is tremendously disruptive, so beat them down with physical attacks or bring multi-target psells.
Wolpertingers: Volatile & Volcanic (Nature)
Volatile Wolpertingers give their whole team access to a free scourge spell matching their own class (making them have a hard-hitting attack against creatures of the same class), and Volcanics makes Scourge spells hit twice as hard - and they are already designed to hit very hard. If you think scourge spells are going to be a problem, take Volcanics out quickly.
Dryads: Warden (Nature)
Can copy her buffs onto her allies by provoking. This rarely ever comes up so she's not particularly threatening.
Dragons: Revenant (Sorcery)
Revenants react to spells being cast by your creatures by reducing the whole team's intelligence. This adds up very quickly and can completely ruin your spellcasting ability in a few casts, so always be on the lookout for them before you start fighting.
Wyverns: Airslayer (Chaos)
Has a 50% chance to steal buffs for itself whenever your creatures would get them. Take it out early if you're using a buff-heavy strategy, especially if Dryad Proliferators are present.
Creatures you've seen before:
Brownies: Mauler, Captain & Trickster (Blood Grove/Cutthroat Jungle, Nature)
Storms: Raving, Thunder & Red (Faraway Enclave, Nature)
Griffons: Assault, Dreamfinder & Divebomber (Faraway Enclave, Life)
Harpies: Pillager, Eyegouger & Screamer (Cutthroat Jungle, Chaos)
Wolpertingers: Vicious & Vile (Temple of Lies)
Dryads: Naturalist, Proliferator & Raincaller (Arachnid Nest, Nature)
Dragons: Soldier, Sentinel & Guardian (Faraway Enclave, Sorcery)
Wyverns: Sonicscreecher, Windrider & Skystalker (Faraway Enclave, Chaos)
Realm ObjectsWood and Tents
Gem Piles
Effigies
Corrupted Totems
Golden Feather
Boss: Kraynaks
Every time Kraynaks dies, it transforms into a copy of one of your creatures. This is more annoying than threatening since your main strength tends to come from your synergies rather than individual creatures, unless you're playing as a Druid. In any case, Kraynaks can't access your perks so it's still going to be much weaker than your monsters.
Bastion Of The Void (Realm Depth 52-54)


CreaturesPit Wraiths: Lord (Death)
The Pit Wraith Lord gives its team a big damage bonus against any of your creatures that are on full or near-full health. Be wary if you're running a team with low speed.
Rift Dancers: Nadin & Inaer (Life)
These still aren't really threats at all, beyond being equipped with Life spells including healing and resurrection.
Carnages: Shadow, Antagonizer, Fallen & Rotten (Death)
Carnages are similar to Reapers in that they do something if they manage to land a kill, but they lack the ability to instantly kill low-health targets - they do have pretty respectable stats however, so don't take them lightly. Rottens steal a significant chunk of stats from their kills, Fallens get a full heal and an extra turn when they kill, Shadows can buff their team depending on how many statuses their kills had, and Antagonizer halves your whole team's defense if it gets a kill. Keep your health and defense up to make sure they can't leverage their traits against you.
Ophans: Geylian (Life)
Geylians give their team a chance to take another turn whenever they cast a Life spell. If there are a lot of life creatures on the enemy team, take these down fast.
Banshees: Valentine, Savage & Anguish (Death)
Valentines are able to use Soul Sacrifice to set all creatures to 70% Health. Savages can use Savage Spores to give all creatures Berserk as well as enhance their own defense and reduce yours, and Anguishes spam several casts of Magic Missile, a basic attack spell. Of these, Savages are the most dangerous and should be considered a serious threat.
Efreets: Obsidian & Frostfire (Sorcery)
Obsidians cause the Burn debuff to deal a large chunk of damage when it expires or is removed, so get rid of them before curing yourself. Frostfires cause a portion of Burn damage to be spread across your team. These can be nasty, but your team needs to be inflicted with Burn for them to do much.
Voidlords: Feral, Angelic, Imperial & Vampiric (Death)
Voidlords are defensive anti-casters. They make use of the Repelling buff, which grants a chance to ignore spell damage. Ferals enhance the chance of repelling to 60%, Imperials enable repelling to reflect damage back onto the inflictor, Angelics always have repelling and can't be damaged by anything that isn't an attack or a spell, and Vampirics grant their team Repelling whenever they're damaged by a spell. It can be worth having an attacker on your team to deal with these so they don't cause too much trouble for your spellcasters.
Inquisitors: Weaver (Nature)
Weavers allow their team to start with Writhelings, and make it so that they get a buff whenever their Writhelings debuff anyone. These are a huge pain to deal with - be judicious with your targeting unless you want your whole team to be riddled with debuffs and shut down in short order.
Wisps: Scheming (Life)
Scheming Wisps always land critical hits and have a 50% chance to dodge attacks. Hit them with spells every so often to knock them down the timeline.
Creatures you've seen before:
Pit Wraiths: Redeemer, Liberator & Dominator (Where the Dead Ships Dwell, Death)
Diabolic Horde: Watchman, Intruder, Spectator & Henchman (Barrens, Chaos)
Rift Dancers: Aerum, Aen (Refuge of the Magi/Azure Dream, Life)
Ophans: Narklin, Enim & Burhua (Eternity's End, Life)
Abyssal Banshee (Path of the Damned, Death)
Efreets: Wildfire & Volcanic (Great Pandemonium, Sorcery)
Inquisitors: Watchful, Carnivorous & Egglayer (Eternity's End, Nature)
Wisps: Abyssal, Laughing & Dancing (Where the Dead Ships Dwell, Life)
Realm ObjectsRelics grant you favor with Tenebris.
Orbs give you a little bit of treasure.
Blue Geysers lower enemy stats by -5% for every one you've activated.
Spires teleport you randomly between other spires in the realm.
Cages summon a group of Voidlords to fight.
Ghosts start a fight with a group of Wisps.
Portals take you to a miniboss room, with a reward of treasure and favor.
Boss: Inner Darkness
When your creatures deal damage during their turns, the skull will deal the same amount of damage back to one of your creatures. This effectively means until the skull is taken down, you'll be taking constant recoil damage. Protective measures and defense are factored in so this isn't quite as scary as it sounds. The other creatures present are reskinned Shadow creatures, who make use of the Fear debuff - this prevents any creature with it from raising their stats.
Take out the skull first to end the recoil damage, and things should be easy to clean up from there. Be careful about using multi-target spells or casting several times in the same turn, so that your creatures don't take too much recoil and die.
General TipsAfter defeating the Inner Darkness, you get several projects that unlock Missions. These are essentially repeatable projects that offer useful rewards. I recommend unlocking these as soon as possible - both because they're good in and of themselves, and you'll be needing them for post-story purposes soon enough.
Torture Chamber (Realm Depth 55-57)


CreaturesDoom Guards: Infernal & Pit (Chaos)
Pit Guards share a large portion of their defensive stats with the creatures next to them at the start of the battle, and Infernal Guards and the creatures next to them take half as much damage.
Carvers: Demented, Sadist & Twisted (Chaos)
Twisted Carvers are able to target invisible creatures and enable their team to deal extra damage to them. Sadists get multiple attacks when they defend, and Dementeds deal an extra chunk of damage when attacking, but sometimes interrupt their own attack to heal their team instead.
Koloss: Night, Doombringer & Eradicator (Sorcery)
Nights dump all of their stats into Health, making them tanky after a fashion - big powerful hits should hit very hard however since they have no defense stat. Doombringers give their team extra maximum health any time they receive healing, and Eradicators allow their team to have stronger barriers.
Clutchers: Ethereal (Chaos)
Ethereal Clutchers punish dodging by halving speed, making further dodges less likely.
Lepers: Defiler, Blightbringer & Plaguespreader (Death)
Defilers inflict debuffs whenever they're damaged by attacks or spells, Blightbringers inflict debuffs at the start of your creatures' turns, and Plaguespreaders make it so that having debuffs causes your creatures to deal less damage and take more. Remember that Lepers have paper-thin defenses, so knocking them down shouldn't be too hard - and Blightbringers in particular should be gotten rid of quickly.
Abominations: Flesh, Volatile & Brute (Death)
Whenever your creatures get Weak or Vulnerable, Brutes add whichever one they didn't get. Volatiles are able to instakill targets with Vulnerable if they hit them hard enough, and Fleshes make their team's attacks against target with Vulnerable undodgeable and more likely to be critical strikes. Be cautious if they're teamed up with Lepers or Plague Doctors.
Plague Doctors: Quack & Scholar (Sorcery)
Quacks will apply new debuffs any time your creatures debuffs expire, and Scholars give their team a defensive boost for each debuff their team members have. Be careful if they're teamed up with Lepers.
Minotaurs: Battlemaster, Skullcrusher, Warrior & Earthshaker (Chaos)
Minotaurs are tough physical attackers that usually have traits that work around being hit or being on low health. Warriors heal off a portion of damage taken and gain a significant attack boost when attacked, Skullcrushers can heal when they attack, Battlemasters gains a significant defense boost and debuff immunity when on low health, and Earthshakers deal half the damage they take from attacks back to your entire team, so be very cautious about using physical attacks on them.
Creatures you've seen before:
Doom Guards: Death & Chaos (Great Pandemonium, Chaos)
Wicked Carver (Caustic Reactor, Chaos)
Koloss Firebrand (Blood Grove/Titan's Wound, Sorcery)
Clutchers: Necrotic, Flamegrip, Vital (Titan's Wound/Where the Dead Ships Dwell, Chaos)
Ritual Abomination (Titan's Wound, Death)
Carnages: Rotten, Shadow, Fallen & Antagonizer (Bastion of the Void, Death)
Plague Doctors: Alchemist & Herbalist (Caustic Reactor/Refuge of the Magi, Sorcery)
Voidlords: Angelic, Feral, Imperial & Vampiric (Bastion of the Void, Death)
Crazed Leper (Caustic Reactor, Death)
Realm ObjectsCages give you a little bit of treasure.
Papers can give you inscriptions.
Racks give a small amount of favor, or a fight and a larger amount of favor.
Iron Maidens start a fight with a group of Lepers and Abominations.
Boss: Tartarith
Tartarith is completely invulnerable, but his allies aren't, so take them out first. Tenebris is on your side in this battle and will damage Tartarith every time he takes a turn, so this is just a matter of walling out Tartarith's attacks. Reavers should have a particularly easy time in this battle, but everyone else shouldn't struggle too hard. If you find yourself having trouble, bring defense-raising spells and bunker down.
General TipsAfter you defeat Tartarith, Nemesis Creatures will be unlocked in all realms. These show up as creature packs with words above them in realms such as "Plague", "Brutal", and so forth. These creatures are more powerful than usual and also operate under a battle condition that benefits them - these are often quite harsh such as your team starting with 3 debuffs, taking recoil damage, and so on.
Be careful and compare which team build you're using with the affix the Nemesis pack carries, as they can counter certain builds fairly hard. Defeating them rewards you with a good chunk of treasure, and more exp and resources than usual.
Kingdom Of Heretics (Realm Depth 58-60)


CreaturesValkyries: Lancer & Queen (Life)
Lancers cause their teammates to retaliate with some recoil damage when attacked, and Queens grant Taunting and Defensive to themselves and the creatures next to them, causing them to automatically defend and provoke each turn.
Concoctions: Gloopidator, Mystery Mucus & Gooarrior (Chaos)
Gooarriors get a copy of the trait off the target's artifact whenever it attacks, Mystery Mucus make it so that disarmed enemies have a 50% chance to have attacks fail, and Gloopidators add Scorn or Silence whenever disarmed is inflicted, depending on whether it's an attacker or caster. Make sure not to attack Blobbarians physically when they're around.
Cerberus: Banelord & Gatewatcher (Chaos)
Gatewatchers can cast one of their multi-target offensive spells when they defend, and Banelords get a 30% chance to cast a spell when they are damaged. Remember that Cerberus can't cast spells manually
Masochists: Angler (Sorcery)
Anglers make their team dodge and critically strike more often for each debuff they have. Be cautious if you're playing as a Defiler.
Devils: Stone & Skull (Chaos)
Stones are effective against Life creatures, and Skulls are effective against Death. Remember that this is a defensive bonus as well as an offensive bonus.
Gorgons: Witch (Sorcery)
Witches can inflict Stone when they use a single-target spell on an enemy. Be careful if they're around other Gorgons.
Creatures you've seen before:
Valkyries: Knight & Scout (Azure Dream, Life)
Doom Guards: Death, Infernal, Chaos & Pit (Great Pandemonium/Torture Chamber, Chaos)
Centaurs: Raider, Warrior, Wrangler & Ranger (Unsullied Meadows, Nature)
Blobbarian (Caustic Reactor, Chaos)
Cerberus: Ashmouth & Caustic (Great Pandemonium, Chaos)
Asuras: Gutslasher, Bonebreaker, Heartripper & Blooddrinker (Great Pandemonium/Barrens, Chaos)
Masochists: Lurid, Witch & Macabre (Sorcery)
Devils: Twisted & Cinder (Great Pandemonium, Chaos)
Gorgons: Gazer, Sorceress & Unhinged (Arachnid Nest/Faraway Enclave, Sorcery)
Minotaurs: Batllemaster, Skullcrusher, Warrior & Earthshaker (Torture Chamber, Chaos)
Realm ObjectsPotion Shelves grant your creatures a buff for the rest of the realm.
Bookshelves can give you inscriptions sometimes.
Knights bring a group of Valkyries and Doom Guards to fight you, with a reward of favor.
Blood Stains start a fight with a group of Diabolic Horde. These are strong in the presence of each other and it's nothing BUT Horde, so expect them to be tougher than most fights. You will be rewarded with Gonfurian's favor.
Boss: Lucian's Godspawn
This is the same battle from Eternity's End, just with higher stats. Follow the same advice from back there and you shouldn't really have any trouble.
General TipsIt's another multiple of 15 so more creatures will be unlocked once you reach Lucian. It's also your last realm of the storyline, so make sure your team is as optimized as you can get it - a big challenge lies ahead.
Sanctum Umbra (Realm Depth 61-62)


CreaturesNixes: Scoundrel (Death)
Scoundrels afflict Scorn on your whole team at the start of battle, shutting down physical attacks. Note that this conflicts with Informers, since you can't have both Silence and Scorn at the same time, so you'll only end up with one of these in this case.
Seraphs: Siralim (Life)
When a Siralim Seraph defends for the first time, it gives its whole team a defense boost. If you can take them out before they do that, do so.
Soulflayers: Drone, Prober & Overlord (Sorcery)
When creatures on a Drone's team get healed, other Soulflayers will copy the healing. Overlords have a chance to resurrect other Soulflayers on their team when a Soulflayer is resurrected, and Probers have a chance to move other Soulflayers to the top of the timeline when others are moved to the top. You can fight packs consisting entirely of Soulflayers in this realm, so be cautious of the repeated actions they can take advantage of.
Ravens: Bloodmage, Ritualist & Batmaster (Sorcery)
Whenever a Bloodmage gets a turn, it converts some of its health into more spell power. This can add up quickly so don't let them get too many turns. Ritualists use a significant portion of their intelligence as defense, and Batmasters enable their team to use a portion of their speed as intelligence when casting. Bear in mind that Ravens are fast but fragile, so you can likely take them out quickly if needs be.
Gargoyles: Sunclaw, Bloodfang & Nightwing (Chaos)
Sunclaws give their teammates a boost in attack stat for every chaos spell they have, Bloodfangs can boost their team's attack stat when they cast chaos spells, and Nightwings allow their team access to any chaos spells your team has equipped. Gargoyles are the only chaos creatures in this realm, so don't expect too much trouble from them unless there's a lot of them.
Sins: Avarita & Gula (Death)
Avaritas steal a portion of their teammates stats at the start of the battle, making themselves more powerful at the expense of the rest of their team. Gulas convert a significant chunk of their offensive stats into Health, making them difficult to take down but not much of a threat.
Spectres: Entropic, Nightveil, Doomsday & Dread (Death)
Entropics sap your creatures' intelligence when they cast damaging spells, Nightveils drain the attack and spell power of your creatures when they're healed, Doomsdays drain your creatures' stats whenever it gains any, and Dreads decrease all the stats of any creature that attacks it. They don't have the best defense, so if they make a nuisance of themselves then take them out - especially if your build uses a tactic they predate upon.
Spirits: Exalted, Succubus & Willow (Life)
Exalted Spirits grant Barriers to their teammates when they get healed, Succubi can move their allies to the top of the timeline when they're healed, and Willows double the amount of healing their team gets. Succubus Spirits can be a gigantic pain and in some cases lead to seriously bad situations as enemies get a spiral of extra turns, so play it safe and take them out first.
Liches: Hellcaster, Bloodletter, Shadowcaster & Overseer (Death)
Hellcasters cast Death spells twice with lower potency, Shadowcasters double the potency of their team's Death spells, Bloodletters cast Death spells using their health rather than gem charges, and Overseers raise the defense of their team depending on how many death spells they have equipped. Shadowcasters in particular are threatening if there's lots of death creatures around, so make them a priority target in that case.
Priests: Forest, Mountain & War (Life)
Forest Priests raise their team's speed, Mountain Priests raise their team's defense, and War Priests purge debuffs from their team. Take Mountain Priests out early so that the enemy team's defenses don't become impenetrable.
Creatures you've seen before:
Nixes: Guardian, Creeper, Informer & Impostor (Barrens, Death)
Seraphs: Andolin, Undolim, Neralim & Vanelin (Azure Dream/Barrens, Life)
Soulflayers: Depriver, Peacemaker (Temple of Lies, Sorcery)
Ravens: Acolyte & Defiler (Refuge of the Magi, Sorcery)
Gargoyles: Goretongue & Dusktail (Great Pandemonium, Chaos)
Sins: Ira, Superbia & Acedia (Path of the Damned/Where the Dead Ships Dwell, Death)
Abyssal Spectre (Path of the Damned, Death)
Spirits: Ancient & Frozen (Frostbite Caverns/Azure Dream, Life)
Lich Priest (Path of the Damned, Death)
Priests: Fire & Water (Azure Dream, Life)
Realm ObjectsAngel Statues grant your creatures a buff for the rest of the realm.
Devil Statues inflict a debuff on enemy creatures for the rest of the realm.
Tithes grant you favor with Perdition.
Obelisks give favor with Perdition or start a fight that rewards you with more favor and some treasure.
Brains start a fight with Soulflayers. Remember that they can take actions as a team, especially when there's several of them.
Mirrors summon a group of Sins to fight.
Final Boss (Realm Depth 63)

Boss: Caliban
Despite Caliban's importance, you need to take out him and his orbs to win the battle - it won't end when just he is defeated. The Orbs will blast out powerful spells so they need to be taken out as fast as possible - in particular, your primary target should be the Life Orb so you can eliminate the healing and resurrection it's capable of, followed by the Death Orb since it puts out a massive amount of damage as well as dangerous debuffs via casting Rapture.
After these are down, proceed as you see fit, though keep in mind that the orbs are using special abilities to cast their spells, so you can't wait for them to run out of charges - they'll just keep casting their powerful spells the entire battle. Caliban himself is no slouch either, so applying debuffs and stat-downs can be important to take some of the immense pressure of this battle off yourself.
Final Boss: Caliban, God of Nightmares
The part you need to defeat is Caliban's heart (center bottom row), but it can only be damaged when the other parts are taken down (they will fade out and become transparent, but not be removed entirely). When the Heart gets a turn and is vulnerable, it will revive all the other parts, regaining its invulnerability in the process. Try to time taking out the other parts so that your creatures have several turns before the heart gets one so you can do as much damage as possible.
As with the previous battle, Caliban isn't going to run out of power for his murderously powerful spells so don't try to wall him out indefinitely. He'll also launch vicious physical attacks so keep an eye on where the damage is going and counter it as best you can - keep your critical team members alive and well-defended as best you can so you don't get caught off guard.
Once you defeat Caliban in his second form, you've finished the storyline, unlocking many new features for doing so - but that's beyond the scope of this guide, so the rest is up to you.
Good luck and have fun!
Source: https://steamcommunity.com/sharedfiles/filedetails/?id=2291371910
More Siralim Ultimate guilds
- All Guilds
- Starter Specialization Guide
- Hellknight Autowin Story to Lategame
- The Damage-Proof Aeolian [Game v1.03]
- Same Race Realm Spawns
- Dumpling Acquisition Guide
- Which Class Specialization!?
- Post-story RI5 Cleric guide - From Mendicant to Cardinal
- Specialisation and me - Siralim Ultimate guide [Beginner friendly]
- Burning Madness
- Team Planning Sheet