
PREFACE & PURPOSE
RECENT CHANGES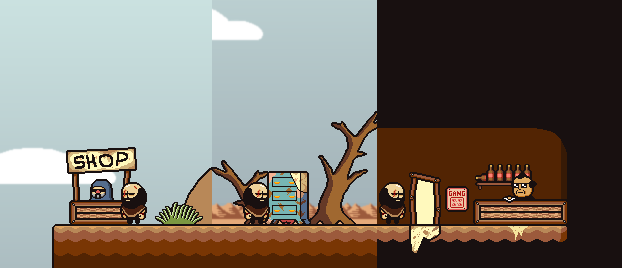

This is a light guide for LISA. It doesn't cover secrets or story event flags, only what's really necessary to navigate through the game without getting lost or stuck.
Bonfire present random event item list is now complete.
PARTICULAR AREASLocations are listed in the direction and order in which you come across them. In situations of route divide, I use an asterisk and linebreak.
PROGRESSION GOALSOn every area hub, I've listed in spoiler tags what you're suppose to be doing and where you can go to accomplish this.
BARS, SHOPS, WEAPON CABINETSI've included an inventory list for all merchants. All items sell for 50% value to vendor. For who can use particular items, use my companion guide.
TIP: Use the Shift key to cycle through your gang when buying weapons and armor.
COMPANIONSArea and specific recruitment details are listed. For abilities and general usefulness, I made a separate guide. You can sometimes miss out on companions by flagging or not flagging certain events.
FARMING/GRINDINGAppended to the end of this guide is a list of random encounters. Good if you are low on magazines or just recruited a low level companion.
AREA ONE

1. Village
2. Field
3. Apocalypx-Games
4. Rando Camp
5. Flammable Orphans
AREA ORDER:Rando camp, field, apocalypx-games.
AREA GOAL:Retrieve firebombs, kill a mutant to receive a bicycle, use both to reach and defeat a boss to save a man who can repair the bridge.
TIP: Take advantage of the save point and tent being so close together. Save before sleeping to save scum around RNG stat decreasing events. For information on bonfire random events, check out the party switching and resting section.
COMPANIONS Name Location Criteria Rooster Top Building Ransom Goldie the Hen (Apocalypx-Games: Barrel Bros 2 )
On the hangman screen prior to the hub, if you've a bicycle , you can access a vendor in the mountain.
SHOP Item Cost Detail Red Armbands 41 +8 ATK Hunting Bow 34 +18 ATK Show Stopper 45 +13 ATK Wooden Bat 31 +15 ATK Big Zinger 37 17 ATK, +3 AGI, fire element Extension Cord 44 +19 ATK
- VILLAGE
Particular areas: Bar (party poster), shop, Blue Rockets HQ, weapon cabinet, factory, +DEF dojo.
BAR Item Cost Detail Potato Liquor 5 200 HP, drunk
SHOP Item Cost Detail Damp Poncho 12 +6 DEF, +4 S.DEF, -2 AGI, flame resistant Shag Poncho 16 +13 DEF, +10 S.DEF, -4 AGI, flammable Dainty Shawl 20 +8 DEF, +1 S.DEF, +3 AGI Drab Tank Top 11 +6 DEF, -1 AGI
WEAPON CABINET Item Cost Detail Wool Wristbands 44 +5 ATK Longbow 30 +14 ATK, +4 AGI Pea Shooter 34 +9 ATK, +5 S.ATK
COMPANIONS Name Location Criteria Nern Cliff screen (left of Bar.) Listen to him. Beastborn Bicycle Cave Hop Defeat Olan Bar 20 magazines El Rage Bar 70 magazines
- FIELD
Particular areas: Snake field, campfire, playground mutant, bicycle.
- APOCALYPX-GAMES
Particular areas: Bicycle checkpoint, barrel bros*, W2D house*, campfire, Magnificent Manes Men's Club & bar, barrel bros 2.
*Barrel bros, flashback door, mini-village with shop and party poster.
*W2D house, bicycle challenge.
Bicycle ChallengeFor 5 magazines, you can traverse a barrel bro obstacle course. If you complete it in under 30 seconds and without getting hit, you will receive one domestic jerky. Slower than that, hit by a barrel bro or if you attempt to cheat by dropping into the goal area from start, you receive nothing. Domestic jerky restores 1000 HP and sells for 7 magazines.
BAR Item Cost Detail Potato Liquor 5 200 HP, drunk Lucrative Tea 13 Revives TP. Diet Cocola Cola 5 200 SP
SHOP Item Cost Detail Rain Poncho 17 +13 DEF, +10 S.DEF Football Pads 7 +5 DEF, +2 S.DEF, +2 AGI Elite Pads 13 +11 DEF, +3 S.DEF Sports Jersey 24 +12 ATK, +9 AGI, -6 LUCK
COMPANIONS Name Location Criteria Mad Dog Mini-village Retrieve Spiked Club (Transition: Telephone Pole or steep drop cave in Apocalypx-Games ) Fardy Magnificent Manes Men's Club Defeat Presidents
- RANDO CAMP
Particular areas: Shadow hallway, Schoolboy Shufflers inn (party poster), firebombs.
- FLAMMABLE ORPHANS

Does what it says on the tin.
TRANSITION

Particular areas: Campfire, telephone poles, motorcycle segment, roulette, pun cave.
COMPANIONS Name Location Criteria Percy Monsoon Impossible to miss. Do a man's duty. Buckets Roulette Building Defeat all roulette opponents.
Russian RouletteParticipating in further rounds costs 50 magazines, with each subsequent victory multiplying your return. There are a total of 10 opponents, yielding 3250 magazines and the Sunsetter (gun, +33 ATK, +33 LUCK.)
To return to the roulette building, jump down the hole and go back through the pun cave. You will take no fall damage.
AREA TWO

1. Construction
2. Swamp
3. Desert (TNT)
4. Drive-thru Mountain (TNT)
5. Gym
6. Laboratory (TNT)
7. Karate Village
Not pictured: campfire cave under save point, southward rope leading to Shardy's dock.
AREA ORDER:Construction, drive-thru mountain
AREA GOAL:Retrieve TNT to clear rocks, use hole in Wally's to find cave, go back to blockade at hub.
COMPANIONS Name Location Criteria Garth Desert Hole, lower rightside door in cave 150 magazines
- CONSTRUCTION
Particular areas: Banana Splitz shop, +S.ATK/SP dojo (left), steel frame maze*, bar (party poster) and weapon cabinet, bulldozer segment.
*Steel frame maze, humble abode.
*Steel frame maze, snakeman showdown 1.
SHOP Item Cost Detail Sunscreen 12 +7 DEF, +3 S.DEF Sparkly Mask 14 +20 DEF, +20 S.DEF Mid-life Crisis Hat 33 +4 ATK, +12 DEF, +4 S.ATK, +9 S.DEF, -18 LUCK Picnic Blanket 26 +15 DEF, +11 S.DEF, small heal at end of every turn Greasy Poncho 26 +6 DEF, +11 S.DEF, +2 AGI, oily Cotton Shawl 18 +10 DEF, +5 S.DEF, flammable Childs Blanket 21 +15 DEF, +15 S.DEF, +3 AGI Skate Pads 22 +15 DEF, +8 S.DEF Spiked Pads 26 +17 DEF, +5 S.DEF
BAR Item Cost Detail Lucrative Tea 13 Revives TP Iced Coffee 50 Restores all HP and SP Cocola Cola 10 400 SP Onion Vodka 15 300 HP, drunk Party Liquor 13 200 HP, drunk
WEAPON CABINET Item Cost Detail All-Star Bands 48 +13 ATK Smoky Bow 48 +23 ATK, chance to blind Gwyn's Bow 51 +31 ATK, +30 LUCK Wooden Boomerang 33 +17 ATK, +7 AGI Chopping Axe 45 +16 ATK Machete 56 +34 ATK, +6 AGI Nosey 56 +20 ATK, +5 S.ATK Peacemaker 67 +23 ATK, +10 S.ATK Potato Peeler 44 +12 ATK, +5 S.ATK Pisler 55 +19 ATK, +5 S.ATK
COMPANIONS Name Location Criteria Geese Thompson Inn Rest at inn 4 times (40 magazines.) D.ck D.ckson Steel Frame Maze See event. Carp Bar Retrieve green paste (Area Two: Swamp .)
- SWAMP
Particular areas: Bar (left), snake swamp, fishpeople village (unobvious entrance), Queen Roger's Beehive.
SnakeMagazinesLoot Table135 XP0Nothing.
BAR Item Cost Detail Lucrative Tea 13 Revives TP Potato Liquor 5 200 HP, drunk Party Liquor 13 200 HP, drunk Onion Vodka 15 300 HP, drunk Olathian Whiskey 20 500 HP, drunk
FISH SHOP Item Cost Detail Green Paste 50 --
COMPANIONS Name Location Criteria Bo Swamp Bar Retrieve Old Record (Area Two: Gym: Flesh Hole ) Harvey Alibastor Fish Court Agree. RT Beehive Retrieve duffle bag (in cave that leads to desert area ) Queen Roger Beehive Service all clients.
- DESERT
Particular areas: Campfire, cave shop (steep drop), +ATK dojo, bar (party poster) and weapon cabinet.
SHOP Item Cost Detail Horse Jerky 20 Recovers all HP Fancy Perfume 20 Revives fully Lucrative Tea 13 Revives TP Olathian Whiskey 10 500 HP, drunk
BAR Item Cost Detail Potato Liquor 5 200 HP, drunk Party Liquor 13 200 HP, drunk Onion Vodka 15 300 HP, drunk Olathian Whiskey 20 500 HP, drunk
WEAPON CABINET Item Cost Detail Cotton Wristbands 55 +38 ATK Bone Bow 56 +40 ATK, +7 AGI Blood Bow 66 +60 ATK, +7 AGI, causes bleeding Metal Bat 41 +19 ATK Head Rocker 46 +20 ATK, can stun Switchblade 67 +50 ATK, +12 AGI Eastern Blade 88 +22 ATK, +4 AGI The Ruler 78 +28 ATK Luckluster 67 +25 ATK, +5 S.ATK, -20 LUCK Tuesday Morning 82 +34 ATK, +5 S.ATK Adventure Whip 77 +25 ATK Sharpened Curtain Rod 87 +8 ATK
COMPANIONS Name Location Criteria Clint Olympic Bar 500 magazines Ajeet Mandeep Desert village peak Agree (can't be in withdrawal)
- DRIVE-THRU MOUNTAIN
Particular areas: Drive-thru cult, Wally's mountain, party poster, Wally's*, campfire.
*Wally's, cave, dead end.
- GYM
WEIGHT LIFTINGParticular areas: Cave, flesh hole (immediately right of cave entrance), Pretty Boys HQ, gym, weight lifting.
Mash spacebar to lift. Only Brad receives XP.
Weight XP Light 20 Medium 50 Heavy 100 Murderous 500
- LABORATORY
Particular areas: Houses with basements, laboratory.
- KARATE VILLAGE
Particular areas: Defunct bar (party poster), village, novelty vendor Morty.
COMPANIONS Name Location Criteria Birdie Hall Bar Retrieve Olathian Whiskey (Area Two: Swamp ) Yazan Barghouti Left of Karate Village Agree.[/spoiler] Jack Hole in Karate Village Retrieve playing cards (200 magazines, Karate Village vendor. Tiger Man Bob's Dojo Defeat him.
WARNING: If you give TNT to the two men who appear at area hub, they will kill everyone in the village, including unrecruited companions and vendor (taking along their inventory as well.) They will not reappear anywhere else. Use a higher ground route around them if you need to make it to the blockade and do not wish the villagers to be killed.
- SHARDY'S ISLAND TOURS
DISMAL ISLANDGARBAGE ISLANDRESORT ISLANDWhile standing next to Shardy, select and use the map from your key items screen. Shardy has a crap memory and no pockets, so you must do this every time you want to go there.
Map can be purchased from Morty in Area Two: Karate Village.
Particular areas: Ground level, mountain top hut (unobvious "rope.")
Map can be taken from fishpeople village in Area Two: Swamp.
Particular areas: Cart race, trash stroll, bar, campfire.
There are four opponents for cart racing. Each race costs 10 magazines and gives you 20 back upon victory.
TIP: If you made a spacebar mash macro for weight lifting, use it for cart racing.
COMPANIONS Name Location Criteria Fly Minetti Cart Race Defeat then cheer him up. Ollie Nickels Bar Pay off his debt (2 magazines.)
Map can be found in Area Three: Atelier.
Particular areas: Exterior, lobby, first floor, second floor, third floor, suite, backroom.
Some hints if you are stuck:
First floor , first door , right side of painting.
Second floor , first door , left of nightstand.
Second floor , last door , right of nightstand.
Third floor , last door , left side of painting.
TRANSITION TWO
Particular interest: EWC, bar (party poster), Devil's Machine.
Small hole on EWC screen leads to area three.
SHOP Item Cost Detail Deluxe Sunscreen 50 +14 DEF, +9 S.DEF Dandy Hat 50 +32 DEF, +32 S.DEF, -4 AGI Hawaiian Poncho 31 +18 DEF, +3 S.ATK, +26 S.DEF, +1 LUCK Meaty Pads 30 +21 DEF, +6 S.DEF, -1 AGI Turquoise Pads 40 +30 DEF, +15 S.DEF Fur Coat 26 +23 DEF, +3 S.DEF Plastic Tarp 40 +23 DEF, +23 S.DEF, -8 AGI
BAR Item Cost Detail Fancy Perfume 20 Revives fully Real Sugar Cocola Cola 20 Recovers all SP Creamy Cocola 15 800 SP Lucrative Tea 13 Revives TP
EWCThere are three divisions you may participate in.
Eternal Championship (solo)
Tag Team Championship (duo)
Dystopian Rumble (main party)
Tag Team ChampionshipConsists of 5 rounds. The first 4 rounds provide 1000 XP and a small amount of magazines. Upon completion, you will receive the Tag Team Title Belt (+6 ATK, +22 DEF, +24 S.ATK, -12 AGI.)
Dystopian RumbleYou aren't penalized for wiping, repeatable. Grants 2000 XP, 0-35 magazines.
If you need to switch party members, just head over to the small village and use the poster there. To throw matches as Brad, spam horse stance. It's more efficient than guard. .
TIP: Put off completing the Eternal Championship until you're done with everything else. You will lose the ability to do dystopian rumbles.
COMPANIONS Name Location Criteria Shocklord EWC Complete Tag Team Championship. Sonny Backluwitz Hole near Devil's Machine guard. Speak to him after winning Eternal Championship.
AREA THREE

1. Atelier
2. Public Bath
3. Blood Forest
4. Ice Bowl
5. Seesaw Valley
6. Campfire
7. Pleasant Field
8. Gary's Cave Exit
Tardy is waiting for you at the very end of a screen to the right.
AREA ORDER:order irrelevant. seesaw valley, blood forest, ice bowl, public bath.
AREA GOAL:Retrieve wood, mint cloth, large fan, and toolbox to make a boat and leave.
SHOP CABINET Item Cost Detail Domestic Jerky 15 1000 HP Horse Jerky 20 Recovers all HP Fancy Perfume 20 Revives fully Lucrative Tea 13 Revives TP Iced Coffee 50 Restores all HP and SP
- ATELIER
Particular areas: Gallery, backroom.
- PUBLIC BATH
Particular areas: Bouncer hallway, Beady's room (left, dead end), red tide room*, crab room, bird room*, leftside placid bird room, bamboo room*, killing room.
*Red tide room, crab room (left, dead end.)
*Bird room, rightside placid bird room (dead end.)
*Bamboo room, glorious nippon room, smoking room (dead end.)
- BLOOD FOREST
Particular areas: Cave, +everything dojo (entrance inside cave), blood forest.
- ICE BOWL
Particular areas: Cave, dynamite sliders, homicidal snowmen, Peter's hunting grounds.
COMPANIONS Name Location Criteria Buffalo Van ♥♥♥♥ Top of snowman climb Defeat him.
- SEESAW VALLEY
Particular areas: Seesaw buildings, weapon cabinet, Mr. Perfect's dead end.
WEAPON CABINET Item Cost Detail Queen Bands 121 +50 ATK, +5 AGI Christmas Day 81 +45 ATK, +7 AGI Nail Bat 65 +24 ATK Sluginator 78 +30 ATK Decent Boomerang 50 +20 ATK, +14 AGI Combat Knife 78 +76 ATK, +12 AGI Snubby 144 +45 ATK, +16 AGI Crimson Tide 111 +45 ATK Grenada 9 130 +52 ATK Mighty Spear 132 +13 ATK, +3 AGI
- PLEASANT FIELD
Particular areas: Cave*, deserted village, bar (party poster), motorcycle race.
*Cave, Gale Motorcycle Club.
BAR Item Cost Detail Party Liquor 13 200 HP, drunk Onion Vodka 15 300 HP, drunk Olathian Whiskey 20 500 HP, drunk Real Sugar Cocola Cola 20 Recovers all SP Iced Coffee 50 Restores all HP and SP Lucrative Tea 13 Revives TP
COMPANIONS Name Location Criteria Crisp Ladaddy Field village Ransom Toby (Area Three: Public Bath )
PARTY SWITCHING AND RESTING


You can switch party members out at party posters. Max party size is 4. There are 9 posters throughout Olathe.
Area One: Village
Area One: Apocalypx-Games
Area One: Rando Camp
Area Two: Construction
Area Two: Desert
Area Two: Drive-Thru Mountain
Area Two: Karate Village
Transition Two
Area Three: Pleasant Field
You can rest for free at campfires. Here are the possible things that can happen to you.
Farted on (does nothing.)
Creeped on (does nothing.)
Have a joy mask put on (does nothing.)
Threatening note (does nothing.)
Party member kidnapped, ransomed (100/200 mags, Blue Rockets/Pretty Boys.)
Have a current party member abandon you.
Poisoned/deep poisoned.
Item theft (jerky, perfume.)
Magazine theft (20.)
Present (mystery jerky, fancy perfume, firebomb, joy, old sock.)
Gale Motorcycle Club event (Area Three campfire only, member permanently lost.)
There is a tent in Area One where you can rest for free. You may suffer a stat-decreasing random event however. You will permanently lose 10 health and 10 luck.
There are also two inns where for 10 magazines you can rest and have nothing bad happen to you. One is at Area One: Rando Camp (inside a tent) and another is Area Two: Construction.
When you've reached the EWC, you may rest safely and freely at the bed there any time after the first bout.
RANDOM ENCOUNTERS & FARMING
AREA ONE: RANDO CAMP: SHADOW HALLWAYThis is an excellent early farming area. If you get low on health or SP, simply use the save point and tent right outside. Even when XP given seems low, you are still receiving 10 magazines and items. Mystery jerky sells for 5 magazines, diet cocola cola for 2. Mob can be killed in one 350+ dmg hit making this go very fast.
Shadowy FigureMagazinesLoot Table91 XP10Mystery Jerky [+300 HP]Diet Cocola Cola [+200 SP]
AREA ONE: FIELD: SNAKE GRASSWhile XP given is more than Shadowy Figures, snakes drop nothing, have two phases, and can poison you. Poison can be cured by cigarettes but there is no one in game that sells them.
SnakeMagazinesLoot Table135 XP0Nothing.
AREA TWO: SWAMP: SHADOW HALLWAYExactly the same as the other shadow hallway.
AREA TWO: SWAMP: SNAKE SWAMPSnakes here cast a higher level poison but otherwise function the same. They give more XP but still drop nothing.
SnakeMagazinesLoot Table500 XP0Nothing.
AREA TWO: GARBAGE ISLAND: TRASH STROLLOut of the way, drops no items and less magazines than shadowy figures. Also higher stats and casts more debuffs. Not suggested.
Lunatic Box/Fridge/TrashMagazinesLoot Table100 XP9Nothing.
TRANSITION TWO: EWC: DYSTOPIAN RUMBLEYou aren't penalized for wiping, repeatable. Grants 2000 XP, 0-35 magazines, no items. Best place to grind XP but opens very late in the game.
DOJOS
There are 4 dojos in Olathe. By completing the dojo master's challenge, you receive a consumable scroll that can be used on one character. Check your key items.
LOCATIONS AREA ONE: VILLAGE
AREA TWO: CONSTRUCTION
AREA TWO: DESERT
AREA THREE: BLOOD FOREST
Muhammad Style Scroll+8 DEF
+8 S.DEF
Gonzalo Style Scroll+5 S.ATK
+5 SP
Christ Style Scroll+8 ATK
+8 LUCK
Doomsday Style Scroll+5 ATK
+5 DEF
+5 AGI
+5 LUCK
+5 S.DEF
PAIN MODE & SAVE POINTS
Pain mode can be activated after defeating the dog tormenting Terry. When this mode is activated, save points become one-use and disappear. New mobs, bosses and an area also open up when you're in pain mode. I have listed save points below. There are 36 in total. Please tell me if I missed any.
Here is a spreadsheet I made as a checklist. There are two versions.
Printable version[docs.google.com] . Google docs version[docs.google.com] .
STARTING Tutorial Area
Brad's House
Blood Cars
AREA ONE Hub
Village
ApocalypX-Games: Mini Village
ApocalypX-Games: Before W2D House
ApocalypX-Games: Magnificent Manes
Rando Camp
TRANSITION Campfire
Pre-motorcycle Segment
Post-motorcycle Segment
AREA TWO Hub
Construction: Inn
Construction: Pre-bulldozer Segment
Swamp: Bar
Swamp: Beehive
Karate Village
Laboratory: Houses
Desert
Drive-thru Mountain: Wally's Mountain
Drive-thru Mountain: Wally's Cave
SHARDY'S ISLAND TOURS Dismal Island
Garbage Island: Cart Racing
Garbage Island: Ollie's Approach
Resort Island
TRANSITION EWC
Past EWC Cave
AREA THREE Hub
Seesaw Valley: Building
Seesaw Valley: Before Dead End
Pleasant Field: Deserted Village
Blood Forest
Ice Bowl: Homicidal Snowmen
POINT OF NO RETURN Island
Prison Cells
Source: https://steamcommunity.com/sharedfiles/filedetails/?id=357919117
More LISA guilds
- All Guilds
- comment jouer lisa
- Lisa The Painful: A Guide for a Less Painful Time (Sort of)
- algunos Fan-Games de Lisa
- how to not cry while playing lisa
- Lisa: The painful
- Empanadas para olvidar el dolor
- How to keep as many party members alive as possible
- LISA The Hopeful Traduo [PT-BR] - Guia de Instalao
- Analyzing and Ranking Every LISA Party Member
- Index of bosses for LISA: The Painful and the Joyful