This guide is intended to help you through your first few hours with Kerbal Space Program. It's far from comprehensive, but provides a decent understanding of the basics as modifying and launching a rocket. The rest will be explored with your intuition or guidance of another tutorials.
How To Get Started
Facilities
Once the new game is started, the Kerbal Space Center (KSC) will appear with the following facilities:
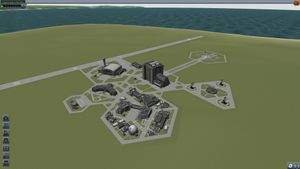
- Vehicle Assembly Building (VAB) - Build and save vertically launched rockets.
- Spaceplane Hangar (SPH) - Build and save horizontally launched planes.
- Tracking Station - Track and go to flights in progress, manage debris.
- Astronaut Complex - Hire new crew and view existing crew.
- Flag Pole - Change the default flag for new launches.
- Launch Pad - Launch vertical rockets.
- Runway - Launch and land airplanes.
- Research and Development - Unlock new technology (available in Science and Career modes only).
- Mission Control - Controlling missions, getting contracts (available in Career mode only).
- Administration Building - Changing the business strategies (available in Career mode only).
To access a facility, just click on it, or its icon.
The director (Gene Kerman) of the installation will greet you giving some tutorials at the each first time you visit an important installation. Read it if you want, and click on the "Thanks, I've got it" button bellow.
Building A Rocket
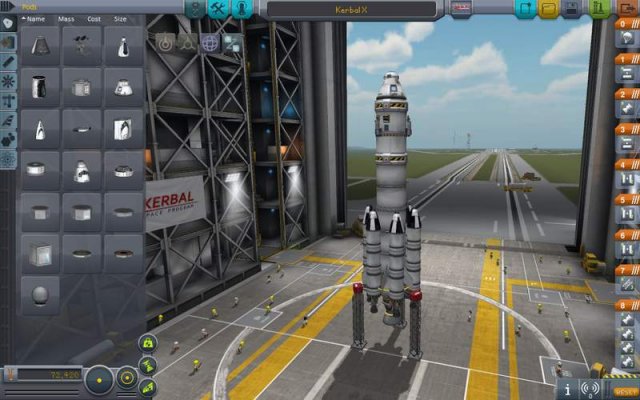
Since a rocket is needed, select the tall, square structure, about in the middle of the KSC(or click on the building with the rocket inside at the row of buttons on the bottom left corner of your screen), it will say Vehicle Assembly Building. From here we will build our first rocket!
Figure.5
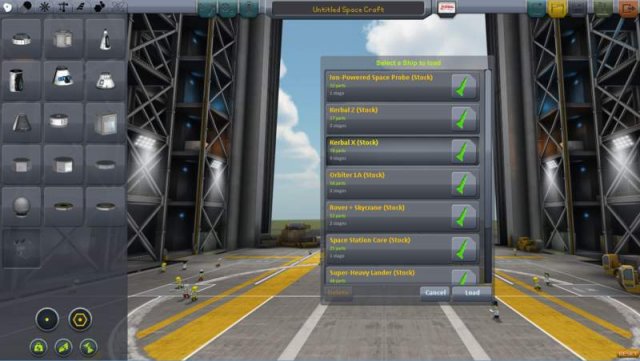
Selecting the Orange Folder in the top right section of the window opens the menu shown in Figure 5. Find and select the Kerbal X (stock) to load it up. This rocket is fairly simple and can easily achieve orbit around the planet. If you are using the demo version, Here is a simple rocket that can achieve orbit with more than enough fuel for returning to the planet. If you prefer to build the rocket yourself check out this tutorial to learn how to build a rocket capable of reaching orbit. Try to make sure you have at least 3,500 m/s of fuel and an aerodynamic rocket. Once you are done building, come back here and jump to the "Launching the rocket" section to learn how to fly your marvelous creation.
Figure.6
As the craft is loaded the editor gizmos appear (they are visible when the first part is placed). They are Place, Offset, Rotate and Root in order, and they changes the behavior of the editor. The editing method can be changed with left-mouse-clicking on the the selected method's icon or using the equivalent 1234 keystrokes. While we are learning the bases of the game in this tutorial, we will use the place method only, the rest of them will be detailed later.
His rocket is very simple and easy to explain. On the right side of the screen, shown in Figure 6, are orange folders that have numbers ranging from 0 to 8. These are the rocket's launch stages. Launch stages differ from rocket stages in that launch stages are events that each spacebar press triggers. Each stage contains at least one icon; each icon symbolizes an event of that stage. The launch stages are:
1. Rocket Launch Stage 8- Initial launch stage.
- Seven Liquid Fuel Thrusters.
- Second launch stage.
- Releases the support braces, called TT18-A Launch Stability Enhancers, at the bottom of the Kerbal X Rocket (the open frame supports capped with the red cap).
- This, the third, launch stage releases two of the boosters from the main rocket.
- Trigger this stage only after the first set of two boosters are out of fuel.
- Audio and visual cues indicate that a rocket engine is out of fuel.
- After a short while two more engines will run out, and pressing the spacebar will activate this stage to release them from the rocket.
- Again, trigger this stage only after two more engines have run out of fuel.
- The same as the previous two launch stages.
- However, it is the last set of the booster engines.
- The end of the first stage of the rocket.
- Pressing the spacebar separates the main engine that helped the boosters get the rocket into space from the second stage of the rocket.
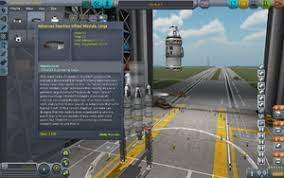
- Activates the smaller engine attached directly to the capsule.
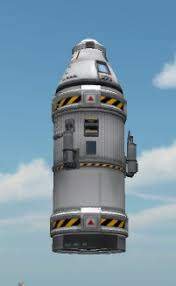 8. Rocket Launch Stage 1
- The last stage before the parachute is opened.
- Release the last engines; activate upon falling towards the planet.
 9. Rocket Launch Stage 0
- Deploys the parachute.
That is the run down of the orange tabs on the right side of the screen. While there is nothing that really *needs* to be done to the Kerbal X Rocket, I strongly advise adding a couple of items that will make getting into orbit a bit easier. To change the order of the staging events click them, and if the parts they represent are placed in symmetry, it will expand. Use Crtl left mouse button click (On Windows) to select multiple icons, and drag them into the desired stage.
Placing SAS Modules
Figure.7
Figure 7 shows the main rocket stage removed in preparation of the black SAS module, from the Control Tab, that will be added. To "break" the rocket in the correct place, simply point your mouse at the section below the separator ring, the black and yellow ring with the red square on it, and do a left-mouse-click (LMC) once. This selects the fuel cell that is underneath of the separator ring and everything below that section of the rocket. Then simply move it out of the way, *but not into the grey component selections on the left* or else it will be trashed, and do another LMC to place the rocket components there.
The SAS module will help greatly in spinning your rocket around as it provides torque. A simple keypress T, after the rocket is moved out to the launchpad, will allow the rocket to stay almost perfectly centered while it is in flight. There are other concerns for keeping the rocket stable but those will be covered later.'
In order to add the SAS module, do an LMC on the black SAS module, then move your cursor over to the rocket sections. There should now be the SAS module following your cursor, and if not simply go back and do another LMC to select the module again. With the module following your cursor, drag it to the base of the decoupler ring and you will see the SAS turn green when it is properly placed. Do one last LMC and the module will be placed underneath the decoupler as shown in Figure 8. The last step is to combine the lower section back onto the SAS module. This is done the same way as it was taken off, just in reverse.
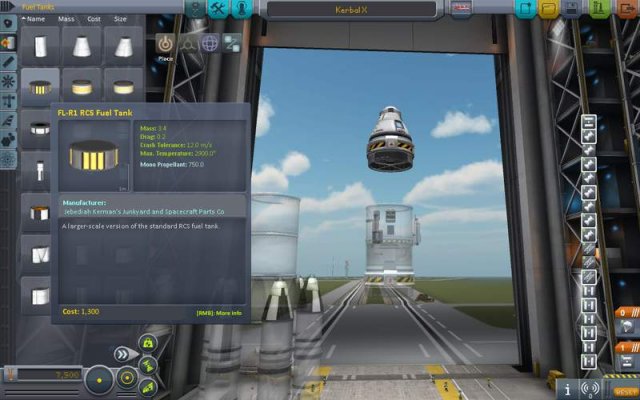
Figure 9: Selecting the RCS Module
Another SAS module can be added to the section directly underneath the capsule. Simply repeat the same process to the separator that is underneath the capsule. While adding the SAS to the Capsule section, adding some RCS Fuel, Figure 9, will also assist in keeping the rocket stable in flight, by pressing R to turn on the rocket in flight. The last step is to add some RCS thrusters like the RV-105 RCS Thruster Block, which I added to the capsule decoupler ring, see Figure 10. To add these thrusters in any sort of symmetry, use the symmetry icon in the bottom left of the screen, see Figure 11. Each LMC on this indicator will cycle through all of the cloning options, i.e. 1 - 8 duplicates of whatever item you are placing.
Launching The Rocket
About The Stages ShortlyIt's time learn more about your rocket. The parts editor in the VAB is simple enough to use, but if I were you I would stay away from spaceplanes for a little while longer.
You already know a little bit about staging, but I'm going to generalize it even more for you.
The Launch StageThis part of the rocket usually called launch vehicle. Here you have a whole bunch of high powered engines and large fuel tanks, Solid rocket boosters are most often used here. The motto here is pack as much of it on as you can because you're not taking it with you.
If you do not already know, you can mount things radially (on the side) of other things, and by the magic of the symmetry button (Bottom of the parts menu) you can have the radially mounted things not make your poor rocket tip over.
Staging is one of the most important aspects of building a rocket, even though a lot of people have quickly traded it in for action groups. On the right there is a tall bar with everything in its respective stage, however if you were to put half your rockets in one stage and the other half in another, you would go almost 3 times as far, in twice the time!
The Other StagesGenerally split into a circularization stage (I totally didn't make that word up), and an interplanetary stage. For now all you really need to know is everything after the stages in the atmosphere should be light, with medium to low power. Once you're out, if you're going into orbit all you need is a LV-N, 909 or a Poodle, depending on your preference.
Once you've made or selected a rocket, press the big green "Launch" button in the top right. This deploys the rocket created in the VAB on the Launch Pad, where we can start our brief mission, which contains a taking off, a getting into orbit and a return.
ControlFlight controls are not exactly straightforward. WSAD move the ship around, but they are relative to your rotation, controlled with Q and E. The easiest way to keep your rocket on target with WSAD is to look at the navball, in the bottom middle of the screen.
Before launching your rocket, take a second to look at your map, by pressing M. This will bring up Kerbin on the map. Scroll out to show kerbins moons, and even farther to see the rest of the solar system. It will be a while before you even learn how to make a rocket than can escape the sphere of influence of Kerbin, so experiment with different rocket designs, and see what works best for you. The craft is driveable in map view if navball is popped up from the bottom middle, although the staging is mot working in this case. The navball holds its position, so it is better to leave it popped up state before launching.
Resource icon.pngIf you want to keep an eye on the resources of the craft, click on the jerry can icon on top left corner. This displays the resources of the vehicle. The rocket engines of this rocket consume oxidizer and liquid fuel. If one of those resources are depleted the engines will flame out.
Launching your rocket is the easy part. Just throttle up with left-shift and press space. But don't do that just yet, press T to turn SAS on. SAS is essentially autopilot, without SAS you just won't turn as well. The SAS allows you to control the movement of your rocket with the WSADQE keys faster, and with more power, and allows your rocket to use thrust vectoring (You'll learn about that later too) and it keeps you on course, instead of you having to turn manually. If the SAS is activated the direction selector table appears on the left of navbal. Some directions possible to be chosen on this table. Let it on the default Stability Assist for now.
Each time you run out of fuel in a stage, press space until the next stage of fuel and engines start burning.
If you have messed up something, or just want to pause the game (for example: reading the wiki), press the ⎋ Esc button. This pauses the game, and pops up a menu with the following options:
- Resume Flight - you can continue the paused game without any other action.
- Space Center - this drops you to the space center building selector menu (not available during the flight).
- Revert Flight - aborts the fly, returns to an earlier state.
- Revert to Launch - reverts the game just before the launching.
- Revert to Vehicle Assembly - leads you back to the editor of the VAB.
- Cancel - back to the previous menu (what else).
- Settings - opens the settings menu.
Execution
If you don't want to read everything I said above all you need to know is before launching press T, hold left-shift until the throttle is at maximum, then press space to launch and if your rocket stops going, press space again.
You can also imitate the real-life launches, execute a slow gravity turn. The main point the gravity turn is the engines can spend all of their thrust to increase the speed and fight against the gravity and drag, turning of velocity vector (this is basically a wasted work) made by gravity on a trajectory minimizes the loss by aerodynamic drag and gravity. It saves a lot of fuel during ascent. As I mentioned, the essence of gravity turn: the rocket always flies towards the heading - this direction called prograde and signed on the navball by this mark: Prograde. During the ascending keep the level indicator in the middle of the navball nearby the prograde mark. And keep an eye on the proper speed - as the terminal velocity has reached, just keep the acceleration around the 2 g avoiding the too great drag and the too steep trajectory.
The first step is ascending vertically - this sequence usually called vertical climb. This is needed to gain altitude and speed and pass the dense region of the atmosphere causing high drag - fast and at low fuel cost. Excelling the speed of 50-60 m/s and approaching to the altitude of 250 ms pitch over with angle of ~10 degrees (relative to vertical) to east (this is called pitchover maneuver), and after this maneuver just slowly, gently and continuously increase the angle following the prograd mark, while keeping a heading of 90 degrees east, givin a tilt of 30 degrees at 5 km but do not give greater tilt over 45° until reach 10 km.
At this altitude you can turn down the throttle a bit, and start increase (slowly, gently and continuously) the pitch to 25-30 degrees above the artificial horizon, over 20 km altitude increase the tilt over ~15 degrees at 30 km, and the heading would differ to horizontal less at 40 kms altitude, but as you passed altitude of 30 km and separated the last stage of the launch rocket, switch to map view. Pop up the navball to keep the rocket steerable - although the staging won't work in this state. Turn down the throttle a bit (left-^ Control), follow the direction and keep an eye on the apoapsis (marked with "Ap" on the map) till 70 km is reached. When it is reached and turn off the throttle (left-^ Control) or press the X. This needs speed of 1500-2000 m/s relative to orbit (or 1325-1825 m/s relative to surface (see: Point of reference) on a right trajectory, but less is enough on less efficient steeper trajectory).
Remember: the too shallow trajectory wastes the fuel for drag, the too steep for the gravity (note: differing to the shallower is a bit more dangerous to the steeper). Don't forget: the good trajectory is clean and continuous.
Source: https://gameplay.tips/guides/7985-kerbal-space-program.html
More Kerbal Space Program guilds
- All Guilds
- Kerbal Space Program - Orbital Rendezvous Guide (Tin Can Program)
- Kerbal Space Program - Advanced Reusability Concepts
- Kerbal Space Program - An Illustrated Guide to Unmanned Spacecraft
- Kerbal Space Program - All Easter Eggs Guide
- Kerbal Space Program - How to Launch a Space Shuttle
- Kerbal Space Program - Texture Revamp Guide
- Kerbal Space Program - Pre-Orbiting Guide
- Kerbal Space Program - How to Use Rocket Engines as RCS Thrusters
- Kerbal Space Program - Rendezvous and Docking Spacecraft Guide
- Kerbal Space Program - Satellite Deployment Missions Guide
