Fire: Cheap, Effective & Very Fun
All special ammunition in HighFleet can be a huge force multiplier, Proximity Fuse rounds can chew through the soft spots on light ships and Laser Guided Missiles are the biggest nightmare of any strike group.
But the biggest force multiplication comes with rapid-fire Incendiary ammo, because even under-powered 37mm and 57mm machine guns when loaded with Incendiaries can be used to bring down heavy cruisers!
The key is Controlled Incineration, so as to not waste your limited supply of Incendiary bullets.
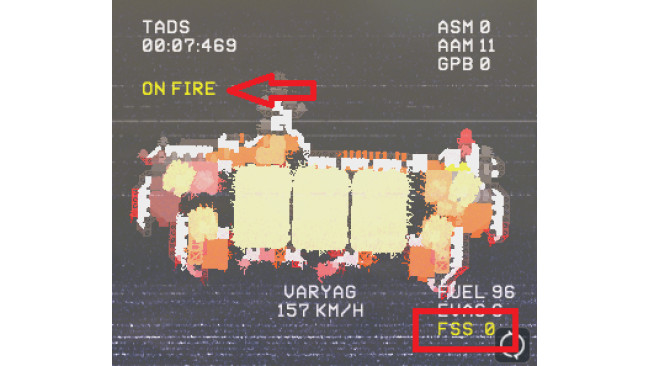
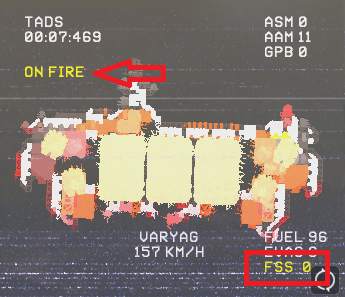
Aim at the exposed tanks on the enemy ship and shoot them enough times until you see the "ON FIRE" symbol flashing in the bottom left:
Once the enemy is set ablaze you should hold your fire or concentrate on other enemy ships until they use their Fire Suppression System modules, the remaining number of which you can see in the corner of the ships' structural diagram.
Upon using their FSS, there will be a huge cloud of gray smoke around the ship which signals for you to start incinerating their fuel tanks again. Repeat this until the enemy runs out of FSS and the fires on their ship rage out of control.
When the flames have fully consumed it, the enemy ship will not be able to rotate its guns or use the engines to save itself from crashing, so simply set it ablaze and then watch as the hard ground and the ammo reserves race to see who can blow up the vessel first!
Just keep in mind that Incendiaries do less overall damage than High Explosive, so unless you plan on fully Incinerating the enemy ship, HE is free and more powerful.
The ship used to absolutely own this Archangel is the "Igniter" from "The King's Corvettes" ship pack, it comes with 2xVympel 57mm rapid-fire cannons specifically meant for igniting the enemy.
My Custom Ships
This guide was written with both vanilla ships and the abilities of my own custom corvettes in mind:
!!!In the ship pack below I also talk about how to silently capture any caravan!!!
https://steamcommunity.com/sharedfiles/filedetails/?id=2676712980
My previous ship pack which included a dominating Fleet of hard & fast Frigates is also available here:
https://steamcommunity.com/sharedfiles/filedetails/?id=2664421839
The Suicide Squadron
Starring :
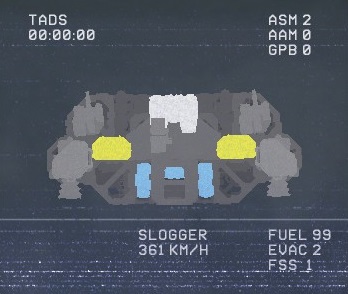
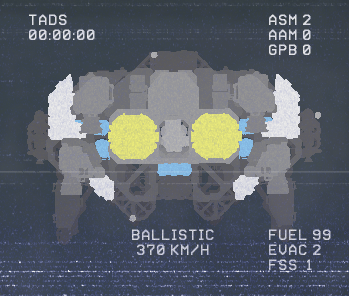
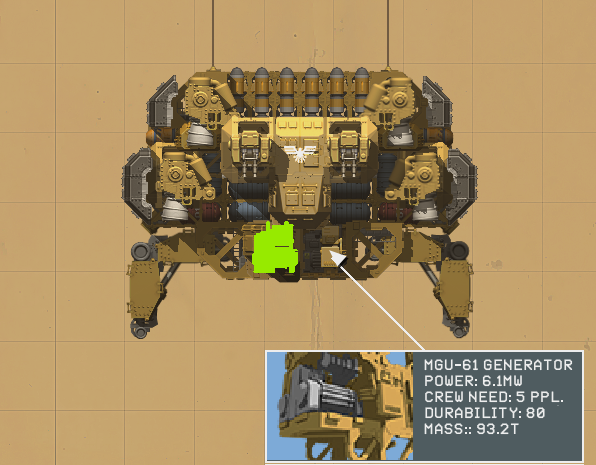
THE COURAGEOUS, NAVARIN, SLOGGER, FLOWER, BALLISTIC
Whoever thought deploying these vessels in combat was a good idea was either mad, high on some very strong recreational drug or both. And just as well, all the crew who made the fatal mistake of ever climbing aboard one of these ships are completely suicidal.
Using special ammo on these guys is the best way to waste your money. The true cheapest way of killing them would be to just wait for them to fly into the ground because the pilot and everyone else in the bridge obviously never had any intention of staying alive, but since that might take a while here are each of their weak points:
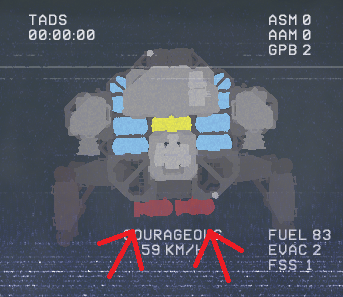
Courageous:
This ship will die after losing basically any of it's sub-systems, whether it is a thruster, generator or fuel, but the best way to kill it while also getting to see a sick explosion is to shoot the ground bombs strapped to its bottom.
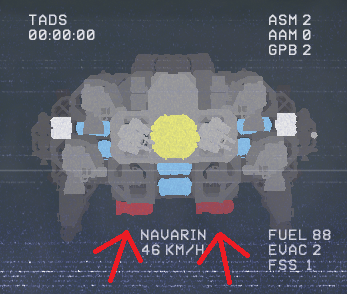
Navarin:
Same as the Courageous, fly below it and destroy the bombs clamped to the bottom and watch it blow up it in a magnificent cloud of smoke and shattered hull.
Slogger:
Because of the 2 artillery cannons strapped to this glorified paper airplane, the Slogger is the only ship in the Suicide Squadron that might be an actual threat and warrant the use of Proximity fuse ammo. However, even a couple salvos of 57 or 100mm High Explosive will make short work of it, just make sure to prioritize destroying all Sloggers before they can fire their own volleys of special artillery ammo at you.
Ballistic:
The Ballistic is a flying powder keg due to all the unprotected ammo loaders it carries, and while its rockets aren't a real danger, you might get hit by a few from each salvo at close range. Position yourself above or below it where it has no armor and chew through with HE until you get to the juicy ammo core in the middle.
Flower:
The Flower can be very annoying, it carries 6 Zenith missiles and has no qualms about launching one at you every few seconds, so either shoot out it's rocket storage from above and then destroy the bridge, or cripple it completely from below by destroying its 2 unprotected generators. Either way this ship is just a minor problem with an easy solution.
The Yellow Belly Legion
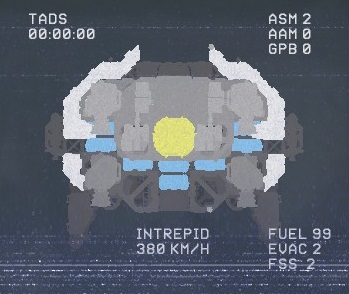
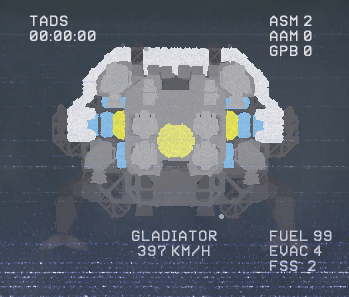
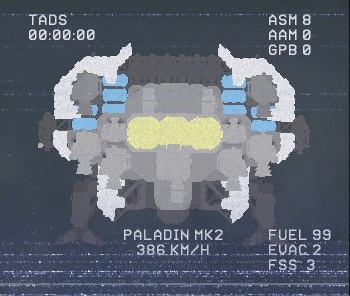
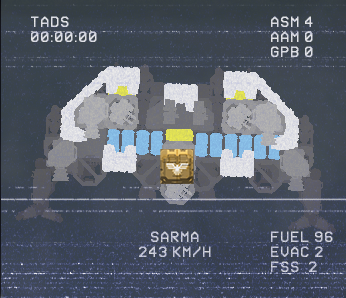
All the ships in this class can be pretty threatening, but are easily destroyed by focusing fire at their soft and exposed underbellies. A fully loaded clip of Proximity Fuse would destroy any of them when aimed at the right place but isn't necessary as even High Explosive rounds will be enough to tear them apart. A bottom fighting versatile ship such as the "Liberator" from "The King's Corvettes" will absolutely eat the enemies in this class for breakfast.
Intrepid:
The Intrepid is not to be trifled with, with its cannons loaded with Armor Piercing it can cut through your ship and even hit your bridge or ammunition, so be sure to dodge those volleys and dispatch it quickly by carving through the underside to reach it's ammo core or burn out the FSS blocks by setting it on fire a few times and then wait for the flames to fully engulf it.
Gladiator:
The Gladiator and its multiple rocket launching cousin can be very dangerous ships, with the basic model being perhaps the most powerful vanilla frigate and capable of blowing small or slow ships to pieces from close range. But like with the rest of The Yellow Belly Legion, it is highly susceptible to shots from below. The APS covering the bottom half can be easily countered with mid-caliber Proximity fuse, or with 57mm Incendiary and Controlled Incinerations. AP is not ideal because it can be deflected by the APS and cannot fully destroy the ship as the Gladiator is still able to fly and use half its guns even after the detonation of the core ammo reserve.
Paladin-Mk2:
The Paladin boasts a SARMAT heavy twin cannon that can be very dangerous if left to linger. Luckily, its has no armor on the bottom and has all 3 FSS blocks left exposed down there, meaning that a few incendiary rounds from a ship such as "The Igniter" can easily and cheaply incinerate and destroy it. If fire takes too long for you, then a few AK-100s loaded with proximity fuse should take care of the enemy Paladin much more quickly.
]Sarma:
The 3 Vympel cannons on the Sarma are harmless to armored ships, but it can be a expensive and time consuming ship to destroy if you don't know where to aim. The cheapest way is to simply aim for its bridge, positioned at the bottom middle, above one of its guns. Even a few accurate low caliber rounds will be enough to cripple the ship by destroying the captain's bridge.
"Invictus-Mk6" from "The Immortal Fleet" using 100mm proximity fuse ammo to absolutely annihilate a large force of Yellow Bellies!
The Winged Boulders
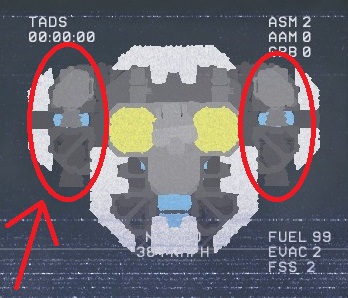
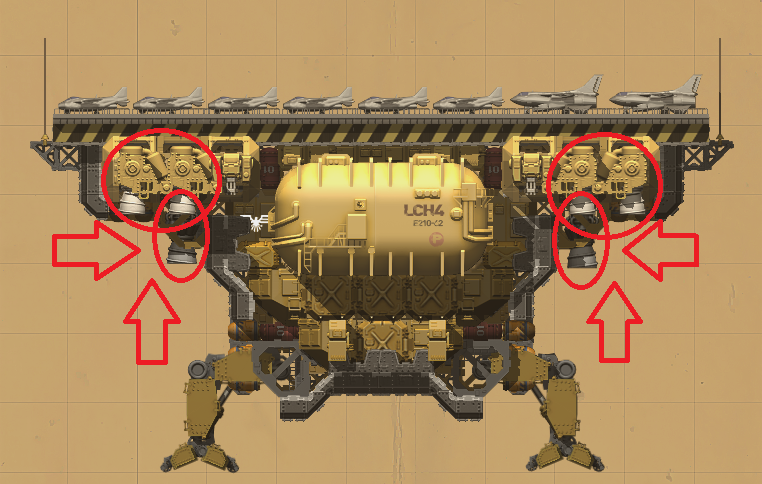
These ships are called the Winged Boulders because they are unholy abominations that were never meant to fly, so just a few well aimed shots to the engines on one side can make them fall out the sky.
Nimrod:
The Nimrod is partly why light unarmored ships are not viable on Hard difficulty. It can fire 180mm Proximity fuse from long ranges that absolutely annihilate any hull pieces not protected by armor. Killing the Nimrod however, is quite easy: destroy the engines on any side with any caliber or ammo type of your choosing and then watch it slowly crash into the desert.
Longbow:
Like with the Gladiator, destroying the ammo on the Longbow will not cripple it. The exposed engines below the aircraft deck are completely necessary though and the ship will fall out of the sky if 3 on one side are destroyed.
The Flying Red Barrels
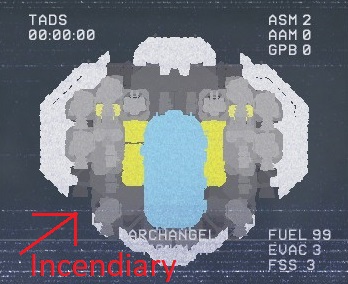
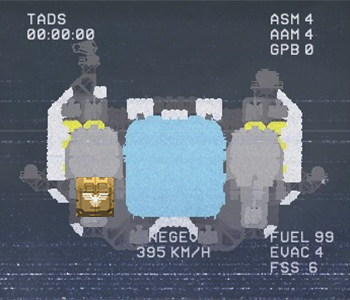
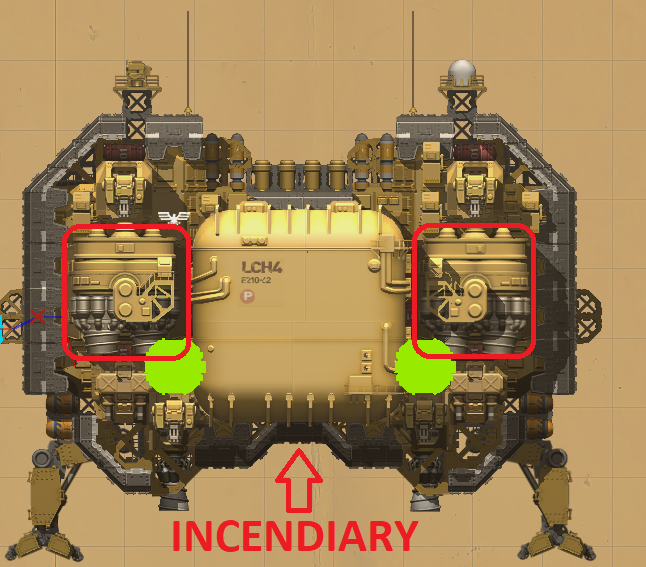
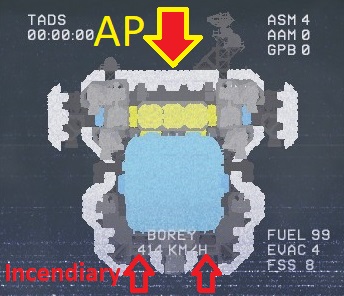

Like all red barrels in video games, you're supposed to shoot the ships from the Flying Red Barrels until they catch fire and then wait until the flames inevitably detonate the entire ship in a glorious explosion of shrapnel. The "Igniter" from "The King's Corvettes" was designed to fill this role cheaply and effectively.
Archangel:
This heavily armored light cruiser can seem very threatening at first, and destroying it with special ammo can end up costing more than your ship itself is even worth, but there exists a very simple solution: Fire!
The Archangel only has 3 fire suppression modules, and they can all be easily burnt out by shooting Incendiary into the bottom corners of the ship. This means that a handful of cheap incendiary rounds from a ship such as The "Igniter" can engulf this behemoth in an unquenchable fire powerful enough to destroy it in seconds. Remember to stay on one side of it in battle to be safe from one of the two heavy cannons.
Negev:
Even with its sizable arsenal of artillery cannons and miniguns, the Negev is perhaps the weakest cruiser in the enemy's ranks. Its bridge is almost completely exposed and the entire ship is incredibly susceptible to fires and incendiary.
If you are fighting it in the absence of any bigger threats, then it would be cheaper to use incendiaries to burn it out and allow the flames to eventually engulf it. But if you are fighting the Negev alongside other, larger threats, then you should use Proximity Fuse or even Laser Guided Missiles to quickly cut through to the bridge and destroy it. This option is much faster but more expensive.
Kormoran:
Like its sister the Negev, the Kormoran is also very weak to fires. How I fight this cruiser is by first destroying the two large ammo compartments in the bottom using AP or HE, this will cripple the 180mm cannons, destroy most of the FSS and cause massive fires aboard the cruiser. Once the large ammo blocks are destroyed you can either end it quickly by destroying one of the main thrusters, or prolong its suffering by setting it on fire again a few more times. Either way, it will be easy for you & painful for the Kormoran.
Borey:
This ship is a mainstay of every enemy strike group, so knowing the best way to kill it is vital knowledge. If you can safely hover above it with a ship such as "The Osprey" from The Immortal Fleet then you can punch through to the ammo with AP or LGMs. But my advice is to stay far below it where you can be safe from the volleys of 180mm that will be raining down and destroy the bottom cannon and then blow up the fuel tank or use incendiary to torch it until the FSS runs out. Soon after the fire engulfs it the ammo will detonate and the Borey will meet its doom.
Gryphon:
The conventional method of dispatching the Gryphon was a couple of quick and easy high caliber Armor Piercing rounds aimed at the ammo core. However, the recent nerfs to AP have made this method dangerous and expensive. Persistent Incendiary shots from the bottom to the fuel tank will work, but the large number of FSS aboard the Gryphon make this time consuming. So what is the answer?
Get under it and blow the fuel tank the ♥♥♥♥ up.
The ship you saw totally demolishing this Gryphon is The "Liberator" from "The King's Corvettes", using its 2xAK-100 and one D-80-MOLOT cannons loaded with nothing but High Explosive.
Powder Keg Heavy Cruisers
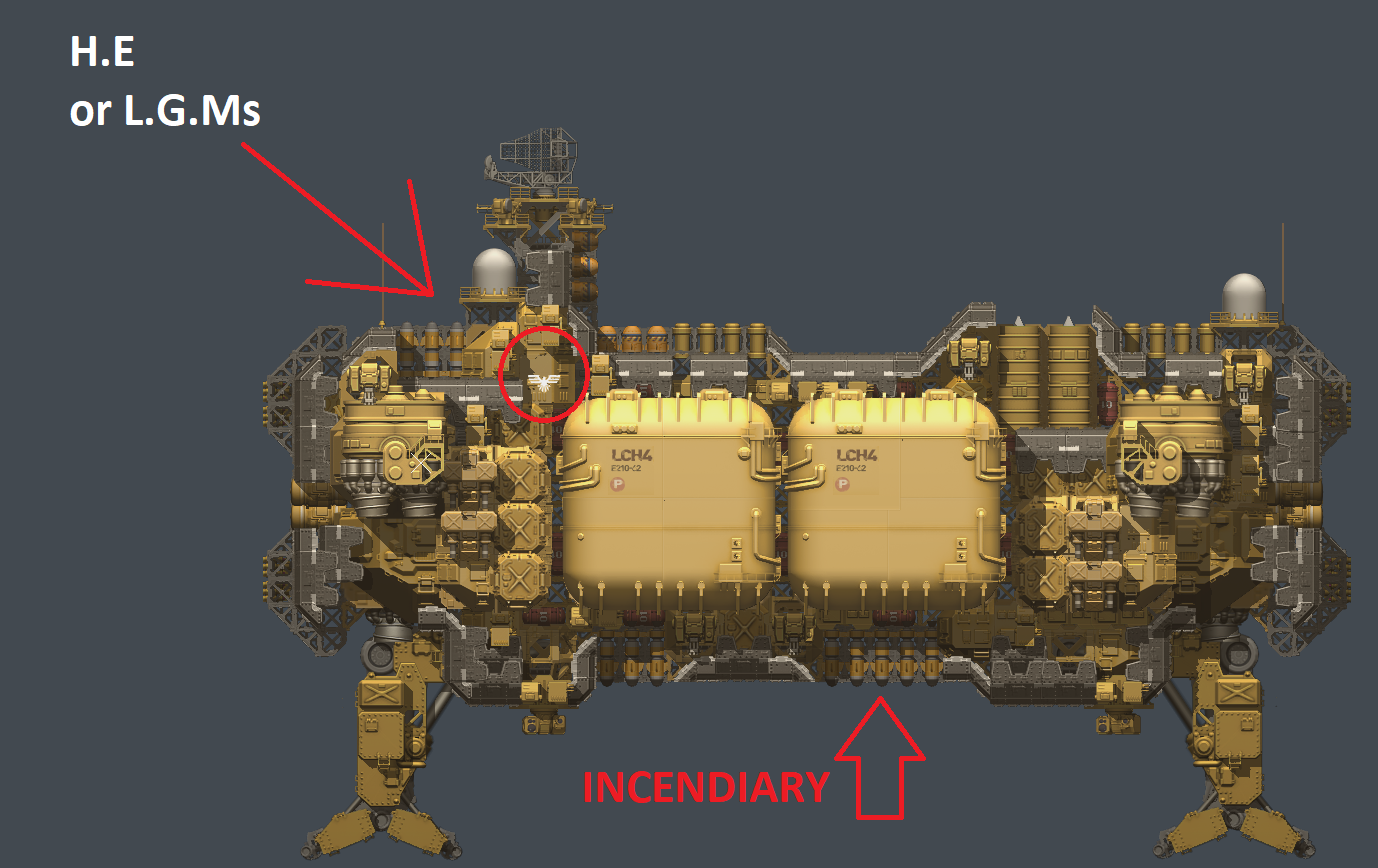
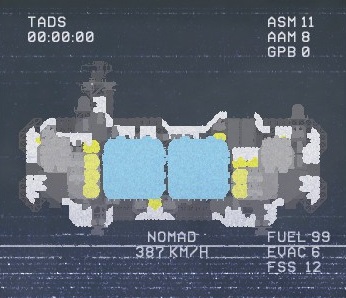
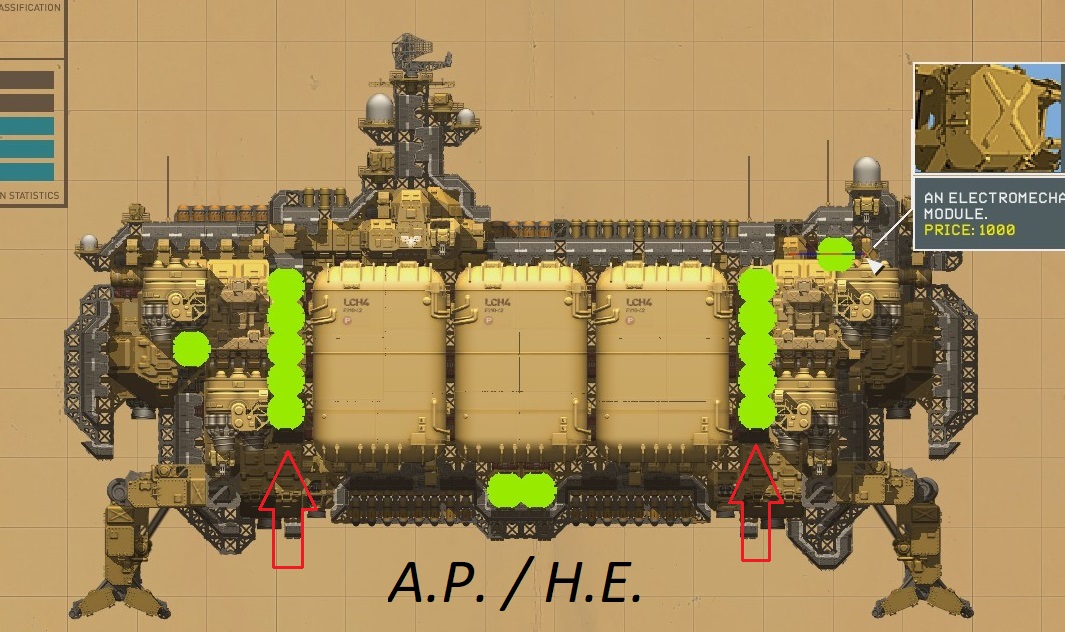
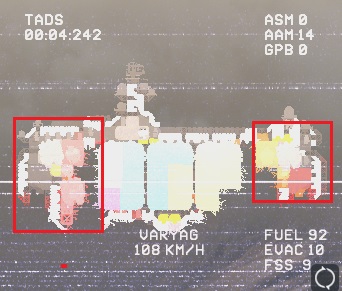
The ships in this class are big and mean, but as they say: "The bigger they are, the harder they fall."
The large guns on these ships necessitate massive amounts of ammunition which are all linked together inside the hull, meaning that a single ammunition explosion can tear apart half the ship and make for an easy kill.
Nomad:
The most powerful defence of the Nomad is the multiple PALASH trophy systems equipped on its sides, this makes shooting at its sides unfeasible, and the heavy armor makes assaulting the engines and ammunition slow and expensive. Luckily, the Nomad is easily destroyed by focusing heavy fire at the bridge from the top left, where the APS cannot deflect your rounds. Using LGMs is recommended to quickly blow up the bridge before the Nomad can do much damage with its own heavy cannons.
Here the "Viper-Mk3" from "The King's Corvettes" can be seen quickly dispatching the Nomad using 180mm Laser Guided Missiles.
The Nomad is also weak to incineration from below as the fuel tanks are largely unprotected from the bottom. Even though this heavy cruiser has a dozen FSS modules, by controlled incineration from underneath you can eventually damage the tanks enough that the last few of its FSS will be useless in combating the flame. So even though igniting the Nomad is possible, it would be much quicker to destroy the bridge with heavy firepower.
Varyag:
The Infamous Varyag is sitting on enough volatile ammunition to blow itself and half of Khiva to bits, but destroying it can be tricky because of all the armor and weapons it carries. It's possible to fly above it and attempt to snipe the bridge, but it is well covered and you could sustain massive damage to the underside of your ship while trying to cut through to it.
The best method is to stay under it and use high-caliber Armor Piercing or Laser Guided ammunition and try to detonate one of the two large ammo veins. The arc that the APS covers is much smaller than the one shown during combat and can safely be ignored if you are trying to penetrate into the ammo.
Once one of the ammo veins explodes, all the guns on that side will be crippled and you can relatively safely get to work destroying the engines. With all the engines on one side gone, the Varyag will lose control and begin a long and serene descent unto the unforgiving dunes of Gerat.
If you want to really bully the Varyag, then I recommend the "Falcon-Mk2B3" from The Immortal Fleet loaded with 180mm Armor piercing and 37mm Incendiary rounds. First you destroy all the ammunition with AP and then get to work incinerating the fuel tanks until the Varyag is no more.
Dishonorable Mentions
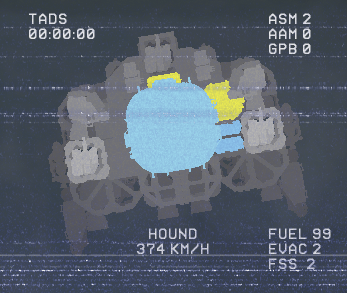
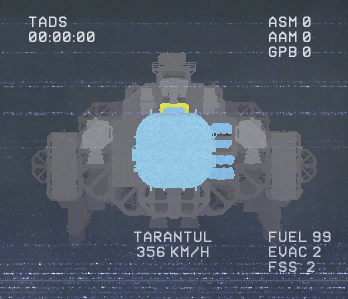
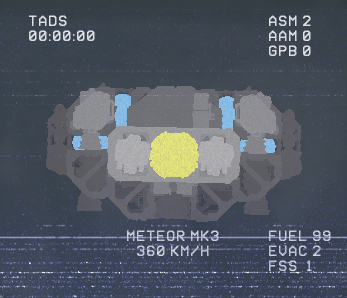
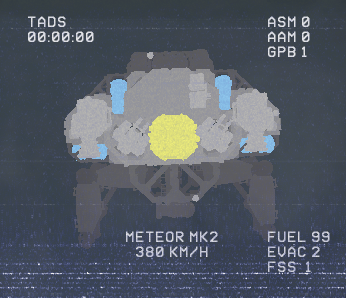
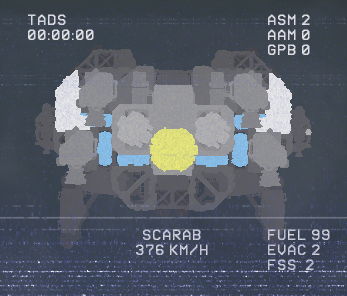
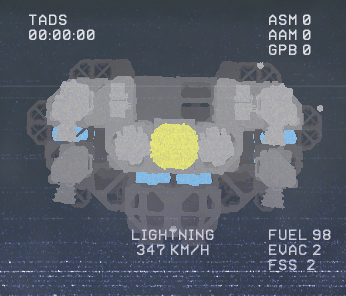
This category includes two classes, the mercenary escorts who are just doing their job, and the missile carriers who are the absolute scum of the earth. I recommend incinerating these "Nuclear Red Barrels", not because it's cheaper, but as revenge for all those missiles and rockets that they so frivolously fire at you and your men. They may have killed several of your ships, but you get to purge each and every one of them with a holy flame burning hotter than the pits of hell. They deserve nothing less.
The only real threat in this group is from the Hound missile carrier, it's carrying 3 MOLOT cannons that can tear you apart if you aren't careful.
The Tarantul, its miniguns or rocket launcher aren't dangerous, but the missiles onboard certainly are and the IRST scanner is going to ruin a lot your sudden strikes.
The Meteor-Mk3 can be pretty powerful when used by the player, but will melt when you shoot any sort of High Explosive or Prox Fuse at it.
And there's its baby brother, the Mark 2, likely the weakest ship in the game.
The Scarab is easily destroyed with High Explosive from below or just Proximity Fuze from anywhere.
Last but not least, you'll find the Lightning escorting some prize ships, very fast but also just as weak.
Ammo Priority List
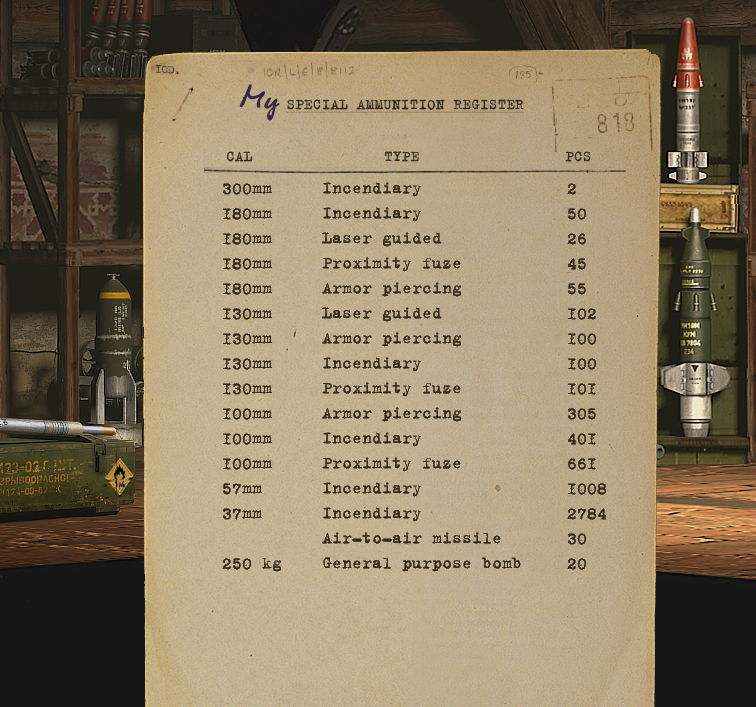
Never, and I mean never allow a ship to be lost in combat or in rioting if it is carrying your special ammunition on-board, when a ship is destroyed or riots then you will lose every single piece of special ammo it was carrying with it, which could be tens of thousands of gold in value. Believe me when I say that I learnt this the hard way.
The ammo I purchase and the priority in which I get them goes from top to bottom like this:
100mm Proximity fuse | 400+ Reserve
57mm Incendiary | All you can buy
130mm LGM | 100 reserve
180mm LGM | 25 reserve
37mm Incendiary | 2,000-4,000 rounds
AP 100/130/180mm | 200/100/40 each
Prox Fuse 130mm | 80 reserve
Prox Fuse 180mm | 20 reserve
Incendiary 100/130/180mm | 100/50/30 each
This ammo list goes excellently with the "Corvettes of The King" ship pack. Couple all this special ammo with the agility and firepower from the ships from this pack and not a single one of your enemies will be left standing!
https://steamcommunity.com/sharedfiles/filedetails/?id=2676712980
Source: https://steamcommunity.com/sharedfiles/filedetails/?id=2675645573
More HighFleet guilds
- All Guilds
- Making Wheels Available in Ship Editor
- highfleetMOD
- HighFleet Guide 520
- HighFleet Guide 510
- Create more Save Slots
- Complete Fleet Design & Doctrine Guide 1.16 [WIP]
- Canonfleet - A Highfleet Texture Pack
- HighFleet Guide 470
- TRADUO PTBR HIGHFLEET
- Hard. "".
