
First Things First (Tutorial)


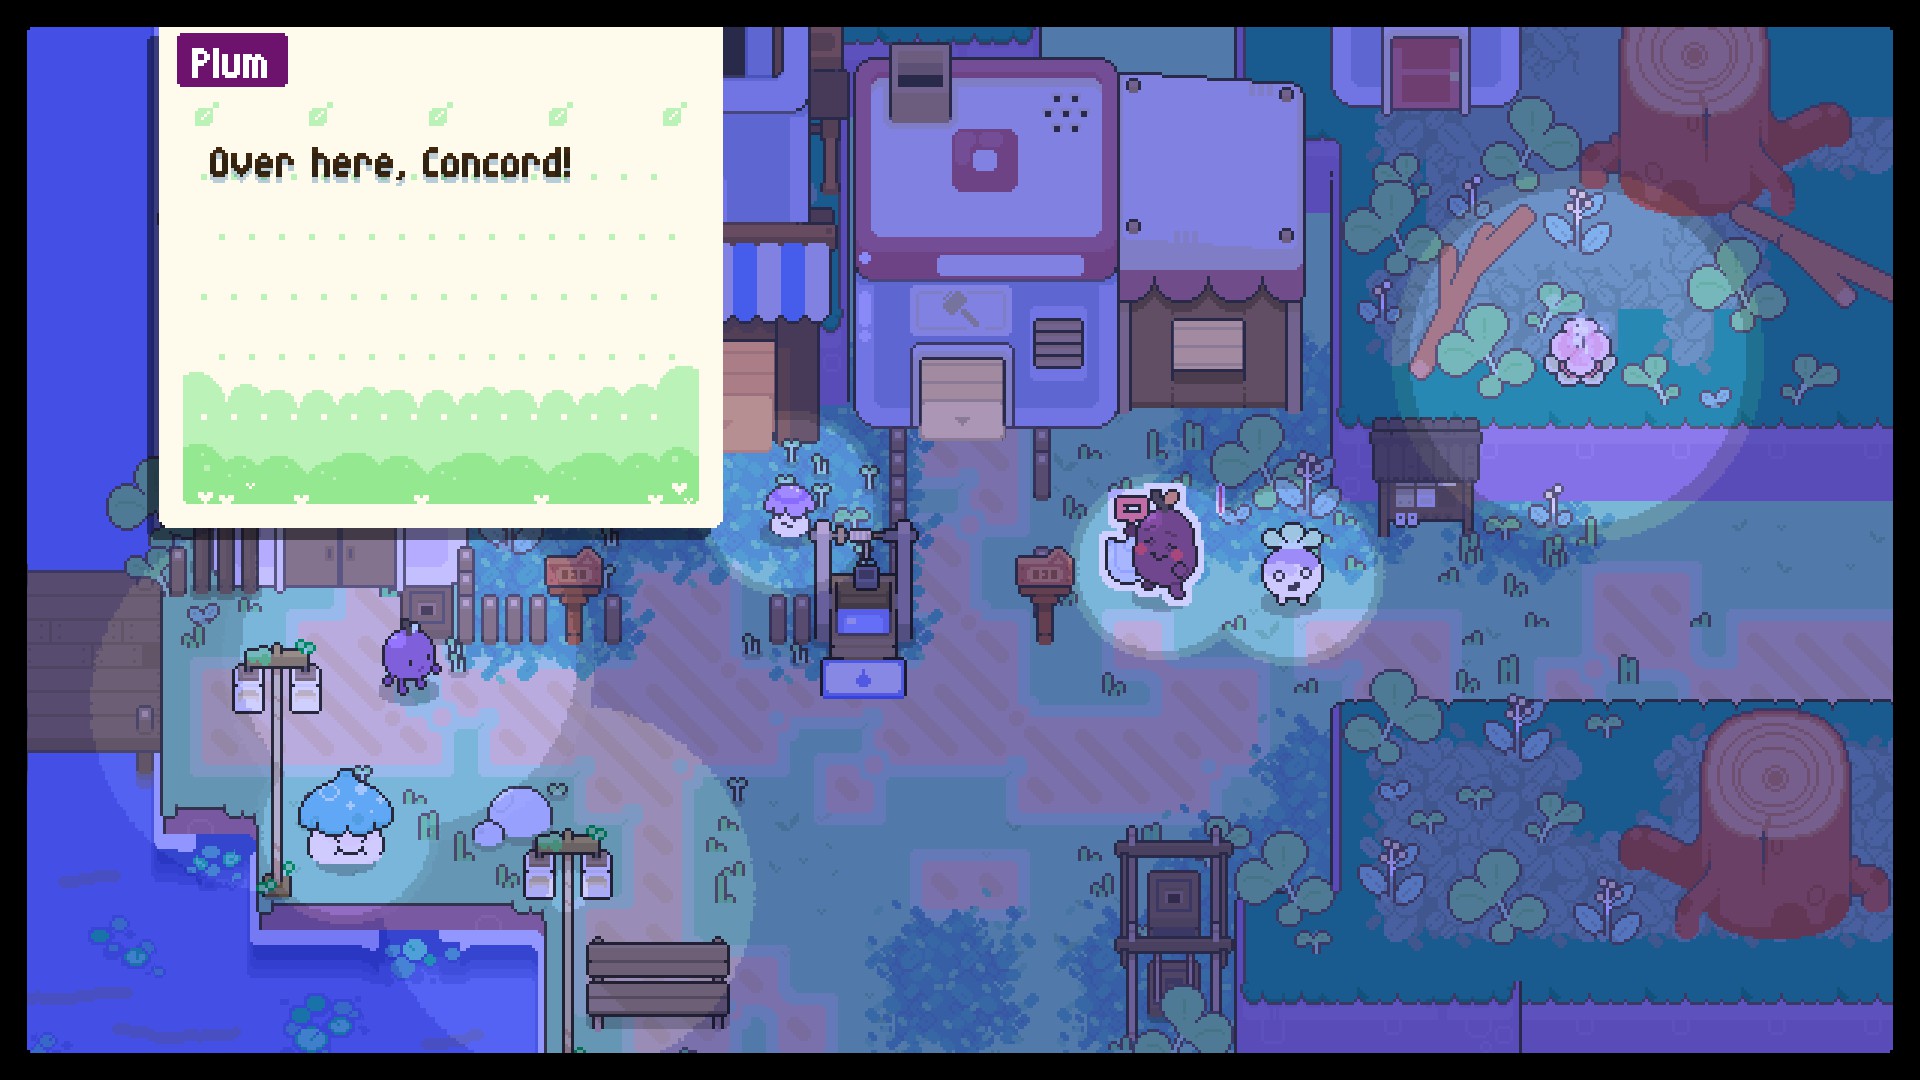


Like most games, it'll open with a cutscene. This one features text and pictures.
⠀
⠀
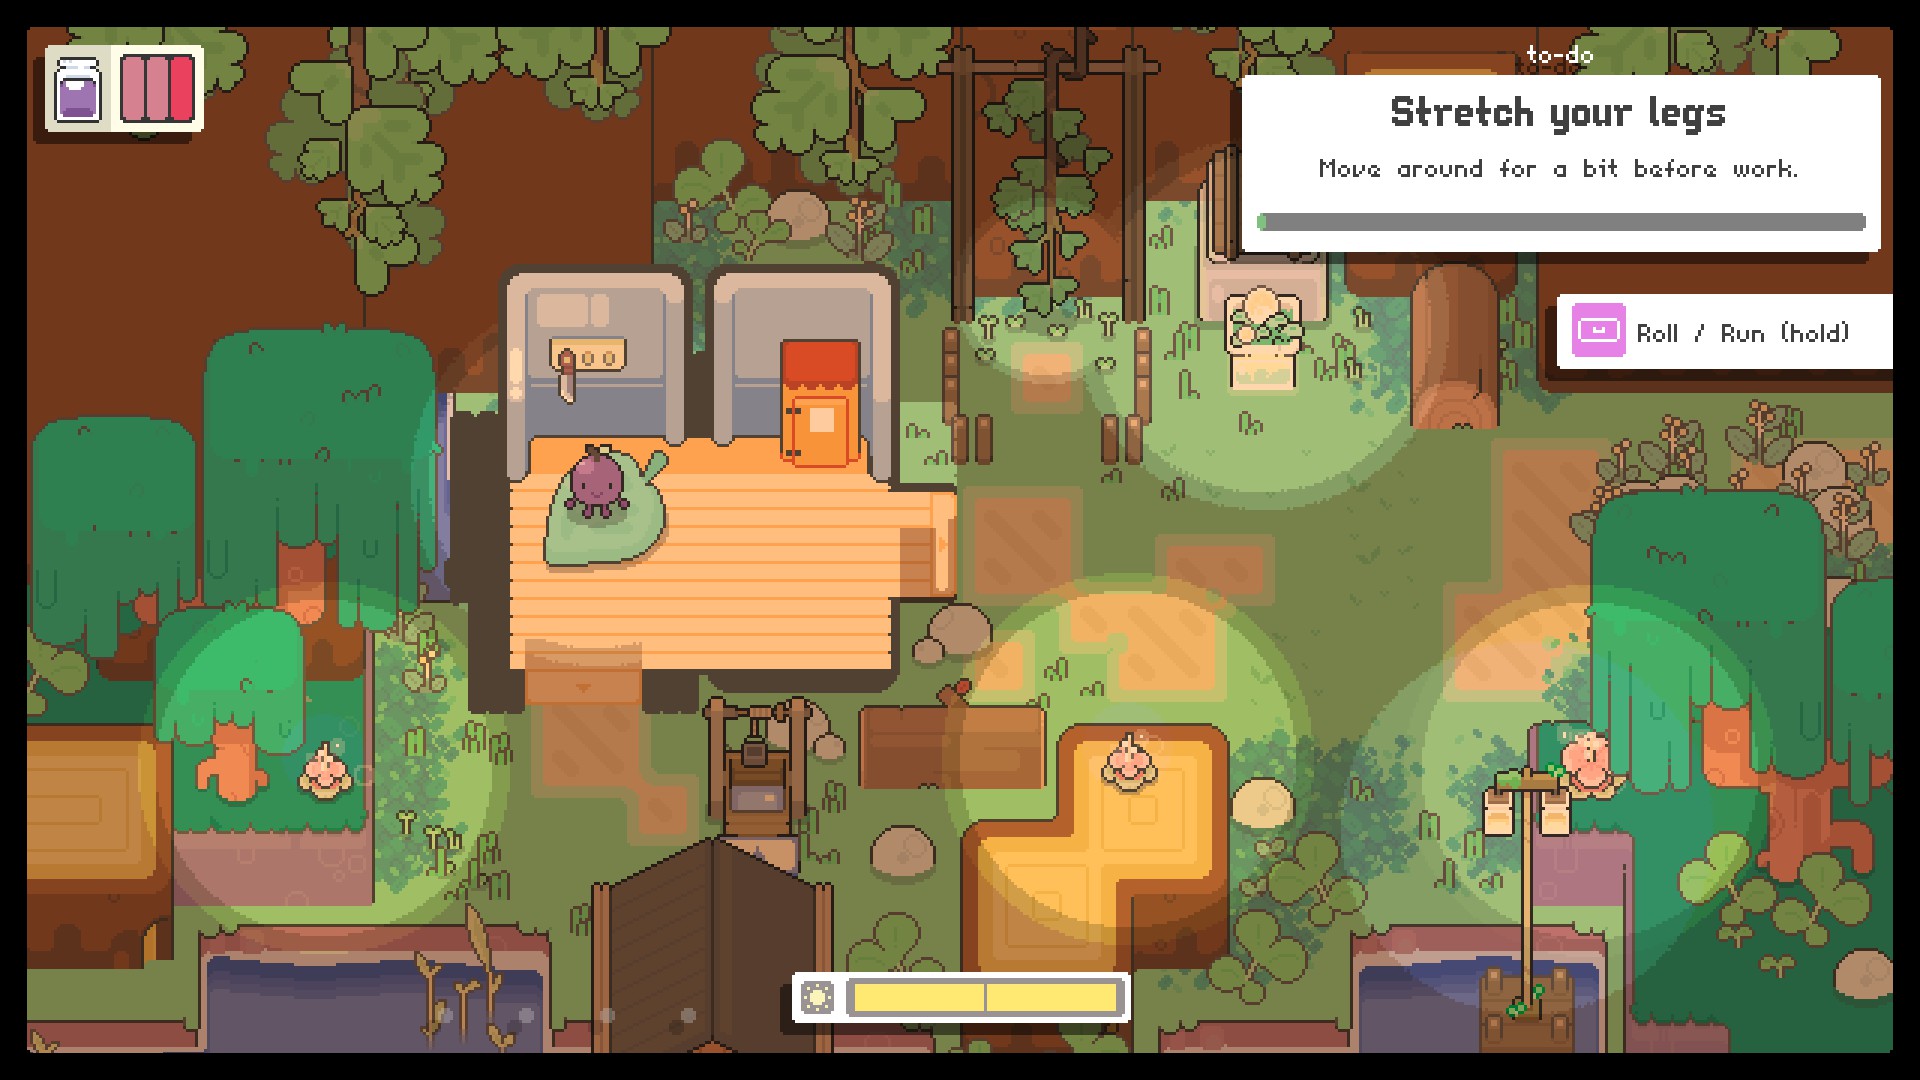
When it's finished, you'll transition into a tutorial in your home, Kindergarden. Very simple stuff, just follow the onscreen instructions.
⠀
⠀
--------------------------------
This is also where you can mess with the options if you haven't already. Here's what I went for:
⠀
- Using ADWS for left/right/up/down is pretty standard, and most people are used to playing that way already. The game is automatically set to the arrow keys for movement, but if you'd prefer left-handed movement, then just switch the keys around to fit. Some of the left-side movement keys are already set to other things, so you'll have to change them to something else temporarily in order to set them to directionals.
⠀
- I for Inventory and M for Map are already set up that way, and I found those worked fine for me.
⠀
- F and G for Page Left/Page Right works; this controls flipping the pages of your inventory (Tools, Dew Jars, Resources, Favors & Building, Key).
⠀
- B, C, and V for Use Jar, Main Tool, and Sub Tool are the ones I'm not too sure others will find as effective as me. Use Jar is your heal ability - you basically gather dew in a jar and then use it to heal yourself when you run low on HP. Main Tool is your weapon attack and Sub Tool is either your shield or your toolkit (once you get the toolkit later on).
Note: The key set for your Sub Tool will also be your exit/close key.
⠀
- Space bar to roll (tap) and run (hold) is self-explanatory.
⠀
- E and R for Interact and Pick Up work well; I've used these keys for the same function in other games before. Unsure why Interact and Pick Up aren't just the same, but in this game, the difference is Interact works with NPCs and objects you don't pick up, whereas Pick Up is used to collect resources dropped from nodes and enemies.
⠀
- Numericals are also assigned for hotbar usage (1, 2, 3, 4). I never used those, but you're free to do what you will with those.
--------------------------------
⠀
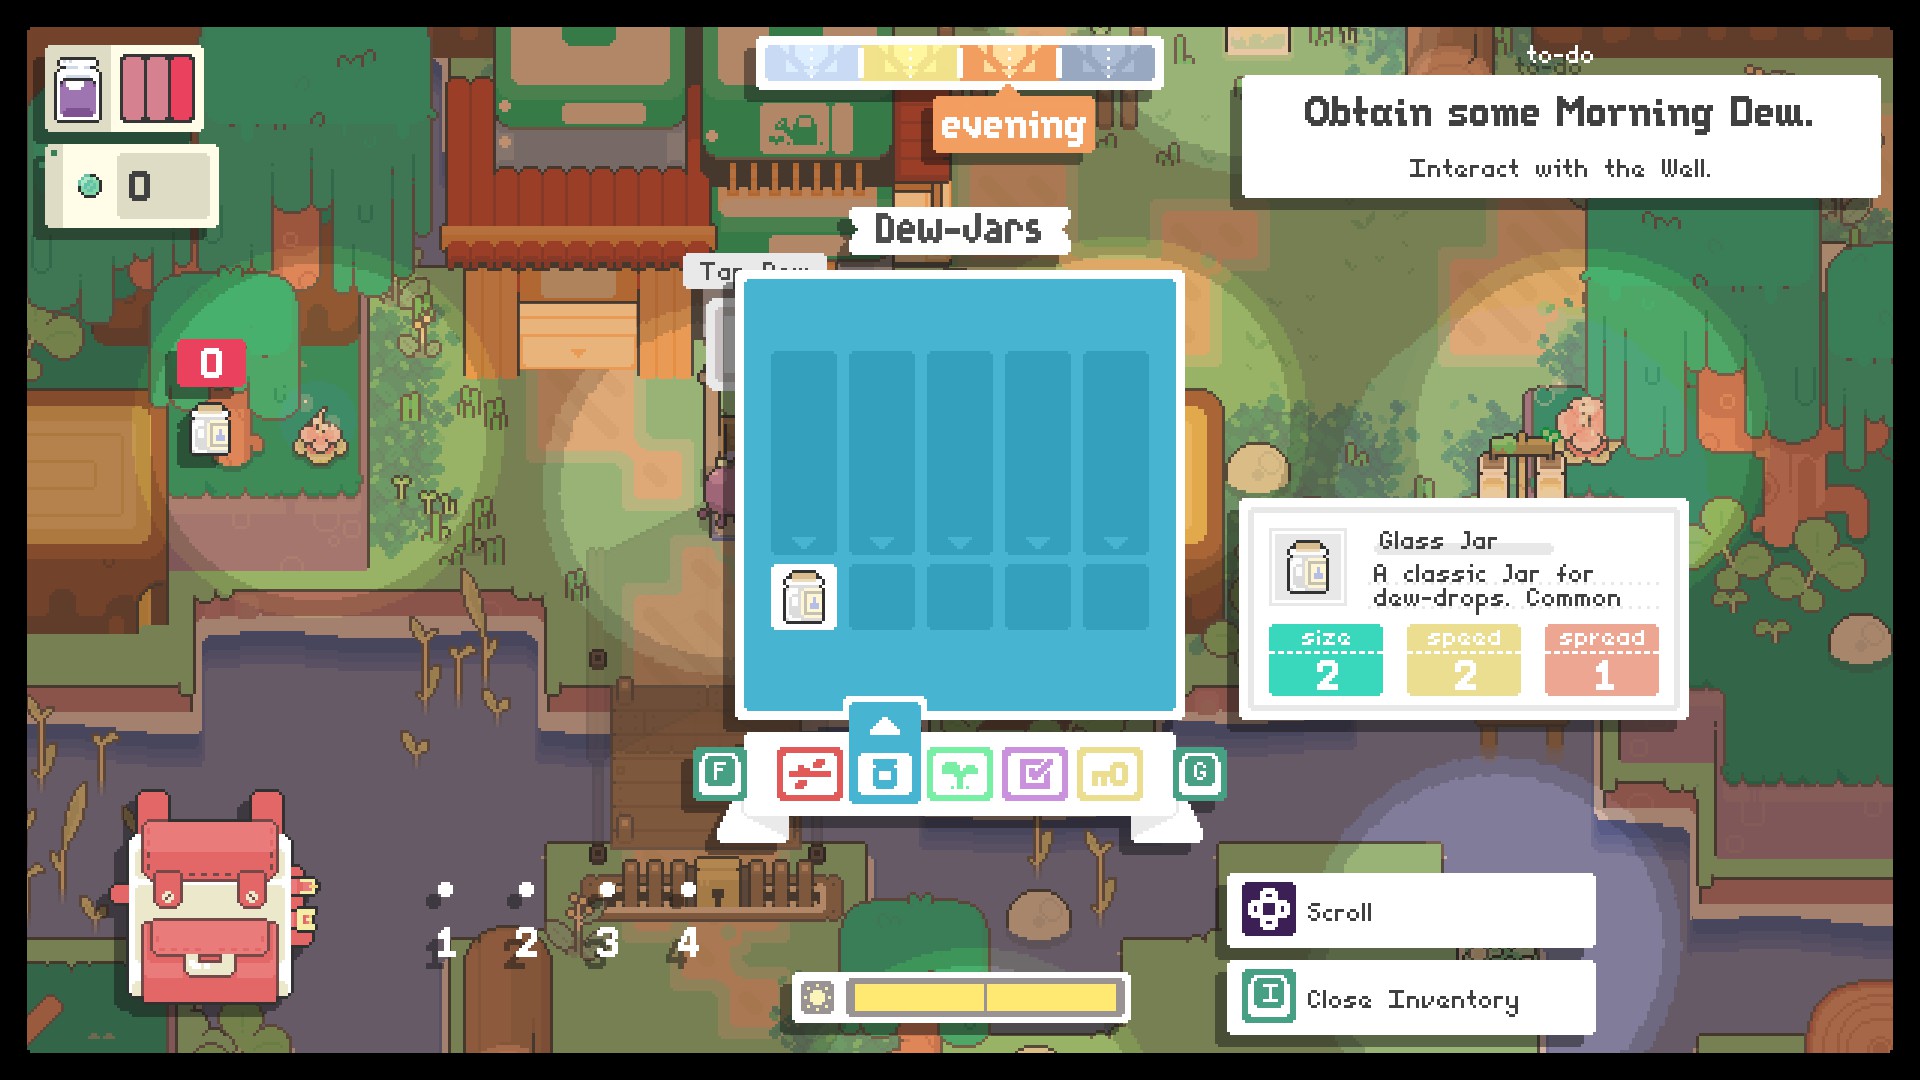
After interacting with the vine, you'll grab your jar from the cabinet in your house, then open your inventory and equip it using interact. You'll notice that the jar has some numbers assigned to it: Size 2, Speed 2, Spread 1.
⠀
⠀
⠀
- Size is how many charges/uses it can hold.
- Speed is how long it takes for the ticks to run out while using it.
- Spread is how far it'll spread out from you upon use.
⠀
⠀
⠀
Different dews will have different additional properties later on. For now, you'll be using tap dew, which only heals you. But later, there will be other kinds you can buy from dew sellers, which grant you temporary buffs or affect enemies around you like knock-back.
⠀
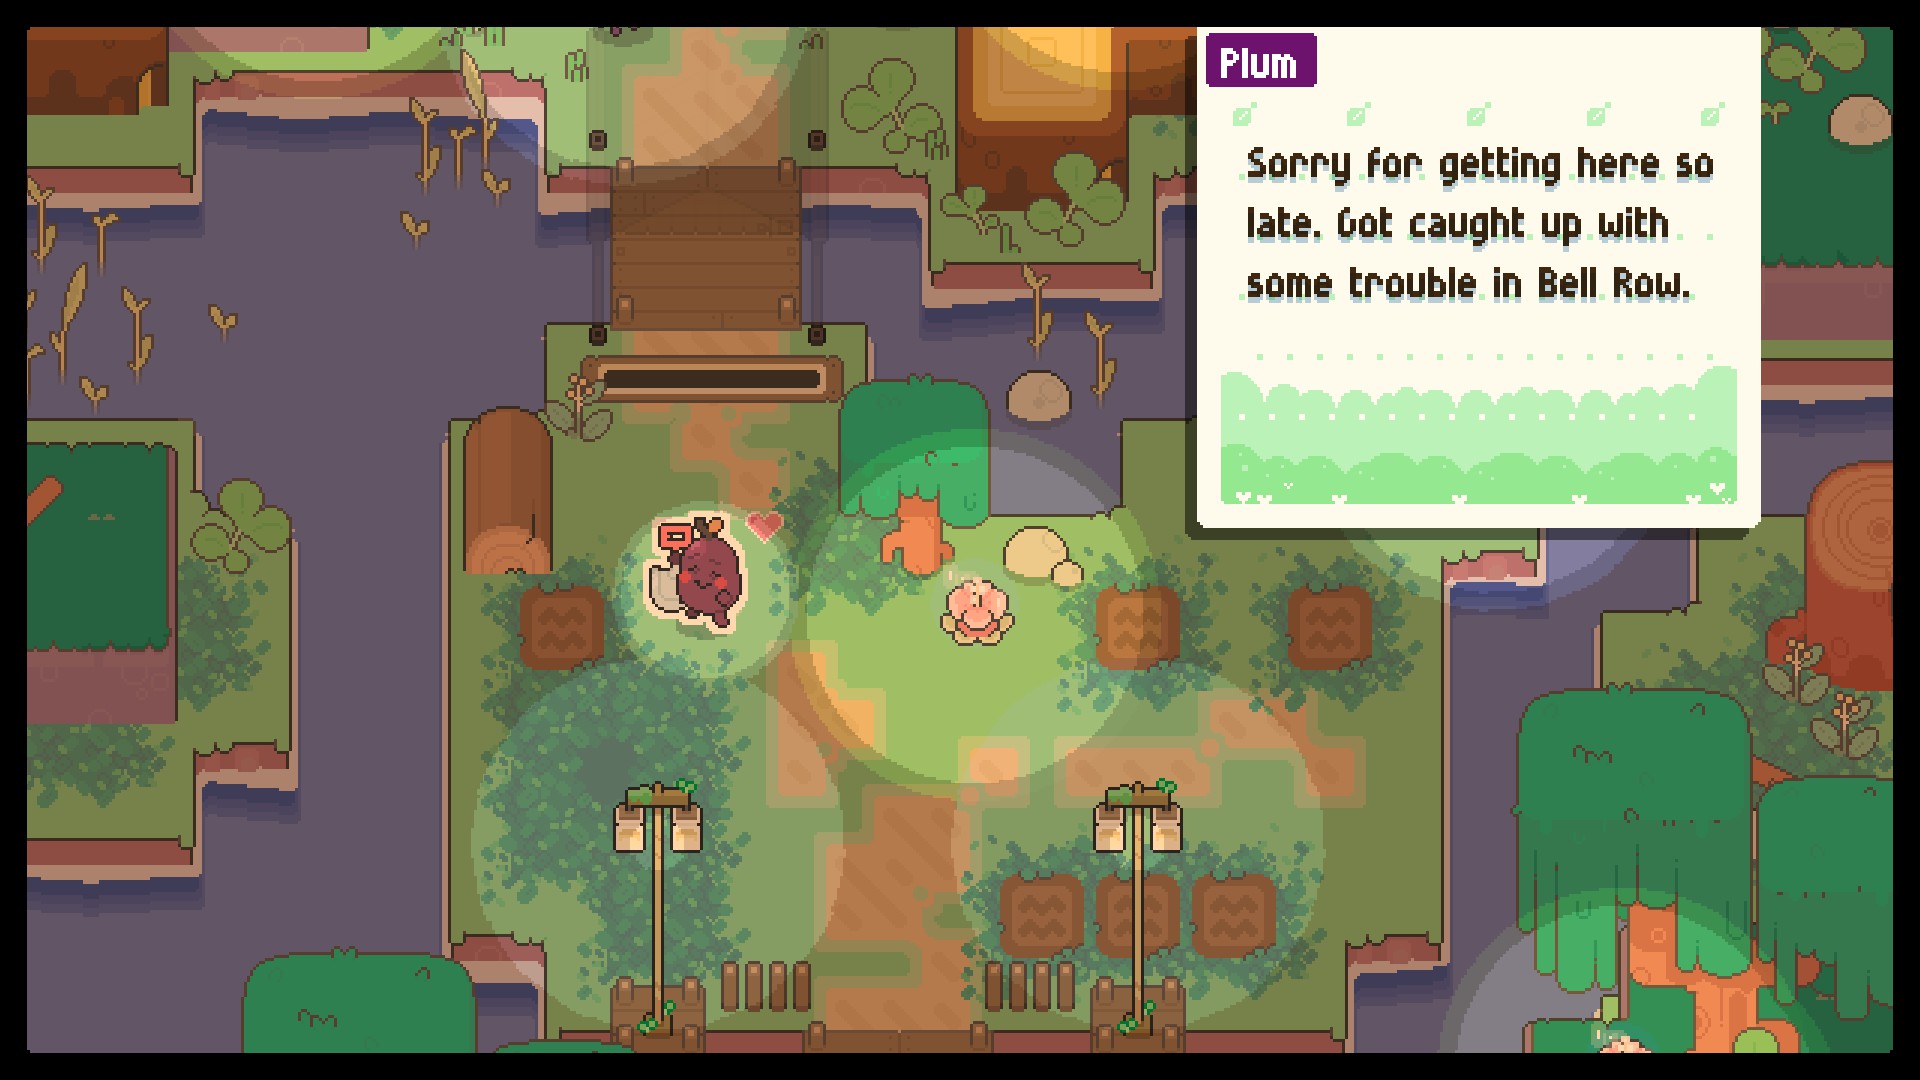
Use interact at the well to fill your jar, then go back to the vine and Use Jar to water it. From here, it's easy enough to continue. Soon enough, you'll meet Plum at the closed gate, where they'll open it up for you and give you the map, which is now accessible.
⠀
⠀
Open the map, then head south, east, south. You might notice a strange ball plant thing a little further east in the next area. This is a Bubble Globe. You can break them with various upgraded weapons later for level-ups (see Bubble Globes Guide chapter for details). For now though, they're just pretty decorations.
⠀
⠀
To the south, you'll run into Rana.
⠀
⠀
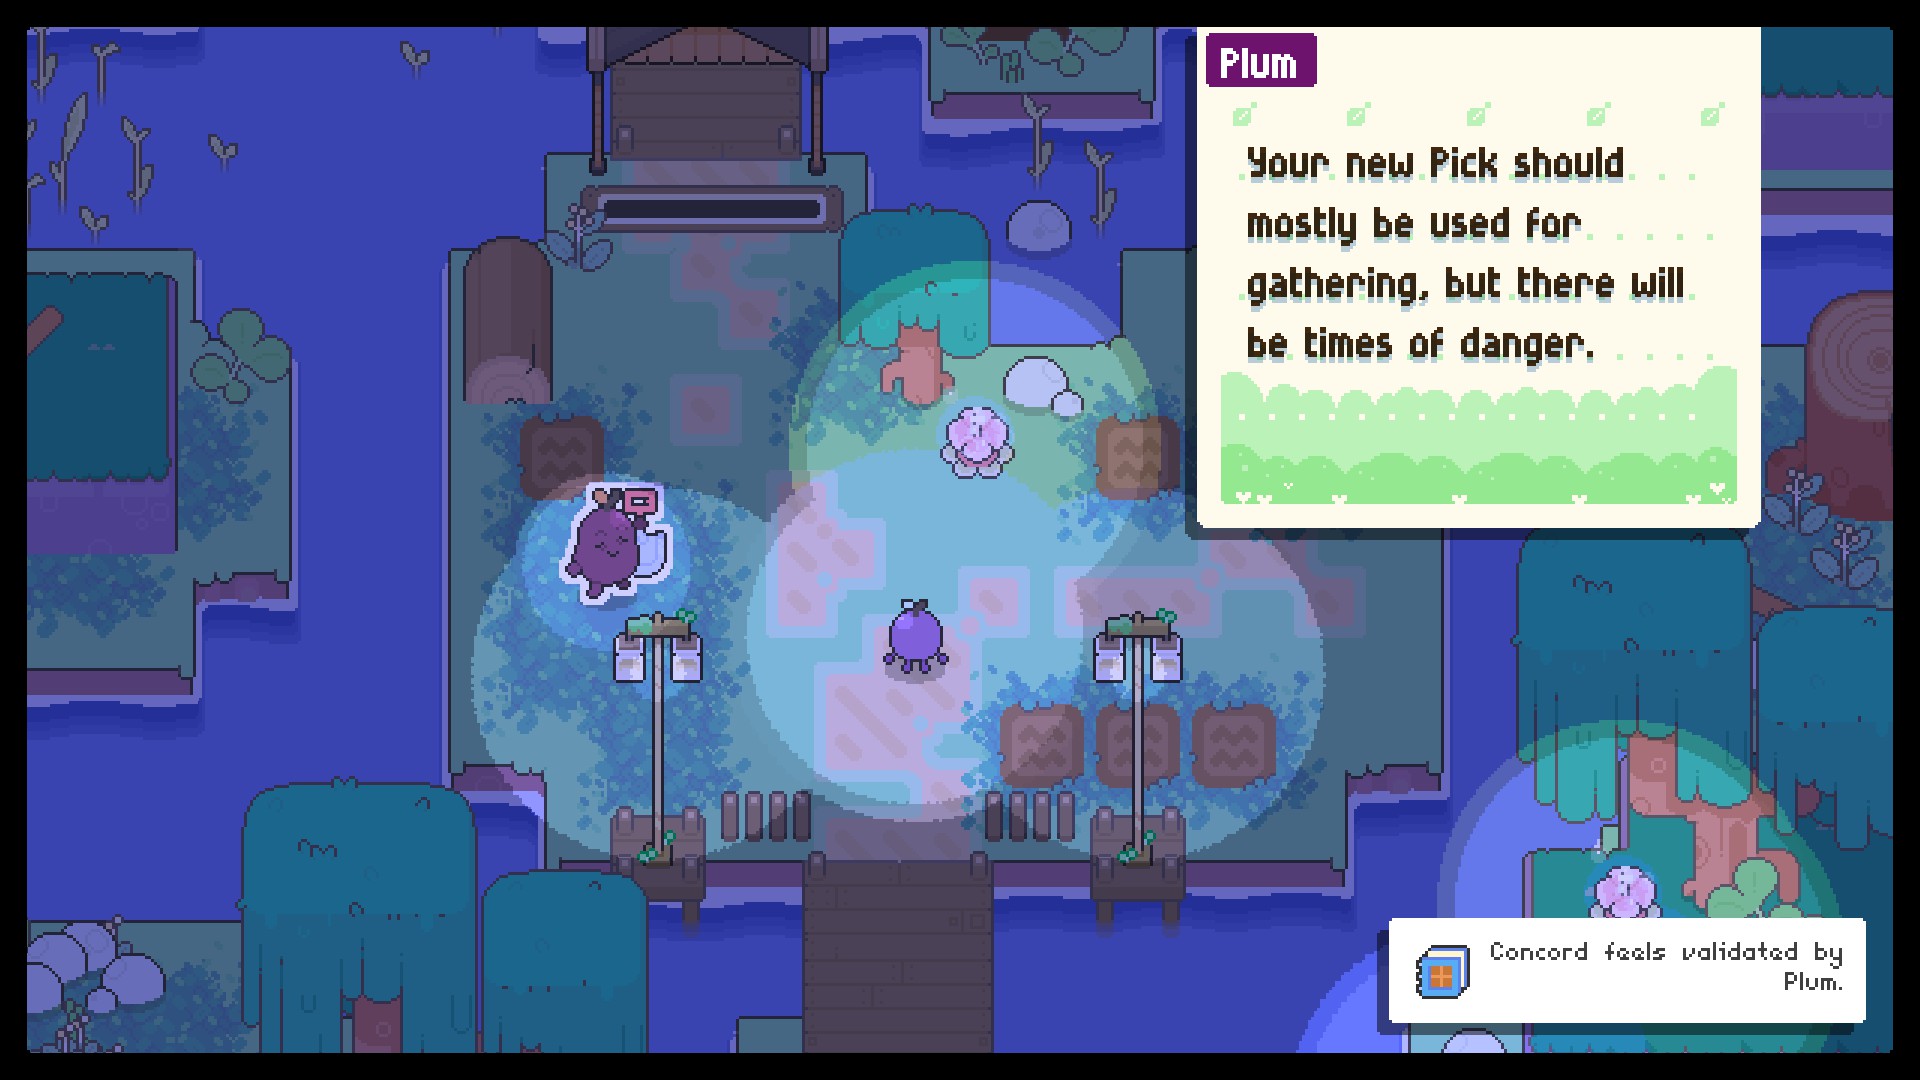
After they give you a hard time, proceed south. You'll enter Spring Hamlet. Feel free to look around, but your goal is the Spring Wood Forge to talk to Granny Smith, where you'll be given your very first tool: a pick. This will be your weapon for the time being, and Main Tool is how you use it.
⠀
⠀
Tools also have a grading system, like Dew Jars.
⠀
⠀
- DMG stands for damage, and represents how much damage it deals to nodes and enemies.
- SPD stands for speed, and represents how fast the swings are.
- RNG stands for range, and represents how far the attack carries.
⠀
⠀
⠀
You'll be able to purchase tool upgrades from tool shops as you progress through the game, and each upgrade costs leaflets (currency) as well as a certain number of one resource; for example: Pick +1 will cost 30 leaflets and 3 sap. All upgrades can be found in the Upgrades Guide chapter.
⠀
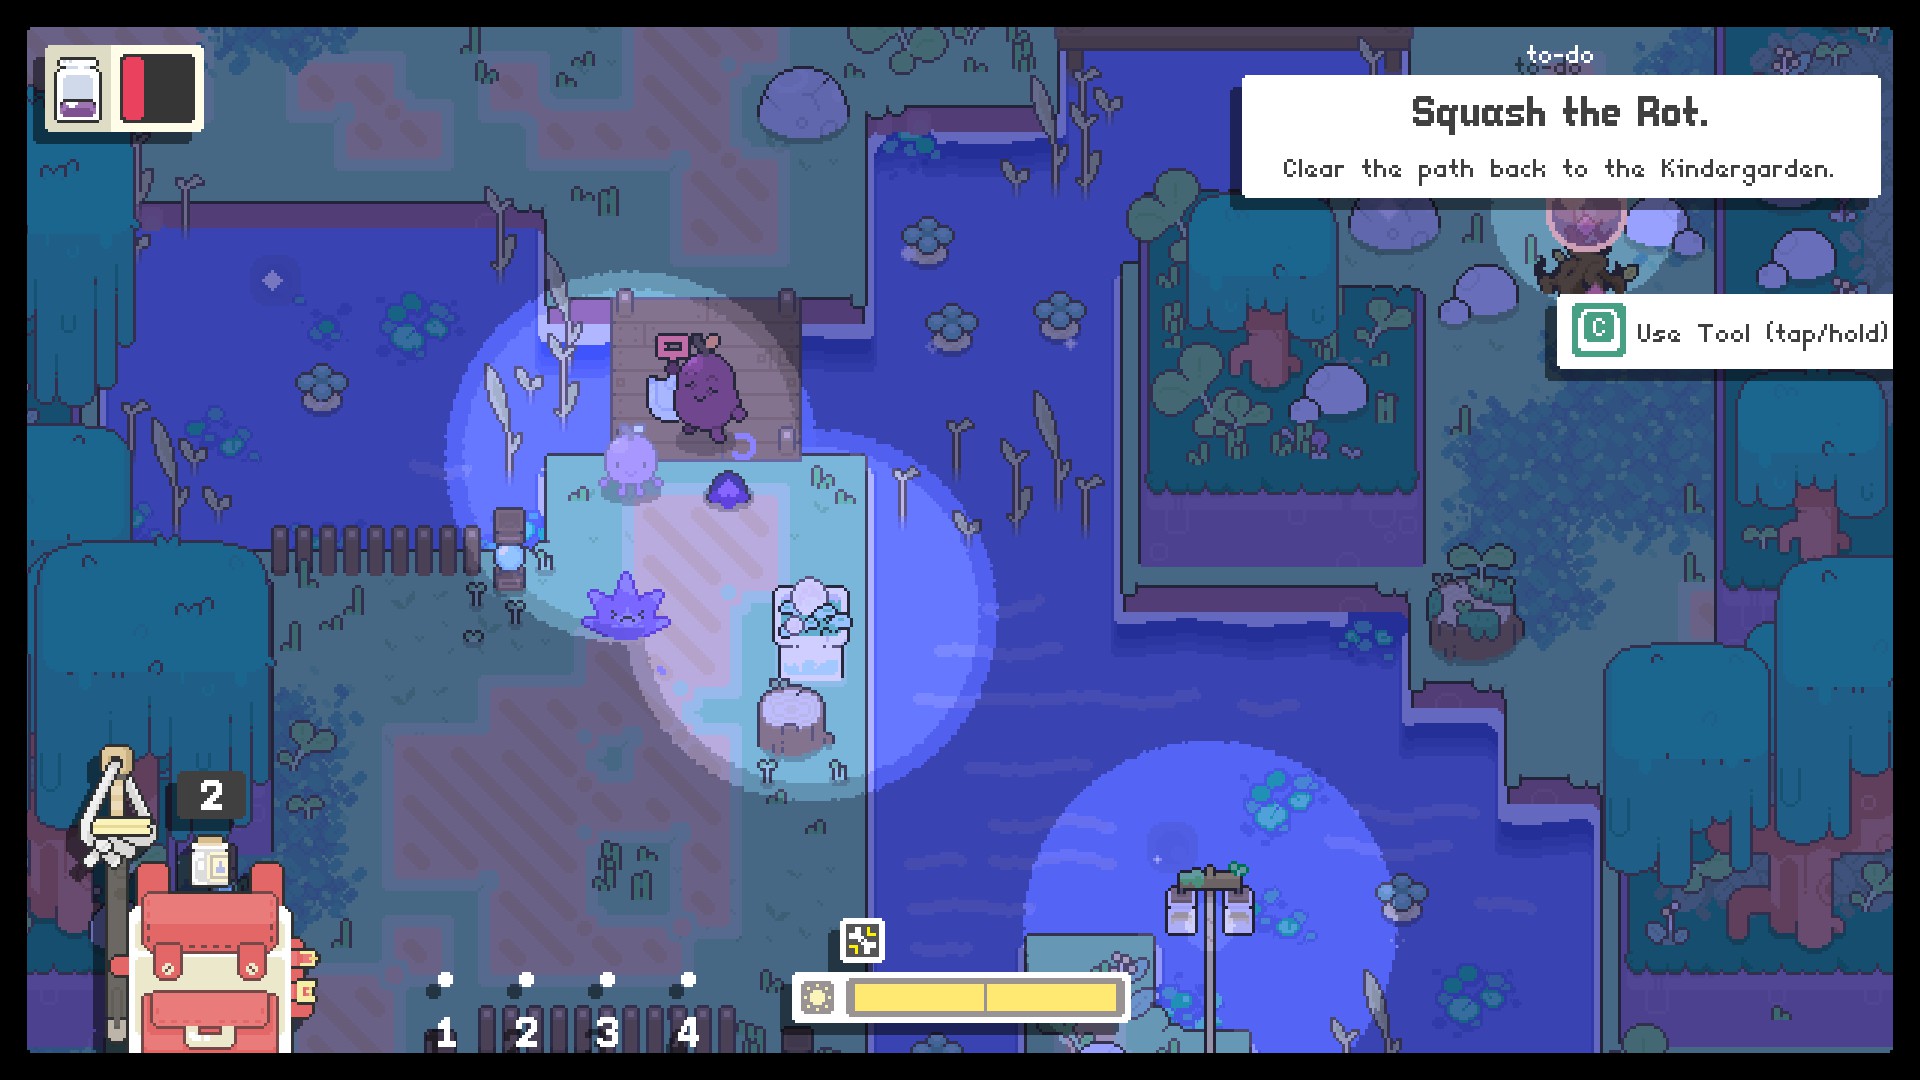
Head back west, where Plum will chat you up briefly before taking you back to Kindergarden. On the way there, you'll run into some basic Rot. Plum will tell you to fight them, so just swing at them til they're dead. You can also hold down the Main Tool key/button to perform a charged attack, which is stronger than a normal attack. Rots are the easiest enemies in the game, and will be present for awhile still. Plum will stand on the sidelines of your battle and will heal you if you suffer any fatal blows. This will be your first experience working with the Garden Story combat system, dealing with Main Tool, stamina, movement, and Use Jar. Go crazy.
⠀
The Rots are basically just little slimes that wander around in random directions unless the AI targets you, in which case they'll head toward you and try to stab you by poking little spikes out of their bodies. When they're hit, they'll be automatically stunned for a few seconds, making it easier to hit them more. It takes 2-3 hits with the basic pick to break them, and then they'll revert to a smaller slime. The smaller slimes are more of a pain, as they hop around much more energetically and will try to bounce against you to deal damage and give you a slowed debuff. Also, if there's two near each other, they'll merge together to form a basic slime. They only take 1 hit to kill.
⠀
⠀
Once both Rots are dead, there will be some dialogue from Plum and Rana, and then you can head back to Kindergarden the way you came. When you return, there will be more dialogue from Plum, and you'll get your first memory. You'll notice a white flash accompanied by a camera sound effect, and a message with a journal icon will pop up in the lower right of the screen. This will happen every time you gain a memory in your journal. Memories are basically power-ups you can assign to yourself when you go to sleep for the night. Unfortunately, you won't be able to assign one this first night, but more will be explained after you receive your journal.
⠀
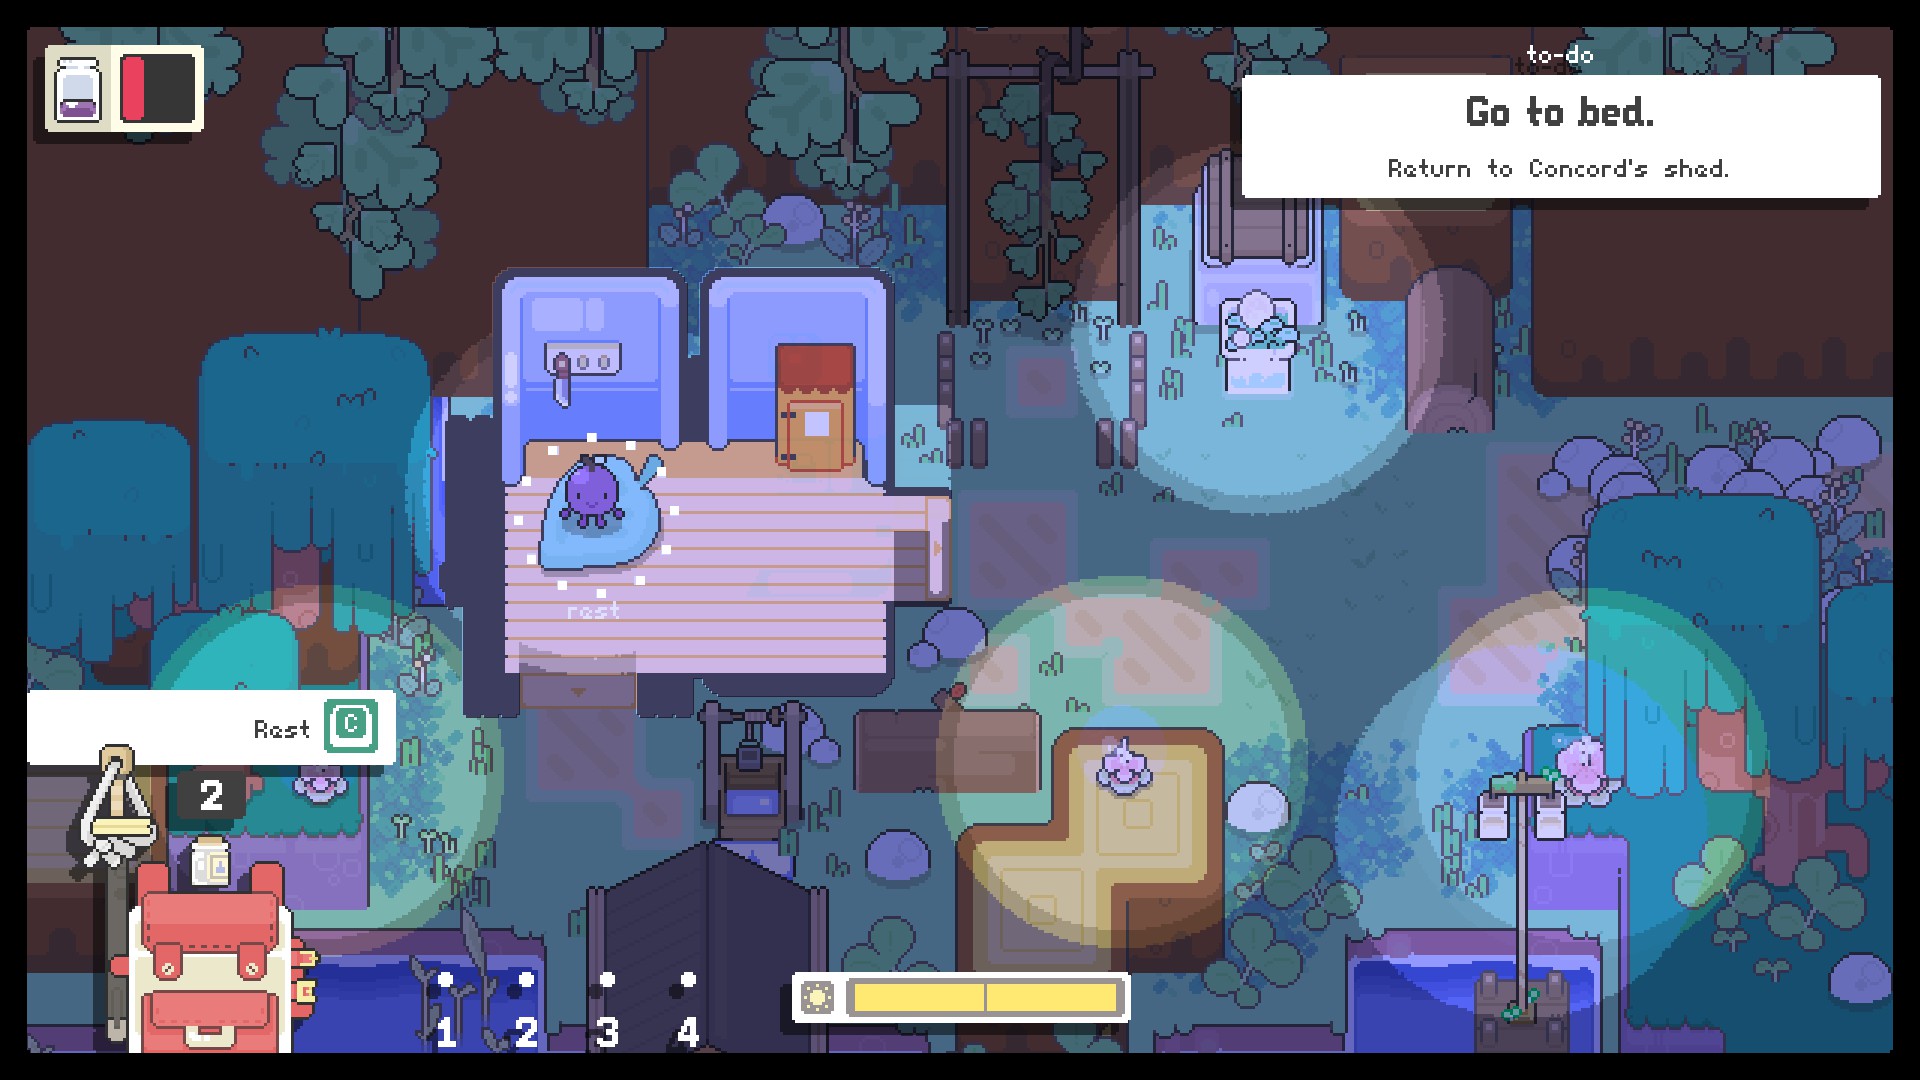
When Plum finishes talking, just head up into your house and use the pillow leaf to sleep. You'll wake up the next morning, and this marks the end of the Day 1 Tutorial.
⠀
Spring Hamlet Pt 1 (Intro)


You'll wake up the next morning in your Kindergarden home. Please bear in mind that the game only saves when you sleep, but the first night is an exception; your game is NOT saved currently. You can tell this from the warning the game gives you when you try to exit- it'll tell you how many minutes you've played since your last save. You'll have to sleep one more night to save. Luckily, the next day is very short with just some dialogue, so blast through it if you don't have time to read it all. You can always experience the scene a different way later on when you do have time, via playthrough video or just replaying it.
⠀
⠀
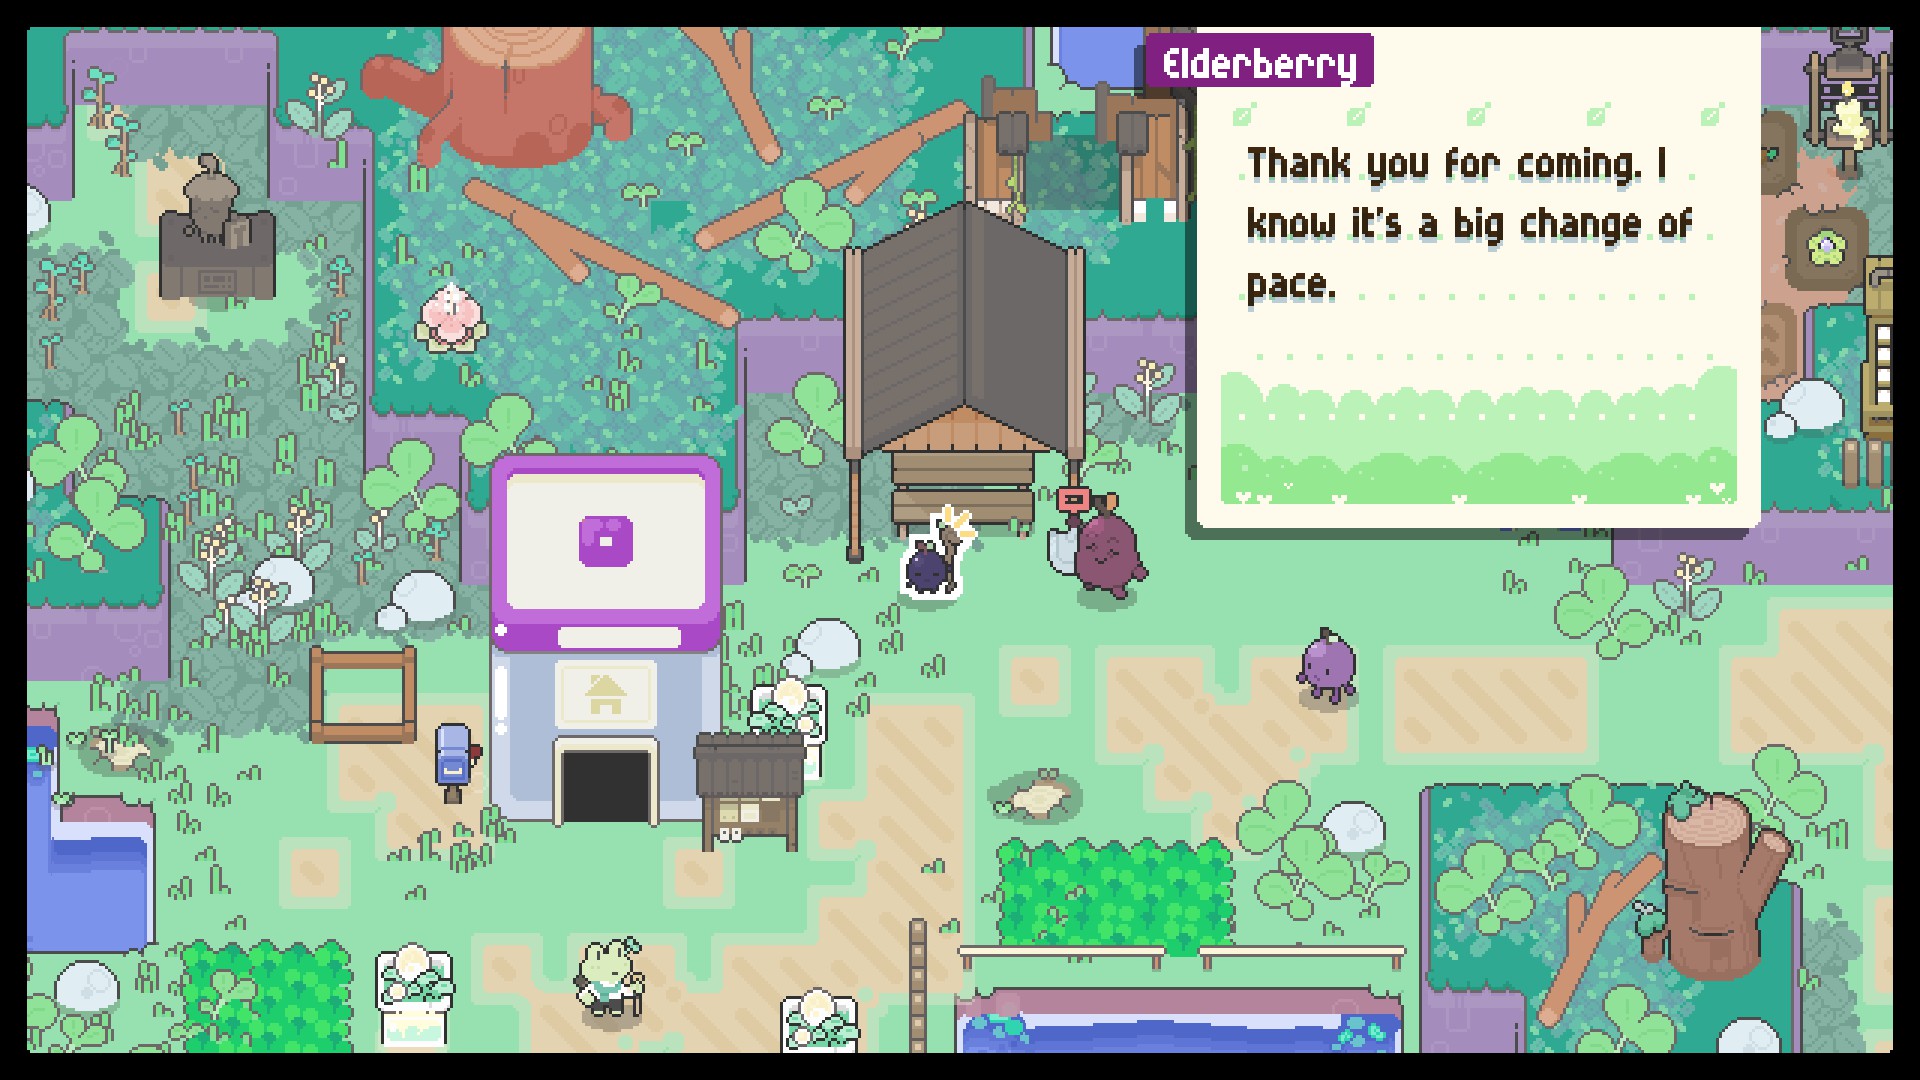
Head the same way as you would to go to Spring Hamlet, but instead of continuing south in the Riverway, go west. This will take you to the Bend where you'll meet Elderberry. Go through all the dialogue with Elderberry and Plum, then Rana's tour of your new home, then conclusion dialogue with Elderberry. From there, you can sleep and save. You won't be able to assign a memory power-up til the third night, after you get your journal.
⠀
⠀
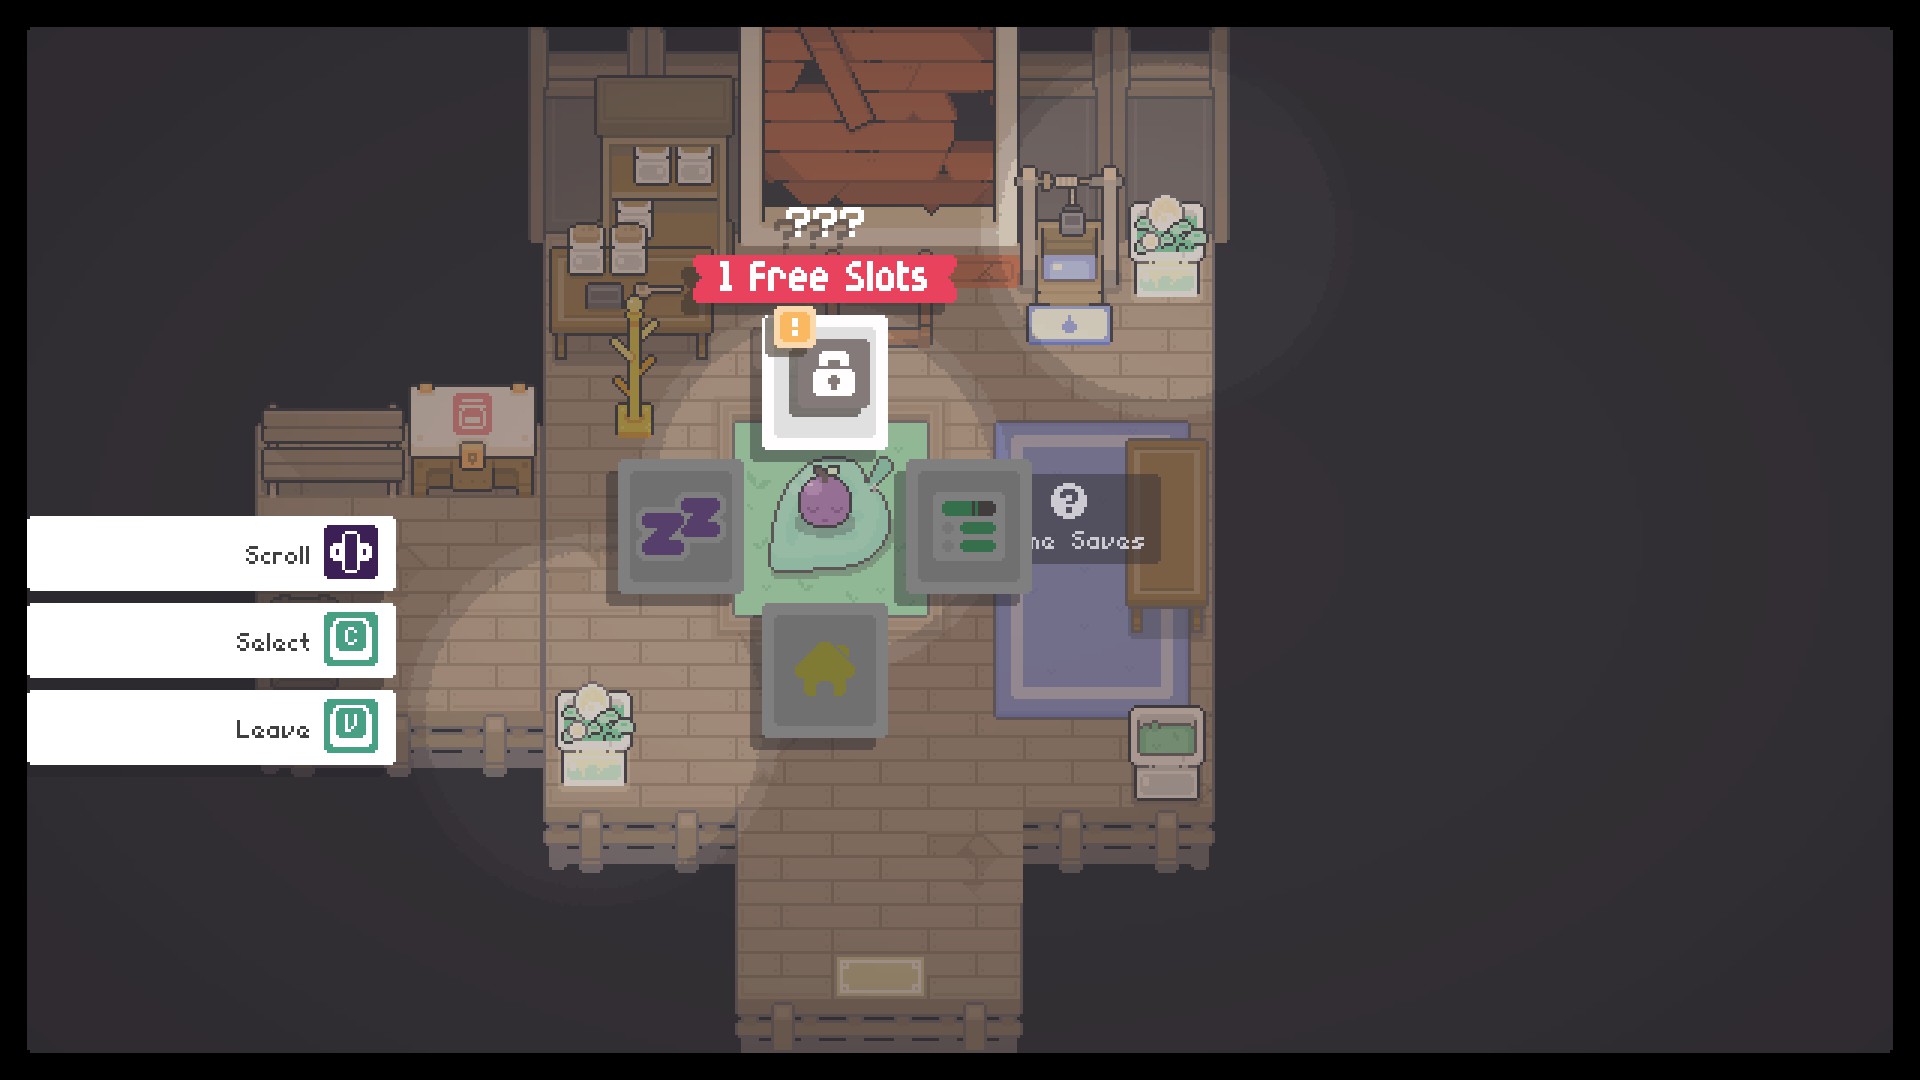
When you sleep, you'll notice some menu options. The gray lock with the exclamation point is your journal with your memories, but you can't use that yet, so just ignore it til the third night. You also have Personal Stats and Village Stats.
⠀
⠀
Personal Stats shows you your current stats, each explained as highlighted in the menu.
⠀
⠀
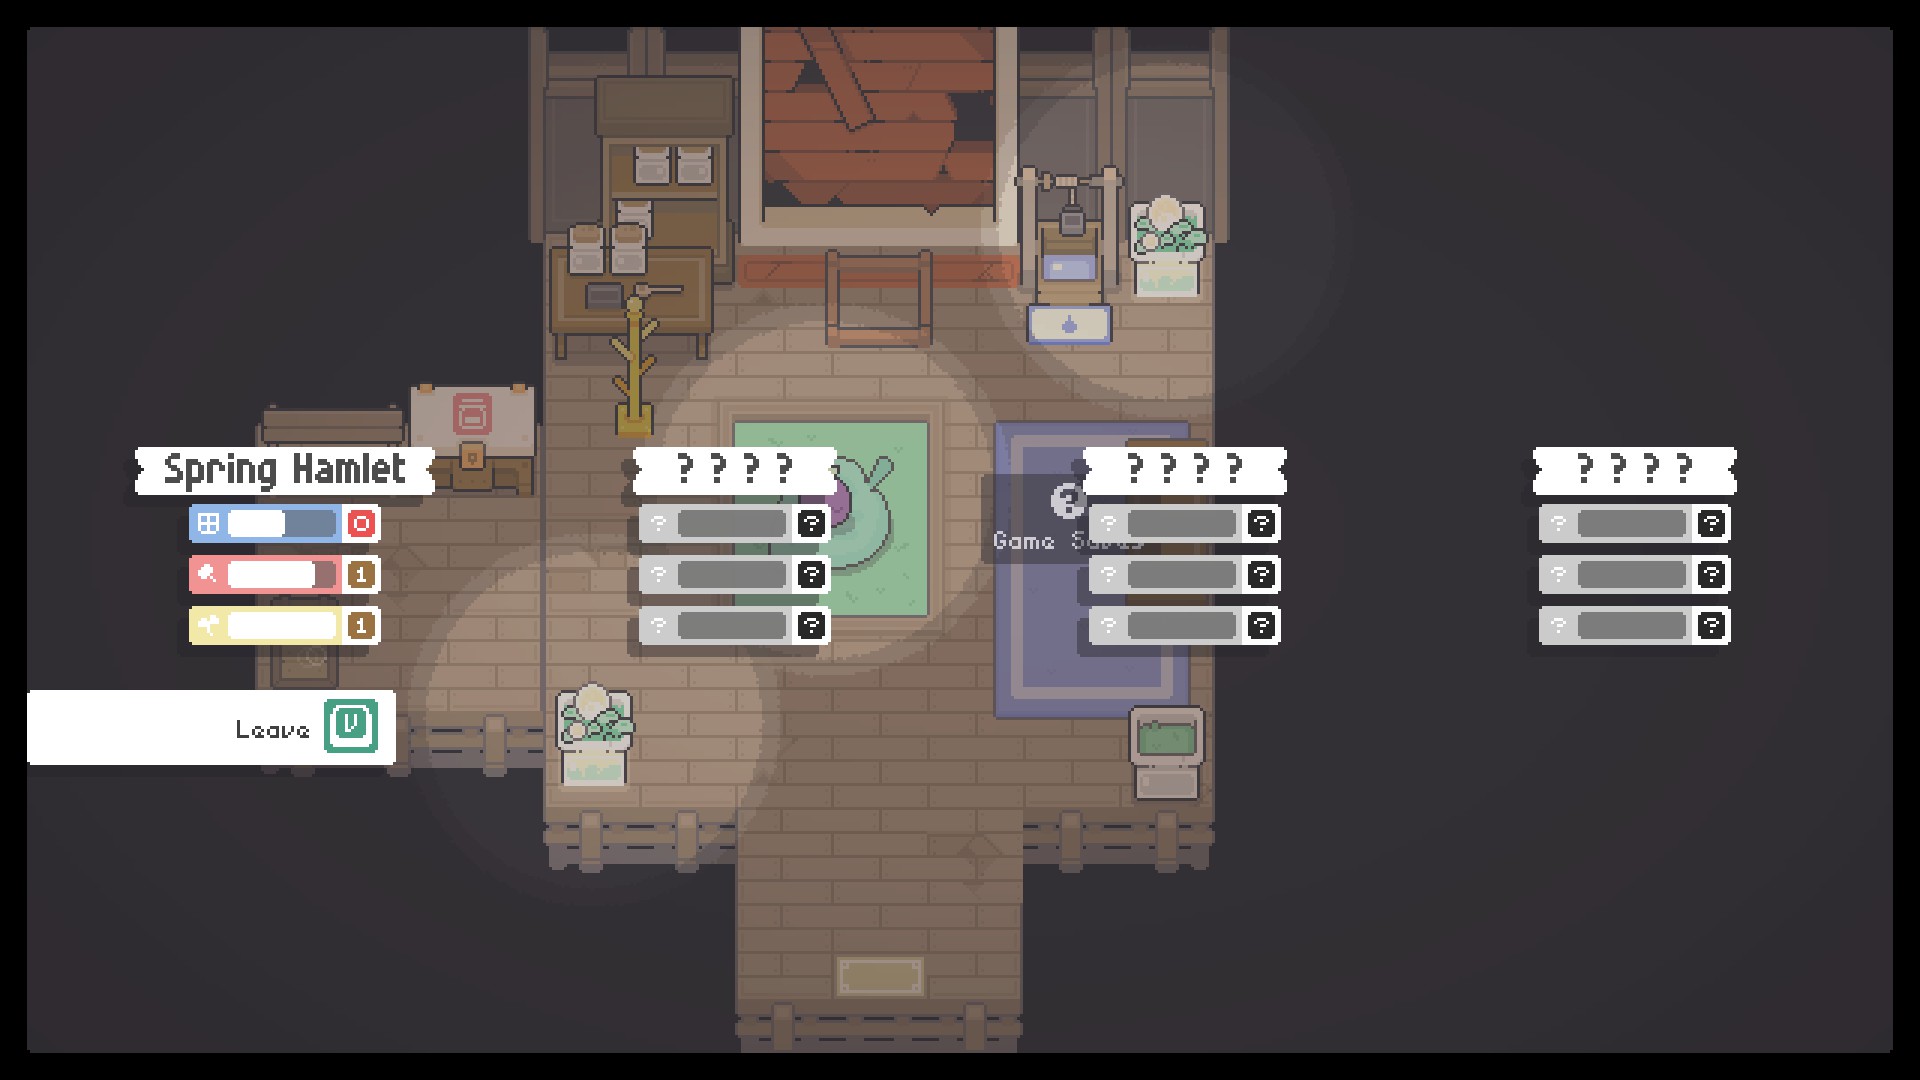
Village Stats shows the current upgrade status of each village that you can reside in throughout the game. The four villages are Spring Hamlet, Summer Bar, Autumn Town, and Winter Glade. The status bars act like experience bars for each job type, which are Conflict, Maintenance, and Forage. Each job type has its own random job which may be posted on a job board. There's always a job board right outside your house in any village, but you can also find others dotted around the village in case you need to refresh your memory.
⠀
Completing the jobs each day advances the status bars of each respective job type, and once the bar becomes full, it'll level up, allowing that village to upgrade certain features. The stars associated with each job represent difficulty, as well as the amount of experience you'll earn upon completion (the harder a job, the more experience you'll earn); 1 star is easy, 2 stars is moderate, 3 stars is hard. Conflict levels result in more nodes appearing in and around the village, Maintenance levels result in higher tool upgrades for sale, and Forage levels result in higher dew jar upgrades for sale as well more options at the general store. The maximum level each job type can reach is 5.
- Conflict jobs involve killing enemies in various areas around the village.
- Maintenance jobs involve fixing structures in and around the village, which may or may not require resources.
- Forage jobs involve putting a number of a certain resource into a forage box or transporting a box from one location to another location (kinda like Grubhub).
⠀
⠀
On selecting sleep, you'll notice a visual that says 'today,' shows four pictographs in a row, and 'X Requests!' The pictographs represent what the weather will be for the day through each time phase (morning, day, evening, night). The 'X Requests!' line tells you how many jobs have been posted on the job board for that day. You'll also see the 'Game Saved!' message in the lower right, confirming that your game has been freshly saved.
⠀
Spring Hamlet Pt 2 (Jobs & Memories)


When you come out of your house, you'll encounter Rana. She'll explain the job board to you, and encourage you to start completing jobs for Spring Hamlet. This is how you'll upgrade the village, and in turn upgrade yourself.
⠀
⠀
The story is still being extremely controlling, so you have no choice but to continue in the direction set for you. Your mission today is to help Rana complete every request on the job board.
⠀
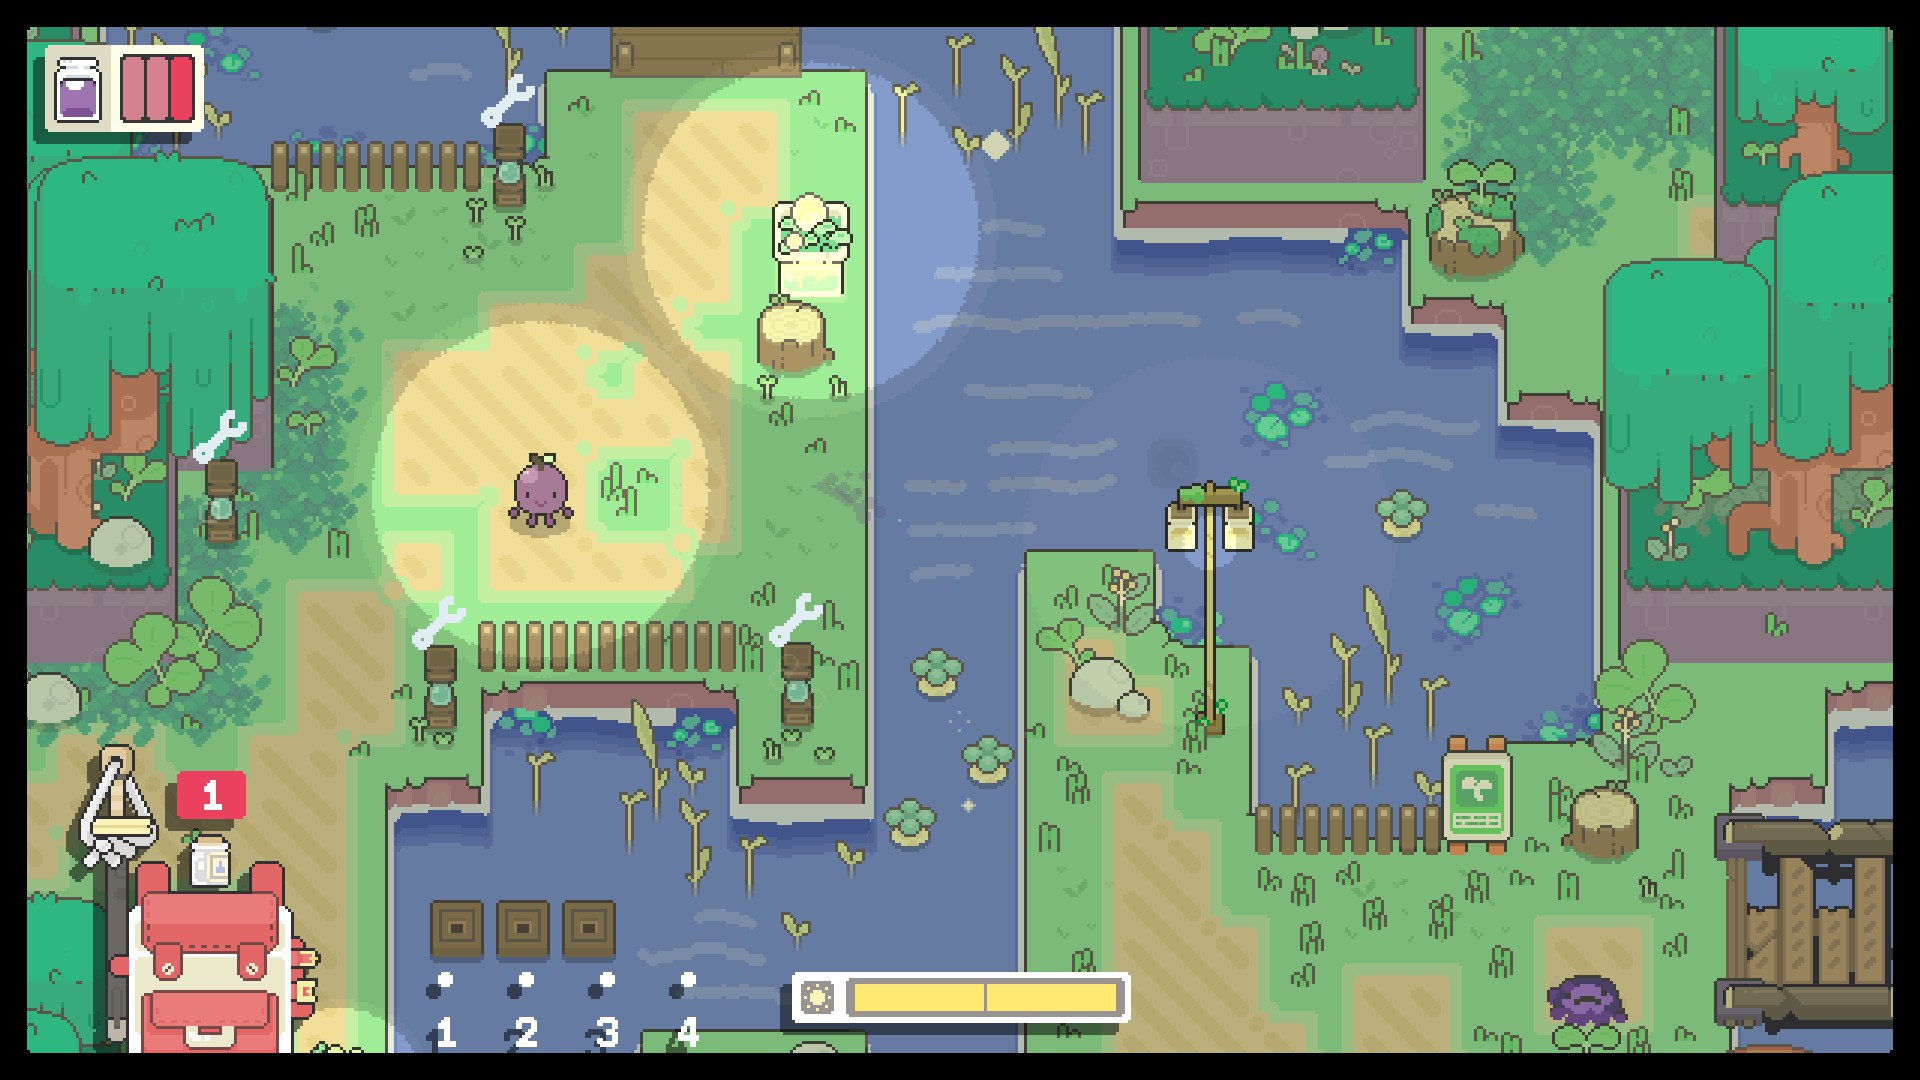
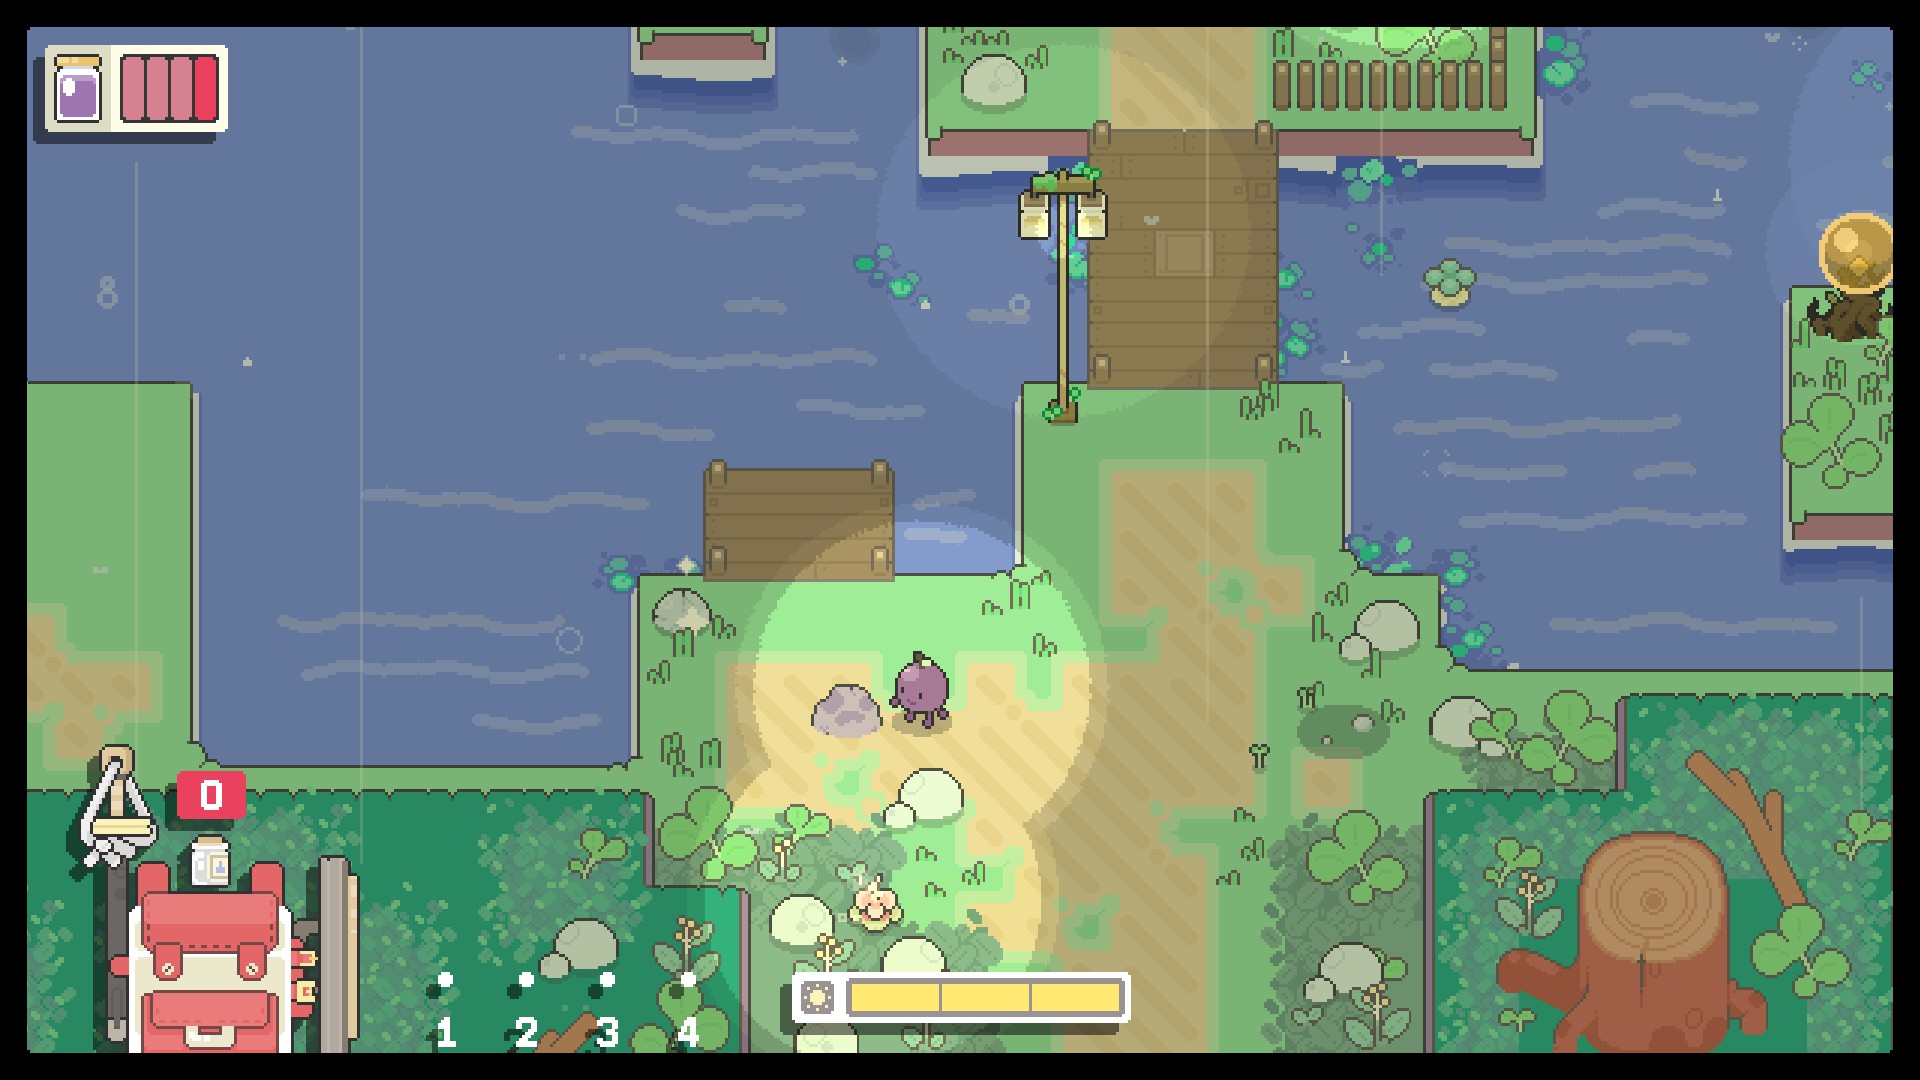
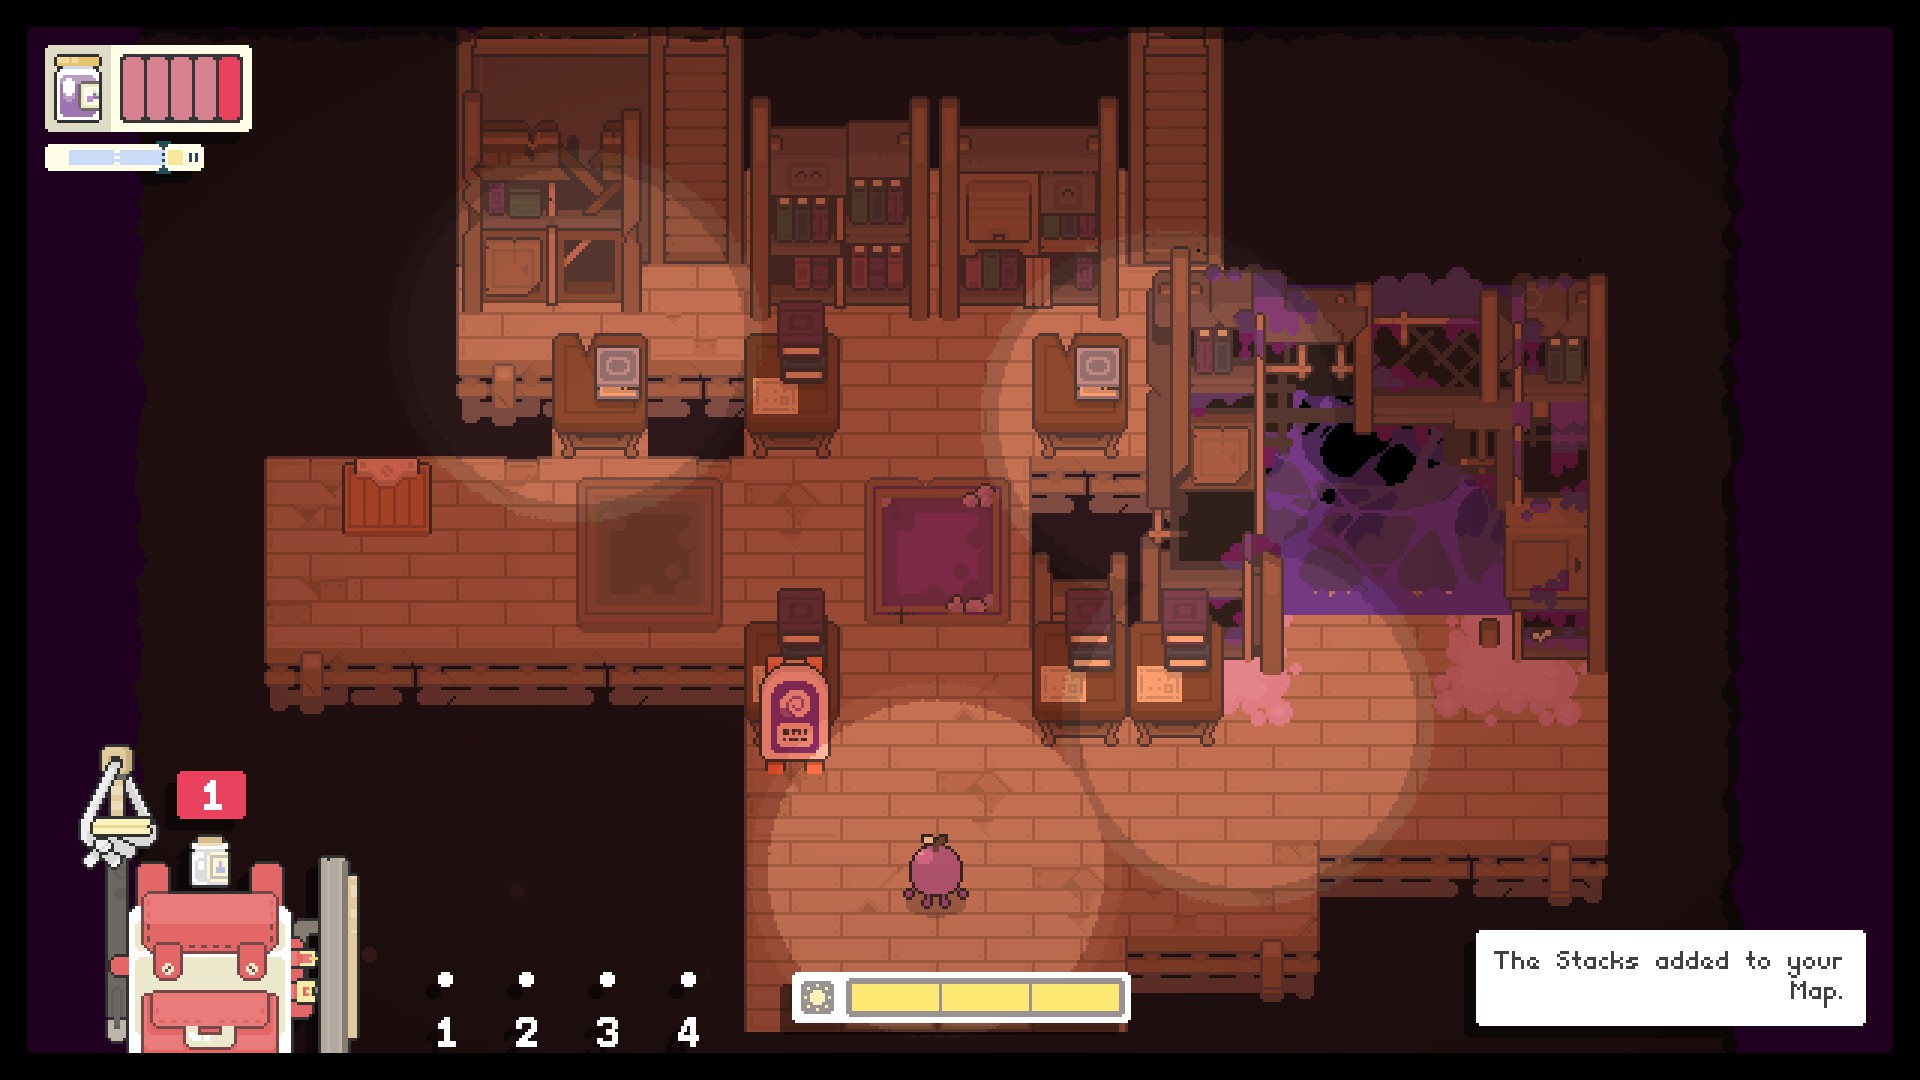
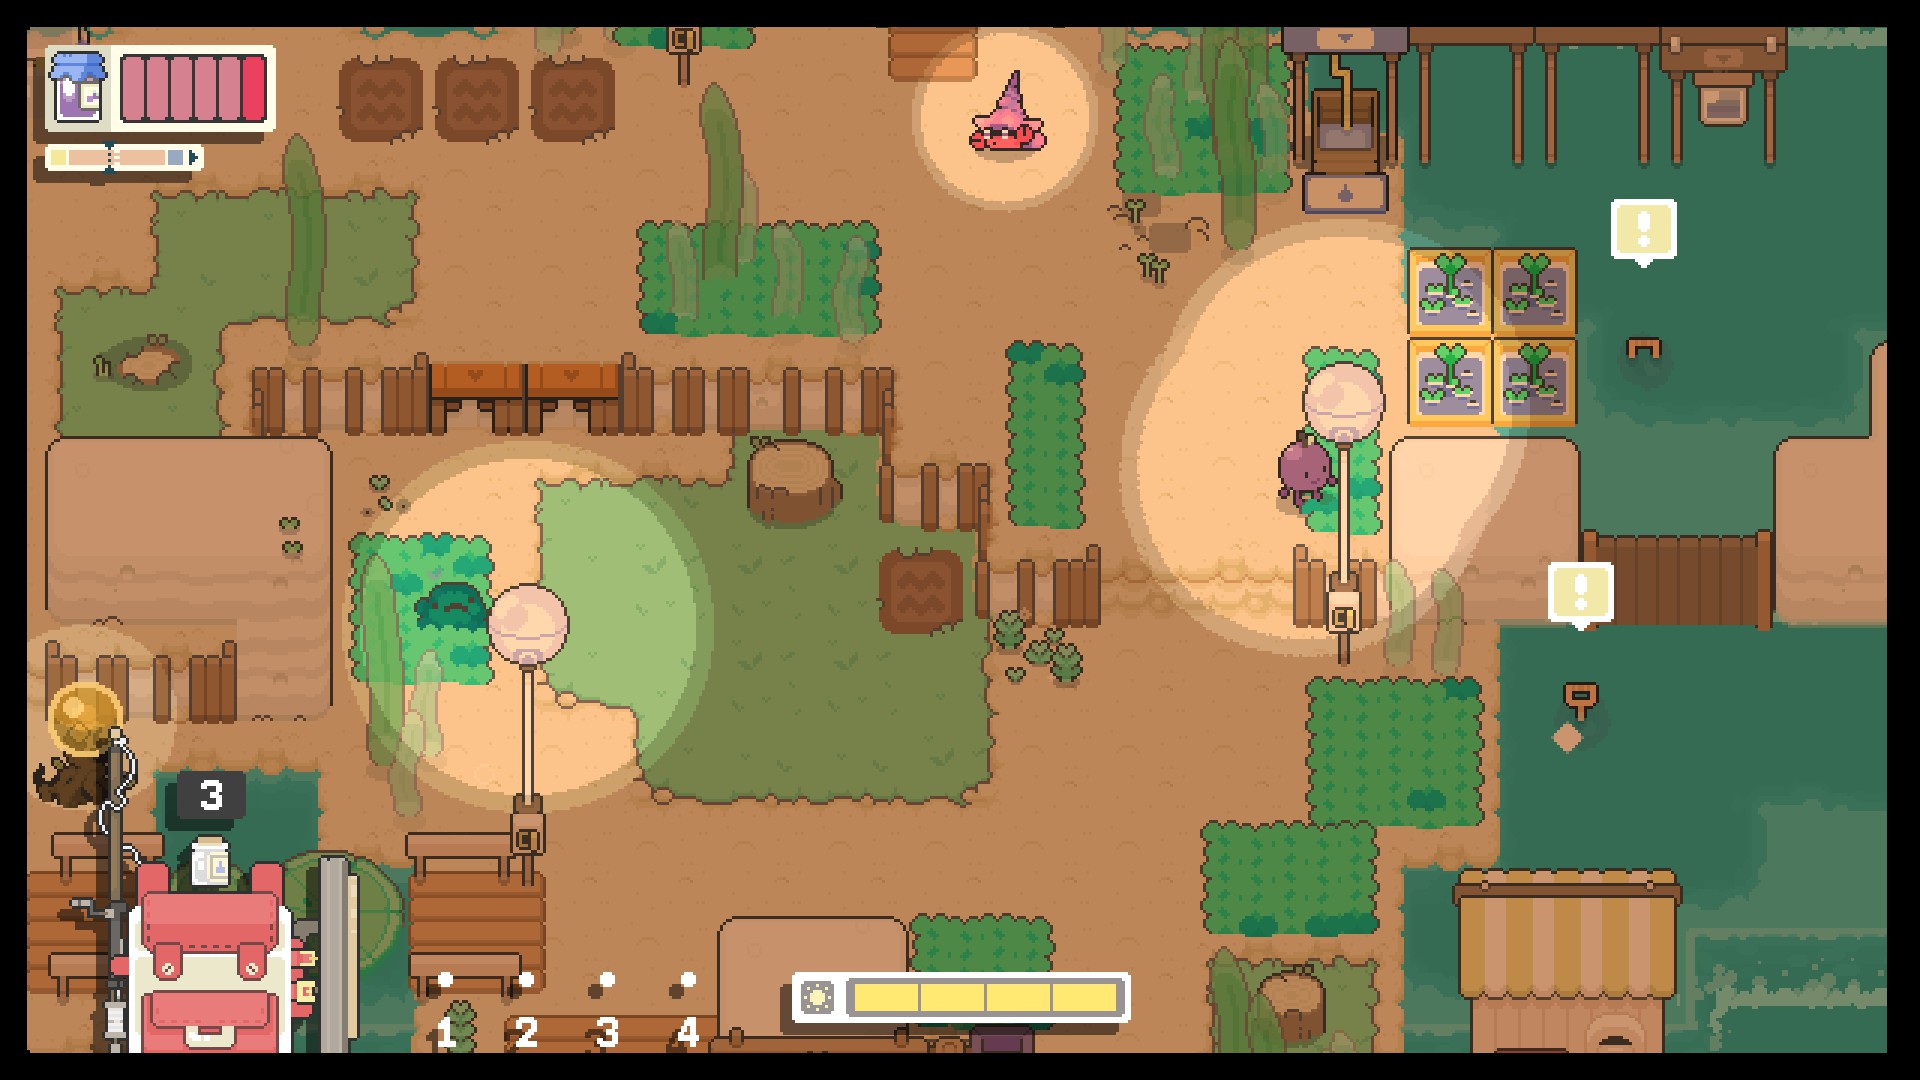
On your way to meet Rana, I highly recommend you start the process of gathering resources by destroying any nodes you find along the way. The more resources you have stockpiled, the less hassle it'll be to complete certain jobs straight away without having to go out of your way. A lot of nodes look identical to environmental decorations, but foragable nodes differ in that they have noticeable sparkles around them; if something sparkles, you can destroy it. However, certain nodes require power attacks, and others are too strong for you to destroy without an upgraded tool. You can tell by the numbers that pop up when you attack them. If you deal 0 damage and a shield with a number appears, it means you need an upgraded tool to break it, and the shield number corresponds with the upgrade; example, in below picture, the 1 inside the shield means the node requires a tool +1 attack to break it.
⠀
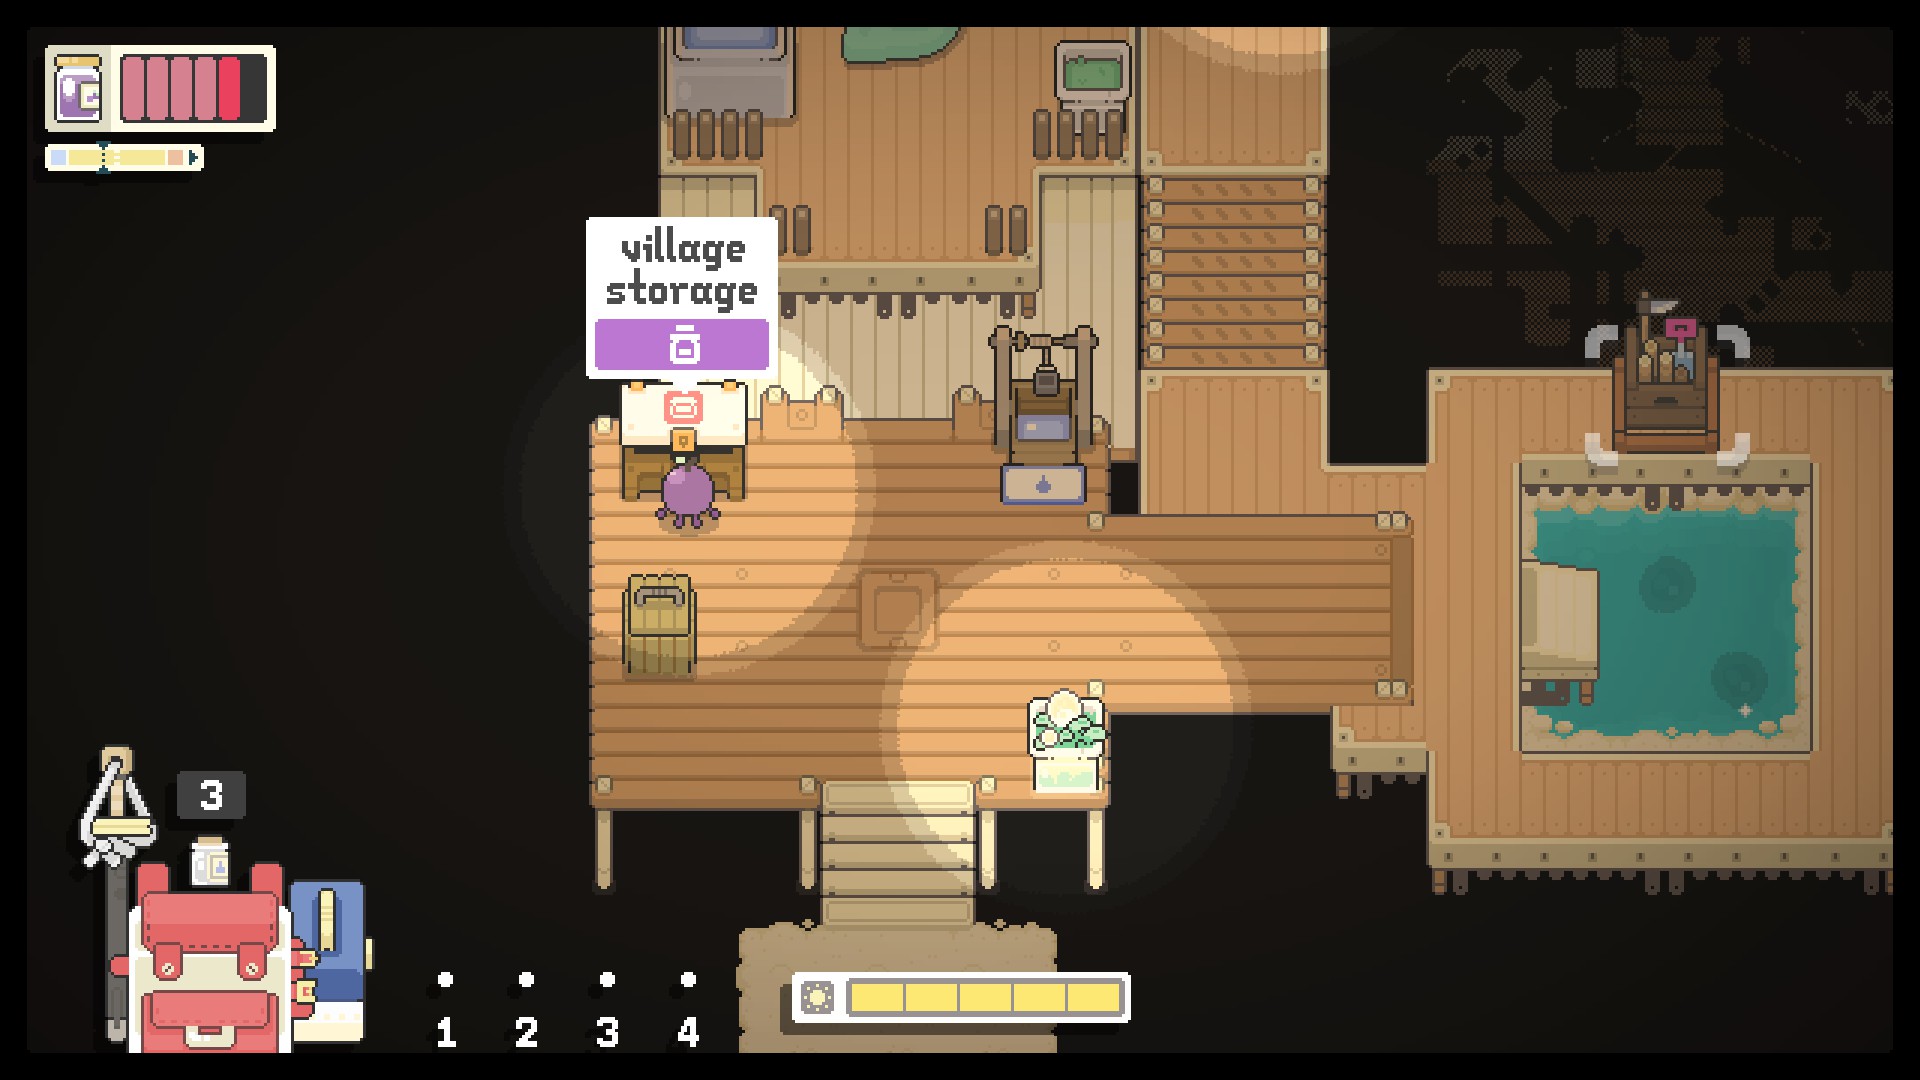
On the same topic, make sure you stop by storage bins regularly to drop off your hoarded resources. Nothing spoils the mood faster than breaking a node only to discover your backpack is full and you'll have to forfeit those foraged resources by leaving the area (yes, resources on the ground disappear if you leave the area they're located in). Important note on the storage bin: wood and stone resources are automatically converted to wood and stone materials and are not preserved in their raw state. Keep that in mind anytime you need to collect wood or stone resources for something, particularly library submissions.
⠀
⠀
Upon entering the Riverway, you'll find Rana standing by the stream with the bridge out. They'll tell you to fix it by whacking the pedestals. It's an extremely easy switch puzzle where you have to turn on every light on the fixtures in the water to activate the bridge. If you can't figure out the concrete solution, then just keep hitting random ones til the bridge appears. It shouldn't take you more than 30 seconds.
⠀
⠀
Once the bridge is activated, follow Rana south back into Spring Hamlet. You'll find them just inside, where they'll talk a bit. When they leave, you can finally check out the shops, where you'll be buying your upgrades as you advance the village levels. There will be three main shops in every village.
- Dew Seller: sells higher quality dew and/or dew jar upgrades
- Tool Seller: sells tool upgrades and/or dew jar upgrades
- General Store: sells cosmetics and sells/purchases resources as well as seeds (you won't be able to use seeds until you unlock the seed bag later in the game)
There may be some deviations, but this is the general set-up. More info can be found in the Upgrades Guide chapter.
⠀
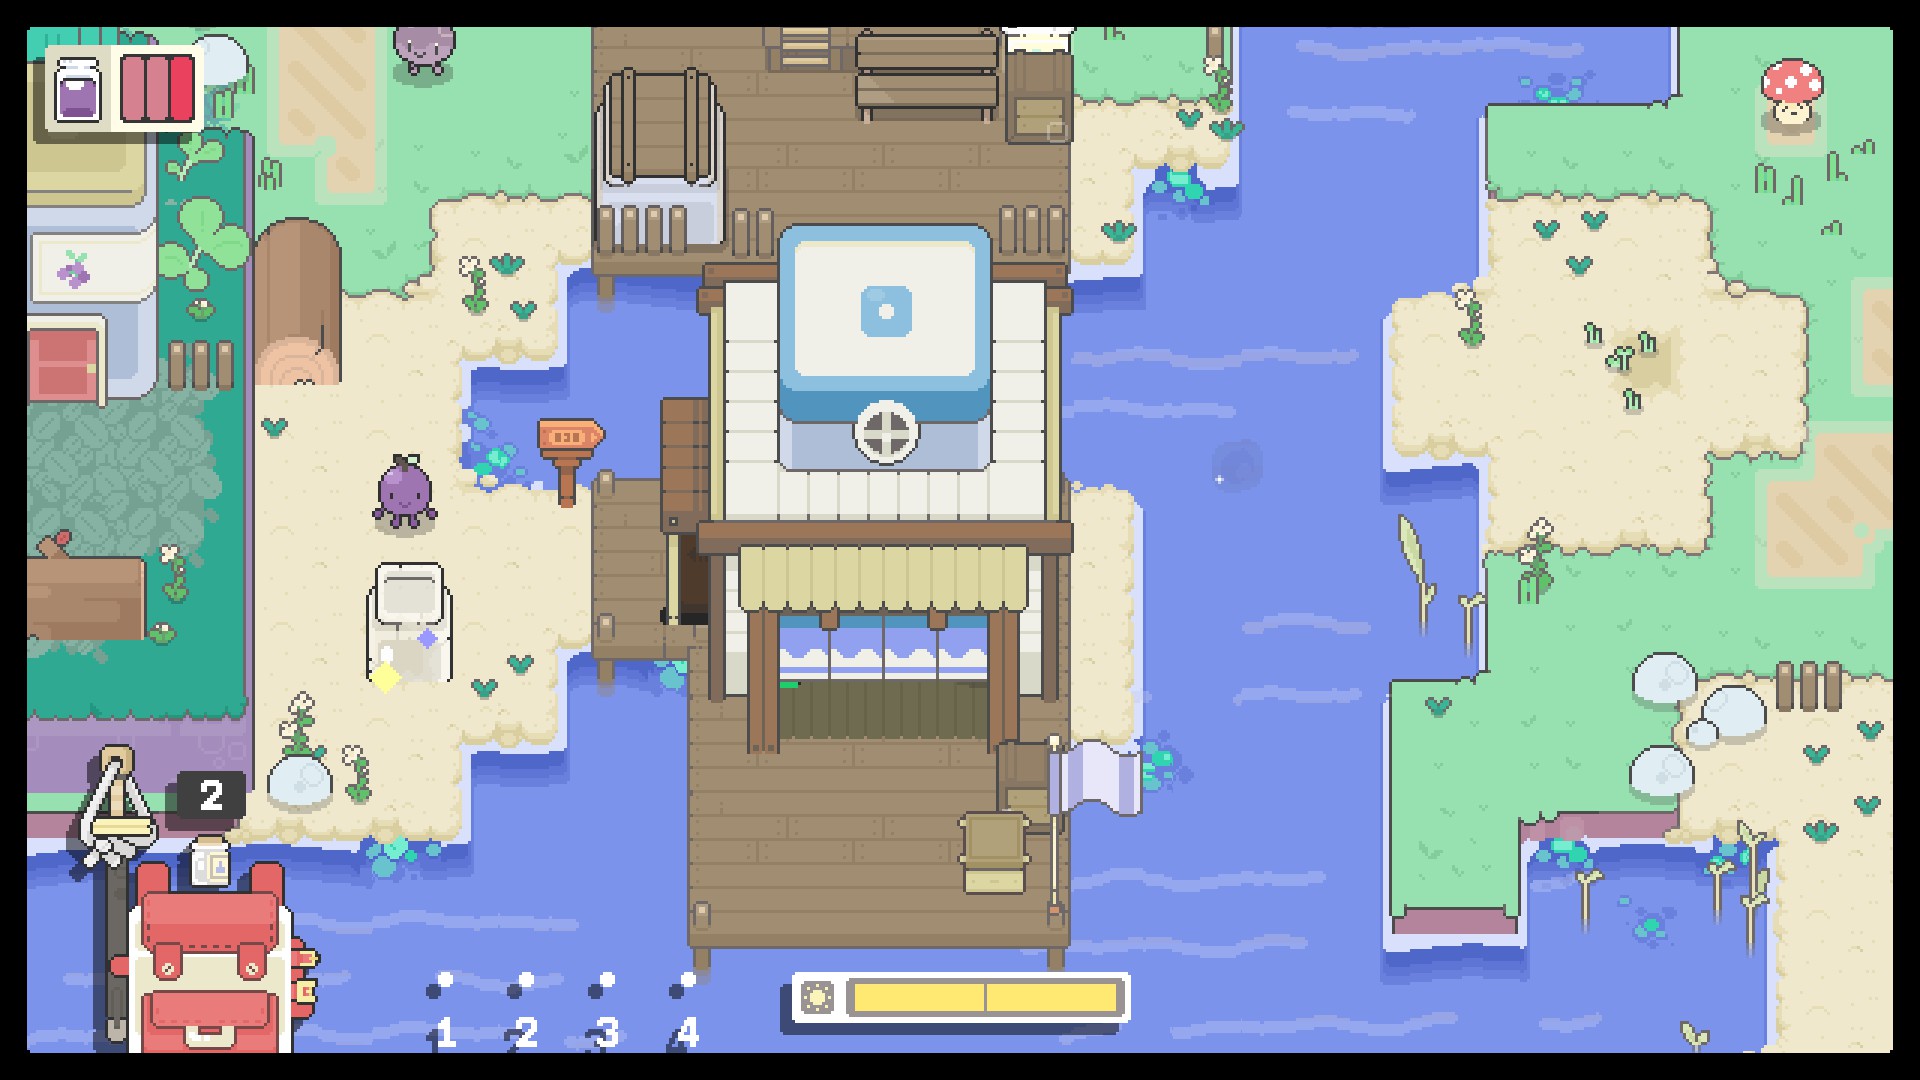
When you're ready to continue, head southwest past the general store and you'll find a giant jar on the beach.
⠀
⠀
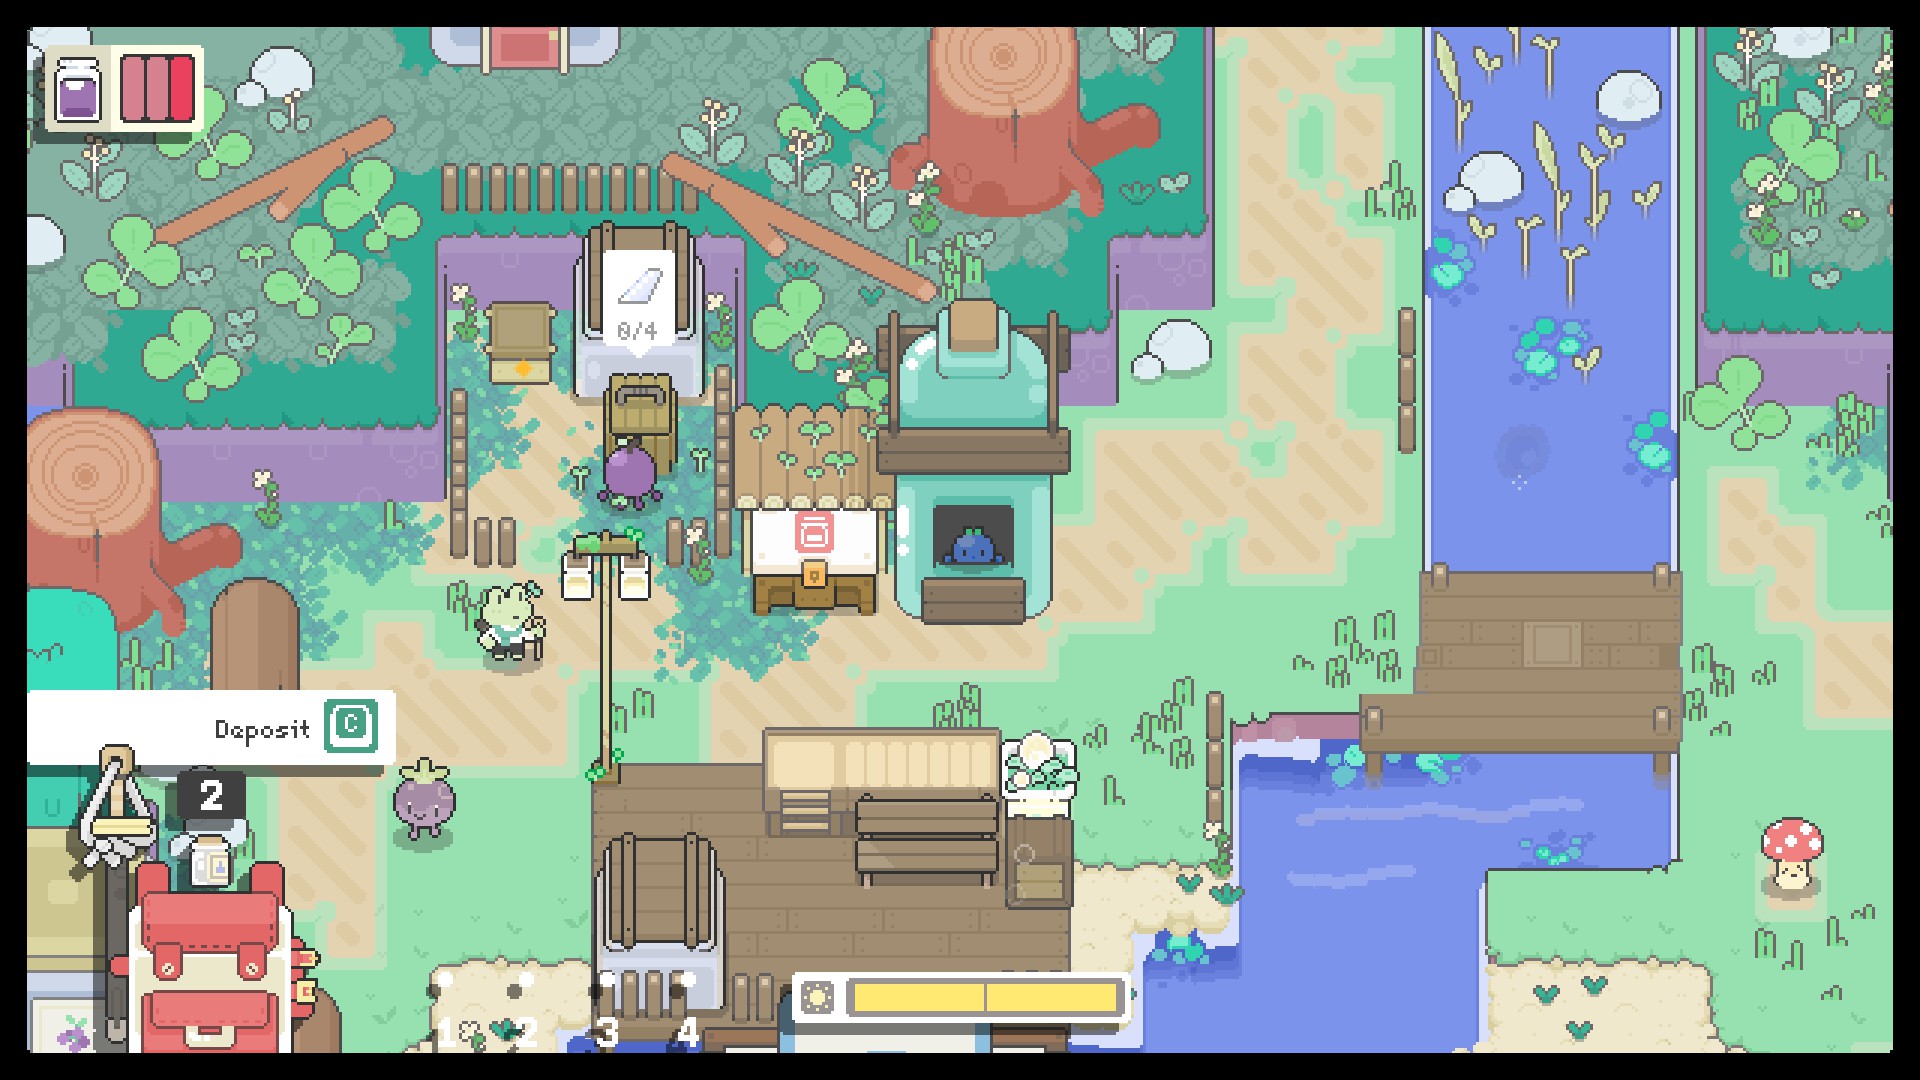
Destroy it to get some glass shards, then head north to put them in the forage bin. Forage bins always have a little white leaf icon over them whenever you have a forage job, making them easy to spot. Keep hitting Interact until all the resources are put in, then turn back to get some more dialogue from Rana. After that, it's off the Bell Row to complete the final job.
⠀
⠀
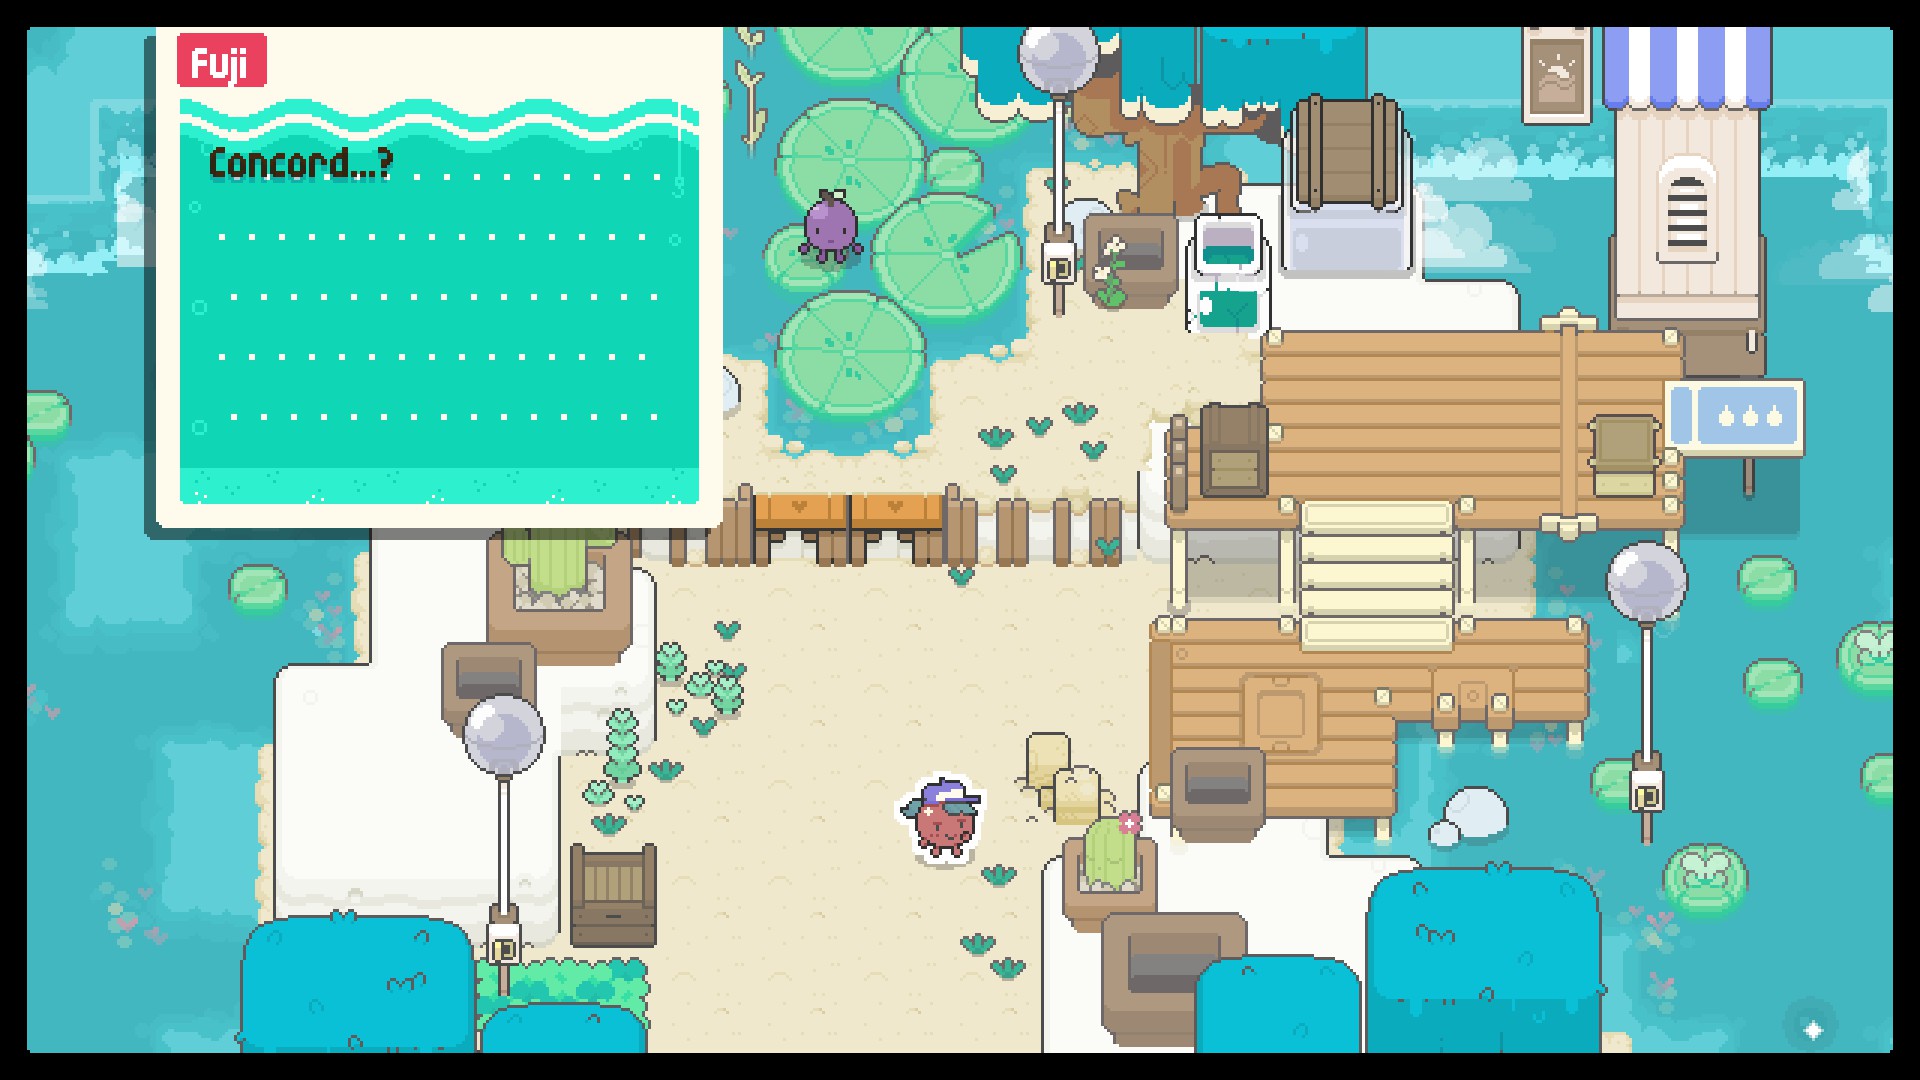
Head east, where you'll meet Maraschino, then east again where you'll meet Fuji. Fuji will be the focal point of the Summer Bar segment later on.
⠀
⠀
Then head north. Here you'll meet Rana and they'll give you a shield. It's automatically equipped just like the pick, so just use Sub Tool to activate it. Proceed north and you'll run into Plum again for some exchanged words.
⠀
⠀
Go over to the Rot branch and kill it. It'll spawn 1-2 little orbs and shoot them at you, so just either use your shield to block them or move around to dodge them. It'll take 4-5 hits with your basic pick to destroy it.
⠀
⠀
When they're all gone, go back down and talk to Rana. Go back up and talk to Plum, who will tell you to go home and they'll meet you there. Head back to the Bend.
⠀
On your way, you may run into some Acorn Rots. These will spew orbs at you in a line, which you have to shield or dodge, but will be stunned briefly when hit. They take 3-4 hits to kill with the basic pick, but when they die, they'll explode in a circle. Be sure to avoid the dotted circle, otherwise you'll take damage.
⠀
⠀
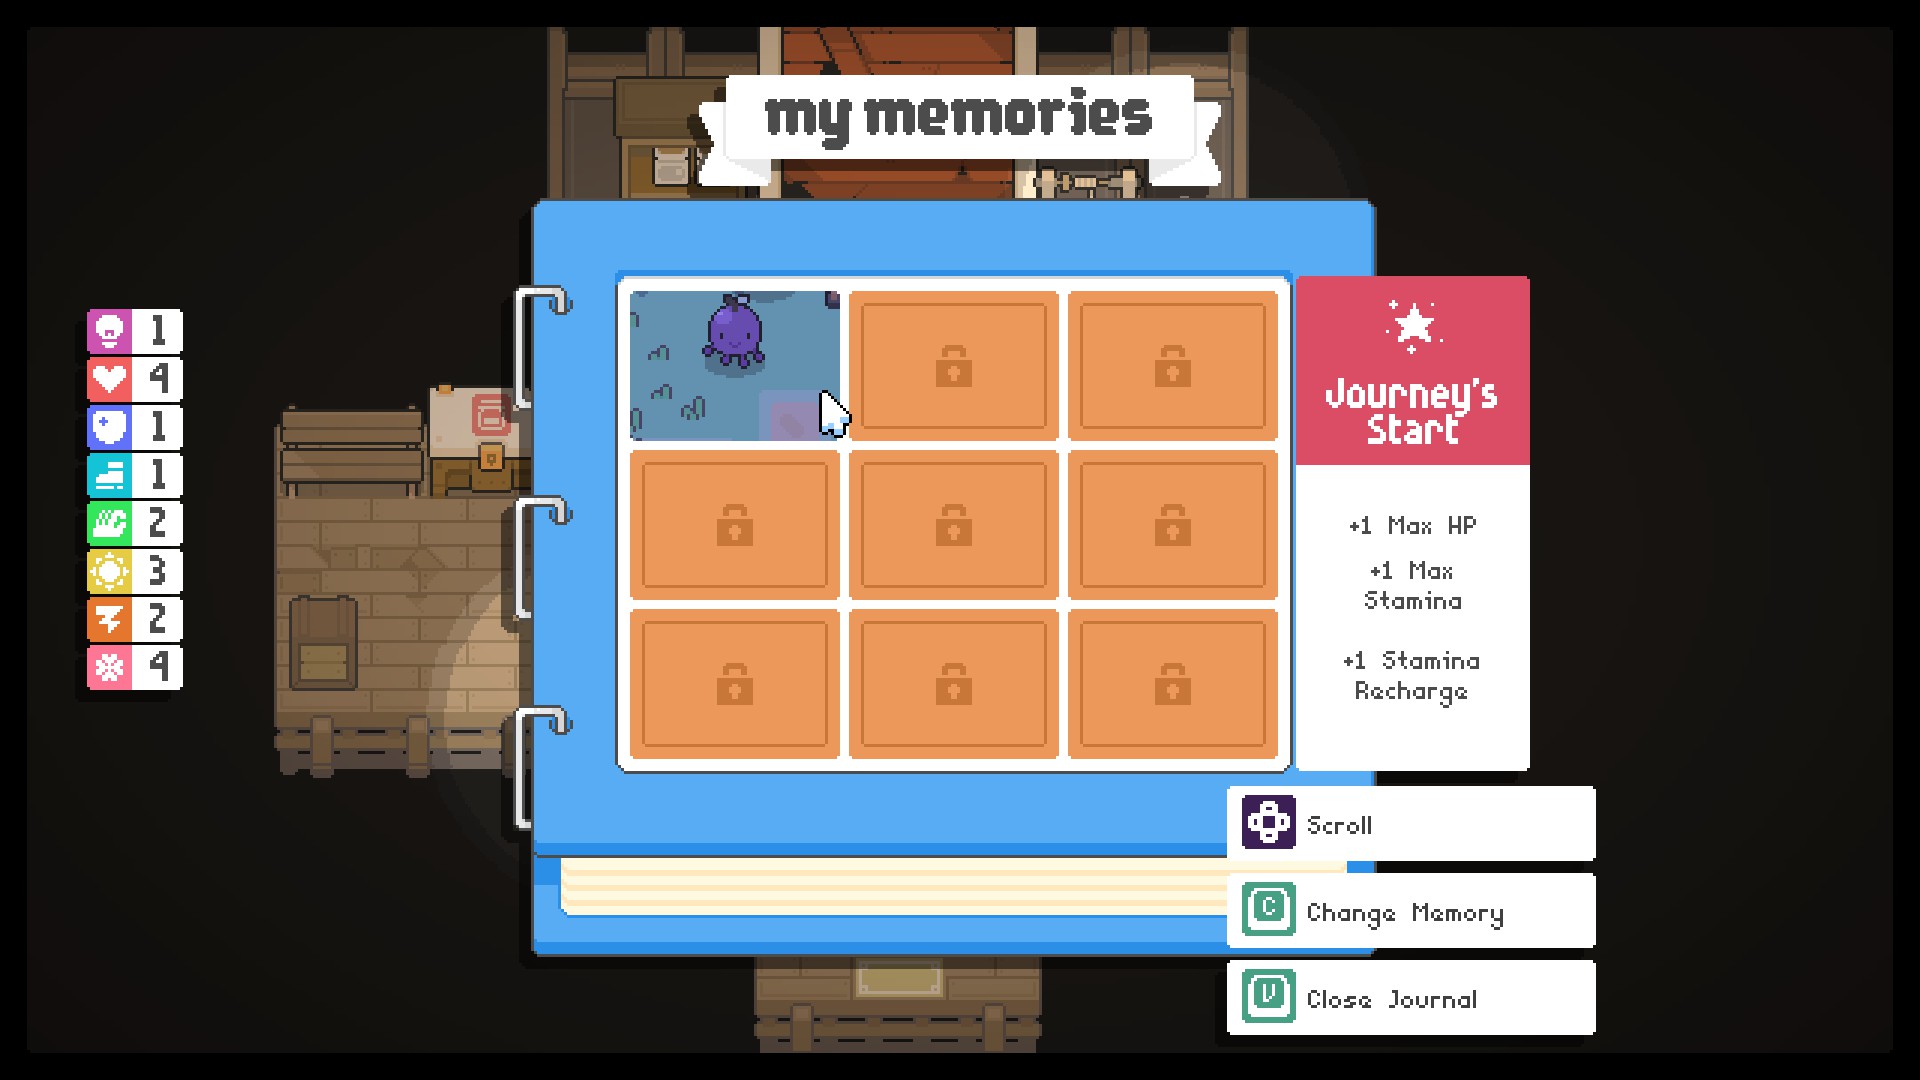
When you return to the Bend, Plum will be waiting on the bench outside. Go talk to them, and you'll receive the Journal. Now you can assign yourself memory perks whenever you sleep.
⠀
⠀
In the journal menu, select the photo spot you want to equip a perk into, then navigate to the memory perk you want. The perks are listed to the right of the photo underneath the memory description; some have only perks, but others have perks along with sacrifices. When you've chosen the memory you want to equip, use Interact to assign it to the photo spot, and those perks will then be active on your stats.
⠀
⠀
When you're finished, you can sleep and save to move on to the next day. You'll get another cutscene, then get the results of your finished jobs. Conflict should advance to level 1 and Maintenance and Forage should both advance to level 2. From then on, jobs will be your sole responsibility, and any further village upgrades will depend on your own efforts.
⠀
Spring Hamlet Pt 3 (Favors & Library)


When you come outside, you'll find Elderberry and Rana waiting to ambush you with a long bout of dialogue. Listen to them, then you can be on your way to village progression in your brand new role as Guardian. One thing you might notice is your mailbox pulsing and making a noise. Attack it to open it and you'll get a bunch of leaflets as tips from villagers for completing jobs. You'll always get leaflets in your mailbox as a result of completing jobs.
⠀
⠀
Now is a good time to grab the Invincible Enemy achievement. Head south just across the bridge and you'll find a little slime-looking statue to the left. This is a Rot dummy that you can attack to test your combat skills. Keep hitting it until it's reduced to small rubble pieces, and the achievement will pop.
⠀
⠀
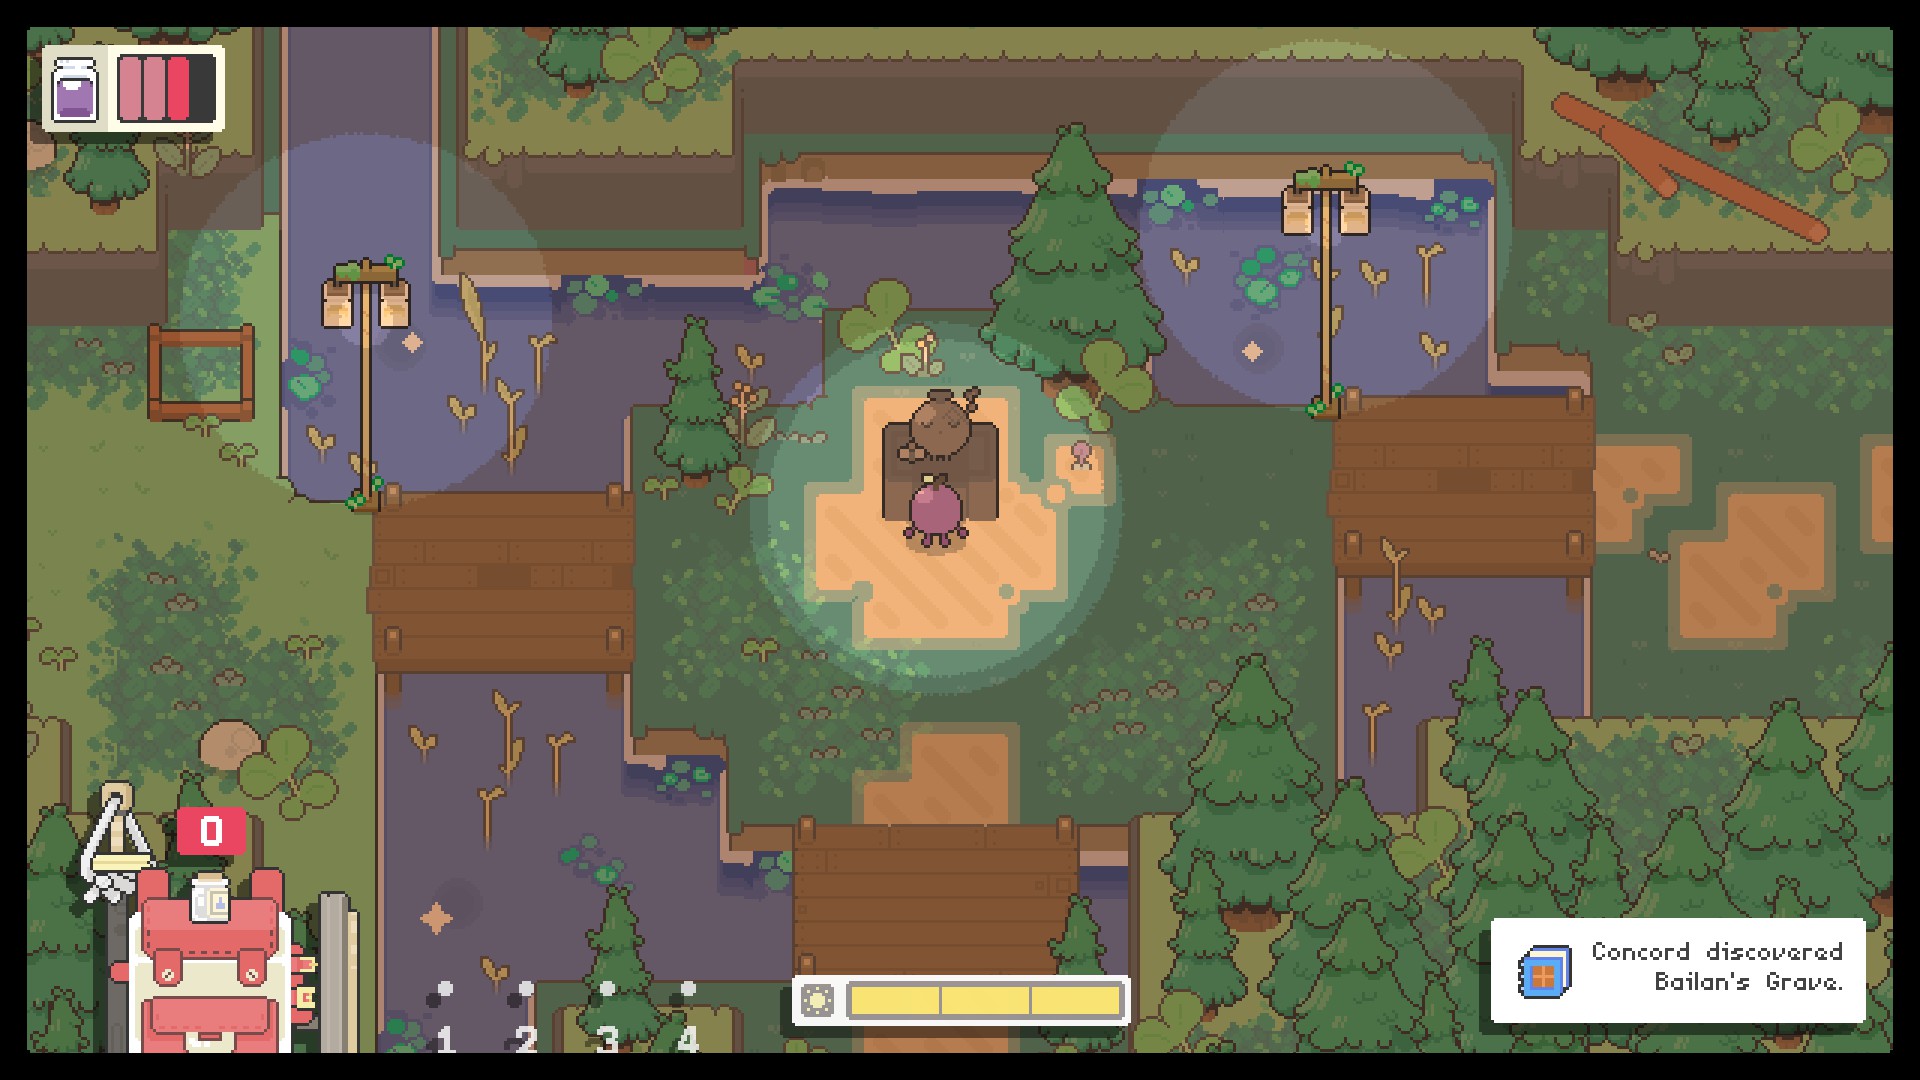
During your first day of solo missions, don't forget to make a stop to discover the Bailan memorial. It's as easy as entering through Treepath by killing any enemies lingering there and bushwhacking your way north into Hidden Pocket. The statue is right there; just interact with it to add it to your memory journal.
⠀
⠀
You may also run into your first Glomp if you run around at night. These things are a little tougher than the other enemies. They pause and light up for a second before charging you like a bull and then leaving behind a miasma which gives you a slowed debuff. Hitting them doesn't stun them, but it only takes 4-5 hits with the basic pick to kill them. When they die, they break up into two tiny slimes, which will merge into a basic slime if you don't kill at least one of them fast enough.
⠀
⠀
You can also pick up Maraschino's Favor. Go talk to Maraschino in Bloom Bank, and tell them you could use their help. They'll tell you they'll be willing to help you in exchange for 2 glass lenses. These are a rare drop from the glass jars found on the various beaches in the vicinity, but not that rare. Just break a bunch until you've got 2 saved up, then go give them to her, and she'll reward you by hanging out at the Bend during nighttime and killing any enemies that wander around there, freeing you up from having to kill or dodge them.
⠀
⠀
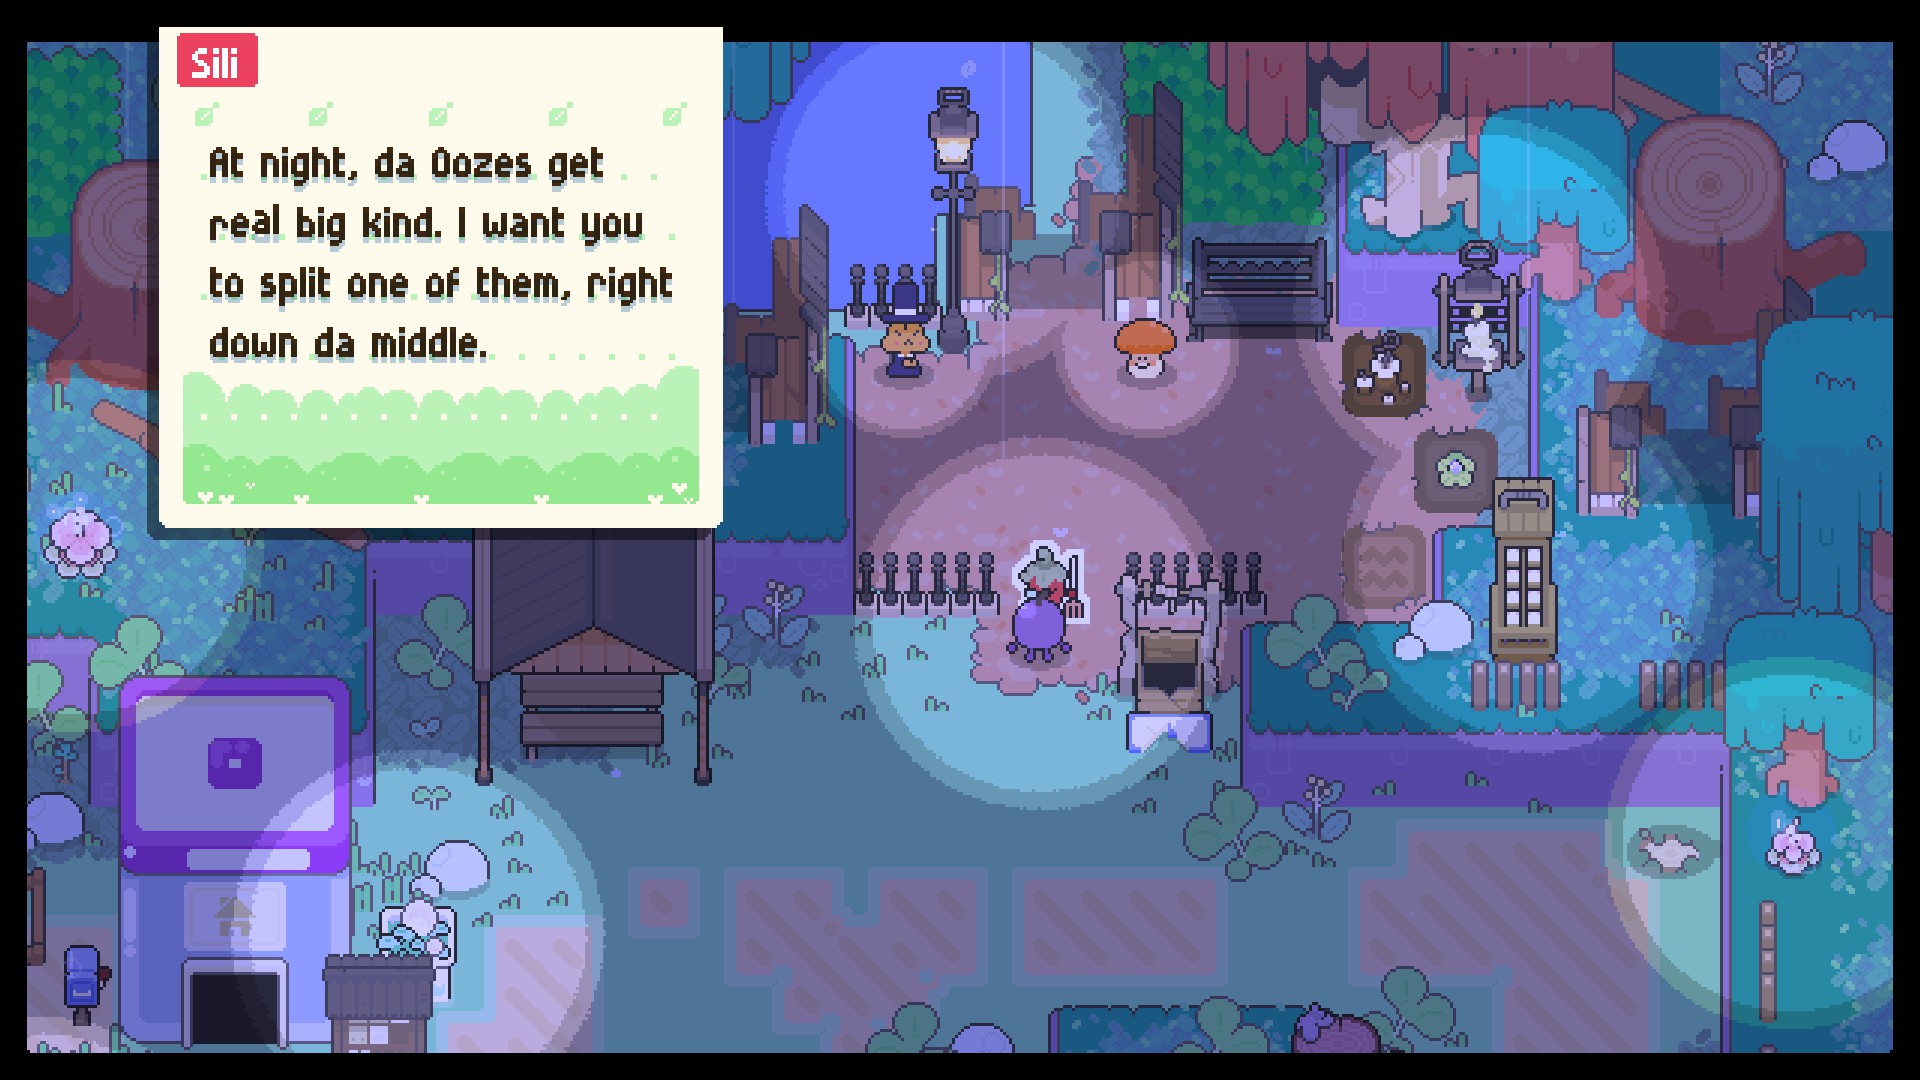
There's also Sili's Favor. Talk to Sili just right of your house in the Bend and they'll tell you to go kill a Glomp. If you've already killed one, then it counts and you can complete the quest right away; if not though, then just go kill one during the night and go back to turn in. On completion, Sili will inform you that they'll start posting requests to the job board. You'll also be rewarded with a pocket watch, which will add a day/night timer to the upper left of the screen, making it much easier to tell the time throughout the day.
⠀
⠀
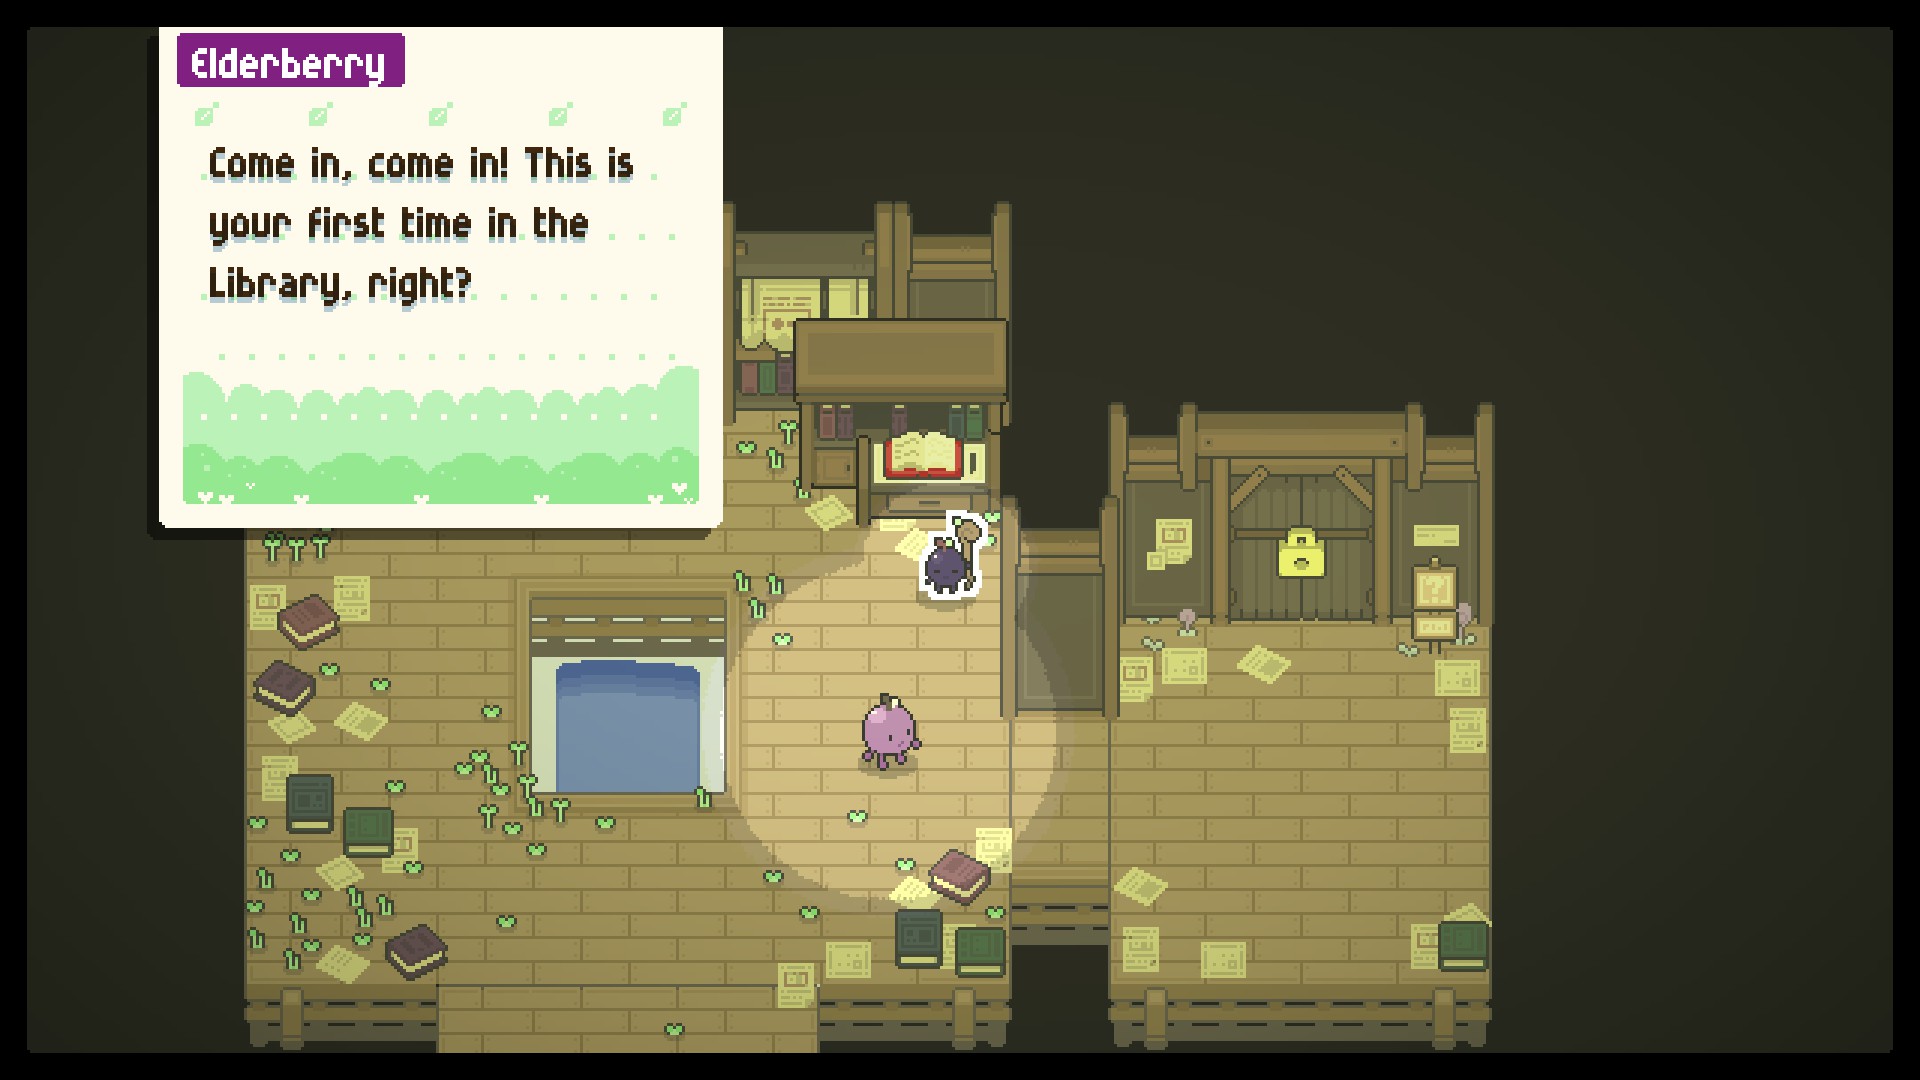
Once you earn Conflict level 2 for the village, Elderberry will appear in front of the library (to the left of the dew store). Go talk to him and he'll invite you inside. Go in for more dialogue, then out and to the right. You'll be pointed to Marsanne (the dew seller), so go in and talk to her next. She'll ask you for 5 sap; if you already have it on you, she'll take it from you, but if not then you'll have to go out to get some and bring it back to her.
⠀
⠀
You'll then need to go to Bell Row to activate the library pillars. One is right next to a pond, and the other is a little easy to miss, located up north in a nook to the right. Hit them both and you'll finish the requirements to fully open the library.
⠀
⠀
After that, just go back to Spring Hamlet and talk to Elderberry in front of the shops. He'll thank you for setting the library back up and go inside. You're free to spend the rest of the day gathering resources or doing whatever you like. Return to the library the next day to meet Hakurei and Scarlet. They'll ask you to gather resources to feed into the Paperbark Tree in order to rebuild the book collection that had been destroyed by a Rot infestation. Interacting with the Paperbark Tree shows you all the items you need to put into it in silhouette form. The items you need are as follows:
pebble⠀⠀⠀⠀⠀water sprout⠀⠀⠀⠀⠀⠀glass shard
sap⠀⠀⠀⠀⠀⠀⠀ rot wax⠀⠀⠀⠀⠀⠀⠀⠀⠀ moon kelp
rock⠀⠀⠀⠀⠀⠀⠀rot bauble⠀⠀⠀⠀⠀⠀⠀ glass lens
branch⠀⠀⠀⠀⠀cobble piece⠀⠀⠀⠀⠀⠀flowstone
dew bell⠀⠀⠀⠀twig
⠀
⠀
Filling out the library collection opens up additional information you can read for further game immersion, items you can build later on when you get the toolkit in Summer Bar, and the Scholar's Motorboard hat in the glass display case when the collection is 100% complete.
⠀
The following building items are unlocked here:
firebloom⠀⠀⠀⠀⠀⠀⠀⠀⠀⠀⠀⠀ wooden stake
spring request board⠀⠀⠀⠀ spring lamp
softwood lantern⠀⠀⠀⠀⠀⠀⠀ request board
village storage⠀⠀⠀⠀⠀⠀⠀⠀ wooden bench
wood storage
⠀
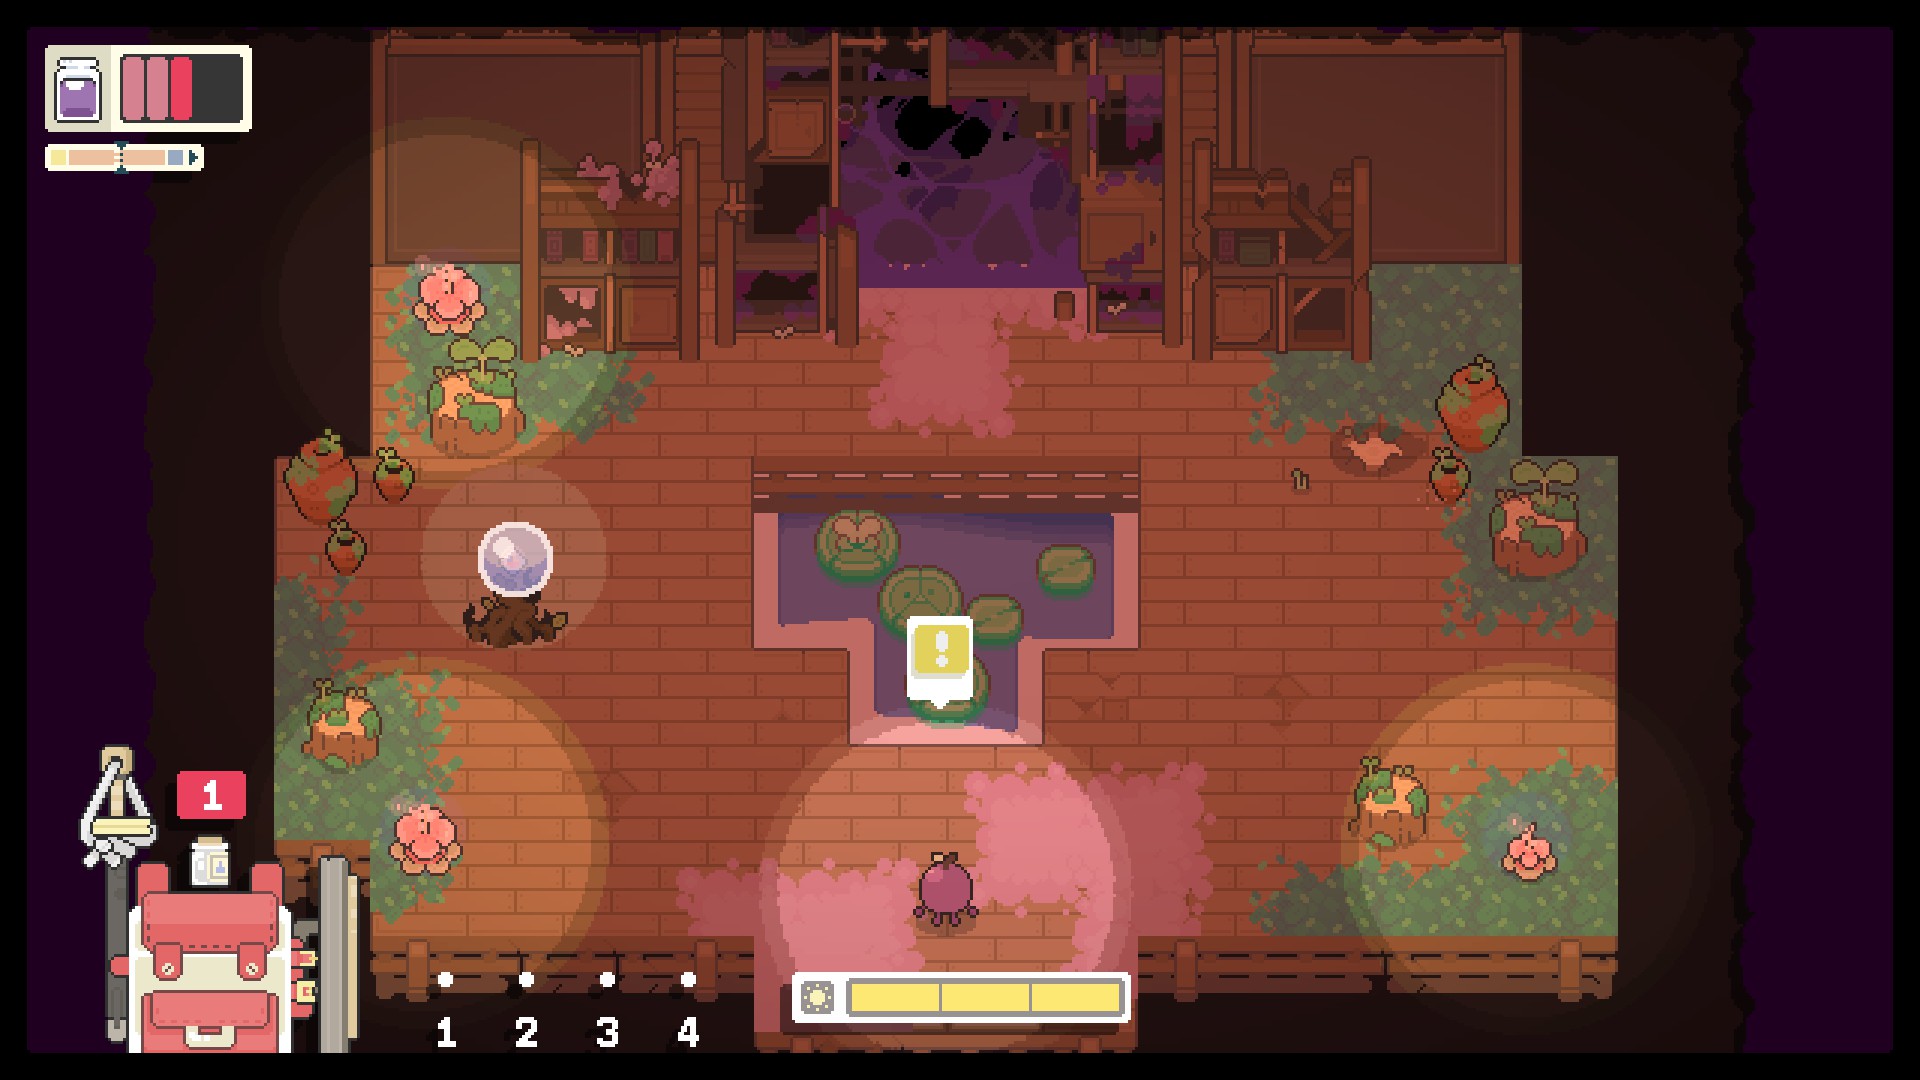
Put 3 items into the Paperbark Tree to progress the story. After the third item, you'll get some dialogue and get pointed to Elderberry outside. Exit the library to go talk to him by the river. He'll tell you they need Fuji back from Summer Bar, then lead you back into the library. Go back in and talk to him again. There, he'll tell you that you need to go to Summer Bar to fetch Fuji, but in order to get there, you need to regrow the lilypads. The only way to do that is to get lily spores from below the library, in the Stacks. The door will be unlocked and your next mission is your first boss fight: the Book Worm. Make sure you're all set to go with weapon upgrades, dew refill, memory perks, and anything else, then venture down to take care of business.
⠀
Spring Hamlet Pt 4 (Book Worm & Lilypads)


The Stacks is a small dungeon with simple switch puzzles in each randomized room involving floor tiles. To open the door to the next area, you have to step on each floor tile until all of them are lit up at the same time. There's one complication in that some of the floor tiles are covered in Rot, which will give you a slowed debuff if you stay in it for too long. This is easily avoidable by only stepping on the corners of Rot-covered tiles as you pass over them. All the puzzles are very easy, and once the door is open, it doesn't matter if you step on any and unlight them afterwards because the door will stay open. There are also occasional little pots with green plants in them; these can be destroyed for extra loot.
⠀
You'll only find basic Rots and tiny Rots in this dungeon, and killing them might make it a bit easier to solve some puzzles. There are a few rooms without switch puzzles and only enemies, in which case you'll have to kill all enemies to open the door. This never includes Rots trapped in glass jars; those are always optional. One thing to note is that tiny Rots in dungeons are always much more aggressive than tiny Rots in the wild. The ones in the wild tend toward random hopping with minimal targeting, but the ones in the dungeon will come after you with a vengeance. Be vigilant.
⠀
⠀
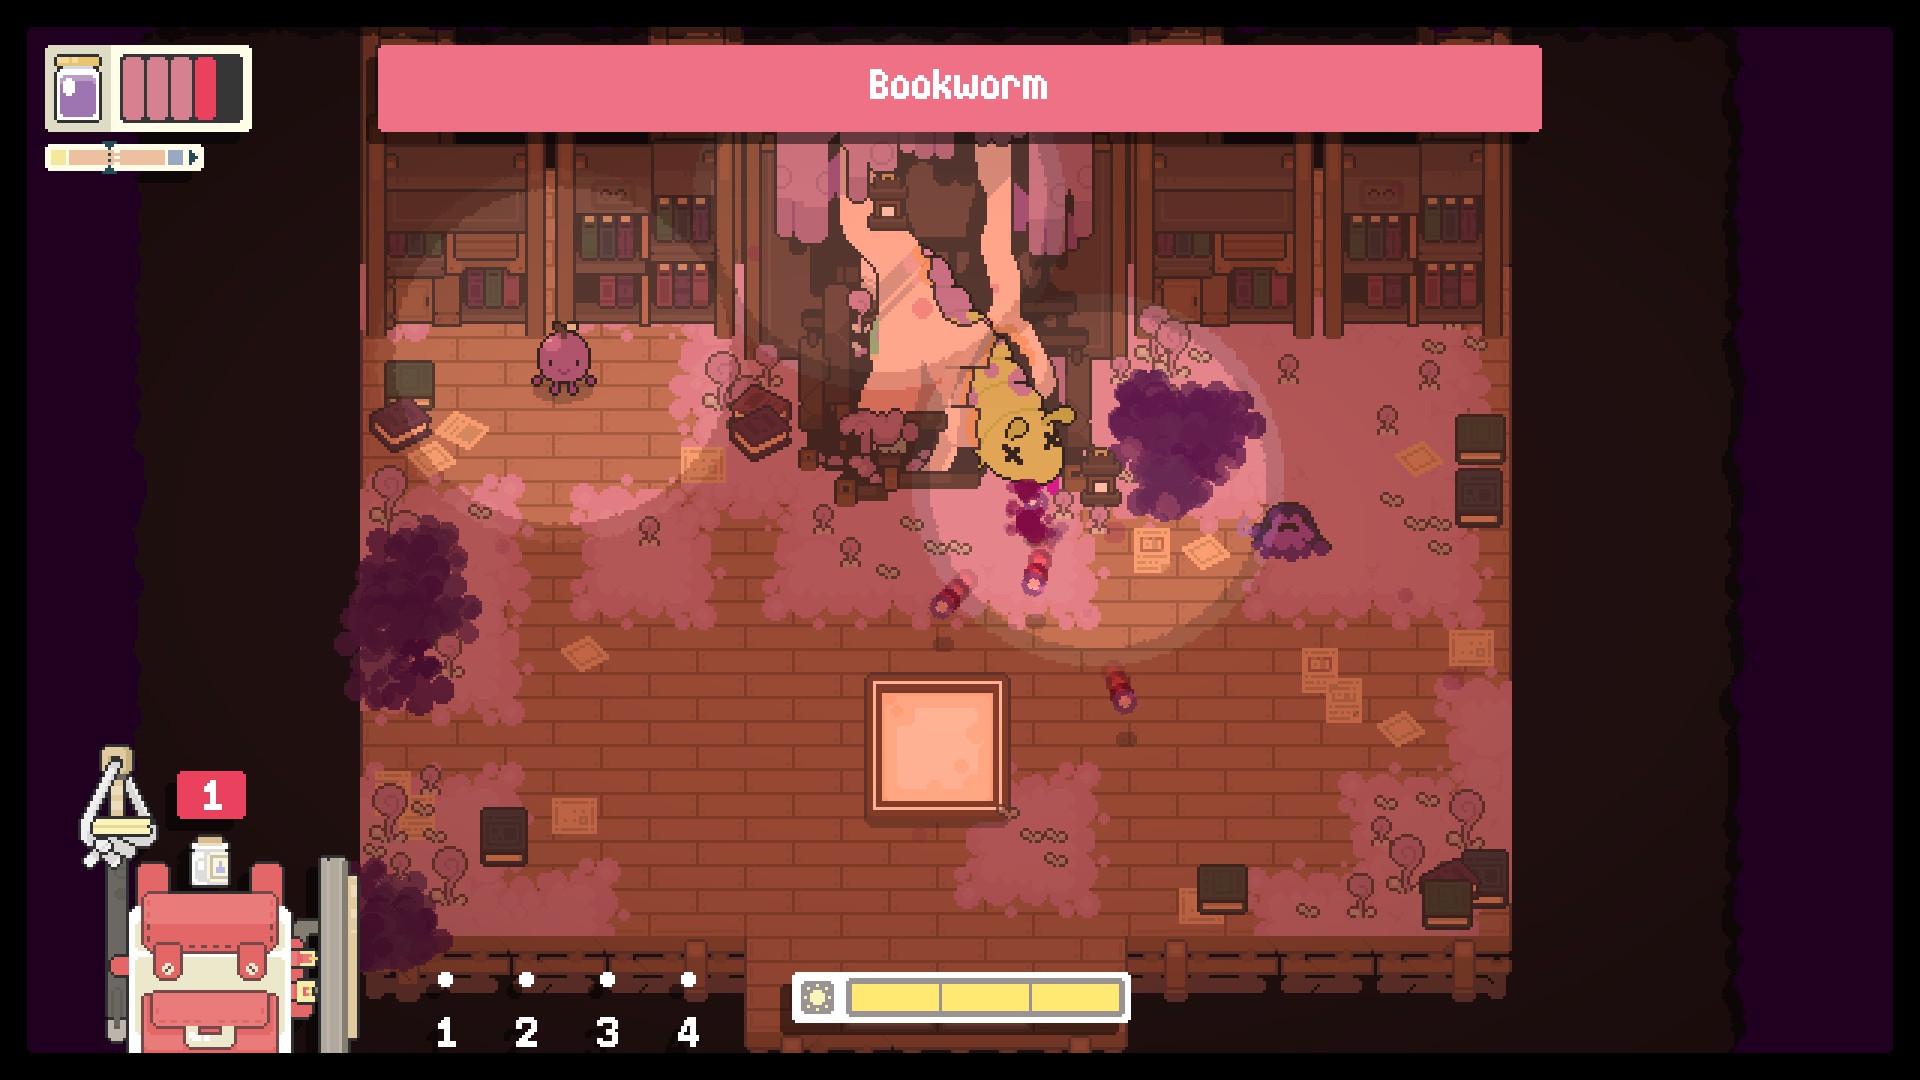
When you reach the final room (there are 4 randomized dungeon rooms before the final boss room), there will be two doors on either side and a large bookcase overgrown with some kind of tree. This is the boss room. Before you do anything, check for any glass jars with trapped Rots; if you see one, destroy it and kill the escaped Rot. This will eliminate the nuisance before you start the big fight. When it's gone, go ahead and step on the center floor tile to trigger the start.
⠀
⠀
The Book Worm will crawl down the center bookcase and will appear and disappear off and on through the fight. It'll do two things alternating: summon tiny Rots which may combine into basic Rots, then shoot out orbs like the Rot branches do. The less hp it has, the more Rots and orbs it will summon.
⠀
There's an easy way to win this fight: stay in the upper left corner most of the time. This makes it significantly more efficient to kill summoned Rots, and the orbs are simply spewed forward rather than honing onto you. When the Book Worm pauses, that's your chance to run in and start swinging. It'll take about 18-20 hits to defeat it. Upon its end, the achievement By the Book will also pop for you.
⠀
⠀
Once it's defeated, it'll crawl away and both the left and right doors will open. It doesn't matter which you choose, because they both lead to the same place. There's some good loot in here: a Bubble Globe that contains +1 Mind, +1 max hp, & +1 max stamina (you only get one the first time you defeat the Book Worm; any other times you defeat it, the Bubble Globe will be absent in the treasure room), 4 overgrown stumps, and a bunch of jars which contain leaflets and random resources. You also get the lily spores from the center pond, which are needed to grow the pads that will allow passage to Summer Bar.
⠀
⠀
To leave the dungeon, just walk at the exit and keep walking until the timer runs out. You can do this in any room within a dungeon at anytime, including if you want to leave early. When you come out, go talk to Elderberry and hand over the spores.
⠀
⠀
You can go do whatever you like for the rest of the day, then go sleep in your house. Don't forget to assign yourself a new memory perk with that extra Mind point you got. Another cutscene later, you wake up and can go meet up with Elderberry at Shell Cove.
⠀
⠀
And with that, you're off to Summer Bar... if you're ready. Fair warning: once you go, you won't be allowed to go back to Spring Hamlet until you're finished with the Summer Bar segment. So take care of any unfinished business if necessary, then you're good to go.
Summer Bar Pt 1 (Dowsing Rod & Library)


When you're ready, head south along the lilypads. You'll arrive in Summer Bar, the achievement Beach-Bound will pop for you, and you'll find Fuji at the village entrance. She'll express surprise at seeing you, then tell you to meet her further in. Continue south and she'll talk to you some more, explaining why she's been gone in Summer Bar for so long. Long story short, she'll be needing your help. This means you'll be performing jobs for Summer Bar for the time being. When Fuji leaves, go check in at the lighthouse; this will be your home until further notice.
⠀
⠀
Dispatch the Rots that have taken up residence inside. They'll be gone permanently, so you don't have to worry about killing them every time you go inside. Spend the rest of the day checking the new village out and gathering some of those nifty new resources scattered about (exploring the whole village isn't possible yet as most of it is blocked off for now). When you're satisfied, go sleep in your new home.
⠀
⠀
As soon as you come outside the next morning, Fuji will greet you. After a little spiel, she'll tell you to meet in the Outpost, which she's cleared the path to. Head east to find her again. This is where you'll meet Saguaro, who will give you an intro, then tell you to go get a dowsing rod.
⠀
⠀
Before you head off to find Coqui, stop in to grab Pearl's favor to restore the forge where tool upgrades will be sold. If you've been foraging, then you may even have 5 succulents ready to be turned in already, but if not, they're not hard to find around the village. Quick win.
⠀
⠀
Summer Bar differs from Spring Hamlet in that there are enemies roaming inside the village proper, so proceed with caution, especially at night. Luckily, they're restricted to the easternmost areas of Reef Ridge and Summer's End.
⠀
To find Coqui, you'll want to head east, then north. There are signs along the road directing you to Coqui's dowsing hut as well, so you can check them to make sure you're going the right way. He'll be in the southeastern part of Summer's End, dowsing off a pier. Just talk to him to get your brand new dowsing rod.
⠀
⠀
In return, he'll ask you to help him fix the dam. The dam levers are located just north of him. Head up and you'll find them both in the water with yellow exclamation points.
⠀
⠀
Dowsing is very simple once you get the hang of it. Just hold down Main Tool to direct your cast. It'll generate a white dotted line which will extend straight out from you. Once the end reaches your target, release to create a circle. As long as your target is within that circle, you'll succeed on a snag. At that point, some cards will appear above you. The first one will have an arrow pointing in a random direction. Hit the directionals (up, down, left, or right) to match the arrow, then it'll flip the next card with a new arrow. Match that one as well, and keep on matching the arrows as each card is flipped. Hitting an incorrect direction incurs a time penalty, if you have timed dowsing puzzles toggled true in your options. When you complete the sequence, you'll succeed on your interact or catch. In this case, you'll succeed on pulling up the dam levers.
Note: Dam lever cards will always be up arrows. Everything else will have random directions.
⠀
⠀
When both dam levers are pulled up, go back down and talk to Coqui. He'll thank you and tell you that you can keep the dowsing rod. Now you can fish for water-based resources, make ranged attacks on enemies, and harvest nodes and pull resources from normally unreachable places. The more stamina you have, the farther you can cast your line.
⠀
⠀
Importantly, you can now kill shelled Rots. The only way to kill them is to deshell them with the dowsing rod first, which will turn them into basic Rots, and then you can kill them with any other weapon. The dowsing rod won't work for attacks post-deshelling until it's upgraded, because the damage it deals isn't high or fast enough to surpass the basic Rot's healing ability.
⠀
⠀
Before you leave Summer's End, go all the way north to discover Blue's statue.
⠀
⠀
On your way back, there's a funny little scene involving Pagu, but nothing important to the story. From there, you can hop into the library, which is now open next door to your lighthouse. Talk to Skimmer, who will not only tell you about the Summer Bar Paperbark Tree needing resources (just like the one in Spring Hamlet), but will also ask you for a favor. This will send you to Ceph when he's on duty guarding the Waterlog dungeon in Reef Ridge (he shifts in and out with the other guard, Uni).
⠀
⠀
The Summer Bar Paperbark Tree requires the following resources:
bough⠀⠀⠀⠀⠀⠀⠀⠀⠀glass lens⠀⠀⠀⠀⠀⠀⠀⠀⠀⠀ twig
water sprout⠀⠀⠀⠀⠀flowstone⠀⠀⠀⠀⠀⠀⠀⠀⠀⠀ branch
crimson shell⠀⠀⠀⠀ bioluminescent pod⠀ glass shard
rot wax⠀⠀⠀⠀⠀⠀⠀⠀ azure shell⠀⠀⠀⠀⠀⠀⠀⠀⠀ driftwood
succulent⠀⠀⠀⠀⠀⠀⠀sandstone
yellow shell⠀⠀⠀⠀⠀ dew bell
⠀
The following building items are unlocked here:
drywood fence⠀⠀⠀⠀warding bell
beach umbrella⠀⠀⠀ summer lamp
stone deposit⠀⠀⠀⠀⠀glass coral tank
vista lounge⠀⠀⠀⠀⠀⠀summer request board
⠀
⠀
When you catch Ceph outside the Waterlog, he'll agree to make Skimmer's parasol, but on the condition that you go defeat some shelled Rots for him as a favor. Go kill every shelled Rot in Reef Ridge, then talk to him again. He'll give you the parasol and you can go hand it over to Skimmer in the library. Turns out, Skimmer has had a change of heart and decides he wants to work in the library after all. He gifts the parasol to you, and you now have a new weapon option.
⠀
⠀
To progress, you'll need to put your dowsing skill to practice. Head out into the village and search for sparkly dark spots in the water. These are all water nodes that can be fished with the dowsing rod. You'll need to fish up 10 items from water nodes to continue the main story.
⠀
Summer Bar Pt 2 (Favors & Building)


After you've completed the mission to fish up 10 resources, you can head over for a chat with Saguaro during daylight hours. He and Fuji will mention that Woody needs to be retrieved from Lillyputt to the west, but in order to do that, the bridge needs to be repaired. Fuji says that she's fixed up the workshop, and you'll need to meet her over there to discuss your future career in architecture. Unfortunately, there's prep work to be done, and in order to start building you'll need to first improve Summer Bar to Maintenance level 2 (if you haven't done so already).
⠀
⠀
Regardless if you've earned Maintenance level 2 already or not, Fuji will run off, leaving you to your own devices for the time being. Now's a good chance to do some jobs and gather more resources, but you should also head up to Summer's End to grab Pagu's favor. He needs 4 pith roots in order to make a new flute. Pith roots normally can only be found in Autumn Town, the setting of the next segment, but you can also farm them by deshelling shelled Rots if you're patient enough; they're very rare drops from deshelling, so it'll take awhile. Otherwise, you can simply wait til you get to Autumn Town, get them quick, then return to Summer Bar later to turn them in.
Note: This is how you gain the Melody Maker achievement.
⠀
⠀
You also may have gotten a job involving destroying tentacles. Tentacles are very straightforward to deal with, whether you've gotten your dowsing rod yet or not. They only have one attack, and it involves an area of effect circle. All you have to do is stay out of it and you won't get whipped. Damaging it with your dowsing rod is the absolute easiest way to kill them, as you can just stay back and keep hitting them until they die, and their attack can't reach you. It takes 3-4 hits with the +1 dowsing rod or 5-6 hits with the +1 pick to destroy them.
⠀
⠀
When you come back to the workshop, Fuji will have returned and you can talk to her. She'll talk about building a bit, then give you your new toolbox.
⠀
⠀
Now you can do all sorts of neat building things, but the arguably most important thing is the repair kits. They're very cheap, so you can build 2 or 3 of them right off the bat to be used right away when you come upon repair locations (see Repairs Guide). I also recommend building a forage box to place inside your lighthouse since the only other one in Summer Bar is the one in front of the tool shop. The two types of building you can do are Functional and Decorative. Functional encompasses usable structures such as storage bins and job boards. Decorative encompasses frills like lights and fences. If you don't want a certain structure taking up space in your toolbox anymore, you can scrap it and get some resources back from it.
⠀
⠀
Heading up, you'll run into Skimmer, who will give you some more instructions on how to use the Toolbox. When you set up the repair kit in Lilyputt, you'll get some more instructions from Palaka nearby. Repair kits require extra resources to prep it for overnight action (see Repairs Guide), and in this case, you'll need to toss in 3 succulents. They're easy enough to get if you don't already have them in your storage box, so just grab them and throw them in. The bridge will be repaired the next morning.
⠀
⠀
Upon checking out the newly discoverable Lillyputt, you'll find that it's by far the tiniest village yet. It'll take you a grand total of two minutes max to explore the whole of it, but there's plenty to see. Upon entering, you can talk to the gate guard who will inform you of where Woody has disappeared to. Before you go chasing after him though, you'll have to go report back to Saguaro.
⠀
⠀
Don't forget to make two important stops first. Ragosa further in has a favor to ask you, and Hop's memorial is only three steps away from them. There's also a bubble globe a bit east, but you can't break it yet.
⠀
⠀
When you check in with Saguaro, he'll give you a short history lesson, then ask you to spearhead the mission into the Waterlog. This will be your second dungeon and boss fight. Once again, make your preparations before you head over.
Summer Bar Pt 3 (Octopihi & Progression)


When you're ready, head over to the Waterlog. The guard is now off to the side, allowing you passage. Going in, you'll notice that the puzzles in this dungeon involve levers just like the ones used to open or close dams during Summer Bar jobs. The difference with these is that some of them move. You'll have to use extra timing to pull these up in most cases. Once all of them are pulled up, the bridge will be activated and you can move on to the next room. Other times, there will only be enemies in the room, in which case defeating them all will activate the bridge (once again, Rots in jars don't count, so those are optional). There are 6 randomized puzzle rooms before the boss room.
Note: It's easy to miss, but if you encounter a broken stump, attack it. This is the driftwood node. Only one will spawn in the dungeon proper, but there are two more in the treasure room after defeating Octopihi, which means you can harvest 6-12 driftwood from each Waterlog run. Also, after it drops resources, keep attacking it because it'll drop stuff twice.
⠀
⠀
Upon reaching the boss room, there'll be a partially submerged octopus head in the center upper pool. That's Octopihi. There are no passive threats in this room, so you can start the fight immediately; to do so, just move forward into the middle of the area. My advice would be to equip your pick and rapidly destroy the two Rot branches on either side to eliminate them right off the bat. That way, they don't prove a nuisance throughout the rest of the fight.
⠀
As soon as the battle begins, tentacles will start popping up. If you've completed the Day of the Tentacles job request, then you'll already be familiar with these things. There's one extra attack these are capable of though- they spawn bubbles that slowly float toward you, then pop on a timer kind of like floating time bombs. When they pop, they create a small area of poison that gives you a slowed debuff if you walk into it. These bubbles can be hit with a melee tool and directed toward either the tentacles or Octopihi's head. Regardless of your target, the bubbles deal damage to Octopihi, and 3 hits from bubbles will destroy a tentacle (they may respawn though). More importantly, when Octopihi's head is partially submerged and his eyes are closed, hitting a bubble at him will cause him to be stunned for approx. 10 seconds, giving you the opportunity to go up and wail on him with your tool. Just be wary if there are tentacles in both positions directly next to him, because they'll be trying to attack you while you're within their range.
⠀
⠀
When he's defeated, his head will fall into the water and all tentacles will disappear. The doors blocking passage north will open, and you can head up to the treasure room. Woody will be there along with a one-time bubble globe which awards +1 Mind, +1 max hp, and +1 stamina. You also get 2 driftwood nodes and a bunch of jars that drop leaflets and random resources.
⠀
⠀
After talking to Woody, he'll thank you for saving him and run off. Go ahead and loot if you haven't already, then you can leave to get on with the story. Drop off all your harvested resources into your storage box, but make sure to keep 6 driftwood with you. Insert them into the repair kit inside your lighthouse to initiate the overnight repair. This will open up the area to the north, which has more resources and, after some more repairs, a detour shortcut to Summer's End from Lily Landing.
⠀
⠀
Saguaro will thank you once again for a job well done, and you can now go grab Fuji and take her back to Spring Hamlet. She'll already be waiting for you at Lily Landing, so go meet her up there and she'll head off ahead of you. You will be able to travel back and forth between Spring Hamlet and Summer Bar for now, so make sure you do everything you want to do in the two villages before taking the lift up to Autumn Town.
⠀
⠀
Arriving back in Spring Hamlet, Elderberry and Rana will be there. After more thanking along with some updates, Elderberry will tell you to go meet Fuji at the Crossroads. She'll be by the closed workshop and will greet you when you approach. Your next destination will be Autumn Town, and the only way to get there is via the lift located in the nearby village Perennial Plaza, which is long deserted. Meet her over there and she'll ask you to clear it out of the wandering Rot. Just like the lighthouse, once you kill these, they won't return and this area will be permanently safe.
⠀
⠀
A couple extra things to do before moving on:
- The day after you sleep in your Spring Hamlet house and switch your residing location to Spring Hamlet, Rana will show up in the Bend. You can talk to her to complete Ragosa's favor, and pick up a favor for Rana. Once you have all of Spring Hamlet's job type statuses up to level 3 (Conflict, Maintenance, & Forage), talk to her again to complete her favor and get a new one to talk to Ragosa in Lillyputt. You can complete this one whenever you want; it's just a quick hike down to Lillyputt and some dialogue, and then they'll gift you a pair of dash shoes which give you a slight boost whenever you sprint (hold down the roll/run key to run).
⠀
⠀
- After the Bend repair is finished (next to your house), you'll be able to discover Cayenne's memorial and open up another memory page.
⠀
⠀
- Popping the Riverway bubble globe opens up a secret path to the right that goes deeper into the forest. Here is where you discover Goldie, who will ask you to make a delivery for her. Take her package to Mirabelle at Glitter Docks, and she'll ask you to take back a glass jar to Goldie as a follow-up favor. Deliver the jar to Goldie, and she'll ask you about Plum then give you some free resources, and the achievement Goldie Opportunity will pop for you.
⠀
Autumn Town Pt 1 (Sickle & Library)


After clearing the Rot from Perennial Plaza, Fuji will be waiting for you by her workshop. She'll tell you to go see Plum at Glitter Docks. Check in with him for some more story progression, then head back over to the now safe Perennial Plaza to fill out the repair box (requires 3 flowstones) if you haven't already. The next day, it'll be repaired and ready for use. Elderberry is standing outside there to see you off, but make sure you're completed any unfinished business before accepting the ride. Once you go to Autumn Town, you won't be able to go back to Spring Hamlet or Summer Bar again until you're finished with the Autumn Town segment.
⠀
⠀
When you're ready to continue on, just step onto the lift. There'll be a 3-2-1 countdown, then the lift will ascend, taking you up to Autumn Town, which will be your home for the time being. At entry, the Arid Arrival achievement will pop for you, and you'll be halted by a guard who will question you, then inform you that the one you should seek out is in the library, but the library is closed off, so he'll refer you to someone else and give you directions. Just proceed onward, and take the rightmost path at the fork.
⠀
Dillford the dew seller will be in the leftmost building and will just give you some friendly tips, Kalo the tool/workshop merchant will be in the center building and will tell you to come back the next day for your first primary mission, and there's someone who needs a favor in the rightmost building. On your way back down, Kaba will mention that you can stay in the old greenhouse near the lift. It's a little worse for wear, but it'll do, especially if you set down a repair kit and fix up the back windows.
⠀
⠀
When you return to the workshop the next day, Kalo will tell you she cleared out some of the overgrown wheat, and will give you a key. You can use this by simply hitting locked gates with your tool.
⠀
⠀
In the little shack to the far right, there are a couple of interesting characters cramped up together. Calabasa will ask you for a favor- bring him back 2 pith roots to complete it. He'll seem impressed, then will give you a tool and ask you for a follow-up favor to take it to the general store shopkeep to fix it. Take it west to Kabocha in the general store, and hand it over to him. He'll let you in on some inside information, then fix the tool and give it back to you. You now have the sickle, and can keep it. Calabasa doesn't seem to care anyway.
⠀
The sickle is used to harvest certain nodes that can't be harvested by other tools, such as corner stones, and must be used to rid Hayrots of their hay, much like deshelling Shelled Rots.
⠀
⠀
To move on, you'll need to set up a repair kit at the overgrown path in Sewer Entrance. It'll require 2 corner stones and overnight repair, then you'll be able to traverse further into the village. The library is in Plantation Village. Go inside to find Haupia, the one who's allegedly in charge. After a bit of a fuss, she'll 'demand' you go pull your fair share in the sewers by clearing out Rot and give you a key. As guardian, you might as well fulfill your duty.
⠀
⠀
The Autumn Town Paperbark Tree requires the following resources:
bough⠀⠀⠀⠀⠀⠀⠀⠀twig⠀⠀⠀⠀ ⠀⠀⠀⠀⠀branch
chunk⠀⠀⠀⠀⠀⠀⠀⠀cobble piece⠀⠀⠀⠀⠀ corner stone
rot bauble⠀⠀⠀⠀ porcelain shell⠀⠀⠀ pith root
sap⠀⠀⠀⠀⠀⠀⠀⠀ rock
rot wax⠀⠀⠀ ⠀⠀⠀ pebble
⠀
The following building items are unlocked here:
ore bench⠀⠀⠀⠀⠀⠀⠀⠀⠀⠀⠀⠀ autumn lamp
autumn request board⠀⠀⠀ candle stand
ore rail
⠀
But before you head back north, there are a few other things you can do. First, check out Cane's memorial just above the library to unlock a new memory tree. Then, go south into First Steppe to find another favor seeker hiding out in a shack. Jujube will request you share some dew with her, and upon splitting some near her, she'll be so ecstatic that she'll give you her gate key. You can use this to swat her fence just outside and access the garden. There's also a repair spot; if you've already gotten your hands on 3 cobble pieces, you'll be able to access the next area prematurely. But that'll be covered later.
⠀
Autumn Town Pt 2 (Rotberg & Seed Pouch)


Now we can get down to business in the Sewers, the third dungeon of the game. Upon entering, you'll find a giant strange-looking cube blocking the way. Simply walk against it until you push it forward. Do it again to sink it into the matching hole in the center of the floor, which will lower the first gate, but not the second. Give the second gate a wack with your tool. With the key that Haupia gave you in the library, the gate will be unlocked and you can travel deeper.
⠀
⠀
You'll be faced with puzzle rooms with the same objective as the first room, and these will be a little harder than previous dungeons. There's a red-handled lever in each puzzle room, and this serves as a reset command. Just interact with it to reset the puzzle back to its original position if you screw it up. There's also the odd enemy room; just kill all enemies to open the gate and once again, jarred Rots don't count. One thing to note is that there are some dowsing nodes in this dungeon, so don't forget to fish them up because they can be valuable, such as rot baubles. There will be 8 rooms before the final boss room.
⠀
⠀
⠀⠀⠀⠀⠀⠀⠀⠀⠀⠀⠀⠀⠀⠀⠀⠀⠀⠀⠀⠀⠀⠀⠀⠀⠀⠀⠀⠀⠀⠀⠀⠀⠀⠀⠀⠀(Solution Hint, hover over black square)
⠀
⠀⠀⠀⠀⠀⠀⠀⠀⠀⠀⠀⠀⠀⠀⠀⠀⠀⠀⠀⠀⠀⠀⠀⠀⠀⠀⠀⠀⠀⠀⠀⠀⠀⠀⠀⠀(Solution Hint, hover over black square)
⠀
⠀⠀⠀⠀⠀⠀⠀⠀⠀⠀⠀⠀⠀⠀⠀⠀⠀⠀⠀⠀⠀⠀⠀⠀⠀⠀⠀⠀⠀⠀⠀⠀⠀⠀⠀⠀(Solution Hint, hover over black square)
⠀
⠀⠀⠀⠀⠀⠀⠀⠀⠀⠀⠀⠀⠀⠀⠀⠀⠀⠀⠀⠀⠀⠀⠀⠀⠀⠀⠀⠀⠀⠀⠀⠀⠀⠀⠀⠀(Solution Hint, hover over black square)
⠀
On reaching the boss room, it'll look like any other puzzle room, but with a laughably easy puzzle. It's a trick. Destroy the jarred Rot first if there is one, then solve the puzzle to initiate the final battle. An eldritch creature called Rotberg will appear with tendons stretching from ceiling to floor, looking like some kind of sentient organ. It's a hard hitter, but luckily it's pretty weak.
⠀
In the beginning phase, if you don't solve the second puzzle immediately after it's exposed by Rotberg's first attack, it'll summon a bunch of tiny and basic Rots as well as some Rot explosions until you do solve it. This cycle will continue and you won't be able to hit Rotberg until you solve the second puzzle. I advise solving it immediately while it's throwing a tantrum just attacking empty air in order to avoid the Rot fallout.
⠀
In the second phase, whenever it lets up on its attacks, just run in and wail on it as much as your stamina allows you to. It'll be triggered by hp percentage to summon more Rots. You'll have your work cut out for you trying to juggle killing the Rots, staying out of the AoE, and attacking the boss in the cramped room. It's easy to get overwhelmed, but kill just enough Rots to give yourself some room and then put all focus on the boss. The more hits you get on it, the faster it'll be defeated.
⠀
⠀
When all is said and done, you'll be rewarded with the treasure room and the Dungeon Delver achievement. Just complete the last puzzle to open the gate and you can go on through. Inside, you'll find several jars and crates that drop leaflets and resources, a dowsing node, a pith root node, and best of all, a one-time bubble globe that awards +1 Mind, +1 max hp, and +1 max stamina.
⠀
Returning to the library, Haupia will be very grateful (in her own way), but isn't willing to let you go just yet. There's more work to be done, and she wants you to see Kabocha in the general shop. Once there, he'll reluctantly part ways with a spade as an extra reward for you. On your way out, you'll run into Lychee who will gift you a seed pouch and give you a rundown on gardening. It's pretty easy once you get the hang of it, and the seeds he includes in the pouch are cobble piece seeds, so you can finally start farming these rare resources.
⠀
Autumn Town Pt 3 (Waypoints & Closure)


When the path is cleared in First Steppe, you can proceed south to Breezy Walkabout. First order of business is discovering Allio's memorial directly right of the entrance to unlock the memory tree. Next, after you've explored the new area, head back to the library to report to Haupia. She'll express genuine gratitude for your help, then ask you to meet her in Breezy Walkabout to set up a trade route with Spring Hamlet. Go on down to find Haupia at the newly cleared path to Perennial Plaza, where she'll run off to meet you there. At the Perennial Plaza exit to Spring Hamlet, you'll find Elderberry and Haupia. Elderberry will give you an update on Spring Hamlet, and will give you your next two goals: find Rana and Maraschino north of the Riverway and meet Negi at Glitter Docks.
⠀
⠀
Rana and Maraschino at Babble Brook will introduce you to the waypoint system. Now you can fast travel between certain points in and around different villages (areas highlighted blue on the waypoint map are locations you can teleport to). Negi at Glitter Docks will tell you that you're needed in Winter Glade. After this, you'll have to wait a day, so go ahead and do some jobs or foraging, or whatever you like. The next day, you'll have to meet Elderberry at Kindergarden. He'll have a deep talk with you, then inform you that you are indeed to report to Winter Glade to aid in whatever important business has been going on over there involving the infamous Mists. At this point, you can meet with Terong at Bell Row, where the closed-off path to Winter Glade is.
⠀
Take a minute first though to go west from Kindergarden to discover Old Shortcut, which is another waypoint location, and is the previously blocked path that connects the Bend to Perennial Plaza at the north end (right next to your house).
⠀
⠀
Once again, when you head off into the next village, you won't be able to come back until you finish that village's segment. So make sure you've gotten everything you want to get before you leave. When you're ready, just pass through the opened gate to access the next chapter.
⠀
Winter Glade Pt 1 (Ice Skates & Library)


The first thing you'll see upon entering are Rots. They seem to be taking over. Important lesson is your first fight with a Snowcap. These are a bit harder than other Rots, as they wear a protective helm of ice and have a little crystal floating around them which allows them to shoot either a single orb at other enemies to heal them or a wave of orbs at you for damage much like the Book Worm. When they're preparing to fire, their floating crystal will speed up and blink. You'll need to either put your shield to use here, or be very good at dodging. It only takes a hit or two with a fully upgraded pick to break their crystal and helm off, rendering them back into basic Rots, which are a cinch to kill.
⠀
⠀
A bit further in, you'll encounter Kolu, who will urgently urge you onward to meet Negi, who's been waiting for you. Negi is next, who's loitering outside the library with Ledidi. He'll panic when he sees you, begging for your help, then running north to show you the way. Ledidi, who seems much more cool-headed, will retreat back into the library. Follow Negi north, have a random little encounter with Ollie who will repeat that Negi is north, then find Negi at the entrance to the Mists. Again, he'll beg you for help, stating that Plum hasn't come back even though he was supposed to.
⠀
⠀
There's nowhere else for you to go, and no home for you to sleep at yet, so just appease the onion and make your trek into the unknown. The Mists is essentially the Winter Glade dungeon, and there's nothing in there for you to do yet and no enemies to fight (there is the occasional tombstone to harvest though), and if you go the wrong way then it'll spit you back out into Winter Glade. However, Plum is in there and you have to find him in order to progress. Just keep trying and eventually you'll find him.
⠀
Pick him up and take any exit to wind up back in Winter Glade again where Negi and Ollie are waiting for you. They'll tell you to take him back to his house, which is just south. Carry him down into the shack just below the Mists and you'll automatically set him into the bed. There'll be some sad dialogue before he falls asleep. Go out to meet Ollie, who will inform you that Negi has a house ready for you. Go back up toward the Mists, and Negi will greet you with some more dialogue worrying about Plum, then tell you to meet them further west. Head that way to find him for more dialogue, then you can head into your new home and take a snooze to save your game and switch to residing in Winter Glade.
⠀
⠀
The next day, Negi will be outside when you leave the house. He'll tell you that Plum wants to see you, so that'll be your next goal.
⠀
⠀
First though, Rose nearby has a favor to ask. Talk to him and he'll ask you to retrieve his sword from a Glomp that ate it at Cube Coast. Glomps only spawn at night, so wait til nightfall to go out there, then just kill Glomps until you find the sword. Bring it back to Rose and he'll reward you with an old world leaflet, completing the favor.
⠀
⠀
When you head over to visit with Plum, it'll be a somber little scene pulling this wholesome game deeper into conflict territory. Things are getting real, and your journey will only get more perilous from here on out. Plum will admit defeat and will forfeit his ice skates to you. Now you can traverse those fields of sparkly ice that you couldn't access before. Coming out, you'll catch Ollie outside who will give you some more words of his own, then you'll be free to go on your way.
⠀
⠀
The Winter Glade Paperbark Tree requires the following resources:
bough⠀⠀⠀⠀⠀⠀⠀⠀⠀⠀⠀⠀⠀pebble⠀⠀⠀⠀⠀⠀⠀ branch
rot wax⠀⠀⠀⠀⠀⠀⠀⠀⠀⠀⠀ chunk⠀⠀⠀⠀⠀⠀⠀⠀porcelain shell
glass lens⠀⠀⠀⠀⠀⠀⠀⠀⠀ moon kelp⠀⠀⠀⠀⠀rot bauble
succulent⠀⠀⠀⠀⠀⠀⠀⠀⠀⠀ tombstone⠀⠀⠀⠀ twig
bioluminescent pod⠀⠀⠀⠀rot wax⠀⠀⠀⠀⠀⠀ corner stone
⠀
The following building items can be unlocked here:
winter request board⠀⠀⠀packed snow
winter seat⠀⠀⠀⠀⠀⠀⠀⠀⠀ winter lamp
glowing chamber
⠀
Winter Glade Pt 2 (The Mists & Silversword)


Now that you have the ice skates, you can explore at a broader range. Check out the areas north of your house to find Mandy's memorial and another bubble globe that requires Rot damage. Someone also needs a favor up there. Dumpy needs 'eggshells' (porcelain shells) for her son, which you can grow yourself using the chickpea seeds for sale at the general store. There are a few plots conveniently located in the area, so just farm them and plant the chickpea seeds. Once they're grown, harvest them and hand 3 of them in to Dumpy to complete her favor. She'll reward you with a pair of roll boots, which will allow you to roll while using a tool.
⠀
⠀
Going back into the Mists, your first goal was presented to you by Ledidi, despite her lack of enthusiasm about it. You'll need to repair all the broken epitaphs scattered throughout the ruins. The Mists is different from the other dungeons in that the rooms are very large, don't hold much in the way of puzzles, and instead of leading to a final boss, it'll just push you back out into Winter Glade after 6 rooms. Keep delving in and completing each randomized room by defeating all enemies to lower the gates until you've repaired all the epitaphs with your hammer; it doesn't matter what direction you go to get to each room in this first phase, so just go whichever ways you want.
⠀
You'll know the job is done when you get the notification that your map journal was updated. If you miss the notification for whatever reason, just check your map journal regularly; if it says to go talk to Ledidi, then you're finished. At that point, it's time to go to the library.
⠀
⠀
Ledidi proves herself a true foil in her dialogue, explaining her perspective on the Mists, Guardian Mandy, and the Rot. Nonetheless, she resolves to help you, and gives you a scrying stone, which will allow you to read the epitaphs you repaired with the ultimate goal of recovering Mandy. And with that, once more into the blue.
⠀
⠀
With the scrying stone, the epitaphs will now be glowing. Navigate your way to each one and get next to them to read them. They'll tell you which direction to take next. Never assume; you may have some identical rooms, but the directions on the epitaphs may not be the same. If you go in an incorrect direction, the epitaphs will stop glowing and you'll be reverted to the regular Mists which will kick you out after 6 rooms.
⠀
Once you reach the final room after following the directions, you'll find a hologram of Mandy who will tell you to proceed. Apparently, she's been waiting a long time for someone to show up. What will follow is a very solemn scene of enlightenment and the procurement of the Silversword. If you remember all those doorways from past areas covered over and blocked by Rot slime, you'll now be able to clear those for entry with the Silversword. Your epic quest now is to retrieve relics to open the ancient temple door within the Mists.
⠀
⠀
Plum will be waiting outside when you return, and will express exuberant surprise at the Silversword. He'll then tell you to come see him and Ledidi in the library when you're ready. Plum will be there when you arrive, and both he and Ledidi will confirm some info you gleaned from Mandy in the Mists. They'll ask you to retrieve the three relics from the three boss dungeons you've visited previously, this time with the aid of the Silversword to open up those doors locked with Rot slime. The next day, you'll be able to go back to Spring Hamlet, and you'll have full access to whole world.
⠀
⠀
There's one more favor you can do in Winter Glade, for Ollie. After obtaining the Silversword and purchasing the cozy flask +3, he'll get the telltale blue exclamation mark over his head. Talk to him and he'll say he wants to make a gift for Plum, but it requires 6 moon kelp. Go grab it and bring it back to him, and then he'll give you a jar of ceremonial dew. Take it to Plum near the south exit of the village and he'll reminisce a little, then gift you another old world leaflet. Favor completed.
⠀
⠀
When you come back through the Winter Glade gate, Terong will greet you and wish you well on your quest. This marks the end of the Winter Glade segment. Now you can go around and finish anything still pending, such as library collections, village statuses, bubble globes, etc.
⠀
Epic Quest: Three Relics


After you've done everything you wanted to do (fully upgraded tools & dew jars, maxed out village statuses, bought all cosmetics, etc), it's time to get your grail quest underway. You can do them in any order you want, but for continuity's sake, I'm going to list them in order of story completion.
⠀
⠀
Spring Hamlet
⠀
First up is Spring Hamlet. When you enter the Stacks, you'll see the blocked doorway immediately to the right. Just go on up and clear it with your new Silversword, then you can head in. Inside is a single room consisting of an entry hall, a puzzle area, and the boss room. The trap door in the middle of the floor of the entry hall will trigger a ladder when stepped on, and this is the exit back into the Stacks. The puzzle floor is a somewhat more difficult switch puzzle than the ones in the Stacks. Stepping on a tile will light up all adjacent unlit tiles and unlight all adjacent lit tiles, including itself. Step on them until all are lit up, then step on the center one to complete it. The door will open forward, and you can head up to fight the boss. Step on the center button to summon it.
⠀
You'll be once again going up against the Book Worm (see Spring Hamlet Pt 4), but this time a bit more challenging. You can't hide in the upper corners anymore, and the boss has more hp. Still, it's a short fight, especially if you have fully upgraded tools and full dew jars. Take advantage of the short pause just before it starts firing off honing orbs to hack away at it with your tool of preference. It should take ~3-4 cycles to kill it.
⠀
When it's defeated, it'll disappear down along the bookcase just like last time, and you'll be awarded the first of the three relics: the Jittery Dew Star. No treasure room, unfortunately, but now you can exit and make your way to the next dungeon.
⠀
⠀
⠀⠀⠀⠀⠀⠀⠀⠀⠀⠀⠀⠀⠀⠀⠀⠀(Puzzle Solution Hints, hover over black squares)
[1]⠀⠀⠀⠀⠀⠀⠀⠀⠀⠀⠀⠀⠀⠀⠀⠀⠀⠀⠀⠀⠀⠀⠀⠀⠀⠀⠀⠀⠀⠀⠀⠀⠀⠀[2]
⠀
[3]⠀⠀⠀⠀⠀⠀⠀⠀⠀⠀⠀⠀⠀⠀⠀⠀⠀⠀⠀⠀⠀⠀⠀⠀⠀⠀⠀⠀⠀⠀⠀⠀⠀⠀[4]
⠀
⠀
Summer Bar
⠀
The Waterlog starts the same as the Stacks, with the webbed door being just inside the dungeon. Tear it open and walk on in to find another puzzle room leading to the boss. This one is much simpler- just pull up the levers in the water with your dowsing rod to drop the obstacles blocking the path forward (there are three of these puzzles). When you reach the end, you'll find Octopihi in a large pool surrounded by lilypads, which you'll have to use as a platform to move around. Just move forward to initiate combat.
⠀
This fight is definitely more difficult than the previous Octopihi, with very restricted movement and the addition of Rot explosions at the end of the fight. The tentacles will spawn in a circle along the perimeter of the lilypad ring and generate poison bubbles, but can still be attacked either with the bubbles or directly with your tool. The same goes for Octopihi's head- the same rules apply for him as the original battle (see Summer Bar Pt 2). I recommend staying upper center, just above the head and just between the two topmost tentacles. The tentacles can't reach you here, and it's the perfect spot to rail on the head when it comes up or when you stun it with the bubbles. You will get hit a few times in this fight, but don't sweat it, just heal up with your ample dew reserves whenever necessary.
⠀
He'll sink down into the water when he's defeated (albeit with a lengthy retaliation of tentacle bubbles and Rot explosions), freeing you up to be rewarded the Warm Dew Star, and then you can leave to make your way to the next and final relic boss. The exit is at the beginning and to the left; just step on the trap door to trigger the ladder, same as in the Stacks.
⠀
⠀
⠀
Autumn Town
⠀
Third verse, same as the first. Rip your way through the slimed door with your Silversword and hop into the depths of the Sewers. The first puzzle is easy as pie. Second one looks daunting but is actually pretty simple. Afterwards, you'll have a challenge against two Glomps; kill them both to lower the next gate. There's a random well down here that dispenses shallow dew that you can just ignore. Third puzzle is a bit tricky, but just think outside the box and you'll get it. Once the third one is solved, the gate will drop, and you can access the final Rotberg. Move forward to start.
⠀
This battle will be quite hectic. There'll be a lot more basic and tiny Rots summoned this time around, and in addition to that, every time Rotberg executes his bite attack with Rots in the area of effect, Rotberg will heal; the more Rots damaged by the bite attack, the more Rotberg will heal. You'll have your work cut out for you dodging and killing enemies, staying out of the bite AoE, and slashing Rotberg. Just do more damage to him than he can heal back and you'll cut him down eventually.
⠀
When all is said and done, Rotberg will perish and you'll be rewarded the Unnerving Dew Star. Head back through the puzzle trail to exit (trap door with ladder is at the very beginning) and that's all there is to the relic hunt. Now you can report back to the Mists to open that mysterious ancient door of Mandy's.
⠀
⠀
⠀⠀⠀⠀⠀⠀⠀⠀⠀⠀⠀⠀⠀⠀⠀⠀⠀⠀⠀⠀⠀⠀(Solution Hints, hover over black square)
⠀
⠀⠀⠀⠀⠀⠀⠀⠀⠀⠀⠀⠀⠀⠀⠀⠀⠀⠀⠀⠀⠀⠀⠀⠀⠀⠀⠀⠀⠀⠀⠀⠀⠀⠀⠀(Solution Hint, hover over black square)
⠀
End Game: The Clutch & Epilogue


We return to the Mists with our well-earned relics, and greet Mandy at the entrance. Talk to her, then open the doorway with your Silversword. Slide in and you'll once again be at the ancient door. Place the relics in their places by simply walking up to each altar, and the door will open. Go consult with Mandy again, and she'll speak more philosophy before disappearing. Follow her through the door. You'll find yourself in a strange jointed corridor with blocks of mist; walking into the mists does nothing but dissipate them (they're not dangerous). At the end is the Grove Clutch.
⠀
⠀
Hit the tree with your Silversword to activate the fight. This will arguably be the most interesting battle in the game. The Grove will send out patches of brambles toward you to defend itself. Just lure the blooms in ideal directions, then move out of the way before they erupt. Throughout the fight, dark spots will pop up on the ground in threes that look like dowsing nodes. Use your dowsing rod on them while avoiding bramble patches; this will pull up basic Rots from the ground which will then make their way toward the tree. Try to keep the brambles away from the Rots, because they will be damaged by them and turn into tiny Rots, and tiny Rots will die in one hit. When a Rot hits the tree, the tree will turn purple, indicating it can be damaged. Use any tool except the Silversword to attack it. You'll only be able to get four hits off before it reverts back to damage immunity. With each percentage milestone of its lost hp, its bramble attacks will get more concentrated and it'll get more difficult to dodge and manage the patches while also pulling up Rots.
⠀
It'll take 4-5 sets of hits to defeat the Clutch. When it drops to 0hp, there'll be a good 10-15 seconds of serious retaliation. Just keep moving and avoiding the brambles until the Clutch finally dies. When it does, a giant crystal will appear from above and transport you to "the World." The achievement A Restful Slumber will also pop for you, which may be your very last one if you've already earned all the others.
⠀
⠀
Follow the path until you reach the dew star, then interact with it. You'll then have a deep conversation with the Grove itself. I won't mention anything else so as to not spoil the ending to the story.
⠀
When you're finished, you say your goodbyes and the Grove spirits you back into your body, which is resting in Kindergarden. Rana will greet you and tell you to go talk to everyone who's been caring for you while you were passed out. Do so, then return to Rana in your house. She'll tell you the world has changed and will urge you to go out and see everyone as the hero of the Grove. On your way down, you'll run into Plum, who will have a chat before filling your Glass Jar with Leafy Dew and telling you to use it on the Kindergarden vine.
⠀
⠀
Go on up and split the dew near the vine, and behold as a new fruit is suddenly given life!
And roll credits!
⠀
⠀
But that's not where the story ends! Reload your save file to appear in Kindergarden. The new sprout is growing on the vine, but it'll be awhile before it wakes up, apparently. Head down to find Rana waiting for you. Talk to her and she'll tell you about a meeting going on down in Summer Bar, and will urge you to go check it out.
⠀
⠀
The meeting is taking place where Saguaro is, in the marketplace. Head over and talk to everyone. Saguaro will get you up to date, then Ledidi will reward you with a new dew jar and you'll be comforted by everyone in the fact that even though the Rot is still present and active, it's a new era of peace and you can now enjoy it. This is basically just an opening for you to continue progress in any areas you didn't complete throughout the story proper. Now you can either relax and finish out anything still pending without having to worry about running guardian missions, or just quit the game.
⠀
⠀
Congratulations and best of luck in your next endeavor!
----------------------------------------
Standalone Guides follow below
Upgrades Guide Pt 1 (Spring Hamlet & Summer Bar)


Spring Hamlet
Marsanne's Tavern (Dew Jars)
⠀
Glass Jar +1: requires Forage level 1, 30 leaflets, 10 glass shards
Glass Jar +2: requires Forage level 2, 60 leaflets, 5 sandstone
Glass Jar +3: requires Forage level 3, 100 leaflets, 15 sandstone
Glass Jar +4: requires Forage level 3, 150 leaflets, 10 glass lenses
⠀
⠀
--------------------------------
Spring Wood Forge (Tools)
⠀
Leaf Shield: requires Maintenance level 2, 75 leaflets, 1 water sprout
⠀
---------------
⠀
Pick +1: requires Maintenance level 2, 30 leaflets, 3 sap
Pick +2: requires Maintenance level 2, 50 leaflets, 5 flowstones
Pick +3: requires Maintenance level 3, 80 leaflets, 5 sandstone
Pick +4: requires Maintenance level 4, 120 leaflets, 8 glass lenses
Living Pick +5: requires Maintenance level 4, 180 leaflets, 12 driftwood
⠀
---------------
⠀
Hammer: requires Maintenance level 1, 50 leaflets
Hammer +1: requires Maintenance level 2, 50 leaflets, 5 sap
Hammer +2: requires Maintenance level 2, 60 leaflets, 8 water sprouts
Hammer +3: requires Maintenance level 3, 70 leaflets, 5 driftwood
Hammer +4: requires Maintenance level 3, 70 leaflets, 15 driftwood
Cane's Hammer +5: requires Maintenance level 5, 150 leaflets, 25 cobble pieces
⠀
⠀
--------------------------------
Summer Bar
Halaan's General Shop (Dew Jars)
⠀
Pocket Phial: requires Forage level 0, 25 leaflets
Pocket Phial +1: requires Forage level 1, 35 leaflets, 10 glass shards
Pocket Phial +2: requires Forage level 2, 70 leaflets, 10 sandstone
Pocket Phial +3: requires Forage level 3, 120 leaflets, 15 sandstone
Pocket Phial +4: requires Forage level 4, 180 leaflets, 10 glass lenses
⠀
⠀
--------------------------------
Pearl's Tool Forge (Tools)
⠀
All Hammer Upgrades (refer to Spring Hamlet, above)
⠀
Dowsing Rod +1: requires Maintenance level 1, 70 leaflets, 5 yellow shells
Dowsing Rod +2: requires Maintenance level 2, 70 leaflets, 10 blue shells
Dowsing Rod +3: requires Maintenance level 3, 90 leaflets, 10 crimson shells
Dowsing Rod +4: requires Maintenance level 4, 120 leaflets, 10 porcelain shells
Super Rod +5: requires Maintenance level 4, 150 leaflets, 20 porcelain shells
⠀
---------------
⠀
Parasol +1: requires Maintenance level 3, 70 leaflets, 5 succulents
Parasol +2: requires Maintenance level 3, 100 leaflets, 10 succulents
Parasol +3: requires Maintenance level 3, 130 leaflets, 10 sap
Parasol +4: requires Maintenance level 4, 170 leaflets, 15 driftwood
Beach Umbrella +5: requires Maintenance level 5, 220 leaflets, 15 moon kelp
Upgrades Guide Pt 2 (Autumn Town & Winter Glade)


Autumn Town
Dillford's Dew Shop (Dew Jars)
Note: He sells only Tap Dew in the beginning, but once you end the drought by defeating Rotberg in the Sewers, he'll sell higher quality types and you'll be able to get Tap Dew from wells throughout the village.
⠀
Big Jug: requires Forage level 1, 50 leaflets
Big Jug +1: requires Forage level 2, 50 leaflets, 10 glass shards
Big Jug +2: requires Forage level 2, 90 leaflets, 8 cobble pieces
Big Jug +3: requires Forage level 3, 130 leaflets, 8 porcelain shells
Big Jug +4: requires Forage level 4, 200 leaflets, 18 porcelain shells
⠀
⠀
--------------------------------
Kabocha's General Shop (Tools)
⠀
Sickle +1: requires Maintenance level 2, 100 leaflets, 5 corner stones
Sickle +2: requires Maintenance level 3, 100 leaflets, 7 flowstones
Sickle +3: requires Maintenance level 4, 100 leaflets, 10 crimson shells
Sickle +4: requires Maintenance level 4, 100 leaflets, 15 moon kelp
Darkmoon Scythe +5: requires Maintenance level 5, 200 leaflets, 20 rot wax
⠀
---------------
⠀
Spade +1: requires Maintenance level 2, 60 leaflets, 5 pith roots
Spade +2: requires Maintenance level 3, 80 leaflets, 15 pith roots
Spade +3: requires Maintenance level 3, 100 leaflets, 5 rusty screws
Spade +4: requires Maintenance level 4, 120 leaflets, 15 rusty screws
Auto Hoe +5: requires Maintenance level 5, 100 leaflets, 20 flowstones
⠀
⠀
--------------------------------
Winter Glade
⠀
Ollie's Dew Shop (Dew Jars)
⠀
Cozy Flask: requires Forage level 0, 40 leaflets
Flask Cozy +1: requires Forage level 1, 50 leaflets, 10 glass shards
Flask Cozy +2: requires Forage level 2, 90 leaflets, 10 tombstones
Flask Cozy +3: requires Forage level 3, 120 leaflets, 15 pith roots
Flask Cozy +4: requires Forage level 4, 180 leaflets, 15 bioluminescent pods
⠀
--------------------------------
Mandarin's General Shop (Tools)
⠀
Silversword +1: requires Maintenance level 3, 90 leaflets, 10 water sprouts
Silversword +2: requires Maintenance level 4, 140 leaflets, 10 succulents
Silversword +3: requires Maintenance level 4, 190 leaflets, 10 bioluminescent pods
Silversword +4: requires Maintenance level 4, 240 leaflets, 10 dew bells
Upgrades Guide Pt 3 (Backpack & Storage)


Fuji's Workshop (Spring Hamlet)
⠀
Backpack +1 Stacking⠀⠀⠀⠀⠀⠀⠀⠀⠀⠀⠀⠀⠀⠀⠀⠀⠀⠀⠀⠀⠀Storage +5 Items
requires 150 leaflets & 5 dew bells⠀⠀⠀⠀⠀⠀⠀⠀⠀⠀⠀ requires 75 leaflets & 12 sap
⠀
⠀
--------------------------------
Woody's Workshop (Summer Bar)
⠀
Backpack +1 Stacking⠀⠀⠀⠀⠀⠀⠀⠀⠀⠀⠀⠀⠀⠀⠀⠀⠀⠀⠀⠀⠀Storage +5 Items
requires 150 leaflets & 15 crimson shells⠀⠀⠀⠀⠀⠀⠀ requires 75 leaflets & 12 driftwood
⠀
⠀
--------------------------------
Kalo's Workshop (Autumn Town)
Backpack +1 Stacking⠀⠀⠀⠀⠀⠀⠀⠀⠀⠀⠀⠀⠀⠀⠀⠀⠀⠀⠀⠀⠀Storage +5 Items
requires 500 leaflets⠀⠀⠀⠀⠀⠀⠀⠀⠀⠀⠀⠀⠀⠀⠀⠀⠀⠀⠀⠀ requires 75 leaflets & 12 cobble pieces
⠀
⠀
--------------------------------
Porro's Workshop (Winter Glade)
Backpack +1 Stacking⠀⠀⠀⠀⠀⠀⠀⠀⠀⠀⠀⠀⠀⠀⠀⠀⠀⠀⠀⠀⠀Storage +5 Items
requires 150 leaflets & 12 porcelain shells⠀⠀⠀⠀⠀⠀⠀⠀requires 75 leaflets & 6 bioluminescent pods
Resources Guide


Resources by Location
Visual shows where you can find certain resources with highest probability of drop rate. Some resources can be obtained from other sources, usually as rare drops. But for farming purposes, refer to this guide for fastest retrieval.
⠀
⠀
⠀
Seeds/Plants by Location
After obtaining the Seed Pouch in Autumn Town, you can buy seeds from the other three villages' general stores to add them to your pouch. When you have a seed type added to your collection, the respective general store will no longer sell the seed and will from then on only sell seed refills (10x). The seeds in your collection are permanently added, and buying refills allows you to plant any seeds in your pouch 10 times before they run out.
⠀
Visual shows what each seed grows when planted in each village. Not every seed yields the same crop in every village, so refer to this guide for faster resource farming.
⠀
Bubble Globes Guide


* For bubble globes that require Rot damage, just lure a Rot over and make it attack next to the globe.
Spring Hamlet
⠀
The Bend Bubble Globe⠀⠀⠀⠀⠀⠀⠀⠀⠀⠀⠀⠀⠀⠀⠀⠀⠀⠀ Riverway Bubble Globe
requires Dowsing Rod attack (any level)⠀⠀⠀⠀⠀⠀ requires +2 tool attack
awards +1 max stamina⠀⠀⠀⠀⠀⠀⠀⠀⠀⠀⠀⠀⠀⠀⠀⠀⠀ awards +1 Mind
⠀
Bell Row Bubble Globe⠀⠀⠀⠀⠀⠀⠀⠀⠀⠀⠀⠀⠀⠀⠀⠀⠀⠀⠀ Bloom Bank Bubble Globe
requires +4 tool attack⠀⠀⠀⠀⠀⠀⠀⠀⠀⠀⠀⠀⠀⠀⠀⠀⠀ requires Hammer attack (any level)
awards +1 max hp⠀⠀⠀⠀⠀⠀⠀⠀⠀⠀⠀⠀⠀⠀⠀⠀⠀⠀⠀⠀ awards +1 max hp
⠀
Crossroads Bubble Globe⠀⠀⠀⠀⠀⠀⠀⠀⠀⠀⠀⠀⠀⠀⠀⠀ The Stacks (first Book Worm win)
requires +2 tool attack⠀⠀⠀⠀⠀⠀⠀⠀⠀⠀⠀⠀⠀⠀⠀⠀⠀⠀ requires tool attack (any type, any level)
awards +1 max stamina⠀⠀⠀⠀⠀⠀⠀⠀⠀⠀⠀⠀⠀⠀⠀⠀⠀ awards +1 Mind, +1 max hp, +1 max stamina
⠀
Babble Brook Bubble Globe
requires Silversword attack (any level)
awards +1 Mind
⠀
⠀
Summer Bar
⠀
Quiet Shore Bubble Globe⠀⠀⠀⠀⠀⠀⠀⠀⠀⠀⠀⠀⠀⠀⠀⠀⠀⠀Summer's End Bubble Globe
requires +4 tool attack⠀⠀⠀⠀⠀⠀⠀⠀⠀⠀⠀⠀⠀⠀⠀⠀⠀⠀⠀⠀ requires Parasol attack (any level)
awards +1 max hp⠀⠀⠀⠀⠀⠀⠀⠀⠀⠀⠀⠀⠀⠀⠀⠀⠀⠀⠀⠀⠀⠀ awards +1 max stamina
⠀
Lilyputt Bubble Globe⠀⠀⠀⠀⠀⠀⠀⠀⠀⠀⠀⠀⠀⠀⠀⠀⠀⠀⠀⠀ Waterlog Bubble Globe (first Octopihi win)
requires Sickle attack (any level)⠀⠀⠀⠀⠀⠀⠀⠀⠀⠀⠀⠀⠀ requires tool attack (any type, any level)
awards +1 Mind⠀⠀⠀⠀⠀⠀⠀⠀⠀⠀⠀⠀⠀⠀⠀⠀⠀⠀⠀⠀⠀⠀⠀⠀⠀ awards +1 Mind, +1 max hp, +1 max stamina
⠀
⠀
Autumn Town
⠀
Wheat Field⠀⠀⠀⠀⠀⠀⠀⠀⠀⠀⠀⠀⠀⠀⠀⠀⠀⠀⠀⠀⠀⠀⠀⠀⠀⠀⠀ Sewer Entrance Bubble Globe
requires Sickle attack (any level)⠀⠀⠀⠀⠀⠀⠀⠀⠀⠀⠀⠀⠀ requires +4 tool attack
awards +1 max stamina⠀⠀⠀⠀⠀⠀⠀⠀⠀⠀⠀⠀⠀⠀⠀⠀⠀⠀⠀ awards +1 max stamina
⠀
Second Steppe Bubble Globe⠀⠀⠀⠀⠀⠀⠀⠀⠀⠀⠀⠀⠀⠀⠀ Sewers Bubble Globe (first Rotberg win)
requires Rot damage*⠀⠀⠀⠀⠀⠀⠀⠀⠀⠀⠀⠀⠀⠀⠀⠀⠀⠀⠀⠀⠀requires tool attack (any type, any level)
awards +1 Mind⠀⠀⠀⠀⠀⠀⠀⠀⠀⠀⠀⠀⠀⠀⠀⠀⠀⠀⠀⠀⠀⠀⠀⠀⠀awards +1 Mind, +1 max hp, +1 max stamina
⠀
Breezy Walkabout Bubble Globe
requires Super Rod +5 attack
awards +1 max hp
⠀
⠀
Winter Glade
⠀
The Mists Bubble Globe #1⠀⠀⠀⠀⠀⠀⠀⠀⠀⠀⠀⠀⠀⠀⠀ The Mists Bubble Globe #2
requires Scythe damage (any level)⠀⠀⠀⠀⠀⠀⠀⠀⠀⠀⠀⠀requires Hammer damage (any level)
awards +1 max hp⠀⠀⠀⠀⠀⠀⠀⠀⠀⠀⠀⠀⠀⠀⠀⠀⠀⠀⠀⠀⠀⠀⠀ awards +1 Mind
⠀
Lost Garden Bubble Globe
requires Rot damage*
awards +1 max stamina
Structure Repairs Guide


Spring Hamlet
The Bend House Window⠀⠀⠀⠀⠀⠀⠀⠀⠀⠀⠀⠀⠀⠀⠀⠀⠀⠀ The Bend Path Clearing (Cayenne)
requires 4 sap⠀⠀⠀⠀⠀⠀⠀⠀⠀⠀⠀⠀⠀⠀⠀⠀⠀⠀⠀⠀⠀⠀⠀⠀⠀ requires 6 sap
⠀
Hidden Pocket Bridge to Riverway⠀⠀⠀⠀⠀⠀⠀⠀⠀⠀⠀⠀ Perennial Plaza Lift to Autumn Town
requires 9 sap⠀⠀⠀⠀⠀⠀⠀⠀⠀⠀⠀⠀⠀⠀⠀⠀⠀⠀⠀⠀⠀⠀⠀⠀⠀ requires 3 flowstones
⠀
Perennial Plaza Wizard Clothing Shop⠀⠀⠀⠀⠀⠀⠀⠀ Perennial Plaza Sporty Clothing Shop
requires 6 rot wax⠀⠀⠀⠀⠀⠀⠀⠀⠀⠀⠀⠀⠀⠀⠀⠀⠀⠀⠀⠀ requires 4 crimson shells
⠀
Hidden Pocket Bridge to Misty Clearing
requires 9 fatwood
⠀
⠀
Summer Bar
⠀
Lilyputt Bridge⠀⠀⠀⠀⠀⠀⠀⠀⠀⠀⠀⠀⠀⠀⠀⠀⠀⠀⠀⠀⠀⠀⠀⠀⠀ Quiet Shore Lighthouse Back Door
requires 3 succulents⠀⠀⠀⠀⠀⠀⠀⠀⠀⠀⠀⠀⠀⠀⠀⠀⠀⠀⠀⠀⠀ requires 6 driftwood
⠀
Lily Landing Lily Bridge (thru Lil' Islet)⠀⠀⠀⠀⠀⠀⠀⠀⠀ Lil' Islet Lily Bridge to Summer's End
requires 1 lily spore⠀⠀⠀⠀⠀⠀⠀⠀⠀⠀⠀⠀⠀⠀⠀⠀⠀⠀⠀⠀⠀⠀ requires 1 lily spore
(obtained by completing the Stacks again)⠀⠀⠀⠀⠀⠀⠀(obtained by completing the Stacks again)
⠀
⠀
Autumn Town
⠀
Sewer Entrance Path Clearing (Second Steppe)⠀ City Road House Windows
requires 2 corner stones⠀⠀⠀⠀⠀⠀⠀⠀⠀⠀⠀⠀⠀⠀⠀⠀⠀ requires 4 pith roots
⠀
Plantation Village Shortcut (City Road)⠀⠀ ⠀⠀⠀⠀⠀First Steppe Path Clearing (Breezy Walkabout)
requires 5 cobble pieces⠀⠀⠀⠀⠀⠀⠀⠀⠀⠀⠀⠀⠀⠀⠀⠀⠀⠀ requires 3 cobble pieces
⠀
⠀
Winter Glade
Misty Clearing Bridge to Bell Row
requires 9 tombstones
Cosmetics Guide


Note: Some cosmetics require higher Forage levels than others. If you don't see something in stock, then raise that village's Forage status until it shows up for sale.
Snow's General Shop (Spring Hamlet)
⠀
Blue Snapback: 50 leaflets⠀⠀⠀⠀⠀⠀⠀⠀⠀⠀⠀⠀⠀⠀⠀⠀⠀⠀Hibiscus Flower: 50 leaflets
⠀
Mushroom Cap: 50 leaflets⠀⠀⠀⠀⠀⠀⠀⠀⠀⠀⠀⠀⠀⠀⠀⠀⠀⠀Royal Crown: 1000 leaflets
⠀
Sprout Snapback: 50 leaflets⠀⠀⠀⠀⠀⠀⠀⠀⠀⠀⠀⠀⠀⠀⠀⠀⠀Sunnyside Rucksack: 70 leaflets
⠀
Sunny Snapback: 50 leaflets⠀⠀⠀⠀⠀⠀⠀⠀⠀⠀⠀⠀⠀⠀⠀⠀⠀Wayfarer's Cap: 75 leaflets
⠀
⠀
--------------------------------
Halaan's General Shop (Summer Bar)
⠀
Blue Snorkel: 100 leaflets⠀⠀⠀⠀⠀⠀⠀⠀⠀⠀⠀⠀⠀⠀⠀⠀⠀⠀⠀Delver's Helm: 75 leaflets
⠀
Found Spectacles: 100 leaflets⠀⠀⠀⠀⠀⠀⠀⠀⠀⠀⠀⠀⠀⠀⠀Green Rain Cap: 50 leaflets
⠀
Ocean Courier Bag: 70 leaflets⠀⠀⠀⠀⠀⠀⠀⠀⠀⠀⠀⠀⠀⠀⠀Red Rain Cap: 50 leaflets
⠀
Summer Rain Cap: 75 leaflets⠀⠀⠀⠀⠀⠀⠀⠀⠀⠀⠀⠀⠀⠀⠀⠀Yellow Rain Cap: 50 leaflets
⠀
⠀
--------------------------------
Seaberry's Clothing Shop (Perennial Plaza)
⠀
Boom Box (Backpack): 150 leaflets⠀⠀⠀⠀⠀⠀⠀⠀⠀⠀⠀⠀⠀Brass Headphones: 120 leaflets
⠀
Colorful Headphones: 100 leaflets⠀⠀⠀⠀⠀⠀⠀⠀⠀⠀⠀⠀⠀⠀Lovely Headphones: 120 leaflets
⠀
Lucky Headphones: 120 leaflets⠀⠀⠀⠀⠀⠀⠀⠀⠀⠀⠀⠀⠀⠀⠀Mint Headphones: 100 leaflets
⠀
Novice Goggles: 75 leaflets⠀⠀⠀⠀⠀⠀⠀⠀⠀⠀⠀⠀⠀⠀⠀⠀⠀⠀Snow Goggles: 100 leaflets
⠀
⠀
--------------------------------
Alvarius' Clothing Shop (Perennial Plaza)
⠀
Angel's Halo: 160 leaflets⠀⠀⠀⠀⠀⠀⠀⠀⠀⠀⠀⠀⠀⠀⠀⠀⠀⠀⠀Bell Witch Hat: 100 leaflets
⠀
Crimson Batpack: 150 leaflets⠀⠀⠀⠀⠀⠀⠀⠀⠀⠀⠀⠀⠀⠀⠀⠀Feathery Backpack: 150 leaflets
⠀
Imp Horns: 65 leaflets⠀⠀⠀⠀⠀⠀⠀⠀⠀⠀⠀⠀⠀⠀⠀⠀⠀⠀⠀⠀⠀Red Horns: 65 leaflets
⠀
Spooky Witch Hat: 100 leaflets⠀⠀⠀⠀⠀⠀⠀⠀⠀⠀⠀⠀⠀⠀⠀Winged Batpack: 150 leaflets
⠀
⠀
--------------------------------
Kabocha's General Shop (Autumn Town)
⠀
Architect's Helm: 75 leaflets⠀⠀⠀⠀⠀⠀⠀⠀⠀⠀⠀⠀⠀⠀⠀⠀⠀Farmer's Wide Brim: 25 leaflets
⠀
Golden Sun Snapback: 50 leaflets⠀⠀⠀⠀⠀⠀⠀⠀⠀⠀⠀⠀⠀Porter's Rack-Pack: 70 leaflets
⠀
Salakot: 100 leaflets⠀⠀⠀⠀⠀⠀⠀⠀⠀⠀⠀⠀⠀⠀⠀⠀⠀⠀⠀⠀⠀⠀Sewer Safety Cap: 150 leaflets
⠀
⠀
--------------------------------
Kolu's General Shop (Winter Glade)
⠀
10-Jug Hat: 50 leaflets⠀⠀⠀⠀⠀⠀⠀⠀⠀⠀⠀⠀⠀⠀⠀⠀⠀⠀⠀⠀⠀Book Bag: 70 leaflets
⠀
Night Cap: 100 leaflets
⠀
⠀
--------------------------------
Mandarin's Clothing Shop (Winter Glade)
⠀
Leafy Pointed Hat: 75 leaflets⠀⠀⠀⠀⠀⠀⠀⠀⠀⠀⠀⠀⠀⠀⠀⠀Old Pointed Hat: 25 leaflets
⠀
Sparkle Cone: 75 leaflets⠀⠀⠀⠀⠀⠀⠀⠀⠀⠀⠀⠀⠀⠀⠀⠀⠀⠀⠀Walnut Helm: 100 leaflets
⠀
⠀
--------------------------------
Library Hats
Each hat is locked in a display case inside their respective library, and requires 100% completion of that library's Paperbark Tree collection to obtain it.
⠀
Spring Hamlet: Scholar's Motorboard⠀⠀⠀⠀⠀⠀⠀⠀⠀⠀⠀Summer Bar: Paper Crown
⠀
Autumn Town: Historian's Glasses⠀⠀⠀⠀⠀⠀⠀⠀⠀⠀⠀⠀⠀Winter Vale: Bookish Cone Hat
Achievements Guide
Storyline
⠀
Spring Awakening: obtained automatically upon starting the game
⠀
By the Book: defeat the Book Worm boss in the Spring Hamlet library for the first time, thus completing the Spring Hamlet segment
(see Spring Hamlet Pt 4 for boss fight details)
⠀
Beach Bound: enter Summer Bar after completing the Spring Hamlet segment
⠀
Summer Savior: defeat the Octopihi boss in the Waterlog dungeon of Summer Bar for the first time, thus completing the Summer Bar segment
(see Summer Bar Pt 3 for boss fight details)
⠀
Arid Arrival: enter Autumn Town after completing the Summer Bar segment
⠀
Dungeon Delver: defeat the Rotberg boss in the Sewers dungeon of Autumn Town for the first time
(see Autumn Town Pt 2 for boss fight details)
⠀
Snowy Stop-Over: enter Winter Glade after completing the Autumn Town segment
⠀
House of the Sun: obtain the Silversword from Mandy in the Mists of Winter Glade
⠀
A Restful Slumber: vanquish the Grove's Clutch at the end of the story (final boss)
(see End Game: The Clutch & Prologue for boss fight details)
⠀
⠀
--------------------------------
Enemy Trackers
These are much easier to get if you kill enemies regularly throughout the story rather than skipping over them most of the time and leaving the achievements for end-game. Do whatever makes you happy, but if you're going for efficiency, I definitely recommend killing all enemies in all areas on most days while completing job requests.
⠀
Rot Squasher: kill 150 enemies (any, doesn't matter what kind) - this can easily be earned while doing the other enemy tracker achievements
⠀
Acorn Breaker: kill 50 acorns - these show up around Spring Hamlet at night
⠀
Glomp Slayer: kill 50 glomps - these show up around every village at night
⠀
Shell Buster: kill 50 shelled oozes - these are found in Summer Bar during any time; you have to use the dowsing rod to deshell them, then use any other weapon to kill them because they heal faster than you can deal damage with the dowsing rod
⠀
Hayrot Cleaner: kill 50 hayrots - these are found in Autumn Town during any time; you have to use the sickle to cut the hay off them, then you can kill them with any weapon
⠀
Snowcap Melter: kill 50 snowcaps - these are found in Winter Glade during any time; you have to swat them until their crystal breaks, then again to knock off their ice hat, then you can kill them with any weapon
⠀
⠀
--------------------------------
Miscellaneous
⠀
Invincible Enemy: keep hitting a rot training dummy until it's reduced to rubble; dummy locations:
- just below your house in the Bend
- first room of Waterlog dungeon
- just north of the Perennial Plaza southeast entrance
⠀
On a Roll: roll 100 times - just keep using the roll command until you get it
⠀
Cutting Edge: simply upgrade a tool to level 4
(see Upgrades Guide Pts 1 & 2 for details)
⠀
Chug Jug: simply upgrade a dew jar to level 4
(see Upgrades Guide Pts 1 & 2 for details)
⠀
Melody Maker:
Pagu's favor to make a new flute is in Summer's End in Summer Bar. He needs 4 pith roots. Pith roots normally can only be found in Autumn Town, but you can also farm them by deshelling shelled Rots if you're patient enough; they're very rare drops from deshelling, so it'll take awhile. Otherwise, you can simply collect them in Autumn Town, then return to Summer Bar to turn them in. After obtaining the pan flute, the achievement Melody Maker will pop for you.
⠀
⠀
Goldie Opportunity:
Popping the Riverway bubble globe (requires +2 tool attack) opens up a secret path to the right that goes deeper into the forest. Here is where you discover Goldie, who will ask you to make a delivery for her. Take her package to Mirabelle at Glitter Docks, and she'll ask you to take back a glass jar to Goldie as a follow-up favor. Deliver the jar to Goldie, and she'll ask you about Plum then give you some free resources, and the achievement Goldie Opportunity will pop for you.
⠀
Source: https://steamcommunity.com/sharedfiles/filedetails/?id=2814666861
More Garden Story guilds
- All Guilds
- Memories: Unlocks and Benefits
- How to Find Every Guardian of the Grove
- 100% Achievement Guide Walkthrough
- Ring That Bell
- Guide 4
- Finding Goldie
- Sewer Puzzles Video Walkthrough