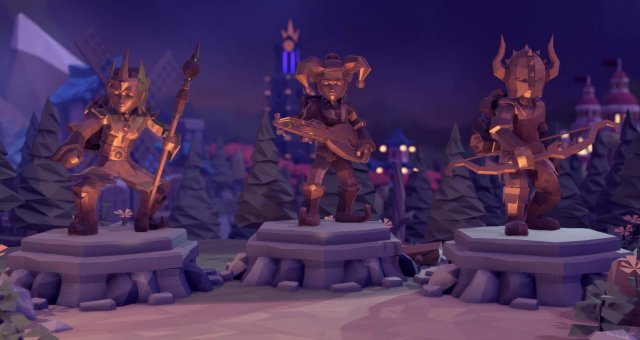
This is a brief description of scourges, how they affect the game, their weaknesses, and how to beat them.
Guide To Scourges
The Bandit King
- The Bandit King appears in the Bandit Camp with two Bandit Henchmen.
- When he is active everything will become more expensive (increased by 100%).
- The Bandit King can increase his team’s damage and has a splash attack, the Bandit Henchmen can inflict bleeding and pierce armour.
- He is immune to stuns and bleeds.
- In a fight with him do physical damage to the Bandit Henchmen and magic damage to him. You can also use armour piercing if you don’t have a magic user but if that’s the case kill the Bandit Henchmen first.
- He will drop the Bandit King Helm, which has +3 Damage Reflection, +3 Physical Damage, +3 Max Health, and Steal Immunity.
Coal Heart
- The Coal Heart will spawn in the Warlocks Volcano with two Lava Golems.
- When he is active he will spawn volcanoes in random map hexes; volcanoes are impassable spaces that ignite the ground around them.
- The Coal Heart will try to inflame your team with an AoE skill or try to hit you with a powerful single target attack. His golems will try to hit you with a splash attack, a single target attack or an AoE attack, all of which will cause the inflamed condition on the party members hit by it (unless they have immunity).
- He is immune to fire and has high resistance. His golems are immune to fire, cannot be stunned and have high resistance and armour.
- When you fight him just hit him with physical attacks and you should be able to kill him quickly. It is recommended that you take some armour piercing weapons since the golems have high armour and resistance.
- He will drop the Volcano Hat, which will give you +1 Party Resistance, +3 Magic Damage, +100% Damage Against Ice and Burn Immunity.
Deimos
- Deimos will appear in the Ancient Quarry alone.
- When he is active, all the monsters in the overworld will look like crystals and be unknown.
- He will apply freeze, burn and shock debuffs to your team. He has a splash attack and a spell that targets everyone.
- Deimos is immune to stun, bleed, freeze, shock, and burn. He has high armour and resistance.
- To fight against him use weapons that have armour piercing, you can also use something to slow him since he already is pretty slow.
- He will drop the Deimos Skull when defeated, which gives you +4 Armour, +15 Max Health, Stun Immunity, Burn Immunity, and Freeze Immunity.
Disciple
- The Disciple will spawn in the Temple of Darkness alone.
- When he is active he will create dark clouds in the overworld every turn.
- He can stun a single character and shock or interrupt your entire team.
- The Disciple is immune to bleed, shock and stuns.
- Take items against shock or go with some focus, the Disciple is not immune to fire and ice attacks so a weapon with either is recommended.
- He will drop the Disciple Hood, which gives you +8 Evasion, +1 Find Distance, +1 Max Focus, and gives your team Shock Immunity.
Fergus The Mad
- Fergus is found in Lucky’s Vault alone.
- When he is active he will steal some of your drop items.
- He will dodge any attacks that are not perfect and cannot be stunned. -He will try to steal your money and flee, his attacks also deal solid damage and are armour piercing.
- To fight him take weapons that don’t have too many hexes and have a high success percentage.
- When you kill him he will drop the Lucky’s Hat, which has +7 Evasion, +7% Gold Multiplier, +7 Luck, and Steal Immunity.
The Foul Priestess
- The Foul Priestess is found in The Desecrated Church with two Fowl Servants.
- When she is active she will destroy Sanctums.
- She drains your focus with single target magic and can curse your party.
- She is immune to freeze, shock and burn. Her servants can’t be stunned.
- To fight her, kill the Fowl Servants and then kill her, area attacks and bleed are pretty effective.
- She drops the Fraybee’s Locks, which have +1 Magic Damage, +1 Max Focus, Curse Immunity, Burn Immunity, Shock Immunity, and Freeze Immunity.
The Hangman
- Spawns in The Gallows with two Enslaved Souls.
- When active he you will have to fight ghosts in fights that aren’t visible in the overworld map.
- In combat he will try to hit you with a heavy attack that does a LOT of damage. His Enslaved Souls will try to curse you or attack you with magic damage.
- He is immune to bleeding, shock, and stuns.
- To fight him I would take some curse immunity items and target The Hangman, also using taunts with your tank is a good call since he deals a lot of physical damage. Also note that The Hangman is not immune to fire or ice, although his Enslaved Souls are, so taking weapons that can inflict those could be a good idea
- He drops the Hangman’s Hood, it grants +10% Crit Chance, +25% Damage Against Undead, +10 Vitality and Death Mark Immunity.
The Old One
- Spawns in The Time Cave alone.
- When he is active he will cause your characters to skip a turn sometimes.
- In battle he will confuse your characters, reset their attacks, slow, and daze them.
- He is immune to freeze, shock, and daze.
- He doesn’t deal too much damage but has a lot of health and magic resistance.
- He shouldn’t be too hard to kill, especially if you use melee weapons, if you have any items you don’t want to risk losing equip some Faded Pearls or Enchanted Pearls on someone and give them the item. A character might use the item when they are confused, but these items are easy to come by and give you confuse immunity.
- He drops the Golden Hourglass, which gives +1 Movement Speed and +10 Speed.
Royal Droll
- The Royal Droll is found in The Black Well with two Backup Bands.
- When he is active he will mess up your rolls.
- He and his minions will buff themselves, debuff you, and attack your characters.
- He can shock and confuse your characters with an area attack, or reset a single character’s turn. He can also distract your characters (like the Busker class).
- He is immune to stuns and bleeds and has 12 armour and resistance.
- To fight him you might want to kill the Backup Bands first and have some armour piercing. Before the fight I would give my valuables to a scholar/herbalist, since they aren’t affected by confusion so they won’t waste them.
- He drops the Royal Droll Hat, which gives +1 Party Armour, +1 Party Resistance, +1 Party Evasion, and has the passive skill Entertain, which is what the Busker does.
Source: https://gameplay.tips/guides/8418-for-the-king.html
More For The King guilds
- All Guilds
- For The King - How To Unlock All Characters
- For The King - Tips and Tricks
- For The King - Party Suggestions for Each Map
- For The King - Adventure Guide
