_________________________________________________
Character Slots
This section explains how character slots work. This is the only Final Fantasy game that features a single row, everything after this game featured a front and back row where characters would receive / deal 50% more / less damage from the back row. If the character had a long range weapon, then they would deal maximum damage from the back row... but those mechanics don't apply here.
FF1 is basically a prototype of what the series would become so characters get hit more frequently based on where they're located in the party from top to bottom:
Slot 1: Targeted 50% on average.
Slot 2: Targeted 25% on average.
Slot 3: Targeted 12.5% on average.
Slot 4: Targeted 12.5% on average.
That being said here's where you should place classes based on the slot:
Slot 1: Tank / DPS [Warrior / Thief / Monk / Red Mage]
Slot 2: Tank / DPS [Warrior / Thief / Monk / Red Mage]
Slot 3: DPS / Caster [Thief / Monk / Red Mage / Black Mage / White Mage]
Slot 4: Caster [Red Mage / Black Mage / White Mage]
Warrior / Knight



Class Rating:
Group Rating:
The "God hand" class of the game...
A literal power house of physical dominance, unmatched by no other for sheer stability throughout the entire adventure from start to finish.
An S tier class before and after his class change and the foundation of every balanced party.
If he's not in Slot 1 of every game you start, you're doing it wrong or trying to torture yourself.
Where he fits best:
Depending on how many of these alpha Gods you decide to take along in your adventure, make sure to slot them accordingly. If you choose 1, put him in the first slot, if you choose 2, take up the first two slots and watch the enemies cower as they try to slash through abs made of cut diamond with their blades.
Pros:
Main tank of the game and also an insanely good DPS, second only to the Monk and ONLY after the Monk has trained beyond level 50+... before that, the Warrior / Knight basically takes home the gold medal for both his ability to tank and deal out the highest raw physical damage possible, as long as you keep him outfitted with the best possible gears.
Will legit carry your ass through the entire game, 1 is great, 2 is even better, 3 is overkill, 4 is just stupid, don't take 4 of them, you need a healer.
Makes use of all the gear found in the game so you can mix and match between two Warriors if you choose to take two.
Can learn up to level 3 White Magic at class change, curative spells can be beneficial in between fights.
Can use even more equipment after class change in to a Knight and has much better stat growth over all. He's well above average growth in all stat types, especially HP which remains at an all time high throughout the entire game.
Cons:
Expensive as hell to maintain, highest maintenance character in the game. Most of his gears are found in later dungeons so the first half of the game will have you grinding for gil and dying of boredom but the payoff is worth it.
The more of them you have in your party the more gil grinding you'll have to do and the more diminishing returns you get at the end game, the only thing worse than spending double the money on gear is giving your secondary warrior hand me downs from his older brother... He'll have less defense and less attack power because all the end game exclusive dungeon gears will be used on Slot 1 Warrior.
If you choose to take more than 1 Warrior you won't have two formidable DPS machines until you obtain both Excalibur and the Masamune, which is literally 99% of the way through the game.
None of the White Magic you can choose to learn is worth using during battle.
Over leveling him before class change can be a problem as his stats won't be nearly as good if you keep his level lower. If you're over level 26 at class change, he won't reach his max potential as a Knight.
Monk / Martial Arts Master



The discount Warrior, secret boss destroyer.
Class Rating:
Group Rating:
A formidable and cost efficient DPS choice.
A very late bloomer indeed but still a worthwhile choice if you like to play the mid / long game.
He doesn't show his true potential until around level 25, and won't really show case his incredible max damaging abilities until after reaching level 50+ but it's definitely worth the grind if you're having issues beating some bosses.
Where he fits best:
Definitely in the 2nd or 3rd slot of the party, preferably the 3rd slot if you're rocking a secondary tank style character [Warrior / Thief / Red Mage]. Early on in the adventure he'll hang around Slot 3 but once he hits level 35 - 40 his natural defense growth will catch up to any class using light to medium armor, and you can tag him in to the 2nd position.
Pros:
The highest physical damage dealer in the game when leveled over 50. He's literally unmatched for damage per turn at the end game, even next to the Warrior equipped with the best possible gear.
Has really quick / insane HP growth after level 30 so he makes a good candidate to act as a secondary damage sponge in Slot 2.
Benefits greatly from over leveling your team. He's a good paring for the Warrior because the Warrior needs gil to become stronger quickly and the Monk needs experience so it's a win win situation for both of them.
Innately gains natural strength / defense as he levels up, equipping him with certain gear beyond level 25 will actually make him weaker. Once he hits level 25 the only gear he needs is a Ribbon, Ruby / Diamond Ring (armor) and the Protect Cloak to shield him from instant gib spells like death.
Insanely cost efficient throughout the entire game, he's literally the cheapest character to have in your party. You won't need to be constantly upgrading him with gear / spells at every new town. He costs a fair amount at the start, just to get him off the ground, but by the time you reach the Earth Cave, his purchasable gear options become limited / non-existent.
He's secretly the best boss murker in the game, if you want a troublesome boss dead within 4 to 5 turns, just Haste him once and cast multiple Tempers on him. His damage will double with each successful turn he survives... By the time you reach turn 5 with Haste and 4x Tempers, he'll be hitting damage numbers in the 3 to 4K range... more than enough damage to one shot the elemental fiends and make quick work of Chaos.
Cons:
Can be incredibly squishy and provides no other real benefit until you hit the mid / end game. So you'll be carrying him for a few hours unless you feel like over leveling your entire party early on.
His stat growth is actually BETTER before his class change and he gain's no actual benefit from the class change itself, in fact, he theoretically becomes weaker. The class change is forced upon all party members at once so everyone will gain a boon and he will earn a disadvantage to stat growth. Bummer.
Can't use any magic at all. Some would see this as a problem, I don't.
If he becomes incapacitated in a boss fight it can be extremely detrimental to your victory. He needs constant care and attention in battle so keep his HP topped up and clear his status effects immediately.
Is very susceptible to status effects / elemental damage. Make sure to equip a Ribbon on him as soon as you acquire one to mitigate the damages of elemental spells.
"Slow" status is the bane of his existence. He'll become even more worthless than a White Mage who's physically attacking... all of his damage comes from his ability to hit multiple times. If he become's slowed, counter it with Haste immediately.
Thief / Ninja



A testament of how bad people can change for the better... but it's usually too little too late.
Class Rating:
Group Rating:
The worthless vagrant turned Ninja assassin... where was this potential 5 hours ago?
So yeah, literally the worst class in the game as a class itself... and doesn't get much better after the fact... I mean it does but it's almost pointless by that time. You'll wonder why you didn't just pick a Red Mage and reap the same benefits much earlier in the adventure. The only thing this guy has going for him is that after class change he can be used to buff your Warrior double time with Haste / Temper, assuming you chose another class along side him that could cast those exact same spells... which you should have... which makes this choice a redundant one.
Where he fits best:
No slots at all... don't even pick this class, seriously, he's a gimp. If you MUST choose to include him in your group he fits well as a secondary tank in the 2nd slot but he's not much of one. He'll be in the same league as a Red Mage for defense in the early / mid game and will only start to outshine him by a paltry amount near the 95% mark... which at that point doesn't matter. Anything other than slot 1 is his place, if you paired him with a Red Mage, keep him in slot 3 until after class change, then bump him up.
Pros:
He eventually becomes a Ninja and gets a total valley girl make over, like to the max. Goes from looking like a drunk homeless bum to an intimidating machine of death. This make over includes bolstered stat growth on level up. He'll get stronger in a shorter period of time after class change, so keep his level low if you want to max out his potential, he's no different than any other class aside from the Monk.
He can use up to level 4 Black Magic after class change, which coincidentally is where the cut off is for the most useful Black Magic Spells so he lucks out, sorry Warrior, you're OP enough.
Apparently he has a higher chance to flee from fights, I wouldn't know because you don't get stronger running from your problems son. In all seriousness, if your group is in a bind, you can start fleeing from every fight with a higher chance and pray you make it out of the dungeon alive.
Can use an exclusive low range end game weapon known as Sasuke's Blade, he's the only class that can equip this thing and there's two of them in the game. So if you made the mistake of choosing to bring two thieves, because gimping yourself with one wasn't enough, there's a spare for your twin. It's basically this classes "Excalibur" except it pales in comparison in every regard.
Is the "true" welder of the Masamune blade as it's a Katana class weapon. It's the strongest weapon in the game but every class in the game can weld it; so basically akin to this entire classes function of "it doesn't matter"...
Cons:
Any other physical fighting class choice is a better choice... seriously, just pick one. The Monk is better than this class from before class change to the end game, the Red Mage outshines this class the entire way through the game from start to finish and has more utility. The Warrior laughs at this guy and pats in him on the head in amusement (but not too hard).
Has below average stat growth in every category and can't use any magic until class change. Why aren't you picking the Red Mage?
Needs to be carried and tended to about as much as a Monk for 50% of the game, except there's no payoff for keeping him alive. He'll just take up a slot and deal worthless damage at boss fights... but eventually he can join his mage friends in Hasting / Tempering a much better fighter.
A mistake.
Red Mage / Red Wizard
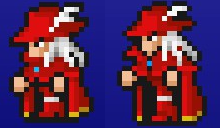


The Swiss army knife of class choices.
Class Rating:
Group Rating:
A jack of all trades, master of none... but that doesn't discount him as valuable party member.
His utility to adapt to any given situation is unmatched by any other class. The Red Mage is an average character with average stat growth and terrible HP growth, like it's as bad as a Black Mage but he can equip heavier armor to compensate for this and his physical damage early / mid game is nothing to scoff at either. He retains his average ability throughout the journey but has a peak moment just after his class change but before the final battle. He'll serve you well if you give him what he needs. He'll work well in any group.
Where he fits best:
You can pretty much place him anywhere and he'll do well. His place in the party is in direct correlation to what's happening at the time, he's a chameleon of sorts. He'll stay on par with a Thief for most of the game up until class change and he'll protect your Monk until around level 30, so keep him in the 2nd slot if you have physically weaker characters like the Thief / Monk tagging along. Once the end game hits you'll want him in slot 3, dare I say even slot 4 once the White Mage starts to outshine him in the HP department.
Pros:
Has average stat growth and a really strong early to mid game presence in the group. He keeps up with the Warrior for quite some time and will outshine both the Thief and the Monk for a while.
Can use almost every useful spell in the game and provides excellent utility throughout the adventure from start to finish by being able to cast both Black and White Magic.
Has great utility with Black Magic AOE spells for long drawn out fights with numerous weak mob grouped enemies. He can make instant work of them early on in the game.
Can use some good mid to high end weapons throughout most of the adventure which makes his physical damage almost on par with a Warriors for quite some time, it fluctuates throughout the adventure.
Acts as a great secondary tank early to mid game and will protect your Monk / Mages from being destroyed by physical attacks.
Outshines the Thief for literally 99% of the game and he's only out shined by the Ninja if you go in to the fight with Chaos at a low level [around 40].... if you level the Red Wizard past 60+, he's still the better option.
Cons:
Has average stat growth throughout the adventure and his abilities don't get much better after class change. He'll be able to use Teleport and Life but those spells are near inconsequential to your success.
His HP growth is among the worst, second only to the Black Mage which potentially has better HP growth depending on RNG. It could be bad news if you reach Chaos with under 400 HP. You'll have to over level him to make up for the losses.
Class change doesn't really provide any significant benefit, he can use some level 5 to 7 spells that he couldn't before but they're all basically worthless AOE damage spells. He's better off used as a physical fighter / secondary tank / damage buffer for your Monk / Warrior at the mid to end game.
Can't use any AOE heal spells or Dia based spells to tackle hordes of the undead like a White Mage can. Limited to single target cure spells only and the low level revive spell.
Can't use Flare which is the highest damaging single target Black Magic spell in the game, but that isn't really saying much because it's a pretty worthless spell any way... There is always a better option than using Flare.
White Mage / White Wizard



Somebody better call the school nurse.
Class Rating:
Group Rating:
You scratch her back, she'll massage yours.
Legit the worst class in the entire game hands down for just about everything... I mean even worse than the Thief when analyzed under the microscope as a solo class. However, you NEED this class to survive in a group, especially any serious boss fight. This class also needs enormous amounts of protection to function and in turn she will reciprocate the favour ten fold.
Where she fits best?:
No questions about it, 3rd or 4th slot. Don't even hesitate. If you have a Red Mage and no other mages, put her dead last, if you have a Black Mage, put her in slot 3.
Pros:
Is THE dedicated healer / ward of the entire group itself. You need her to beat bosses with grace and ease. No party should be without at least one of these precious gems.
The only class in the game that can use AOE healing spells like Healara and Healaga which are literally must have spells for the final boss fights.
The only class in the game that can use Holy spells for damaging undead hordes. She's a one man wrecking crew against these types of fights. They can normally can be insanely gruelling as most undead have an innate ability to stun your party members just by physically attacking them.
Is the only class that has access to high end White Magic which includes spells like Full-Life and Holy. Full-Life is a game changer in late game boss battles / dungeons.
Has a decent level of HP growth that outshines the Thief / Red Wizard / Black Wizard.
Can use spell items in battle to benefit the group with little to no detriment for not physically attacking. If you need a free heal, use the Healing Staff, if you need to do some AOE to kill trash mobs, use the Gauntlets to cast Thundaga.
Becomes a formidable single target killing machine when equipped with the Masamune.
Cons:
The ultimate carry bot of the game, you need to carry her the entire game so that she can help you stay alive in boss fights / dungeons.
Physically and magically offensively the weakest class in the entire game. Will do next to no damage until she acquires Thor's hammer but by that point you'll be mitigating battle damage with the Healing Staff every turn or casting mid level spells to help speed things up.
Poor stat growth, among the poorest, her HP starts to get a boost after class change however.
A necessary burden to take this class with you regardless of party composition, just a must have party member to make boss fights and dungeon running go smoother.
The hardest class to beat the game with in a "4 of a kind" run.
Near impossible to solo the game with unless you grind Goblins for 200 hours.
Black Mage / Black Wizard



Everyone thought I had a necessary skill set, they were wrong.
Class Rating:
Group Rating:
Ever hear of the placebo effect?
Contrary to popular belief and modern day meta of "needing a nuker" this guy suffers from the unfortunate "bad programming syndrome" of his spells not depending on his character stats. All the offensive spells in Final Fantasy 1 deal damage at a finite range, so it doesn't matter how much you level up your Mages, they're always going to do the same amount of damage with a certain offensive spell tier... and the range is atrocious. That being said, this class is more or less just for aesthetics. Using him makes you feel like your spells are doing more damage at the cost of physical damage but that's not the case.
Pros:
Can use Flare.
Is a better choice than Thief for 70% of the game.
Cons:
Red Mage is a better class.
Best Party Setup #1


Warrior / Red Mage / Monk / White Mage
Stats:
Survivability:
Physical Damage:
Magic Damage:
Support:
Normal Combat Effectiveness:
Boss Combat Effectiveness:
Cost Efficency:
Effectiveness:
Early:
Mid:
Late:
Chaos:
Best Party Setup #2


Warrior / Warrior / Red Mage / White Mage
Stats:
Survivability:
Physical Damage:
Magic Damage:
Support:
Normal Combat Effectiveness:
Boss Combat Effectiveness:
Cost Efficency:
Effectiveness:
Early:
Mid:
Late:
Chaos:
Source: https://steamcommunity.com/sharedfiles/filedetails/?id=2907551339
More FINAL FANTASY guilds
- All Guilds
- Final Fantasy
- Final Fantasy I Achievement Guide (checklist mostly)
- walkthrough for 100% final fantasy
- Armor Modding for Final Fantasy Pixel Remaster
- FINAL FANTASY
- FINAL FANTASY | Guida al 100% del bestiario
- How to remove white screen flashing on critical hit in FF I PR
- Desequipar las armas del Monje mejora su ataque
- FINAL FANTASY Guide 191
