
Notes

Side notes
Z to confirm, X to backspace when naming your character
Reminder that personality traits do not affect the game in any way
Reminder that you can change your name and design at the inn
Important, note that if you are unable to pay back your loan, it is an automatic game over.
Controls
Z - Select / Interact / Speak
X - Open menu / cancel / hide text in recollection
Q - Teleport
W - Heroine status
Shift - Skip text
F5 - Change screen size
F12 - Return to title screen
How to install the uncensored patch
1. Download the patch from their official page https://otaku-plan.com/en/fall-in-labyrinth/
2. Once downloaded, unzip the file using a unzip software such as 7zip.
3. After unzipping, run the patcher and click continue
NOTE - My system locale was Japanese which makes the text look unreadable. If you want to be able to read it, ensure your system locale is in English. Regardless, the patch will still work.
4. The patcher will find the game and patch it. You confirm if the patch works, some items should have changed in name for example
Energy Enhancer -> Sexual Energy Enhancer
Mag -> Porn Mag
5. If you are unable to install the patch or it does not work, try these solutions
There might have been a new update such as bug fixes/improvements. If this is the case, just wait for Otaku Plan to release the updated version for the uncensored patch.
If the patch is not able to find it in the Steam files, try redownloading the game. Recommended to backup your save files in case something goes wrong.
Important tips Always save, save and save. It hurts a lot if you make significant progress, make a mistake, return to title screen/game crashes, only to find out your last save was hours ago.
Its a good idea to backup saves as well in the event you accidentally overwrite one of them. Here is how you do it
1. Right click Fall in Labyrinth in your Steam library, and click properties.
2. Next, click local files then browse.
3. Create a backup folder somewhere in your PC. it can be anywhere.
4. Copy and paste the save files (example below) and paste them in your backup folder.
5. To use them, simply copy the save file of choice in your backup folder, then paste it in your Steam game folder.
NOTE - This will overwrite the save in your Steam game folder. So make sure there are no problems.
The City Of Veria-pool
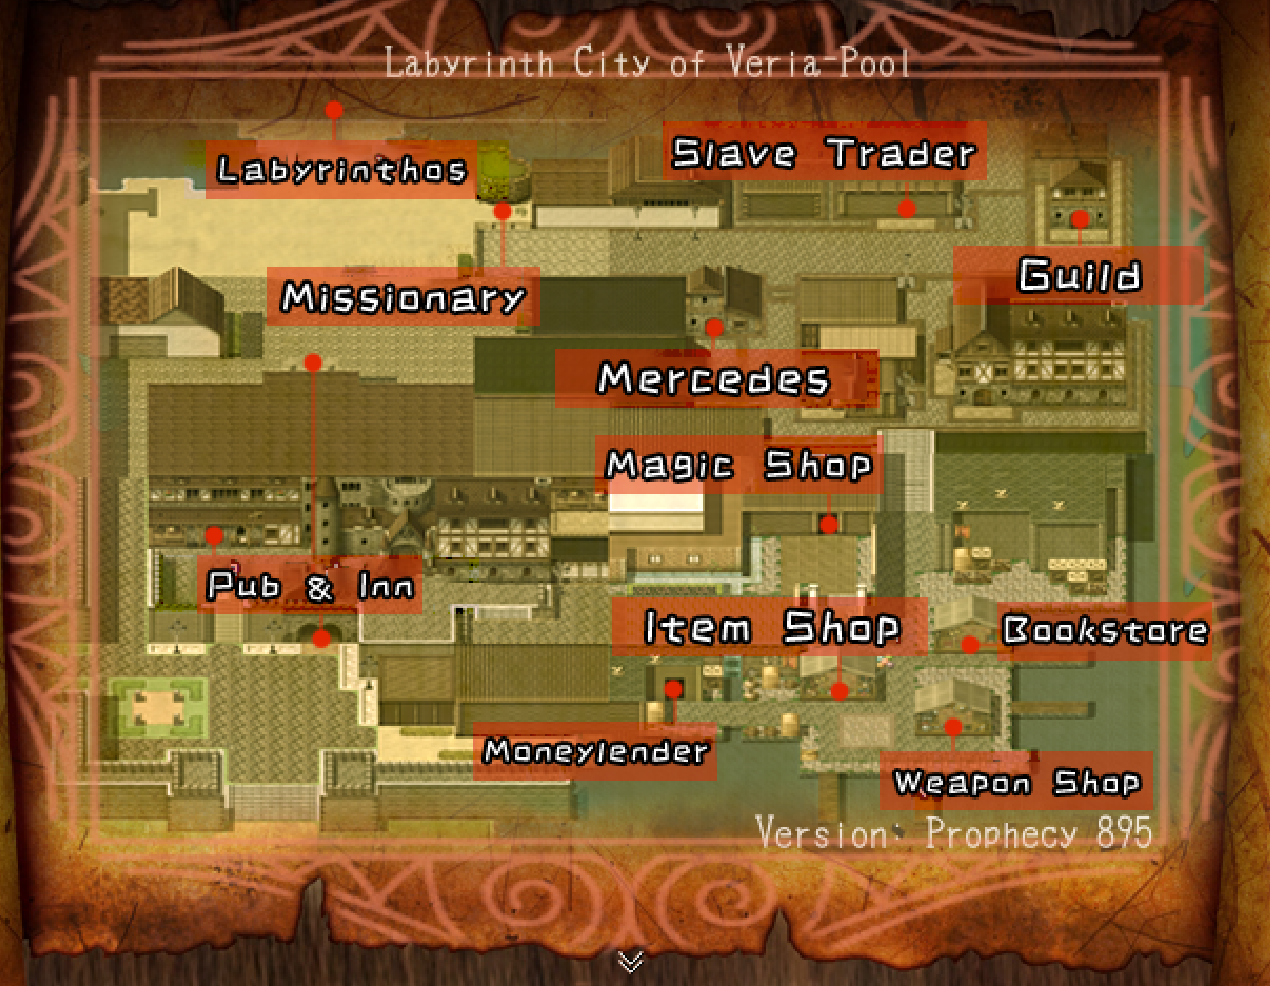

Here is a map of Veria-pool for your convenience.
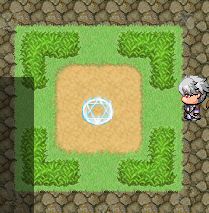
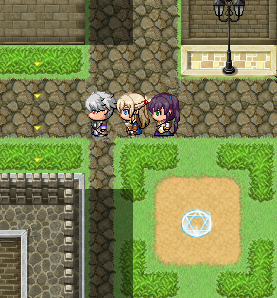
Magic circlesThese are located around Veria-pool and will allow you to fast travel to places conveniently.
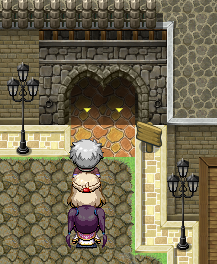
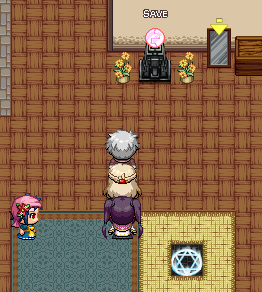
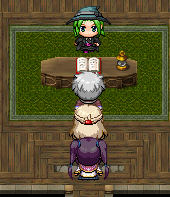
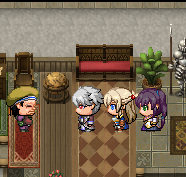
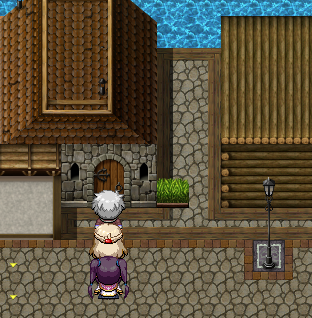
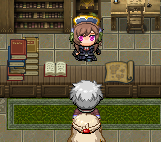
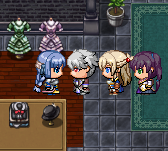
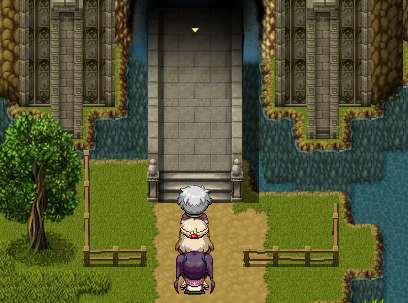
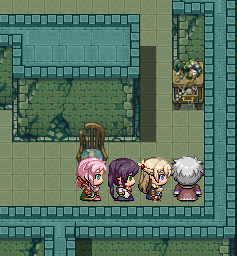
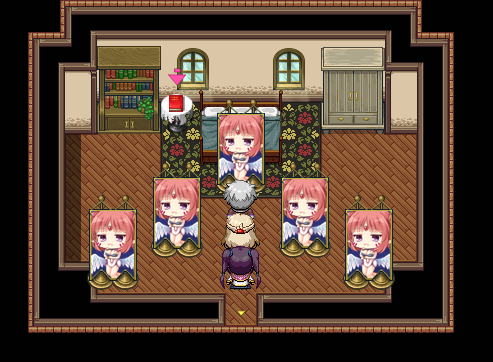
The InnEntering Veria, the first building you should see is the inn.
In here, you will find a crystal ball allowing you to save your progress, a mirror to customize your character, and a scene recollection room. You are also able to rent a room at the inn to stay.
Resting at the inn will restore your HP and MP, as well as provide an experience boost the next day.
Standard room
1 day - 100G
1 week - 500G
Nice room (+10% exp boost)
1 day - 200G
1 week - 1000G
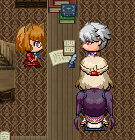
The PubUp the stairs in the inn, or on the second level outside, is the pub.
Pub owner Eriel
She will sell you custard pies each costing 80G and spicy chicken each costing 150G
They restore health somewhere in between potions and high potions. However I would not buy them as they rot the next day. So if you do plan on buying, make sure to be conservative.
Magic researcher Khabur
He will provide you information on treasure chest drops, you can also accept a quest from him where he will ask of you to fill in the item encyclopedia.
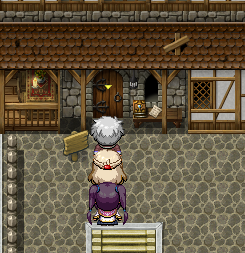
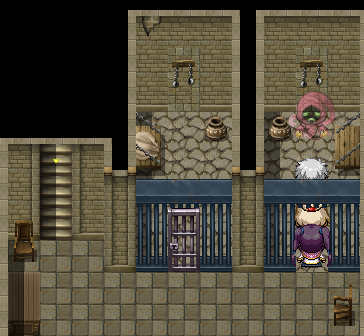
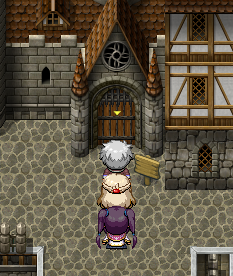
Everthin Shopping DistrictHeading east, you will come across the shopping district, where the , item shop, bookstore, weapon shop, magic shop and moneylender are located.
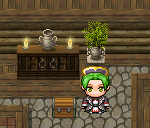
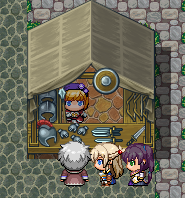
Magic shop
Sells consumable items or items for slave training. Also allows you to appraise depleted gems in order to restore them in exchange for a sum of 300G each. Also has a back room where you can create custom magic.
NOTE - Every depleted gem is unique, so even if you save and load back again to try to reroll, you will receive the same gems.
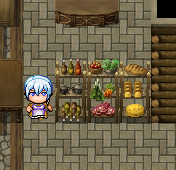
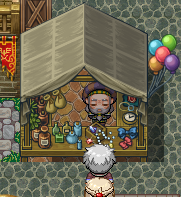
Item shop
Sells consumables and items used for exploration. Once you unlock the house, you can buy furniture here.
Weapon shop
Sells armor and weapons. Also sells expensive daily rotating equipment. This unlocks after Fano joins.
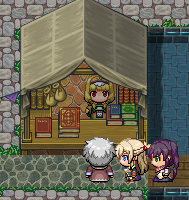
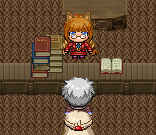
Bookstore
Sells books for learning skills.
Moneylender
Provides loans if you are in need of gold. Loan repayment deadline of 10 days and has a 20% interest rate. By using a redemption coupon, you can extend the deadline to 15 days. Failure to repay the debt will result in a game over, so be careful.
After Fano joins, they will begin to sell lottery tickets.
Lottery tickets cost 300G and the prize winners will be announced 5 days later.
1st place - 10000G
2nd place - 3000G
3rd place - 1000G
4th place - 300G
5th place - 10G
NOTE - If you have borrowed money, you are not allowed to purchase a lottery ticket.
Town HallNot displayed on the map, it is located in the same area as the slave market, cosmetics shop and adventurer's guild towards the south or it is right in front of you when entering from the shopping district.
Secretary Baasha
Allows you to buy/sell property, as well as build your own house.
Warehouse - 2500G, no exp boost
SIngle story house - 3500G, +5% exp boost
Secretary Saasha
Allows you to apply for marriage. A fee and wedding ring is required for marriage. And each girl you add to your harem will increase the fee. The first wife has a fee of 1000G. The second wife has a fee of 10000G. And any wives after will have an addition of 10000G (the highest possible cost is 50000G, as there are 6 heroines)
Follower of the H God Ovah
Found in the infantry basement guarded by the soldier. Will give you a ticket to unlock all low fondness and loss of virgin scenes once you reach a fondness of 100 with the heroines.
Adventurer's guildAllows you to manage your party and allows for class change. As well as accept subjugation quests.
Mersing
She will allow you to manage party members and change classes.
NOTE - Each class for every character has their own separate level. If you were a level 3 warrior who decided to change to a mage, you will become a level 1 mage, but if you choose to change back, you will retain the levels your warrior had and vice versa.
Subjugation quest book
Allows you to accept subjugation quests. See the subjugation quest section for info on quests.
Mercedes/Cosmetic shopHere, you can purchase a variety of cosmetics for your heroines.
Marl
She will sell you cosmetics, and give you info on cosmetics.
May-Mes
You can chat with her regarding some info on clothing.
Cuina
She will teach you about enemy attributes, weaknesses, and resistances.
Slave marketA building for slave auction, and is where you will buy Torte, the first heroine.
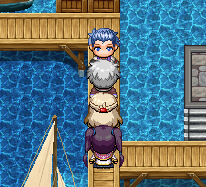
PortNorth of the adventurer's guild, is a port that is not shown on the map.
Fisherman Jutis
To the northwest is Fisherman Jutis, who will trade you fishing medals in exchange for fish you give him. Up to 3 fish maximum can be given per day. You can also swap your fishing gear and fish by talking to him.
The H God missionarySells the H techniques of the almighty H god. Used for training your heroines.
LabyrinthosPast the beach at the north, is Labyrinthos, the place you will be exploring for majority of the game.
You can also find Cath there, where you can buy keys to unlock heroines diaries for 1000G each.
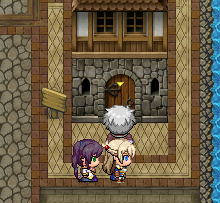
Manor districtOn the left of the area where the pub and inn are located, is the manor district.
Letterfaith guildhouseOn the building next to the pub, is the Letterfaith guildhouse.
The Arena
How to unlockAfter completing the quest for Tainy to join, head back into the Letterfaith guild and speak to Galio. After that, simply buy a custard pie from Eriel, head to the building in front of the entrance to Veria-pool and give it when the person asks for the password.
Arena battlesBattle 1
Warrior Darina - Level 13
Mage Effie - Level 13
Prize
1000G
Custom Magic gem
Battle 2
Hunter Momor - Level 21
Warrior Liddy - Level 19
Mage Shena - Level 20
Prize
5000G
Battle 3
Warrior Nina - Level 26
Mage Yutche - Level 29
Hunter Makmik - Level 27
Prize
10000G
Battle 4
Warrior Enarith - Level 31
Adventurer Cayenne - Level 12
Mage Lazarus - Level 34
Prize
3 Energy Enhancers
20000G
Battle 5
Knight Nanna - Level 59
Astronomer Ilpana - Level 52
Sniper Yuris - Level 54
Prize
50000G
Labyrinthos
Helpful notes After Fano joins, you should have the crystal key in your inventory, this allows you to use the warp stones (green orbs) around Labyrinthos.
Giving a mage auto heal will make your team far more sustainable and reduces the need for potions. However, its healing is dependent on MATK and costs 2 MP automatically each action.
Memorise your auto skill timings well. This allows you to prep for turns to do extremely high damage. For example, assault boost is an auto skill that lasts for 1 action. And will activate every 3 turns. You could use buff skills to power up and on every 3rd turn, combine it with the assault boost to do even further damage.
In battle, your tension bar raises slowly, when maxed, all allies stats will raise significantly, however, this bar resets when you move to a different floor.
Artifacts can be found by following clues on a treasure map. These treasure maps are found as extremely rare drops from enemies after level 3 onward.
Using luck boosting amulets will improve chest drops and artifact map chances.
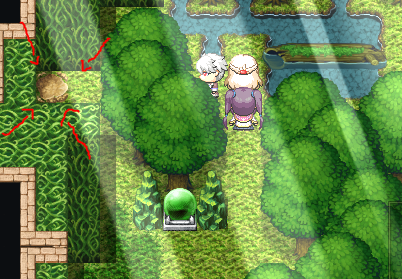
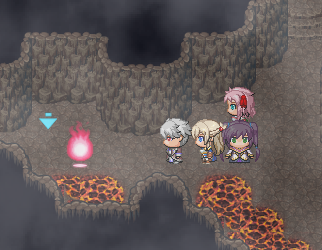
Succubus enemies can appear anywhere in Labyrinthos as red flames, they drop succubus wardrobes containing clothes and other things.
If the shame of your heroines is very low, Succubus attacks will not affect them. This can only apply to Torte and Fano
NOTE - $ means that there are room clear chests on this floor.
Level 1Floor 1 ($)
Enemies
Zombie
Puppet
Bat
Floor 2 ($)
Enemies
Zombie
Phantom
Hostile adventurer
Puppet
Floor 3
Enemies are the same as floor 2. This is where you can find the magic circle for meeting Fano. Stairway past the magic circle leads to floor 4
Level 2Floor 4 ($)
Enemies
Cursed copper coins
Sahuagin
Sea serpent
Floor 5
Same enemies as floor 4
Hostile adventurer
Level 3Floor 6($)
NOTE - Your first time in floor 6 will cause no enemies to spawn until you finish the Leaze cutscene. The dragon boss is weak to ice but Leaze should be able to easily defeat it.
NOTE - Chests here drop the terra rods which are 6 star. Higher stats than the rods in floor 4. The rods in floor 4 also drop here.
Enemies
Wind raptor
Thunder snake
Hostile adventurer
Floor 7($)
Enemies
Same as floor 6
Dragon zombie
Thriving giant beast
NOTE - There are tasty looking nuts (the apple) that will restore the MP of all party members by 50 when eaten.
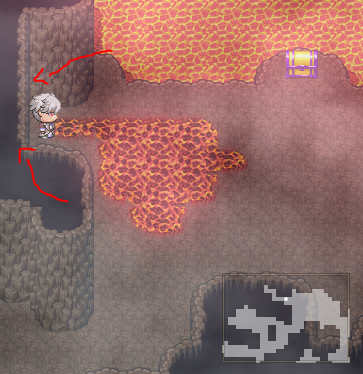
NOTE - There is a pitfall at the west of floor 7. Do be careful as it will lead to level 4 into lava.
Level 4NOTE - Lava tiles here do 10 damage to all party members each time you step on them.
Floor 8($)
Enemies
Magma slime
Cerberus
Fire spirit
Floor 9($)
Enemies
Same as floor 8
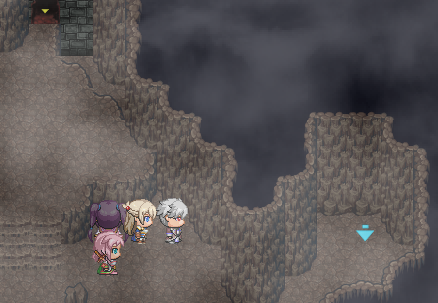
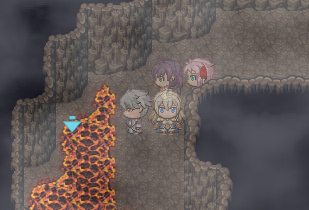
NOTE - The cave at the north will lead to level 5 and a short cutscene where Torte gets roasted. The cave at the west has a cutscene with the Evil Church. Heading to the south, you will be forced back by a strong barrier. To continue onward, use the cave to the north.
NOTE - There is a hidden passage leading to a room where you will find a thief and a chest. She spots you, grabs the artifact and runs off. See side quests for more details.
NOTE - At this point, you should go back and prepare. The next boss will be pretty tough. You could recruit Pristina and Tainy at this point to assist.
Level 5Floor 10
No enemies
Here, you will find a place where you can save, as well as a bandit selling a lightning spear for 6000G.
After defeating the Death Armor and the magic circle is found, a flight of stairs will open up in the town. Leading to floor 6.
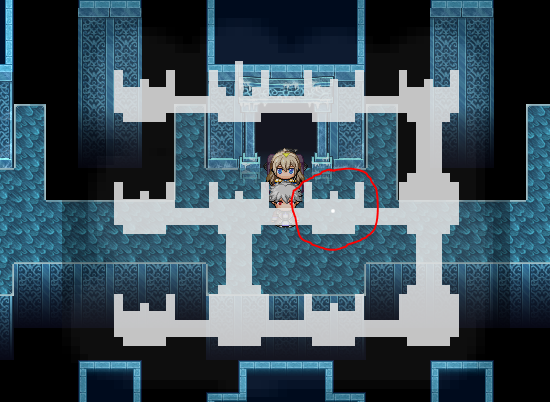
Magic circle below floor 10
There are no enemies here either, but a magic circle instead. To activate it, you need to meet Veria from the quest "Clearing out a dungeon" and use the ring she gave you. There is a save point so make sure to save before the upcoming boss
Boss
Death Armor - Level 38
At the beginning of the battle, he is resistant to all elements except darkness and holy. physical attacks work as well.
He can enhance his attack power
After a few turns while his attack power increases, he will release a powerful attack that hits all allies
After he releases his AOE attack, all his resistances drop, and he should become weak to every element
After a short moment, he will regain his resistances, this time, including darkness, holy and physical resistance and the attack pattern repeats.
Level 6Floor 11($)
Enemies
Wandering Familiar
Mithril Eater
Dark Giant
Undead Knight
Lesser Demon
NOTE - A chest can be found heading down east. it contains a wise man's cape for the protagonist.
Activate the 4 magic circles around the area then proceed throufh the door. Further up ahead there is a maze and then past that is a save circle, there, you will find Leaze about to fight an Ancient Beast Demon.
NOTE - You will watch Leaze fight. After that, you will join in.
Boss
Ancient Beast Demon - Level 40, weak to physical attacks
Level 7Floor 12
Enemies
Lady Ghost
Flower apparition
Kamaitachi
NOTE - Middle staircase leads to a chest with elemental waist armor for the protagonist
Floor 13($)
Enemies
Air spirit
Lady Ghost
Flower apparition
Floor 14
Up ahead is a save point so be sure to prepare for the boss.
Boss
Dullahan Knight - Level 38, weak to holy
NOTE - Be sure to prepare counterstance for your tank when he prepares charger, he will one shot with deadly attack when in this state.
Level 8Floor 15
Enemies
Jelly Tyrant
Cockatrice
Will o Wisp
Floor 16
Enemies
Same as floor 15
Floor 17($)
Enemies
Same as floor 15 and 16
Rock of Life
Floor 18($$)
Enemies
Same enemies as floor 17
Lamia Queen
Specter
Chests
Top left - Ether Helmet
Top right - Teleportation stone
Top far right - Magic clover
Middle left - Costume medal x2
Middle - Level 8 warp crystal
Bottom left - Stairway to level 9
Bottom right - Elixir, music box of life
Level 9Floor 19($)
Enemies
Grim Sahuagin
Gaze
Earth spirit
Cursed beast
Earth apparition
NOTE - There is a chest with magic pants
Floor 20($$)
Enemies
Same as floor 19
Hariti
Floor 21
No enemies, but there is a save circle, prepare for a boss.
Boss
Ancient Spirit of the Dead - Level 52
Deadbeat A - Level 30
Deadbeat B - Level 30
Core Room
NOTE - No save circles here, restore your teammates with consumables for the upcoming boss fight. The protagonist will be greatly weakened.
Enemies
Housemaid A - Level 25
Housemaid B - Level 25
Housemaid C - Level 25
Leaze - Level 34
NOTE - After this, the protagonist's power drops even further.
Boss
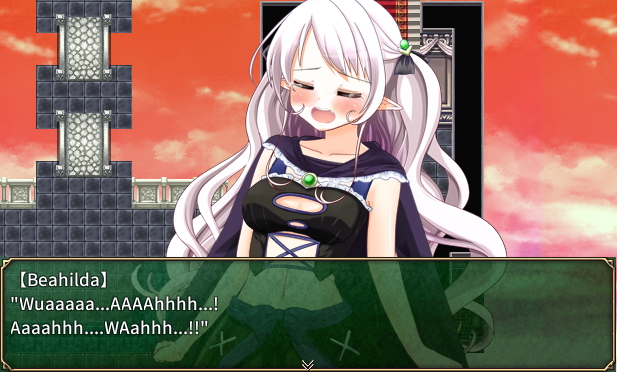
Beahilda - Level 66
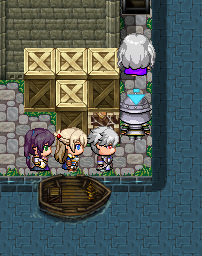
NOTE - You will not be able to hurt Beahilda, after that, you and Aulla grant Torte access to the Audragon.
Boss
Beahilda - Level 66
NOTE - This fight is automatic, after this, you will be teleported out of Labyrinthos.
And that wraps up the Labyrinthos arc, the next part of the guide for this section is next. All the best.
After Labyrinthos (spoilers)
Unknown landAfter Torte sacrifices herself to teleport everyone out of Labyrinthos, you awake alone in a strange land, greeted by an old lady, you are told to make an offering to Veria up at the temple ahead.
Veria TempleNOTE - The room on the left has green lingerie.
After that, you'll find Fano, who does not seem to recognize you, leave a prayer for Veria, then Fano will leave a room for you to sleep in.
When you wake up, you'll find Fano and Arma talking to Beahilda, being threatened, Fano decides to follow them, leaving the temple, your vision turns white, and you awake in a cave.
Unknown cave
NOTE - There is a save statue here, your slave contract with Torte will become invalid.
Exiting the cave, you reunite with Fano, and you two set off to find Torte and Aulla.
NOTE - Fano will regain her memories, and her title changes from ??? to Veria's Shaman.
Unknown Beach
Enemies
Hornet - Level 1
Creeping Plant - Level 2
Veria-pool
Arriving at Veria-pool, you find it swarmed with monsters.
Enemies
Ice hornet - Level 9
Wind spirit - Level 12
Head into Labyrinthos and there, an ancient false god will block your path.
Boss
Ancient False God - Level 50
After defeating it, head to the 9th floor of Labyrinthos.
You meet Beahilda again, only to find out she killed Torte and Aulla. Before you have a chance to attack, she traps Fano and prepares to sacrifice her, before it happens, Veria stops time and meets with you once more. She will rewind time and this time, wants you to stop her for good. Just then, Beahilda wakes up, and next time, she will be prepared for Veria's intervention.
Outside, wake up Torte and Fano, who have been revived. You decide to find Veria's statue in order to dispel Beahilda's charm on you.
NOTE - With time rewound through Veria Requi- ahem, you should be able to use all the places again. Do prepare for the upcoming battles ahead.
Head to Beahilda's mansion and retrive a piece of Veria's Statue. Then, return home and sleep.
NOTE - With Beahilda's mansion key, you should be able to enter the two locked rooms. The right room has chests with aphrodisiac cookies, costume medals, and a barrier stone. The room on the left will lead you to Leaze.
After Beahilda's curse is removed from your body thanks to Veria, you return to the 9th level to confront her once again. Head downwards into the room with a magic circle, and teleport through.
Magic circle dimension, Level 10
Floor 22
Enemies
Elder Stone
Botis
Dark Spirit
Mage Warrior
Floor 23
Enemies
Same as floor 22
Floor 24
Enemies
Same as floor 22 and 23
No-Life King
The End of LabyrinthosLooks familiar? Hm. Anyways, prepare for the boss fight ahead, there is a save circle for your convenience.
Boss
Beahilda Phase 1 - Level 66
Beahilda Phase 2 - Level 66, just a lot more health, will transform after losing some health
Beahilda Phase 3, New Goddess - Level 88, full heals damage taken from phase 2
Universal Grimoire - level 58
After defeating Beahilda, Phalphurdoll will appear and fight Veria, they begin to clash and disappear, for now, retreat back. Then once you sleep, a cutscene starts. The group plans to save Beahilda, Aulla suddenly has an idea and urges you to rush to the 9th level where you met Fano. Proceed into the room that was locked before, and enter.
9th level Emergency FacilityFloor 1
Enemies
Same as floor 22 and 23
Floor 2
Enemies
Same as floor 1
Queen Lamia
NOTE - This is a box puzzle, to open the laser gates, simply block out the laser switches. Defeating the skulls will turn them into blocks for a short moment
Floor 3
NOTE - There is a save circle, make sure to use it, a boss will be up next.
Boss
Faunus - Level 56
After Aulla stops what is left of the ritual, you see a tiny Beahilda collapsed on the floor. heading up, you'll see Beahilda's maid who brings Torte's mother with her, at the end of her life, she entrusts her with the group as well, you decide to bring her to the adventurer's guild.
Torte is afraid to confront her mother, and heads off, Fano decides to help. Missed opportunity for protagonist to be knocked into the ocean. Torte's mother entrusts you with the Black Medal, granting you a new title. Torte regains her title as well.
Next, head to the innkeeper for Beahilda to rest. After that, you will be contacted by Veria through her ring, as she tells you she is still engaged in combat with Phalphurdoll, and requests you take care of Beahilda. Bratty Beahilda ran. Rush to Labyrinthos. However, Beahilda is unable to use her magic. Rush to protect her
Enemies
Large Bat A
Large Bat B
oh no Beahilda is cute nani!?!?!?
After that, she'll join your party. Head to the 4th level and she will assist you in finding the magic circle. Head to the area that was blocked off by that strong magic barrier from all the way back, then head down.
Enemies
Cerberus
Magma slime
NOTE - The right side filled with lava has nothing. i got baited.
Hidden Area Level 5
There will be a boss up ahead. Should be easy by now.
Sea Monster Jormungandr - Level 52
Hidden Area Level 6, 7, 8
Same enemies as their respective floors
Hidden Area Level 9
There is a save circle for your convenience, boss up ahead. Below the magic circle is a warp crystal for the room that you can activate before teleporting.
Magic Valley
Enemies
Greater Imp
Haron-Peor
Seventh Aura
As you continue on, it begins to rain, head into the nearby cave. While waiting in the rain, chat with the heroines and enjoy some food, a newborn deity then enters and asks if you could share your food, when you ask about Phalphurdoll, he becomes afraid and leaves, but out of thanks, he tells you to head northwest.
At the meeting place of the gods, head up the hill to see the Death Spirit you have fought before. Speaking to him, he tells you of Phalphurdoll's incredible growth rate, and how he plans to consume Veria, he is touched by the resolve of humans and advises you to collect the souls of smaller gods to smash the barrier at Phalphurdoll's castle.
NOTE - You can return to your world by speaking to the god in between the 2 floating crystals. However, you must pay a level for 50000G
Head to the offering altar, you can save before fighting the gods.
NOTE - I moved the offering altar to its own category in order to more in depth explain about the bosses, and their drops.
Phalphurdoll's Castle
Enemies (outside)
Socaris
Haron-Peor
Greater imp
Enemies (inside)
Dark Knight
Wyrm
Evil God's Henchmen
Elder Dragon
Further ahead, will be 3 gods you must defeat to face Phalphurdoll.
Bosses
Goddess Skadi - Level 60
Nefertem - Level 58
Divine Beast Sleipnir - Level 75
The next boss will be Phalphurdoll, use Veria's Ring to dispel his magic and defeat him
Boss
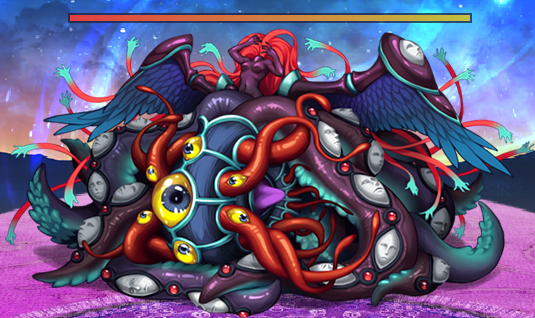
Phalphurdoll - Level ??
After hurting him for a certain amount of HP, he will transform.
Boss
Phalphurdoll - Level 85
Evil God's Left Arm - Level 68
Evil God's Right Arm - Level 77
NOTE - When his arms are at low health, he will devour them and increase his HP. When he is at low health, Aulla will unlock Audragon's Full Attack. After defeating Phalphurdoll, you will be sent to the Sanctuary, where you speak with Veria. After the conversation, wake up your group. At the end, Veria will give you the Goddess' Anklet.
And with that, your journey comes to an end, you can still continue playing or you can start a new game+ at the right of the house. There are also new post game events and quests.
Offering Altar (spoilers)
Things to take note of After defeating Phalphurdoll, Slepneir, Skadi, and Nefertem can spawn from the altar, and their respective spices will be sold at the meeting place.
After defeating Phalphurdoll, you can return to the Realm of Gods or Veria-pool witth no sacrifice of levels/gold needed.
You can either summon a random god, or use a spice that is sold in the mountain area for 2000G to summon a specific god. The spice seller can be found at the Meeting Place, ride side cave.
All bosses will drop 3-4 of rarity from 1✰ to Artifact weapons. So its a good place to grind for endgame weapons, the completion of the item encyclopedia or trading of equipment for Malt's clothing exchange.
A good tip would be to get the tension skills for your team, they use no mana and probably hit the hardest out of your skill arsenal. This means you can do long time farming.
Magic amulets that increase luck will result in better drops and a higher chance for artifacts.
Difficulty 1 would be easy, Difficulty 2 would be harder but doable, Difficulty 3 would be the "I want to choke you" difficulty.
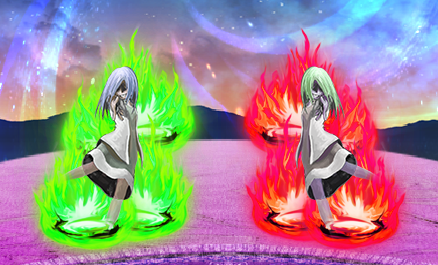
List of BossesSamsara Twins - Handy Life (Level 61), Handy Death (Level 42)
You will not be able to view the status effects or HP of the twins
Handy Death will cast instant death on their turn, which one shots your team member
After a team member dies, Handy Life will give you a life potion, can be used to revive party member for 1 HP
If Handy Death dies, Handy Life will revive them to full health
Difficulty 3 strangle under all costs
Will always drop a Music Box of Life
Ancient False God - Level 65
Mainly uses physical attack moves that your tank should be able to take for no damage at all
Difficulty 1
Sea Serpent Jormungandr - Level 58
Mainly uses physical attack moves that your tank should be able to take for no damage at all.
Difficulty 1
War God Death Armor - Level 57
Resistant to all attacks
When it uses charge up, all his resistances drop
Difficulty 2
Violent Red Dragon - Level 55
Mainly uses physical attack moves that your tank should be able to take for no damage at all
Llowest health out of all the gods
Difficulty 1
Goddess Skadi - Level 60
Appreciate the censoring skill
Uses a lot of magic attacks
Difficulty 1
Divine Beast Sleipner - Level 75
Flicker attack can hit your mages hard if not careful
Aim and attack can be troublesome, make sure your tank with provoke guards in order to minimize damage.
Much tankier than the other bosses
Can use fend off, which allows her to counter physical attacks
Can use fend off magic, which allows her to counter magical attacks
Difficulty 3
Nefertem - Level 58
Uses fairy song which I assume increases EVA or AGI
Uses mainly magical attacks
Is weak to a lot of elements as well as physical
Difficulty 1
Classes
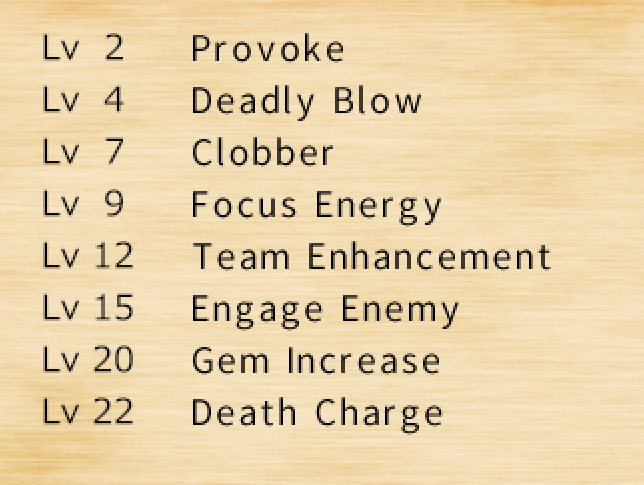
WarriorA class boasting high stats in physical offence and defense as well as HP, they are typically the tanks of the group.
High HP
High ATK
High DEF
Doubled aggro
Skills learned from leveling
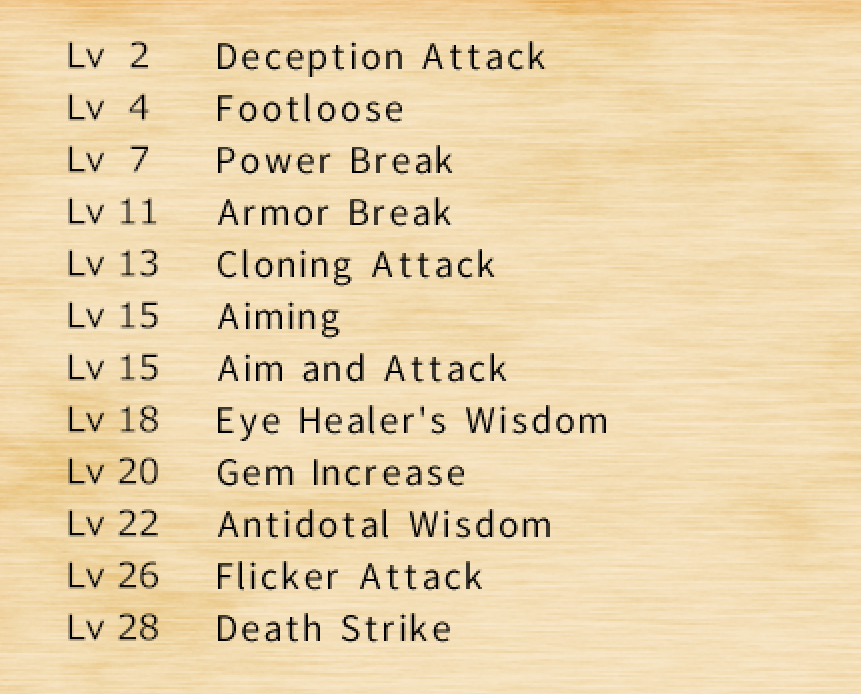
HunterA class boasting high stats in physical offence and speed, allowing them to possibly attack multiple times before an enemy can. Also has debuff skills.
High ATK
High SPD
Skills learned from leveling
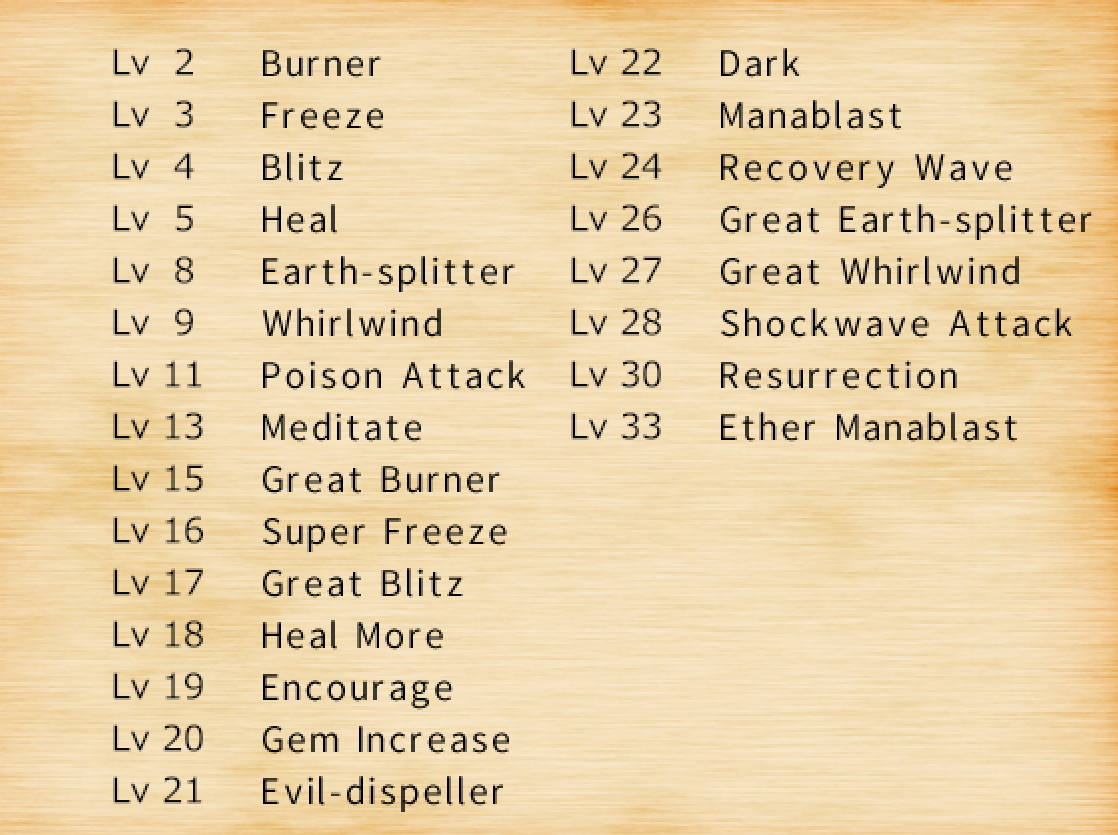
MageA class boasting high stats in magic attack and defense. Wields a variety of offensive and support magic.
High MATK
High MDEF
Skills learned from leveling
The Audragon


The Audragon, the legendary sword forged for the purpose of defeating evil, with Aulla as its guardian, is the sword you receive at the prologue of the game, this will be the weapon you will probably use for your character during the majority of the game.
Strengthening the AudragonThe Audragon is powered through H scenes with the heroines or just sleeping. The more you do, the more the Audragon will be restored to its original power.
In addition, you are also able to further enhance its power by equipping Aulla with weapons, which will give a percentage of its stats to the Audragon.
Giving equipment to Aulla for the Audragon has its limitations. The following is what it will improve and what it won't.
What will be added
Stats
Elemental affinity
Skills depending on type of weapons equipped
What will not be added
Elemental attribute, which changes basic attack element
Additional abilities such as Kagutsuchi's Burning Wave or Wind Bow's Whirlwind Attack
Audragon stats
Sacred Sword Audragon (Prologue)
+100 ATK, +100 MATK
Sacred Sword Audragon
+25 ATK, +25 MATK, 1 weapon slot
Sacred Sword Audragon +1
+50 ATK, +50 MATK, 2 weapon slots
Sacred Sword Audragon +2
+80 ATK, +80 MATK, 3 weapon slots
Sacred Sword Audragon +3
+100 ATK, +100 MATK, 4 weapon slots
Sacred Sword Audragon EX
Quest location - Exorcist's Cave, Field Map
Availability - After Pris and Tainy live with you
NOTE - You need to sleep after getting the requirements in order to trigger the quest
Head to Wezen to ask about the Audragon being restored, you are then told to see Adriana, the Ovah missionary. She will write a letter and ask you to see Mersing. Then, head to Exorcist's Cave on the map.
NOTE - There is a chest in the first room, and the area before the wall of flesh has another chest. The room opposite the wall of flesh is a save circle that you can also use to teleport.
Boss
High-class Demon - Level 48, weak to holy
After that, you spend some time with Aulla, the best heroi-
Anyways, your sword should upgrade now.
Skills you can learn through Aulla equipmentBelow are a list of skills the protagonist gains depending on what weapon types are equipped on Aulla
Daggers - Storming Slash
Bows - Zero In
Gloves - Blast Punch
Sword and Shield - Outmaneuvering Stance
Two-handed Sword - Power Strike
Side Quests
Item encyclopediaQuest location - Khabur, Veria-pool pub
Availability - Beginning of the game
By filling in your item encyclopedia, you can see Khabur to obtain rewards depending on your completion rate.
TIPS
Early levels are more likely to drop cosmetics from floor clear chests, while later levels will more likely drop weapons and consumables
For weapons, you'll more likely have an easier time farming the Offering Altar bosses.
Some cosmetics will require you to buy them from Marl's shop, if you are low on medals, you can fish and trade in fishing points for costume medals
Some artifacts can only be obtained from the Offering Altar bosses, while some can only be obtained from treasure chests.
Floor chest searchQuest location - Cayenne, Veria-pool pub
Availability - After taking part in the slave auction
At the pub, Cayenne is curious about what is inside the floor completion chests of Labyrinthos and asks you to open these chests 3 times.
All you have to do is clear out every enemy in a floor while exploring Labyrinthos, it can be repeated on the same floor.
Quest reward (choose 1)
[Gem] Agni's Hymn - Strengthens fire attribute and offense of the wielder (ATK and MATK +10%, Fire +35)
[Gem] Cybele's Resurrection - Enhances health and magic defense (MDEF and HP +30%, Earth +35)
[Gem] Assault Boost - Gives an auto skill which allows you to boost the attack of all party members. (Active from start of battle for 3 actions, all allies ATK +30%, can't overlap, 1 MP cost)
The Slave GirlQuest location - Slave trade market
Availability - Beginning of the game
Heading towards the slave market, you see a crowd eager to witness the auction. Head inside and enjoy the cutscene. After that, you are to buy Torte for 5000G. However, as of now, you probably do not have enough money to purchase her.
There are several methods to earn the money such as
Borrowing a loan (you have to repay the full amount as well as 20% interest. Not recommended)
Selling items in your inventory
Adventuring Labyrinthos
Here is a trick that made this quest extremely easy. No loans required and its probably much easier than Labyrinthos.
Just basically go back to the Valley of Sea Rumbling and farm the enemies there.
The chests there have a chance to drop gold in sums around 300G. The thieves are guaranteed to drop 20G as well as energy enhancers (each can be sold for 200G) and you can stock up potions while leveling.
The statue there allows you to restore your HP and MP without needed to pay 100G at the inn. Its genius. Go wild.
Looking for a +1 weaponQuest location - Cath, entrance to Labyrinthos
Availability - After Torte joins your party
Cath is looking for a +1 weapon. You can find these as drops from chests in Labyrinthos.
Quest reward (choose 1)
Classic swimwear
School swimwear (purple)
School swimwear
In search of a Monk's staffQuest location - Enarith, entrance to Labyrinthos
Availability - After Torte joins your party
Enarith is looking for a monk's staff. I found mine on floor 4 as a drop from a chest.
Quest reward
Energy enhancer x9
Sealing off the dungeonQuest location - Wezen, Labyrinthos lobby
Availability - After encountering Leaze (floor 6)
Wezen requests you to clear out the dungeon at the cliff which can be found west of the Labyrinthos entrance (the locked gate).
Dungeon on the cliff (enemies level 9-12)
NOTE - Chests here can drop decent equipment for early levels., including Kagutsuchi for the house quest.
Flame Sword Kagutsuchi - +109 ATK, +3 Crit ATK, Fire attribute, 30% chance per attack to perform a burning wave instead.
Enemies
Cursed copper coin
Ice hornet
Wind spirit
NOTE - There will be a boss fight eventually as you progress. There will be a save circle. Do your preparations accordingly.
Boss Fight (Cliff dungeon)
Furcas - Level 20, weak to thunder
Pale Horse - Level 20, weak to physical attacks
NOTE - After the fight, past the door is the warp crystal for the 4th level of Labyrinthos. I recommend you don't proceed further if you have not been able to confidently clear level 3.
After returning to the 1st floor of Labyrinthos, exit and head back up to the cliff and you should be able to pass now. Head forward to the tree and enjoy the cutscene.
Cutscene reward
Ring of the Goddess - +15 DEF, +15 MDEF, +20 MP, all element attributes +15, only you can wear it.
Quest reward
5000G
Get scammed
Buy the cliff land for 5000G instead
Build a houseQuest location - Vithis, Adventurer's guild
Availability - After buying the cliff land permit from Wezen in the Sealing off the dungeon quest
After getting scammed and buying the cliff land permit, you visit Vithis to request that he build a house. He will require compensation and a material fee to do so.
Requirements
10000G
Flame Sword Kagutsuchi or Lightning Spear
Building permit
TIP - Flame Sword Kagutsuchi can be found as a chest drop at the cliff dungeon or at level 4. Lightning Spear can be bought from a bandit from 5th floor for 6000G but its probably easier to farm for Kagutsuchi.
After that, he will get started on the house. Come back in 3 days. For more info on the house, see the house section.
Quest reward
Access to the house
Pristina's SecretQuest location - Weapons shop, Everthin shopping district
Availability - After meeting the following criteria, check daily at the quest location
Torte and Fano have joined you
Completed quest "Clearing out the dungeon"
Built a house
You find Pristina at the weapons shop, seemingly looking for a weapon. When she spots you, she makes a break for it. Time to find her.
Head to the adventurer's guild next, she will run again
Head to the inn rooms and peek on her artifact
After having a conversation, you decide to recruit her, which she accepts.
Quest reward
Pristina joins your party.
Pursue the Demon Lord groupQuest location - Tainy, The Inn
Availability - When Labyrinthos gets closed down, before confronting Beahilda for the first time
You get a letter from Tainy, who asks you to see her. Then head out to the area where the Demon Lord group are hiding. Head into the cave for the meeting.
After that track down Frederick to his office and head in. After Tainy gets captured, you have to save her as usual.
After that, fight Frederick
Boss
Frederick
He activates a magic barrier, escape into the dungeon, you will have to fight Frederick again
Enemies
Frederick
Man in White A
Man in White B
Man in White C
Frederick forces the believers to attack and woahh Tainy finally saves you??? That makes it 3-1 she's finally on the board!!
Quest reward
Tainy's equipment upgraded
Tainy learns Germonique Bird
Tainy can live with you
200000G
Side Quests 2
Maco the ThiefIts not really an actual side quest, but she is someone you meet who finds an artifact, and she is determined to keep it away from you.
Location 1 (initial meeting)
She can be found in a secret room past this well hidden area. After spotting you, she makes a break for it.
Location 2 (after defeating the Death Armor and opening the stairway to the 6th floor)
She will be found in the town. After speaking to her, you engage in conversation before she eventually gains an incredibly frighteningly genius idea. Instead of heading up, she'll head down!!
Location 3 (level 8)
I was actually blind for this until my contributor told me about the location. She can be found on the same floor as the level 8 warp crystal in this room.
After that, hand Maco a piece of teleportation stone, and she will give you a barrier stone, which is an item that fully restores your entire team's HP and MP once per day.
Demon Sword's DungeonQuest Location - Pristina's Room, The Inn
Availability - After completing quest "Pristina's Secret"
The three locations are
Mount Menou - "Cowgirl on the rampage" subjugation quest
Castle under water - "Sea castle exploration" subjugation quest
Valley of Sea Rumbling - Prologue
After that, speak to Pristina when you are ready
NOTE - During this quest, you will not be able to bring Torte, Fano, as well as the Audragon. Make sure to have a backup weapon.
Enemies
Elder Zombie
Phantom Mage
In the next room, there will be two levels, just try to switch on the first one, then the second one, this will result in Pristina helping you to keep the other switch held.
NOTE - The next room has two chests, the one on the left has a holy cape for the protagonist, and the one on the right has a costume medal
After that, you will be blocked by a boss, you can always prepare and come back
Boss
Gaunt Ghost - Level 36
Will wait the first turn
Uses mainly fire skills
Wind God Puzzle
1. Take out both red and green jewels in the first area.
2. Use the green jewel on the lower statue and ride the wind
3. Ride the wind current at the red statue and get the barrier stone from the chest
4. Remove the green jewel from the statue and place the red jewel, then ride the wind
5. Take the red jewel from the statue
6. Place the red jewel on the statue at the right and ride the wind
7. Remove the red jewel and place the green jewel then ride the wind
After that, activate the crystal balls in the next room, a spirit appears and you will be forced to fight Pris. You win and then you win.
Quest reward
Demon Sword Hailveil (can only be equipped on protagonist or Pris)
Students WantedQuest Location - Adventurer's School, Veria-pool city
Availability - After completing subjugation quest "Founding of Adventurer's Academy"
The next day after helping Magnus, you will receive a letter of him thanking you, he has another request, so see him at the school.
He will request for you to try recruiting students as there is only one so far. Go talk to her. After that, head to Marl at Mercedes. She'll give 2 sets of summer uniforms. Have Torte and Fano put them on, then head to the four parts of the city to recruit students. After that, head back to Magnus. Then head to class.
Quest reward
School uniforms
5000G
Fragment of unlimited powe- sort of
Subdue the Venom GriffinQuest location - Pristina, The Inn
Availability - After completing "Demon Sword Dungeon'
NOTE - Recommended you level a bit more. Enemies here hit pretty hard.
After your artifact expedition with Pristina, you receive a letter in the mail asking to meet her. There, you encounter he younger brother, who intends to take her back to the capital. In order for her to stay, she will have to defeat the venom griffin.
NOTE - Torte and Fano will not be able to join you on this expedition. But you can always return to Veria-pool.
Enemies
Adamant Eater
Elder Stone
Kobold
On the second floor, the room before the stairs to the third floor should have a magic doublet on the right side and a costume medal on the left. On the third floor, there should be a chest with an Equator.
On the third floor balcony, the door on the left is a save circle while the middle door leads to the Venom Griffin.
Boss
Venom Griffin - Level 41
After weakening it, in a last ditch attempt, it strikes you and knocks you off the tower. You can save after this.
Quest Reward
Pris will gain an equipment upgrade
Pris will learn Demon Cross
Pris can live with you
The Silver Maiden
Quest location - Beahilda's Mansion, Veria-pool
Availability - After the time rewind
You find Leaze locked up in Beahilda's Mansion, in order to save her, Aulla proposes to create a special potion. Head to Wezen. After telling her of the materials, head to the 4th level to find a dragon's tooth.
Boss
Green Dragon
After obtaining the dragon's tooth, head back to Wezen and use the alchemy stand to create the potions.
NOTE - Just follow Aulla's instructions. Make the 3 potions, head back, then its time to make Leaze yours. By the power of my command se- wrong series.
Quest reward
Leaze will join your party.
Leaze can live with you.
Subjugation Quests
Slime SlayerQuest location - Scoop Cave, Field Map
Availability - Adventurer's guild, when subjugation quests are unlocked
Slime girls. I'm in.
Enemies
Cursed copper coins
Wind spirit
Ice hornet
NOTE - In Scoop Cave, heading north, there will be a chest. inside is an ice cape for the protagonist.
NOTE - In the next room, there are several chests on the platforms.
East
Chest containing a blessed amulet, which increases a party member's luck by 30 for a day when used.West
Chest containing an ice rod
Chest containing a masturbation detector
NOTE - In the room after that, there is a chest on the east side containing waist armor for the protagonist.
The next room will be the female slime boss. There is a save circle for you in case.
Boss fight (Scoop cave)
Female Slime - Level 18, resistant to physical attacks, resistant to all elements except dark.
Defeating her will give you a captured slime girl. At the chest after defeating her, you will receive the following heroine cosmetics
Golden Tiara
Arm Wings
Harem Pants
Dancer's Bikini
Subjugation reward
8000G
Sea fortress explorationQuest location - Eriel, The Pub
Availability - Adventurer's guild, when subjugation quests are unlocked.
NOTE - Eriel will give you a swimsuit bag, a bento, and a fruit of air. Head over to the location on the field map, there is a save altar for you in case something goes wrong.
Before entering the hole, eat the fruit of air and the swimsuit bag will automatically open, equip the swimsuits on Torte and Fano.
NOTE - You have to complete this in one go. Ensure you have consumables stocked up.
Enemies
Sea bishop
Siren
Water sprite
NOTE - To the east of the second floor, is a chest containing a terra cape for the protagonist.
NOTE - To the east of the third floor, is a chest containing a costume medal.
Eventually, you will reach a room with air. Suddenly, the magic swimwear short-circuit, resulting in Torte and Fano removing them for Aulla to repair. While repairs are going on, the group hears a noise.
Interact with the skeletion and he will attack you. Because the girls are naked, they will have a penalty in this battle.
Boss
Skeleton - Weak to fire and holy
After that, you have a choice to read the skeleton's diary. Aulla is just about done with repairs as well. Head back to the surface.
Speak to Eriel and give her the spices. Then collect your reward at the adventurer's guild. You can keep the swimsuits of course.
Subjugation reward
10000G
Assistant Needed!Quest location - Abandoned House, Field Map
Availability - After meeting the following criteria, the quest will be available at the subjugation book
Gain access to the third floor of Labyrinthos
Cleared quest "Clearing out the dungeon"
Built a house
Remember this girl? Yeah. The one that left you. Sly person. Only a 500G reward. Smh.
NOTE - This is a solo quest. Flex on her.
Meeting with Tainy, she'll start talking behind your back, while you're behind her back. Ironic right?
Being surprised, you tell her of how you survive after she abandoned you. She says she'll be counting on and that angers the ghost woman who will attack you.
Mini-boss
Ghost of a woman - Level 19, weak to fire
After that, the ghost retreats downstairs. Follow her.
NOTE - The room to the south is empty, continue east and there will be a chest. It contains the whirlwind cape for the protagonist.
Enemies
Cursed doll
Cursed copper coin
Nocturnal revenant
NOTE - The wine cellar door should be locked. Head south and fight the ghost woman once again
Mini-boss
Ghost of a woman - Level 19, weak to fire
After defeating her once more, she retreats further down. Follow her.
NOTE - The room to the east has a chest containing a costume medal.
The rooms toward the west lead to the ghost woman once again. Fight her.
Mini-boss
Ghost of a woman - Level 18, weak to fire
She retreats into her study room. Apparently she was a hikkikomori who got rejected by her significant other, and likely died of alcohol overdose. Still a better character than Tainy.
Anyways, long story short, you're drunk, horny, and slow as hell.
Of course, Tainy leaves. Payback time. Slam into walls. Reaching your limit, Tainy comes back for you.
Revenge time.
Head back, and the ghost woman should unlock the wine cellar. Grab the bottle of vintage wine and head out.
Next, head to the Letterfaith guild building and meet their guild master. You'll meet the Rubymals captain once more.
A reward of 100000G seems nice. But of course Tainy decides to keep it all for herself. Luckily, she's not allowed to board any ships. So she'll be joining you for the time being.
Subjugation reward
500G
Tainy will join the party.
A Shrine Maiden for hireQuest location - South Cave, Field Map
Availability - Adventurer's guild, once you unlock subjugation quests
Requirements - Torte and Fano fondness at 30 or more
The job description is awfully specific... hmm..
NOTE - The cave is quite dark, a magic lamp or torch is recommended.
Enemies
Cursed puppet
Nocturnal revenant
NOTE - North is a room containing a chest with the thunder cape for the protagonist
Heading downward, there will be a save slot, make sure to save.
As you continue, you will awaken the undead in the casket. Defeat him.
Mini-boss
Tomb Owner - Level 28, weak to fire and holy
After defeating him, I recommend you save again. Head down and speak with priestess Helen. She will give you two sets of micro bikinis and ask you to put them on Torte and Fano. After you put it on them, speak to her again.
Speaking to her, you get trapped outside the room, and priestess Helen exposes herself to be the Dark Unicorn, who you might have heard from back at the pub at night.
Dark Unicorn starts acting like a creepy old man before Aulla eventually comes through as always and unlocks the door. Now, destroy him.
In the chests are a mage's hat and martial arts uniform for the protagonist.
Now, the Dark Unicorn will beg for forgiveness, you have 3 choices.
Beat him for gold
Beat him for experience
Leave him beThe choice is obvious of course.
NOTE - If you beat him for gold, he only drops 40G, each time you hit him its 20G. He's poor.
NOTE - If you beat him for experience, you can do it over and over, but its only 20 EXP each time.
Subjugation reward
5000G
3000G additional compensation
Become a millionaireQuest location - Tailor Marl, Mercedes
Availability - After sufficient main story progression
Requirements - Torte and Fano fondness at 30 or more
Recently, there have been reports of bandits targeting the rich. In order to apprehend them, you undergo a plan to disguise yourself as a rich person with servants. Head to Marl and speak to her.
She will request you bring 3 spools of monster silk for her, which come from silk spiders at the 4th level of Labyrinthos. You can find them in the following locations
Outside the 4th level teleportation area.
Head south from the location above and then towards the west in a lava area
The cave heading towards level 5, at the left, same place as the succubus enemy location.
After that, Marl will give you the outfits required, equip them them speak to Malta at the pub. Next you have to play the part. So we do what all millionaires do(???).
After identifying the bandit, head to the alleyway outside at the west.
Subjugation rewards
Housemaid Set
Millionaire Suit
10000G
Subjugation Quests 2
Cowgirl on the rampageQuest location - Mount Menou, Field Map
Availability - After sufficient main story progression.
Enemies
Mithril eater
Elder zombie
Nocturnal revenant
Phantom mage
NOTE - Theres a pathway west of the entrance, at the end is a chest with a costume medal.
NOTE - Heading down, there should be a chest in sight with a fire cape for the protagonist. There is another chest close by with a music box of life inside.
There is a save circle before you engage the female minotaur. Enjoy a nice cutscene and then fight her.
Boss
Minotaur (Female) - Level 20
After defeating her, you will capture her. The purple chest contains the following
Minotaurus Horn
Fur Sleeve
Fur Boots
Minotaurus Axe - Unique, ATK +148, CRIT ATK +5, 30% chance on attack to perform earth-splitting attack, damage unstable
Subjugation reward
12000G
Founding of Adventurer's AcademyQuest Location - Cosloft Mine, Field Map
Availability - After sufficient main story progression
Enemies
Kobold
Vampire bat
Ogre
Earth Apparition
Creeping Vine
NOTE - Magnus will follow your team in this quest. He actually has 0 ACC which means he won't hit anything, he also has very low HP.
NOTE - The left door leads to a room with a chest containing a costume medal, the right door leads onward. The mine is dark so its recommended to bring a magic lamp or torch.
After that continue onward, and there should be two divided paths again, the left path leads to a room with a chest containing an elixir
The room to the right leads to a boss fight, there is a save point so prepare accordingly.
IMPORTANT - If you fail this subjugation, you can possibly be locked due to needing to clear all the monsters, so save in a SEPARATE slot to be safe.
Boss
Corrupt Jewel - Level 32, weak to wind
Casts an earth barrier at the beginning of the battle
Can use earth-splitter, an AOE earth element attack
Can also use great earth-splitter, a stronger variation
Boss Drops
Magic clover
Elixir
Subjugation rewards
10000G
A housemaid for hire!Quest location - Ariel's Mansion, Field map
Availability - After sufficient main story progression
Requirements - Torte and Fano at 30 fondness or more, Torte and Fano must wear maid outfits
NOTE - If you have completed the "Become a millionaire" subjugation quest, the maid outfits should appear on sale at Mercedes.
There will be a save circle when you enter the house.
IMPORTANT - If you fail this subjugation, you can possibly be locked due to needing to clear all the monsters, so save in a SEPARATE slot to be safe.
Enter the room on the first floor and you should find Arael, suddenly, you will be attacked, so be ready.
Enemy
Succubus' Messenger - Level 22
After that, carry Arael to his bedroom. Once Torte and Fano leave, you two do a little trolling.
NOTE - The next events are decided by what undergarments Torte and Fano wears. So get creative!
After your team (or solo) trolling, speak to Torte outside. Then head to the third floor's barrier. After starting it back up, head down for dinner. After dinner, head to the room at the opposite end and sleep.
After the barrier is broken, head upstairs to the third floor. Where you will find a Succubus brainwashing Arael to switch the barrier off once more. After the barrier is turned off, the Succubus escapes. Take Arael back to his bed. Then, head to the room where you were peeking and go down.
Enemies
Guardian of the Dead
Phantom Mage
Elder Zombie
Corrupt Dragon
NOTE - The chest to the left gives kitty gloves, a strong 8 star weapon for hunters.
Heading downwards, the room to the left should have a chest containing a costume medal. The room to the right will be a fight.
Enemies
Succubus' Messenger A - Level 22
Succubus' Messenger B - Level 22
After that, return up and see Arael, he will unlock the blue chest containing unlimited powe- I mean, its quite close.
Subjugation reward
10000G
Care worker for a drunkQuest location - Outside Wezen's shop, Everthin market district
Availability - After completing subjugation quest "A housemaid for hire"
There have been reports of many drunks in the city recently, the guild requests you investigate. Simply head over, check the drunk Cayenne, go get water from Wezen, kick Cayenne, beat up Cayenne. Everyone's happy.
Subjugation reward
500G
A mesmerizing cityQuest location - Northeast of Veria-pool
Availability - After completing subjugation quest "Care worker for a drunk"
The plot thickens to these drunk incidents, and the guild asks you to investigate further. Speak to Lazarus and investigate. He will give a broken amulet, then bring it to Wezen. The correct answer is that they were both in the northeastern area.
After that, head to the northeast area and you will see Enarith checking something. Then, head into the magic circle. Head back to Wezen and she will conclude they were attacked by a succubus. You are given a talisman to assist you. Head back to the magic circle.
Enemies
Succubus' Messenger - Level 22
NOTE - You are not able to escape these battles. However, they can be avoided with footloose.
In the next room, listen to Saya's instructions and activate the buttons accordingly.
NOTE - The left and right magic circles lead to the same area, there is no save circle so be careful.
Boss
Saya - level 32
NOTE - You will be Succubus Charmed during this battle, which makes the protagonist attack Torte and Fano based off his own stats, I actually one shot my Torte because of this so be careful.
Subjugation reward
Succubus Horn
Cute Skirt
Succubus Wings
Black Lingerie
14000G
Post Game Quests (spoilers)
Infiltrate the PiratesQuest location - Pirate ship, Veria-pool
Availability - Post game
Requirements - Torte's fondness 70+, Fano's fondness 30+
I swear this is not an Among Us reference.
Impostors using your name and Torte's as pirates have boarded the ship on Veria-pool port, head there to go undercover. After meeting the impostors, go greet the other pirates on the ship. After poor Torte's self confidence is crushed and tossed into the ocean, head down to the hold to clean the area, seemingly feeling down, Torte sits out the cleaning out of fear that she is a bother.
You also see the box where you first met Aulla and got the Audragon. After cleaning the garbage, head back up. it appears your impostor keeps the logbook with him at all times. Head back to Torte. She feels like she has not been doing enough for her country.
Strategy meeting time with Aulla. In order to lift her spirits, you speak to Torte, after she has cheered up, the ship suddenly is under attack by the same ghosts from back then. Head up.
Enemies
Ghost
Boss
Evil God's Messenger - Level 50
The messenger, being cornered, releases a magic spell that freezes everyone. However, the chest that has been following you opens, and is revealed to be Torte's Paladin Armor. She equips it and is able to move again. Torte will defeat the messenger 6996 damage ( ͡ಥ ͜ʖ ͡ಥ)
Subjugation rewards
Torte's Paladin Set
Torte's stats are increased
Torte can now use Shining Caliber
8000G
Knight's Play with Torte (speak to Ovah missionary)
Assistance at Village FestivalQuest location - Old-pool, Field Map
Availability - Post game
Enemies
Creeping Vine
Vampire Bat
Place looks familiar? Hmm... no matter. Head to Old-pool and speak to the group at the fence. It appears the festival tools have been left on the mountain, go with Fano to retrieve them. At this very familiar place, a monster is in sight, defeat it.
Boss
Great Ghoul - Level 43
In this very familiar place, you find very familiar clothes. head back to the village. They suggest that Fano be the shrine maiden for the festival. While the old lady helps Fano, help the old man. After that, enjoy the festival.
Subjugation reward
Fano's Shrine Maiden set
Fano's stats are increased
Fano can now use Ceramic Nova
5000G
Shrine Maiden Play with Fano (speak to Ovah missionary)
Destroy a powerful demonQuest location - Everthin Market District, Veria-Pool
Availability - After completion of Torte and Fano's post game quests
You find Beahilda in the market district investigating the sewers for a knight, after she roasts him and casually acts lovey-dovey with you, she heads off and the knight decides to send a request to the adventurer's guild. Head there and accept the quest then head into the sewers
Beahilda will join you after she followed you into the sewers.
Enemies
Guardian of the Dead
Elder Zombie
Adamant Eater
Pasuzu
Arachne
Kobold
NOTE - There is a save statue up ahead before the boss.
Oh, a familiar boss. Oh, the guy who hurt Leaze. Terminate him.
Boss
Ancient Beast Demon - Level 50
After defeating it, it decides to take out Beahilda in a last resort. Save her. Save her. I don't know what happens if you don't do anything but you should save her!!! ┌∩┐༼ ಠ益ಠ ༽┌∩┐
In the beast demon's realm, there is a group of 3 chests containing a costume medal, elixir, and a magic clover.
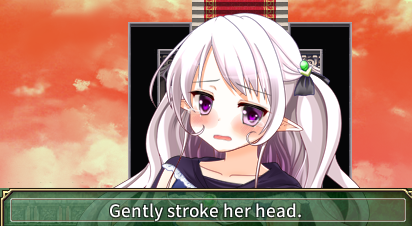
And now, we interrupt this guide for a short moment to gather all players here reading this, to pat Beahilda.
Yes, do it
And then you do it-
Subjugation reward
20000G
The Thugs' HideoutQuest location - Bandits Hideout, Field map
Availability - 3 days after the completion of the quest "Destroy a powerful demon"
They stole her magic equipment, now they'll pay. ∋━━へ(⚈Д⚈)へ
Enemies
Thug
Head into the main building and Beahilda impatiently rushes to open the chest, unleashing paralysis gas. The thieves come in and attempt to sully Beahilda. Aulla hard carries and saves her, now, terminate them.
Enemies
Just terminate them
After reestablishing dominance and ownership of Beahilda while restoring her confidence with your harem protagonist skills, open the other chest and she should power up.
Quest reward
Beahilda can now use Black Lotus
Beahilda's stats are increased
Weapon TradingQuest location - Butler Waits
Availability - Post game
In order to avoid bankruptcy, Butler Waits is willing to trade you Malta's costumes in exchange for weapons. These costumes are mainly for the sub-heroines to wear.
Pristina's Bunny Costume
Excalibur - 10✰
Claymore EX - 9✰
Great Blitz Sword - 8✰
Pristina's Succubus Costume
Ether Fantasma - 10✰
Long Sword EX - 9✰
Black Rapier - 8✰
Protagonist has learnt "Succubus Charm"
Tainy's Bunny Costume
Flame Ice Sword - 10✰
Twin Dagger - 9✰
Knife of Lethal Poison - 8✰
Tainy's Dancer Costume
Holy Boots - 10✰
Battle Gloves EX - 9✰
Kitty Gloves - 8✰
Protagonist has learn "Overboost"
Leaze's Bunny Costume
Assassin Bow - 10✰
Hunter's Bow EX - 9✰
Equator - 8✰
Beahilda's Bunny Costume
Zecil's Holy Scepter - 10✰
Magic Rod EX - 9✰
Darkness Rod - 8✰
And I believe that concludes all the post game quests. From here on out, you finish the item encyclopedia quest, or explore freely and finish unlocking any scenes you left out.
Cast Of Characters


Protagonist (you)The main protagonist, a stowaway who sneaks into the Rubymals, and gains a sacred sword while on his time there. Fully customisable. Isn't that just great?
Appearance and name can be changed at the inn
Personality does not affect gameplay or dialog.
NOTE - You can select a protection status of your choice from one of the elements.
Origin
Possibly a hero - (HP +50, MP +20)
Titles
Golden King - (HP, ATK, MATK, DEF, MDEF +10, AGI +5, lethal poison nullified)
Black Knight, obtained after Torte's mother gives you the Black Medal - (ATK +5, DEF +5, MATK +5, MDEF +5, AGI +5)
Protection
Element of choice depending on your character creation
On your journey, you will be assisted a the cast of heroines. No protagonist is complete without his harem. So gain a harem you shall. Below are the possible allies and heroines you will partner with.
TorteOur first heroine and one of the main ones, Torte is a girl who you first meet on the Rubymals ship during the prologue. Eventually, you will buy her as a slave.
Availability - Beginning of the game
How to get - Complete quest "The Slave Girl"
Origin
Princess - (HP +35, MP+35)
Titles
Sacred Knight (stripped) - (DEF +10)
Sacred Knight, unlocked after Torte reconciles with her mother - (ATK +20, DEF +15, MDEF +5, AGI +10, Charm +10)
Protection
Holy +5%
Personality
Bullishness - (ATK +10)
Intuition - (EVA +2)
Special
Knight's Pride - (When HP drops to below around 20%-30%, DEF and MDEF +50%)
Unique
Mental Toughness - (Nullifies sleep and confusion)
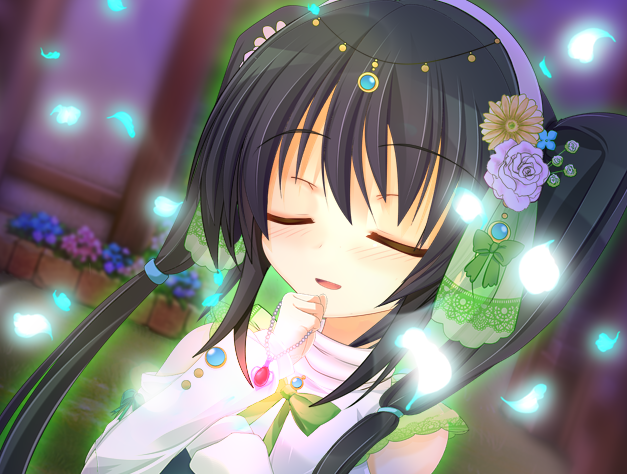
FanoOur second heroine and one of the main ones, Fano is a girl who you will find in a mysterious location in Labyrinthos after activating the magic barrier at the third floor. She has lost her memories and is in search to regain them.
Availability - After Torte joins
How to get - Progressing through the main story, activating the magic circle at floor 3 and investigating the mysterious area
Origin
Shaman - (HP +30, MP+40)
Titles
??? - (MATK +10)
Veria's Shaman, unlocked after Labyrinthos arc - (ATK +5, MATK +20, MDEF +15, AGI +10, Charm +10)
Protection
Darkness
Personality
Charity - (MATK +5, Charm +5)
Politeness - (CRIT rate +5)
Special
Ancient Protection - (When HP drops to around 10%-20%, all attributes increase by 30%)
Unique
Magic affinity - (All attributes +5)
PristinaA sub-heroine who you meet after the prologue, she eventually parts ways with you but eventually she will join your party.
Availability - After you meet the requirements for the side quest "Pristina's Secret"
How to get - Complete side quest "Pristina's Secret"
Origin
Baldegard - (HP +30, MP +50, MATK +20)
Title
Possibly a brave hero - (ATK +20, DEF +10, MDEF +15, Charm +35)
Protection
Fire
Earth
Personality
Naivety - (ATK +10)
Bold - (CRIT rate +10)
Special
Passion - (When HP is above 90%, her ATK increases by 20%)
Infinite Guts - (When below a certain MP amount, restores MP by 10%)
TainyA sub-heroine who you meet in the prologue. Left you to die on the ship. You know, that girl! Eventually somewhere along the way things happen and now she's stuck with you.
Availability - After you meet the requirements for the subjugation quest "Assistant needed!"
How to get - Complete subjugation quest "Assistant needed!"
Origin
Elf girl - (HP +30, MP+40, Charm +15)
Titles
A Seasoned Adventurer - (ATK, MATK, DEF, MDEF, AGI +10, Charm +5)
Protection
Wind
Personality
Positive - (ATK +5, AGI +3)
Shrewd - (ACC +5)
Special
Sense danger - (Below a certain amount of HP, gain a boost in AGI and EVA by 10%)
Tidiness - (When using an item in combat, their turn comes faster)
LeazeA homunculus created by Beahilda. After being abandoned, you become her new master, and she follows your every order.
Availability - After time rewind
How to get - Complete side quest "The Silver Maiden"
Origin
Homunculus - (HP +50, MP+20)
Title
Silver Maiden - (DEF +5, MAT +15, MDEF +20, AGI +10, Charm +35)
Protection
Ice
Personality
Loyal - (DEF +10)
No-nonsense - (ACC +5)
Special
Chain spell - (When using a magic skill, boost MATK and AGI until the next move)
BeahildaSaved from the sacrificial ritual, she's now a brat, but a cute imouto style brat. As an astronomer, she will assist your party in fully understanding Labyrinthos.
Availability - After emergency room in 9th level is unlocked
How to get - Main story progression
Origin
Old Elf - (HP +10, MP +100)
Title
Whiz Girl - (MATK +30, MDEF +20, Charm +30)
Personality
Innocence - (MATK +10)
Confidence - (EVA +10)
Special
Magic Shield - (When MP is above 50%, DEF AND MDEF +20%)
H Scene And Marriage Guide
NOTE - You can always sleep until night, save your game, buy a H book, use it, then reload your save. H scenes are shared globally. No need to spend large sums of money. You get large sums of money eventually anyways though.
NOTE - Some Torte and Fano scenes also require a certain level of shame in addition to fondness to obtain
NOTE - Some Torte and Fano scenes depend on the level of that scene, for example servicing scenes with high fondness positive, they require a certain service level.
Torte and FanoThese should be easy since its already mentioned in the scene recollection and CG viewing on what scenes they are.
Low fondness
-30 to 0
High fondness
30+
High fondness positive
Scenes depend on fondness. Safer to max out fondness to 100 through training.
NOTE - Climax during insertion and foreplay can cause high fondness positive scenes as well.
3P scenes are unlocked once Torte and Fano are at high fondness (enough to wear shameful outfits without drawbacks). Speak to the Ovah Follower and she should give you the books.
Some scenes also are not obtainable until sufficient story progression.
Pris, Tainy, Leaze, and BeahildaThey can engage in H with you after you battle with them a few times in the Labyrinth, once you engage in H, it is reset so you have to fight again.
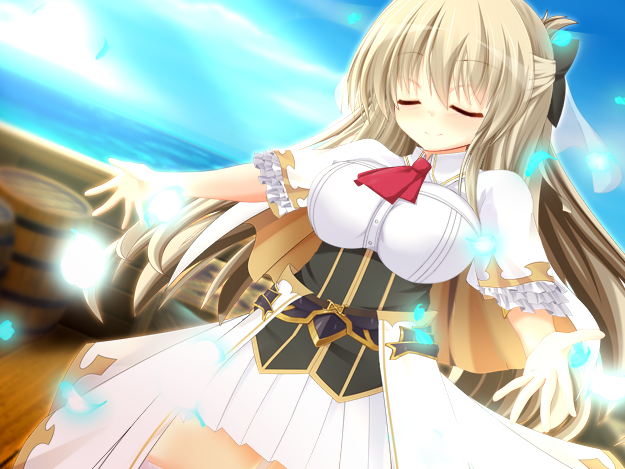
AullaSee "The Audragon" section for more info.
The Monster GirlsSimply beat them 1 on 1 when they are captured by you.
Marriage guideTorte - High fondness
Fano - High fondness
Pris - Completed both heroine quests
Tainy - Completed both heroine quests
Leaze - Unlocked both heroine scenes
Beahilda - Completed both heroine quests
Fanmade Popularity Poll
Recommended to answer after you've played the whole game since some characters appear late.
Just for fun since I'm curious to see what everyone thought of our heroines.
https://strawpoll.com/zckh43sa4
Aulla is the best heroine.
And that's all for this guide, this is my first time writing one so I hope I did well. Hope you all had as much fun as I did playing.
Source: https://steamcommunity.com/sharedfiles/filedetails/?id=2459697790