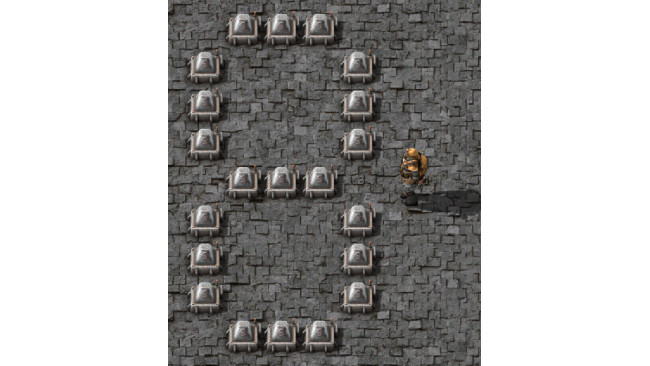
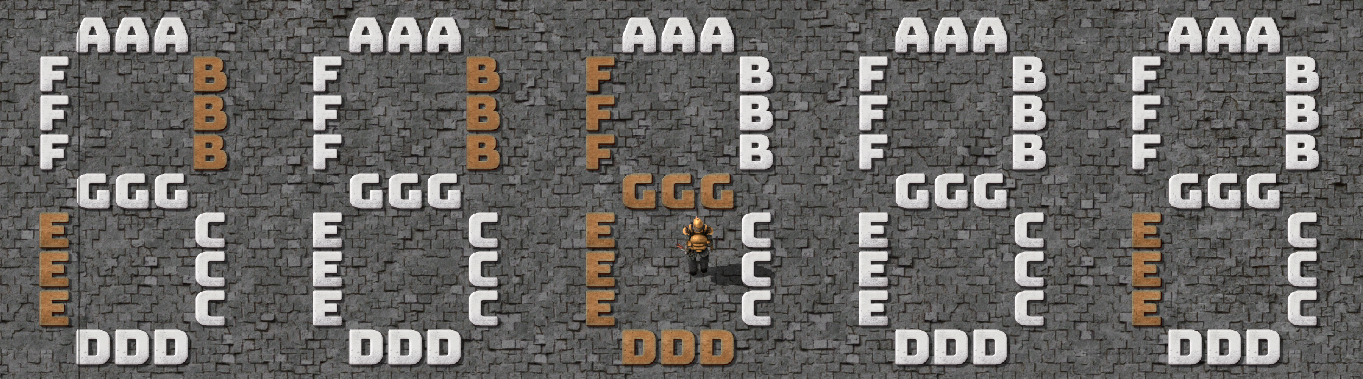
Lamps
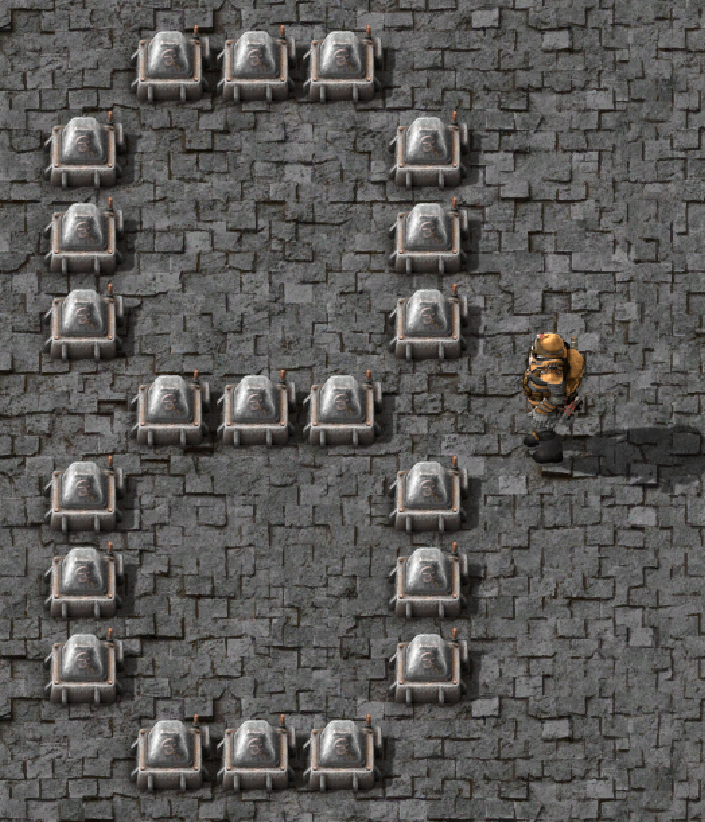
First, let's create our segments, in my case. These are 3 small lamps
Connect them with a cable and set a condition
A<0, B<0, C<0, etc. according to the screenshot
Also check the "Use colors" checkbox
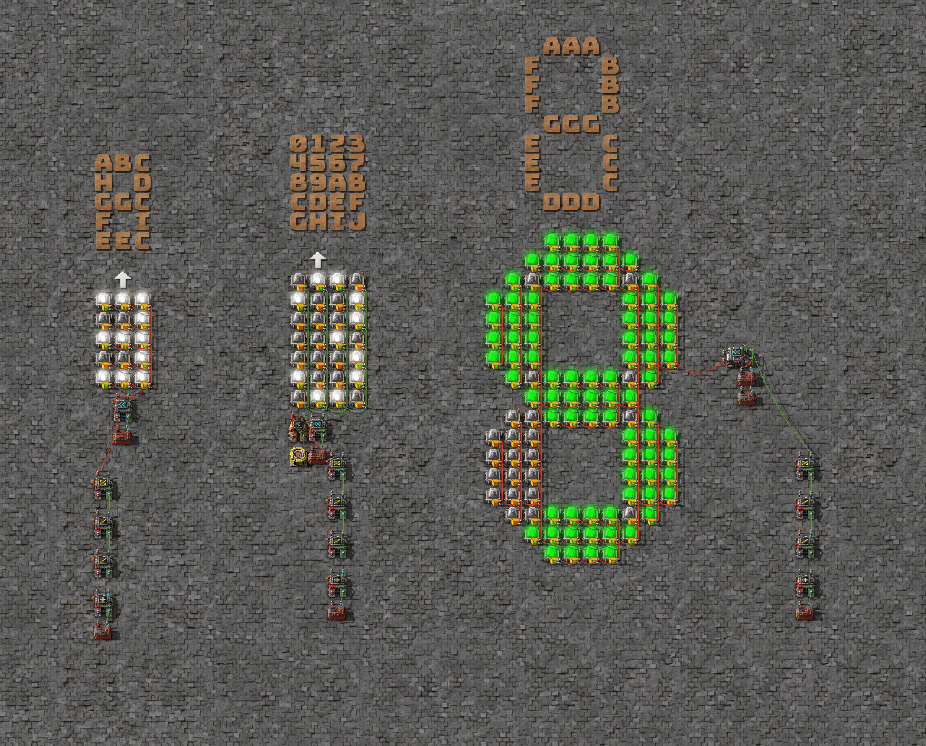
Numbers
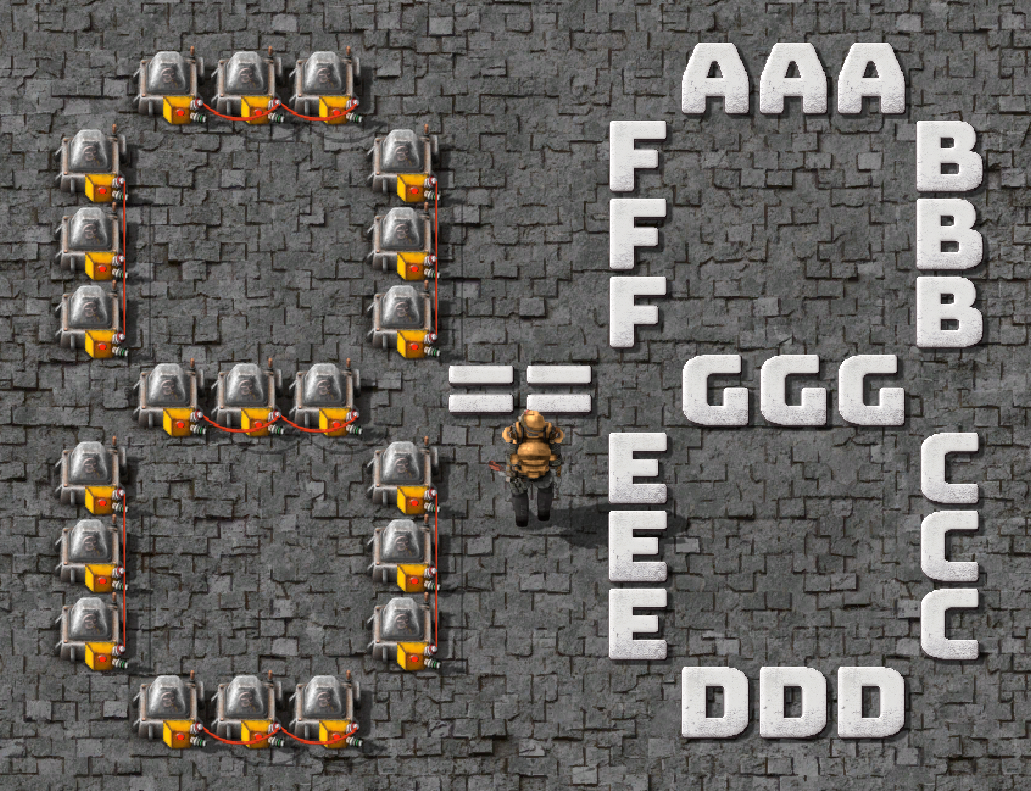
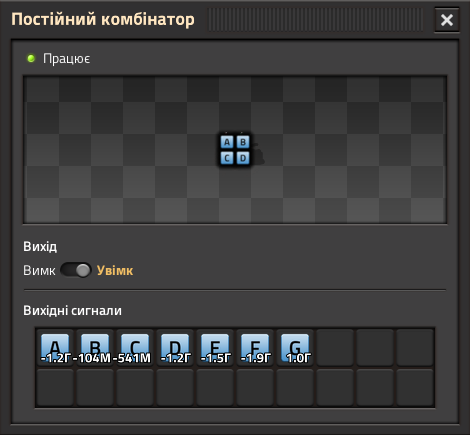
Now we need to create a permanent combinator where we will store the values
To do this, we need to understand what bit codes our signals have
And to make it easier, I visualized the numbers that should be on in white and the numbers that should be off in copper
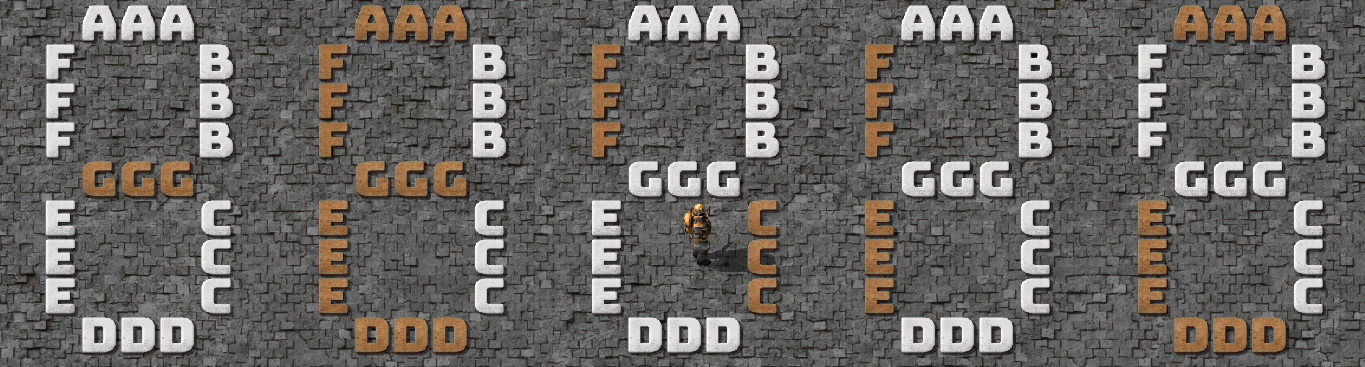
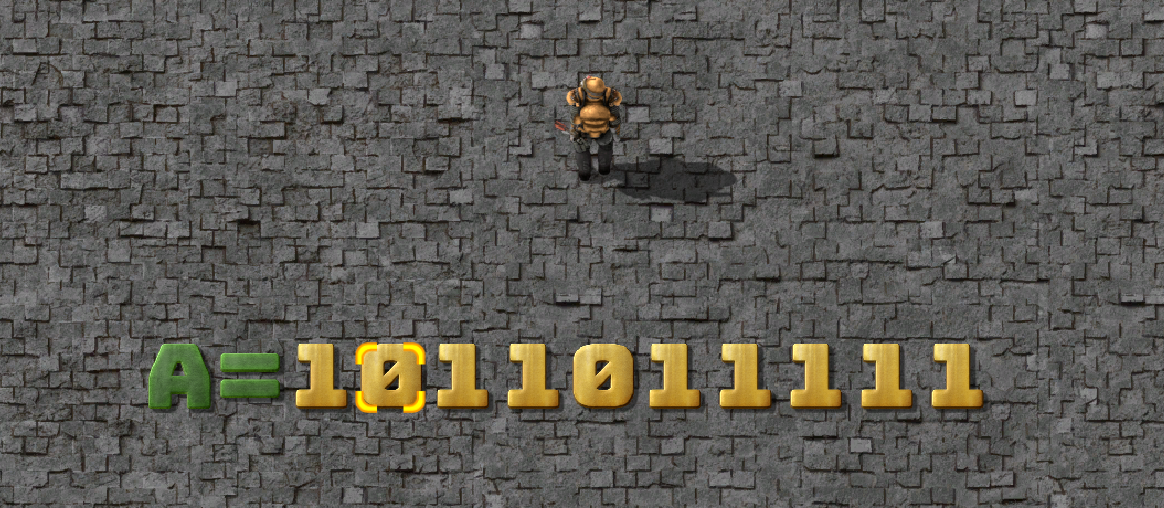
Now let's take the segment AAA, which corresponds to the signal A, and search the numbers
(yes on = 1, no = 0)
For zero, 1, for one, 0, for two, 1, etc.
As a result, we get the code 1011011111
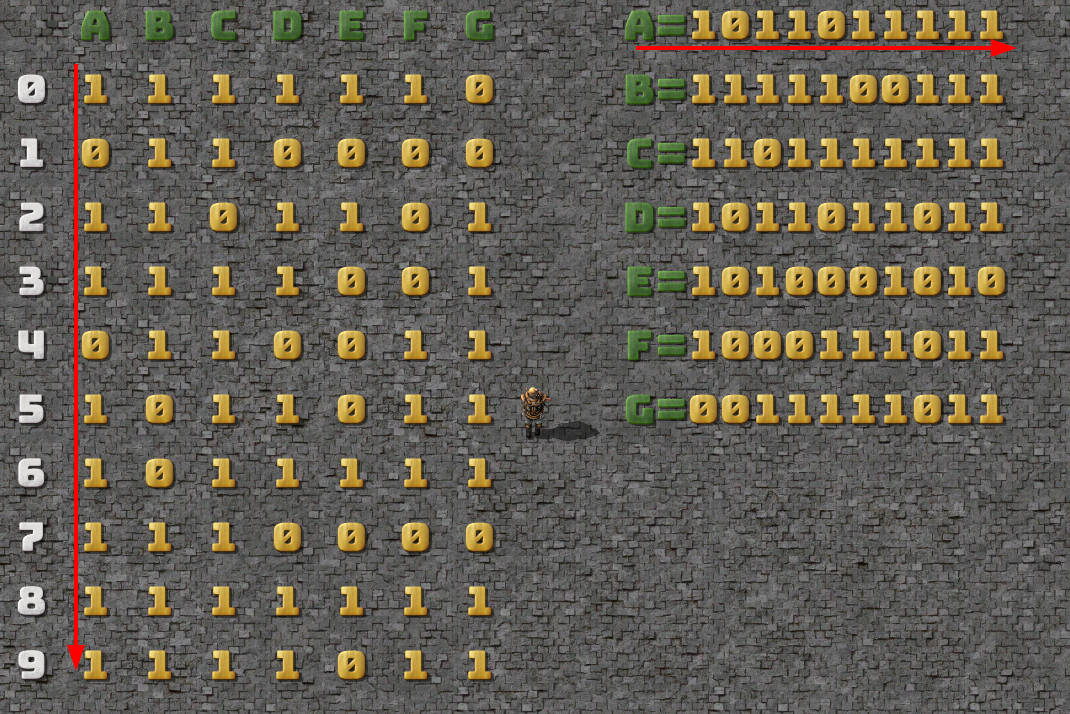
Now let's go through the rest of the signals and get the following table
Binary Calculator
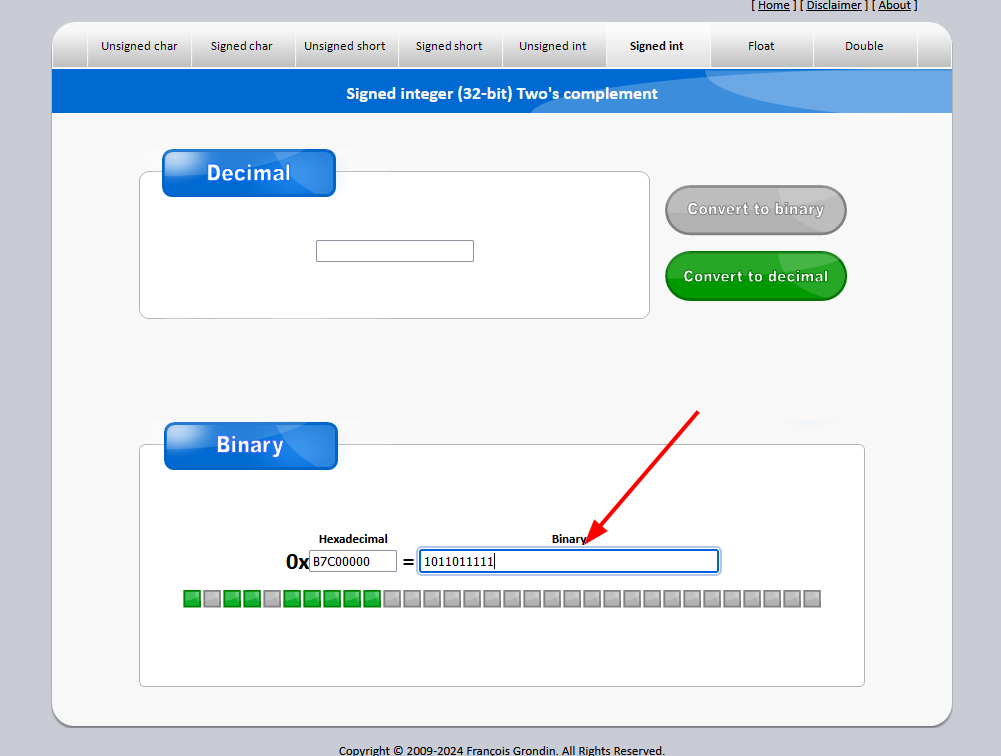
Now we take one calculator[www.binaryconvert.com] and paste our codes here
And add zeros at the end, just press the zero key
And convert binary to decimal
Youtube video
https://www.youtube.com/watch?v=lLi6d-L4lG4
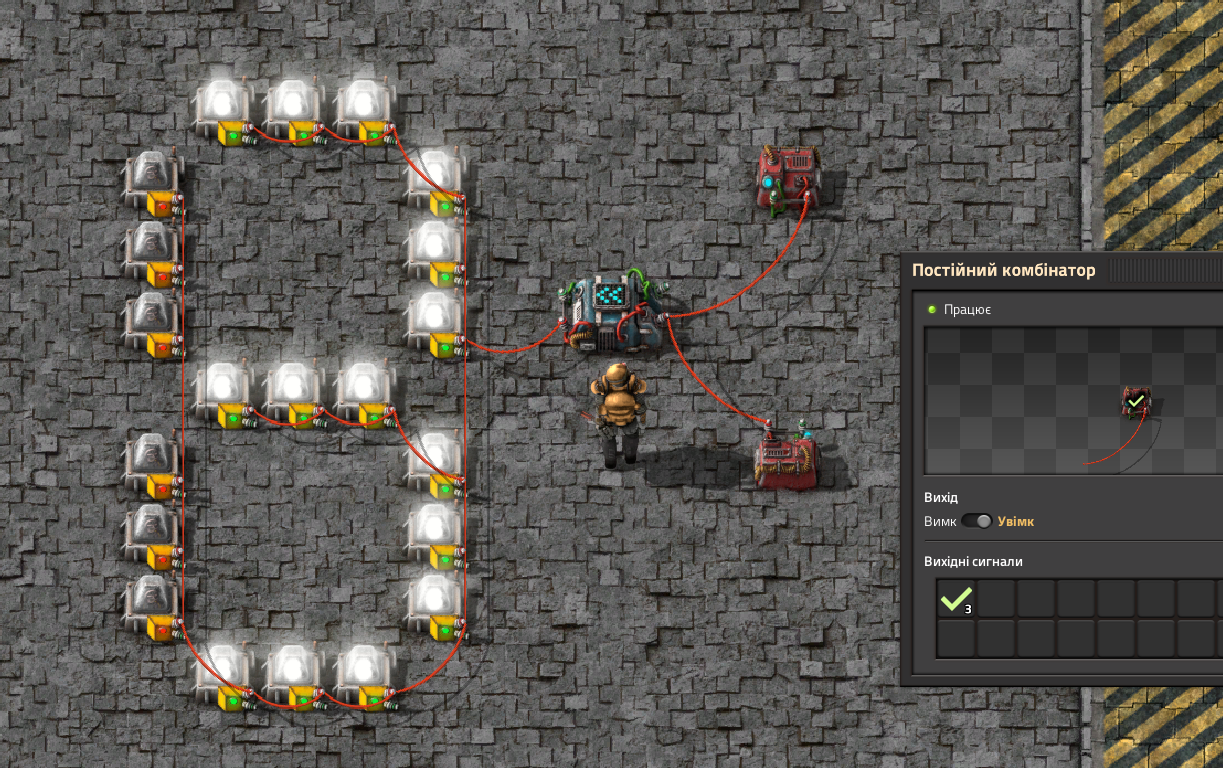
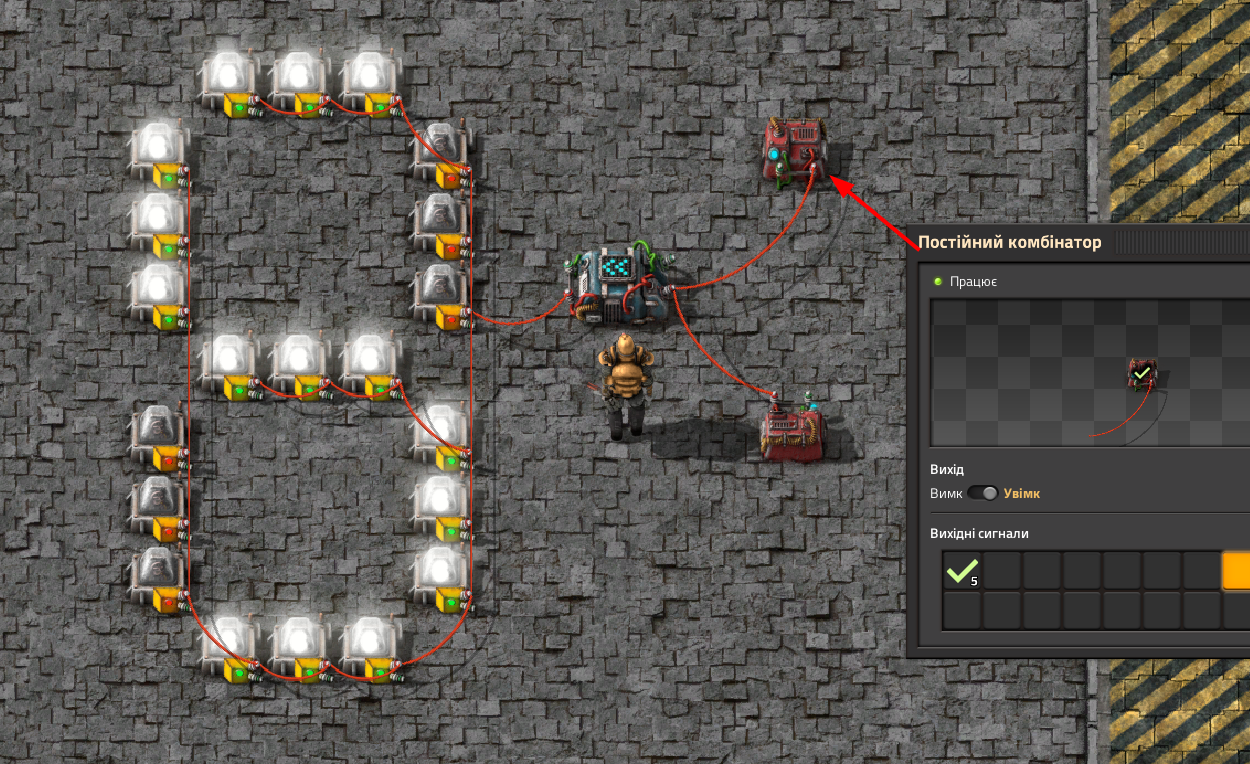
The resulting values are written to a constant combinator
And the result will look like this
Why are there zeros at the end?
Explanation in the FAQ section
Bit Shift
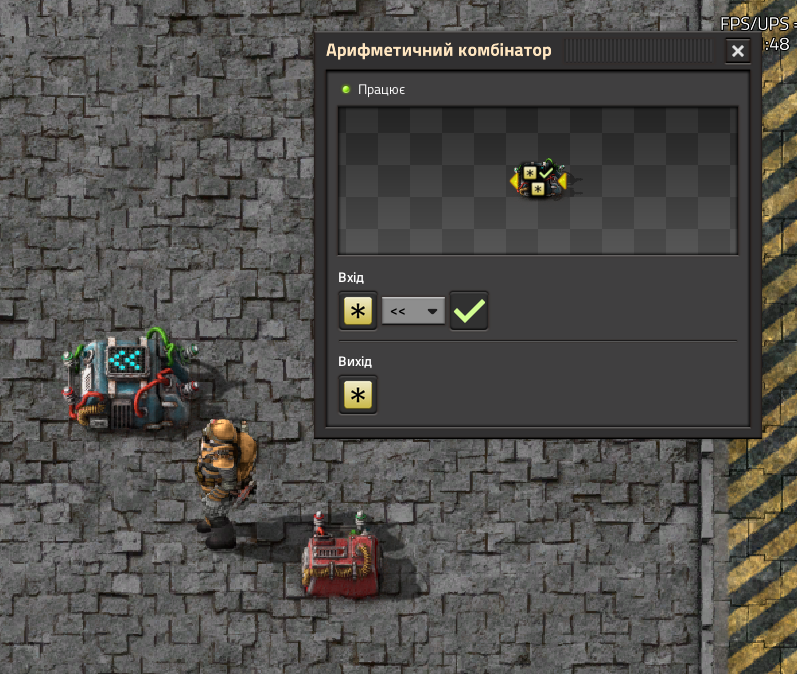
Now we take an Arithmetic combinator in which we set the following conditions
Signal mark. Its value will mean the digit
And connect it to the small lights
And the training plan is ready
As you can see, the check mark corresponds to the number on the display
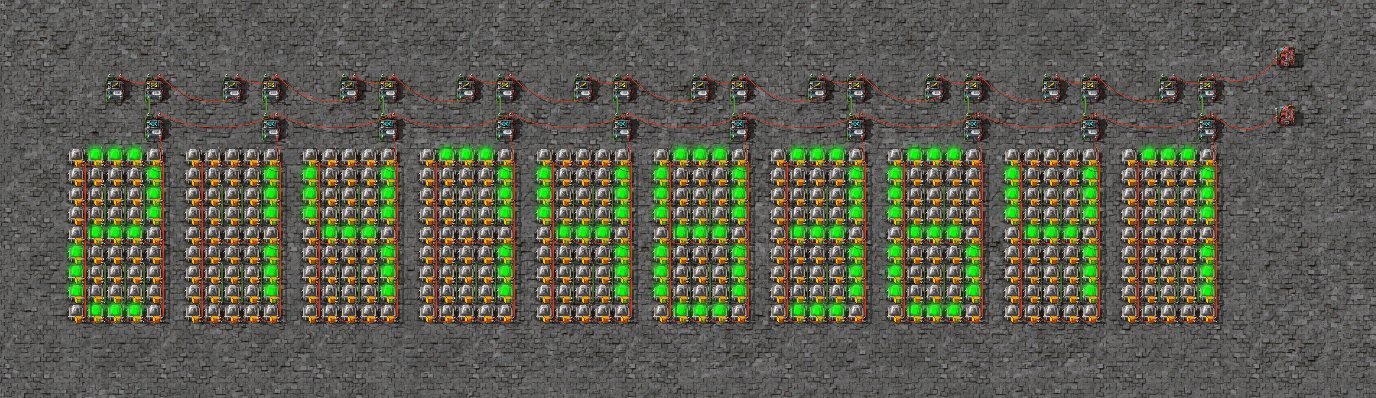
Practical Use


Make your display look good
Just add small lamps with no strings attached
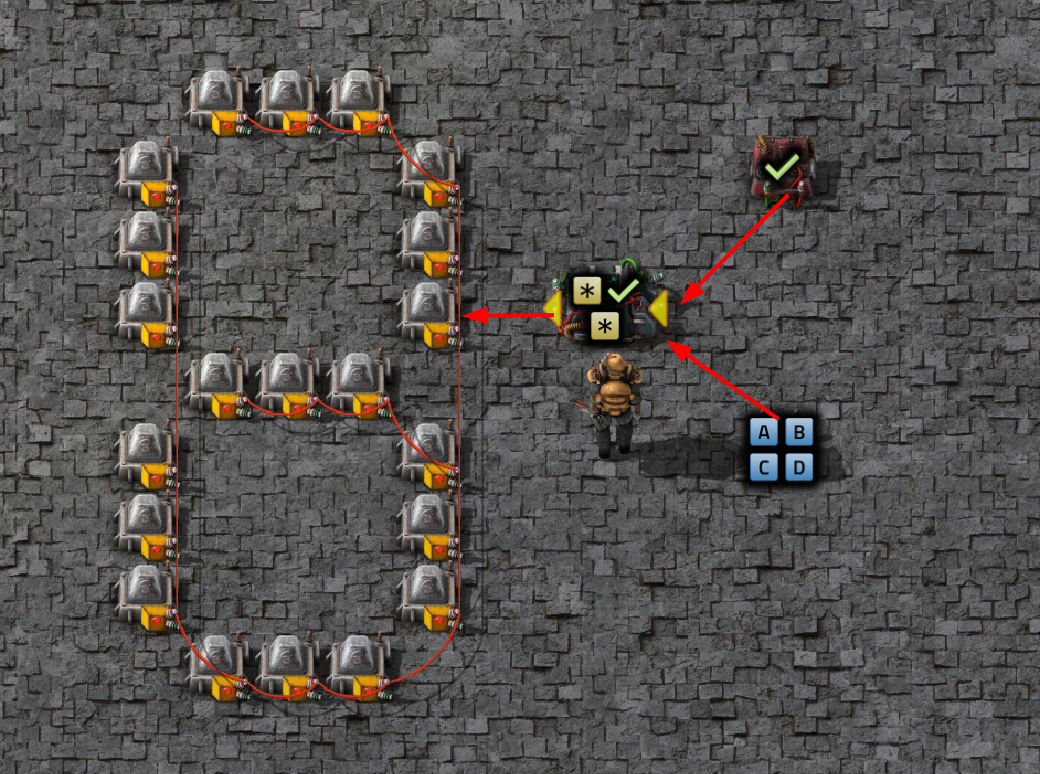
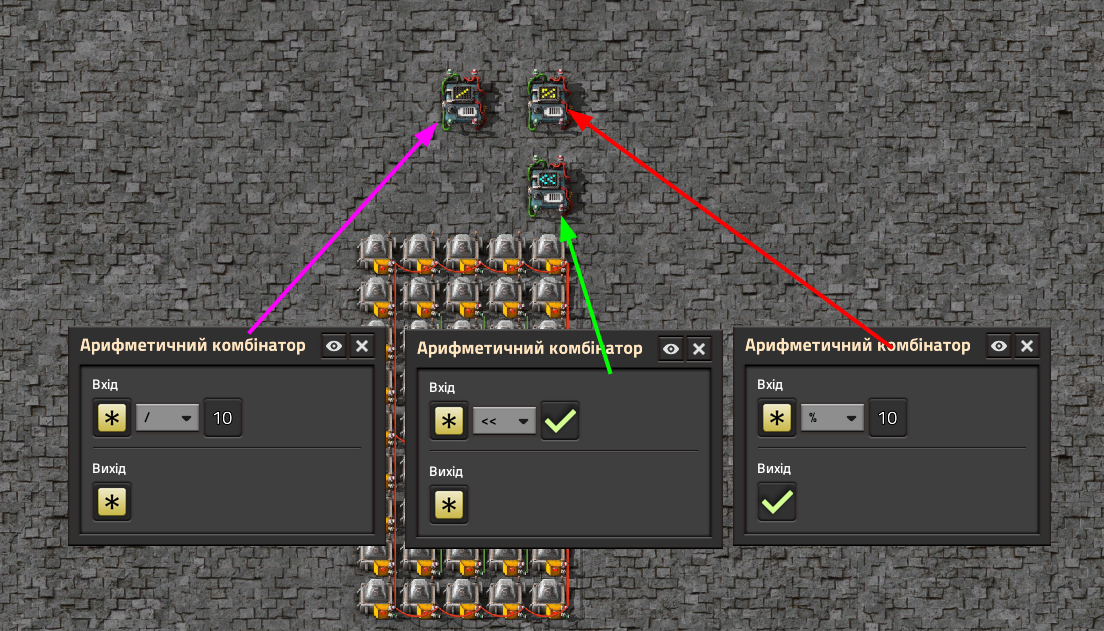
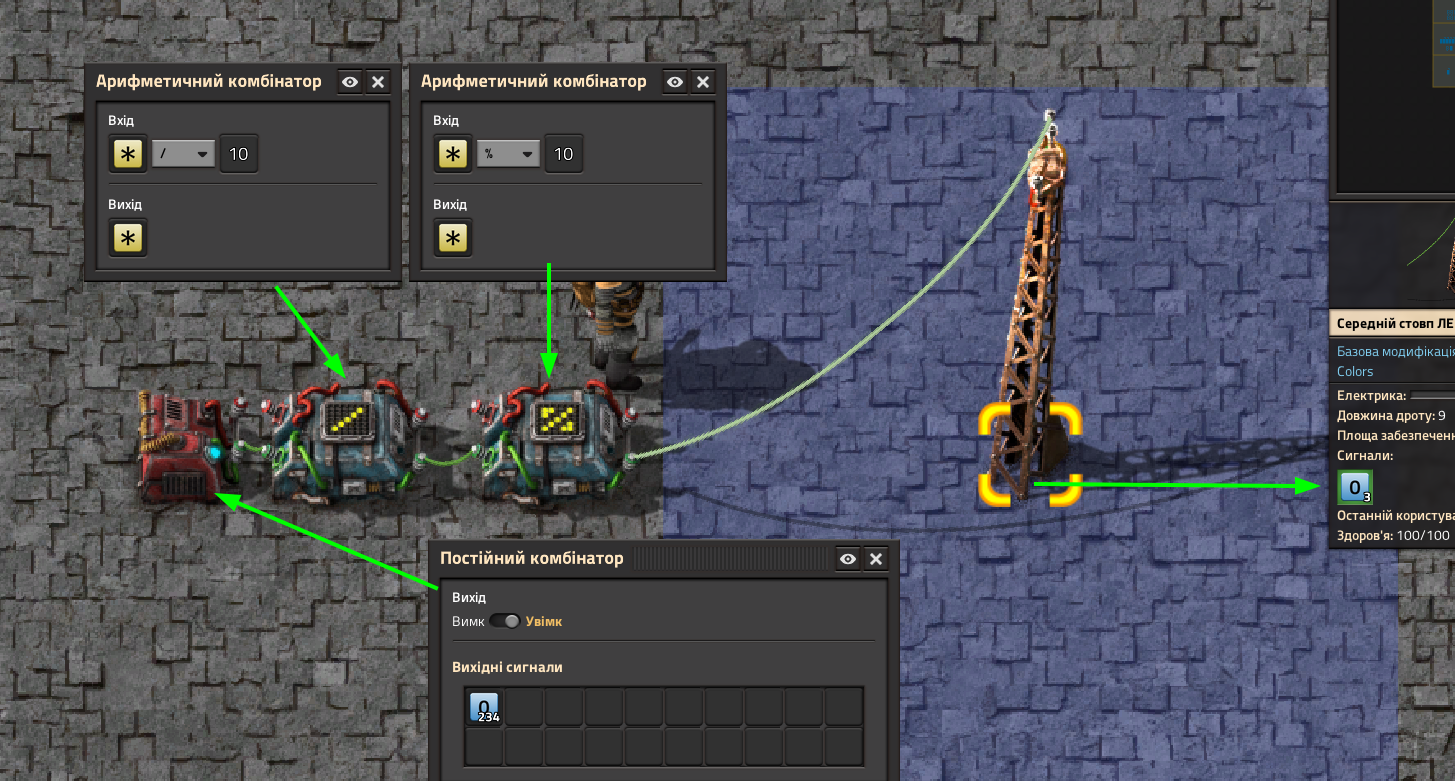
Let's also add two arithmetic combinators to the logic with the following conditions
TheoryRed arrow
The idea of this combinator is to print the most extreme digit
For 234, the output is 4. For 23, the output is 3
Purple arrow
It simply divides by ten
And in this way, it helps to get 3 out of 234, not 4
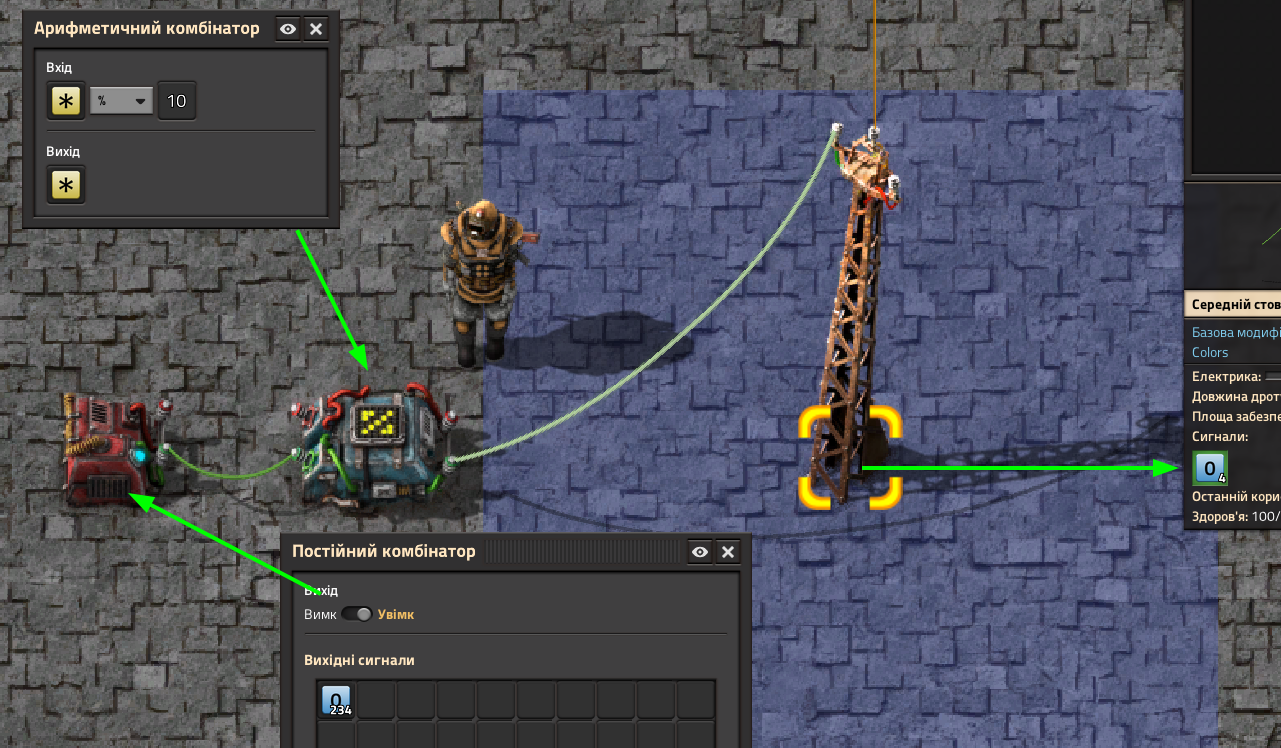
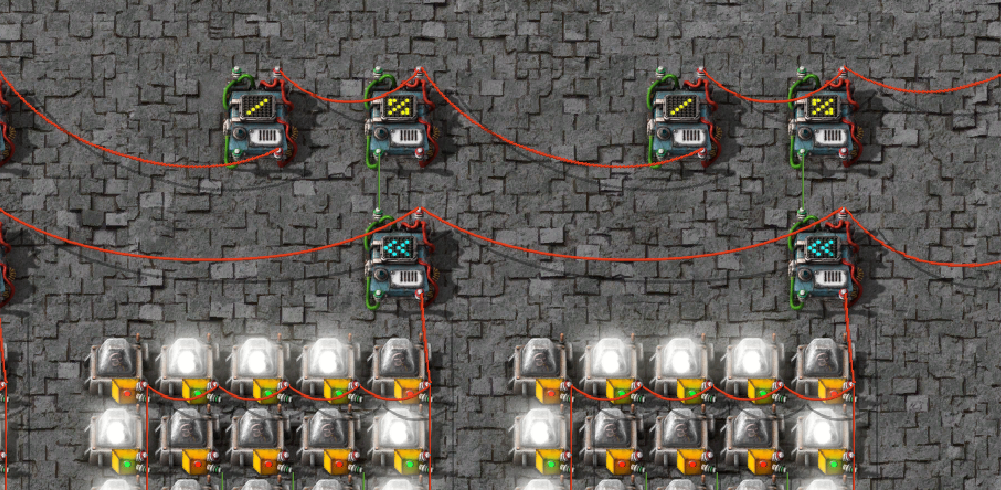
Repeat the scheme as in the photo
All that remains is to connect the combinator with the values and the signal to be output
Green is A B C D C
Yellow is a signal to output
The scheme is ready
FAQ & DLC
"each"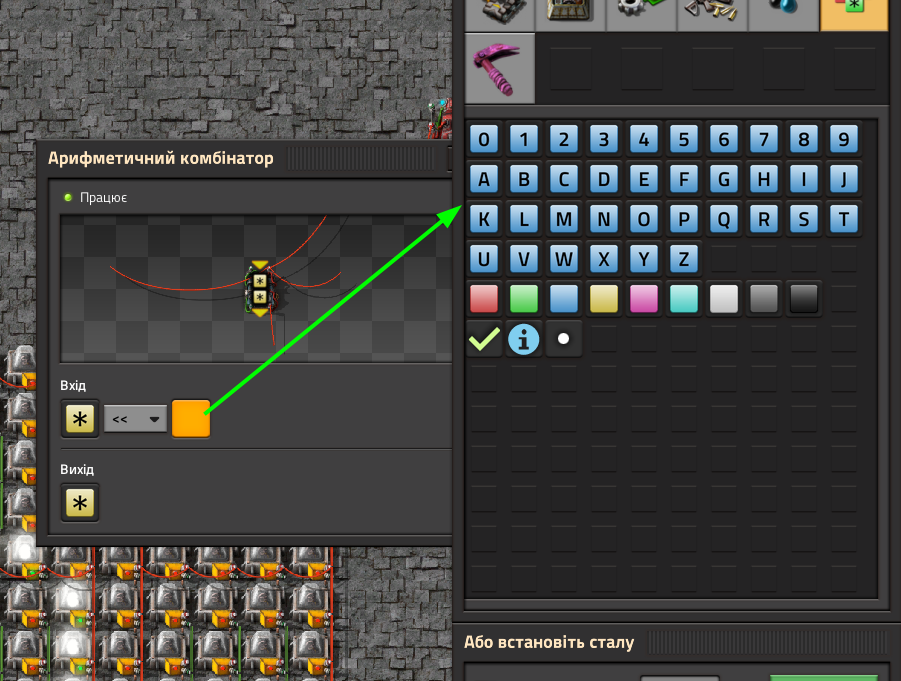
Why do I need to add zeros?
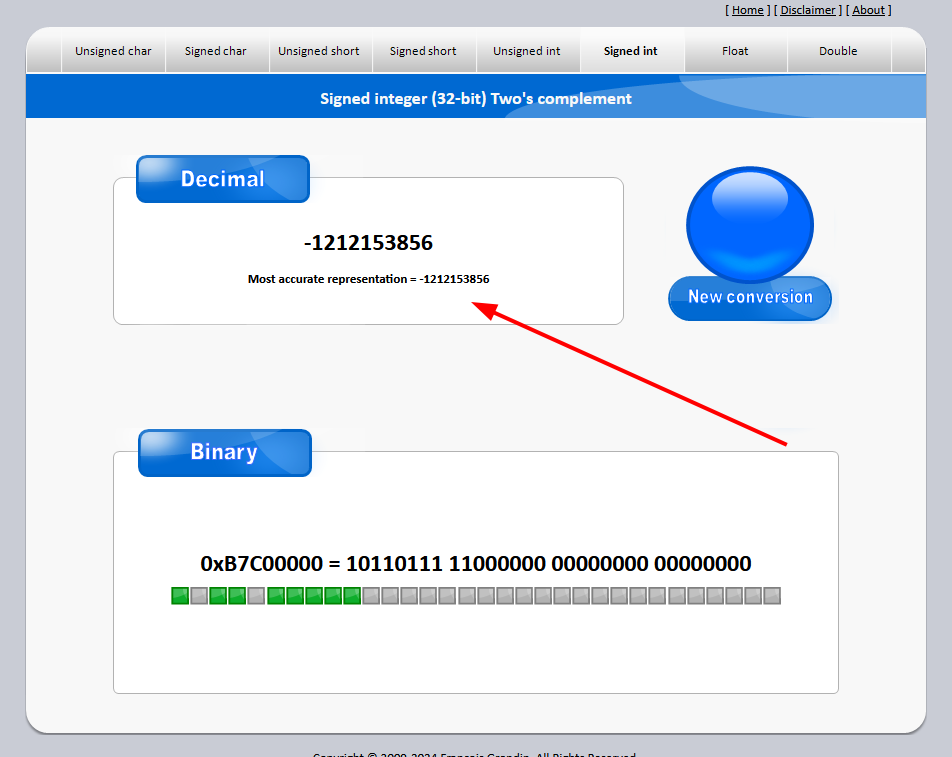
Factorio works on 32 bits
And for computer programs that run on 32 bits, it's important that every number has exactly 32 bits, even if its binary representation has fewer bits. For example, in the case of the number "1011011111", which consists of only 10 bits, we add zeros to the right until the number of bits is 32. Thus, the final number would be "10110111 11000000 00000000 00000000". This is done to ensure that each number has the same length and can be processed correctly by a computer program.
Why does the combinator output a check mark instead of ?
The first reason is that for each resource in the first combinator (bit shift), you must specify your own resource, because it cannot accept "anything"
A check mark acts as a filter, a tree, a stone, an ore. It doesn't matter what will be translated into this tick signal, but it will preserve the value of the tree or stone
Why this display? I don't like it, I want another one.....
No problem.
All game icons are at your disposal...., and I'm not even talking about modifications.....
This was a training example, and the task was to show how the display is made and make it simple. So I took a real, digital display with 7 segments
Make them whatever you want.......
DLC
https://steamcommunity.com/sharedfiles/filedetails/?id=3168668712
Source: https://steamcommunity.com/sharedfiles/filedetails/?id=3168628437
More Factorio guilds
- All Guilds
- FACTORIO (UA)
- Train builder for FACTORIO (ENG)
- 1188 (11 to 88 Flow Line Blueprints)
- Unpatched Bugs List as of Version 1.1.107
- Alternative Atmospherics
- Factorio Guide 842
- Haxard's Blueprint Book v1.1
- Achievements - Saved games
- Factorio
- 22 . Factorio | F