
The Golden Rule
Chain Signal Into Junction, Rail Signal Out.
This is the universal rule when using rail, and will work in all situations. By placing a chain signal before a junction, and a rail signal on every exit, pathfinding issues are eliminated from your network.
Rail Directions

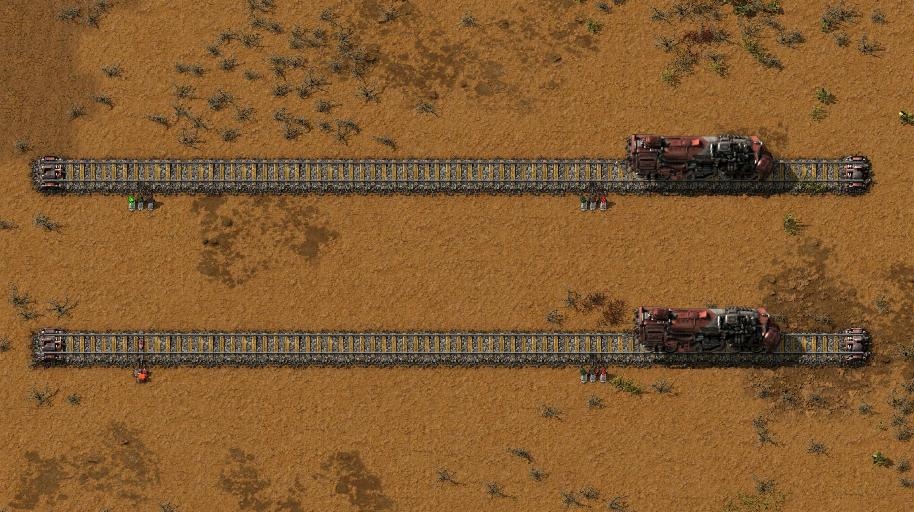
A rail signal placed below the track, designates it one way, in the direction left to right.
A rail signal placed above the track designates it one way in the direction right to left.
A track with a rail signal above and below designates the track two way (eg trains can go in both directions).
The white position, on the other side of the rail track, indicates the space to place the rail signal in order to make the track two way.
Rail Signals
In Factorio, signals can be placed on the track, breaking it into blocks, which help to control and manage the network. Different blocks are represented by different colours- the actual colour is irrelevant, it is only there to help the player distinguish between each block.
There are two types of rail signal in Factorio, the standard rail signal, and the chain signal.
The standard rail signal will be open (green), provided the next block is free (no train present).
The chain signal will be open (green/blue), provided the next block is free and the next signal after it is open.
Since a chain signal reflects the state of the next signal, they are especially helpful in preventing blockages in busy segments of track. They can be incorporated easily by using the Golden Rule; Chain Signal In, Rail Signal Out.
The colours of the signals are
Green-Next block is free
Red- Next block is not free
Yellow- Next block is reserved for that train (all other tracks that cross, their signals turn red)
Blue (only chain signal)- Some blocks are available for the train, but some are not. Train will continue on it's route, provided the next signal on it's route is open.
A flashing signal indicates it is unable to divide the track. Either the track needs another signal somewhere, or the signal needs repositioned.
Track Designs And Junctions

There are pros and cons of each track type, one way vs two way, and different track designs.
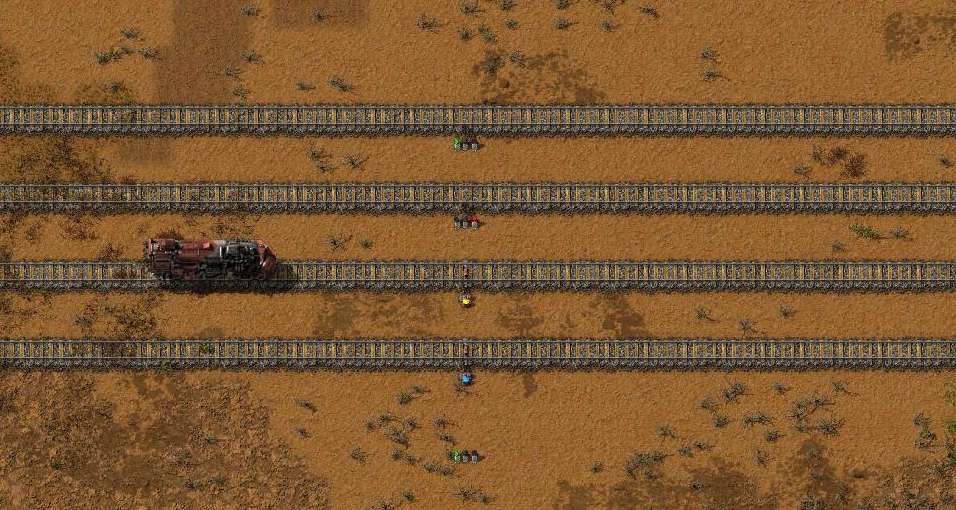
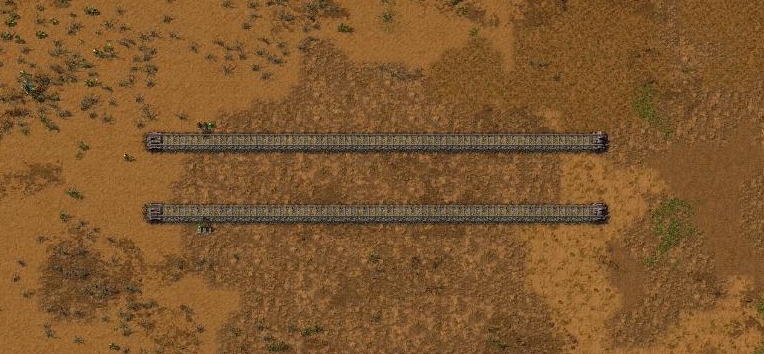
Two Way TrackUses less resources to set up, and can be helpful at the start of a game when space, or problematic biters might be an issue. However, it is harder to incorporate multiple trains on it, and to scale it up for future expansion. Plus two locomotives are needed to power the train, one facing each way.
One Way TrackTakes more resources to set up, as two lanes of track are required. It also takes up more space. However, one way track is far easier to scale up, when more trains are included within the network. For this reason, a one way track system is generally seen as superior.
It is useful to include electric poles within track designs, as electricity will be needed to power buildings at outposts and resource patches.
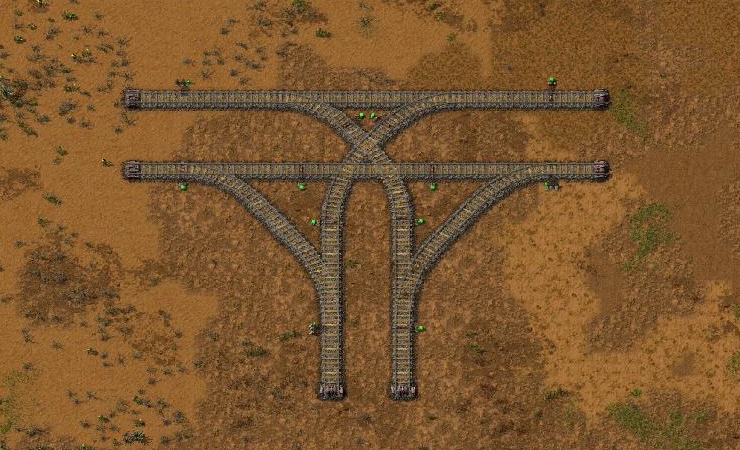
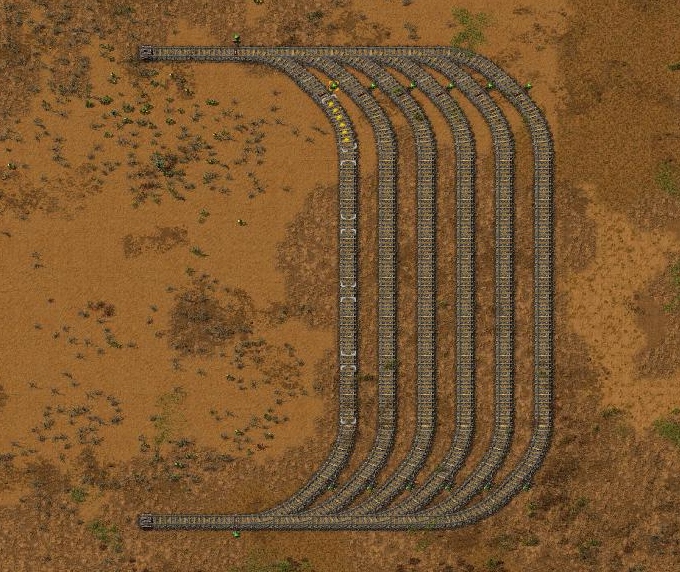
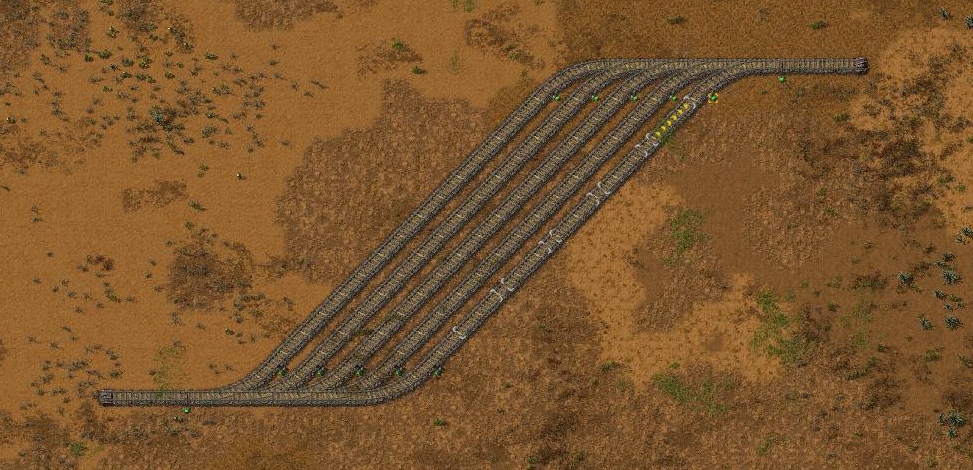
Track
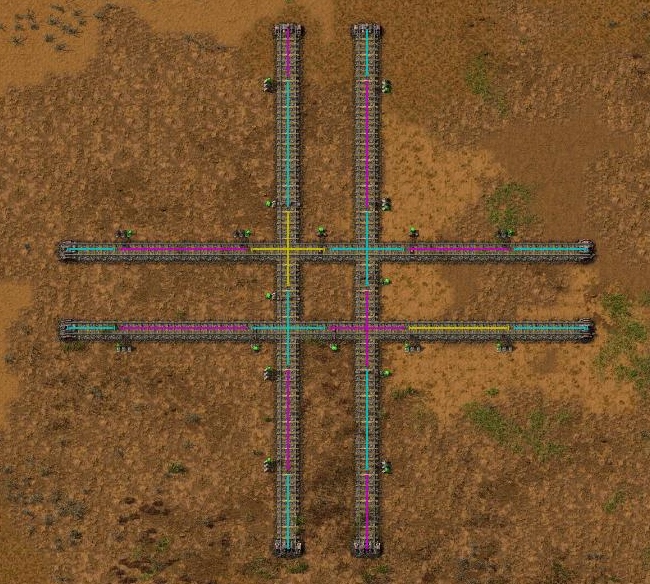
Junction
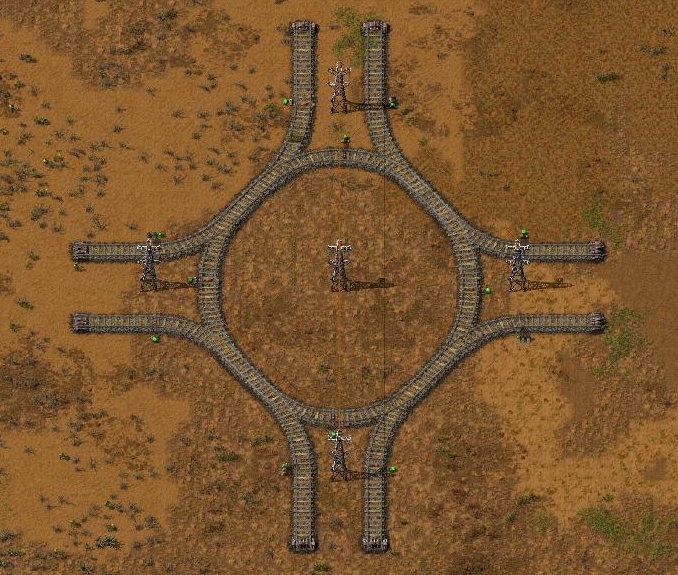
Roundabout
Stations And Train Designs


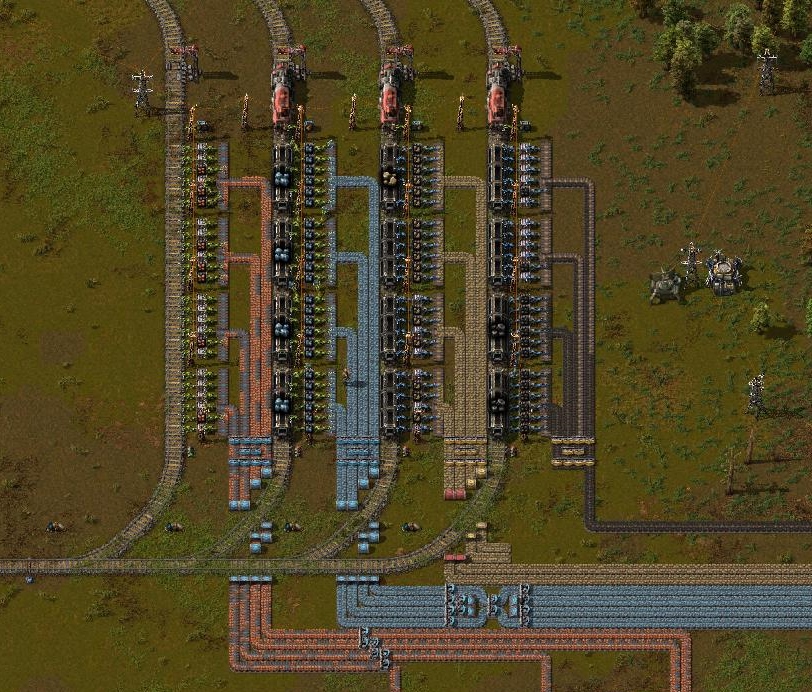
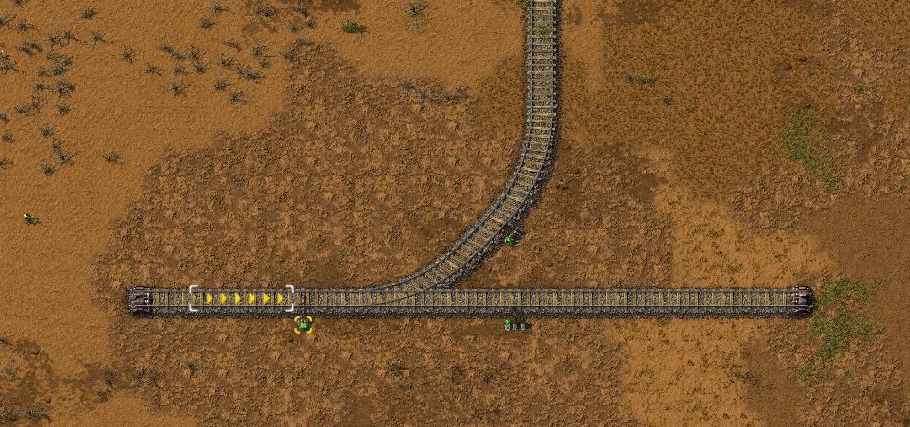
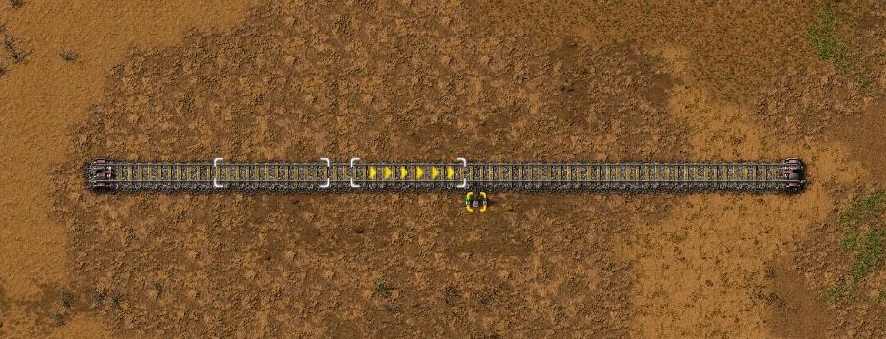
In order to transport resources, two stations are needed. One that will load resources on to a train, and a station to unload them at the factory. When a station is placed onto the track, the space for each locomotive or wagon is shown by a white outline. This helps determine if there is enough space for the station, and the placing of the necessary infrastructure of inserters, boxes and belts.
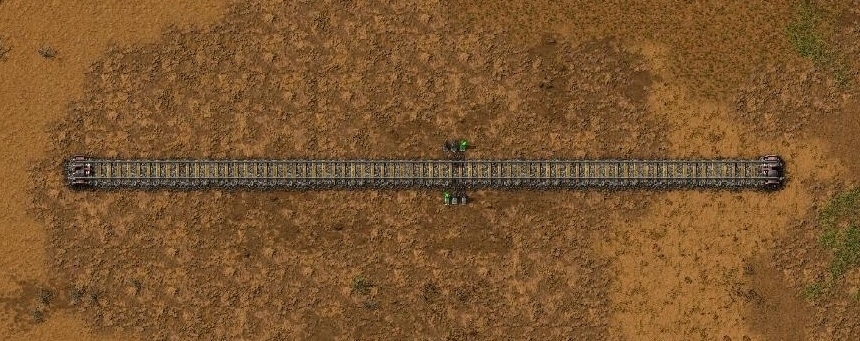
Two way track, requires a train to have two locomotives; one at the front and the other at the back. It will travel into the station, loads/unload, then travel back out along the same track.
One way track, requires a train to have a single locomotive at the front. It travels into the station, loads/unloads, then the track is looped back onto the main rail system.
Ideally stack inserters are used when loading and unloading trains, as they are efficient at moving large amounts of items. Locomotives require refuelling too.
The default game setting is 1-4 (one locomotive and 4 wagons), however faster trains can be created using more locomotives, or more wagons could be included for greater capacity. Higher grade fuels can also be used to boost locomotive speed and performance.
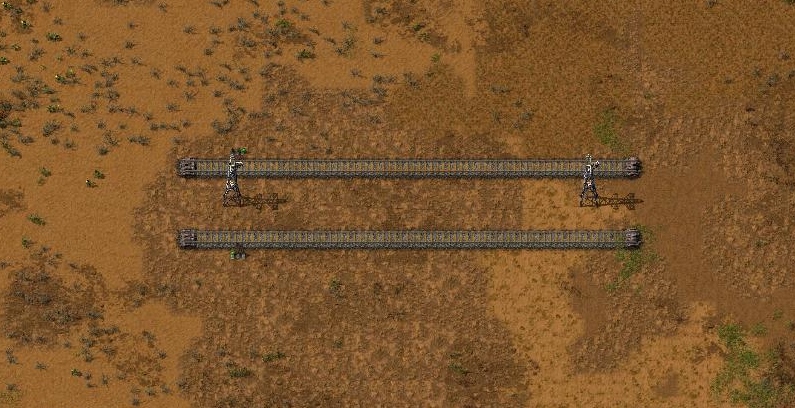
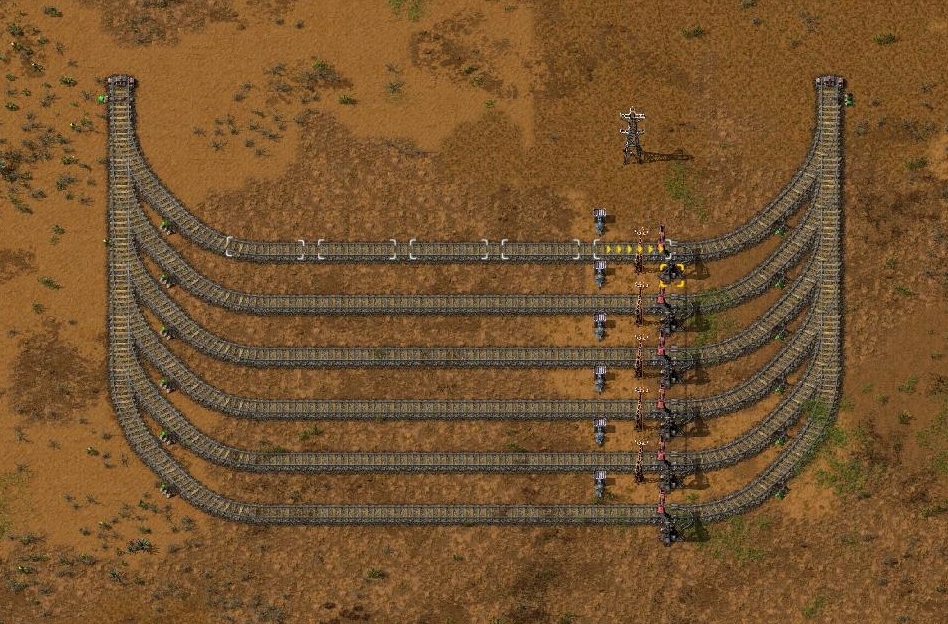
Stackers
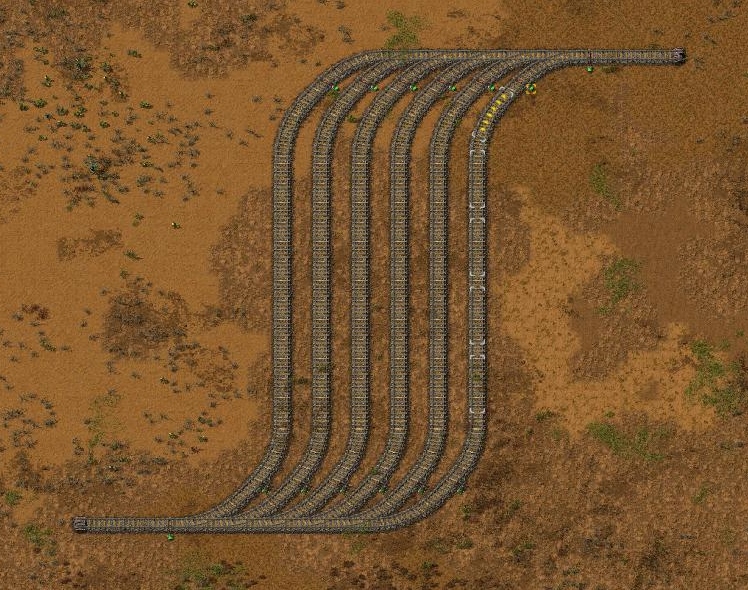
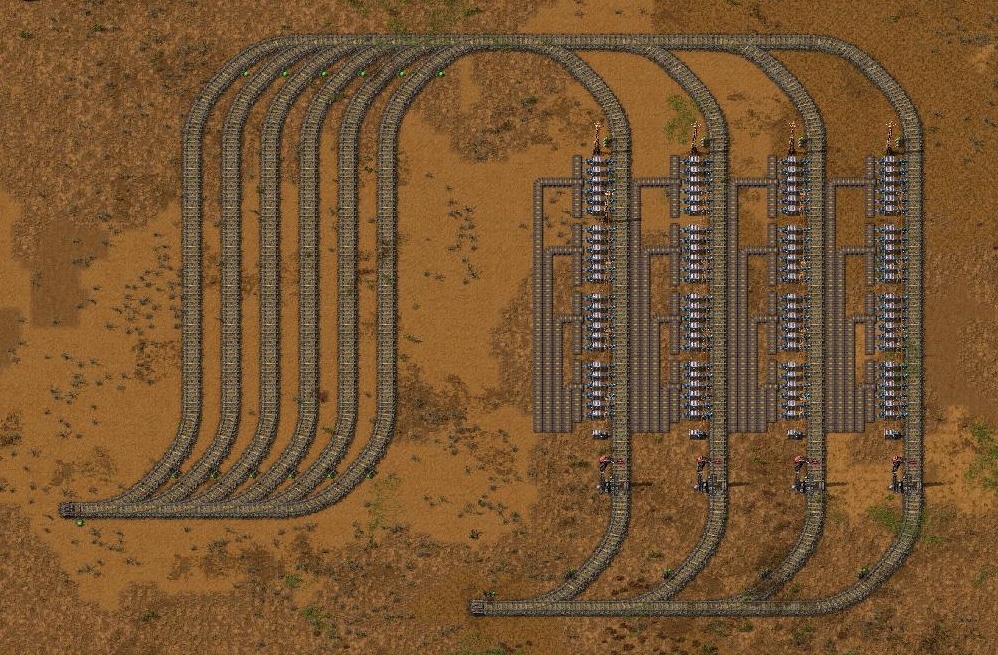
Stackers are basically a rail design that enable trains to "park". They are useful for areas that could have several trains waiting for track to clear eg a train station.
The design uses a chain signal to determine if there is space within the required parking slot without blocking the junction. Each parking space has a standard signal at the entrance, and a chain signal at the exit.
Note the chain signal at the exit, is one of the few times where the golden rule is not applied in the same way as before, especially if multiple stations are used. When a train is in a stacker, the idea is that it will only leave when there is space available down the line. The required rail signal(s) will be inserted further ahead, and will open up (when a space becomes available), and relay it's status to the chain signal within the stacker. So the exit for a stacker is a chain signal, until the end position, which will then be a rail signal.
One Way Station with Stacker
Station Outposts
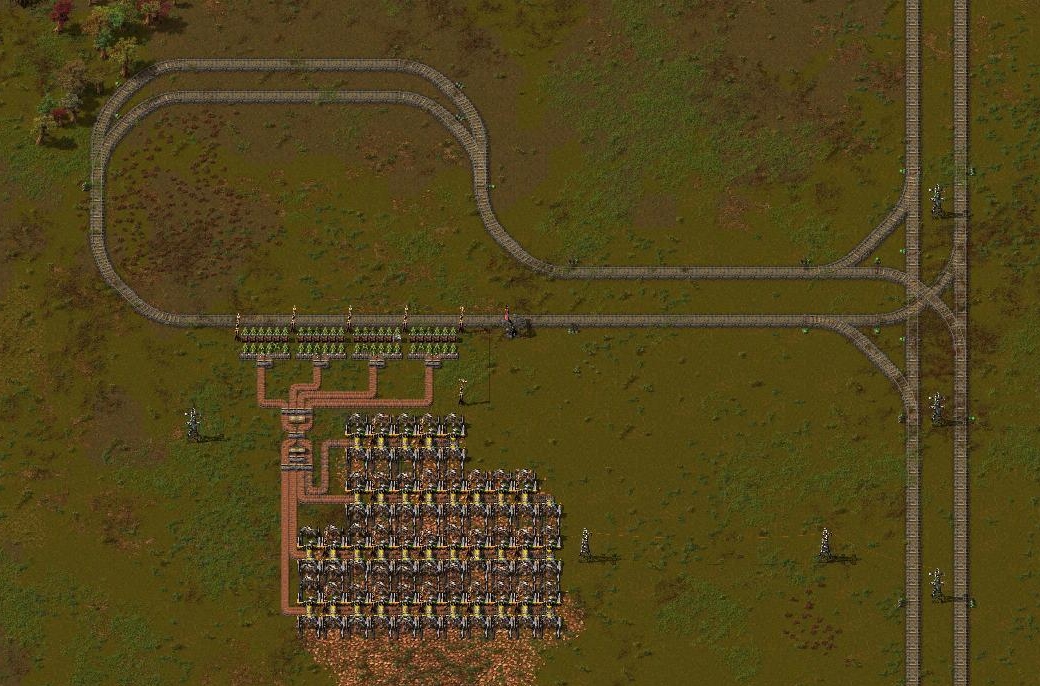
A station outpost ideally should be connected off the main track and include a small stacker. This is good practise as it will help prevent blockages from occurring. An outpost that is close to enemy nests may need some defence, to protect it from biter attacks, should the pollution cloud spread.
It is also useful to include "Belt Balancers" whenever loading or unloading trains. These will evenly distribute resources amongst all the belts, removing the risk of costly time delays that can arise through bottlenecks.
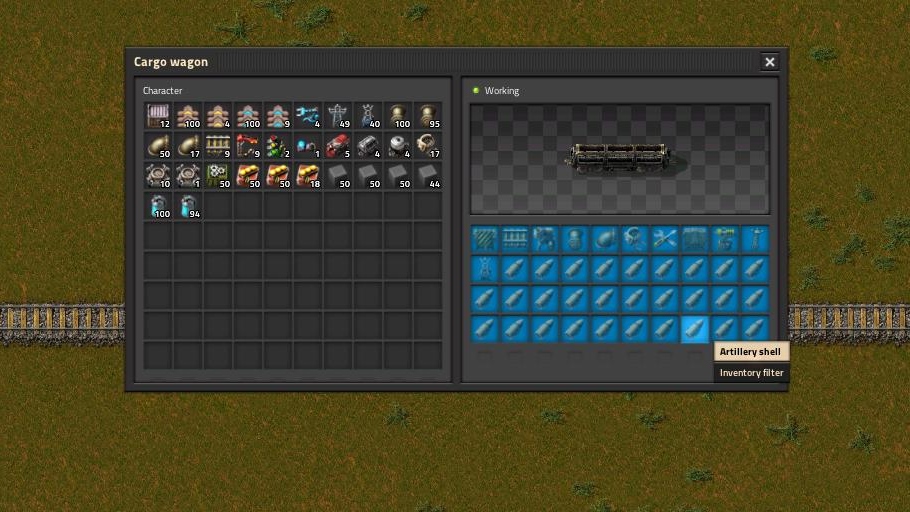
Wagon Inventory FilterIt is possible to designate wagons to only accept specific items. This is done by selecting a wagon and using the middle mouse button on a storage location and selecting the item that is to be accepted. This is especially useful for resupplying outposts with defence materials.
Station Names And Limits
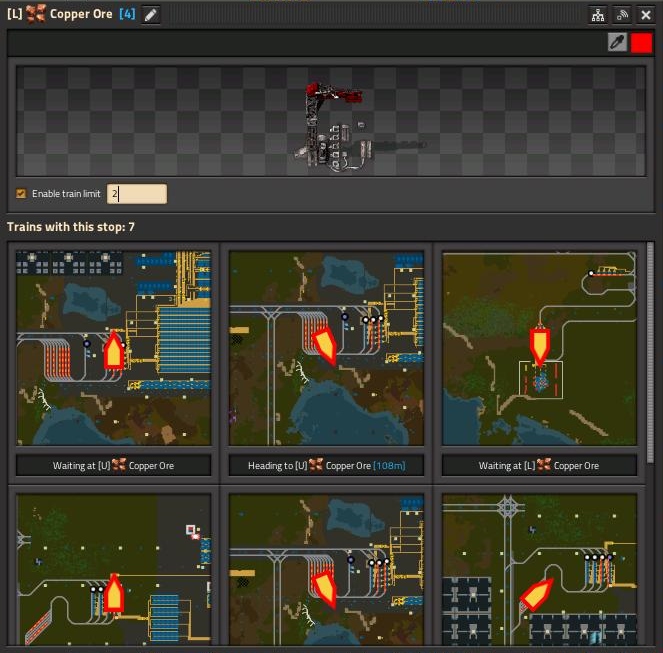
By giving stations the same name, this enables multiple trains to visit them all, provided the name appears within their route. This is useful, as it makes your train network more efficient and easier to manage. For example by giving all stations that load copper ore from resource patches the same name, this means several trains can collect copper ore from multiple patches.
The game facilitates this feature further by allowing limits to be placed on the number of trains that can visit individual stations. For example, by giving a train limit of 2 for a specific station, this means only 2 trains can be accommodated there at any one time. So if there are 7 trains in total that have the same route, 2 will visit that station and the other 5 will go to other stations. This makes full use of the network and their capacity.
The limit feature is a very useful tool within Factorio, as without it trains will always go to the nearest station within their route.
Wait Conditions And Circuit Network
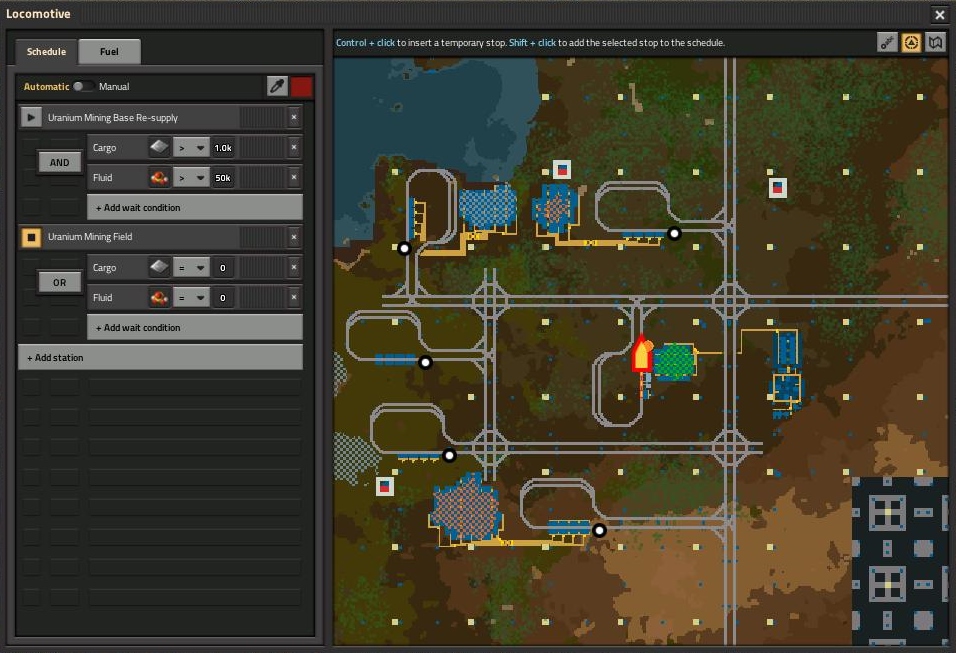
Aside from the standard "Full Cargo" and "Empty Cargo", there is a large range of wait conditions that can be used to control trains. A specific time could be used as a condition, a number of items within the cargo could be used, or even a combination of several conditions.
Several separate conditions could be used using "OR", or multiple conditions together using "AND". For example, the train only leaves the station when there is at least 1,000 iron plate "AND" 50,000 sulphuric acid present. The train leaves when both of these conditions are met, as shown in the picture.
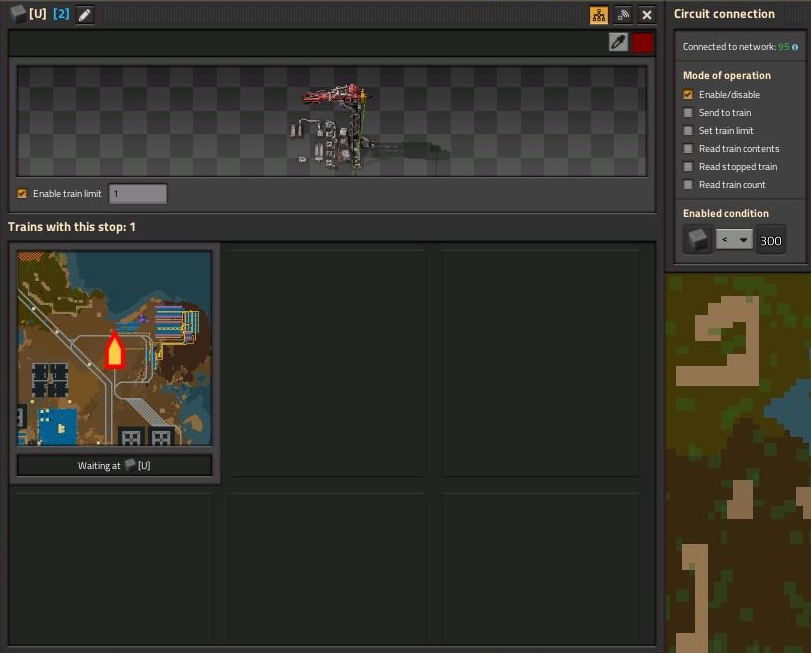
More complex conditions can be set up using circuit network conditions. Connect a station to the circuit network by selecting either the green/red wire, and hooking it up to signals. Stations can also be turned on and off using the circuit network. This could be useful for stations that are resupplying specific items to locations eg defence or energy requirements. For example station turns on when solid fuel is less than 300.
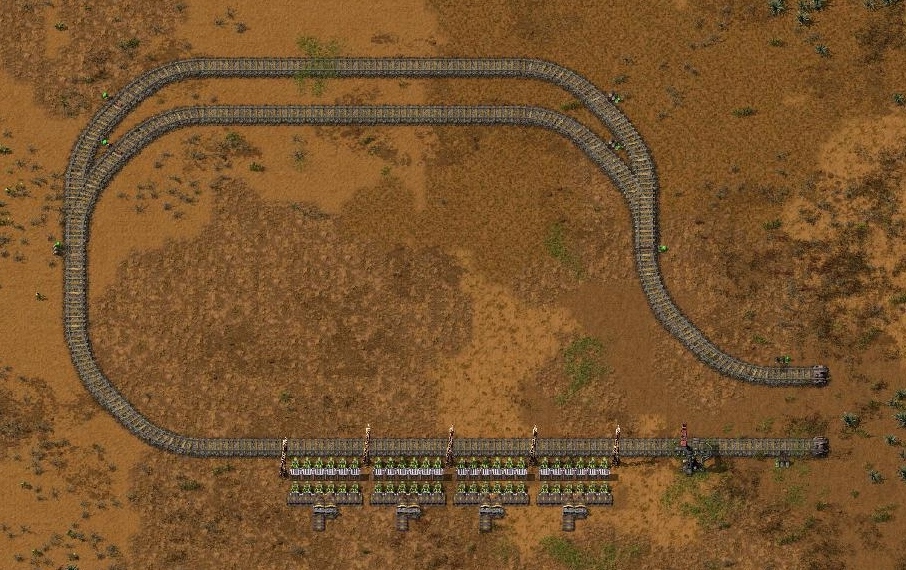
Network Blockages And Depots
When the train network expands there is a risk of blockages or trains being held up preventing "throughput".
Train limits and stackers are a great way at managing the network and making the best use of trains and resources, however there is a future risk of potentially too many trains. A depot is a great feature that can allow trains to visit and park if there are no load/unload stations available. It is also a good place to refuel trains.
Each individual station at the depot has a train limit of 1. A time passed wait condition provides the opportunity for refuelling.
Rail Network Overview
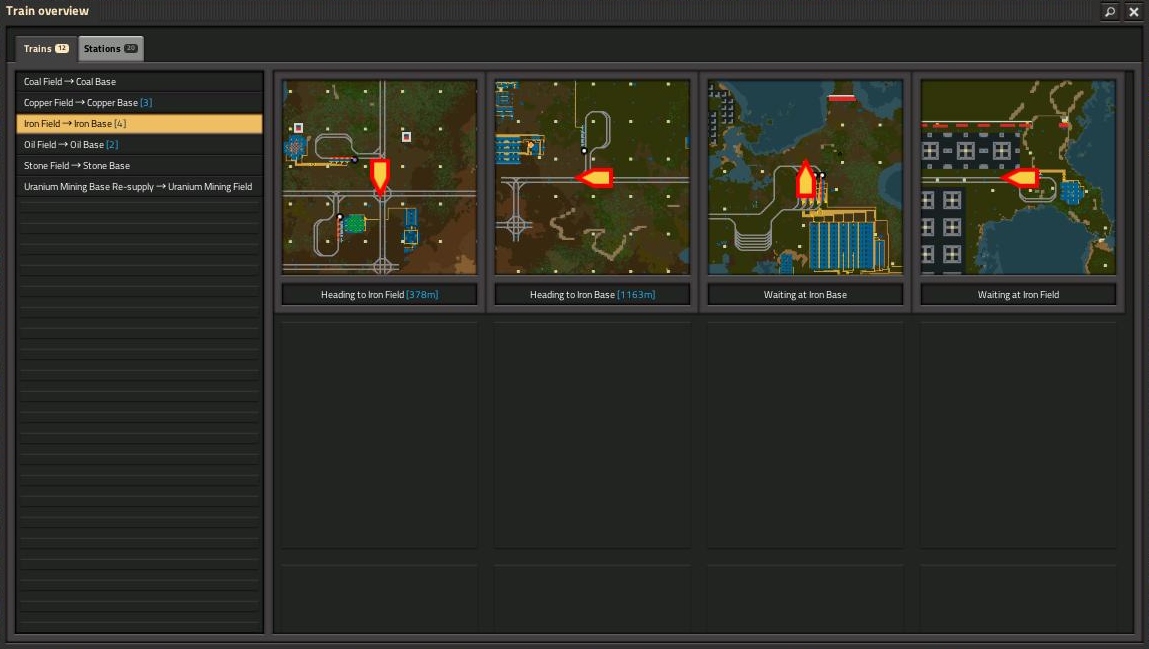
Press the O button to bring up all trains and stations that are within the rail network. This is a good overview that can help locate trains, pinpoint problems or identify improvements within the rail system.
Remember to change a train's route fast, on a locomotive, "Shift+Right Click" copies a train route, "Shift+Left Click" pastes a route to a train. This is a time efficient way for changing many train routes efficiently.
It is also possible to set up temporary stations, to direct trains to certain parts of rail, by using the command "Ctrl+Left Click" on the map screen. This can be helpful, as it enables the player to use a train, to taxi them automatically to a specified destination (saves time).
Final Thoughts
I hope this guide has given some light to those who are confused over railways, and provided a solid grounding in the basics of how to use trains. The range of options and possibilities is endless, and this is only just a brief summary, of what can be achieved within Factorio. Thanks for reading this guide. GL
Source: https://steamcommunity.com/sharedfiles/filedetails/?id=2737259470
More Factorio guilds
- All Guilds
- Schemes for oil refining. Advanced and liquefaction of coal
- Vanilla LTN Using Interrupts
- Factorio
- Factorio Guide 1313
- Factorio, (Be)
- Factorio Guide 1301
- Mid/Late Game Furnace Layout
- [Easy Mode] Factorio Dedicated Server using Windows Batch
- Factorio Guide 1278
- Useful checkboxes in the interface settings (ENG)