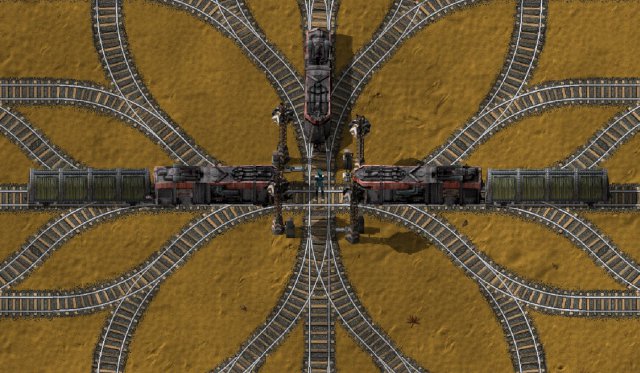
This guide focuses on setting up a train route at a beginner's level, and includes basic information on track, fuel, train orientation, and scheduling.
Building Track
In the beginning of the game, you'll want a simple layout until you get the hang of running trains. You have a couple of options, which each have their own advantages & disadvantages.
Loop
Advantages
- Only one locomotive is required.
- Multiple stations can be serviced easily.
Disadvantages
- Requires a lot of track/resources.
- Because running trains should only be done over long distances (to take advantage of the train's speed over conveyor belts), a loop would be extremely cost prohibitive at the beginning of the game.
Straight Line
Advantages
- Easy to set up.
- Requires the minimum amount of track - very advantageous over long distances.
- Easy to expand. Also, trains can easily bypass filled stations, allowing more trains to run on a minimal amount of track.
Disadvantages
- Requires two locomotives.
Building The Track
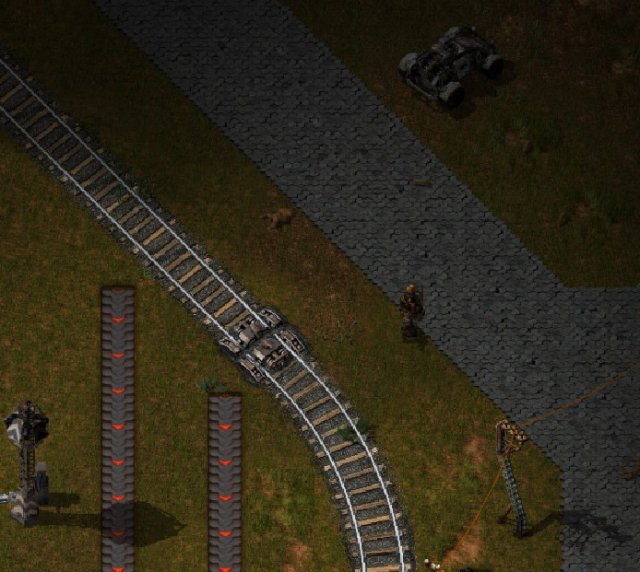
Either way, you need to make sure that there are NO gaps. Try to run a smooth, continuous line to your destination. The easiest way is to take (straight) track in hand, and run with it. This even works diagonally. (Hold WA, or WD, etc. at the same time to go up/left, or up/right, respectively).

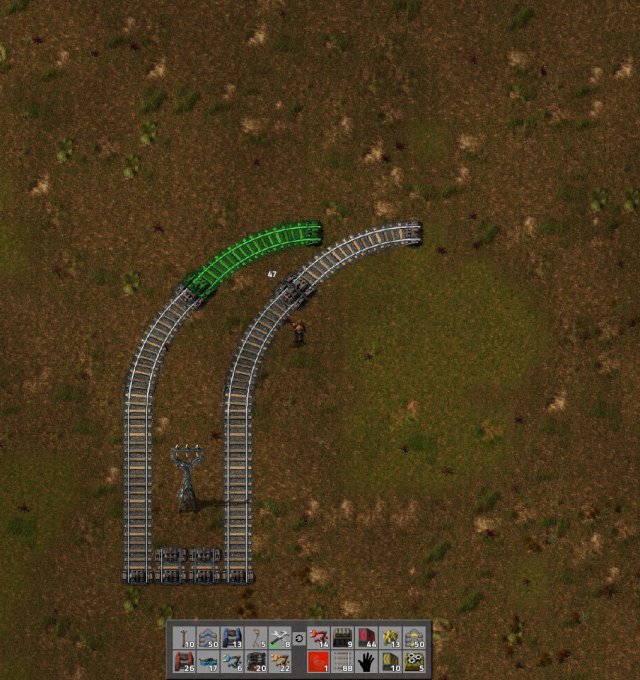
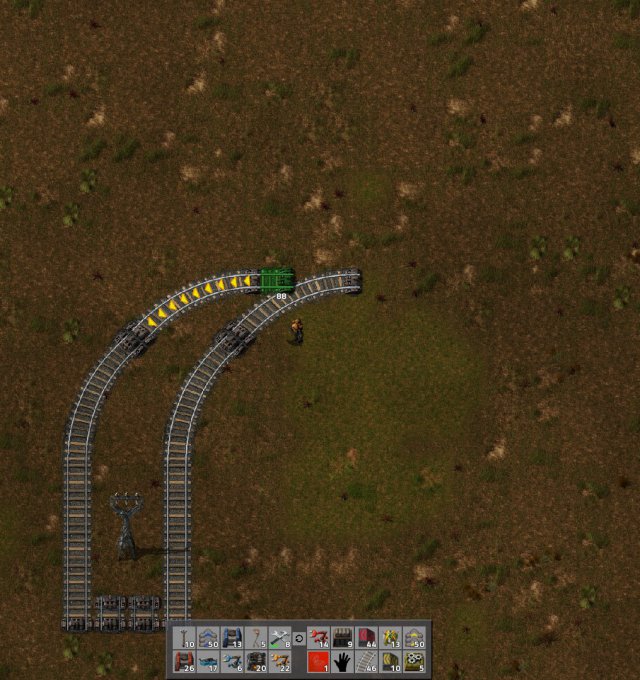
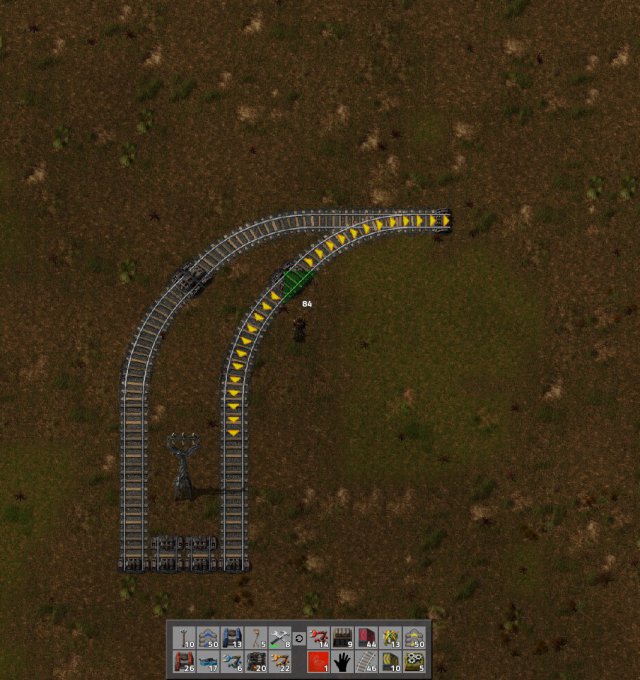
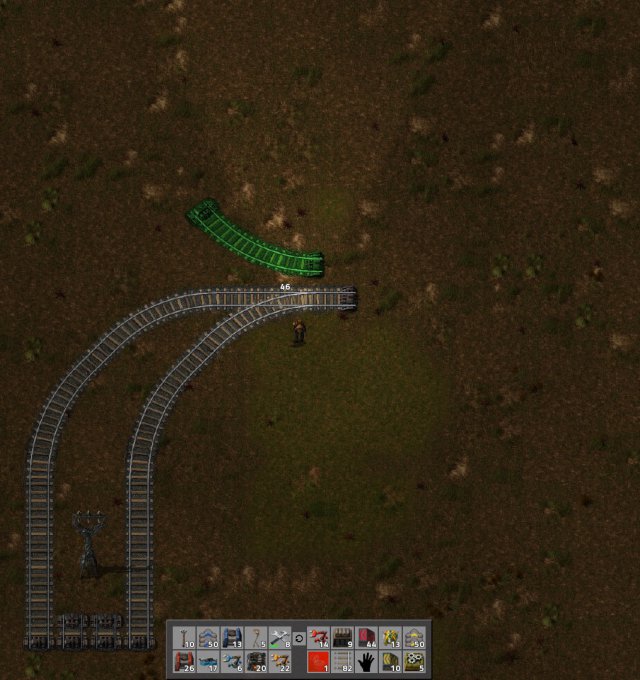
This is what gaps look like - they can be difficult to see if you are zoomed out far away. Where curves join, it can be particularly hard to spot. If in doubt, take up the track (right click), and re-lay it.

To make sure, test for gaps using your locomotive; where you stop is where there is a gap. (See the Putting Your Loco on the Tracks section).
Crafting Your Train

Craft 2 Diesel Locomotives if using a Straight Line Track. One if you have a loop.
Craft 2 Wagons, (or 1 if you don't need the extra capacity).
Putting Your Loco On The Tracks
One of the first things I encountered when putting my very first locomotive on the tracks was directional issues!
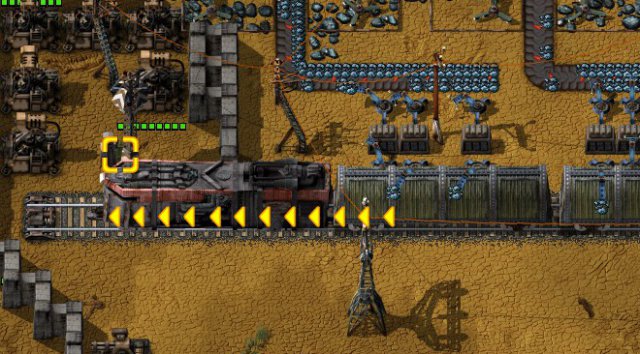
If you want to schedule your train, it MUST face the direction it is scheduled to go. On a straight-line track, that means you need a locomotive on each end: each FACING THE OPPOSITE DIRECTION.
Note engines on both sides of the train. Each "nose" is pointed away from the cars.
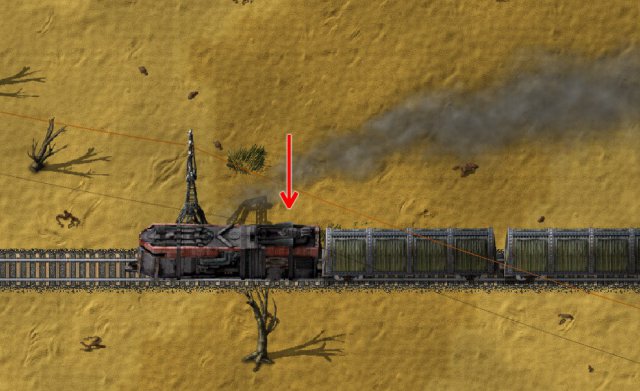
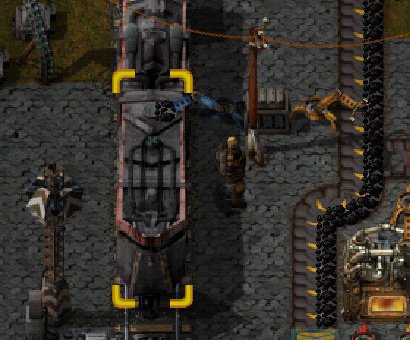
It's important to note the FRONT of the loco. It is the pointy part, in the 2/3 area of the loco. The back is the 1/3 of the locomotive denoted by the red arrow, below.
Why am I writing so much about direction? When you place cars on the track, they are joinable when it shows a green link between them. However... the game doesn't automatically know which way you want your locos to face. If it attempts to place it incorrectly, use R to rotate the locomotive.

If an engine is facing the wrong direction, you will get a "No Path" error when you try to run the schedule.
Fueling
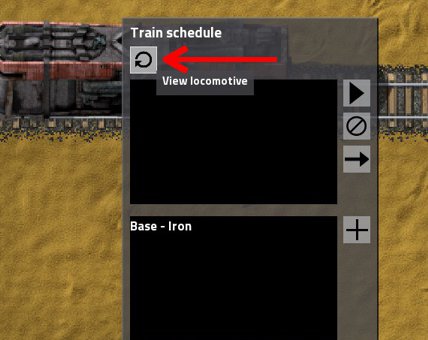
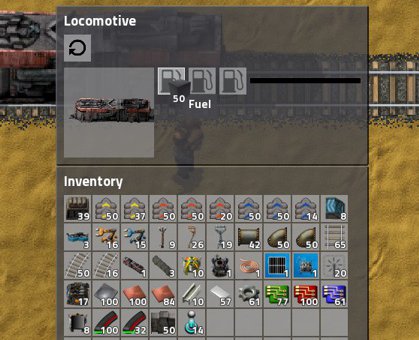
If you want to take a quick spin, or check out the alignment of your station, fuel your locomotive by clicking on it. Then, click the circle-arrow symbol on the upper left, (marked with red arrow).

It will show you the engine compartment -- 3 slots allow 3 stacks of fuel. Fuel just like you would a furnace, etc.
Stations & Scheduling
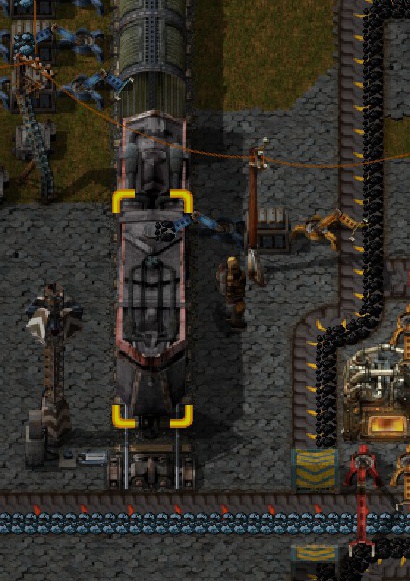
Creating A Stop
Craft two Train Stop items. Placement is as follows: in the direction your train will be travelling, place the Train Stop on the right hand side of the track. When you mouse-over the Stop, arrows will face in the direction your train will be arriving.
Train arriving from the east, going west.
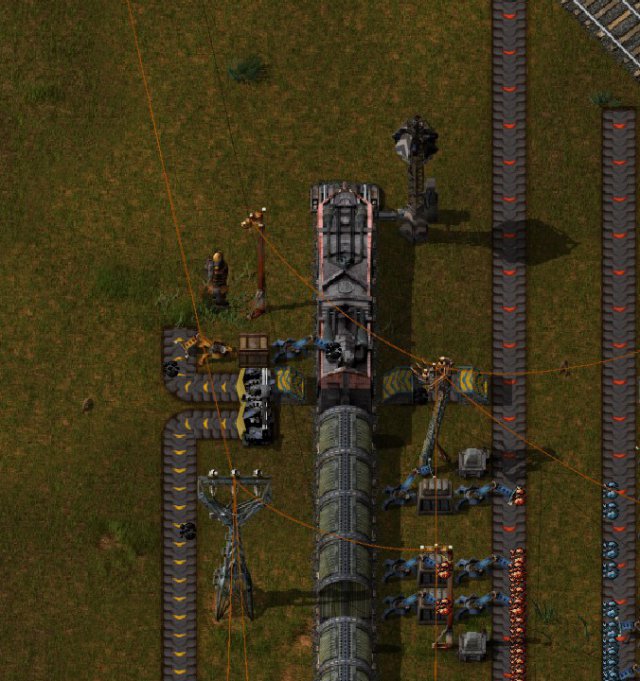
Train arriving from south, going north.
Naming Your Station
To rename your station, simply click on it, type the new name in the blank at the top, then click the arrow button on the right to save.
It is helpful to name your stations in an easy-to-remember fashion, such as "Iron Mine", with it's corresponding "Base - Iron Processing", etc. This will assist you in scheduling.
Note that when you rename a station, it will not affect your train schedules -- the name will be updated there without disruption.
Scheduling A Route
(Note: requires Research into Automated Rain Transportation).
- Click on the locomotive/train you want to schedule for automation.
- The top area is the schedule, the bottom area is the list of stations you own. When you first open window, the top area will be blank.
- Add stations to your route, by clicking on their names, then clicking the on the + button to the side.
- As you add each station, you can set a wait duration with the slider in the center of the window. (This is the duration you will allow for the inserters to move items into and out of the train wagons)
- When you are ready, click the Play (arrow) at the top right. The train will then attempt to run your schedule. (The Play button will then transform into a double vertical line "Pause" button, which allows you to stop running the schedule).
- If you encounter errors, such as "No Path", see the section above about locomotive directional placement.
- To delete a station from the schedule, click on it, then click the crossed zero symbol to the right, (Station Delete button).
- To immediately proceed to another station, select it, then click the right-facing arrow to the right, (just below the Station Delete button).
- If you want to ride your train, hop on by moving close to the the loco, then press Enter.
Hop on the train by moving close and pressing Enter.

Loading/Unloading
Building your station requires some amount of planning:
Locomotive Fueling

Fuel your locomotive with coal. (Or Solid Fuel, later in the game). It's handy to have a conveyor belt going to the area, then a regular (yellow) inserter which dumps coal into a Wooden Chest. A Fast Inserter (blue) then quickly loads the coal into the locomotive's tender.
The engine can hold a max of 150 coal/fuel units.
Cargo!
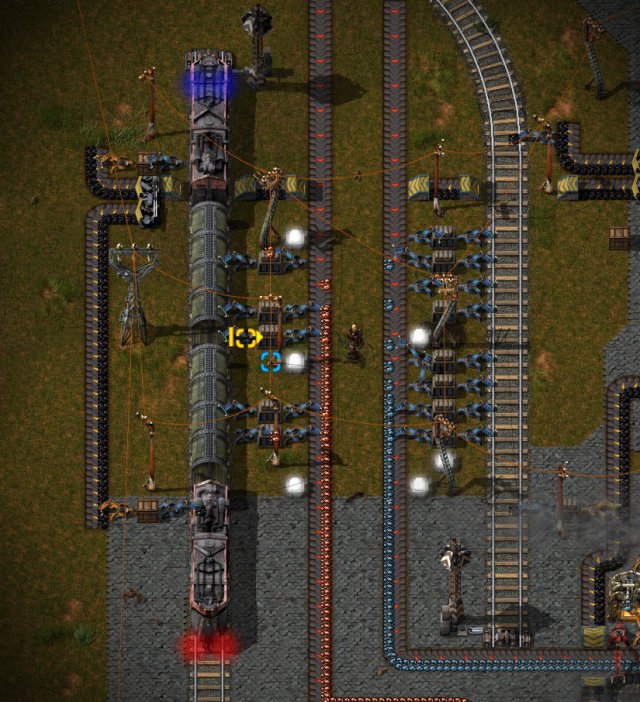
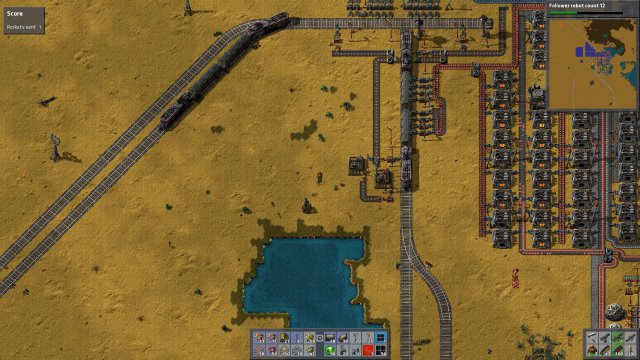
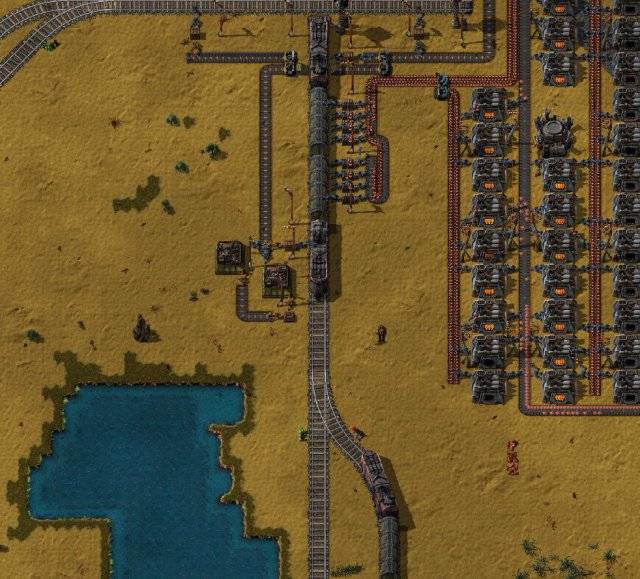
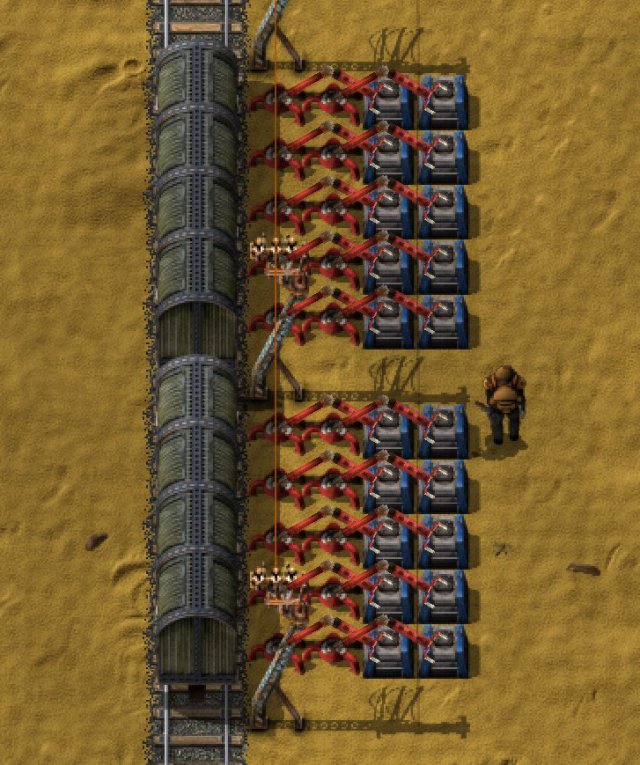
Handling cargo is done in a much similar way. Shown is the Unloading at my base. A row of Fast Inserters is next to where the Cargo Wagons stop, next to a row of Steel Chests, next to another row of Fast Inserters, which drop the ores onto the conveyor belt, which are whisked away to my factory.
Be sure to align the inserters/chests, etc. with the Cargo Wagons while they are stopped at the stop. If they are misaligned, they won't function. (One of the inserters on the left track is slightly off, and doesn't service the first Wagon. The ones on the right track are much better aligned.)

It is easiest to place the inserters, chests, etc. while you train is actually standing at the station.
Note that the inserters start loading/unloading when the train is at a full stop -- they will not work when it is moving.
Care needs to be taken where you park your train.... if you run the train free-hand, and stop at the unloader area... it could unload all the fuel from your engine!

For Loading stations, simply reverse the inserters -- belts carrying ore should be inserted into similar chests, and then loaded onto the train when it stops.
Depending on the number of chests & inserters you use, your scheduled stop time may need to be adjusted.
Late Game
In later game, upgrade your belts to faster speeds to maximize throughput of ores.
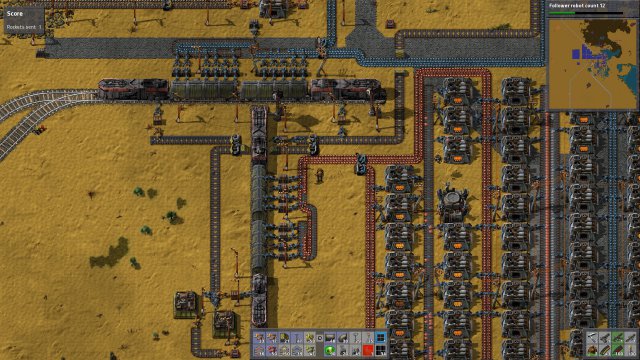
In the picture below, note the conveyor belt curves: this enables one wagon to unload on the right side of the belt, one on the left, combining them so that the belts are completely filled.
This picture also shows the fueling system for both engines. Fuel is stored in wooden crates to keep the quantity down.
Exercising Control
You can specify exactly what your wagons hold down to numbers of stacks. This enables you to make sure you have room for specific amounts of items, and carry carious cargo from different stations.

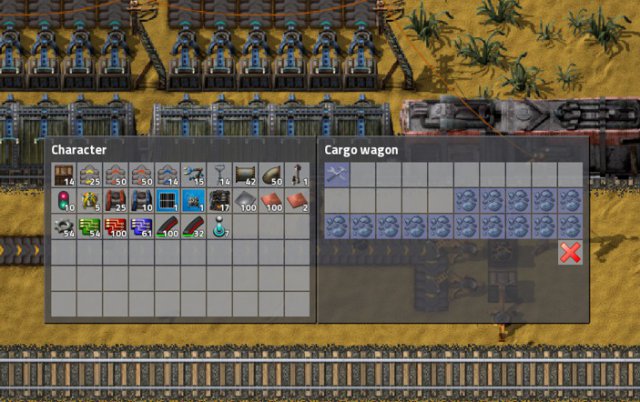
To set cargo specifics, click on the wagon. Then, middle-click (wheel-click), on the slot you want to assign. Pick a product, and you're done!
For example, you may want to dedicate half a car to one product, half to another.
In this example, I have an outpost which has it's own robo port, which needs to be periodically restocked with repair packs. I dedicate one slot of one wagon for tools. At the mining outpost, I have a Smart Inserter (green) which takes out only tools. At the base, smart inserters for that wagon take out ONLY ore, in case the tools come back for some reason.
Basic Signaling
Planning
If you have more than one train, the most efficient way to set up your track is to have one trackway going away from the base, and another coming toward, rather like a highway, where lanes move in ONE direction.
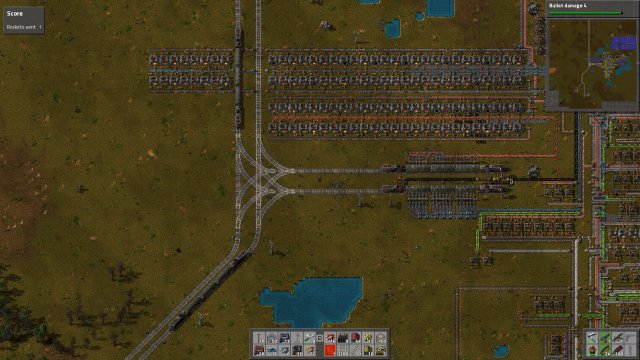
To set this up, you can use signals. Craft several of the Rail Signal items. (NOT the Chain Signal). The correct one is the leftmost of the two.
As with the Train Stops, you will want to place the signals on the right hand side of the track in the direction you want to go. I chose to have the trackway on the right go forward, and the left the opposite direction, (Drive on Right).
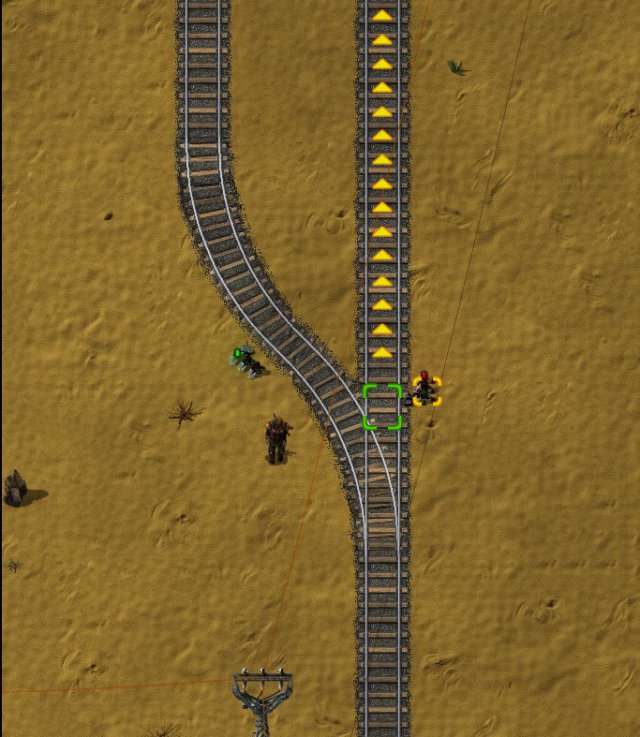
When you place a signal, the arrows in the game show you the direction that the train will be permitted to go.
Going North.
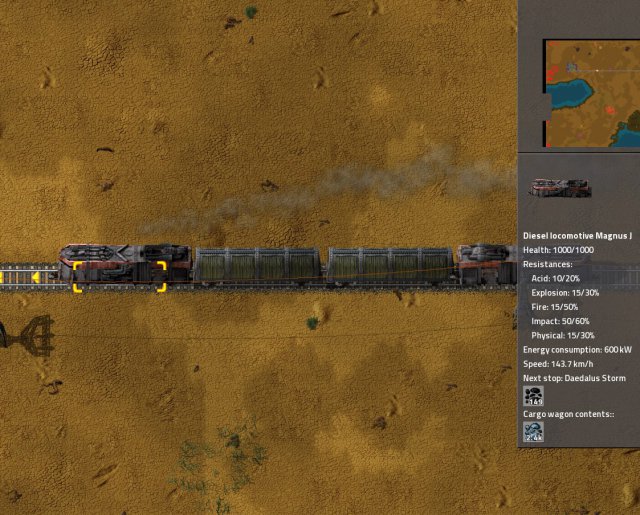
Going South.
The single track at the bottom of the images leads to a station, where I want trains to fill up with cargo one at a time.
Observe this sequence of images!
A train goes North, entering the station from the right hand side track.
The train has parked at the station. Note the signal to go north is RED. This means that trains coming to the station MUST stop.
The second one comes along, and sure enough, stops right where it is supposed to. It will wait until the other train clears the station, and then will move forward to arrive at the station.
Building The Line
If your mining facilities are distant, you will want to put additional signals along the way. This enables a second train to get as close as possible to its destination, and prevents delays.
Place signals along your track, exactly as above, aligning the arrows with the direction you want the trains to go.. They are not needed often, and certainly not more frequently than can hold an entire train's length between them.
Expanding Your Line
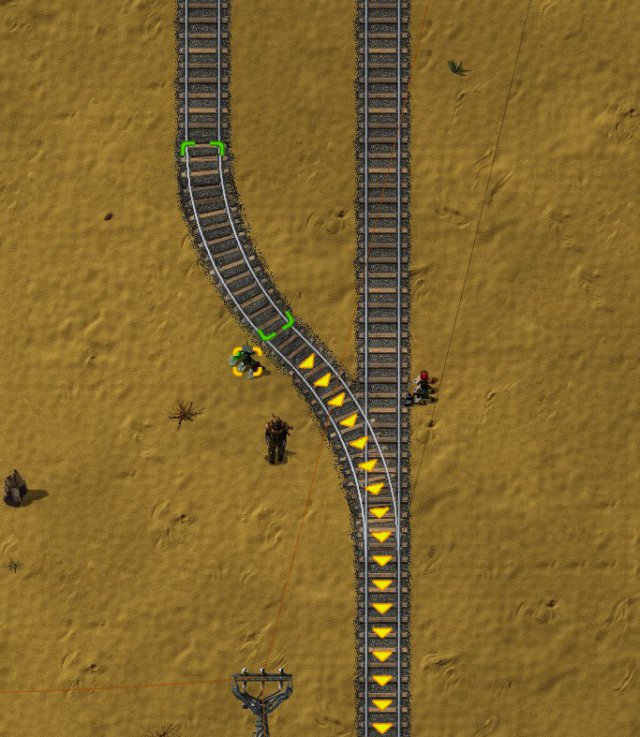
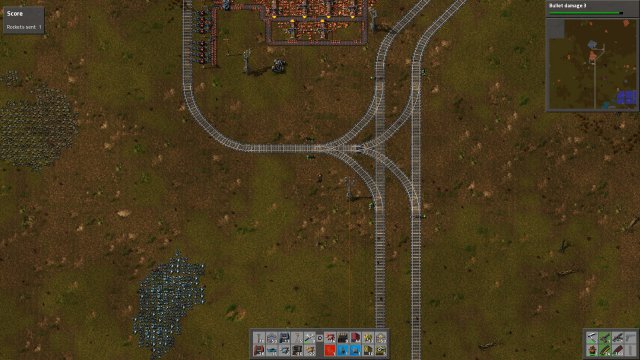
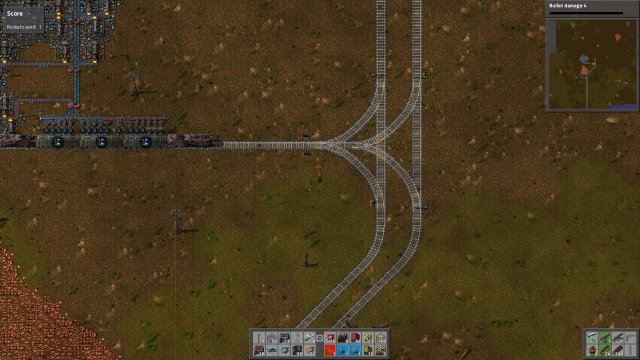
At some point in the game, you'll want to be able to have several trains running on your carefully-constructed lines. The easiest way of creating stations is to make T-junctions off of your main branch line.
All of the examples below use Right Hand Drive.
Here is how I usually setup the iron & Copper Delivery stations in my base:
Overview - stations on the right, main branch line on the left.
The intersection looks complicated, but really isn't that difficult to set up.
Building A T-Junction
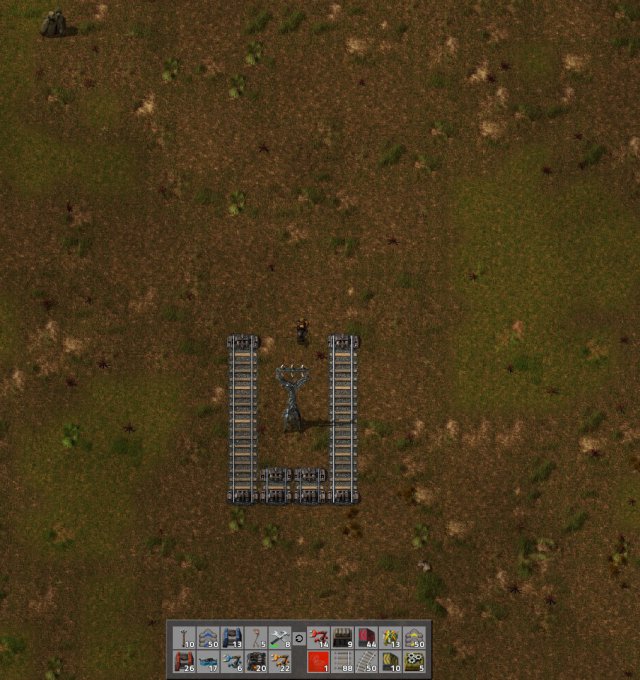
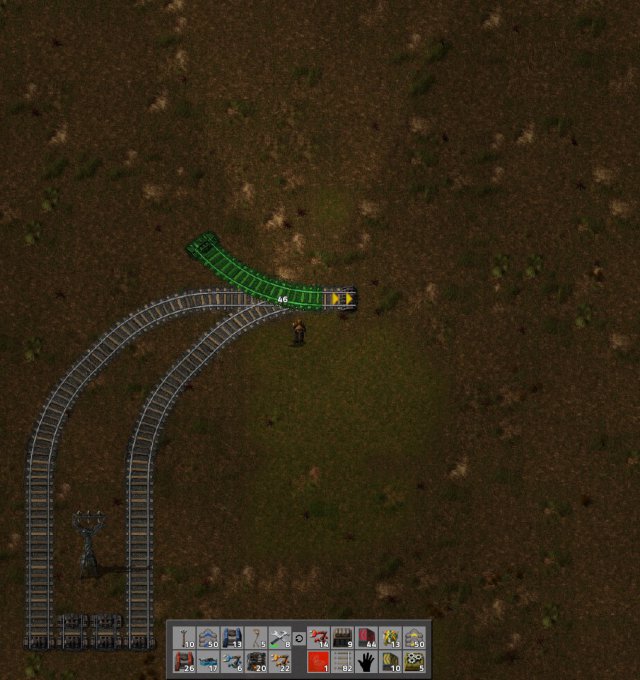
I generally place tracks 2 train tiles apart. (See picture below). Another way to align them is to have a large power pole between them.
If you are having trouble aligning your quarter-curves, build the branch line straight sections until they are at the same square of height.
Then, select the curve and align it. Place it atop both straight lines.
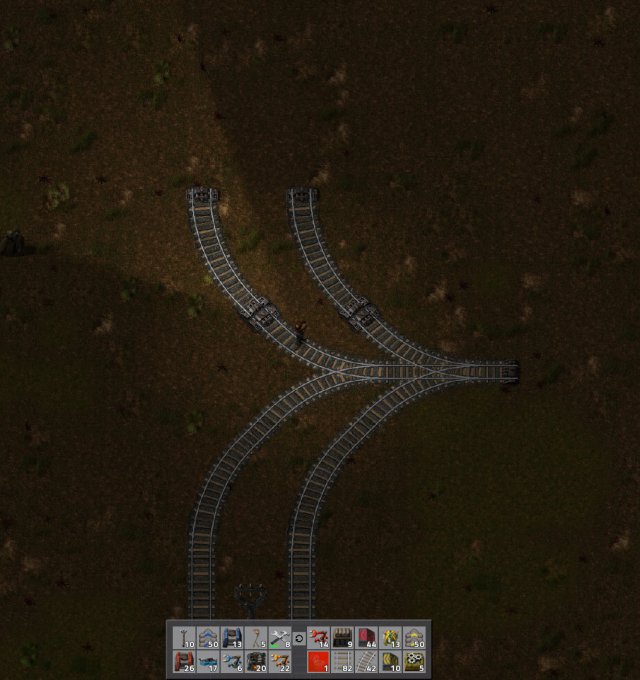
Now, change the curve to the one that goes inline with the next one. Apply it to both sections.
Connect the two with a straight section of track.
Make sure to seal the gaps in the curves with a diagonal straight section.
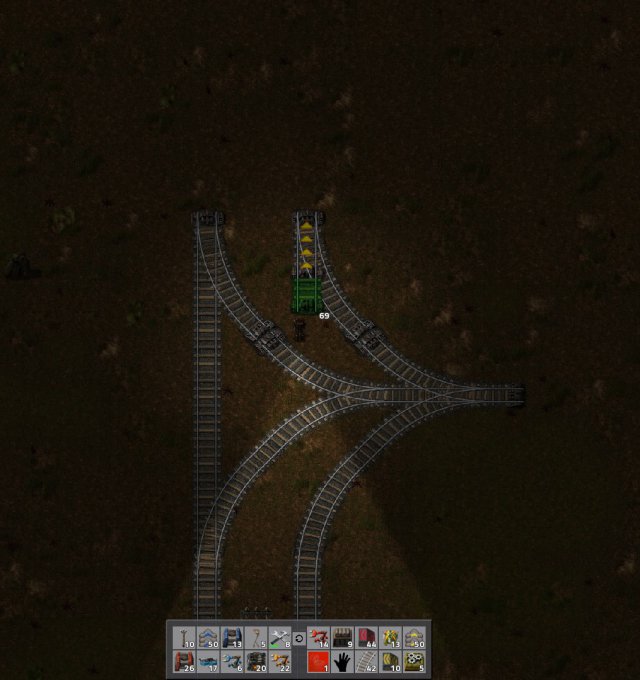
To make the opposite curve, align the end of the new curve with the old one just below... then move the section one square down, and place. Do the same with the second section.
Contine placing the curves and connecting the straight areas.
Build complete!
Time To Apply The Signals!
Now, we go back to the original example, with two bi-directional stations: one station each for iron and copper delivery.
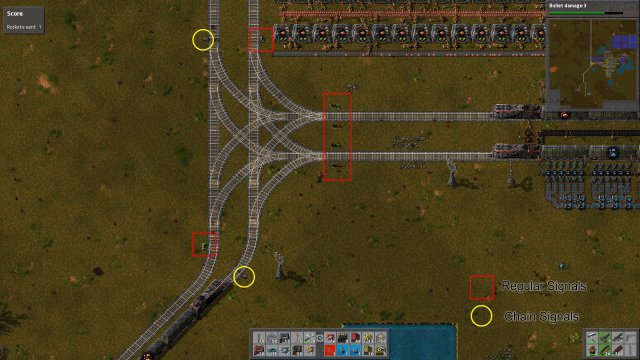
Take note of the colored indicators -- only TWO of the signals are Rail Chain Signals. These are both placed on the ENTRY to the intersection, (marked with yellow circles). The rest, marked with red rectangles/squares are regular Rail Signals.
Chain signals are used when you have multiple crossings & signals, and to make sure the path is completely clear to your destination. They are especially useful in multi-way crossings where you have intermediate signals. (Note the SHAPE of the Chain Signal -- they are a single round light, where the Rail SIgnals are three tiny lights. This can help you identify them in other screenshots)
The Chain Signals at the entry points of the intersection assure that the NEXT signal in line is green before proceeding.... if you place a regular signal in place of the Chain Signals, trains would move straight up to the signal at the station, potentially head-to-head with the train leaving, creating a deadlock.
On the bi-direction station entry, a Rail Signal is placed on BOTH sides of the track, on the same block of track. WIthout these, your trains will back up on the main line.
It is important that no matter how long your station is... do NOT put more than the entrance signals. Otherwise, trains will back up into the station, creating a gridlock.
Here are examples of other (single) bi-directional stations off the main line:
Traffic Management
Do note that as trains wait to get into the stations, it might back up the line. Depending on how many trains you are running, it may be more useful to build additional base stations to handle some of the traffic, and move the extra ores with conveyor belts.
In this particular game, I have 4 trains running -- 2 to stations in the North and 2 to the South. And, obviously, 2 stations in the base to serve them.
I don't find backups happening at all in this setup, and my base is constantly supplied. (I had to pause the trains in the stations to take the screenshot!)
Tips & Tricks
Locomotives
Not enough track, but you've got your loco? Use it! Make sure you load it with coal, and then speed down the track until you get to the end. It's much faster than walking!
Board the loco by coming close to the locomotive, then press Enter. Enter will also allow you to disembark. (You can control the train from either front or back locomotive).
Mouse over the locomotive, even while traveling, to see how much cargo and fuel it is carrying.
Do NOT stand on the train tracks. Your life will end, and so will the game.... (here comes another reload of an autosave...! )
In that vein, zoom out and check for trains before crossing the tracks!
Building Track
To build track super fast, board your locomotive, hold the track in front of you, and place as you go along! (Best on straight lines; be sure to have a large stock of track pieces!)
If there are a lot of trees, board your tank, and build in the same manner as above -- the tank will go right through the trees!
At end-game, don a power suit with exoskeletons (for speed), then blast through trees with a Combat Shotgun, placing rail as you go.
Blueprint diagonal lines of track & construct with bots from your Personal Roboport.
Stations
Too many trains going to one station? You can name stations identically to have trains choose the one that is not occupied. This is especially good for ore loading at mining outposts, or ore dropoff at your base.
The Inserter Stack Bonus, (available through research), will also save you time, as inserters can move more than one item from chests/train cars. (Does not apply to conveyor belts). This is another reason for placing chests as an intermediate container instead of loading directly from the belt.
Try to build your stations on the outskirts of your base to prevent too much walking over railroad tracks; (avoid getting hit!)
If you need a wagon to be loaded with a LOT of different materials, you can use long-armed inserters and Requester Chests in a double line, (and on each side of the train). This is good for times when nearly each square of the wagon needs a different product.
Blueprint stations, complete with signals, walls, & defenses for easy construction.
Source: https://gameplay.tips/guides/73-beginners-train-guide.html
More Factorio guilds
- All Guilds
- Schemes for oil refining. Advanced and liquefaction of coal
- Vanilla LTN Using Interrupts
- Factorio
- Factorio Guide 1313
- Factorio, (Be)
- Factorio Guide 1301
- Mid/Late Game Furnace Layout
- [Easy Mode] Factorio Dedicated Server using Windows Batch
- Factorio Guide 1278
- Useful checkboxes in the interface settings (ENG)
