General Information
As with all previous FromSoftware games, playing as a pure mage is a completely different experience than playing as a classic melee warrior. By "Pure magician" term I mean the use of staffs and seals as weapons exclusively and non-use of any melee weapon as the fundamental rule. Of course, there are many hybrid builds available. And game developers even trying to seduce us, setting both high "physical" and "magical" necessary stats requirements for the most good-looking weapons with interesting and unique skills.
However, in this guide we will focus on the “Pure magician” build, without increasing starting strength and dexterity stats at all and without using any melee weapons (and, consequently, without weapon skills - nothing can be done about it because staffs and seals can’t be customized with Ashes of War; the only staff in the game with weapon skill is Carian Regal Scepter, but it can’t be replaced).
Basic states and goals:
- This is not meta or cheese build guide, not a guide about bugs and exploits,
- Guide represents and describes most (but not every) part of equipment, that can help mages in their journey through the Lands Between for NG walkthrough,
- This guide aims to help in PvE component of the game. PvP requires different approaches,
- All advices and conclusions below are the author’s result of observation and analysis of many game aspects by trial and error method. There may be alternative opinions and I don’t deny them by default.
Class Selection
First things first. Let's start with character creation. In fact, the initial equipment of any class can be obtained later in the game, so this should not affect our choice.We must focus on the initial characteristics. And since we don’t need Strength and Dexterity, it would be better if these stats would be low initially.
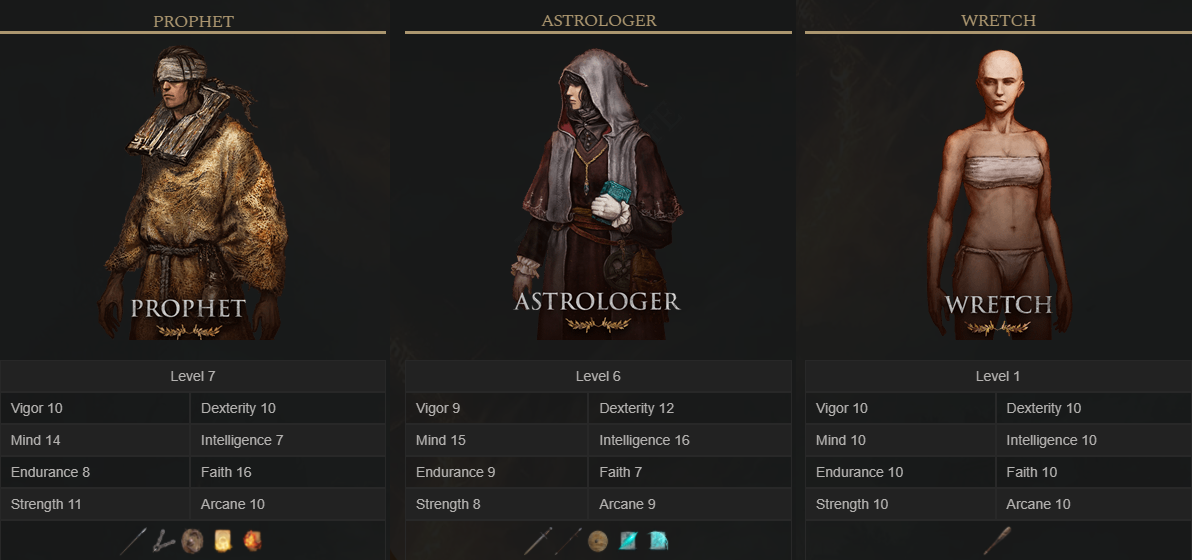
We must select a class based on this rule: the fewer unnecessary stats it has, the more this specific class fits. This approach narrows the choice of class to three options: Astrologer, Prophet and Wretch.
Prophet has a slightly higher total Strength + Dexterity sum than the other two options and low Endurance as well, so it is the least preferred option of these three.
Astrologer and Wretch are pretty good options, while the latter one is little more flexible and, therefore, more preferable. But also Wretch is the most difficult class to handle in Early Game.
Early Game
So, we (re)born, died from the first boss, ran through the tutorial dungeon, met Varre, and finally we are free to explore the open world. What's next?
Well, of course you can start leveling up in the standard way and this is definitely the right decision if you are playing the game for the first time.But if you seriously decide not to use melee weapons at all, your FP amount is negligible and your INT/FAI stats are so low you can't even remember some basic spells, then get ready for a long run around the world map. At that point, we can explore the vast territory, but we can’t enter the Royal Capital until we get any two Great Runes. Also we have to find two parts of the Grand Lift’s “pass”, but it is easily obtainable without a fight. In other words, we already have very wide opportunities to get some nice equipment, talismans, spells and upgrade materials.
There is really a lot of stuff to collect. First of all we ought to collect all the Estus Flask of Tears enhancements. Items for flask quantity and quality enhancement (Golden Seeds, Sacred Tears) are not guarded in 90% of cases.
Also we must find the Flask of Wondrous Physick and its fillers - Crystal Tears. At least some of them we can collect without a fight.
Another absolutely necessary things - Memory Stones. These items permanently increase the amount of available spell memory slots to a maximum of 10, so collecting them is also one of our top priorities. One stone can be bought from Twin Maiden Husks, quite a lot can be found in towers with riddles. Try to collect them as soon as possible, but during the first half of the game you will hardly use more then 6-7 memory slots.
Now let’s talk about the specific things we're looking for. The most valuable things, that are available from the beginning of the game. Below is a list of equipment that can be collected either with no battles at all, or with easy mini-boss fights, that you can win almost from the first level.
Early Game: Equipment

Weapons:
Here and below: I will not describe locations where each item can be found. But for Early game chapter I will provide some general indications of the place for you to plan a route.
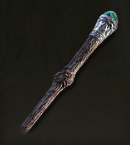
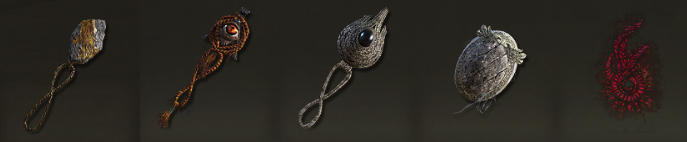
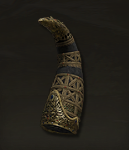
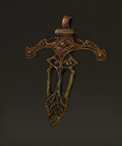
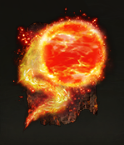
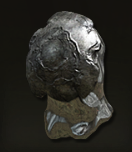
Meteorite Staff - The best staff in Early and pretty good in Mid Game. It cannot be upgraded, but it is initially very powerful and enhances Gravity Sorceries by 30%. It can be safely picked up in Caelid in the swamp.
Golden Order Seal - Very good seal, which we can use throughout the game. Damage scales from INT and FAI so this seal is more effective if you are increasing Intelligence then other ones. Plus it becomes even stronger when you have both stats equally high. You can pick it up without a fight inside the outer walls of the Royal Capital.
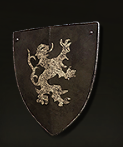
Beast Crest Heater Shield –Of course, ideally we don’t need a shield. But sometimes it’s very difficult to master rolls against some cunning boss attacks. Mages can handle most of medium shields, you are free to choose any. The one I recommend has good guard boost stat and weight. Can be found not far from Godrick's castle in his soldiers camp east of Warmaster's Shack.
Armor:
As for armor, you can choose whatever you like. Playing a mage, it would make more sense to authentically wear magical robes rather than heavy armor, but the choice is yours. After all, not everyone accepts Fashion Souls dogma.
Useful clothes with unique bonuses are mostly hats/helms (traditionally for FromSoftware). But I will not even mention the most awful looking ones, like scarabhead.
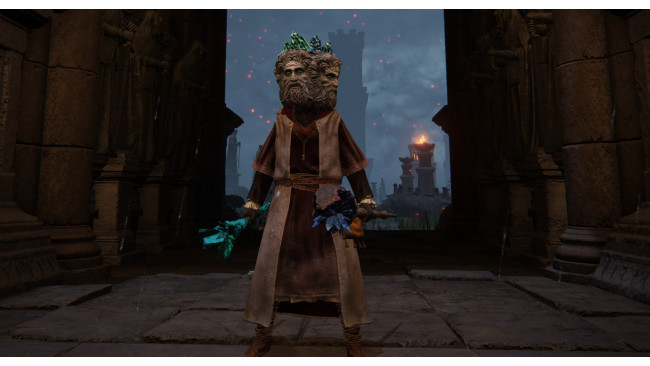
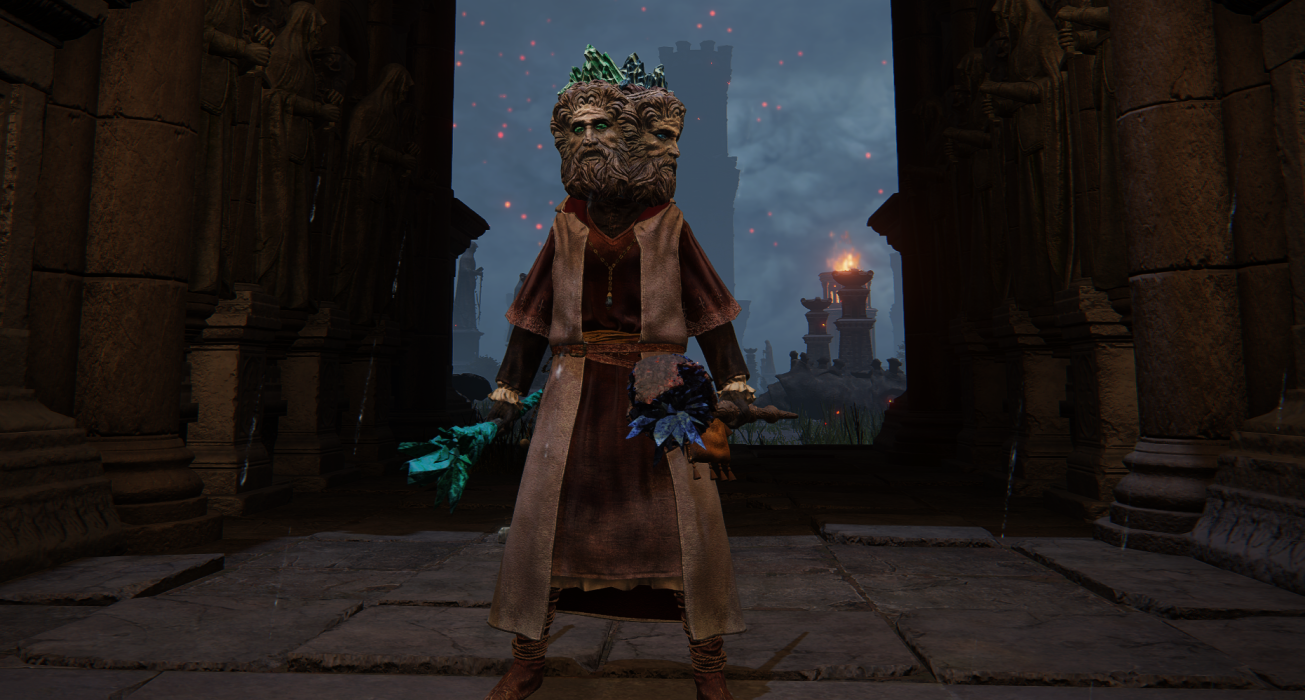
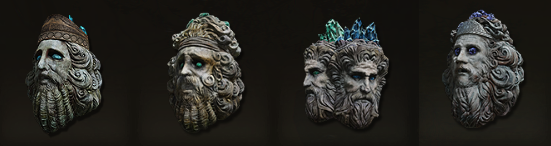
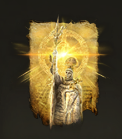
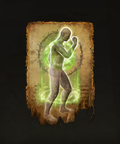
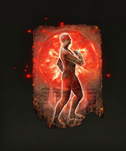
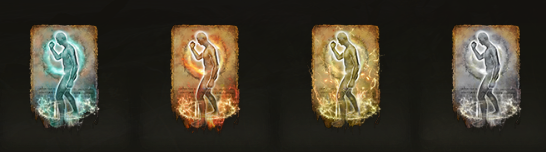
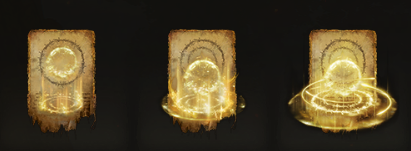
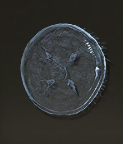
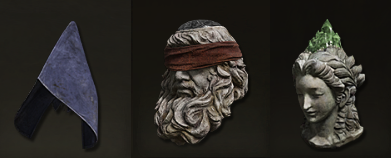
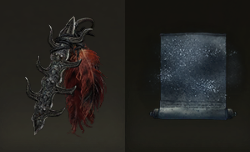
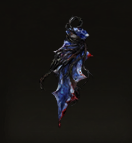
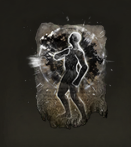
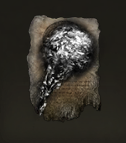
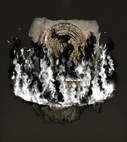
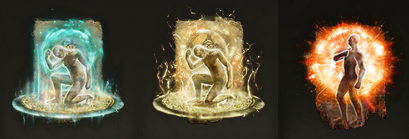
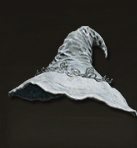
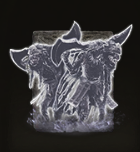
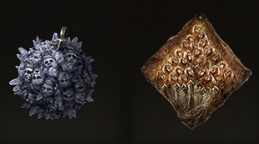
Karolos Glintstone Crown, Olivinus Glintstone Crown, Twinsage Glintstone Crown, Lazuli Glintstone Crown - 4 different crowns can be obtained at the Raya Lucaria Academy. All of them increase Intelligence, while decreasing max HP, Stamina, or both.
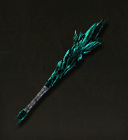
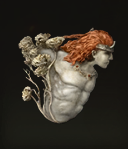
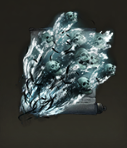
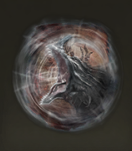
The most powerful is Twinsage Glintstone Crown with two faces (3rd picture), it increases Intelligence by 6.
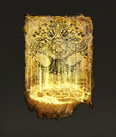
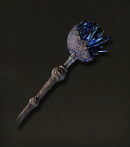
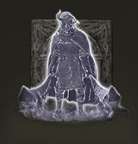
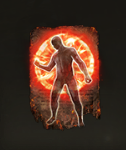
Keep in mind that the only crown obtainable before the dog boss (Red Wolf of Radagon) i.e. without any fight is Olivinus Glintstone Crown (2nd picture) with +3 intelligence / -9% HP.
Spirit Ashes:
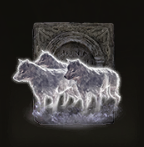
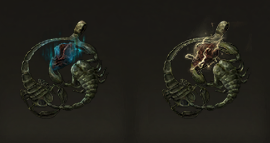
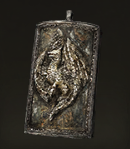
Lone Wolf Ashes - Great summon for the Early Game stage. Wolves are fast and good at luring enemy attention - exactly what magicians need. Can be obtained from Ranni at the beginning of the game or bought later in the Roundtable Hold.
Talismans:
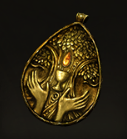
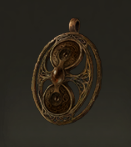
Blessed Dew Talisman - Nice talisman for everyone. It’s just one of few, that available from the start and the most efficient when you have low Vigor (heal fixed at 2 HP per second). You can easily find it in the isolated part of the Capital, but first you must teleport there from the tower (by chest-trap) in Weeping Peninsula.
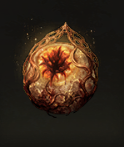
Radagon's Soreseal - Must have talisman for mages with low Vigor (it increases VIG/END/STR/DEX by 5 points). Moreover, you can progress through the whole game with it equipped if you don’t have a plan to increase Vigor much. At the Early Game, when HP and Stamina are low its advantages are much more significant than extra 15% of incoming damage. Can be found in Fort Faroth.
Fire Scorpion Charm – First one from scorpion talismans series, must have for magicians. Every talisman raises element attack by 12% and increases physical damage taken by 10%. This one can be found without a fight in Fort Laiedd on the path to Volcano Manor.
Sacred Scorpion Charm - The second of scorpion talismans. By the way, all offensive holy spells well... pretty weak for PvE. You can always use it for skeletons so they don't revive, but for bosses better to use another spells, even if they are weak to holy damage. This is very niche talisman for very niche spells. This one dropped by NPC invader phantom - Anastasia, who is not a dangerous enemy even for low-level magician.
Early Game: Spells


Sorceries:
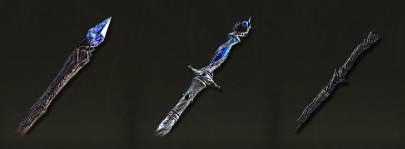
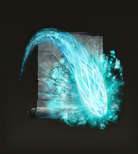
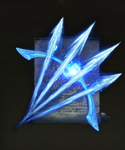
Rock Sling – One of the most useful spells in the early and mid stages of the game due to its 30% bonus damage from Meteorite Staff. In mid game you will probably choose and upgrade better staff, but you can still hold Meteorite Staff in your left hand for 30% bonus. In addition to decent damage, it has good target chasing, low cost, long range and poise break effect (knocks out most bosses in 3-4 casts with triple hits). Can be found literally in the next cellar from Meteorite Staff in the swamps.
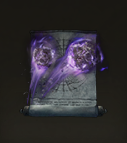
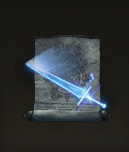
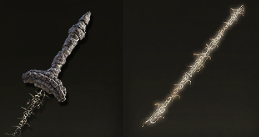
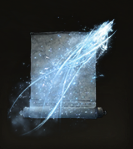
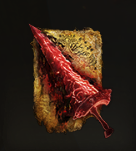
Carian Slicer –Another must have for any sorcerer spell. It’s like fast melee weapon, you can even perform jump hit or rolling hit. Damage is high, cast time is fast and FP/Stamina consumption is low. Especially effective in the catacombs, where ranged combat severely restricted. To get it, you need to find the Royal House Scroll book and give it to a sorceries seller (highly recommended to the turtle Miriel in the Church of Vow’s. Another option - Sellen, but you have to beat easy pumpkin-head mini boss in order to get to her).
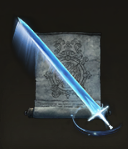
Carian Greatsword - Stronger and slower wide radius melee attack. Situationally useful, e.g. against groups of enemies to not allow them getting close. Can be bought from the turtle Miriel.
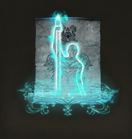
Glintstone Pebble, Great Glintstone Shard – Two classical magic range spells. The first one is used in Very Early Game, when your Mind and FP is too low for more expensive spells. The second is a standard ranged attack that can be used even in the Late Game, the most effective spell in terms of damage / FP and Stamina consumption. It’s contained in the Academy Scroll book that can be found on the cemetery behind Godrick's castle. Glintstone Pebble is sold by Sellen.
Glintstone Cometshard - More powerful version of the previous spells, but also more expensive so it is better not to use it against ordinary enemies. Projectile pierce through enemies – it can hit multiple targets in a line. Spell is available to receive without a fight. Conspectus Scroll book located before the boss dog in the Raya Lucaria Academy. Bring it to the turtle or Sellen in order to get access to this spell in shop.
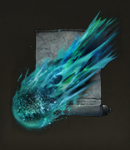
Comet - The most powerful one of this type of spells and the most long ranged, but also the most expensive in terms of both FP and stamina cost. It’s Mid – Late Game spell (requires 52 INT to use), but you can get it early and safe. Can be found almost in front of the dog boss entrance in the Raya Lucaria Academy, behind the Illusory Wall.
Night Comet – This spell has slightly lower damage / Stamina + FP cost then regular Comet and requires only 38 INT to use. But there are two major differences: 1) fast enemies and NPC phantoms do not try to dodge its projectiles and 2) you can boost its potency by 30% using Staff of Loss in you left hand and it will overpower Comet spell. Anyway, it’s also Mid – Late Game spell. Can be obtained without a fight (but this place is dangerous for low levels) in the city of Sellia by lighting the braziers on the towers.
Starlight – Handy spell -flashlight, though not essential. It can illuminate caves very well, but not cheap and doesn't last very long. But if you don’t have every FP in the account, why not to use it? Are we mages or not mages, after all, to travel with torches and lanterns?
Unseen Form - Slows down enemy reaction time. Another optional supportive spell. If you need to run through a dangerous area while avoiding enemies – this is your case. For example, Gaol with snipers on rooftops in Ordina, Liturgical Town. Can be found in the Mirage Tower, which can also be opened without a fight.
Incantations:
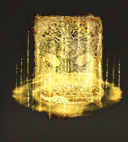
Golden Vow - Our alpha and omega. Buff it before each bossfight as soon as FP and Faith allow it. Increases damage by 15% and defense by 10% for self and allies nearby. Can be found on the road to Volcano Manor.
Blessing's Boon - The second most important buff. HP regeneration incantation (it can be replaced with a more powerful one a bit later) that is also highly recommended to use before each bossfight. Can be purchased from Miriel at the Church of Vows.
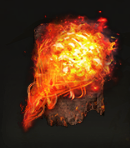
Flame Sling - Basic fire attack. Cheap, classical fireball. Nothing special, but at the Early Game it can come in handy, because many enemies and mini bosses have a vulnerability to fire. Can be charged to increase damage. Sold by Brother Corhyn.
Lightning Spear - Basic lightning attack. It has quick casting, high poise break and relatively high damage. Not very cheap though. Can be charged to increase damage. Unfortunately, effective range is limited. But most enemies doesn't try to dodge it. To get this spell you need to find the Dragon Cult Prayerbook, which is dropped by a Leyndell knight patrolling the road near the tower of Liurnia. Beating him is not a super difficult task even at low levels, but he's an enemy worthy of attention.
Honed Bolt - Strikes enemy with lightning from above. It has less damage compared to Lightning Spear, but like 100% chance to hit. Also this is a great tool against enemies with shields, because projectile flies from above, not from casters hand. Contained in the same Dragon Cult Prayerbook as Lightning Spear.
Cure Poison - Extremely cheap and fast poison healing. Effective in poisonous catacombs. Sold by Brother Corhyn.
Flame, Cleanse Me - Another quick and cheap cure for poison, but also for scarlet rot. Indispensable in the lake of scarlet rot and rotten catacombs. Can be freely picked up at the Fire Monk Сamp southeast of the turtle church.
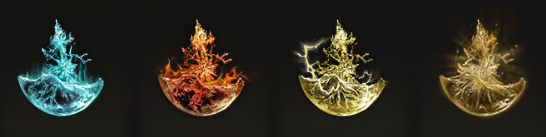
Magic, Flame, Lightning & Divine Fortification - Pretty good elemental resistance boosts (+35%). First 3 are sold by Brother Corhyn and the last one dropped by a Teardrop Scarab in Weeping Peninsula region.
Urgent Heal, Heal, Great Heal– Our treatment and alternative for HP Flask of Tears. Urgent Heal is extremely cheap and only heals yourself (if you don't have a lot of Vigor it is a good option). The rest heal incantations are better, heal everyone around (for example, summoned creatures) but not so cheap. Rather than taking HP flasks, it's better to have an extra FP flasks and heal with spells. But for bossfights it’s long cast time can create unnecessary problems so HP flasks will be better. All 3 heals sold by Brother Corhyn, but the last one - just after he moves to Altus Plateau.
At the Endgame stage you will also get Lord's Heal - extra effective and extra expensive heal, but it may be enough for you to use Great Heal instead.
Mid Game
And that's it for the Early Game description. if you have collected all (or most) equipment pieces and spells from the previous section, you can level up confidently and reach Leyndell, Royal Capital, very quickly.
Now our topic of discussion will go to next stage – Mid Game. At this stage you are strong enough to go through ordinary dungeons. You collected at least two Great Runes and you have an opportunity to open and explore Leyndell. After the capital you can access Mountaintops of the Giants location.
Our top priority is the same - 14 Flasks of Tears with potency +12. You can collect up to 13 flasks +10 while you are in capital, and finish collecting all of them after moving to Mountaintops location. The distribution of flasks is better to put in favor of FP: for example, 10/4 or 12/2. As mentioned before, you can use FP on healing incantations mostly, leaving few HP flasks for emergency situations.
This chapter will list a lot of equipment and spells that can be collected during Mid Game, but you are free to choose which of these will be useful specifically for you.
Crystal Tears For Flask Of Wondrous Physick

Magic-Shrouding, Flame-Shrouding, Lightning-Shrouding, Holy-Shrouding Cracked Tear - Increases corresponding elemental damage by 20% for 3 minutes. In most cases one of that tears should be constantly charged in your flask. Exactly the same as for Sacred Scorpion Charm, Holy-Shrouding Cracked Tear has a very niche application.
Opaline Bubbletear - Makes it possible to survive one enemy attack and receive -90% damage from it. Lasts 3 min. The best option for the second ingredient in the flask if you have low Vigor.
Cerulean Hidden Tear - For 15 seconds (patch 1.0.4 changed it to 7 sec, but 1.0.4.1 rolled it back; probably it will be changed later again), grants you the ability to not spend FP at all. Situational and extremely powerful buff for 15 seconds duration.
Mid Game: Equipment


Weapons:
Academy Glintstone Staff – Very good sorcery scaling for players with INT stat around 40-60 points. Possible replacement for Meteorite Staff in Mid Game.
Lusat's Glintstone Staff - Potentially the most powerful staff in the game (not really, actually) with a massive 50% increased FP cost. If you want to raise your INT and FAI you don’t need it, because in the Late Game you can use another staff with higher damage and without FP overspending.
Azur's Glintstone Staff – The most versatile offhand staff that increases casting speed of sorceries and incantations but also slightly increases FP cost (+20%) of sorceries only. No penalty for incantations cost.
Carian Glintstone Staff, Carian Regal Scepter, Staff of Loss - Staves to hold in the second hand for bonus damage to Sword Sorceries (+15%) Full Moon Sorceries (+10%) and Invisibility Sorceries (+30%) respectively. Bonus works if staff is equipped, you don’t have to use it to cast magic. Besides Carian Regal Scepter is the best scepter for high INT (70+ points) players, who don’t have high Faith yet.
Gravel Stone Seal, Giant's Seal, Godslayer's Seal, Clawmark Seal, Dragon Communion Seal - Seals to hold in the second hand (with more powerful seal in primary hand). Each one boosts certain useful spells - Dragon Cult Incantations (+15%), Fire Giant and Fire Monk Incantations (+20%), Godskin Apostle Incantations (+10%), Bestial Incantations (+10%) and Dragon Communion Incantations (+15%) respectively.
Jellyfish Shield – We can use this shield as buff item due to it has unique skill. But can we? Actually, yes. In case we have at least 9 STR/DEX points, we can equip Radagon's Soreseal (now we have 14 STR/DEX), then we must two handed shield (and now we have 14*1.5=21 STR which meets the requirements). That will give us opportunity to use shield skill: +20% damage for 30 seconds. Or we may just activate the Godrick's Great Rune effect instead of Radagon's Soreseal.
Coded Sword, Cipher Pata - Melee weapons that deal no physical damage and only scale with Faith. We don’t need it, but you can keep it just in case (e.g. to stop walking mausoleums without FP losses). Cipher Pata's weight is 0 and you can equip it anytime without harm to your rolls.
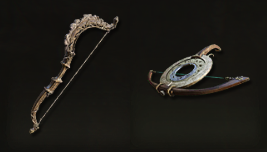
Erdtree Bow, Full Moon Crossbow - Bow and crossbow can be used for hitting fire-breathing pillars in catacombs without FP losses. Of course, we can also use simple short bow, but we are magicians - we love stylish magical things. Bow requires 8/12 and crossbow - 10/10 STR/DEX points.
Armor:
Queen's Crescent Crown - Rennala's hat provides +3 Intelligence with no side effects. You can buy it only after defeating Rennala herself.
Greathood, Hierodas Glintstone Crown, Witch's Glintstone Crown – Some more hats that increase Intelligence, but decrease something else. Like those that can be collected in the Academy.
Spirit Ashes:
Banished Knight Oleg - Quite mobile summon with good damage and average HP. Not bad option for Mid Game.
Ancient Dragon Knight Kristoff - Very high survivability, but there is one problem. He has an unhealthy habit to charging his remote lightning spell and slooowly walk toward the boss hiding behind his shield. He is a perfect tank, but his actions are terrible. Despite this, he looks good with slow bosses. Could be useful in Mid and Late Game.
Mad Pumpkin Head – He has low damage but good at tanking. Another summon that is slow and will not keep up with some fast bosses, but he is good against nukers like Loretta.
Omenkiller Rollo - Deals good damage (but that's not the point for us, as we deal a lot more damage), while pretty well draws enemy attention and dies relatively fast. Good option for Mid Game.
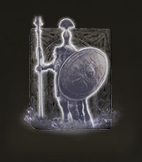
Greatshield Soldiers - Definitely the best tanking ashes in the game. They can fall on the boss and lock him in the corner of the arena, allowing you to shoot boss without fear. They are mobile, survivable and tanky - exactly what magician need.
Talismans:
Radagon Icon – Boost the speed of spellcasting (~5-10% depends on your DEX). Must have talisman for mages.
Magic Scorpion Charm, Lightning Scorpion Charm - Every scorpion talisman raises element attack by 12% and increases physical damage taken by 10%. Another must have talismans.
Ritual Shield Talisman – Raises defense by 30% when HP is at maximum. We have powerful HP regeneration buffs and this talisman perfectly works with it.
Ritual Sword Talisman - Raises attack power by 10% when HP is at maximum. Also increases any magic attacks. Just like the previous talisman perfectly works with HP regeneration buffs.
Red-Feathered Branchsword - Raises attack power by 20% when HP lower than 20%. Сontroversial talisman to use, because only 10% bonus damage difference with Ritual Sword Talisman. But if you want all you can get and you die from single hit of every common enemy anyway, use this talisman. You can use Night Maiden's Mist sorcery at the Site of Grace to damage yourself and activate effect of talisman.
Primal Glintstone Blade – Reduces spell FP consumption by 25% and HP by 15%. Very useful talisman for clearing locations. Too bad it appears very late in the game, when you already collected and upgraded Flasks of Tears and there are no more problems with a lack of FP.
Mid Game: Spells

Sorceries:
Terra Magica - Very strong buff, boosts sorceries damage by 35%. It’s hard to stay inside the area of effect, but bonus damage is really high.
Cannon of Haima - Very expensive, but very dangerous area sorcery. High poise break. Can’t chase the target so we have to use it with caution.
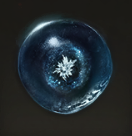
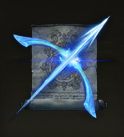
Glintstone Icecrag – The only range cold sorcery available (except Ranni's Dark Moon which doesn’t count as part of “Cold Sorceries”). Damage is medium, but this sorcery effective against enemies with corresponding vulnerability.
Rykard's Rancor – Ghost that pretty long, but slowly, following the target. Then track along which it flew detonates by consecutive blasts like a wick for dynamite, each deals area fire damage. Fast cast time, may be useful against big slow bosses.
Loretta's Greatbow – Super long range, super homing, high damage. Сan be charged to increase damage. The only drawback is the long cast time.
Incantations:
Blessing of the Erdtree - Replacement for the less powerful Blessing's Boon. Our HP regeneration buff for Mid and Late Game.
Black Flame's Protection - Powerful buff, increases physical damage reduction by 35% for 70 seconds. That’s not pure 35%, but that’s 35% of damage you receive without this buff. Also in reduces healing from all sources by 20%, but it’s nothing. Careful, this buff may not be compatible with some spells (below) and items like crab meat.
Flame, Grant Me Strength - Boosts our physical and fire damage by 20% for 30 seconds. Some spells deal physical damage and this incantation boosts its damage as well, e.g. Rock Sling and Stone of Gurranq. This spell doesn’t compatible with Black Flame's Protection (only the last one you cast will work)!
Stone of Gurranq - Throw a stone at the enemy. Fast cast, stun effect for small enemies, but no homing. It can be used somewhere. Decent damage with Flame, Grant Me Strength buff.
Giantsflame Take Thee – Larger version of fireball with high damage. Can be charged to increase damage even more. Quite expensive incantation for the one without homing.
Flame of the Fell God - Rare fire incantation with homing, very slow though. Explodes with a delay. Its damage is not very high and FP consumption is significant. But again – this is fire damage spell with homing and it will definitely find its application.
Black Flame – Fireball like Flame Sling, but with more damage and higher cost. In addition to normal damage it also deals damage over time equivalent to few percent of the boss's HP. The thicker the boss -the more effective this spell (and also every other spell from Godslayer Incantations category).
Black Flame Ritual – Area effect spell that is highly recommended. Creates circle of black flame around you for 5 seconds. Casts quickly and does decent damage. Great against fast and aggressive opponents.
Pest Threads - Surprisingly good spell against large bosses like dragons. For some reason it deals increased damage to big enemies, but its effective range is not very high.
Swarm of Flies - A spell from the Blood Incantations. Almost every creature in this game more or less vulnerable to bleeding, but better to use this spell combined with bleeding melee weapon. In our case – we can help other players as a cooperator with bleeding damage, but hardly we can count only on bleeding damage itself during bossfights.
Barrier of Gold, Golden Lightning Fortification, Flame, Protect Me– Strong elemental resistance boosts. Reduces magic/lightning/fire damage by 60% for 90 seconds (Flame – for 70 seconds).
Late Game
Late Game starts when you have the entire map opened, your level is 100+, your weapons are maxed out, and you already have access to some of the hardest bosses in the game. At this stage, all that remains is to collect the most valuable things from distant regions to be fully prepared for fight with these bosses.
Below I will show the most powerful things that can be found and used by a high level magician and will be especially relevant at this stage of the game.
Late Game: Equipment

Weapons:
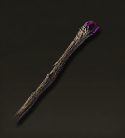
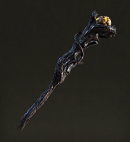
Prince of Death's Staff - The most powerful staff in the game exclusively for INT/FAI builds. It overpowered even Lusat's Glintstone Staff, but with 70-75 points of both INT and FAI. However, it will not be the best, but still show good results with lower stats, so it can be used with around 55 points of both INT/FAI.
Armor:
Azur's Glintstone Crown - Increases damage of Comet Azur (+15%), Glintstone Cometshard (+10%) and Comet (+10%) but increases cost of all spells by 15%. Comet with this crown will still work slightly worse than Night Comet with Staff of Loss. The only reasonable application of this crown is to boost Comet Azur, but always keep in mind increased cost of spell.
Silver Tear Mask - Rather then raise extra characteristics we can equip this mask. It increases Arcane stat by 8. That will allow us to use certain Sorceries and Incantations like Swarm of Flies or different types of dragon breath.
Snow Witch Hat - Increases cold sorceries damage by 10%. Main application - Ranni's Dark Moon sorcery.
Spirit Ashes:
Azula Beastman – Can be found late in the game. Two extremely aggressive and highly damaging beasts. Сan help a lot with poise breaking an enemy.
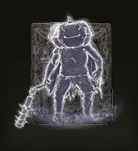
Black Knife Tiche - A gem among Spirit Ashes. Incredibly mobile, dodging many attacks of any bosses, holding aggression well and causing serious damage. She leaves almost everyone else out of work, except, perhaps, from the Greatshield Soldiers - sometimes quantity is preferable to quality.
Talismans:
Marika's Soreseal - Significantly increases magical stats (+5 MIND/INT/FAI/ARC) and increases damage taken by 15%. Works well until your stats become too high (80+ points, but even if so, bonus will be about +5% damage).
Dragoncrest Greatshield Talisman - Protection against physical damage +20% without conditions and negative effects. Can be combined with the Ritual Shield Talisman and Black Flame's Protection incantation for huge increase in physical damage protection.
Graven-Mass Talisman, Flock's Canvas Talisman – Boost sorceries and incantations respectively by 8% without conditions and negative effects.
Late Game: Spells
Sorceries:
Ancient Death Rancor - Spell with bonus damage from Prince of Death's Staff. Ghosts slowly chasing down foes, dealing fairly high damage and causing poise break effect for enemies with low resistance.
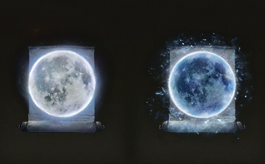
Rennala's Full Moon, Ranni's Dark Moon – Launch moon at enemy with high damage, high speed and homing. Long casting time, but when caster inside the moon he/she is invulnerable for any damage. Ranni's Moon deals less damage (it could be fixed using Snow Witch Hat) and it is magic + cold damage type, while Rennala's Moon deals more damage and it is pure magic damage type. Both spells reduce the target's magic negation by 10% for 60 seconds.
Loretta's Mastery - Enhanced version of Loretta's Greatbow. Works the same as Loretta's Greatbow, but shot four arrows at once. Favorite spell of this guide’s author.
Comet Azur - Not exactly a comet, more like an energy beam. Cannot be moved while casting and immobile caster is very vulnerable. Anyway this is the spell that can literally annihilate bosses in seconds. Use all you have, every little piece to increase your damage at the expense of everything else if you want to achieve this.
Incantations:
Greyoll's Roar- Deals high damage in the area few meters around caster, decreases enemy attack by 20% and increases damage to them by 10% for 60 seconds. Sounds like strong debuff and that's the way it is, but you have to stay really close to your target to apply it.
Black Blade – Maliketh’s ranged attack. If you have it, most likely you already at the Endgame stage. Adds a debuff to maximum HP like Maliketh himself. High projectile speed, high range, reasonable FP cost, cool casting animation.
Character Leveling
Discussion about stats distribution.
The most important stats for magicians are Mind, Intelligence and Faith. It would be wise to focus on Intelligence first prior to Faith, since it allows you to use powerful staff (Meteorite Staff) and more diversive spells in Early Game.
The third in importance attribute is Mind. It doesn’t make sense to raise Mind too much, but we must definitely raise it to a certain value (up to 40-55 points in Late Game, taking into account talismans and hats) because Late Game spells spend a lot of FP.
Another two stats which are worth paying attention to – Vigor and Endurance.
For the rest, pure mages don't need Strength and Dexterity at all and Arcane is the stat for enthusiasts only. Maybe someone want to boost Arcane instead of Intelligence or Faith for a specific build – its ok but it will not be considered in this guide.
I can suggest 3 basic strategies for character leveling:
1) Glass Cannon - Very relevant build for a mage, but also the most risky one.
In this build we will raise Intelligence and Faith almost constantly. Sometimes we will have to raise Mind (e.g. few times by 5 points in a row) as we get more expensive spells. We must literally ignore everything else.
This strategy will allow us to tear apart some bosses even in Mid Game and destroy others as quickly as possible. At the same time, Glass Cannon will be constantly die from every missed hit. Not only by bosses, but also by many ordinary enemies. Radagon's Soreseal talisman will have the maximum impact in this build. In the Late Game you should have about 60-70 points of Intelligence and Faith and about 40 points of Mind.
I recommend this build for the people who want to test themselves. It is unique experience. But if you are not sure about your own skills and patience – you have no reason to suffer like this.
2) Balanced Mage – build with moderate damage and high survivability.
To ensure high survivability, we must raise Vigor up to 30-40 points and Endurance up to 20-25 points. With suitable talismans it will be possible to equip even heavy armor set while not losing medium roll ability. At the same time we can raise Mind up to 30 points, and Intelligence and Faith up to 50-60 points (but if you want to use Rennala's /Ranni's Dark Moon you must slightly shift the balance in favor of Intelligence). Marika's Soreseal will grant a great damage boost in this build, but slightly decrease survivability.
The benefits of this strategy will be revealed in Late Game. This is a compromised build for those who want to be an almighty mage with full spellbook available to use, but don’t want to kick the bucket every time a chihuahua imp from catacombs falls onto your head.
3) Pure Wizard/ Pure Sorcerer - Specialized mage build. We can raise Vigor and Endurance like in Balanced Mage build, while raising almost only Intelligence or only Faith (you can put few points in second attribute for useful buffs). In this build we can afford 40-50 Mind points and 80+ points for basic attribute (INT/FAI). The main disadvantage of this build is obvious - inability to use the significant part of spells: Sorceries or Incantations. But it allows us to be very powerful in fight and tough damage sponge at the same time.
I recommend this build for those who has no fundamental interest to use all types of magic at the same time. It is the easiest build to handle.And remember: all three strategies above are like landmarks, extreme points of where you can end up. You can always come up with your own build, perhaps it will be something between Glass Cannon and Balanced Mage or between Balanced Mage and Pure Wizard.
Сonclusion

Thank you for your attention! I hope my guide will help you in a better understanding of the game. I will be glad to listen your constructive criticism and wishes. Unfortunately, I am not a native English speaker and, most likely, there are some mistakes in the text because of this. If you can (and want) to help me fix them - feel free to send me friend request in Steam and write about it.
Have a nice game!
Source: https://steamcommunity.com/sharedfiles/filedetails/?id=2798709716
More ELDEN RING guilds
- All Guilds
- Rellana, Twin Moon Knight
- Elden Ring
- How To Beat Elden Ring Without Dying
- Position des 8 Piliers brasier de la Siofra
- Alternative / goth female character preset
- Elden Ring Hakknda Bulabileceiniz Her ey Kapsaml Rehber
- EN OP GREATSWORD BULD ! !
- How to finally quit Elden Ring for DS2
- ELDEN RING Guide 2344
- How to create Dante DMC on Elden Ring/Como criar o Dante do DMC no Elden Ring