Introduction
SOME VERY IMPORTANT POINTS BEFORE YOU VENTURE DEEPER:
-While i understand that the actual max level is not that easily reached by everyone due to the insurmountable amount of runes required, this guide is not targetted to max level players alone, given how maxxing 2-3 stats to 99 is completely possible.
-Assuming that you have the stats that the mentioned weapons scale with at max (99), everything mentioned in this guide will apply to you as well, regardless of your level.
E.g. If you have 99 Intelligence and 99 Faith, you will be able to utilize the highest scaling Sacred Seal (Golden Order Seal) to its full potential even if you have 30 Vigor.
-In depth testing and comparisons took place at ''max enemy difficulty'' NG+7, more specifically on my 11th playthrough (NG10) at level 713. That's why something that you may be using on NG0 to a solid extent may not be mentioned here, because once enemies become a lot more beefy and gain a ton of extra poise, quite a few things become obsolete, both damage wise, and stance breaking wise. A quick example would be guard counters, a single guard counter is usually enough to break stance on NG0, on NG7+ you'd need over 4-5 of them with the right setup to break a Cleanrot Knight or a Haligtree Knight.
-Enemies tested include nearly every category of enemies encountered in the game, such as Trolls, Knights, Simple Humanoids (Demi-Humans, Soldiers, Perfumers, Mages etc), Omens, Crabs/Lobsters, Undead, Beastmen, Imps etc.
-The verdict on whether I deemed an incantation/Sorcery/AoW/Weapon ''strong'' is based on its all around performance against every enemy category mentioned above. Basically all-around multi-use Incantations/Sorceries/AoW/Weapons that will serve you well regardless of region.
-Incantations/Sorceries/AoW/ that ended up being good against a single enemy were not included due to their limited usage. The only exception here being Undead, given how they are a big enough category to dedicate a detailed strategy to them.
-Guide is made to explain how you can destroy everything with the easiest most risk-free way possible, if you're looking for a way to challenge yourself or make the game harder, this is not the guide for you, its exactly the opposite.
-I've added some very short videos showcasing some effects/interactions of specific Sorceries/Incantations/AoW for a more ''in practice'' understanding. There could be some stuttering unfortunately but I'm fairly positive you will get the idea regardless.
-It is completely normal to disagree with some things mentioned in this guide, but please, make certain to respect the effort that was put into this which was definitely considerable.
-''I really like this Sorcery/Incantation/AoW but the ones you show here make it feel suboptimal, i still like it a lot through''. Then you should definitely use it. While a lot of things may be suboptimal, the fun factor is really important in games like these, so make sure you don't take that away from yourself!
-When the DLC releases for this game (surely soon...SURELY), i will make sure to update the guide when my time allows.
-Guide is PURELY FOCUSED ON PVE. Nothing mentioned in it is PvP focused.
The Importance Of Stagger On NG7+
Before we begin, it is of the utmost importance to explain the importance of stagger on the endgame. By stagger i don't necessarily mean stance breaking, as this is really hard to achieve quickly with the amount of poise enemies possess on NG7+, i mostly mean the ability of specific Incantations/Sorceries/AoW to permanently keep an enemy in place and force them into a ''cannot move'' animation while they are being hit.
On every category in this guide, you will see that stagger is usually stressed a lot and prioritized over a variety of things, it is crucial for you to understand why.
While this may not be as important early in the game (on NG0) because quite literally anything with a couple of hits will break enemy stance and open them up for a riposte or outright kill them, on NG7+ where the tricky enemies (Crucible,Haligtree Knights, Battlemages, Omens, Trolls etc) become really beefy and stack a lot of poise it is critical to always manage to have them under control, limiting the abilities you have to dodge.
That is where stagger comes into play. The ability to permanently lockdown an enemy in place, completely nullifying their kit is what simplifies massive parts of the game by neutralizing key enemies put in place to make your life miserable. While some Sorceries/Incantations/AoW may have really high damage on paper (Corpse Piller), in practice, when a hard enemy gets to freely react and your only source of crowd control is a status proc, more often than not you will get murdered or be forced to dodge a lot.
While you may think that maxxing every stat will practically make you a god, it only really means that you gain a ton of versatily when builds are considered, freely being able to swap between weapons and have a variety of Incantations/Sorceries/AoW active at the same time, which of course sounds very handy (and it is), but really does nothing for the actual damage numbers. For example, assuming you went all out on Intelligence on your first/second playthrough and reached 99 Intelligence, your Sorcery damage assuming you have a solid Staff, is basically capped. While your FP pool will increase allowing you to use a greater number of Sorceries, their damage will be the same. On the other hand, enemies do not face the same ''cap'' until NG7+ (playthrough 8) is reached. Imagine that an enemy that used to have 3K hp now has 11K, you can immediately understand that while that was an enemy you could easily get rid off earlier, it now becomes an entirely different process. To put it simply, your offense remains the same, while the enemies get stronger.
To summarize, while reading, remember that as i mentioned in the introduction, something that works wonders on NG0, does not automatically mean that it will work wonders on NG7+ as well. The enemies keep scaling, while any source of damage that is based on a stat that has reached 99 on NG0 will remain exactly the same. That means that specific types of your offensive damage will remain identical, while enemies slowly become much stronger. It is why you start relying on crowd control much more than damage.
Sacred Seals


Some basic information on Sacred Seals and their respective damage boosts.
The Sacred Seal in your Off Hand, just as the one on your Main Hand provides its damage boost to a specific school of incantations regardless of whether you are casting through it. This effect also applies while on horseback, simply having a specific Sacred Seal on your Off Hand will provide the damage boost benefit regardless of the fact that its ''greyed out'' and cannot be used.
The damage of your Incantation is based on the total Incantation Scaling stat on the Sacred Seal you are using, the higher the better.
The following damage boosts on specific incantations stack multiplicatively with each other if your Main Hand Sacred Seal is the same as your Off Hand Sacred Seal. For example, having a Giant's Seal on your Main Hand will increase Fire Giant Incantation damage by 20%, but having another on your Off Hand will further increase the damage of Fire Giant Incantations to 44%. Sacred Seal upgrade level does NOT influence the said bonuses.
Golden Order Seal: +10% damage on Golden Order Incantations
Gravel Stone Seal: +15% damage on Dragon Cult Incantations
Giant's Seal: +20% damage on Fire Giant Incantations and some Fire Monk Incantations
Godslayer's Seal: +10% damage on Godskin Apostle Incantations
Clawmark Seal: +10% damage on Bestial Incantations
Frenzied Flame Seal: +20% damage on Frenzied Flame Incantations
Dragon Communion Seal: +15% damage on Dragon Communion Incantations
The Best Sacred Seal:
Golden Order Seal.
Maxxing Requirements: 99 Intelligence, 99 Faith.
Inc Scaling 418.
Golden Order Seal has the highest incantation scaling out of every Sacred Seal at 418. It should always be your main hand seal (the one you cast from) and your off hand Seal should match the incantation you're using to gain the respective damage boost. For example if you're using Giantsflame Take Thee, you will be casting from Golden Order Seal, and your off hand seal should be the Giant's Seal. If you're using Black Flame, you will be casting from Golden Order Seal and your off hand should be Godslayer's Seal.
To maximize your damage it is crucial to know what school of Incantation you are using and have the appropriate Sacred Seal on your Off Hand.
VERY IMPORTANT
As i mentioned on the Sacred Seal introduction, while having 2 of the same Sacred Seals stacks the respective incantation damage boost multiplicatively, the sheer amount of incantation scaling Golden Order Seal has will always outperform this mentioned stacking of most Sacred Seals with only 3 exceptions.
EXCEPTION 1: Frenzied Flame Seal.
Maxxing Requirements: 99 Strength, 99 Dexterity, 99 Intelligence, 99 Faith.
Inc Scaling 400.
At 400 incant scaling, Frenzied Flame Seal is the 3rd highest scaling seal and features only 18 less scaling than the Golden Order Seal. That means that ONLY for Frenzied Flame Incantations (Frenzied Burst, Howl of Shabriri, The Flame of Frenzy, Unendurable Frenzy), having x2 Frenzied Flame Seals is better than Golden Order Seal on main hand and a Frenzied Flame Seal on the off hand. It is important to note that the damage buff provided by the Howl of Shabriri does NOT increase through the Frenzied Flame Seal, only the offensive damage of the actual incantation does.
EXCEPTION 2: Dragon Communion Seal.
Maxxing Requirements: 99 Faith, 99 Arcane.
Inc Scaling 415.
At 415 incant scaling, the Dragon Communion Seal is the 2nd highest scaling seal behind only the Golden Order Seal, and features only 3 less scaling compared to it. That means that ONLY for Dragon Communion Incantations (every breath incantation along with Dragonclaws EXCEPT Placidusax's Ruin), having x2 Dragon Communion seals is better than Golden Order Seal on main hand and a Dragon Communion Seal on the off hand.
EXCEPTION 3: Erdtree Seal.
Maxxing Requirements: 99 Faith.
Inc Scaling 367.
The Erdtree Seal is the best seal for any faith-based scaling Healing and Weapon Buff Incantations like the Erdtree Heal and Electrify Armament respectively. That is because weapon buff incantations and healing incantations only benefit from the Faith portion of the total scaling number and the Erdtree Seal has the best Faith scaling out of every seal. At max level, casting an Erdtree Heal with the Erdtree Seal will always top the entirety of your health pool regardless of how low your health is. Every faith scaling buff should be cast through this.
Best Fire Damage Incantations


As i explained in the introduction the incantations i will list as ''best'' are the ones that can be used in a plethora of scenarios while also packing a punch. Because this is mostly targeted to end game players, FP cost is not taken into account given how your endgame FP pool can support the spam of mostly anything. If your FP pool is limited because of a much lower level, you will have to personally judge your needs and adjust your playstyle and FP usage accordingly, conserving FP for troublesome harder enemies and using baseline cheap Incantations for fodder ones.
Personal Flask Allocation Preference: 2 Crimson Tear Flasks - 12 Cerulean Tear Flasks
Recommended Passive Talismans: Flock's Canvas, Godfrey Icon (if chargable), Fire Scorpion Charm, Ritual Sword Talisman.
Recommended Proc Talismans: Blood Lord's Exultation, Kindred of Rot's Exultation, Red-Feathered Branchsword.
Additional Recommended Item: Oil Pot.
An extremely underrated and reusable item whose crafting material is very easy to farm and can increase the damage of your next Fire Attack by 50%. Increasing the already very high damage of Incantations like Giantflame Take Thee by 50% can lead to very very high damage numbers.
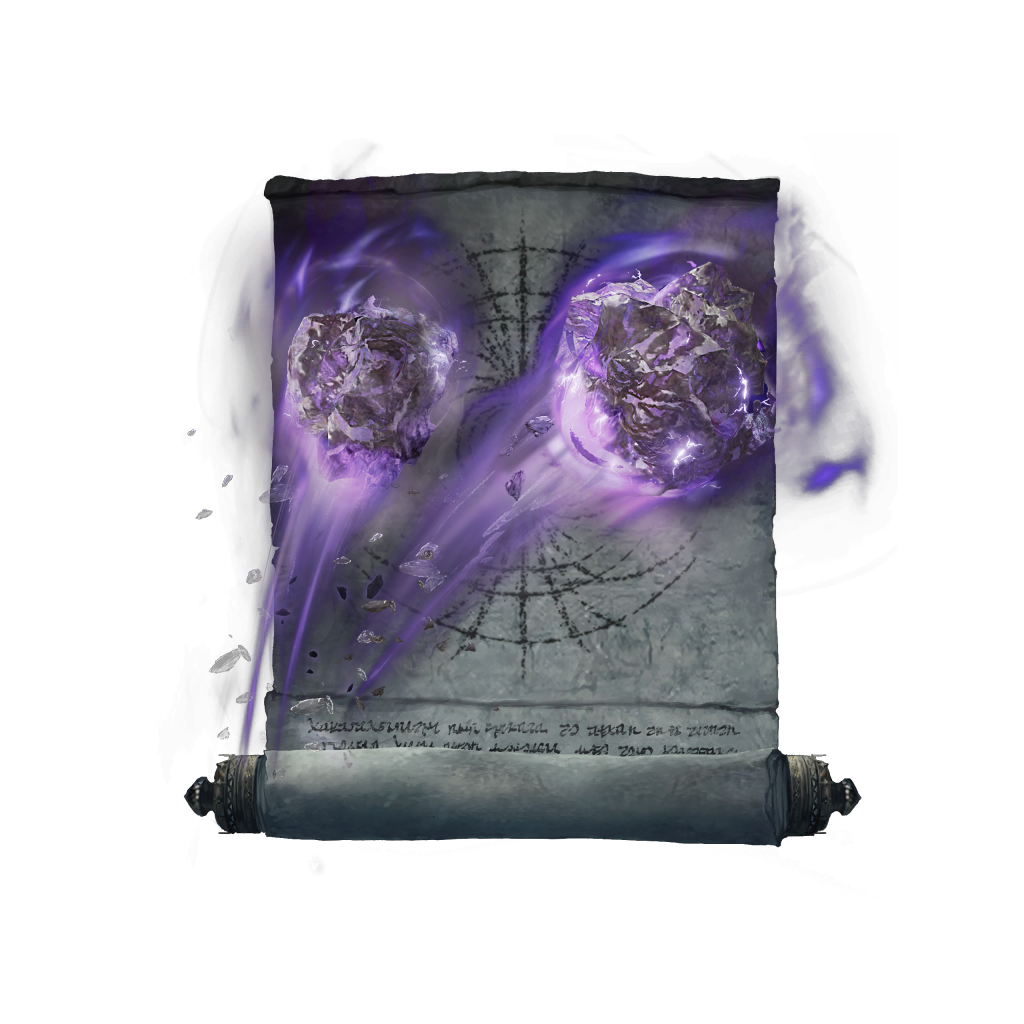
Giantsflame Take Thee. - Fire Giant Incantation
-Pros:
Very high damage.
Can be charged to further increase its already high damage and blast radius.
Insane crowd control (will knockdown most humanoid enemies, and stagger those that it will not)
Insane AOE damage and crowd control if charged.
When charged the blast will almost always knock the target down even if they dodge
Solid range if fired without Lock On.
Charged splash can sometimes damage/kill enemies through thin walls-Cons:
When fired with Lock On the fireball usually lands short unless you are decently close to the target.
Lengthy charge time.
O Flame!. - Fire Monk Incantation
-Pros:
Very high damage
Nearly Instant if uncharged
Can be charged to further increase its high damage
Spammable
Relatively quick charge time-Cons:
Extreme melee range.
Attempting to charge the incantation in the closest possible melee range poses the respective risks.
No hyper armor while charging, can be knocked out of the cast.
Low stagger if uncharged, usually allowing the enemy to react between casts.
May feel ''clunkier'' compared to its much weaker but much more versatile counterpart "Catch Flame"
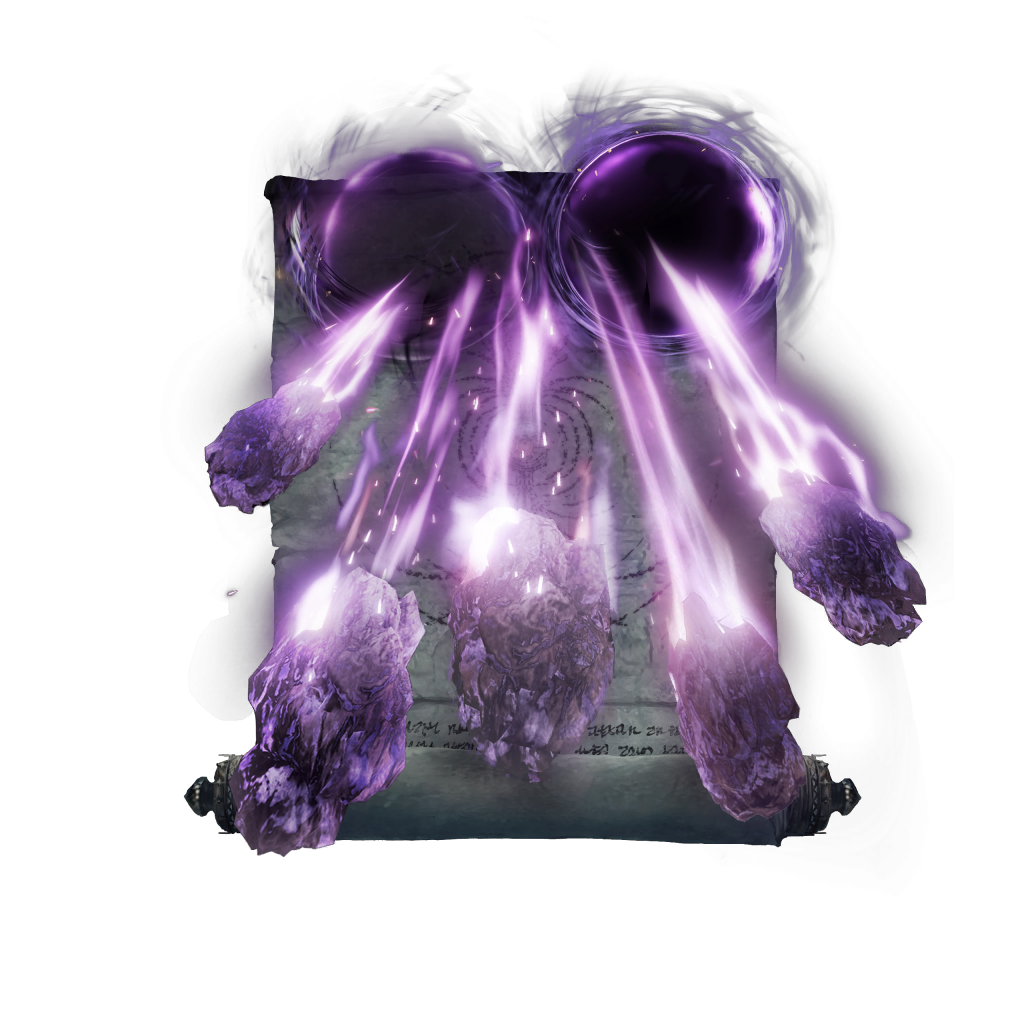
Burn O Flame!. - Fire Giant Incantation
-Pros:
Extreme damage potential if multiple flame pillars land.
Roughly less than a second of immunity frames right before the pillars of fire appear.
Insane crowd control, will knock up most humanoid enemies.
Solid AOE damage potential.-Cons:
Really situational on Single Target, especially if its not a big one.
RNG dependant on small single targets.
Has to be cast in melee range which poses the respective risks.
Frenzied Burst. - Frenzied Flame Incantation
-Pros:
Very long range flame incantation, if you can lock on something, you're basically in range.
Near Hitscan projectile.
Can be charged to further increase its damage.
Penetrates shields and targets when charged.-Cons:
Minor madness buildup (even though mostly irrelevant later on).
Long charge time.
Black Flame. - Godskin Apostle Incantation
-Pros:
Reliable
Decent damage
Max HP % DoT over 2 seconds
Can be charged to further increase its damage and gain a small blast radius.
Solid ''filler'' incantation
-Cons:
Lengthy time to charge
Pure Single Target unless charged
Bloodflame Blade - Blood Incantation
-Pros:
Added Fire damage to a weapon of your choice (limitations apply)
Added Hemorrhage build up -40 over 2 seconds- to a weapon of your choice (limitations apply)
Solid duration at 60 seconds
Can be buffed by any talisman/Cracked crystal tear that buffs fire damage
Can be used as an option to add an additonal element of damage to your build-Cons
Cannot be applied to weapons with an added elemental infusion, massively limiting your choices or forcing you to opt out of blood/frost/poison affinities
Cannot be applied to most weapons with an innate elemental infusion, further limiting your choices
The buff will be removed upon swapping the weapon away, requiring a re-cast to be applied again
VERY VERY IMPORTANT FOR WEAPON BUFFS
Incantation weapon buffs are Faith scaling, thus to get the maximum benefit you need to cast them through the Erdtree Seal. For example, Bloodflame Blade cast from Golden Order Seal +10 at 99 Int and 99 Fath gives 103 Fire damage, when if its cast through Erdtree Seal +10 at 99 Faith it gives 146 Fire damage.
Best Lightning Damage Incantations

As i explained in the introduction the incantations i will list as ''best'' are the ones that can be used in a plethora of scenarios while also packing a punch. Because this is mostly targeted to end game players, FP cost is not taken into account given how your endgame FP pool can support the spam of mostly anything. If your FP pool is limited because of a much lower level, you will have to personally judge your needs and adjust your playstyle and FP usage accordingly, conserving FP for troublesome harder enemies and using baseline cheap Incantations for fodder ones.
Personal Flask Allocation Preference: 2 Crimson Tear Flasks - 12 Cerulean Tear Flasks
Recommended Passive Talismans: Flock's Canvas, Godfrey Icon (if chargable), Lightning Scorpion Charm, Ritual Sword Talisman.
Recommended Proc Talismans: Blood Lord's Exultation, Kindred of Rot's Exultation, Red-Feathered Branchsword.
Ancient Dragon's Lightning Strike. - Dragon Cult Incantation
-Pros:
Extreme damage potential if a lot of Lightning Strikes land on the same target.
Can be charged to further increase its potential.
Solid AOE damage potential.-Cons:
Landing multiple Lightning Strikes on a single enemy is only possible if the enemy is big, making it a questionable Single Target Incantation.
Usually only usable against big groups of low health enemies or really big targets.
Has to be cast from melee range for maximum potential which poses the respective risks.
No hyper armor on cast, thus really easy to get knocked out of it.
Honed Bolt - Dragon Cult Incantation
-Pros:
Reliable
Spammable
Fast cast
Decent range
Decent ''filler'' incantation-Cons:
Underwhelming damage without proper talismans and off-hand Seal
AI can sometimes dodge
No AOE damage
Electrify Armament - Dragon Cult Incantation (NOT boosted by Gavel Stone Seal however)
-Pros:
Added Lightning damage to a weapon of your choice (limitations apply)
Exceptional duration at 90 seconds
Can be used as an option to add an additonal element of damage to your build
Can be buffed by any talisman/Cracked crystal tear that buffs lightning damage -Cons
Cannot be applied to weapons with an added elemental infusion, massively limiting your choices or forcing you to opt out of blood/frost/poison affinities
Cannot be applied to most weapons with an innate elemental infusion, further limiting your choices
The buff will be removed upon swapping the weapon away, requiring a re-cast to be applied again
Electrify Armament vs Vyke's Dragonbolt
The added Lightning damage of Electrify Armament is identical to that of Vyke's Dragonbolt. The difference is that Vyke's Dragonbolt lasts for 70 seconds isntead of 90, offers an additional +15% equip load and Increases Lightning damage taken by 35%, making Electrify Armament safer to use and more applicable to a variety of scenarios.
VERY VERY IMPORTANT FOR WEAPON BUFFS
Incantation weapon buffs are Faith scaling, thus to get the maximum benefit you need to cast them through the Erdtree Seal. For example, Electrify Armament cast from Golden Order Seal +10 at 99 Int and 99 Fath gives 194 Lightning damage, when if its cast through Erdtree Seal +10 at 99 Faith it gives 275 Lightning damage.
Lightning Spear. - Dragon Cult Incantation
-Pros:
Reliable
Solid range
Solid damage if charged along with a small AOE splash
Does not proc AI dodge if NOT charged
The go-to Lightning Incantation-Cons:
Lengthy-ish cast animation/charging
Pure Single Target unless charged
Best Holy Damage Incantations
As i explained in the introduction the incantations i will list as ''best'' are the ones that can be used in a plethora of scenarios while also packing a punch. Because this is mostly targeted to end game players, FP cost is not taken into account given how your endgame FP pool can support the spam of mostly anything. If your FP pool is limited because of a much lower level, you will have to personally judge your needs and adjust your playstyle and FP usage accordingly, conserving FP for troublesome harder enemies and using baseline cheap Incantations for fodder ones.
Personal Flask Allocation Preference: 2 Crimson Tear Flasks - 12 Cerulean Tear Flasks
Recommended Passive Talismans: Flock's Canvas, Godfrey Icon (if chargable), Sacred Scorpion Charm, Ritual Sword Talisman.
Recommended Proc Talismans: Blood Lord's Exultation, Kindred of Rot's Exultation, Red-Feathered Branchsword.
Discus of Light. - Golden Order Incantation
-Pros:
Practically a free incantation at the cost of 3FP
Decent damage with proper talismans
Pierces targets enabling interesting group clear/AOE capabilities
Spammable
Long range
Reliable
Solid ''filler'' incantation-Cons:
Returning discs occassionally fail to hit the mark due to angle, thus ''halving'' its damage
If not used with x2 Golden Order Seals + proper talismans damage is underwhelming
Triple Rings of Light - Golden Order Incantation
-Pros:
Decent damage, especially if all 3 rings hit on return
Solid AOE potential
Nearly undodgable by AI when spammed
Spammable-Cons:
Limited range
Enemy needs to be large for its full Single Target potential
Order's Blade - Golden Order Incantation (NOT buffed by Golden Order Seal however)
-Pros:
Added Holy damage to a weapon of your choice (limitations apply)
Exceptional duration at 90 seconds
Can be used as an option to add an additonal element of damage to your build
Can be buffed by any talisman/Cracked crystal tear that buffs holy damage
Buffed weapon deals an additional +100% damage against Undead enemies -Cons
Cannot be applied to weapons with an added elemental infusion, massively limiting your choices or forcing you to opt out of blood/frost/poison affinities
Cannot be applied to most weapons with an innate elemental infusion, further limiting your choices
The buff will be removed upon swapping the weapon away, requiring a re-cast to be applied again
VERY VERY IMPORTANT FOR WEAPON BUFFS
Incantation weapon buffs are Faith scaling, thus to get the maximum benefit you need to cast them through the Erdtree Seal. For example, Order's Blade cast from Golden Order Seal +10 at 99 Int and 99 Fath gives 194 Holy damage, when if its cast through Erdtree Seal +10 at 99 Faith it gives 275 Holy damage.
Honorable Mentions Of Damage Incantations

Incantations mentioned here are the ones that while sometimes strong, did not make the ''cut' either due to limitations or functionality. While completely usable, the ones mentioned above can do what these do better.
Stone of Gurranq - Bestial Incantation
-Pros:
Decent damage
Decent range
Decent stance/poise damage-Cons:
3 stamina cost higher than Giantsflame Take Thee
Abyssmal tracking
Terrain limitations
Really low splash damage/Low AOE potential
Spam is surprisingly limited by stamina cost
Bloodboon - Blood Incantation
-Pros:
Widespread area of denial
Decent damage
Hemmorhage build up-Cons:
Hard to place properly, need to free aim
If the enemy is moving towards you, they will more often than not simply run over the flames
Really low build up at 30/s, requires multiple casts and immense placement to proc Blood Loss
Scouring Black Flame - Godskin Apostle Incantation
-Pros:
Good AOE potential
Solid damage when charged
Max HP % DoT over 2 seconds
Can sometimes hit large enemies twice-Cons:
Lengthy charge time
Numerous and obnoxious terrain limitations
Usually requires free aim to hit your target
Requires a lot of usage to properly judge its range through experience
Catch Flame - Fire Monk Incantation
-Pros:
Nearly instant
Chain-castable
Very versatile, can be used out of jumps,rolls and sprint-Cons:
Underwhelming damage
Does not stagger enemies on hit allowing them to react
Extreme melee range poses the respective risks
Overall a weaker but more versatile version of "O Flame!"
Every Breath Incantation - Dragon Communion Incantations
-Pros:
High damage
Solid AOE damage potential
Decent range
Numerous elements to pick from (Borealis' Mist-Frost, Ekzyke's Decay-Rot etc.)-Cons:
Ridiculous FP cost even for a completely maxxed out character at 90-156FP per cast
No hyper armor on cast allowing enemies to knock you out from it
Long start up animation
Very situational
Black Flame Blade - Godskin Apostle Incantation (NOT boosted by Godslayer's Seal however)
-Pros:
Added Fire damage to a weapon of your choice (limitations apply)
Can be buffed by any talisman/Cracked crystal tear that buffs fire damage
Can be used as an option to add an additonal element of damage to your build
Max HP % DoT over 2 seconds-Cons
Cannot be applied to weapons with an added elemental infusion, massively limiting your choices or forcing you to opt out of blood/frost/poison affinities
Cannot be applied to most weapons with an innate elemental infusion, further limiting your choices
Hilariously short duration at 7 seconds, forcing you into very unique playstyles of buffing mid-swinging and mid-combos. While this may be appealing to some, it is something you need to get used to and its more often than not inferior to simply using Black Flame.
Best Utility / Buffing Incantations


Same as the offensive incantations, the utility ones listed are those that can be used in a variety of scenarios and offer numerous new opportunities of playstyle. Because this is mostly targeted to end game players, FP cost is not taken into account given how your endgame FP pool can support the spam of mostly anything. If your FP pool is limited because of a much lower level, you will have to personally judge your needs and adjust your playstyle and FP usage accordingly, buffing strategically or waiting for specific HP thresholds before you use a healing incantation.
Personal Flask Allocation Preference: 2 Crimson Tear Flasks - 12 Cerulean Tear Flasks
Recommended Talismans: Old Lord's Talisman (when it applies on the HP/s Incantations and Buff duration increase).
Erdtree Heal
-Pros:
Will full heal your entire bar when cast from the Erdtree Seal (2100HP)
Achieves the same result as x2+ Crimson Flasks at the cost of 65FP
Can heal Summons/Torrent/Cooperators with its AOE
Can be cast on horseback
Immense sustain on Open World/Dungeons/Fights
Roughly less than a second of immunity frames right before the heal occurs-Cons:
Lengthy cast time
Need to be stationary to cast
Need to know fight ''windows'' to be able to get a cast through without being hit
Law of Regression
-Pros:
Will cure every ailment
Cure every debuff at the cost of a single Incantation slot
Enables immense sustain vs any region
Can be cast on horseback-Cons:
Need to remain stationary to cast
Will also remove buffs (Golden Vow, Bloodflame Blade etc)
Blessing of the Erdtree
-Pros:
Highest HP/s Incantation at 12HP/s
Solid duration at 90 seconds for a total of 1080HP
Can be pre-cast before a hard encounter to provide slow sustain over its course
Duration can be prolonged by Old Lord's Talisman to 117 seconds for a 23.4HP/FP and a total of 1404HP
Can heal Summons/Torrent/Cooperators with its AOE
Can be cast on horseback-Cons:
Need to remain stationary to cast
Need to know fight ''windows'' to be able to get a cast through without being hit
Bestial Vitality
-Pros:
Most efficient HP/s Incantation at a shocking 33HP/FP
Solid duration at 120 seconds for a total of 600HP
Duration and efficiency can be prolonged by Old Lord's Talisman to 156 seconds for a 43HP/FP and a total 780HP
Can slow-walk during its cast
Can be pre-cast before a hard encounter to provide very low sustain over its course
Can be cast on horseback-Cons:
Much lower HP/s compared to Blessing of the Erdtree at 7HP/s lower
Cannot affect friendly targets due to its Single Target nature
Need to avoid a ton of attacks after being hit for the heal to be meaningful
Protection of the Erdtree
-Pros:
Blanket elemental damage negation against all types of elemental damage at 30%
Can buff Summons/Cooperators with its AOE
Solid duration at 70 seconds
Can be pre-cast before a hard encounter to provide higher survivability
Can be cast on horseback-Cons:
30% less damage negation compared to the element-specific Greater Elemental Barriers (Barrier of Gold, Golden Lightning Fortification, Flame Protect Me, Lord's Divine Fortification)
Need to remain stationary to cast
Darkness
-Pros:
Completely resets aggro of afflicted enemies for roughly 7 seconds
its AOE allows for entire groups of enemies to be reset
Can buy you time to heal, reposition or flee
Aggro resetting also resets ''surprise damage'' for an extra 20% on your next hit
Creates numerous openings for backstabs
Creates numerous openings for charged hard hitting Incantations or AoW that would be hard to pull off otherwise like Carian Grandeur
Allows you to single out and nuke strong enemies on big groups without having to fight all of them at the same time
Generous cloud hitbox afflicting enemies even if they dont enter it entirely-Cons:
Lengthy cast until the Darkness actually appears
Enemy needs to be touched by the Darkness in order to reset
Ranged enemies are completely unphased by it and can target you/snipe you from affar even if you are in the middle of the cloud
Enemy attack animations that have started before the cloud influenced them will continue and can still hit you
Knowledge of which enemies are immune to it is required to not be caught off guard by them
Most if not every boss is immune to it, making it a strictly world/dungeon Incantation
Darkness utility example paired with Carian Grandeur
Darkness Recovery example after a heavy hit
Flame Grant me Strength
-Pros:
Solid damage buff of 20% Physical Damage
Solid damage buff of 20% Fire Damage
Decent Stamina Recovery buff at 5/s
Duration can be prolonged by Old Lord's Talisman to 39 seconds.
Multiplicative stacking with Golden Vow
Can slow move while casting-Cons:
Very short duration at 30 seconds requiring often use
Golden Vow
-Pros:
Decent damage buff of 15% All Damage
Decent All Damage negation of 10%
Solid duration at 80 seconds not requiring often use
Duration can be prolonged by Old Lord's Talisman to an excellent 104 seconds
Damage buff stacks multiplicatively with Flame Grant me Strength
The best "use and forget" buff incantation
Can be cast on horseback-Cons:
Stationary during cast
Howl of Shabriri
-Pros:
Very high All Damage buff of 25%
Deals high Madness build up on enemies within its proximity (even though the Incantation is mostly used for its damage buff)
When used with Old Lord's Talism, its duration becomes decent at 52 seconds-Cons:
Heavy damage taken increase of 30%
Awakes idle or sleeping enemies when cast close to them, forcing good planning on when to use the Incantation
Rather low duration without Old Lord's Talisman at 40 seconds
Gain the taunt effect on use, attracting enemy aggression and making them more likely to attack you instead of your Summon/Cooperator
Stationary during cast
Detailed Incantation Playstyle
Now that we've been through the Pros and Cons of the strongest offensive and utility/defensive Incantations, it's time for a more detailed dive into the idea of them, how you can make a functioning build and the playstyles that those enable.
If you already had something in mind and you were experienced enough to just have a peak into their Pros and Cons to make a decision between two or three of them, then you can safely skip this part.
A functioning Incantation focused build requires a solid balance between offensive and utility/defensive incantations. While destroying everything is fun, if you cannot sustain yourself in combat then a lot of your runs will be cut short. Utility is a very underrated concept, especially for new players, a colossal mistake given how utility is what enables your strong offense to take place.
Starting from my last point above, regardless of whether im playing full Incantations, full Sorcery, a mix of those or neither, there are 3 Incantations that are never missing from my memory slots.
1) Erdtree Heal
2) Law of Regression
3) Golden Vow
Erdtree Heal:
The later the game goes, and the greater your health pool gets, you are slowly realizing the inability of Crimson Tear Flasks to keep up with it. Once your Vigor is maxxed and your HP reaches 2100 you will need a minimum of 2 Crimson Tear Flasks to recover from a really heavy hit or a series of small ones. This is where this Incantation comes in big. While it requires practice to figure out the proper timings and windows that it can be used, using this from the Erdtree Seal will always top your entire health pool at the cost of 65FP. This is very important because a single Cerulean Tear Flask will recover 220FP. That means that with a single Cerulean Tear flask you can top your entire health pool nearly 4 full times. So in the endgame, if you know when (something that you have to practice to gain, unfortunately there is no easy way around this), a single Cerulean Tear Flask practically equals 8 Crimson Tear flasks. I cannot stress enough how important this Incantation is at keeping you strong in dungeons and open world, i highly recommend you inherit it in your build.
Law of Regression:
One of the major mechanics of the game is the one of status effects. Numerous status effects can be applied by both you and your enemies. In this segment we focus on the latter part. Receiving the wrong status effect at the wrong time can mean certain death. Specifically, Scarlet Rot is an extremely heavy and lengthy DoT, Poison while very light on damage, lasts an eternity and Death Blight results in an Instant death when the bar fills up regardless of your health at the time. While you can resistance target all of them, its really hard to prevent the application of all of them at all times, something will eventually build up on you. This is were Law of Regression shines, you don't care what and when is going to build up on you, since it will remove absolutely all of them. You no longer need to analyze which region you are going for and heavily plan your resistances/Incantations for it, Law of Regression has you covered regardless of what you will face. It is also worth noting that it can clear the build up process as well, you don't have to wait for the status to proc, this is very important for Death Blight, given how when the status builds, you die.
Golden Vow:
Your bread and butter when you need that tiny bit extra damage to one-shot a hard enemy with a hard hitting Incantation, which also comes with a sweet and definitely not negligible 10% reduction to All Damage received. Golden Vow is the most ideal use-and-forget buffing Incantation due to its lengthy duration, having no negative effects associated with it and buffing All Damage by 15%, that means that you do not care about what Damage type Incantation/Sorcery/Attack you are using, Golden Vow will buff all of them. It gives you this extra inch both on offensive output and on defensive, helping you make it through a tough area. It is important to note that having it to a memory slot and not using it is not some sort of ''misplay''. Waiting for the right time or conserving FP is a solid strategy, especially when you feel like you are cruising through your enemies and you have no need of something extra.
Moving on to offensive Incantation options.
When deciding on what offensive Incantations you'd want to run, there are 5 things that you need to always have in mind to not be caught off-guard.
1) Short Range
2) Long range
3) AOE Damage
4) Damage mixture
5) Boss Killing
The first point is pretty self-explanatory, Incantations that will serve you well in close range, usually those that have a really quick cast and a quick charge time. In addition, for short range Incantations you can opt to use staggering ones, to ensure you always have breathing room, especially when fightning big beefy enemies. Really good options i run for short range are O Flame!, offering you a very quick solution to dispatch melee enemies with high damage and Giantsflame Take Thee, one that while it has lengthy charge time, its uncharged version comes out fast and offers you stagger, solid damage and AOE in case you get swarmed.
The second point is usually covered by Lightning Spear and Frenzied Burst, even though using NON Lock On Giantsflame Take Thee can also fill this role. Lightning Spear helps you opt out of Fire-only damage and gives you a very solid and accurate option to snipe enemies from a decently far range. If something is further away and it is not Fire Immune, Frenzied Burst is by far the best long range option of an Incantation out there, being at max range also gives you time to charge it up unleashing its heavy damage potential. It is worth mentioning that Discus of Light also has very solid range and it will add a 3rd element to your build, that of Holy damage.
Third point is usually covered by Giantsflame Take Thee (at this point you can already see why this is one of if not the best Incantation) and Ancient Dragon Lightning Strike. Giantsflame Take Thee will always be the extremely reliable option being able to be targetted at specific centered units, maximizing the AOE splash while Ancient Dragon Lightning strike offers a more wide-spread RNG based option in case your targets are Fire Immune or heavily fire resistant (Man-serpent and Fire Monk respectively). It is worth noting that Triple Discs of Light will also serve you extreme well on AOE and will also allow you to kite backwards while still doing damage with their innate ''return to caster'' ability.
The fourth point is mostly already covered at this point. Assuming that you have implemented at least 2 different types of damage, in this case Fire+Lightning or Fire+Holy etc, you will have an alternative option to deal with enemies that turn up to be resistant or immune to your primary planning.
Lastly the fifth point is something that you don't have to deal with right away. Meaning that you can always rest at the grace before the boss, and completely revamp your Incantation kit to prepare yourself for the boss. Solid Incantation options to boss kill are Giantsflame Take Thee combined with Oil Pots and Flame Grant me Strength, Ancient Dragon Lightning Strike along with Burn O Flame! if the boss is large, Black Flame if you want to take advantage of the Max HP % burn it offers you, O Flame! if its one that does not punish melee range and lastly Triple Rings of Light if its vulnerable to Holy damage and you want to spam it out of existence.
Example Incantation Build:
1)Erdtree Heal
2)Law of Regression
3)Golden Vow
4)Giantsflame Take Thee
5)Lightning Spear
6)Frenzied Burst
7)Ancient Dragon Lightning Strike
8)Flame Grant me Strength
9)Discus of Light
Boss-Specific Incantation Buff Sequence
While you can stack a ludicrous amount of buffs to increase your damage to unbelievable levels, unless you are going for an absolute one shot, a simple, more ''sane'' amount of buffs will also work wonders for you, and this is the one i'll explain here.
You want to buff by first using the longest duration ones, and then moving on to the shorter duration ones, so by the time you have finished with the buffs the short ones havent expired.
Recommended Boss Killing Fire Incantations: Giantsflame Take Thee, Burn O Flame!
Recommended Talismans for Fire Damage: Fire Scorpion Charm, Godfrey Icon, Flock's Canvas Talisman, Ritual Sword Talisman
Simple Fire Damage Buffing Sequence:
1) Flask of Wondrous Physik - Flame-Shrouding Cracked Tear +20%
2) Golden Vow +15%
3) Howl of Shabriri +25%
4) Rallying Standard - Commander's Standard AoW +20% (only if you DON'T use Golden Vow since they DON'T stack)
5) Contagious Rage - Jellyfish Shield AoW +20% OR passively having Giant's Seal on Off Hand if its a Fire Giant Incantation +20% (identical damage increase)
6) Oil Pot +50% Fire damage taken debuff on enemy
7) Use charged Burn O Flame! if the target is large or charged Giantsflame Take Thee on smaller
8) Oil Pot
9) Re-use the incantation you picked at 7
10) Repeat steps 8-9 until buffs run out
IMPORTANT
Charging the Incantation may not be possible on certain fights, use your judgment to figure out whether you have the time to charge it or not.
Once buffs are out, the boss is either dead or should be close enough to death that its not worth it to put the time to re-buff.
Recommended Boss Killing Lightning Incantation: Ancient Dragon's Lightning Strike
Recommended Talismans for Fire Damage: Lightning Scorpion Charm, Godfrey Icon, Flock's Canvas Talisman, Ritual Sword Talisman
Simple Fire Lightning Buffing Sequence:
1) ]Flask of Wondrous Physik - Lightning-Shrouding Cracked Tear +20%
2) Golden Vow +15%
3) Howl of Shabriri +25%
4) Rallying Standard - Commander's Standard AoW +20% (only if you DON'T use Golden Vow since they DON'T stack)
5) Contagious Rage - Jellyfish Shield AoW +20%
6) Use charged Ancient Dragon's Lightning Strike
7) Re-use charged Ancient Dragon's Lightning Strike until buffs run out
IMPORTANT
Charging the Incantation may not be possible on certain fights, use your judgment to figure out whether you have the time to charge it or not.
Once buffs are out, the boss is either dead or should be close enough to death that its not worth it to put the time to re-buff.
Staves

Some basic information on Glintstone Staves and their respective damage boosts.
The Staff in your Off Hand, just as the one on your Main Hand provides its damage boost to a specific school of Sorceries regardless of whether you are casting through it. This effect also applies while on horseback, simply having a specific Staff on your Off Hand will provide the damage boost benefit regardless of the fact that its ''greyed out'' and cannot be used.
The damage of your Sorceries is based on the total Sorcery Scaling stat on the Staff you are using, the higher the better.
The following damage boosts on specific Sorceries stack multiplicatively with each other if your Main Hand Staff is the same as your Off Hand Staff. For example, having a Carian Regal Scepter on your Main Hand will increase Full Moon Sorceries damage by 10%, but having another on your Off Hand will further increase the damage of Full Moon Sorceries by 10%. The Staff upgrade level does NOT influence the said bonuses.
Astrologer's Staff: No bonus
Glintstone Staff: No bonus
Academy Glintstone Staff: No bonus
Digger's Staff: +20% damage on Stonedigger Sorceries
Demi-Human Queen's Staff: No bonus
Azur's Glinstone Staff: Reduces cast time of Sorceries and Incantations by 8% while increasing FP cost by 20%
Lusat's Glintstone Staff: Very high innate Sorcery Scaling, no actual % damage bonus
Carian Glinstone Staff: +15% damage on Carian Sword Sorceries
Carian Glintblade Staff: +15% damage on Glintblade Sorceries
Carian Regal Scepter: +10 damage on Full Moon Sorceries
Albinauric Staff: Scales with arcane, no actual % damage bonus
Staff of Loss: +30% damage on Invisibility Sorceries, does NOT buff Unseen Form in any way
Gelmir Glintstone Staff: +15% damage on Lava Sorceries
Crystal Staff: +10% damage on Crystallian Sorceries
Rotten Crystal Staff: +10% damage on Crystallian Sorceries, the Rot build up is ONLY for melee attacks and does NOT apply to any spell
Meteorite Staff: +30% damage on Gravity Sorceries, the staff cannot be upgraded through any means
Staff of the Guilty: +20% on Thorn Sorceries. the Bleed build up is ONLY for melee attacks and does NOT apply to any spell
Prince of Death's Staff: +10% on Death Sorceries
Staves are really straight forward with 1 being the absolute best at every scenario when maxxed.
The Best Staff.
Prince of Death's Staff.
Maxxing Requirements: 99 Strength, 99 Intelligence, 99 Faith.
Sorc Scaling 448
Prince of Death's Staff features the highest Sorcery Scaling of all staves at 448. It should always be your main hand staff regardless of what you are casting and your off hand should match the sorcery you are using. For example, for Night Comet, you will be casting from Prince of Death's staff and your off hand staff will be Staff of Loss.
To maximize your damage it is crucial to know what school of Sorcery you are using and have the appropriate Staff on your Off Hand.
VERY IMPORTANT
While Staff of Loss features a ludicrous 30% damage boost for Invisibility Sorceries (Night Shard, Night Comet) which also stacks multiplicatively with itself if you have another on your Off Hand, it still gets outperformed by a tiny amount with a Prince of Death's Staff on your main hand and a Staff of Loss on your off hand.
VERY VERY IMPORTANT FOR WEAPON BUFFS
Scholar's Armament scales ONLY through the INT portion of Sorcery scaling of the Staff. That means that to get the highest amount of Magic damage from it, you need to cast it through a Staff that has S tier on Sorcery scaling which comes purely from INT and no other stats. That staff is Lusat's Glintstone Staff. So for Scholar's Armament and other similar buffs ONLY, Lusat's Glintstone Staff is the best staff to be used.
Best Damage Sorceries

When deciding on what the best Sorceries are, one must take into account the ability of a said Sorcery to connect with its target. That means that while some Sorceries may have solid damage output on paper, in practice they are completely irrelevant against enemies that spam dodge due to their inability to ever land. This is one of if not -the- most important factor when deciding on the strength of a Sorcery.
Personal Flask Allocation Preference: 2 Crimson Tear Flasks - 12 Cerulean Tear Flasks
Recommended Passive Talismans: Graven-Mass, Godfrey Icon (if chargable), Magic Scorpion Charm, Ritual Sword Talisman.
Recommended Proc Talismans: Blood Lord's Exultation, Kindred of Rot's Exultation, Red-Feathered Branchsword.
Additional Recommended Gear:
Azur's Glintstone Crown: +15% damage on Comet Azur, +10% damage on Glintstone Cometshard and Comet at the cost of 15% extra FP on all Sorceries cast while wearing it
Lusat's Glintstone Crown: +15% damage on Stars of Ruin, +10% damage on Star Shower and Glintstone Stars
Snow Witch Hat: +10% on Cold Sorceries
IMPORTANT
While it may be confusing due to its ingame description, each piece of the Spellblade Set provides +2% Magic and Cold damage for Ashes of War and Skills, NOT Sorceries.
Comet - Glintstone Sorcery
-Pros:
Very high damage
Decent range
Can be charged to further increase its high damage
Penetrates targets offering AOE capabilities
Spammable
Good choice for a ''filler'' sorcery when your FP pool supports it in the end game-Cons:
Procs AI dodge making it obsolete against some enemies
Lengthy-ish charge time
Comet Azur - Azur's Primeval Sorcery
-Pros:
Extreme damage potential
Penetrates targets, offering AOE capabilities
Excellent Boss Killer Sorcery under specific circumstances-Cons:
Requires Unlimited FP Crystal Tear (Cerulean Hidden Tear) for its Boss Killer ability to ''activate''
Terrain limitations, cannot be used against targets a level or more below you
Need to be stationary to channel
If the target moves out of the beam, the beam will not track, it requires manual recast at the target's new position
Needs numerous ticks of damage to reach its ''high damage potential''
Long channel start up time, requiring strategic positioning
Night Comet - Invisibility Sorcery
-Pros:
Solid damage
Solid range
Can be charged to further increase its solid damage
It will NOT proc AI dodge, allowing you to hit every enemy regardless of how obnoxious their dodging is
Penetrates targets
Spammable
Excellent ''filler'' Sorcery
Usually a superior version of ''Comet'' due to its ability to consistently land-Cons:
Lengthy charge time
Star Shower - Glintstone Sorcery
-Pros:
Decent damage
Solid range
Can be charged to further increase its damage
Impeccable tracking allowing it to almost always connect with its target
Spammable
Excellent ''filler'' Sorcery-Cons:
Lengthy charge time
No AOE, limiting it to pure Single Target
Stars of Ruin - Lusat's Primeval Sorcery
-Pros:
Solid damage
Can be charged to further increase its damage
Relatively fast charge time
Impeccable tracking allowing it to almost always connect with its target
Spammable
Situationally a superior version of ''Star Shower'' at the cost of extra FP-Cons:
While the number of projectiles is high, strong beefy enemies will just endure through it, not getting staggered
Average range
No AOE, limiting it to pure Single Target
Example of the really high damage Stars of Ruin can achieve with just 2 buffs / Example of Omens not being staggered, regardless of projectile number
Ancient Death Rancor - Death Sorcery
-Pros:
Decent damage
Solid range
Impeccable tracking allowing it to almost always connect with its target
Can be charged to further increase its damage
Very heavy stance damage, perma-staggering most humanoid enemies including some bigger ones like Omens
Spammable
Excellent ''filler'' Sorcery-Cons:
Lengthy charge time
Slow traveling projectiles give it a more ''patient'' type of damage than an instant/direct one
Very low AOE damage requiring enemies to be very tightly stacked to splash
Ancient Death Rancor permanent stagger example vs Omens
Adula's Moonblade - Carian Sword Sorcery + Cold Sorcery
-Pros:
Solid damage
Large Slash allows for exceptional AOE capabilities
Frostbite build up
Can occasionally stagger humanoid enemies rather well
Spammable
Can double hit an enemy on first cast with both blade and the projectile-Cons:
Enemies with hyper armor moves that break the chain stagger can massively punish you on melee range
Short range due to it being a Sword Sorcery (even though projectile will travel quite further)
Magic Glintblade - Carian Glintblade Sorcery
-Pros:
Solid damage
Solid range
Can be charged to further increase its solid damage
Spammable
Its nature allows you to cast numerous blades and switch to a different sorcery while they are preparing
Allows you to ''bypass'' shields with strategic play and rotating shielded enemies properly
Exceptional ''filler'' Sorcery
Can manipulate terrain very well due to where it appears after the cast-Cons:
Requires solid knowledge of its range to not kite enemies outside of it while the blade is preparing
A more ''patient'' type of damage than an instant/direct one
Loretta's Mastery - Loretta's Sorcery
-Pros:
Extreme range, if you can lock on something, you're basically in range
Solid damage
Can be charged to further increase its solid damage
Impeccable tracking, allowing the arrows to almost always connect with their target
Master open-world sorcery allowing you to kill enemies from very very far away without ever being at risk
Exceptional open-world dragon killer due to all 4 arrows being able to track their heads very well and being mounted on Torrent gives you a vantage point to avoid terrain interference-Cons:
Terrain limitations on the furthest side arrow when you're not mounted, usually forcing it to explode on the floor right after release
Very long charge time, making it really hard to use on tight boss fights
Loretta's Mastery Exceptionaly safe range example vs dragons
Honorable Mentions Of Damage Sorceries

Sorceries mentioned here are the ones that while sometimes strong, did not make the ''cut' either due to limitations or functionality. While completely usable, the ones mentioned above can do what these do better.
Rock Sling - Gravity Sorcery
-Pros:
Solid tracking, enemy AI dodges on cast, allowing the rocks to safely land after
Decent stance damage
Decent range
An ok ''filler'' sorcery-Cons:
Underwhelming damage
Terrain limitations destroy rocks mid-flight
Nearly unusable from close range
Cannot be charged
Meteorite of Astel - Gravity Sorcery
-Pros:
Extreme damage potential
Extreme stagger potential
Solid AOE damage and crowd control capabilities
Solid Boss Killer if the size of the boss is very big like Dragons/Elden Beast and you position strategically as close to the boss as possible, practically opening the Meteor portals on top of it-Cons:
Unrealistically situational, practically only usable against massive targets or numerous small ones
If used against anything non massive, its damage is completely based on RNG
Very FP hungry like Comet Azur, requiring Cerulean Hidden Tear to be used extensively
Carian Greatsword - Carian Sword Sorcery
-Pros:
Decent damage
Good cleave from a wide-arc slash
Solid stance damage, can chain stagger most enemies
Relatively spammable
A good choice for when enemies close the gap-Cons:
Enemies with hyper armor moves that break the chain stagger can punish you massively on melee range
Unless the enemy is Frost resistant or Frost immune, Adula's Moonblade is usually a superior option
Melee range locked, unlike Adula's Moonblade that features a projectile after the slash
Carian Slicer - Carian Sword Sorcery
-Pros:
Very versatile usage, can be used after jumps, rolls or sprint
Highly spammable
Its spam enables really high DPS on paper
Comes out really quickly
Can chain stagger some basic enemies-Cons:
Very few enemies will get chain staggered by Carian Slicer
Really unimpressive damage unless you're allowed to chain spam
Really low stance damage, allowing most enemies to react and massively reduce its DPS potential
Cannon of Haima - Glintstone Sorcery
-Pros:
Very high damage when charged
Very high AOE splash radius
Its massive splash radius can kill enemies through walls
Solid stance damage, instantly knocking down most enemies-Cons:
Rather underwhelming when uncharged
Ridiculously long charge time
Its really long charge time makes it really situational, especially when you face enemies that quickly gap close
Best Utility / Buffing Sorceries
Unseen Form - Invisibility Sorcery (NOT buffed by Staff of Loss however)
-Pros:
Halves aggro range
Enables a variety of different strategies
Makes specific enemy-crowded parts smoother to run through
Enables complete enemy skipping when used properly
Stacks with AoW Assassin's Gambit to reduce aggro range to a ridiculous extent-Cons:
Does NOT silence footsteps like Assassin's Gambit
To be used properly you need Crepus' Vial or Black Knife Armor (NON alterted) to silence your footsteps
Requires extensive knowledge of the game to understand what you can and cannot do with it
Unseen Form aggro range example
Unseen Form STACKED with Assassin's Gambit aggro range example
Terra Magica - Glintstone Sorcery
-Pros:
Extreme Magic Damage buff of 35%
Boosts every source of Magic Damage not just Sorceries
Quick cast time
Relatively generous width of the ground sigil, allowing it to be pre-placed outside of Boss rooms and still receive the buff when entering the fog wall as long as you dont move much further in-Cons:
Low duration at 30 seconds which can NOT be extended by Old Lord's Talisman
Buff is limited by floor Sigil, massively reducing the freedom of your movement
The buff only persists for 1.5 second after exiting the Sigil on the floor
Scholar's Armament - Glintstone Sorcery
-Pros:
Solid duration at 90 seconds
Can buff the weapon with extremely heavy Magic damage when cast from Lusat's Glintstone Staff
Can be used as an option to add an additonal element of damage to your build
Can be buffed by any talisman/Cracked crystal tear that buffs magic damage-Cons:
Cannot be applied to weapons with an added elemental infusion, massively limiting your choices or forcing you to opt out of blood/frost/poison affinities
Cannot be applied to most weapons with an innate elemental infusion, further limiting your choices
The buff will be removed upon swapping the weapon away, requiring a re-cast to be applied again
VERY VERY IMPORTANT FOR WEAPON BUFFS
Scholar's Armament is Sorcery scaling based (ONLY from the INT portion), thus to get the maximum benefit you need to cast them through the Lusat's Glintstone Staff. For example, Scholar's Armament cast from Prince of Death's Staff +10 at 99 Int 99 Faith gives 205 Magic damage, when if its cast through Lusat's Glintstone Staff +10 at 99 Int it gives 322 Magic damage.
Starlight - Glintstone Sorcery
-Pros:
Illuminates surroundings, making caves and other light-limited areas easier to navigate
Long duration at 180 seconds-Cons:
The existence of Lantern renders Starlight obsolete, given how you can have nearly the same effect without a limited duration or using a Memory Slot
Detailed Sorcery Playstyle
Now that we've been through the Pros and Cons of the strongest offensive and utility/defensive Sorceries, it's time for a more detailed dive into the idea of them, how you can make a functioning build and the playstyles that those enable.
If you already had something in mind and you were experienced enough to just have a peak into their Pros and Cons to make a decision between two or three of them, then you can safely skip this part.
While Incantations offer a variety of defensive/utility options, unfortunately Sorceries do not, the selection for utility is very limited and the one for sustain entirely absent. That means that as a full Sorcery build your arsenal will be mostly consisted of offensive options, something that can prove a true struggle against difficult areas without a lot of breathing room (grace sites) in between. While you may be tempted to allocate much more to your Crimson Tear Flasks over your Cerulean Tear Flasks, that will result in extremely limited aggressive options since more often that not you'll end up conserving. I cannot stress enough how highly i recommend to run Erdtree Heal (or a lower version if you can't afford it) and Law of Regression along with any Sorcery you decide, the potential that these two Incantations will unlock is inconceivable, and its something that you really need to deeply consider in order to make your runs smoother.
As far as Utility Sorceries go:
Unseen Form is always a solid option to help you skip some really hard enemies that you can't currently deal with with your kit, or you ended up taking one too many hits and your run is scuffed. The only thing that you really need to be careful of, is as i mentioned on my Utility Sorcery List, you need to know exactly what you are doing with Unseen Form in order to use it properly, or else it will just occupy a memory slot with you believing it's completely broken and it doesn't work.
Terra Magica is another option that should rarely miss from your kit. While its stationary nature can be difficult to get used to, once you realize that it's not something that you need 100% uptime on and its purely something that will help you dismantle specific hard enemies, the full potential of Terra Magica unlocks. It is definitely something worth investing a memory slot into.
I do NOT recommend Starlight due to the existence of Lantern, and i do NOT recommend Lucidity either due to the existence of Law of Regression.
As i explained in the intro of this section with more detail, i HIGHLY recommend a Healing Incantation along with Law of Regression. While a Golden Vow would be a solid option as well, unless you need the damage reduction it provides, Terra Magica will be sufficient for a damage boost when used properly.
Moving on to offensive Sorcery options.
When deciding on what offensive Sorceries you'd want to run, there are 5 things that you need to always have in mind to not be caught off-guard.
1) Short Range
2) Long range
3) AOE Damage
4) Damage mixture
5) Boss Killing
While Sorceries are very limited to their utility/sustain function, they are actually extremely versatile on their range, meaning that short and long range can be fullfilled by numerous different Sorceries. A good short range option that i like to run for things that rush you is Comet. Comet hits really hard and its also piercing, massively helping clear out multiple enemies if you are being swarmed. In the case that you are facing an infamous dodging enemy, you can use Night Comet instead, but regardless, even through an enemy dodge, Comet will buy you enough breathing room. Another solid option would be Star Shower. Comes out fast, and tracks very well, usually making quick work of fodder close range enemies. Lastly Ancient Death Rancor can help you a lot to perma stagger particular hard enemies with lots of HP so they never connect with you. Assuming you are not running a shield on the Off Hand (which sometimes does help, its something that comes down to your personal judgment), allowing an enemy to reach absolute melee range usually turns into a tragedy. Adula's Moonblade tends to bail you out when that happens, massively cleaving everything while Frostbitting them at the same time. Carian Greatsword and Carian Slicer are honorable alternatives in case the enemy that made it close and is Frost resistant.
The second point is more or less already covered from my first. Night Comet, Comet, Ancient Death Rancor, Star Shower and additionally Stars of Ruin with Magic Glintblade are solid average/long-ish range options. If you want to engage something from a mile away that is not locked behind a Boss-room like a Dragon and you never even want to get close, Loretta's Mastery has you covered. While it may appear limited-use, and it sometimes is, Loretta's Mastery is one of those Sorceries that once you get used to, you will always dedicate a slot to it, because open-world practically becomes a cruise with it.
Unlike Incantations that have some hardcore AOE damage options, for Sorceries, the third point is mostly covered by Sorceries that have innate cleave, like Comet, Night Comet, and Adula's Moonblade if the enemies are more widely spread and not lined up. While i find its charge time ridiculous and its uncharged damage is unfortunately disappointing, Cannon of Haima can definitely resolve quite a few AOE damage situations, you can try it out and see if it's for you, the reason i rarely run it is because getting the charged version off, means that you probably haven't yet engaged the enemies, at which point, every strong offensive Sorcery can work.
Damage mixture is also a really tricky point when Sorceries are considered, given how the entirety of your pool is Magic damage with very few exceptions. The only true options you have to mix up your damage with a Sorcery build is a Sorcery like Rock Sling which deals pure physical damage. Unfortunately, as i mentioned on its Pros and Cons, its a very situational and underwhelming Sorcery, so while you will be mixing your damage, you will also be lowering it a lot. While the option of Magma Sorceries also exists, you have probably noticed that none of them is mentioned in this guide, that's because they are all extremely sub-par to even the honorable mention Sorceries, and i would NOT recommend anyone using them. The good news is, that if you exclude Rennala and Battlemages, very few enemies are resistant to magic damage, or at least resistant enough to cause you significant troubles. While battling Rennala, Rock Sling will be nearly mandatory if you do not want to use a melee weapon because her Magic damage reduction is 80%.
Lastly the fifth point is something that you don't have to deal with right away. Meaning that you can always rest at the grace before the boss, and completely revamp your Sorcery kit to prepare yourself for the boss (especially since Comet Azur occupying 3 memory slots and being nearly a pure boss killing sorcery can be limiting enough for you to decide not to use it on your way to the boss). Solid Sorcery options to boss kill are Comet Azur, Comet/Night Comet, Stars of Ruin along with Meteorite of Astel if the boss is large and Ancient Death Rancor if you want to take advantage of its innate stagger on most human-build enemies for a more relaxed boss fight. Of course, a properly used Comet Azur (and a boss where it can be used against) or a well placed Meteorite of Astel cast will always be the superior choices for extremely quick kills.
Example Sorcery Build:
1)Night Comet
2)Magic Glintblade
3)Star Shower
4)Unseen Form
5)Terra Magica
6)Ancient Death Rancor
7)Comet Azur
8)Carian Greatsword or Adula's Moonblade
Boss-Specific Sorcery Buff Sequence
While you can stack a ludicrous amount of buffs to increase your damage to unbelievable levels, unless you are going for an absolute one shot, a simple, more ''sane'' amount of buffs will also work wonders for you, and this is the one ill explain here.
You want to buff by first using the longest duration ones, and then moving on to the shorter duration ones, so by the time you have finished with the buffs the short ones havent expired.
Recommended Boss Killing Sorceries: Comet Azur, Meteorite of Astel (Only if you really want and only vs Dragons/Elden Beast)
Recommended Boss Killing Sorceries against non stationary, dodge spamming Bosses: Stars of Ruin, Night Comet
Recommended Boss Killing Sorcery against non stationary, human-build, aggressive boss that you need stagger against: Ancient Death Rancor
Recommended Talismans for Magic Damage: Magic Scorpion Charm, Old Lord's Talisman, Graven-Mass Talisman, Ritual Sword Talisman
IMPORTANT REGARDING TALISMANS
While you can use Graven-School Talisman instead of Old Lord's Talisman, you only get 4% Magic Damage increase. It is much better to prolong the duration of your buffs by 30% instead through Old Lord's Talisman since this is where the majority of your damage will come from.
Recommended Gear:
Azur's Glintstone Crown for Comet Azur
Lusat's Glintstone Crown for Stars of Ruin
Off Hand Meteorite Staff for Meteorite of Astel
Off Hand Staff of Loss for Night Comet
Simple Magic Damage Buffing Sequence for Comet Azur:
1) Golden Vow +15%
2) Howl of Shabriri +25%
3) Terra Magica +35% - go as far against the fog wall as possible and place it there
4) Contagious Fury - Jellyfish Shield AoW +20%
6) Rallying Standard - Commander's Standard AoW +20% (only if you DON'T use Golden Vow since they DON'T stack)
7) Flask of Wondrous Physik - Cerulean Hidden Crystal Tear - Infinite FP for 10 seconds + Magic-Shrouding Cracked Tear +20%
8) Enter fog wall and immediately lock and cast Comet Azur
IMPORTANT REGARDING BUFFING ORDER
If you are using Old Lord's Talisman, Rallying standard will be prolonged to 39 seconds, surpassing the 30 seconds of Terra Magica, meaning that optimally, you will cast it before. On the sequence above that means that you swap number 3 with 6.
IMPORTANT REGARDING BUFFING
While at first the buffing sequence may feel overwhelming or you may do things out of order or a bit too slow to the point where buffs run out, keep in mind that it's mostly practice and muscle memory, you will get better at it with time.
Buffing Sequence for the other recommended Sorceries
If you do not go for the instant burn/kill Comet Azur offers because you either want to try something different or the boss is mobile enough that it does not allow that type of playstyle, the fight will probably be more prolonged, which makes short buffs like Rallying Standard have lower value, especially on lower damage Sorceries. That means that if you want, you can be more lenient with your buffing and go for a more stagger focused approach wth Ancient Death Rancor (if the boss allows it) or a more certain ''undodgable'' type of damage like Stars of Ruin. Of course, you could also follow the Comet Azur buffing sequence to the letter and get a really good opening chunk off the boss from the get go, that is up to you.
Regarding Ranni's Dark Moon / Rennala's Full Moon
Both these Sorceries will reduce the target's Magic resistance by 10% when they land, with the addition of Frostbite build up (270) on Ranni's Dark Moon. That does NOT mean that they will increase the targetted enemy's damage taken by 10%, it will merely lower their resistance, meaning that the increased damage they will take is based on their total amount of Magic Damage resistance. The cast time of both these Sorceries, their travel time and the minimal amount of resistance shred renders them obsolete for a "Boss Burn". By the time you cast either of them and it lands (if it lands), most of your buffs will be running short, and the very low resistance shred will NOT compensate the damage lost from the buffs. That also applies even if Frostbite procs immediately after a single cast of Ranni's Dark Moon for an additional 20% damage increase on the target (something that can only happen on a Frost vulnerable enemy). The goal especially with Comet Azur is to make certain that at least 80% of your beam lands on the boss with the buffs still active. The resistance debuff of either of the mentioned Moon Sorceries lasts for 60 seconds, so a really clunky suboptimal playstyle you could use if you REALLY want to use either of these Sorceries, is to enter fog wall, cast either of them and then proceed with the buffing sequence. I HIGHLY recommend AGAINST that though.
Knowledge Above All - Innate AoW on Staff of the All-Knowing
Identical effect of the Full Moon Sorceries mentioned above without the Frostbite of Ranni's Dark Moon. If you'd like to reduce the Magic Resistance of the Boss by 10% (which as explained above, does NOT mean that it will receive 10% more damage from your Sorceries), in a quicker and less flashy way, you can cast this as soon as you enter the fog wall (it does not work if cast before entering).
Best Damage Ashes Of War / Skills

Unfortunately there are quite a few really strong Ashes of War that are really situational, from those a couple i've listed on my Honorable Mentions, but unlike Incantations and Sorceries, Ashes of War are much more versatile, justifying the use of many. To narrow it down and make it efficient and accurate as promised, the the ones listed here are the ones that completely trivialize big parts of the game.
Personal Flask Allocation Preference: 2 Crimson Tear Flasks - 12 Cerulean Tear Flasks
Recommended Talismans: Shard of Alexander (always on)
Recommended Talismans (damage element based): Fire Scorpion Charm, Magic Scorpion Charm, Lightning Scorpion Charm, Sacred Scoprion Charm
Recommended Talismans (situational based on AoW nature): Godfrey Icon (if chargable), Ritual Sword Talisman (if empty slot for damage Talisman), Blood Lord's Exultation (if Blood Loss proc), Kindred of Rot's Exultation (if Rot/Poison proc)
Recommended Gear: Spellblade Set (if AoW deals Magic or Cold damage), White Mask (if AoW procs Blood Loss)
Carian Grandeur
-Pros:
Ridiculous damage
Ridiculous poise damage, always knocking large or smaller humanoid targets down unless the hit is blocked
Solid hyper armor, especially when the overhead slash comes down, allowing you to tank most hits without interrupting the move
Using buff Sorceries or Incantations can scale its damage to inconceivable pocket nuke levels
Solid range for a Carian Magic Sword AoW, especially when max charged
Can kill enemies through walls with its solid range allowing you to completely bypass specific foes that wait for you to turn the corner to attack
Cleaves everything in a line, offering interesting AOE damage capabilities
Decent damage when not fully charged-Cons:
Long charge time to reach its maxiumum potential at max charge
Even though it has solid hyper armor, some enemy moves will interrupt the charging process
Its long charge time limits its usage, usually needing additional support Sorceries or Incantations to make it viable like Darkness/Unseen Form/Assassin's Gambit
Carian Grandeur Enemy Wall Clipping example
Carian Grandeur paired with Unseen Form+Assassin's Gambit
Gravity Bolt - Innate AoW on Fallingstar Beast Jaw
-Pros:
Solid damage
Decent range
Highly Spammable
Deals a mixture of Magic and Physical Damage, making it very versatile against most enemies
Very high stance damage, permanently staggering most large and smaller humanoid enemies
While an enemy blocking the AoW will reduce its damage, the stagger still applies, holding that enemy in place
The permanent stagger can trivialize a variety of content
Annihilates Crystallians without the need to break their stance-Cons
Some terrain limitations
Low AOE potential, enemies need to be very closely stacked to be cleaved
Cannot be removed from Fallingstar Beast Jaw, forcing you to use this specific weapon if you want to use Gravity Bolt
Gravity Bolt permanent stagger against Omens
Gravity Bolt permanent stagger against Haligtree Battlemages
Gravity Bolt vs Haligtree Crystallians
IMPORTANT
On two of the Gravity Bolt videos you see Godfrey Icon Talisman equipped, that is because it's one that i usually leave on due to its multi-use between Sorceries/Incantations/AoW. Gravity Bolt CANNOT be charged thus it is completely uninfluenced from Godfrey Icon.
Taker's Flames - Innate AoW on Blasphemous Blade
-Pros:
Very high damage
Solid range
Massive sustain potential, it will heal you by 150 flat HP + 10% Max HP per target hit, and an additional 4% Max HP + 40HP when killing an enemy
Very high stance damage, instantly knocking down most large and smaller humanoid enemies
When used from a proper angle, it can easily knock enemies off the map
Cleaves everything in a line, offering solid AOE damage and crowd control capabilities
The permanent knockdown along with the near infinite sustain the Blasphemous Blade provides can trivialize a variety of content-Cons:
Need to know knockdown windows to chain it properly
Enemy AI can dodge the AoW (even though the flame line is generous enough to hit them regardless)
Terrain limitations, a tiny obstacle can end the line prematurely
Lengthy cast time, allowing enemies that block it to slowly close the gap
Cannot be removed from Blasphemous Blade, forcing you to use this specific weapon if you want to use Taker's Flames
Taker's Flames permanent stagger-knockdown vs Omens
Taker's Flames off-map knock example
Lifesteal Fist
-Pros:
Solid damage when paired with proper buffs
Ridiculous Single Target lockdown where applicable
Generous immunity frames right before the Critical Attack startup
Locks enemy into Critical Attack animation, allowing you to ignore every attack received during it
Can chain lockdown hardest humanoid enemies, completely trivializing them
30% max HP heal on AoW finish
Generous tracking
Can be used on certain bosses like Duelists
Can be used through enemy block since its a grab attack-Cons:
Requires knowledge of knockdown windows to chain properly
Does not work on large targets like Omens
Highly vulnerable until immunity frames kick in
Sometimes clunky, grabbing literally nothing (even though its rare)
Without proper buffs (Weapon buff Incantations/Sorceries + Golden Vow) its damage is rather weakIMPORTANT
Unlike popular belief, Dagger Talisman DOES work on Lifesteal Fist
Lifesteal Fist permanent lockdown on Haligtree Battlemages
Lifesteal Fist on Haligtree Knights
Lifesteal fist 4 buffs on Haligtree Knights
Bonus meme buff stack 12.5K+ vs Duelist
Bloodboon Ritual - Innate AoW on Mohgwyn's Sacred Spear
-Pros:
Extreme AOE damage to everything non heavily Fire Damage resistant or immune
Quick Hemorrhage build up
Stagger through Hemorrhage procs
Can kill enemies through walls
Really quick damage ticks through its 3-part cast
Solid Boss Killer AoW-Cons:
Low to non existent hyper armor on cast, easily being interrupted by enemies
Only source of stagger is the Hemorrhage proc
Need to remain stationary to cast
Cannot be removed from Mohgwyn's Sacred Spear, forcing you to use this specific weapon if you want to use Bloodboon Ritual
Bloodboon Ritual Wall Clip example
Bloodboon Ritual Heavy AOE example
Best Damage Ashes Of War / Skills - Part 2

Last Rites - Innate AoW on Golden Epitaph - Undead Dedicated AoW
-Pros:
Insane buff vs Undead Enemies at +100% damage
Prevents Undead Enemies from respawning
It is a body buff which applies an additonal 10% buff to All Damage
As a body buff it persists even when the weapon is swapped
The +100% damage buff vs Undead also works on other weapon AoW allowing rediculous combinations trivializing every Undead enemy in the game
Solid duration at 60 seconds-Cons:
Only truly functional vs Undead, Golden Vow offers higher damage buff % and damage negation at a longer duration and should be used instead for other enemy types.
Cannot be removed from Golden Epitaph, forcing you to use this particular weapon if you want to buff with Last Rites
Last Rites combined with Gravity Bolt trivializing Crumbling Farum Azula Dragon Temple Lift Undead enemies
Siluria's Woe - Innate AoW on Siluria's Tree
-Pros:
High damage
Long range
Penetrates targets offering solid AOE damage and crowd control capabilities
Very high stance damage, instantly knocking down most large and smaller humanoid enemies
Deals a mixture of Holy and Physical damage, making it a versatile AoW
When used from a proper angle, it can easily knock enemies off the map-Cons:
Long charge time
It will not convert into a ranged projectile unless fully charged
Need to know knockdown windows to chain it properly
Enemy AI can dodge the AoW (even though its hitbox is generous enough to hit them regardless)
Terrain limitations sometimes end the AoW prematurely
Cannot be removed from Siluria's Tree, forcing you to use this specific weapon if you want to use Siluria's Woe
Silluria's Woe permanent knockdown vs Omens
Ancient Lightning Spear - Innate AoW on Bolt of Gransax
-Pros:
Exceptional range, allowing you to snipe enemies like with Frenzied Burst or Loretta's Mastery
Solid damage
Strong stagger when fully charged-Cons:
Lengthy charge time
Throwing the Lightning Spear makes your character perform a forward movement which can throw you off ledges and cliffs if you don't position carefully
Realistically unusable from close range, purely a sniping AoW
Cannot be removed from Bolt of Gransax, forcing you to use this particular weapon if you want to use Ancient Lightning Spear
Moonlight Greatsword - Innate AoW on Dark Moon Greatsword
-Pros:
Decent damage
Decent Projectile range
Frostbite build up
Solid stance damage, staggering some humanoid enemies
Decent buff duration at 60 seconds
Decent AOE damage and Frostbite application capabilities-Cons:
While the weapon itself is good, the buff needs to be active for its full potential to ''activate''
Cannot be removed from Dark Moon Greatsword, forcing you to use this particular weapon if you want to use Moonlight Greatsword
Waterfowl Dance - Innate AoW on Hand of Malenia
-Pros:
Very high damage, extremely underrated
Can stagger most humanoid and large humanoid enemies during the entirety of the move
Exceptional AOE damage and stagger capabilities, able to clear entire rooms of stacked enemies
Can alternate targets mid-AoW, allowing you to kill multiples with a single use
Low Hemorrhage build up
Decent hyper armor during the move
Can be buffed to exceptional damage levels with proper buffs-Cons:
Even though you get some hyper armor, specific hard hitting enemy attacks can interrupt the move
Hemorrhage build up is low enough to nearly never proc from an entire use of the AoW, unless the enemy is vulnerable
Even though there are a lot of ways to make Malenia easier (Burn O Flame! perma knock up, Ancient Rancor perma stagger etc), it is still a tricky boss for many, sometimes being a barrier for this AoW
Cannot be removed from Hand of Malenia, requiring you to use this specific weapon if you want to use Waterfowl Dance
Waterfowl Dance paired with Golden Vow and Flame Grant me Strength single AoW use Omen kill
Waterfowl Dance paired with Golden Vow and Flame Grant me Strength against Haligtree Battlemages
The Queen's Black Flame - Innate AoW on Godslayer Greatsword
-Pros:
Very high damage
Solid hyper armor during the move
Solid stagger and stance damage against most enemies, almost always knocking humanoid and large humanoid enemies down
Solid AOE damage and crowd control capabilities
Decent slash range
AoW applies the standard Black Flame Max HP % DoT over 2 seconds
Can be buffed to exceptional damage levels with proper buffs-Cons:
Lengthy cast time to complete the move
Even though hyper armor is solid, some heavy enemy attacks can still interrupt the move
Cannot be removed from Godslayer Greatsword, forcing you to use that specific weapon if you want to use The Queen's Black Flame
The Queen's Black Flame paired with Golden Vow and Flame Grant me Strength vs Haligtree Battlemages
The Queen's Black Flame paired with buffs vs Omens / Additionally showcasing its hyper armor
AoW Scaling Details
While i could have put the scaling information individually on each AoW on the previous 2 sections, i felt like they were already overcrowded with information, so i made a 3rd smaller section to put their scaling information in a more tidy and clear way.
The scaling of every AoW shown above is as follows:
Carian Grandeur
Scales with: Weapon Upgrade Level, Magic Affinity when enchanted into a weapon, Total character Intelligence (NOT scaled by weapon's INT scaling ONLY character's total)
Specific Talismans: Magic Scorpion Charm, Alexander's Shard, Godfrey Icon, Ritual Sword Talisman
Gravity Bolt
Scales with: Weapon Upgrade Level, Character's Strength, Dexterity and Intelligence
Specific Talismans: Magic Scorpion Charm, Alexander's Shard, Ritual Sword Talisman
Taker's Flames
Scales with: Weapon Upgrade Level, Character's Faith
Specific Talismans: Fire Scorpion Charm, Alexander's Shard, Ritual Sword Talisman
Lifesteal Fist
Scales with: Weapon Upgrade Level, Buffs applied to the weapon, Crit of the weapon
Specific Talismans: Dagger Talisman, Alexander's Shard, Ritual Sword Talisman, Magic/Fire/Sacred/Lightning Scorpion Charm (depending on what weapon buff you used)
Bloodboon Ritual
Scales with: Weapon Upgrade Level, Character's Arcane
Specific Talismans: Fire Scorpion Charm, Alexander's Shard, Ritual Sword Talisman, Blood Lord's Exultation
Last Rites
Scales with: Nothing, its a flat buff
Specific Talismans: Old Lord's Talisman (to prolong duration of the buff)
Siluria's Woe
Scales with: Weapon Upgrade Level, Character's Strength, Dexterity and Faith
Specific Talismans: Sacred Scorpion Charm, Alexander's Shard, Godfrey Icon, Ritual Sword Talisman
Ancient Dragon's Lightning Spear
Scales with: Weapon Upgrade Level, Character's Dexterity
Specific Talismans: Lightning Scorpion Charm, Alexander's Shard, Godfrey Icon, Ritual Sword Talisman
Moonlight Greatsword
Scales with: Weapon Upgrade Level, Character's Strength, Dexterity and Intelligence
Specific Talismans: Magic Scorpion Charm, Alexander's Shard, Godfrey Icon, Ritual Sword Talisman
Waterfowl Dance
Scales with: Weapon Upgrade Level, Character's Strength and Dexterity
Specific Talismans: Alexander's Shard, Rotten Winged Sword Insignia, Millicent's Prosthesis, Ritual Sword Talisman OR Blood Lord's Exultation (if you know you will use the AoW at least twice)
The Queen's Black Flame
Scales with: Weapon Upgrade Level, Character's Dexterity, Faith and Strength
Specific Talismans: Fire Scorpion Charm, Alexander's Shard, Ritual Sword Talisman
IMPORTANT
Keep in mind that The Queen's Black Flame, Waterfowl Dance and Moonlight Greatsword only directly scale from the weapon's total Attack Rating, which comes from the respective stats they scale with. One may think that the Character's stats are irrelevant, but its through those that the Attack Rating will increase.
Honorable Mentions Of Damage Ashes Of War - Skills


AoW mentioned here are the ones that while sometimes strong, did not make the ''cut' either due to limitations or functionality. While completely usable, the ones mentioned above can do what these do better.
Lion's Claw
-Pros:
Can chain knockdown most enemies
Relatively strong stance damage on blocking enemies-Cons:
Lengthy-ish preparation before the move
Need to know knockdown windows to chain properly
On higher NG+ it takes a couple of uses to break stance of strong blocking enemies
Wave of Gold - Innate AoW on Sacred Relic Sword
-Pros:
Solid damage
Really long range
Massive AOE damage spreading cone
Will knockdown most enemies
One of the best options to AOE clear enemies with an AoW-Cons:
Quite limited usage focused mostly on AOE
Very inefficient when used on Single Target
Cannot be removed from Sacred Relic Sword, forcing you to use this specific weapon if you want to use Wave of Gold
Miquella's Ring of Light - Innate AoW on Halo Scythe
-Pros:
Solid damage
Long range
Chain castable / Spammable
A solid choice for ranged Holy damage instead of Discus of Light / Triple Rings of Light-Cons:
Will not track enemies
Casting animation forces you to move slightly forward, making it tricky to use on edges
Unlike Discus of Light and Triple Rings of Light, it cannot be used while mounted, like every AoW
Cannot be removed from Halo Scythe, forcing you to use this specific weapon if you want to use Miquella's Ring of Light
Phantom Slash
-Pros:
Decent damage
Can be used a second time for an overhead slash following the dash
Phantom will apply weapon buffs on the target
Can stagger most enemies
Provides an interesting gap closing capability-Cons:
Some terrain limitations, especially when used on stairs/bridges with your halberd/spear getting wall blocked during the upward dash-slash
Poor against moving enemies, Phantom will not track mobile enemies
Its terrain limitations and its incapability of dealing with mobile enemies make it really situational
Royal Knight's Resolve
-Pros:
Ridiculous damage buff on your next melee swing, +80%
Acceptable duration for its purpose at 10 seconds
Can be used as an extra edge against hard beefy enemies-Cons:
Unfortunately its effect is massively reduced for Critical Attacks (roughly 34% instead of 80%), letting the dream one-shot Critical build remain a dream
Extremely situational regardless of the massive increase
Absolutely no AOE damage capabilites since the buff will drop as soon as a single enemy is hit
Bloodblade Dance - Innate AoW on Eleonora's Poleblade
-Pros:
Solid damage
Solid Hemorrhage build up, usually proccing Blood Loss from a single use
Ends the move with a backwards dash, creating space between you and the enemy after the damage-Cons:
While it does have decent stagger, the stronger, beefier enemies will be able to react, making the Blood Loss proc the only guaranteed stagger rendering it tricky to use, even though its stagger is still superior to Corpse Piller (which is not mentioned due to its only stagger source being the Blood Loss proc)
Extremely poor against any shielded enemy
Low cleave potential unless enemies are very tightly stacked
Impaling Thrust
-Pros:
Decent damage
Decent dash range
A solid option to deal with highly tanky enemies like shielded knights since it offers 85% block piercing-Cons:
Other than its ability to decently deal with shielded enemies, both its damage and its relatively low stagger, make it a very situational and a rather underwhelming choice
Eochaid's Dancing Blade - Innate AoW on Marais Executioner Sword
-Pros:
Very high damage potential
Very high stagger potential
Permanent enemy lockdown potential-Cons:
Very limited by the angle you send your sword into the enemy, requiring solid precision to put it in the middle of their hitbox to maximize damage and stagger
Very underwhelming and practically irrelevant if not used properly
Very kit-specific, requiring unique talismans and buffs to maximize its damage
Giant Hunt
-Pros:
One of the highest damage AoW
Will instantly knock up most humanoid enemies
Can be used to permanently lockdown an enemy
Can be used to setup for another attack/ability-Cons:
While a solid stance breaking/damaging tool, its pure single target nature and its repetitive dashes required to lockdown an enemy make it an inferior choice to other previously mentioned AoW
Giant Hunt vs Omens
Giant Hunt vs Battlemages
Spinning Weapon - Innate AoW on Carian Regal Scepter (DIFFERENT to the blanket Spinning Weapon AoW that can be put to other weapons)
-Pros:
Decent damage
Can permanently lockdown average sized human build enemies
A really good melee ''bail-out'' choice for Sorcery users-Cons:
While hilarious on its lockdown potential, its limitation on enemy size renders it a very niche option and its massively surpassed by other AoW
Its damage is highly based on proper Talismans which are contradicted to the Sorcery ones, making it very unorthodox to maximize
Best Utility / Buffing Ashes Of War - Skills


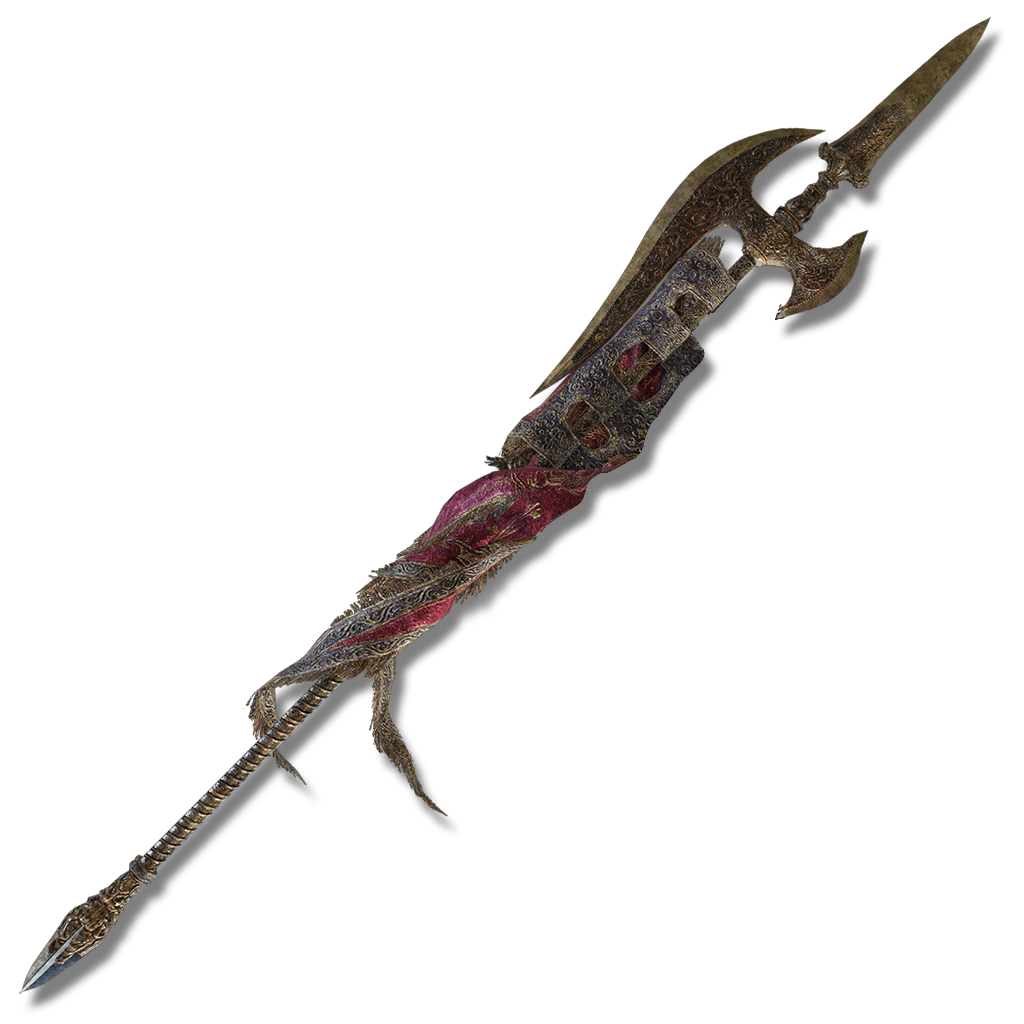
Dynast's Finesse - Innate AoW on Bloody Helice
-Pros:
Instantly activated
Solid breathing room created between you and the enemy
Can be spammed to disengage even futher
Completely immune to damage during the spin
Highest immunity frames after Vow of the Indomitable
Can follow up with a hard hitting, staggering piercing lunge further chained into another thrust and a slash-Cons:
Cannot be removed from Bloody Helice, forcing you to use this specific weapon in order to use Dynast's Finesse
Dynast's Finesse dodging/immunity frames example against Omens
Assassin's Gambit
-Pros:
Halves aggro range
Enables a variety of different strategies
Unlike Unseen Form, it also silences your footsteps
Makes specific enemy-crowded parts smoother to run through
Enables complete enemy skipping when used properly
Stacks with Sorcery Unseen Form to reduce aggro range to a ridiculous extent-Cons
Requires extensive knowledge of the game to understand what you can and cannot do with it
Assassin's Gambit aggro range example
Assassin's Gambit STACKED with Unseen Form aggro range example
Braggart's Roar
-Pros:
10% Physical damage increase
10% All damage reduction
Solid stamina recovery speed at +10/s
Solid duration at 60 seconds-Cons
As a weapon buff, the effects are removed upon swapping the weapon away
Contagious Fury - Innate AoW on Jellyfish Shield
-Pros:
Solid damage buff of +20% on All damage
Really good option for a permanent re-buffing option on your Off Hand while your casting Incantations/Sorceries from your Main Hand-Cons:
The effect is removed upon swapping the shield away
Duration is rather short at 30 seconds
Permanently occupies your Off Hand slot if you want uptime on the buff, rendering it mostly situational for hard enemies or boss fights where you need an extra boost of damage
Vow of the Indomitable
-Pros:
Instant activation
Completely immune to damage while its active
Highest Immunity frames of every Skill
Can be used instead of dodge to avoid tricky timing on grapple attacks-Cons:
You remain stationary during the immunity
While it can be chained, proper planning is needed to be used efficently while you're also being offensive
Seppuku
-Pros:
Adds 30 Blood build up and 30 flat physical attack power
Solid duration at 60 seconds
Can be used to instantly proc Blood Lord's Exultation and White Mask, allowing it to fullfill the role of a pure buffing weapon-Cons:
Deals 100 damage + 15% max HP to yourself when used
By the time the animation is finished, Blood Lord's Exultation and White Mask have roughly 17 out of their 20 seconds left on the buff, narrowing the window which their damage buff can be used
Rallying Standard - Innate AoW on Commander's Standard
-Pros:
Solid All damage increase of +20%
Solid All damage negation of 20%
Can be prolonged to 39 seconds duration with Old Lord's Talisman-Cons:
Rather short duration of 30 seconds
Will not stack with Golden Vow, basically being a 5% better but massively shorter version of it
Stationary when used
Cannot be removed from Commander's Standard, forcing you to use this specific weapon if you want to use Rallying Standard
Parrying Enemies

I've decided to dedicate an entire section for this category given how it's a rather big one.
Parrying enemies is probably one of the most satisfying things in Elden Ring, it instantly ends their attack move, an echoing sound occurs along with weapon colliding sparks and the enemy is open for a riposte. It is really important to note here that a Riposte Critical Attack is NOT the same as a Backstab Critical Attack. The riposte will always do more damage than a backstab, and will always be harder to proc, either through a Parry, or through a stance break after enough hits. However, both the way Parry works and the damage you get through the riposte leave a lot to be desired compared to other Skills/AoW/Incantations/Sorceries that do similar if not more damage with 1/100th of the effort.
Unlike the majority of the games that you have to use your Parry/Riposte move right before the enemy blade connects with you, in Elden Ring you have to Parry/Riposte the enemy intention, which means that you have to look at the enemy hands/movement/tells instead of their weapon. Basically you need to know the enemy's moveset to acknowledge which of the numerous attacks they are winding up and use one of the Parry skills to cut their move short. If i had to put it in a single sentence, i'd probably say that you are parrying moves, not blades.
Additionally not every attack or enemy type can be parried, pushes, grabs, AOE attacks and large enemies like Trolls cannot be parried, limiting your kit if it entirely revolves around parrying. On top of that, numerous bosses require a certain number of parries before they open up for a riposte, massively lowering the value of it given how you need to play near perfectly consistently to make use of it.
Failing to properly Parry usually results in massive punishment damage in return, which can prove outright lethal in the endgame. It is a very high risk playstyle.
While parrying is and will always be an interesting and very flashy strategy, it requires a ton of practice and twice the patience to become good and consistent with it. If that is what you are after, repetition and being relentless is the name of the game for you. You go again and again until you are comfortable enough with the majority of enemies in the game.
On a personal level, Parrying is not something i'd recommend, especially if you want to cruise through the game, the numerous things i've mentioned on the categories above will always serve you twice as well with minimal effort.
If you've set your mind on going for the flashy Ripostes however, you'd want to go for the Skills that give you the highest amount of Parry frames, that means that the ''window'' of which a Parry will register is bigger, more specifically, more lenient and not so timing sensitive. Remember of course, that while the skills i will mention below have lenient parry frames, by no means do they make parrying easy, they just make it more start-friendly.
The weapon of choice for Riposting should be one with high Critical Bonus, NOT one with the highest damage possible. The reasoning behind that is that Critical Bonus ridiculously multiplies damage output on riposte making it far superior to everything, even things like Clossal Weapons that one would assume would do the absolute highest amount of damage, well unfortunately they dont.
The highest Critical Bonus Weapon (140), the Dagger Miséricorde
Carian Retaliation
Highest Parry frames tied with Golden Parry.
Can also Parry Sorceries if they get caught in the glowy blue circle that appears on activation.
Successfully parrying a Sorcery makes the projectile vanish and gives you 3 Glintblades.
Very FP efficient given how it spends none if you dont successfully Parry.
Golden Parry
Highest Parry frames tied with Carian Retaliation
Unlike Carian Retaliation, Golden Parry CANNOT Parry Sorceries
Unlike Carian Retaliation, Golden Parry will spend FP regardless of whether you succeeded in Parrying the incoming attack.
Some Parrying videos
Muscle memory trying to Parry a Cleanrot Knight push.
A soft buff stacking example for a hard hitting Riposte
Normal soldier Parrying example
Trying to Parry Omen slam move and kick move to no avail
Example of an Omen spamming unparriable moves for an extensive amount of time
Example on how punishing bad Parry gameplay can be even on a single enemy
Especially the last 3 videos are very important, because you can easily compare them to other AoW/Skills/Sorceries that i have showcased against Omens and see how massive the difficulty difference is on top of how longer it takes for you to kill a single one. Of course you can implement a normal weapon strike in between but given how some enemies can chain an extensive amount of unparriable moves, when the one parriable comes up, you don't want to be mid-attack.
Weapons
While this one is a colossal category, it's also a very ''lenient'' one, given how your weapon choice comes down purely to your playstyle. I will mention the strengths and weaknesses of each weapon category, along with which shines the most to me in each, but you really need to understand that if something else fits your playstyle, its completely ok to use it, especially on lower NG+ given how there are very few things that are undertuned to an unusuable extent (i see you bows). I will NOT be mentioning Sacred Seals and Glintstone Staves because those categories are already covered earlier.
With no further adeu:
Daggers : As you can already suspect, daggers are defined by their short range and hard hitting Critical Attacks and Backstabs, having the highest innate damage multipliers for both. While daggers like Reduvia or Black Knife allow you interesting ''ranged'' gameplay with their AoW spam, i basically only use them for Critical Attacks when (never) i go for ripostes or as buffing weapons (Assassin's Gambit). Here you'd go for Miséricorde for Critical Attacks and Backstabs and Reduvia/Blade of Culling/Black Knife for AoW spam. Downside is that elite shielded enemies like Knights will more often than not trash you if you dont manage to circle around for the backstab or Parry them for the riposte.
Straight Swords: Average attack speed attacks, mostly rapid slashing with some occasional piercing (when powerstanced) and medium range but overall lacking damage compared to Greatswords, Colossal Swords, Spears etc. Additionally, they are far from ideal for status builds due to the combination of their average attack speed and their low status build up. Elite shielded enemies are your bane if you cannot navigate around them. Good options here are Sword of St Trina (ONLY vs sleep vulnerable enemies) and Noble's Slender Sword for fashion powerstancing. Rotten Crystal Sword is a Rot applying option but there are far better ones.
Greatswords: Solid attack damage, decent swing rate, a variety of options to powerstance, acceptable range and excellent jump attack building options while powerstancing them. In addition, some of them have really strong AoW, as i have already mentioned further above like Taker's Flames and Moonlight Greatsword. Without stance damaging jumping attacks, elite shielded enemies can prove troublesome. Good options here (other than Blasphemous Blade, Golden Epitaph, Dark Moon Greatsword mentioned further above) are Iron Greatsword(to apply AoW), Gargoyle's Greatsword,
Colossal Swords : Slow swings, very high damage, exceptional stagger interrupting most enemies, solid range, battering powerstanced jump attacks, capable of staggering elite shielded enemies even with plain powerstanced attacks and have the highest status build up rate at max Arcane (194 Poison, 168 Blood, 150 Frost) making powerstancing them a status proc fiesta. Favorite options here (other than Godslayer Greatsword mentioned further above) is the Greatsword for a status build.
Greatsword Barbarian themed Blood Status Build
Thrusting Swords: Quick piercing stabs, solid range, average damage, can be used behind a shield to safely poke your enemies and a great moveset when powerstanced. While they possess relatively high attack speed, status proccing through powerstancing a bit hard, given how your only stagger source is the status proc, limiting them to mostly shield poking or fodder enemy dispatching. Elite shielded enemies can be hard to deal with. Good options here are Noble's Estoc for fashion, and Cleanrot Knight's Sword for range, both allowing usage of AoW.
Heavy Thrusting Swords: Rather slow piercing stabs, solid range, relatively high damage, can be used behind a shield to safely poke your enemies and a great moveset when powerstanced. Their slow attack speed may make status proccing tricky regardless of the high build up they get from Arcane, since enemies will usually be able to react. Favorite option here (other than Bloody Helice mentioned further above) is the Godskin Stitcher which allows AoW use.
Curved Swords: Relatively quick slashes, no piercing whtasoever, acceptable powerstancing, not ideal for status builds, not impressive damage and like most categories, elite shielded enemies test your patience. Not a category i'm really a fan of, usually only using Nox Flowing Sword due to its AoW, but that is a rare occurance.
Curved Greatswords Slow slashes, heavy damage, solid powerstancing with good jump attacks potential. With impressive damage and middle of the pack status building, they are good choices for heavy slashing damage, keeping in mind that once again, elite shielded enemies without a colossal weapon or a hammer, will be a pain. Favorite choices here are Omen Cleaver and Dismounter for its exceptional range.
Katanas: One of Elden Ring's favorite weapon category. Quick slashes, solid for powerstancing, solid for 2 handing, good for status builds, good range, and good attack speed. Quite a few of them also have innate status build up, making them solid options to have passive procs. Overall a solid weapon category that will not let you down. Shielded enemies require strategic rotating around them as with most other weapon categories. Favorite option here (other than Hand of Malenia mentioned further above) would be the Uchigatana.
Twinblades: Another exceptional category of weapons. Twinblades shine the most when two handed or when powerstanced, offering quick attacks and impressive moveset for the first, and solid multi hit jump attacks for the latter. Status build up is also very viable on twinblades due to their rapid attacks, making it one of the best categories for that department. The rapid attack moveset, esepcially when 2 handing, can sometimes break shielded enemies through stagger, even though later in the game its progressively harder. Favorite options here (other than the honorable mention of Eleonora's Poleblade) would be Godskin Peeler.
Axes: An unimpressive category of a weapon type that feels like a mixture between hammers and swords while they don't excel as either. Average attack speed combined with average damage and overall low status building compared to some of the upper categories, make this a relatively ignored category. I usually never run axes other than Sacrificial Axe as an Off Hand for its passive FP regen on kill.
Greataxes: High damage per hit, surprisingly fast swings, average range, and most of them are able to be infused with AoW allowing for a variety of different builds. Additionally, they allow good powerstancing with solid jumping attacks like most Great Weapons. Unfortunately more often that not, ill prefer the Greatsword due to its slightly faster swing speed and range. My choices here include the Executioner Greataxe for its 115 Crit and solid overall damage.
Hammers: The first category after Colossal Swords that allows you to practically just mash attacks. While their range is unimpressive and their swing speed average, hammers allow you to batter through enemies without caring too much about what the enemy weilds. When powerstanced their chain attacks have some very soft hyper armor against specific attacks allowing you to endure the incoming hit and attack through it. Overall an okay category to play around with while also giving you many options to pick from. My picks here are Marika's Hammer for its interesting damage AoW, Scepter of the All-Knowing for its debuff AoW and Stone Club for a free AoW slot.
Weapons - Part 2
Great Hammers: Basically hammers, but bigger and nastier, featuring slower attack speed, but higher damage along with impeccable stagger potential, allowing you to mash uninterrupted. Powerstancing is also extremely viable, with repetitive double hits being capabe of chain staggering most enemies. Overall definitely a category to consider. Favorite options here would be Rotten Battle Hammer as an interesting Rot application and AoW choice and Pickaxe for pure raw damage and stagger.
Flails: Flails is one of the categories that i never played around with enough to form a solid opinion, but the little time i have with them left me unimpressed. Their swing speed is average, their damage quite low, their range unimpressive and overall they are just lacking compared to the other categories. Honorable mention here would be Bastard's Stars with its Nebula AoW that is surprisingly fun to use, other than that, i never touch these as there are so many better things to use.
Colossal Weapons: Same as Colossal Swords, they feature slow swings, very high damage, exceptional stagger interrupting most enemies, solid range, battering powerstanced jump attacks, capable of staggering elite shielded enemies even with plain powerstanced attacks and have the highest status build up rate at max arcane (194 Poison, 168 Blood, 150 Frost) making powerstancing them a status proc fiesta. Overall an exceptional category that extremely shines when you're capable of powerstancing them, unlocking a ton of potential. Favorite options here (other than Fallingstar Beast Jaw mentioned further above) is the Rotten Staff for the highest base rot application of a weapon in the game (75), Giant-Crusher for its absurd damage and Axe of Godfrey for its interesting moveset after using the AoW.
Spears: An exceptionally versatile category. Spears are probably something you'd have to always consider bringing along. Great range, decent damage, can be used to shield poke, quick startup when powerstanced and overall a well rounded weapon option. My usage for spears is either powerstancing against mostly fodder enemies, and shield poking annoying big ones. Unfortunately, shielded enemies can be tricky to deal with. Favorite options here (other than Bolt of Gransax mentioned further above) would be the Cross-Naginata for status building and Rotten Crystal Spear as a Rot application option.
Great Spears: Spears but longer and nastier. Great Spears feature the best weapon range in the game (along with whips) while also allowing you to shield poke, making enemy dispatching extremely safe. They also rock solid damage and have decent stagger on their attacks making powerstancing them a viable option. Unfortunately, only the Lance will allow you AoW modification, limiting your build variations. My go-to options here (other than Siluria's Tree and Mohgwyn's Sacred Spear mentioned further above) would be Lance for its AoW slot and Treespear for its all around good performance.
Halberds: Another exceptional category of weapons. Halberds shine due to their very versatile playstyle. You can use halberds for mostly anything due to their solid range, solid damage, solid capability of being powerstanced and different AoW playstyles. While i usually go for the Great Spears for their range, Halberds will most certainly not disappoint you if you give them a go. My go-to option here would be the Golden Halberd for all-around play, and Nightrider Glaive for AoW options.
Reapers: Intrinsic Hemorrhage build up, intrinsic ability to pierce a % of enemy shield block, good reach but overall slow attack speed and underwhelming powerstanced moveset, making the jump attack the only truly solid option through powerstancing. Reapers are generally an okay category to use regardless of the fact that weapons like the greatswords will always be a tiny bit better. Favorite option here (other than Halo Scythe mentioned further above) would be the Grave Scythe for its high damage and passive increase on Vitality.
Whips: Practically the longest reach of any melee weapon in the game, wide and generous hitbox and some have passive Hemorrhage build up, offset by slower attacks and slower combos. Powerstancing them is most certainly a viable option. While i'm not a big whip supporter, the Giant's Braid AoW can be very interesting on some points being capable of chain staggering specific enemies. The reason why its not mentioned on the AoW list further above, is because its usage is limited enough to make other things much better in carrying you through the lategame on NG7+.
Fists: Quick, low range hard hitting attacks capable of really quickly dispatching fodder enemies. Jump attacks are also incredible with these weapons especially when powerstanced, allowing for multiple hits to take place with a single jump attack. In addition, Fists are one of the categories that allows Lifesteal Fist to be used, one of the most solid AoW as mentioned above. My go-to option here would be the Katar, especially with Lifesteal Fist since it gives it an extra bonus with its 110 Crit with Iron Ball and Star Fist also being solid options for general use.
Claws: Very similar to Fists, Claws feature quick low range hard hitting attacks that additionally rock innate Hemorrhage build up. Jump attacks are exceptional, especially when powerstanced, allowing you to quickly shred through enemies. Claws is the other category that allows Lifesteal Fist to be used, one of the most solid AoW as mentioned above. My go-to option here would be the Bloodhound's Claws for its solid damage and 110 Crit which pairs nicely with Lifesteal Fist.
Bows (Light Bows, Bows, Crossbows, Ballistae, Greatbows): Not much to be said about all these. There are only 3 viable builds that are miles below nearly everything in the game and should only be used if you are on low NG+ or you feel like making the game much harder for yourself. You either use Black Bow with Barrage to quickly stack up status effects, or you go with Golem Greatbow +10 with Great Arrows and right talismans to attempt to one shot enemies from affar. High HP enemies like knights will require multiple shots of course. Lastly, the 3rd build would be with the Jar Cannon, which while hilarious, still does extremely poorly compared to even the most basic stagger Incantation. I would only use any of these to aggro something very far away, nowhere else.
Shields (Small Shields, Medium Shields, Greatshields): Another category that once you have enough stats, feels like Greatshields are just superior unless you are going for the Parries. Greatshields will innately put the enemy into the ''shocked'' animation after you block an attack from them, cutting their following combo short, making them the best defensive option at the cost of hefty extra weight. My favorite option here is the Haligtree Shield due to its solid fashion and near 100 % Holy damage resistance when Sacred infused. Fingerprint Stone Shield is the best defensive shield in the game if you can accept its subjectively dull look and heavy weight. For Parries i use the medium shield Carian Knight's Shield with the AoW Carian Retaliation.
Armors
While the game offers a ludicrous amount of different armors, the usage of them is completely subjective usually. Unlike Incantations/Sorceries/AoW/Weapons, the Armors don't really have a ''best'' and a ''worst''. All of them have their usages and what you pick usually depends on what type of resistances or fashion you want.
On NG7+ where nearly every enemy packs a punch, the Armor's defensive value drops massively. While that may sound paradoxical given how % damage negation would gain more value the higher the damage received is, the ugly truth is that being hit by something you shouldn't be, more often that not will outright kill you, or drop you low enough to force you to flee and recover. Basically on NG7+ the amount of things that a heavy armor would allow you to facetank earlier is abyssmal, solid preparation and game knowledge is the name of the game. The reason why Armor Tankiness value drops so much is because by the time you finish NG0, you have more or less reached 80%-90% of your tankiness. While there's still room for character growth, its nowhere near the difficulty increase, meaning that bosses and enemies become a lot harder while you more or less stay the same, you just gain higher versatility on builds without the need to respec, which does nothing for your tankiness.
Regardless, i will mention my go-to options and what i usually run, but i really want to stress that you can use literally everything to a solid extent.
Chest Armor:
Black Knife Armor Non Altered
As you have seen in most of my videos, one of my favorite Chest options is the Black Knife Armor (NON Altered) and frankly, the only piece of my set that does something that matters. That is because its passive footstep/jump/roll silencing can passively bail you out of encounters without you even realizing it while also allowing you to run past enemies that have their back turned against you without triggering a response, all of that at the cost of absolutely nothing, purely passive. In addition it supports decent Physical damage resists that puts it roughly in the middle of the pack when it comes to tankiness and durability (even though as i mentioned on the intro, matters very little on NG7+). Keep in mind that to get the passive footstep silencing effect, the Armor needs to be NON altered, the altered version does not silence your footsteps.
Head Armor:
Fia's Hoood
While there are no passive benefits on this particular piece, it features decent elemental resists and quite hefty Vitality, ensuring you don't get caught off guard by a quickly ramped Death Blight proc which as i already mentioned, will instantly kill you.
Hand Armor:
Queen's Bracelets
Same as on the Head pieace, nothing passive gained from the gloves, mostly used for fashion. They have decent elemental resists which as i mentioned on the Armor introduction, don't really matter too much.
Leg Armor:
Blue Silver Mail Skirt
Acceptable physical damage resists, and decently matching with Black Knife armor, once again, mostly a fashion pick.
In case you are on lower NG+ where armor still makes a difference:
The highest Physical reduction armor in the game is the Bull-Goat Set while also being the heaviest.
The highest Fire damage reduction armor in the game is the Fire Prelate Set
The highest Holy damage reduction armor in the game is the Tree Sentinel Armor (while there are some other seperate pieces that increase Holy damage resistance by a tiny extra bit, the difference is negligible enough for me to not mention)
The highest Magic damage reduction armor in the game is the Lusat's Set with Perceptor's Set being a very close second
The highest Lightning damage reduction armor in the game is once again the Bull-Goat Set tied with the Omen Set
Spirit Ashes
While Spirit Ashes share the versatility of Armors, meaning that you can use a variety of them to an exceptional extent based on your needs, for me 3 shine the most, with 2 not far behind, simplifying a lot of encounters.
To nobody's surprise, the shinning 3 are:
Black Knife Tiche +10
The infamous daughter of Alecto is well known for her ability to relentlessly crowd control and interrupt the enemy's movement and stance once summoned. She additionally has the ability to use Blade of Death (Innate AoW on Black Knife), a skill that reduces the target's health by 10% for 15 seconds while also applying a nasty DoT. The duration is short and it will only give you a clear advantage if you are going for a quick boss burn, at which point having 10% HP extra off its health from the get go is a nice bonus. Black Knife Tiche is very survivable and extremely aggressive, attacking almost immediately after being summoned. She is capable of dodging a variety of different enemy attacks to keep herself alive by your side while also delivering quick solid damage strikes. Unfortunately, same as every summon, her AI has some issues. Being an assassin, she will rarely tank for you and quite often while you're the primary focus of the boss, she will just dodge around without attacking looking completely clueless and confused about the purpose of her existence. To conclude, while she is most definitely S+ tier, she will not beat the game on her own for you, not at NG7+ at least.
Mimic Tear +10
Mimic Tear is one of those summons, that if you have not decyphered, it may look fairly irrelevant to you, but once you figure out how it works, it has the potential to be as good as a second player by your side. Mimic Tear will completely copy your current loadout when you summon it. It will not swap weapons based on what's the best thing you have on your kit, it will simply use what you had on your hands when you summoned it. That means that if you summon it while holding an unupgraded weapon that you are using purely to buff, the Mimic Tear will use that very weapon for the entirety of the fight, contributing absolutely nothing, If you are on an Incantation build, and you summon it while you do not have your Sacred Seal out, it will not be able to use Incantations for the entirety of its duration. That means that to make Mimic Tear an S+ tier summon, you need to carefully plan your loadout when you summon it. Given how Mimic Tear has infinite FP being Sorcery or Incantation focused can result in ridiculous amount of damage if summoned properly. As an Incantation build, if you want your Mimic to have the absolute best damage output possible, you should not have Incantations like Darkness equipped, given how your Mimic will try and use/spam that, you need to keep your kit simple with a couple of high damage Incantations and 1-2 buffs. For example, on Malenia, you will go in with Golden Vow, Flame Grant me Strength, Giantsflame Take Thee and Burn O Flame!, your Main Hand Sacred Seal will be the Golden Order Seal (if you have 99 Faith and 99 Int, if not use x2 Giant's Seals) and your Off Hand will be the Giant's Seal, you then summon the Mimic Tear. It will first buff itself with your 2 buffs, and then it will become a relentless Giantsflame Take Thee artillery machine with infinite FP, occasionally going into melee range to use Burn O Flame!. While that may feel limiting to you, the sheer amount of power you gain by that particular Mimic, will more than compensate for what you are giving up.
Mimic Boss Fight Bonus Tip:
The same logic is followed by the Mimic Tear and Stray Mimic Tear boss fights, meaning that you can walk through with a Sacred Seal in your hand and a single damage irrelevant Incantation like Law of Regression, and once it copies your form, you swap to your normal weapons. That will result in the Mimic Boss being unable to do nearly anything since the only things it has access to are your consumables, Law of Regression and a Sacred Seal.
Lhutel the Headless +10
Lhutel is one of those that when she decides to do work, she does work. While she is your average Mausoleum Knight, her ability to teleport is what completely breaks her (in a good way) at many points. She can casually shift throughout the fight arena, completely nullifying abilities targetted at her, making her extremely survivable. She is usually shifting at ranged, using a Spirit Lance and then shifting right back into melee for a triple heavy damage piercing move while also being able to block most attacks. While she has the ability to nearly single handedly turn fights, the only thing that makes her tricky to use, is managing boss aggro with her around. As soon as she teleports, the boss will immediately swap to you, even if it is mid-ability, that can cause some issues when something targetted at her does a 180 turn and lands on you. As long as you have that in mind, she is a solid one.
Followed by the 2 runner ups:
Cleanrot Knight Finlay +10
While her description leaves a lot to be desired, she unfortunately will not carry you as hard as she carried Malenia back to the Haligtree. Nevertheless, her kit is apparted from a variety of things that can be very useful in a fight. She will always use and refresh a heavy fire resistance buff (60% fire damage reduction) that is also paired with a Healing over time effect at 7HP/s, the buff will last for 30 seconds and she will try to refresh it when it drops. While the fire resistance buff is not always useful, the healing over time provides an interesting medium sustain assuming you are not tanking absolutely everything. Her other shinning tool is to vomit pure Scarlet Rot on the enemy, which should it stick, it provides a very heavy Max HP % DoT for a solid 90 seconds. While the damage my be slow ticking, the accumulated raw % she takes off with it is truly worth mentioning. Lastly, she is capable of spamming Miquella's Ring of Light from ranged dealing Holy damage, and using either the melee properties of her scythe or her Cleanrot sword for Physical damage in melee. While all that sounds solid, and it occasionally is, her issues come from the lacking AI, usually ending her up confused not knowing when to prioritize what. If she decides to work, she's exceptional, if not, she leaves you wondering if her description was merely a myth, which is why she's a runner up and not a top 3.
Night Maiden and Swordstress Puppets +10
You met them at the Eternal City, and cursed at them for relentlessly whipping you from nearly a mile away, not allowing you to catch a breath. Luckily enough, this version allows them to do the very same thing to your enemies. The Swordstress and Nightmaiden puppets shine in their ability to ruthlessly stagger the enemy with an unwavering attack spam, offering a very solid crowd control option along with surprisingly high DPS when they manage to stick to their target. They are both very mobile, capable of quickly closing the gap towards their target, following it up with a flurry of attacks. While their AI is surprisingly aggressive and helpful, the reason they end up in a runner up spot, is their lacking survivability, which unfortunately, gets them murdered really quickly against hard hitters.
Verdict:
The deciding factor between these 5 summons would probably be your needs, the nature of the fight and your playstyle, play around with them and see what suits you the most.
Closing Notes
To be entirely honest i did not think that this guide would end up being so extensive, but i suppose i like the way it turned out, a comprehensive explanation of things that people can pick up from and return to if they need something refreshed.
As far as all the things i've written here go, even if a single player improves in the game or i make their life easier, i'll be satisfied. It wasn't long ago when it was myself, trying to figure out how to simplify this beautiful but at points extremely frustrating game and make it smoother and more stress-free.
Like i said in the introduction, you may have found some points that you disagree with, or others that you'd prefer a more detailed explanation, that is only natural. it is inconceivable for any guide or piece of written text to be a perfect read for everyone at the same time, but please, remember to respect the effort put in this that especially at the time im writting this, i understand it was massive.
Lastly, i'd like to once more focus on the fun factor of this game. While a lot of things i mentioned here can trivialize big parts or the entirety of the game, if there's something that you consider more fun or you entertain yourself with, you should definitely hang on to it. You don't have to necessarily overhaul the entirety of your playstyle either, you can pick up a thing or two that you saw here while maintaining your own personal touch.
Closing, i'd like to remind everyone to take very good care of themselves and each other, we are all human after all and each other is practically all we have.
Until next time!
Source: https://steamcommunity.com/sharedfiles/filedetails/?id=2915892309
More ELDEN RING guilds
- All Guilds
- Night's Cavalry cheese (Caelid)
- beautiful female character preset 2
- How to set up HDR properly on ELDEN RING
- beautiful female character preset
- Ranking All 115 Elden Ring Consumables From Worst to Best...
- This is a guide on how to walk.
- HOW TO BECOME ALPHA WOLF IN ELDEN RING
- All about Crystal Tears in Elden Ring
- STUTTERING FIX
- (, ) -