Things Betwixt
1 Rusted Coin (Temporarily boosts item drop rate (luck))
You can find this item near the start of the game.
From where you first appear, head up the hill to where the strange monkey-like creatures are gathering.
Turn to your right and follow the path around.
At the end, you'll find a corpse with one rusted coin that you can pick up.
1 Gold Pine Resin (Apply Lightning to weapon)
Before you cross the drawbridge leading to the crones' house, you'll find a narrow path between some bushes to your left.
Walk through the bushes and follow the path as it leads upward.
You'll eventually come across a large cyclops with its back turned to you.
In front of it is a gold pine resin that you can grab without having to get into a fight with the big one-eyed fella.
Just dash in and grab it before he reacts (this is basicly teaching you how to hit and run, does not work in real life tho).
1 Small and Smooth Silky Stone
Look down and to the left as you're crossing the bridge to the crones' house.
See that glow near the base of the waterfall? Believe it or not, it's pretty easy to grab.
Simply head left once you're across the bridge and walk through the bushes.
There's a short path leading down and to the left where you can pick up the mysterious smooth and silky stone.
10 Human Effigy
Believe it or not, you can find 10 Human Effigy's inside the "Three Crones' house".
Kill the maid, drops 3 Human Effigy.
Kill the Firekeeper sitting at the table, drops 6 Human Effigy.
Upstairs in the house, chest, drops 1 Human Effigy.
1 Soul of a Lost Undead, 1 Torch
Once you walk outside the other door, destroy the wagon parked over these items, and proceed to loot the shinies.
1 Divine Blessing (fully restores HP and cures all status effects)
Once you get through the narrow passageway beyond the crones' house, you'll find yourself in an area with several mists that you can walk through.
Ignore all of these for now, and walk straight through to the other end, where you'll eventually find yourself on the path to the town of Majula.
On the path heading down, make a left past some boulders, and you'll see a corpse with the glow of an item.
Entrance to Forest of Fallen Giants
Starting at the bonfire, looking out over the ocean at the cove with all of the spiky rocks sticking up, look to your right along the coast.
~10 strides away you'll see a crumbling wall; on the sea side of the wall is a torch sconce marking an entrance that leads down to an underground stone rampway.
To the right of the main path in, is an iron chest with a Rusted Coin x1.
Proceeding down the hallway, there is a dead end to the right and to the left a large gated door. Pulling the lever to the right opens the gate.
The path opens up to a cave with a wooden bridge that spans a stream.
Once past the bridge going to the right leads to the Forest of Fallen Giants and to the left there are two long planks to a large stone with a chest that contains Human Effigy x1.
Beyond in the stream is a corpse with a Homeward Bone and Soul of a Lost Undead.
Whatever you do, don't walk off the island toward the corpse with the glowing object, because you'll immediately drown.
You can make it across by running and then leaping from the island, or if you're not confident, you can leap from above (near where you first entered this cave), but you will take some damage.
Once you grab the bone and soul, you'll have to keep moving forward.
Follow the stream to the left, where you'll eventually find yourself in an open area with enemies.
If you stay to the right after you exit the cave, you will the first Forest of Fallen Giants Bonfire.
3 Lifegems (slightly restores HP), 3 Homeward Bones (return to last bonfire rested at)
From the corpse you just picked up the divine blessing from, go up the hill, where you'll see another narrow path between some rocks. Head through the rocks and past the ruins until you come to a sitting down warrior with a large sword sitting in front of a fort.
Just past him on the left is another corpse with the lifegems and the bones.
I highly recommend killing every single monsters there before engaging the Heide knight.
This knight is quite powerful but will drop a very good sword if you manage to vanquish him.
Anyone aiming to be a Faith Cleric or a DEX Swordsman, should get the Heide's sword and upgrade it to +10 when available.
Majula
Estus Flask
Once you're back in Majula, hanging around the bonfire should be a mysterious woman. Talk to her to receive your Estus Flask.
1 Soul of a Nameless Soldier, 3 Lifegems
To the left of the bonfire is the blacksmith's house (and the blacksmith, who seems to have locked himself out).
To the right of his house, you'll find three very handy lifegems and one soul for the taking.
1 Lifegem
Next to the blacksmith's house and in front of the cathedral-like building is a small tent leaning against a wall.
Inside is a corpse that holds one lifegem.
5 Homeward Bones
Before you enter the cathedral, head up the path that's to the right of it.
At the top is a corpse next to Victor's Stone that has a load of bones just sitting there for you.
1 Crimson Parma Shield
Enter the cathedral, and you'll eventually find yourself heading down a winding staircase.
About halfway down on the left is a chest containing a crimson parma shield, which is super handy if you're playing a class that doesn't have a shield as starting equipment (which is most of them). Head back up and into Majula.
1 Estus Flask Shard (grants additional estus flask uses)
Once you're back in the "town," look for a small well in front of a building that has a stone conveniently perched on top of it.
Knock the stone down, and a corpse will be raised featuring a handy item that lets you increase the amount of health your estus flask regenerates.
Be careful around this area, though: just around the corner are three small enemies that look like giant, hairless rats, AVOID these at all cost, they will ravage you within seconds.
1 Titanite Shard (reinforces equipment)
On the other side of the huge well-like hole in the ground is another hut, where the armorer lives. Go inside and climb up the ladder near the back of the hut.
In a chest on the next level is another shard for the taking.
In the middle of this hub area is a large circular tunnel that leads straight down.
Peek into it, and you'll see some corpses, with items perched precariously on some wooden planks.
The jump down to the first plank may look survivable, but it isn't.
You'll have to get an item to survive that fall, so leave those mystery goodies alone for now.
Useful Equipment And Items
Ring of Binding
You need this badly.
Here's why: whenever you die in Dark Souls 2, you become a little more Hollow.
Hollowing reduces your max HP, and after a few deaths you'll find your available HP reduced by half.
The only be able to recover your loss is though the use of Human Effigies, which are more precious than gold in the first sections of Dark Souls 2.
The Ring of Binding changes all of this.
When worn as a Hollowed, it raises your maximum health to 75%...still a handicap, but the difference between life and death a dozen times over.
The Ring of Binding is located in a chest just outside the Cathedral of Blue before the Old Dragonslayer Boss, just across the raised drawbridge from the Heide's Tower of Flame zone.
To reach it from Majula, you'll need to be able to overcome a total of eight Old Knights guarding the path, a tall order for a new character.
The Knights are very slow, but extremely durable, and they relentlessly follow characters who sprint past them.
Killing the first seven knights is optional, but the eighth is an absolute necessity.
Killing him raises a switch, which in lowers the drawbridge.
A very quick character may be able to weave up the path, enter the great circular plaza guarded by three knights, take the exit to the left, dodge the two knights, run up the stairs, head left, and kill the waiting Knight, but extreme speed is required, as the knights following you will eventually overtake and overwhelm you.
The difficulty of waiting for the switch and the drawbridge requires some very creative evasion.
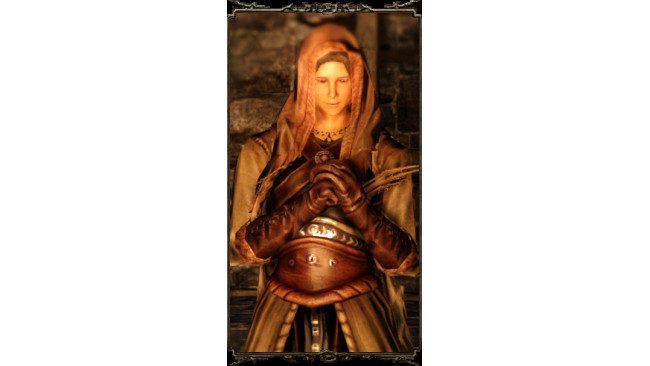
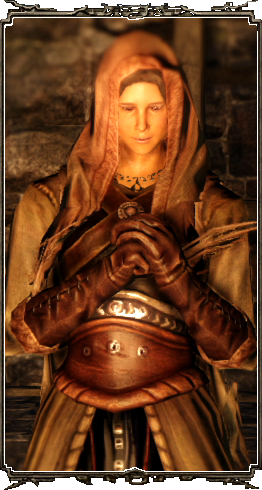
Licia The Cleric
Up the stairs from the Dragonrider in Heides Towere of Flame is a platform leading to No-Man's Wharf.
Waiting there is Licia.
If you're planning on creating any Faith-based builds or utilizing Miracles, you're going to want to visit this spot.
The Cleric has a wide arsenal of spells available, as well as catalytic items.
Moreover, talking with the cleric provides you with the necessary key to operate the Subterranean Contraption near Majula.
Image of Licia below.
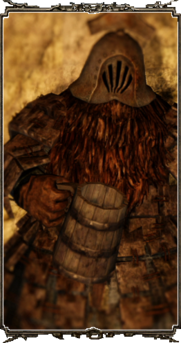
Gavlan the Merchant
You can find Gavlan the Merchant in No-Man's Wharf, the second floor of the house swarmed by the Dark Stalkers, on the uppermost level of the wharf, just before the bell.
Sells a limited number of Consumables.
Warning, these enemies will aggro you all the way into his room and burst the door frame down. Clear them before talking to him.
This is one of the most important encounters you'll have in the early game, and it's entirely possible to blow it.
In the upper story of a house along the harbor, you'll find a rotund, helmeted merchant.
He's important for two reasons.
First, he sells valuable poison and anti-poison gear which some builds will find helpful.
Secondly, he buys junk.
You can sell unwanted items to this guy in exchange for souls.
However, there's a catch: he only lingers in this place for the length of a single visit (You will encounter him a second time at Harvest Alley when he moves from this place, so don't worry too much.).
Image of Gavlan below.
Callhillion the Sorcerer
At the far edge of No-Man's Wharf rests Calhillion the Sorcerer.
To reach him, cross through the docks, head up the stairs into the town, turn right, then weave back down through the dock.
He'll be at the far end of the pier.
Calhillion will sell you a Sorcerer's staff and a wide variety of spells
Pharros' Lockstones
The Pharros Lockstone is a vital item used to operate contraptions.
Two stones are available in the early game, and you should gather each as soon as possible. The first is sold by the old woman near the Cardinal Tower Bonfire in The Forest of Fallen Giants.
The second is in the locked house in Majula, accessible via the House Key mentioned below. Pharros Stones open up secret ways and helpful devices.
A Pharros Stone makes No-Mans Wharf much easier, and also unveils hidden treasures in the Forest of Fallen Giants.
House Key
First found in a cave in the Forest of Fallen Giants (down the ladder at the second bonfire and through the hole with the tree root you have to run up). Talk to him and he will give you the key to the locked mansion near the pit in Majula. Exhaust his dialogue and he will move to the basement of the Majula mansion after you kill the skeleton(s) lurking below.
Watch out for the boulder trap that appears just before encountering him.
You can find him in the hole across the large area of outdoor scaffolding below the long ladder. Turn left after entering the chamber across the pit, (be wary of the huge boulder) and talk with the man several times until he gives you the key.
The house is crammed with goods, including essential tools for a Re-spec, a Pharros Lockstone, and more.
In the mansion, there is a basement area containing a chest and an unlit light guarded by a skeleton that will prove a challenge to new characters as it appears and moves quickly and has powerful, fast attacks.
One more thing:
The Covetous Silver Serpent Ring +1 can be acquired from Old Hag Melentia at the Cardinal Tower bonfire in the Forest of the Fallen Giants after buying a certain number of items and talking to her.
This ring can increase soul acquisition early in the game and make levelling up much easier.
By exhausting her dialogue, she will move to Majula.
Source: https://steamcommunity.com/sharedfiles/filedetails/?id=256392830
More DARK SOULS II guilds
- All Guilds
- DARK SOULS II Guide 378
- DARK SOULS II Guide 372
- Dark Souls 2.
- Dark Souls 2 FPS default controls/input lag FIX
- DARK SOULS 2
- Dark Souls 2 GeDoSaTo Mod
- DLC-? (Crown of the Old Iron King)
- DARK SOULS II Guide 328
- Ultimate Pure Caster/Hexxer Guide
- Dark Souls II - Chameleon Spell Location