Introduction
This guide is based on default/average settings (Sorcerer, Normal). The challenge can vary greatly based on changing your difficulty level and game length.
Always try to go for 3 completed stars for each level so you can get a legendary spell book that helps you in the next area of the map.
Keep in mind choosing curses and how they will stack compared to each challenge that you are doing - for example - don't choose the curse that speeds up the Lord of Evil's progress if doing the speed challenge, which already speeds that up. Select carefully.
Lastly, these are all just my opinions, so if you have tips to add, feel free to!
Chaos Challenge
Challenge:
Magical aberrations are twice as common and take twice as long to disappear.
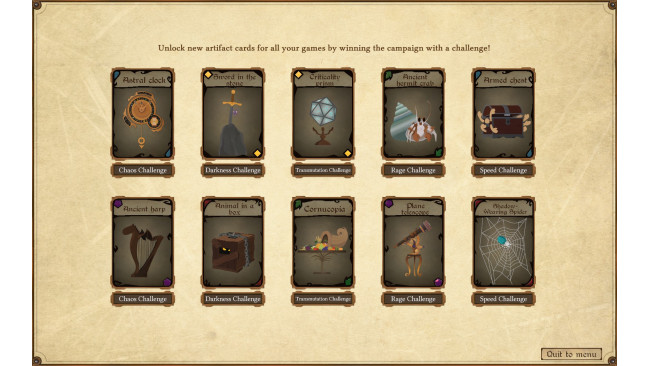
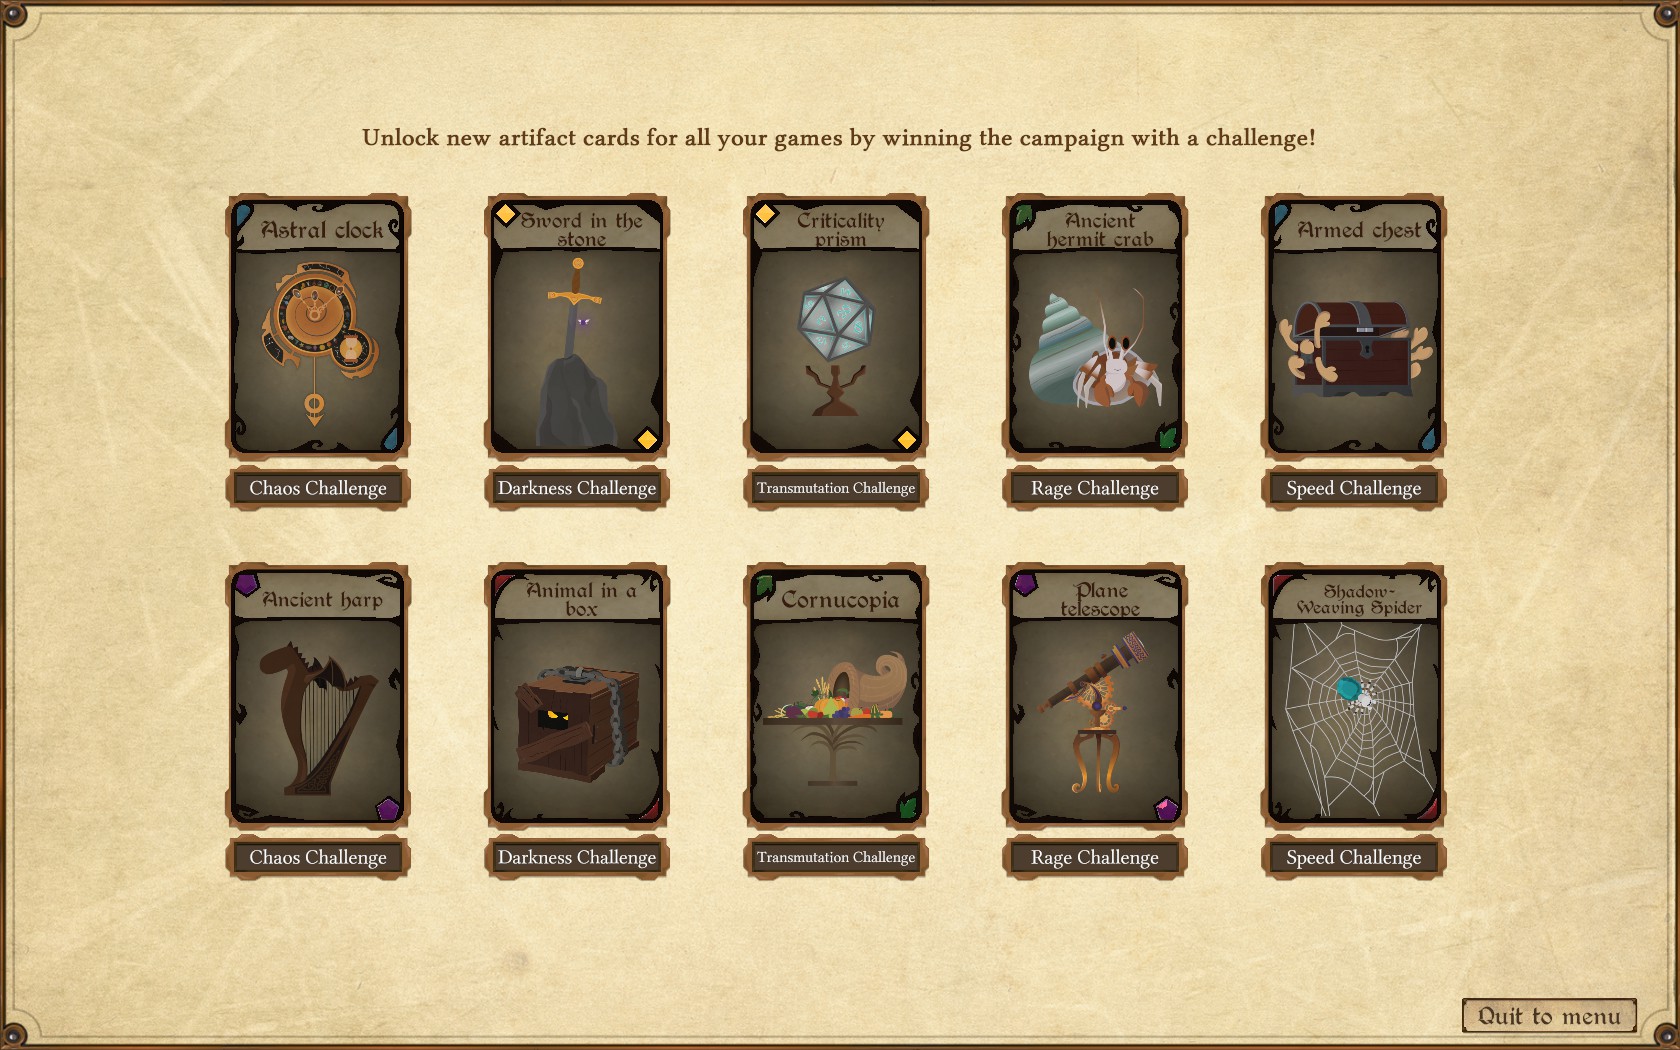
Rewards:
1. Astral Clock: Active Characters in this room plan their day, which prevents their needs from increasing by burst for a long time.
2. Ancient Harp: Students who are active in the room are no longer subject to aberrations and are a little more disciplined for a long time.
Difficulty:
1/5
Advice:
This is an easier challenge - make sure you prioritize infirmaries and there isn't much of a challenge for this one. The rewards are excellent, so you may want to attempt this challenge first.
Darkness Challenge
Challenge:
You choose between two cards instead of three when drawing from your deck
Rewards:
1. Sword in the Stone: Active students in this room slightly increase their skills in Heroism.
2. Animal in a Box: Active students in this room slightly increase their skills in Beast Magic.
Difficulty:
4/5
Advice:
One of the harder challenges. Once you get deep into this game and know what cards/rooms/pieces you're looking for, they are less likely to appear with only two choices instead of three. I'd attempt this challenge last or second to last. Focus on gaining gold and mana so you can draw more cards for more choices.
Transmutation Challenge
Challenge:
Two potions of each type are added to each deck when shuffled. Potions are 25% more effective.
Rewards:
1. Criticality Prism: Active teachers in the room become able to make "critical hits" while teaching, which provide a big knowledge bonus to the students.
2. Cornucopia: Students active in the room generate gold according to their level in Nature magic.
Difficulty:
2/5
Advice:
This challenge places a potion card in the mix of three cards you draw. Sometimes, this works in your favor so it isn't a terrible challenge. Other times, you may be waiting for a specific card and because you're less likely to draw it, it could be challenging. Most of the time, I thought it helped, though. If you didn't like the two options you could often choose the third card and get more mana or gold, or useful things like cleaning potions.
Rage Challenge
Challenge:
Relationships with normal factions deteriorate by 2 each season. Attacks contain 4 extra enemies.
Rewards:
1. Ancient Hermit Crab: Active teachers in the room have a chance to gain positive traits.
2. Plane Telescope: Active students in this room have a chance to extend their studies by 1 year.
Difficulty:
4/5
Advice:
This is one of the harder challenges as well. Each YEAR, every faction decreases by 8 points. It doesn't seem like much, but it does add up, especially if you're trying to keep the bonuses (like for the peasants and getting faster communication). Tip: prioritize banners that increase your reputation with different factions. Prioritize them early and place them strategically.
Speed Challenge
Challenge:
The forces of Evil advance faster (+25%) and no student ever applies for 7-year studies.
Rewards:
1. Armed Chest: Active students in this room slightly increase their skills in Enchantment.
2. Shadow-Weaving Spider: Active people in this room generate the resource you have the least of (gold or mana).
Difficulty:
3/5
Advice:
This can vary in difficulty greatly depending on what difficulty level, game mode, and map you are on. For example, the Cliffs map already speeds up the Lord of Evil progress, so it may be good to avoid that. Focus on slowing down the Lord of Evil with relationship points and other bonuses early on. Keep your goals simplified. Do not choose the star challenge with teaching 100 students; choose something simpler like the merchant challenge where you collect 10,000 gold.
Suggested Order To Complete Challenges
Based on difficulty I suggest to go in this order, in terms of difficulty and rewards:
1. Chaos Challenge
The easiest challenge, and has two great reward cards - the astral clock which helps with student's needs, and the harp, which prevents aberrations.
2. Transmutation Challenge
Easier challenge with an excellent reward - the Criticality prism which gives knowledge bonuses to students, and the Cornucopia is decent as well.
3. Speed Challenge
A mid-level challenge that has one of my favorite rewards - the shadow-weaving spider that generates the resource you need most. The armed chest helps with Enchantment which is good for dungeons, but the spider is best here.
4. Darkness Challenge
A difficult challenge with good rewards. The rewards are more niche, though - focusing on Heroism and Beast Magic.
5. Rage Challenge
The other difficult challenge. The rewards are great but not my favorite out of the others - the Hermit crab improves teachers and the plane telescope increases lengths of study, which can help if you like to do the dungeons or go for archemages.
If you're having trouble with a challenge, you can change your difficulty level and game length to help achieve it!
Source: https://steamcommunity.com/sharedfiles/filedetails/?id=2560779613
More Spellcaster University guilds
- All Guilds
- Samurai Programmer's Guide To Higher Magical Education
- Basic Information and Startup Guide
- Going infinite in Spellcaster University
- Advanced Guide to help make decisions
- Dfis de campagne et rcompenses
- Mcaniques de base du jeu
- Guide approfondi du jeu, ou comment russir la campagne en mage
- Archimage easy and fast
- Spellcaster University : Le Guide Complet