Should You Buy This Game?
Demo Version vs Paid Version
The first thing you're going to notice about Bloody Raid is that there are 2 different versions of this game: a demo version and a paid version. What's the difference? It may surprise you to learn, but honestly...not a lot!
As someone who actually has owned/played both versions I can honestly say that I enjoyed the demo version just as much as I am currently enjoying the paid version of Bloody Raid.
So, what's the difference?
Honestly? Convenience.
There's a disclaimer in Bloody Raid that specifies that the demo version is just as capable mechanics-wise as the paid version of the game. That's 100% true; you can do all things in-game and play as much as you want with the demo version. You can level up your hunters, you can level up your profile, you can create Named Weapons, and so on. The only thing you cannot do in the demo version of Bloody Raid, is hire/work-on more than hunter at a time.
Is that a deal-breaker? Not really honestly. With a base (Tier 1) hunter you can achieve various levels of success as you desire. Even a certain challenge-task that asks you to hire a 2nd hunter is not limited in the demo version. You can easily dismiss the initial hunter you have and hire the 2nd hunter for completing this task. However, dismissing the hunter half-resets that hunter's progression and you'll have to start that hunter's progress over if you rehire that hunter again.
With the paid version of the game: you bypass this minor inconvenience. Which may seem like a big deal at first, but in the grand scheme of things, it's really not. By the time you're stagnated with the "Hire a 2nd hunter," task you're likely looking at other hunters and their perks to see how they play differently.
So ultimately, the convenience of having the paid version is definitely worth it, but if you don't have the budget for a new game then you're still going to have a great time playing the demo.
Understanding Raider Currencies
Okay, so here's where this game slightly differs than others in the genre (check the bonus section, "Opinion: Is Raid a Knock-Off?," for comparison analyses). The menus are where the majority of your character/profile progression is going to take place, but they can be a little confusing. To understand the menus, we'll need to quickly go over the currencies in Raid really quickly as it's with the menus that we interact and engage with the menus.
CurrenciesCash: is used to buy all things in Bloody Raid that you would possibly need to run a successful raid. Cash is used specifically at the Market Vendor. The Market Vendor is limited in selection, but not limited in quantity. So you can buy as much as your hunter can carry.
Cash is earned from returning items found in the Zones; they're considered contaminated and are removed, but you are paid for those items.
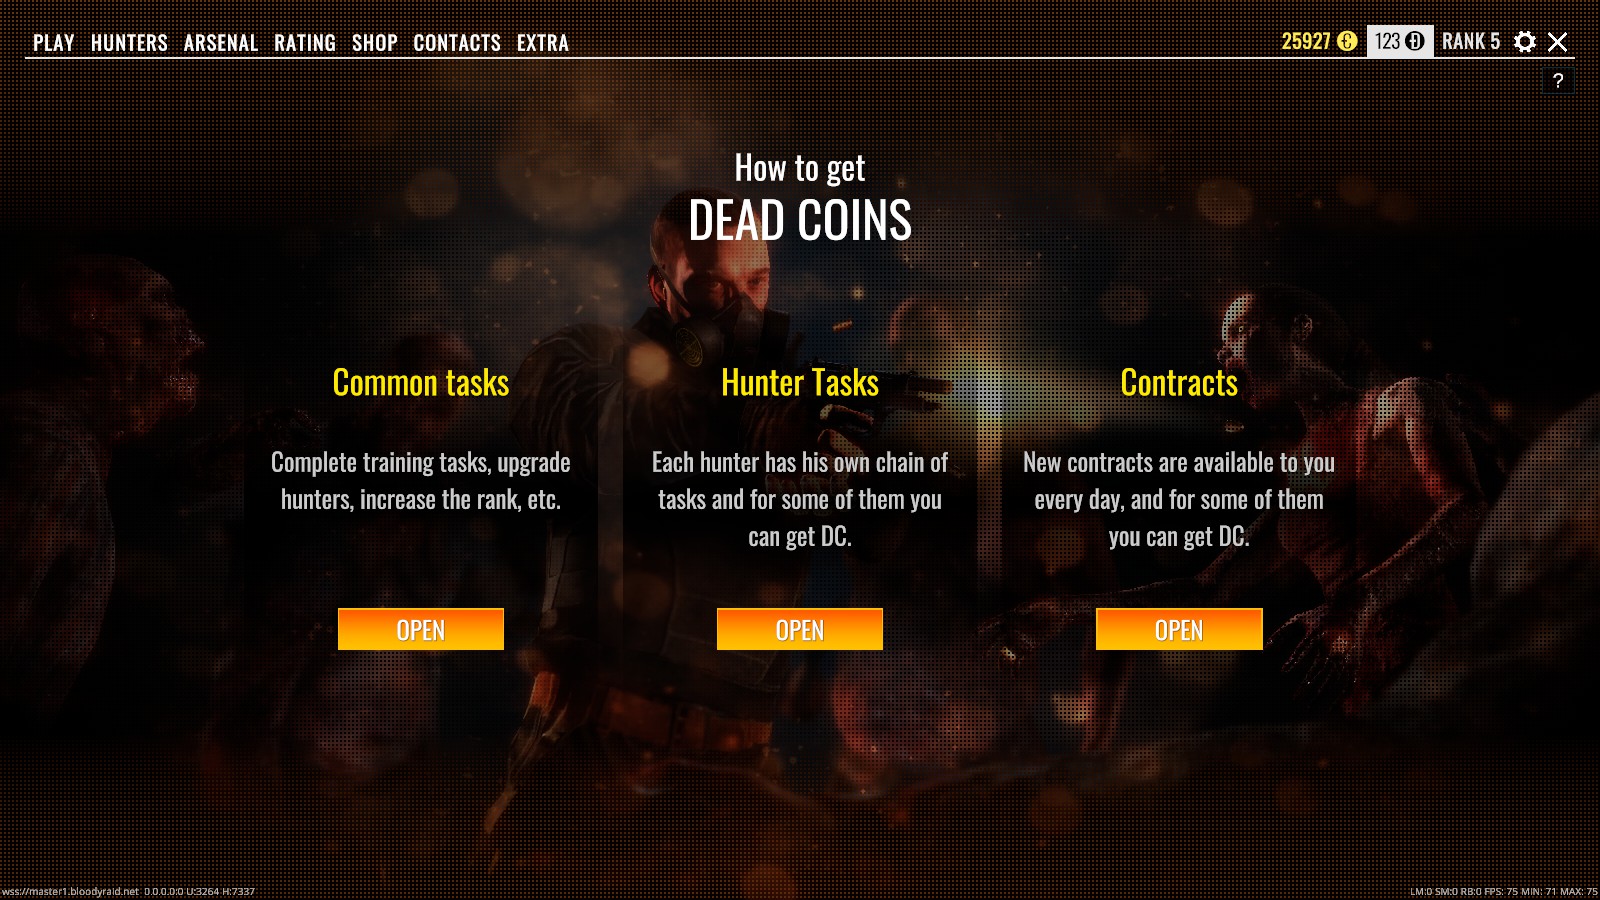
Dead Coins: Coins are acquired from leveling up your Hunters as well as leveling up your profile.
Cash can be used to purchase Dead Coins.
Coupons: Coupons are actually items that you can redeem into your inventory or your Arsenal (more on the Arsenal in a moment).
Though you will not find Cash, Dead Coins, or Coupons physically in the Zones, all of these currencies are awarded for completing tasks and contracts.
God Roll Games really has done a pretty awesome job at steering away from pay-to-win mechanics while also allowing a form of Bloody Raid to be free-to-play. This is why you cannot buy Dead Coins with real life money. The only way to accrue Dead Coins is to play Bloody Raid and level up.
Understanding The Menus
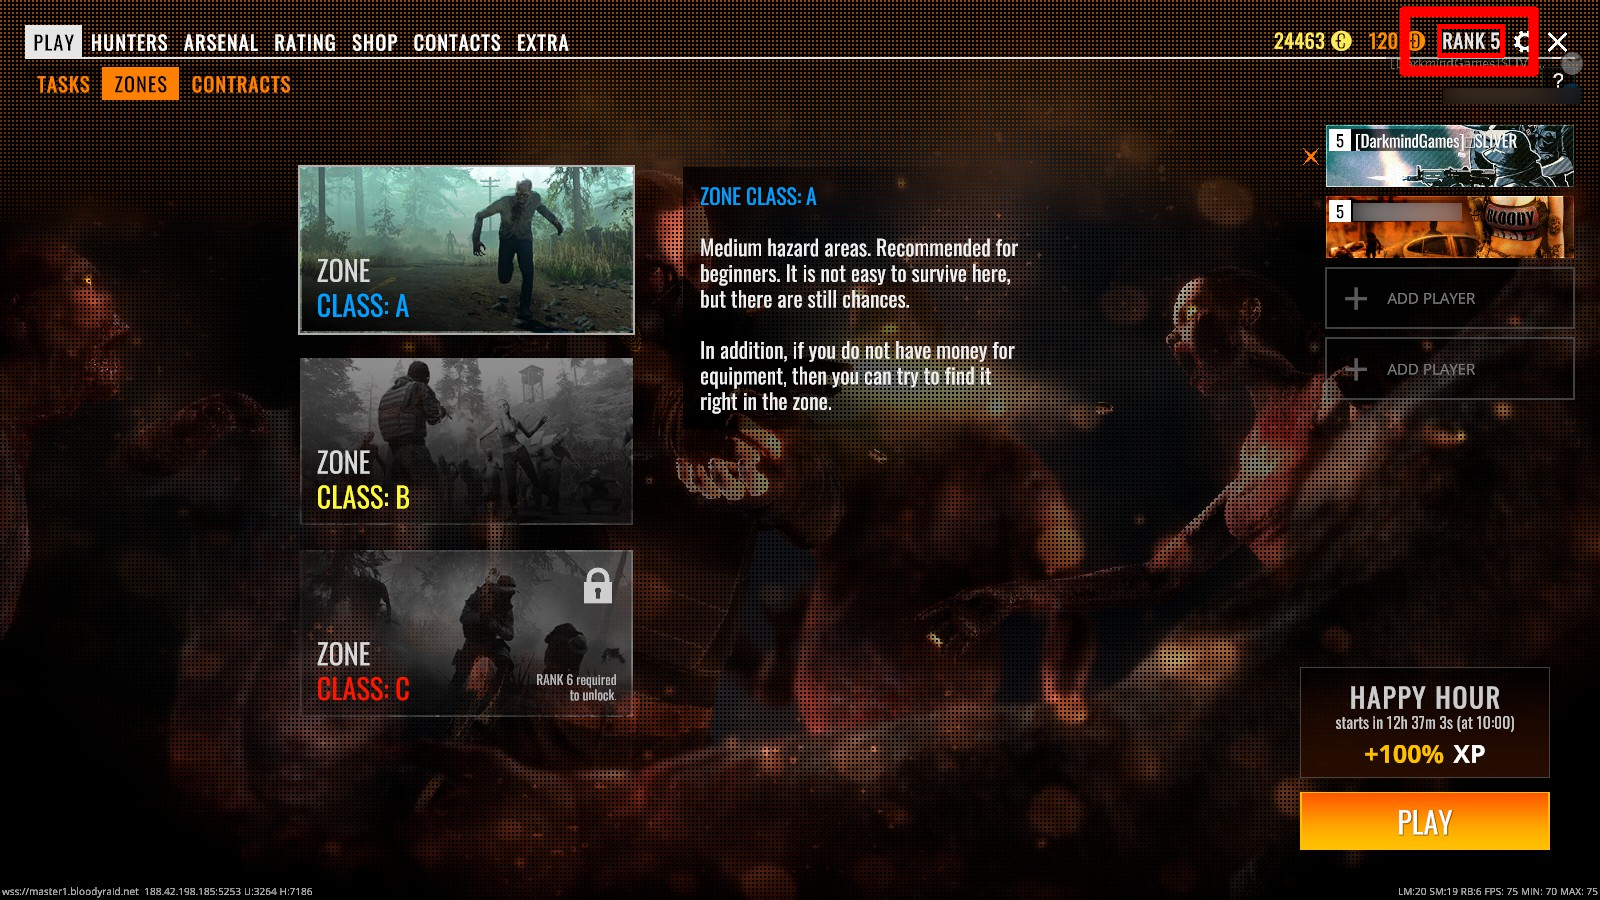
So, let's get into the real meat and potatoes of this guide, shall we? The bulk confusion of this game is understanding how all of the menus work and how to effectively gear up. More than likely, when you start the game you'll be looking at a menu that looks something like this:
There's a lot to unpack here, but it's all pretty simple stuff really.
-Front and center we have Zone Selection. Certain Zones are locked away until your profile reaches a certain level. As you can see in the photo above, both Zones A and B are unlocked; this is because my Rank Level is a Level 5 and Zone B unlocks at Level 2. Zone C however is locked until I reach Rank Level 6 (Note the highlighted red boxes in the top-right, this is your Rank).
To the Right, we have your team roster. I have a friend joining me in this game, but have blurred their name on both the in-game roster and the Discord Overlay.
-To the very Top we have a Title Menu Bar hosting a set of different menus that we're going to cover in just a moment.
-Just under the Title Menu Bar we have the Context Menu Bar where we're given certain options and sub menus we can access.
-To the Bottom Right, we have the Play Button that leads into actually fighting in the Zones.
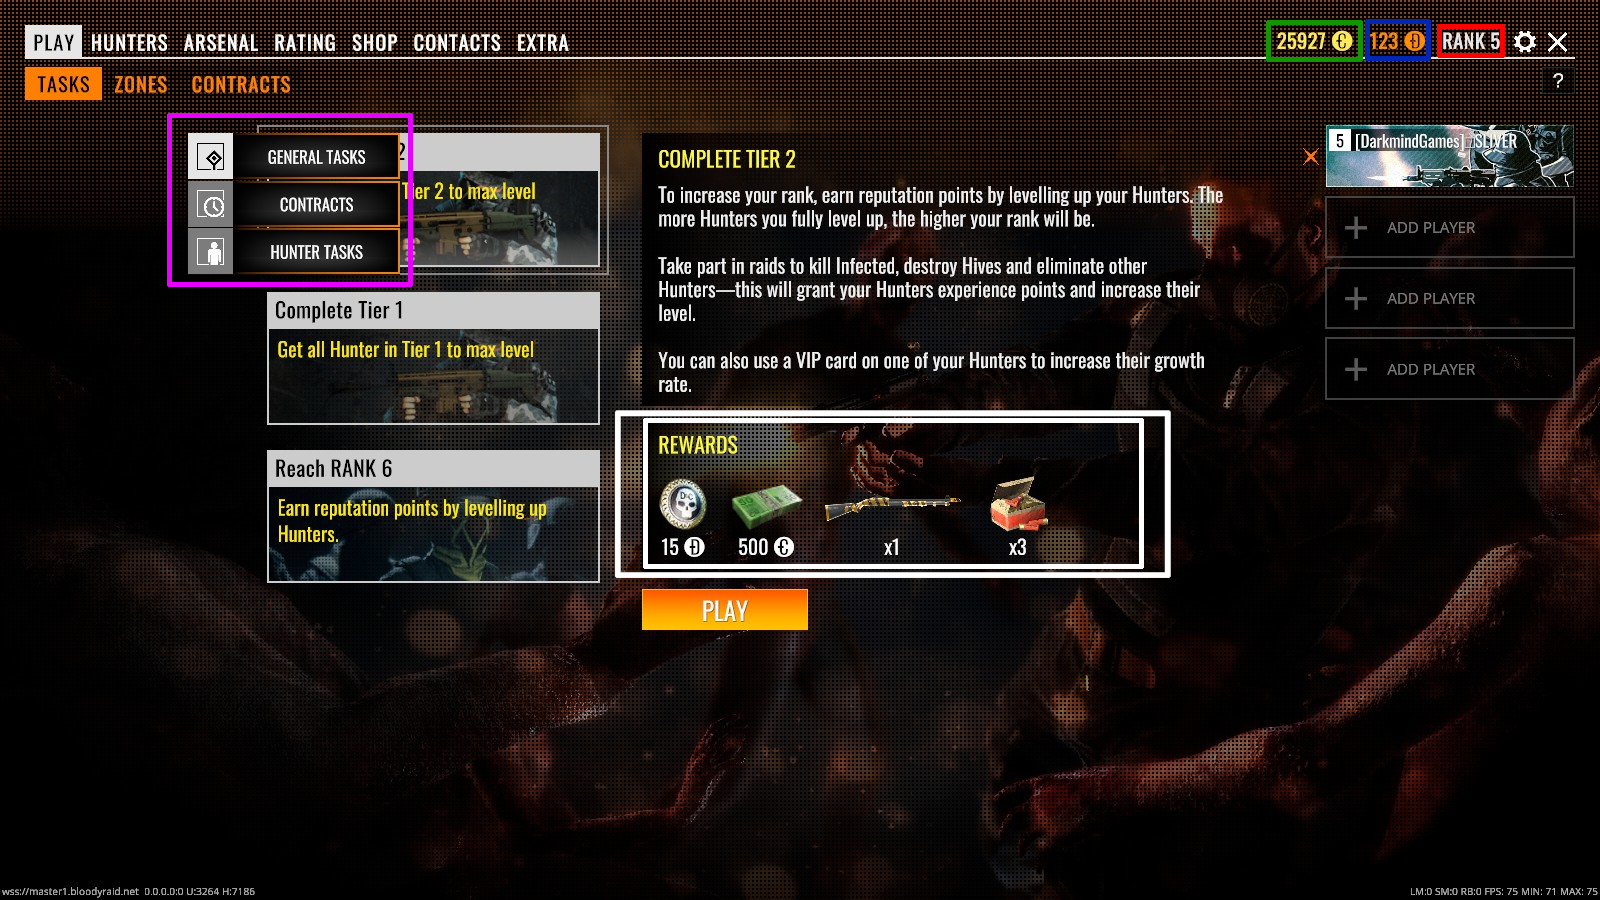
First, as a new player, you're going to make sure Zone A is selected. Then, go to the Context Menu Bar and choose Tasks.
-Again, starting at the top: In the Pink Boxed area we have a set of Tasks we can perform in order to profit for our efforts in the Zone.
There are General Tasks in which any hunter you've hired can perform.
There are Contracts in which any contract you've agreed to complete can be done by any hunter you've hired.
Then there are Hunter tasks which are Hunter-specific and can only be completed by certain hunters.-Moving Front and Center: these are the previews of the rewards that will be given if you complete the Tasks that you have selected to attempt.
-Top Right, green box: How much cash you have.
-Top Right, blue box: How much Dead Coin you have.
-Top Right, red box: Your current Rank.
-Top Right, cog wheel icon: Game Settings.
-Top Right, 'X' icon: Exit Game.
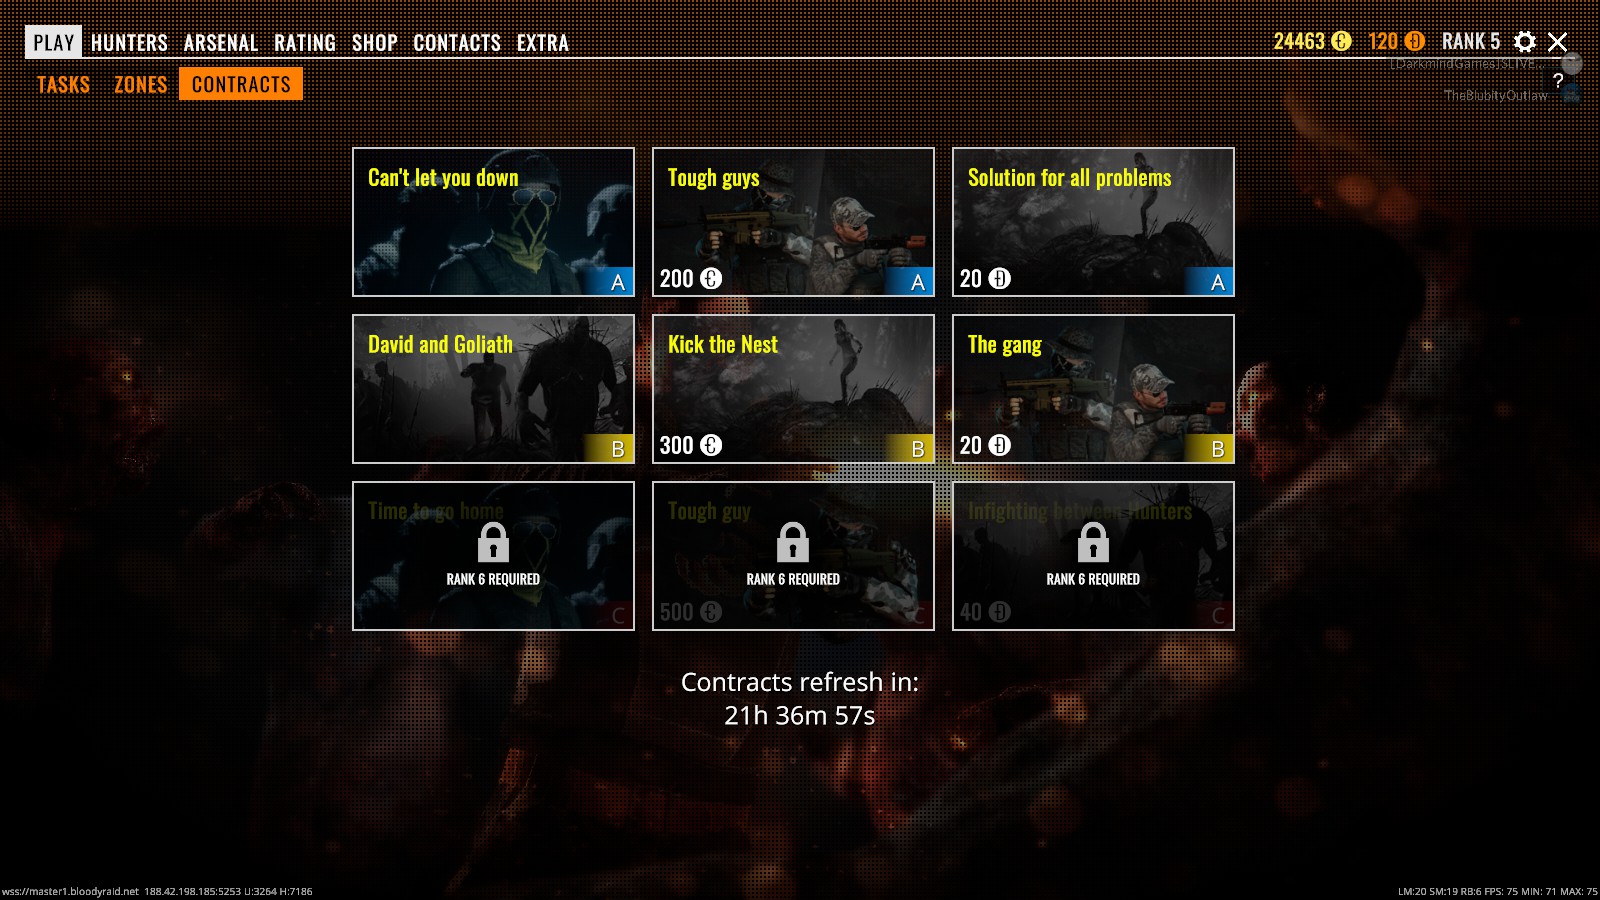
Lastly, let's take a look at Contracts and then we'll move onto Hunters and gear load-outs. Contracts is the final Context Menu tab under the Play option that we've not looked at yet and once chosen, it looks something like this:
The top row of Contracts will always contain Zone A contracts, just the middle row will always contain Zone B contracts, and the bottom row holds Zone C contracts.
The left-hand column of the Contracts is a contract that can always be done at no cost to you. It's usually an easy task to complete for minimum payments.
The middle column is a contract that requires you to pay a little bit of cash to complete, but the reward payments are moderately larger than the easy tasks.
The right-hand column are contracts that require a Dead Coin deposit, are the hardest to complete, but yield the highest payment and will always net you more Dead Coin than paid.If you never take a contract or complete a Task in Bloody Raid, you're going to go broke. If you're finding weapons in the Zones, completing Tasks and Contracts, you're going to seriously profit quicker than you realize. So, if you want to know how to make money and move up quickly in this game, this is how: Tasks, Looting, Contracts.
Gearing Up!
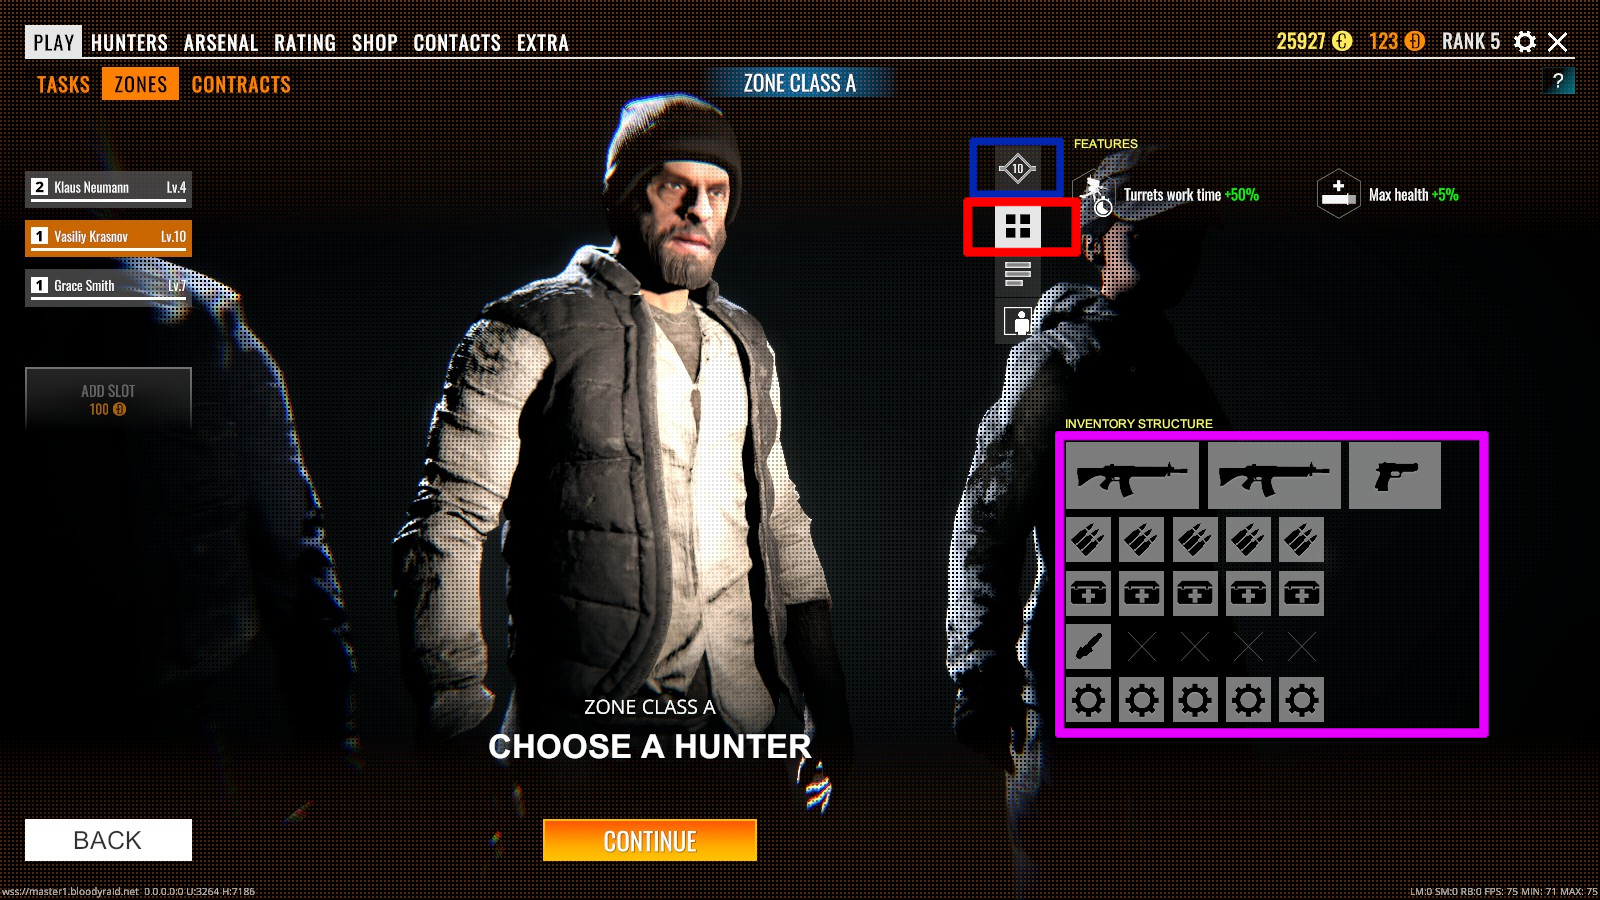

Alright Raider, it's time to gear up and prepare to smash some zeds! From the Play Menu, select a Zone, then press the "Play," Button. You'll then be taken to a screen in which you will hire a Hunter or will select a hired hunter to play with. That screen looks something like this:
On the Left-hand, Side we have the Hunter's name.
On the Top-Right, High we have the Hunter's Level Panel (Blue Box).
This panel will show you the requirements to level your Hunter up to the next level.
On the Top-Right, Middle we have the Hunter's Trait/Gear Panel (Red Box).
This panel will show you what gear limits and traits your hunter has available.
On the Top-Right, Side we have a description of the Hunter's traits/abilities (titled: Features).
On the Bottom-Right we have the gear limit representation.
This grid shows you how many weapons, ammo boxes, med kits, stims, and gadgets your hunter will be able to carry by default (before a backpack/vest is equipped).-Choosing "Continue," will take you to the next screen where you can buy from the Market Vendor, or Redeem Coupons.
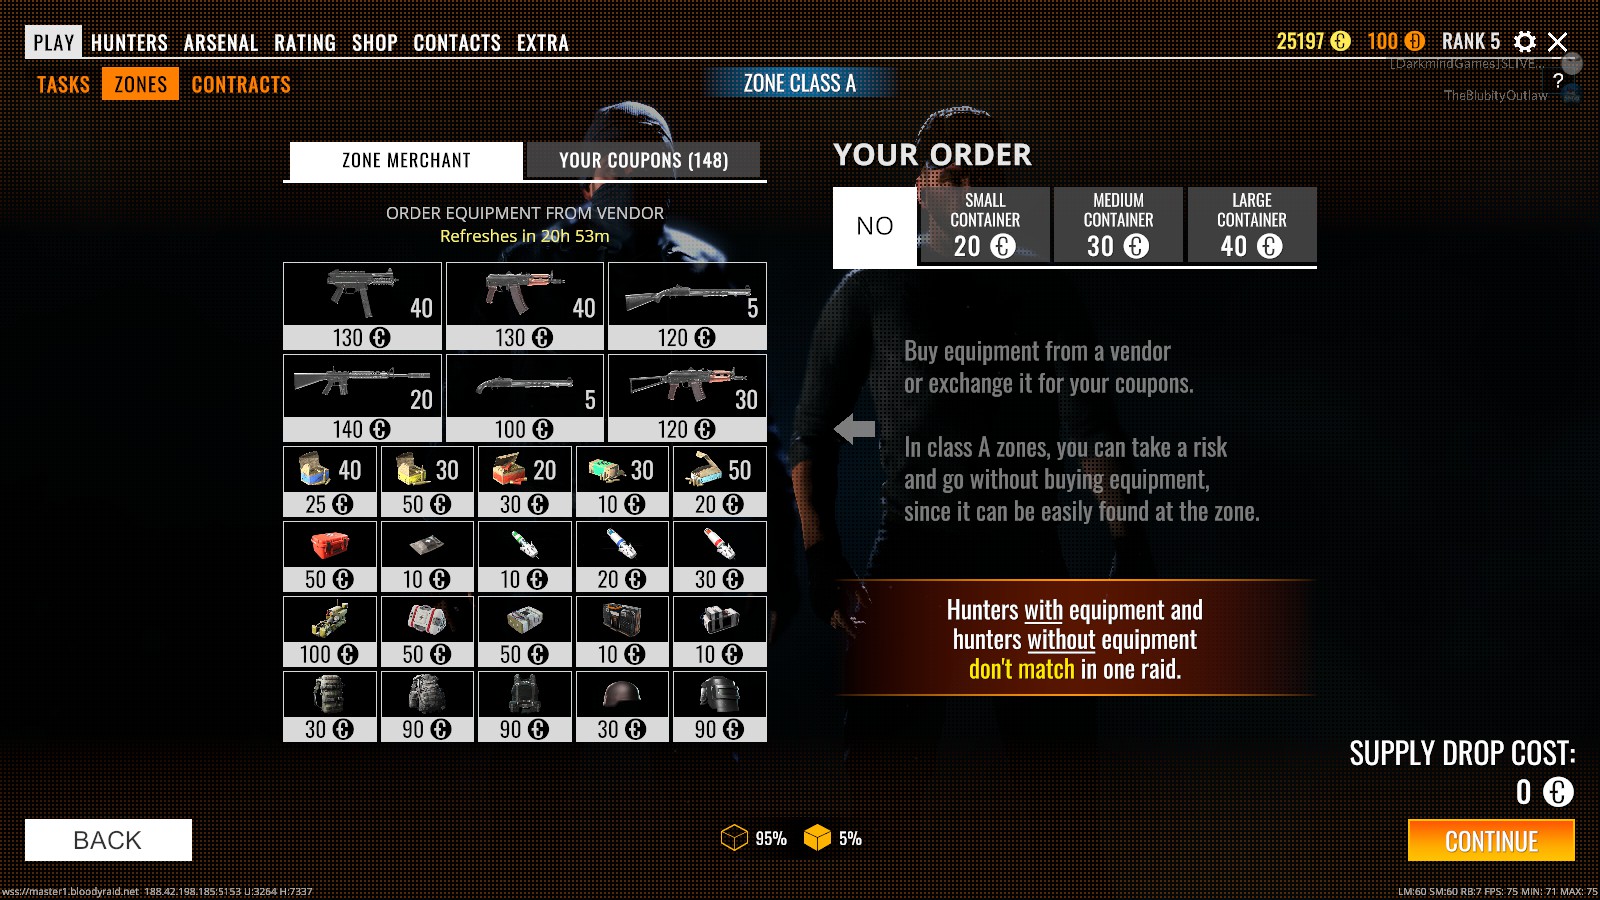
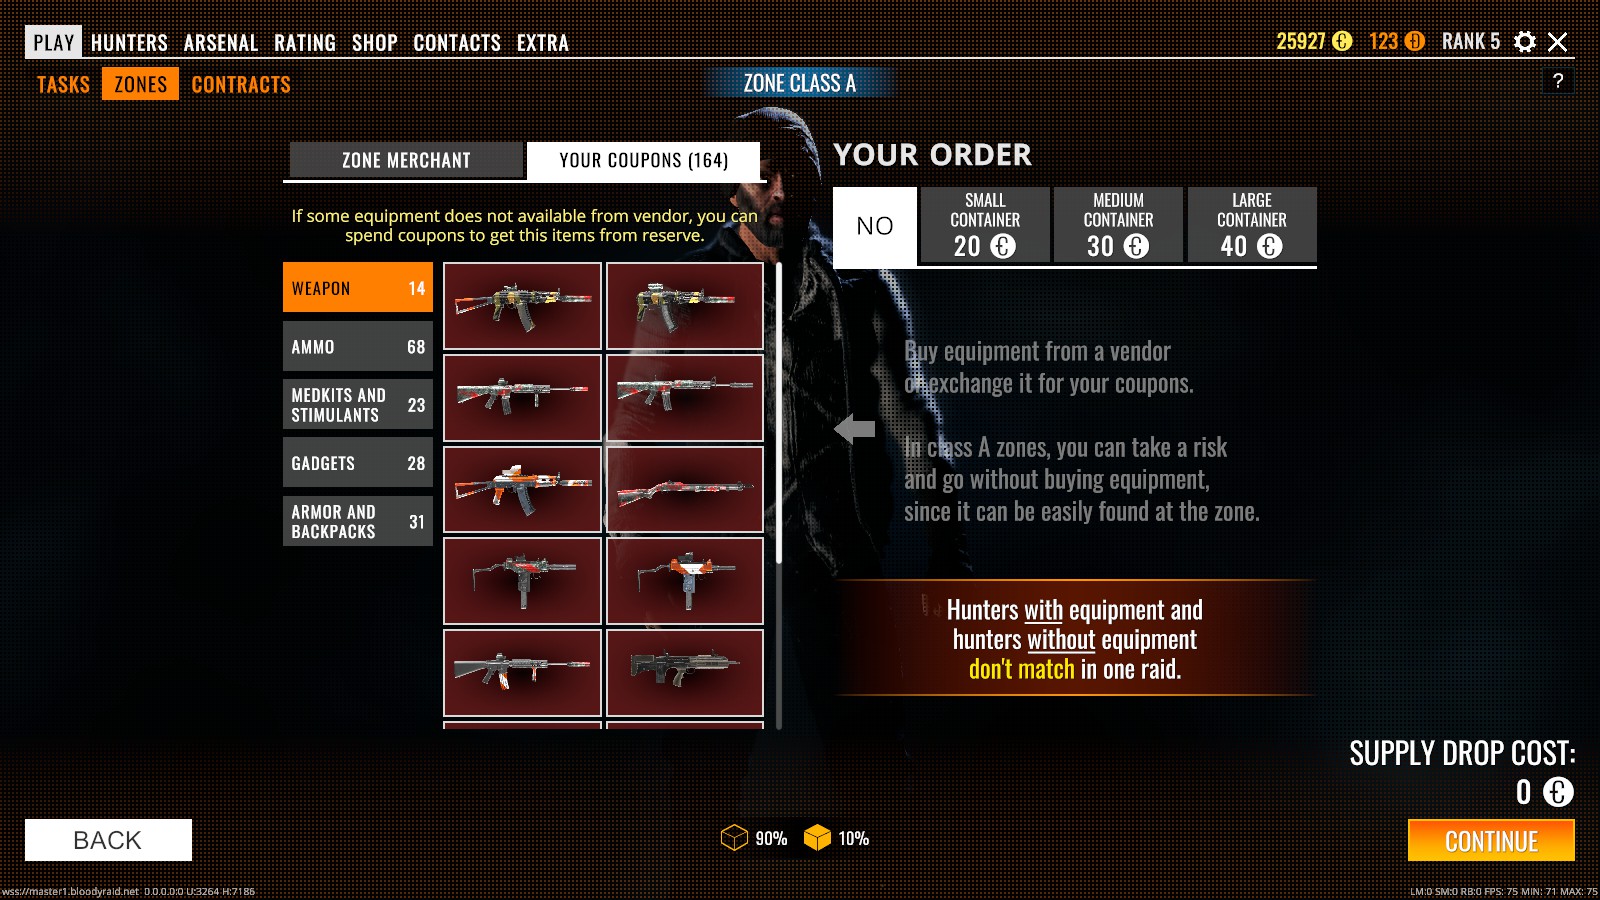
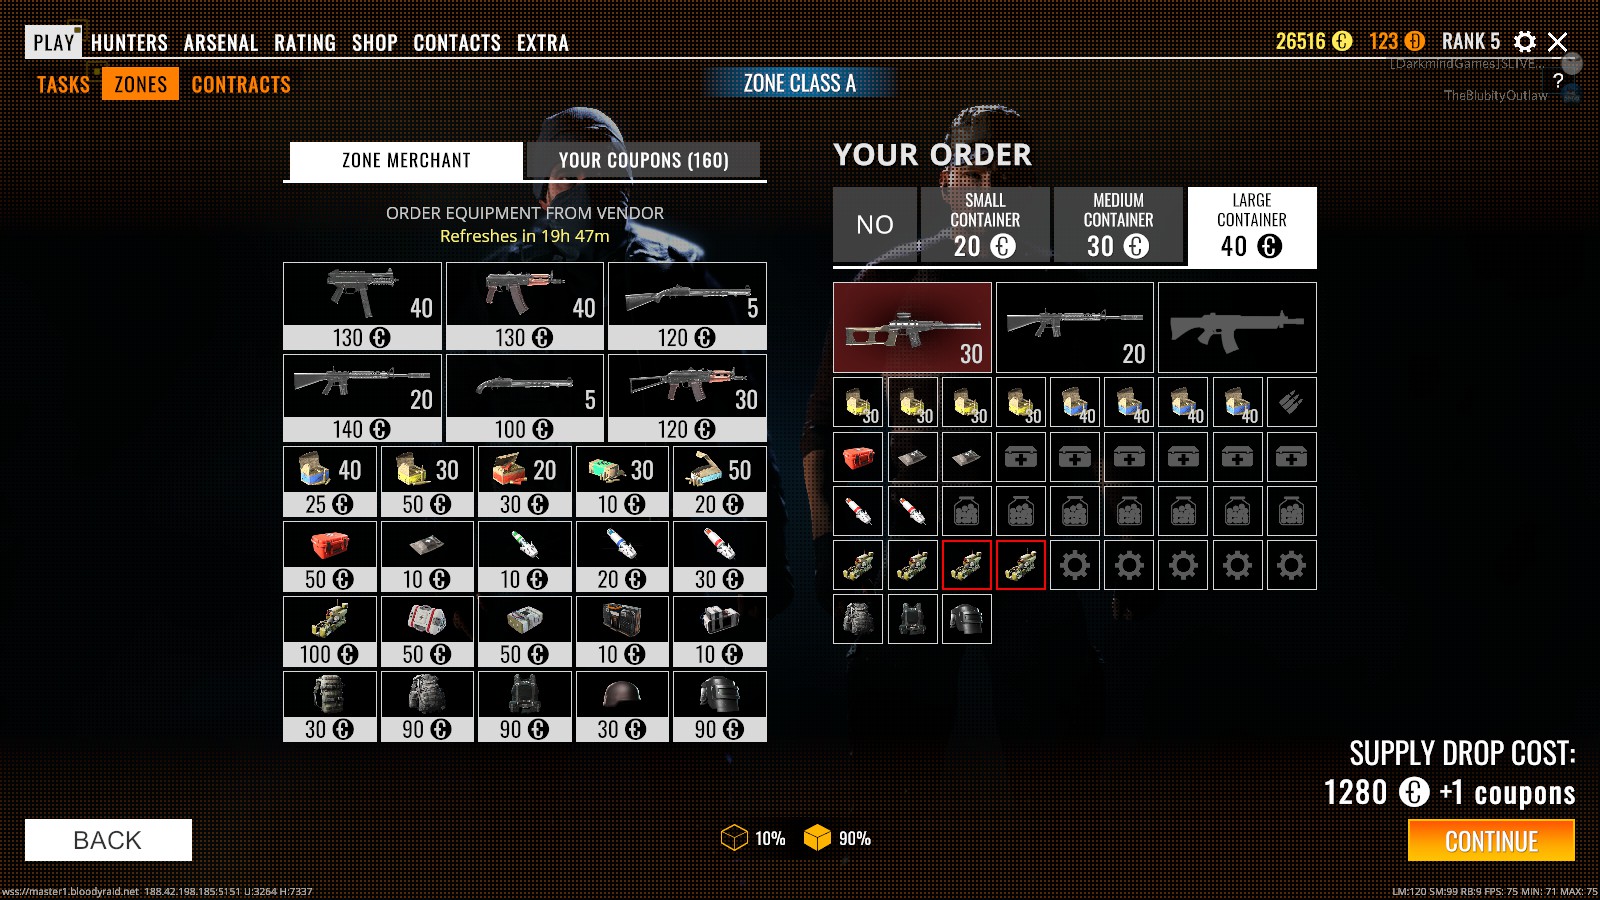
Here is the Vendor Screen (Left) and Coupon Redemption Screen (Right):
-Taking a closer look at each screen you can see the accepted currency for purchase of each item. As mentioned in the Currency Section: Vendors take Cash, whereas Your Coupons are collected and then redeemable.
-Coupons represent weapons you have either been rewarded from completing tasks or from weapons you have purchased with Dead Coin in the Shop Menu. All of these weapons are customized and upgraded in the Arsenal (more on the Arsenal in a moment). If you have enough Dead Coin, you may purchase either a basic or fully upgraded weapon as seen here:
-Now that you're ready to gear up, it's important that you don't overload your Hunter, which is entirely possible. If you bring in too much gear, it will be left at the spawn point in your bag which will be unreachable after dropping into the Zone. Every item that is considered as overloaded will be encased in a red box. It's important to realize the distinction in a red box outline, versus the Coupon's red background. So, here's an image of what overloaded items look like:
-Notice how the first weapon selected is a Coupon weapon and has a red background, but this Hunter cannot carry away 2 of the 4 turrets he's ordered to bring into the Zone with him. If a raiding partner has extra space, they may pick up these overload items as their own which can be useful if you're "mentoring," someone in this game.
Fighting In The Zone...the Danger Zone.
...this section is coming soon.
This section will include a few tips and tricks about managing inventory, quick searching, tactics for clearing an EVAC site, After Action Reports/Debriefing, Contacts in the Zones, and so on.
The Arsenal
The Arsenal is a very in-depth menu and mechanic of Bloody Raid and therefore requires its own section entirely. However, despite its depth, the overall idea is actually really simple. Take a weapon you've either bought from the Shop or have brought back with you from the Zone, customize it to your liking, boost its abilities, and use it again when you want. Each attachment, including the skinning, adds a modified affect to your weapon.
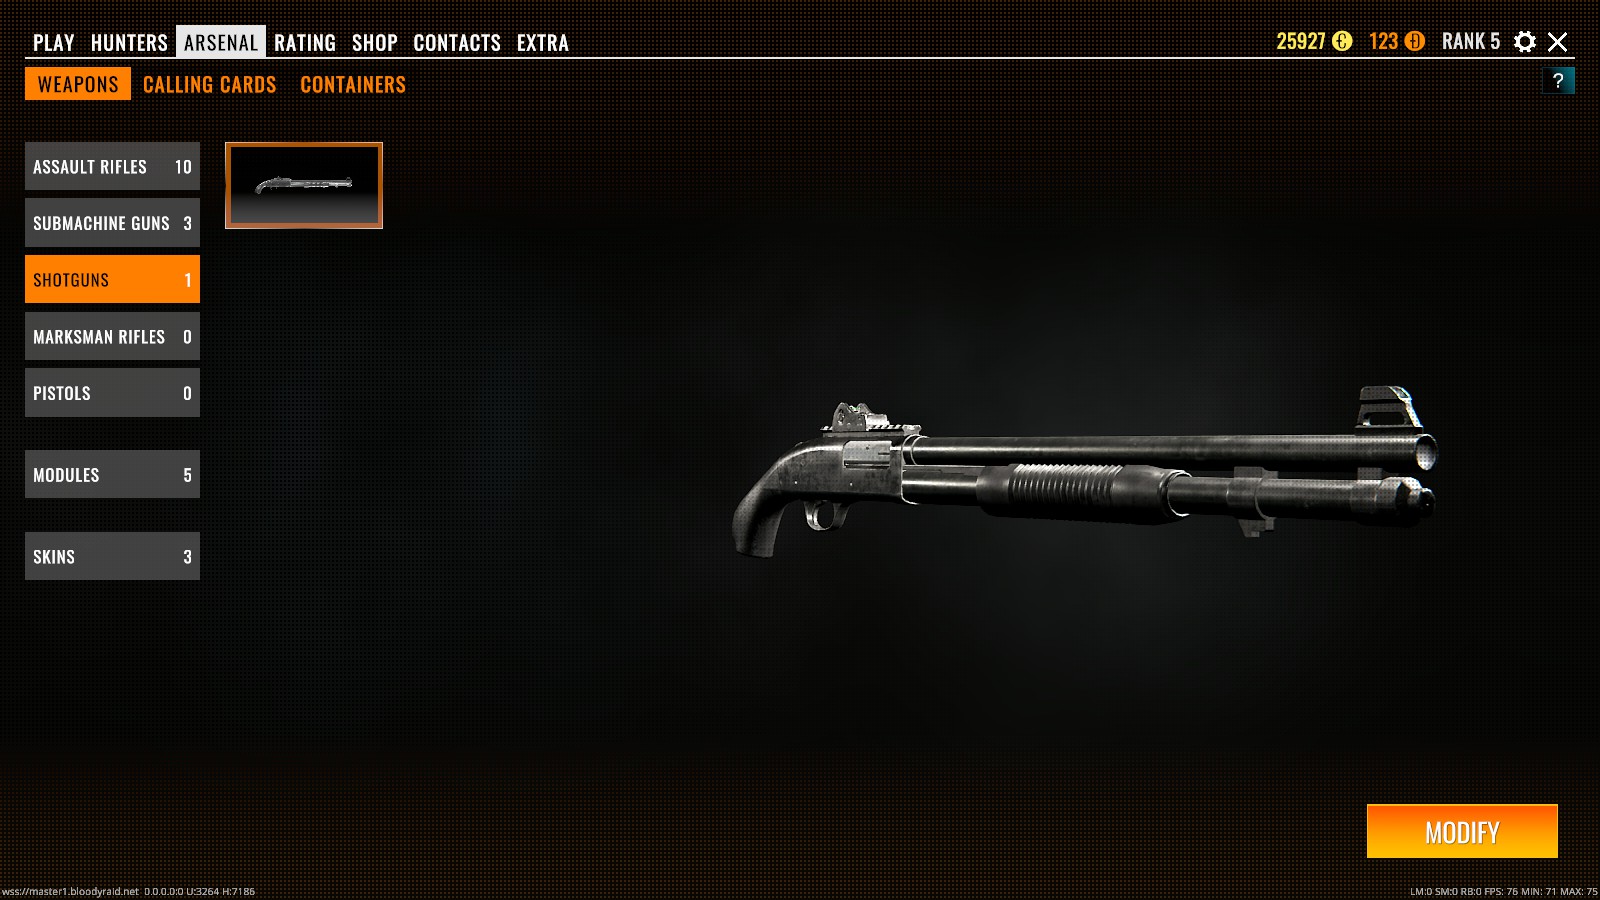
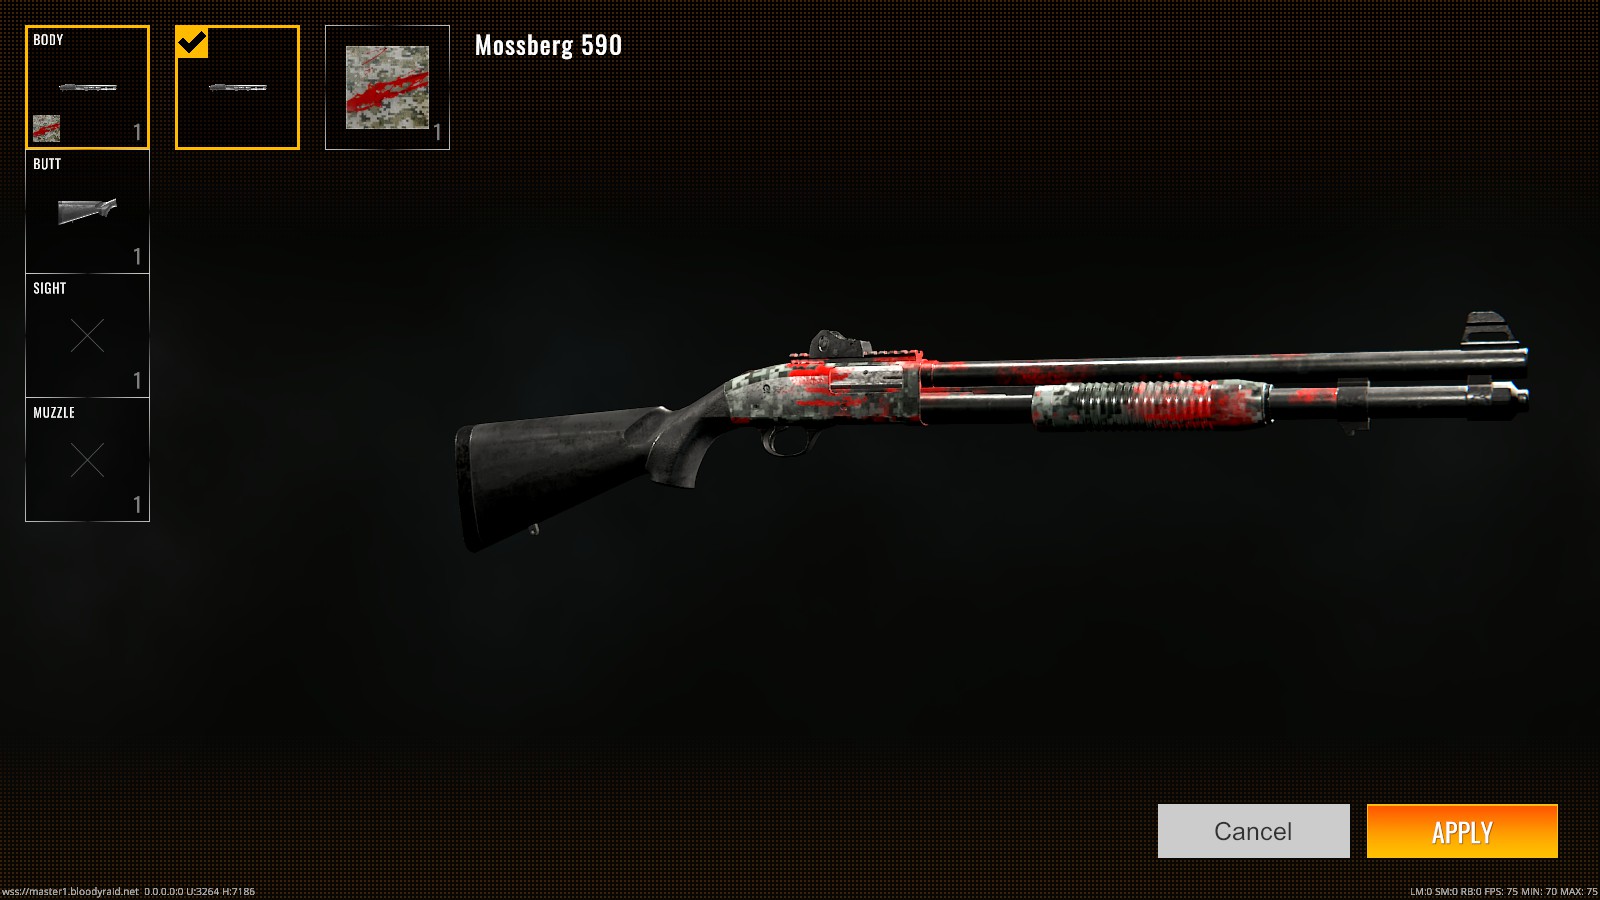
-Here we have a shotgun that was awarded to us through completing a task (Left).
This shotgun came with an assortment of attachments and options we can apply or choose to place on another shotgun that we acquire later.
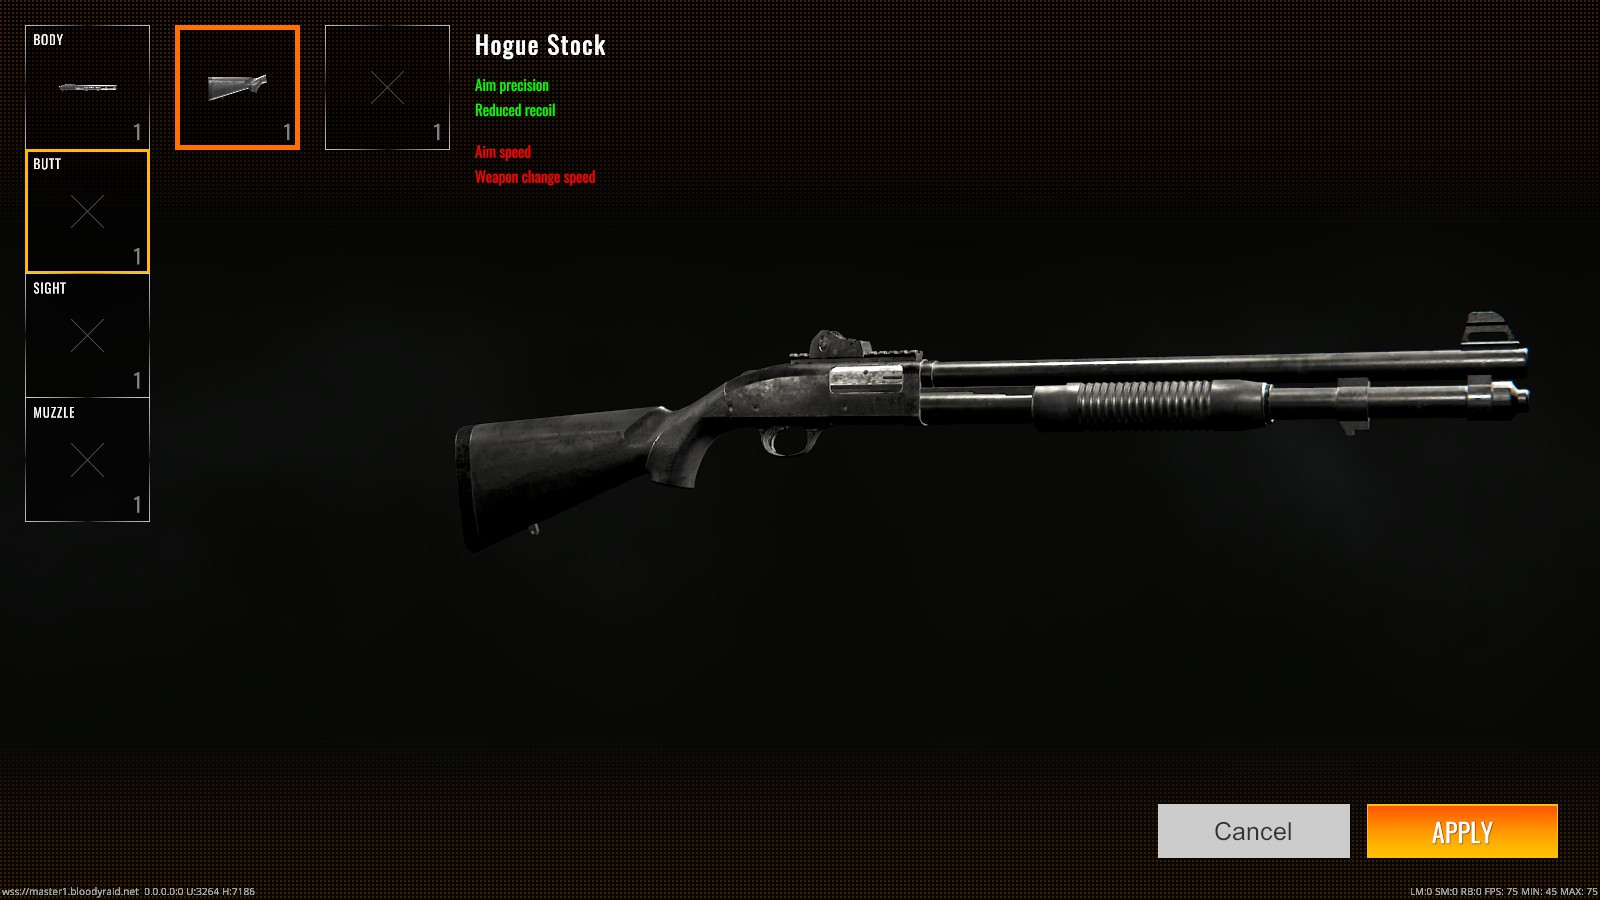
-Let's give it a full butt stock so that we increase its precision and recoil (Right).
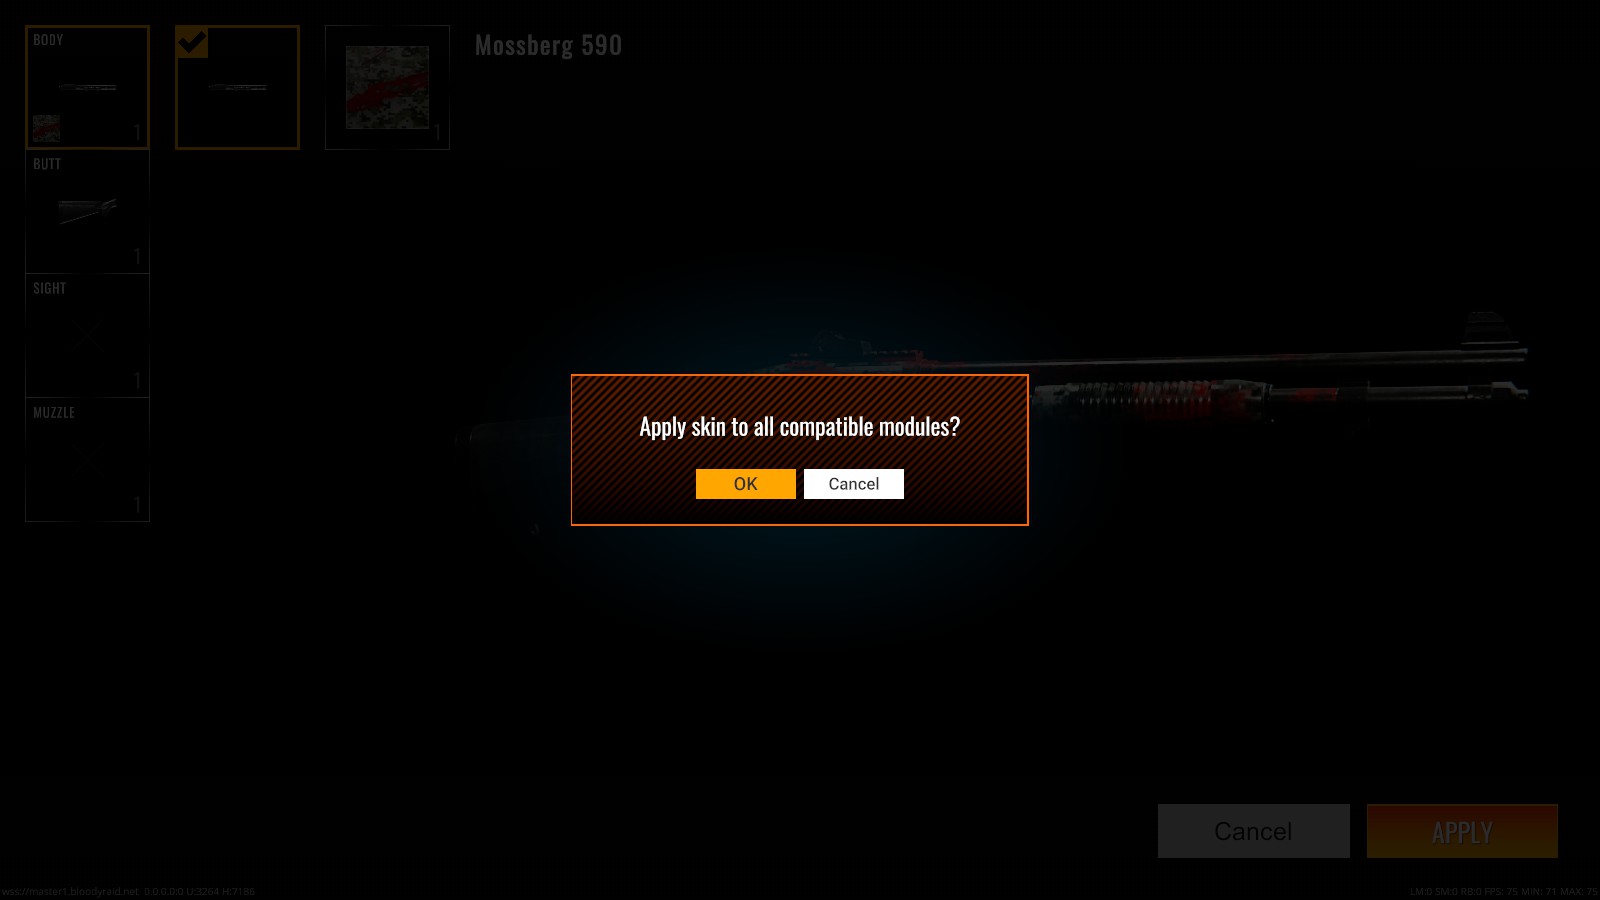
-Next, let's give this shotgun's Body piece a skin that will help its bullet spread.
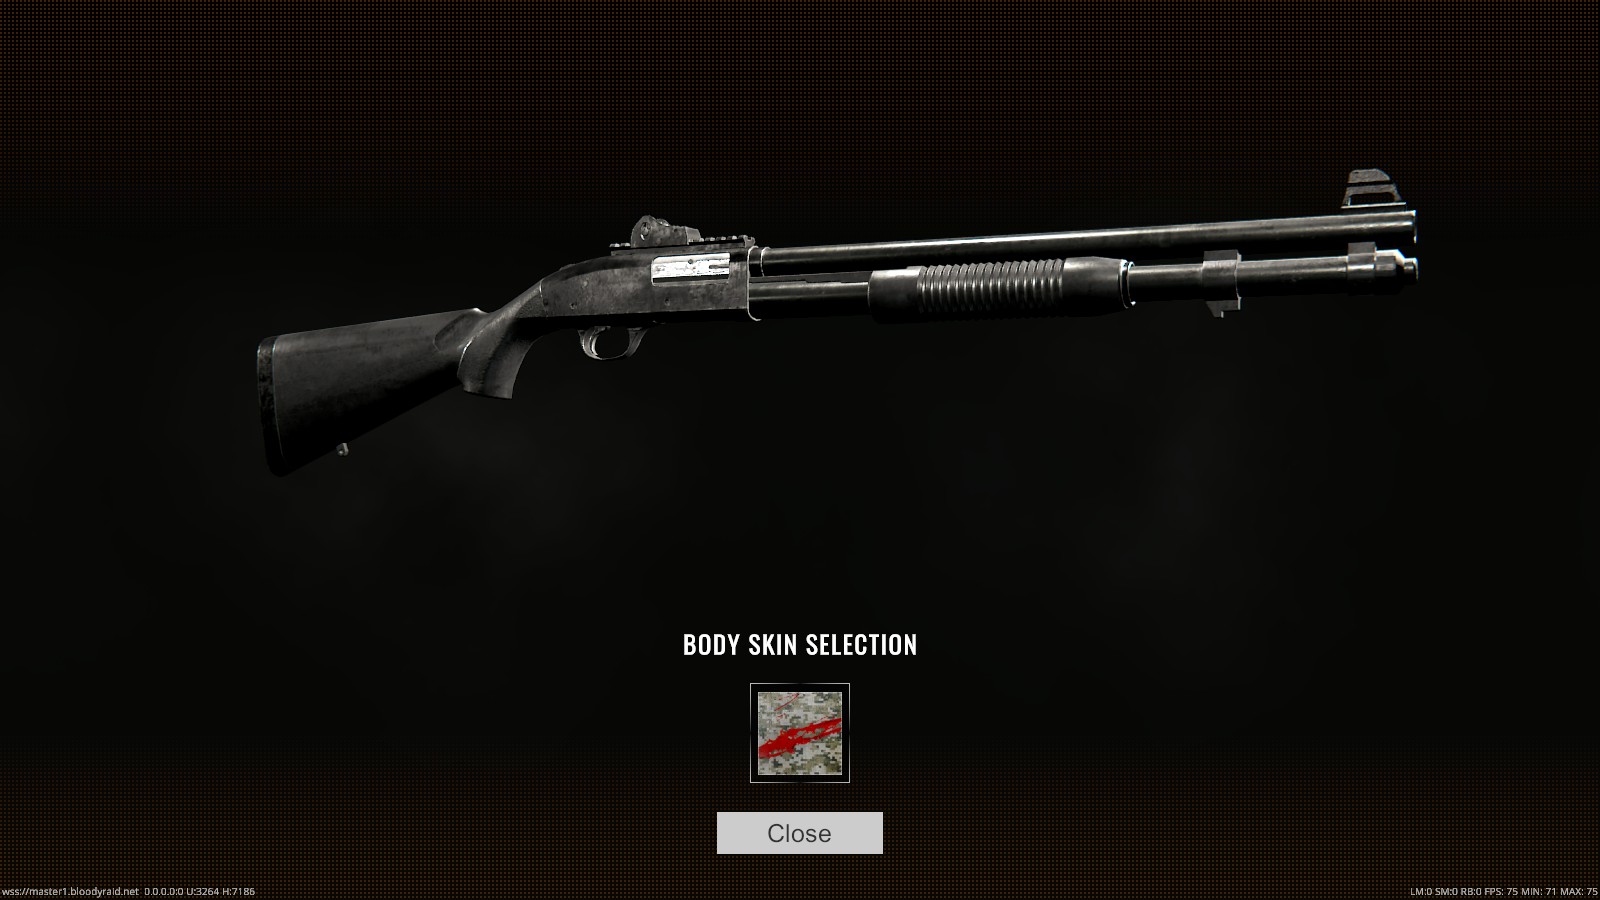
Now, if we wanted we could choose to wrap this skin over the entirety of the shotgun, but the reach a weapons full potential it's best to give it multiple skins over multiple parts to get multiple effects.
-So, we'll choose "Cancel," when asked to apply it to all other parts (Left).
-This will apply the chosen skin only to the body and we can continue modifying the weapon if we like (Right)
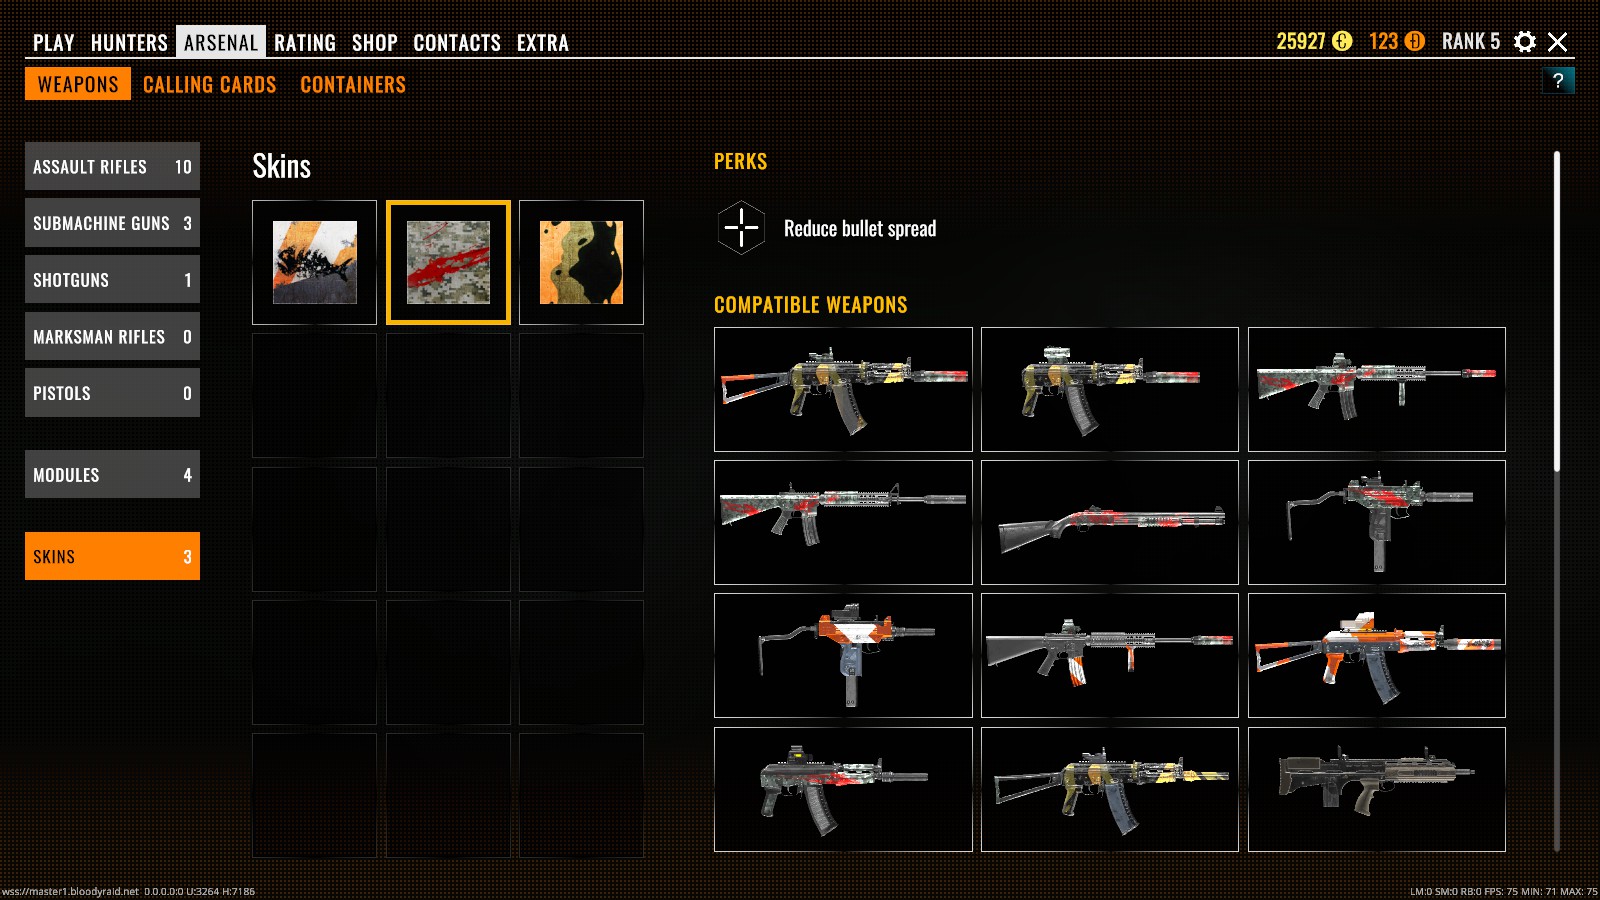
-So now, if we wanted to put another Skin on the butt stock or another compatible attachment, we could. But how do you tell what special effects each skin gives your weapons? If you look on the left hand side you'll see a box labeled, "Skins," that will show you this screen:
And as you can see, the skin we've been applying to the shotgun gives the weapon a perk of "Reduced bullet spread."
Opinion: Is Raid A Knock-Off?
...section coming soon!
Short answer: "No."
Source: https://steamcommunity.com/sharedfiles/filedetails/?id=2554528856