
Prerequisites
WSL or a linux VM of your choice (for the sake of this guide's length google it if you don't know)
Common sense - While I will try to make this guide as detailed as possible I still expect readers to have at least a little linux knowledge.
Setting Up WSL Or The Linux VM
Launch WSL or your VM and head to the terminal. We'll start by installing a file manager and text editor. Feel free to skip this if you already have ones installed.
Begin with the usual sudo apt update && sudo apt upgrade -y Proceed to install your file manager and text editor. I personally prefer dolphin and mousepad however feel free to use ones you may prefer. sudo apt install mousepad dolphin -y Also install curl, python3, python3-pip and unzip. sudo apt install python3 python3-pip unzip curl -y Last but not least, install NVM (Node Version Manager) because it makes installing node.js so much easier. You can do this by reading their instructions on github[github.com] and then reloading your environment variables by running . ~/.bashrc (do not forget the . at the start)
Getting The Source Code For The Most Recent Steam Update.


Now, we'll be essentially modding the game so we'll obviously need the source code. Thankfully the developers were kind enough to put it on github[github.com] for all of us to use.
We begin by getting the current version of the game and its release date from steam.
As we can see in my case I'm looking for version 2.6.2 released on the 4th of July despite what the title says. With all that in mind we head to github and look at the releases.
As we can see the current release is 2.6.2 released on the 4th of July, matching the details we got from steam. If yours appears to be newer just click on the releases button and you'll get a list of all releases. Just look for yours there.
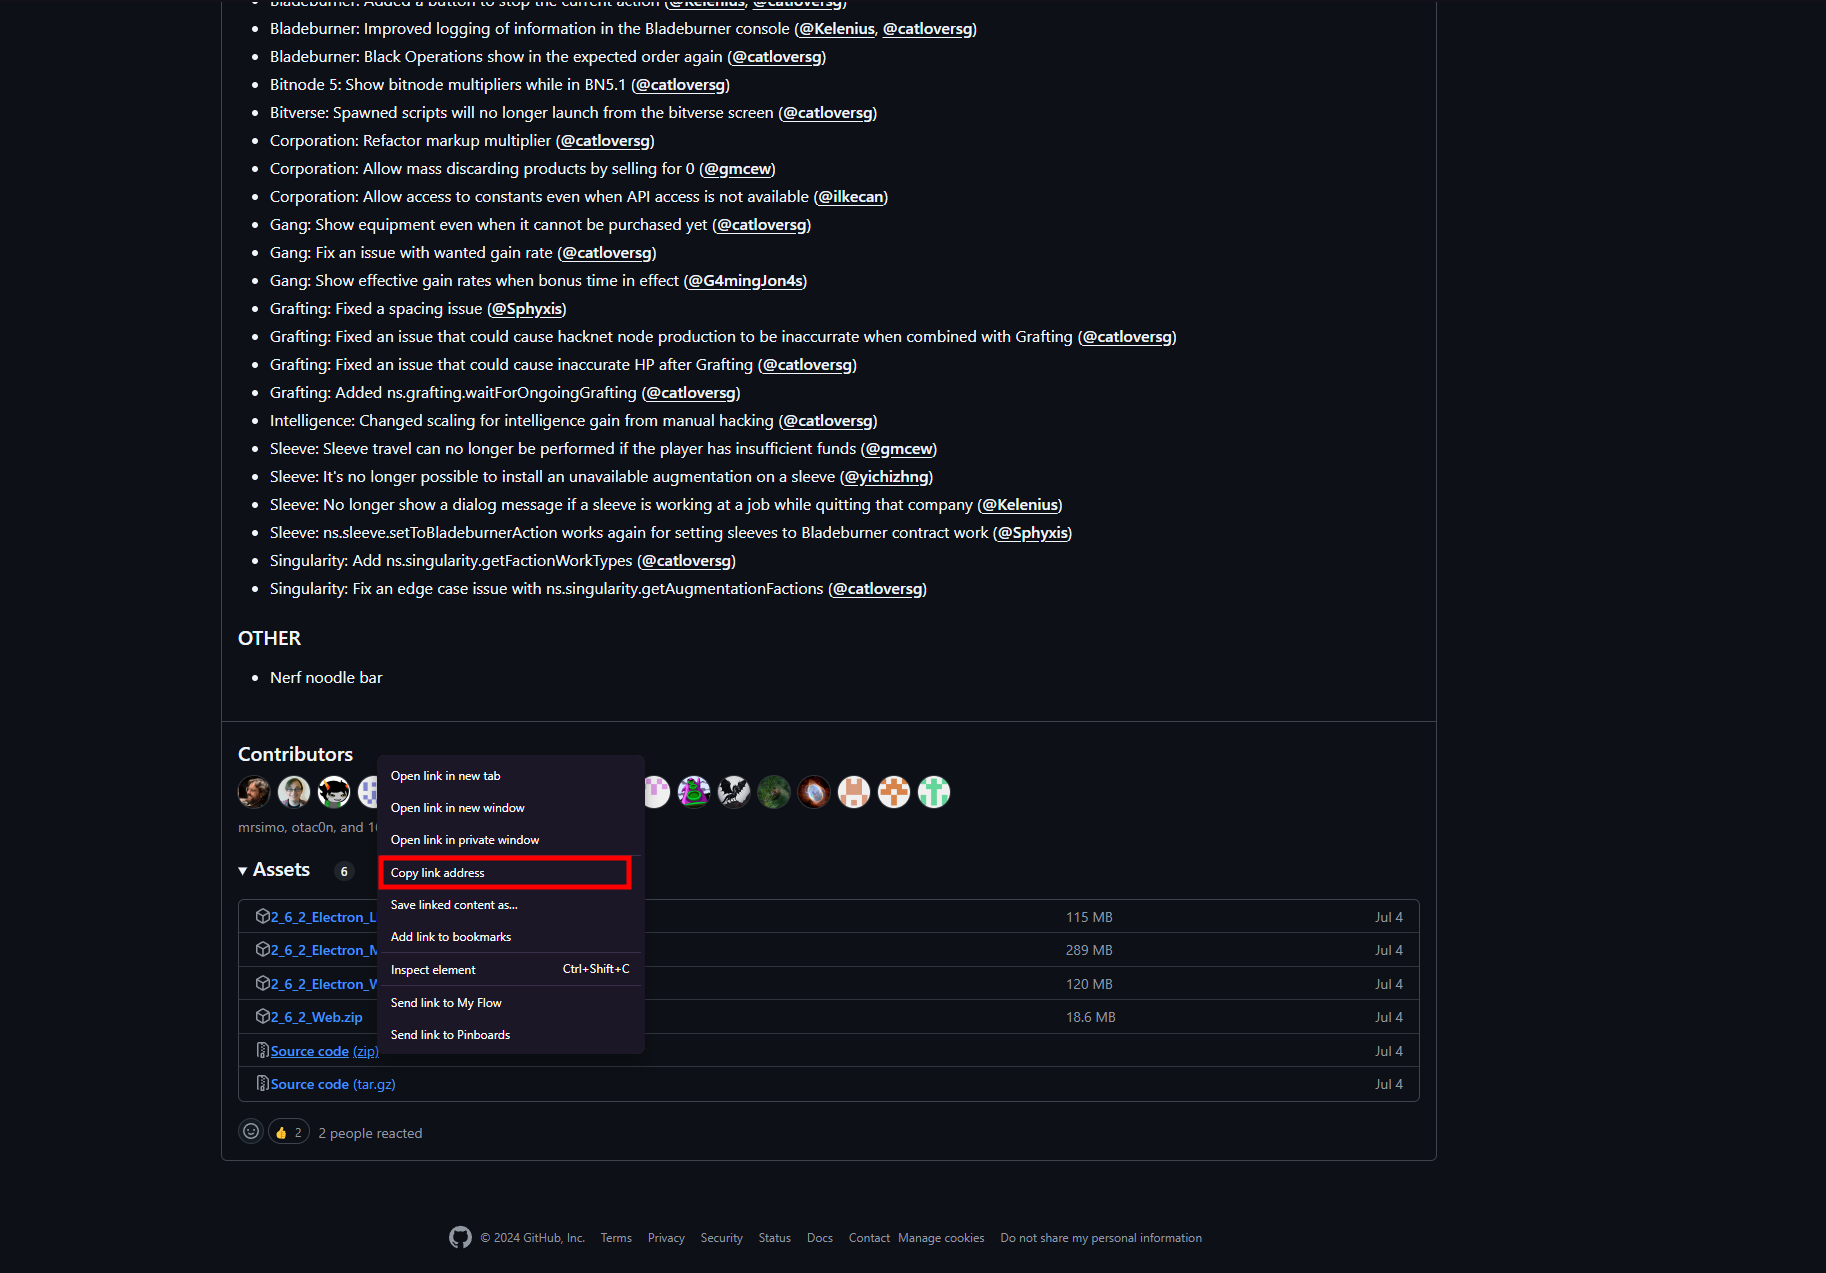
Head on over to the github page for you release and scroll all the way to the bottom until you reach the assets. Right click the Source code (zip) button and click on "Copy link address"
With all that done head to the terminal of WSL or your linux VM and download the source code by typing curl -L "<Copied Link>" -o vx.x.x.zip When pasting your links you'll want to make sure you don't include the "<>" characters and the v.x.x.x.zip part should be changed according to your version. In my case my completed command is curl -L "https://github.com/bitburner-official/bitburner-src/archive/refs/tags/v2.6.2.zip" -o v2.6.2.zip
Once done your output should look similar to this.
You can then proceed to unzip the zip file with unzip ./v2.6.2.zip (of course, replace the filename if needed) and head into the directory with cd bitburner-src-2.6.2 (of course, replace the numbers if needed)
Patching The Game To Show The Dev Menu Button


Begin by opening up your file manager (or feel free to keep using the CLI if you're a power user) and head to bitburner-src-2.6.2/src/Sidebar/ui/ and open the file SidebarRoot.tsx using your preferred text editor.
After that head to the bottom of the file and you should see something similar to this.
You'll want to delete what I've currently selected and save the file.
You'd be surprised to know that was it in terms of patching the game.
Building And Testing The Game


Close out of your text editor and file manager and head back to the terminal. Start by heading back to bitburner-src-2.6.2 and use pip to install the python dependencies with pip install -r ./requirements.txt and also install node.js using NVM with nvm install --lts and then install node.js dependencies with npm install
Now we can move on to actually building the game. Use your text editor and edit the file webpack.config.js
You'll want to go back to your version's release page on github to get the commit hash. Go back to github and click on the backwards clock icon.
After that find the commits that happened on the day of the release of your version. In my case it's the 4th of July.
With some common sense we can deduce that the needed commit is the third one. Click on it. Once loaded you can click the button shown in the image below to copy the commit hash.
Go back to the webpack.config.js file and find the highlinted line shown below.
Delete the part after the equal sign and replace it with the commit has you copied, surrounded by double quotes and save.
Now exit your text editor and run npm run build
If it all goes well without any fatal errors you may then run npm run start to test out the game before packaging it.
As we can see in my game I now have the Dev button shown.
And when clicking it we access the dev menu.
Packaging The Game.
Moving on to the last section, packaging the game. To do that simply run npm run electron and that'll package the game for all platforms and architectures. There is a way to make it package only for your platform and architecture but that's beyond the scope of this guide.
When it's done packaging you can head into the .build directory and there you'll find all the files for all platforms. Folders are named as: "bitburner-{platform}-{architecture}", so for example if I wanted the files for 64 bit windows I'd use the files from bitburner-win32-x64.
You can then transfer the files anywhere you want on your actual computer, including the game's steam directory and as far as my testing went at the time of writing this you CAN still get achievements even with the modded files.
Conclusion
Congratulations! You just modded the game to show the dev menu so you no longer have to go through the tedious process of opening the chrome dev tools.
If you have any feedback please write it in the comments as this is my first time making a non-meme-y guide so it won't be the best. Hope this help y'all and have a good remainder of your day!
Source: https://steamcommunity.com/sharedfiles/filedetails/?id=3349289470
More Bitburner guilds
- All Guilds
- Kato's script collection :3
- Neofetch in BitBurner
- How to get the window object without RAM cost
- My Beginner BitBurner Notes, Batch Scripts and Deployments
- Myst's Misc Script Repository
- Unlock "Exploit: rainbow"
- vim_Chad = () => "Enable EZ Mode";
- Hack-Weaken-Grow-Weaken script and more
- IPvGO